¡Bienvenidos!
Welcome!
Fotografía tomada por mi y editada en Powerpoint
Photo taken by me and edited in Powerpoint

Español
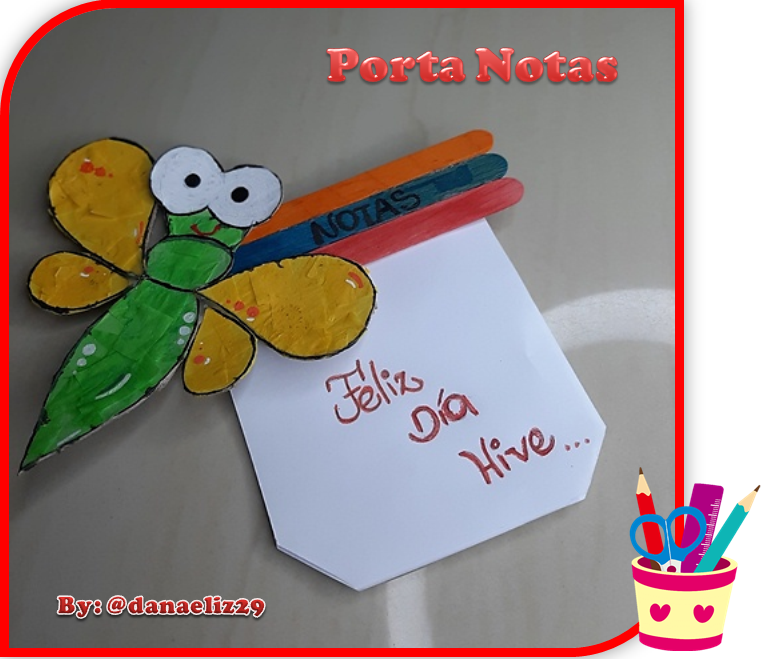
Saludos a todos mis #hivers que conforman esta excepcional comunidad, ingeniosa y creativa, ante que nada les mando muchas bendiciones y buena vibra; hoy estoy cibernéticamente de nuevo con ustedes y feliz de estarlo. Les traigo un tutorial muy útil y sin duda alguna muy creativo, haciendo énfasis en que la creatividad es magia. Y se trata de un fabuloso porta notas el cual podemos pegar, en nuestro cuarto o cocina.
English
Greetings to all my #hivers that make up this exceptional, ingenious and creative community, first of all I send you many blessings and good vibes; today I am cybernetically with you again and happy to be. I bring you a very useful and undoubtedly very creative tutorial, emphasizing that creativity is magic. And it is a fabulous note holder which we can paste in our room or kitchen.
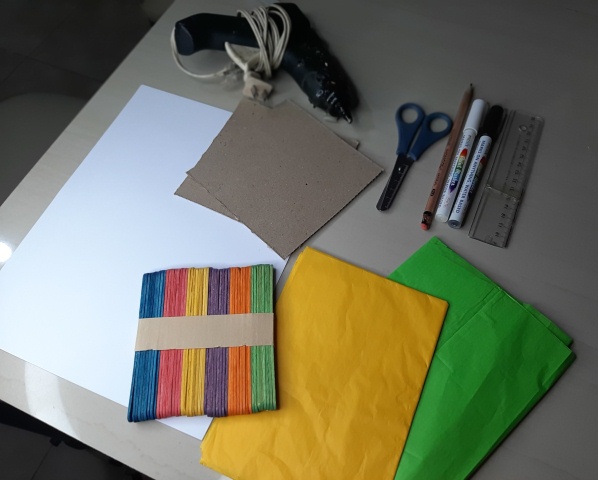
Materiales:
° 5 hojas blancas.
° Tijera.
° Cartón.
° Paletas de helado (3).
° Marcadores.
° Pega.
° Regla.
° Silicón en barra.
° Papel de seda (verde y amarillo).Materials:
° 5 white sheets.
° Scissors.
° Cardboard.
° Popsicle sticks (3).
° Markers.
° Glue.
° Ruler.
° Silicone stick.
° Tissue paper (green and yellow).Paso 1
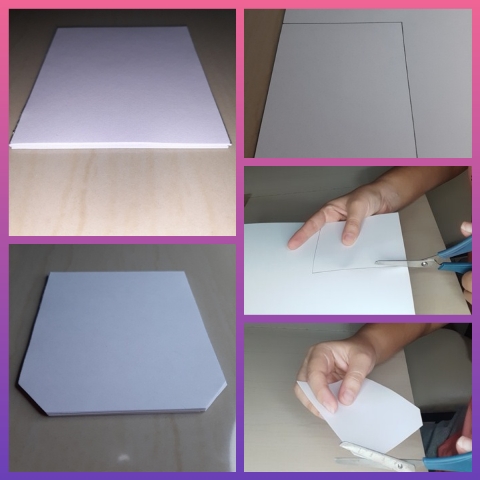
En las 5 hojas blancas, dibujamos un cuadrado y recortamos, repetimos 3 veces el mismo procedimiento y de esta manera obtendremos nuestro talonario de hojas. Luego vamos a pegar por el borde con pega blanca hoja por hoja.
Step 1
On the 5 white sheets, draw a square and cut it out, repeat the same procedure 3 times and in this way we will obtain our checkbook of sheets. Then we are going to glue along the edge with white glue sheet by sheet.
Paso 2.
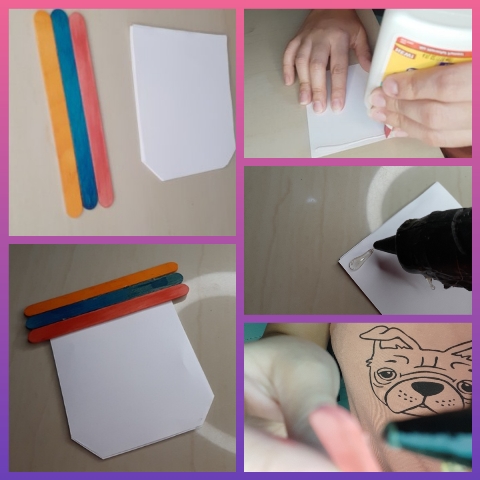
Una vez tengamos nuestro talonario de hojas, procedemos a pegar 3 paletas de madera, con el silicón de barra si no tiene pistola de silicón lo puede hacer con una vela y de esta manera también puede calentar el silicón. Seguido a esto pegamos las 3 paletas a las hojas. Y ya está listo nuestro talonario. Procedemos a la decoración.
Step 2.
Once we have our leaf stubs, we proceed to glue 3 wooden pallets, with the silicone stick if you do not have a silicone gun you can do it with a candle and in this way you can also heat the silicone. Then we glue the 3 pallets to the leaves. And our checkbook is ready. We proceed to the decoration.
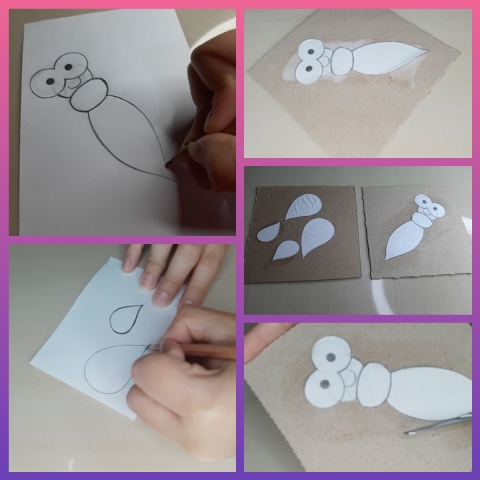
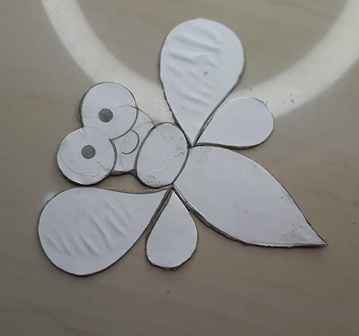
Paso 3
En una hoja vamos a dibujar una linda libélula y luego la recortamos, procedemos a pegarla en el cartón y recortamos nuevamente. Este mismo procedimiento lo hacemos con las alas, las dibujamos en una hoja recortamos, pegamos en el cartón y volvemos a recortar.
Step 3
On a sheet of paper we are going to draw a cute dragonfly and then cut it out, proceed to glue it on the cardboard and cut it out again. We do the same procedure with the wings, we draw them on a sheet of paper, cut them out, glue them on the cardboard and cut them out again.
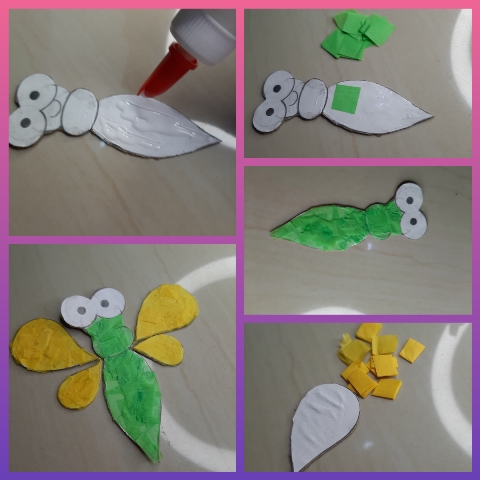
Paso 4
Ya con nuestra linda libélula recortada comenzamos a decorarla, le colocamos pega y cortamos papelitos de papel de seda color verde en forma cuadrada y pegamos sobre nuestra libélula; para las alas hacemos el mismo procedimiento pero utilizamos papel de seda amarillo.
Step 4
Once we have our beautiful dragonfly cut out, we begin to decorate it, we put glue and cut green tissue paper in a square shape and glue it on our dragonfly; for the wings we do the same procedure but we use yellow tissue paper.
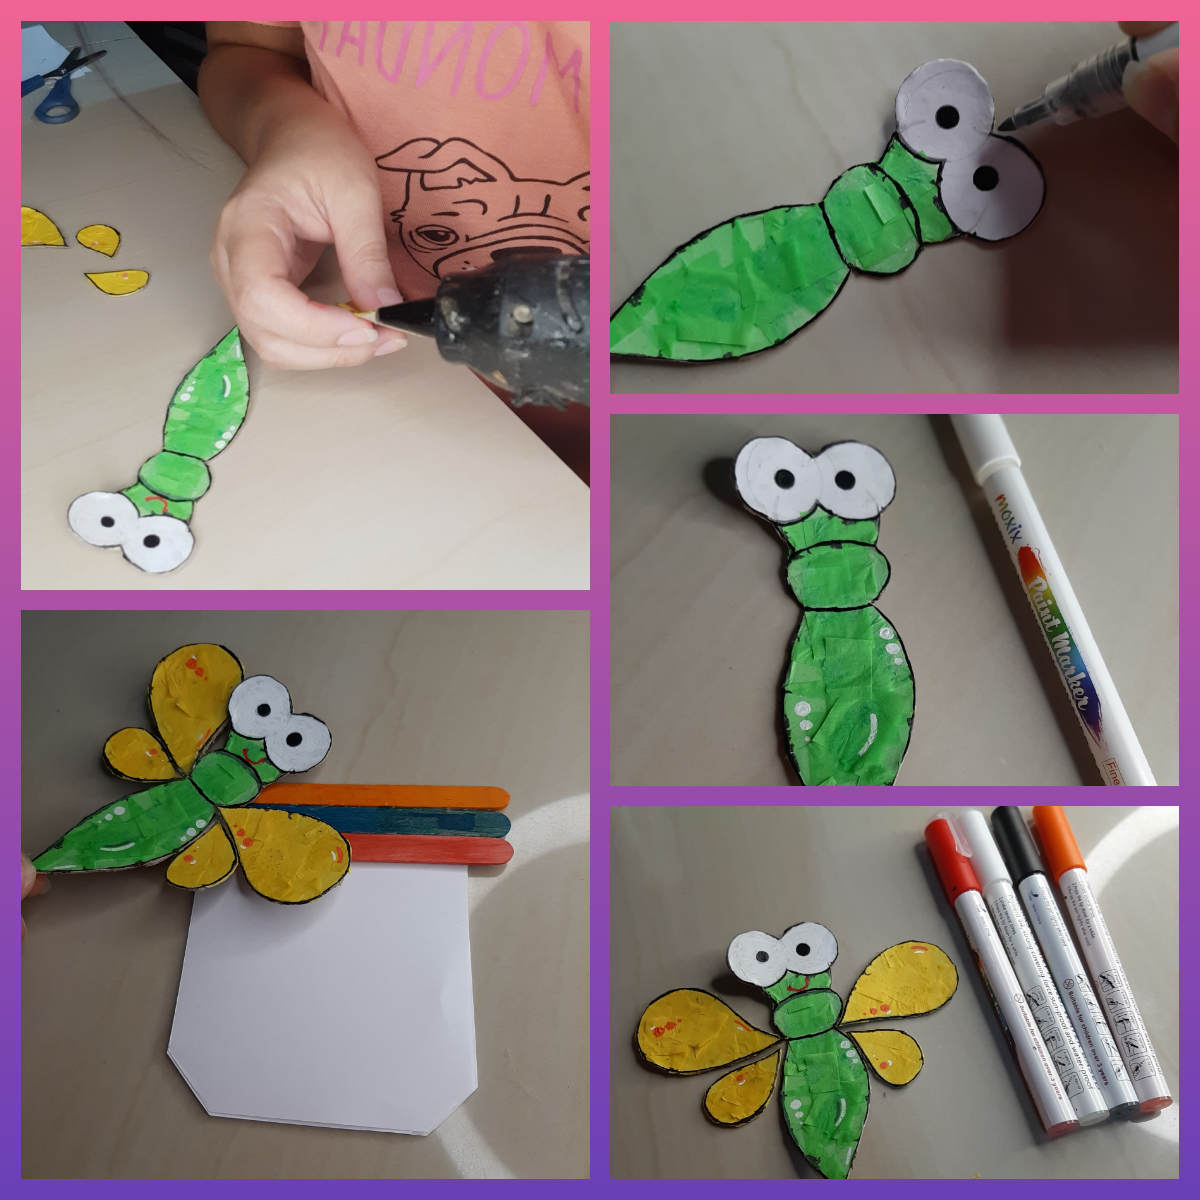
Paso 5
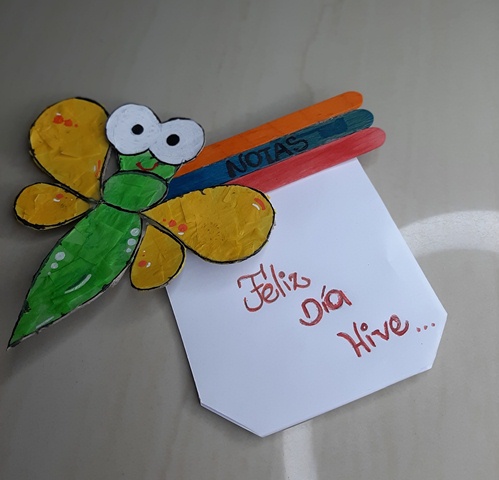
Ya con nuestra libélula decorada procedemos armarla con el silicón en barra pegamos las alas al cuerpo de la libélula y seguido a esto con la ayuda de un marcador deliniamos los bordes le dibujamos la boca y remarcamos los ojos. Y listo la pegamos en las paletas de nuestro fabuloso porta notas.
Step 5
Once our dragonfly is decorated we proceed to assemble it with the silicone stick we glue the wings to the body of the dragonfly and then with the help of a marker we outline the edges we draw the mouth and highlight the eyes. And ready we glue it on the pallets of our fabulous note holder.
Gracias por leerme. ¡Nos vemos en un próximo post! Thanks for reading, see you in a future post!Las fotografías son de mi autoría tomadas con mi celular Samsung Galaxy A50
The photographs are my own, taken with my Samsung Galaxy A50 cell phone.La traducción fue realizada en traductor Deelp.
The translation was performed in Deelp translator.https://www.deepl.com/translator
El collage de fotos lo realice en fotojet. // The collage of photos was made in fotojet
https://www.fotojet.com/es/apps/?entry=collage
Gracias por el apoyo siempre 💚🪄🍀🙌 @rutablockchain
Que lindo se ve
Gracias ☺ y es muy facil de elaborar 💕!