[ESP-ENG] Aprende a cómo hacer Lazos fácil!!! 🎀✂️/ Learn how to make Easy Bows!!!🎀✂️

in Build-It4 years ago


IMG_20210331_155351_1.jpg
 

Hola familia 🌞 El día de hoy les traigo un nuevo y divertidísimo paso a paso donde aprenderemos a realizar un lazo para niñas. Genial no?, Sin duda es una perfecta manualidad para poner nuestra creatividad a volar y darle ese toque creativo y personal, y lo mejor de todo es que esta hecho de materiales súper económicos y muy fáciles de conseguir. Así que, los invito a seguir disfrutando de este divertido proyecto.

family 🌞 Today I bring you a new and hilarious step by step where we will learn how to make a bow for girls. Great, no? Without a doubt, it is a perfect craft to put our creativity to flight and give it that creative and personal touch, and the best of all is that it is made of super cheap materials and very easy to get. So, I invite you to continue enjoying this fun project.


¿Qué están esperando? Gracias a esta técnica podemos crear nuestros propios accesorios, además, una hermosa obra hecha en casa es una manera creativa y muy económica.

What are they waiting for? Thanks to this technique we can create our own accessories, in addition, a beautiful work done at home is a creative and very economical way.


IMG_20210331_151414.jpg
 

Para realizar esta lindo lazo necesitaremos:

  • 30 cm de listón o cinta del color de tu preferencia.
  • 9 centímetros de listón o cinta.
  • 12 cm de cinta dorada.
  • 1 gancho de 5cm.
  • aguja.
  • hilo.
  • pistola de silicon.
  • Tijera.
  • barra de silicon.
  • encendedor.
  • To make this beautiful bow we will need:

    • 30 cm of ribbon or ribbon in the color of your choice.
    • 9 centimeters of ribbon or ribbon.
    • 12 cm of gold ribbon.
    • 1 5cm hook.
    • needle.
    • thread.
    • silicone gun.
    • Scissors.
    • bar made of silicon.
    • lighter.

      IMG_20210331_152347.jpg

      Primero, tomamos la cinta de 30 cm y sellamos los extremos con el encendedor con la llama clara.

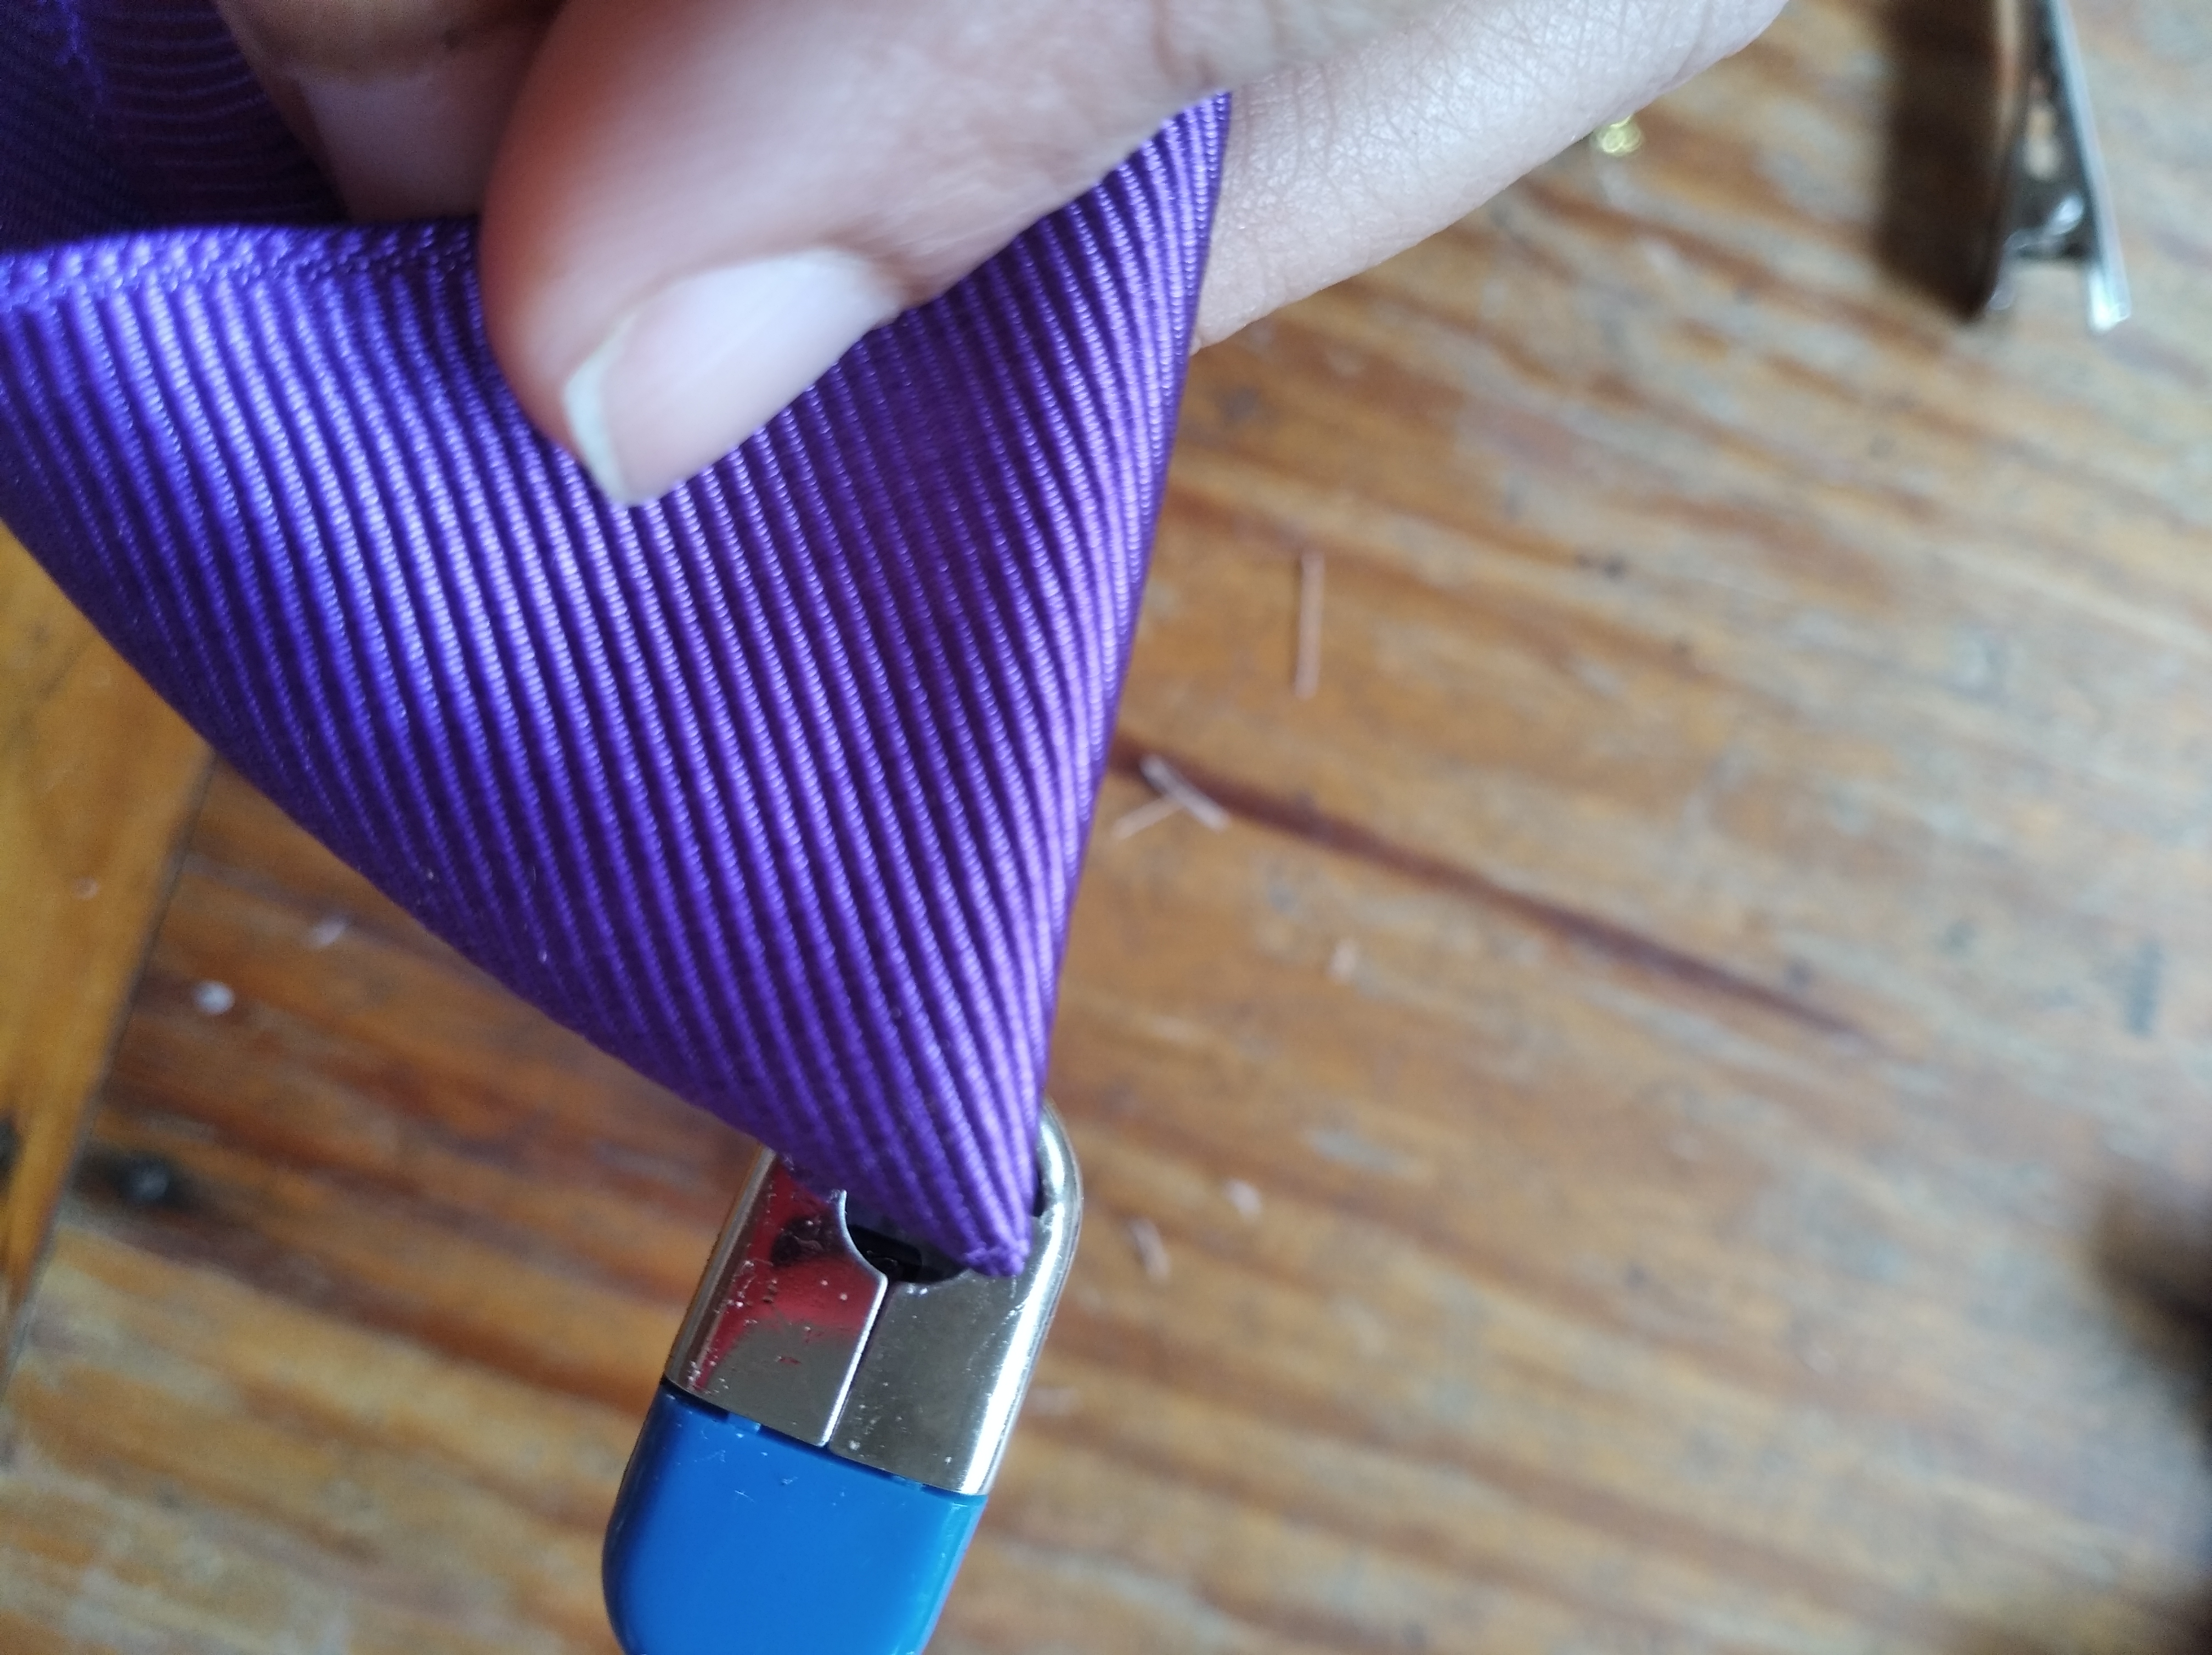
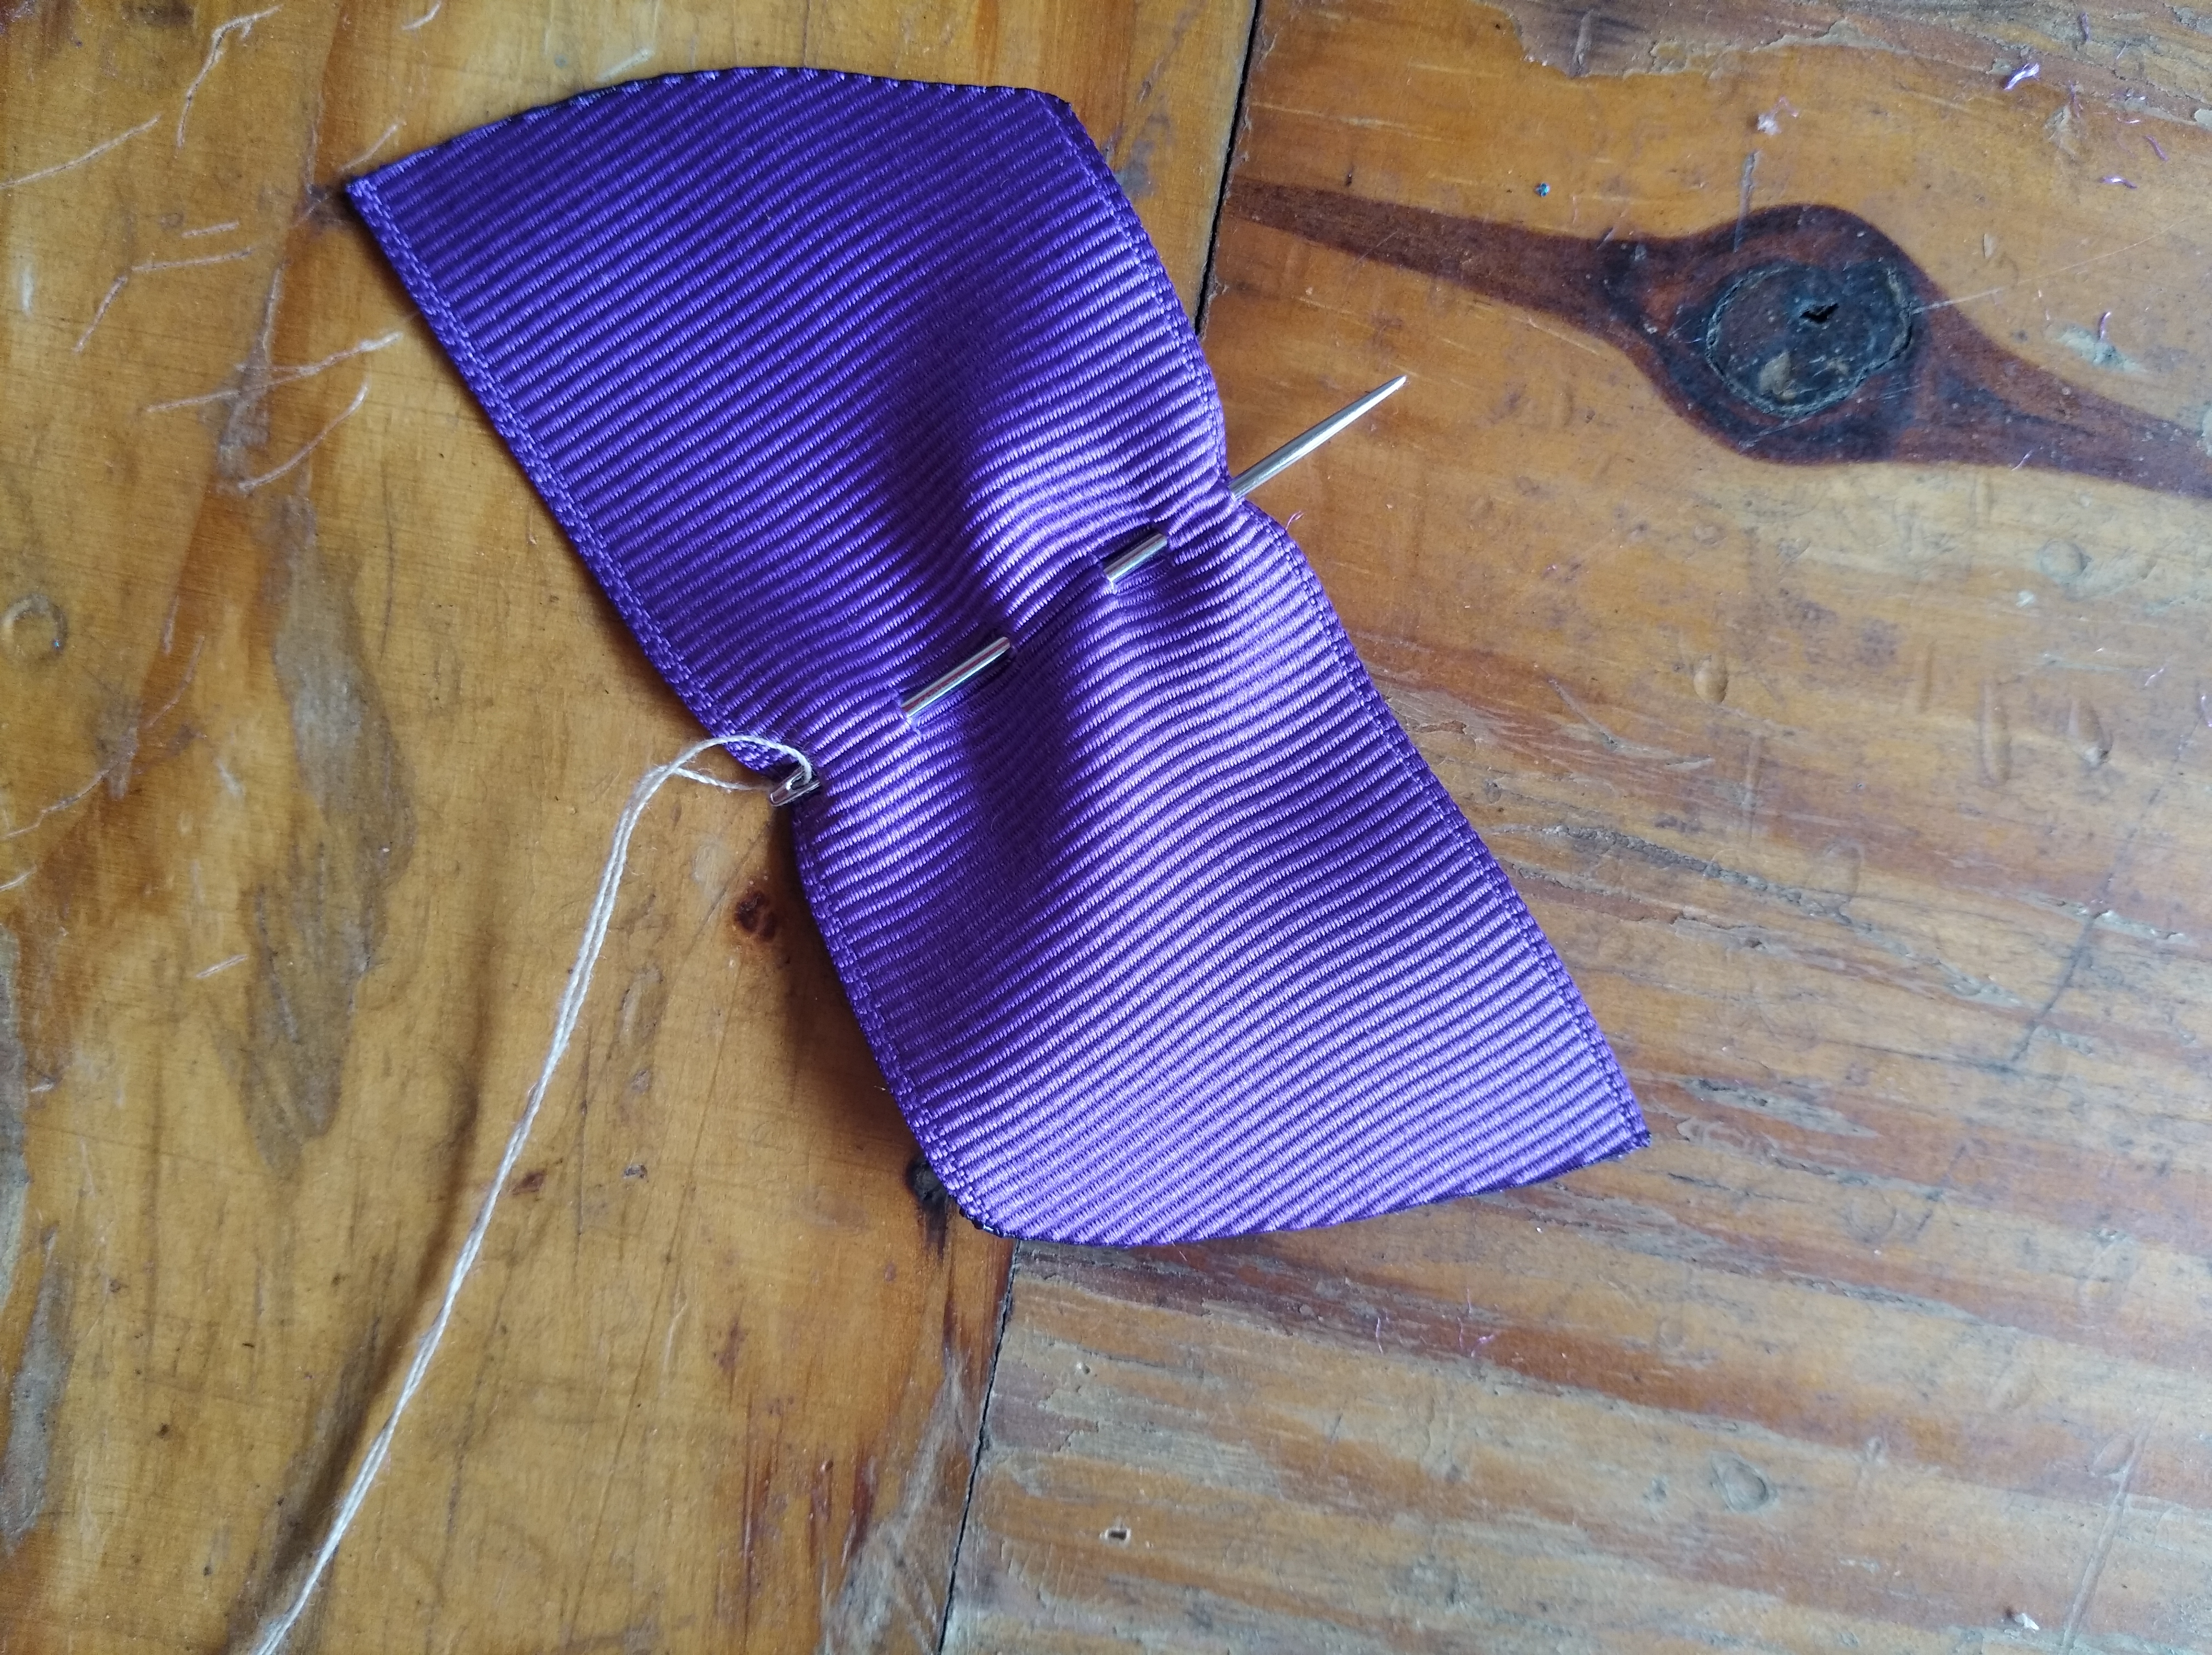
      First, we take the 30 cm tape and seal the ends with the lighter with the clear flame.

      IMG_20210331_152512.jpg


      Seguidamente, se marca el centro de la cinta y se llevan sus extremos al centro en diagonal para formar un ocho.

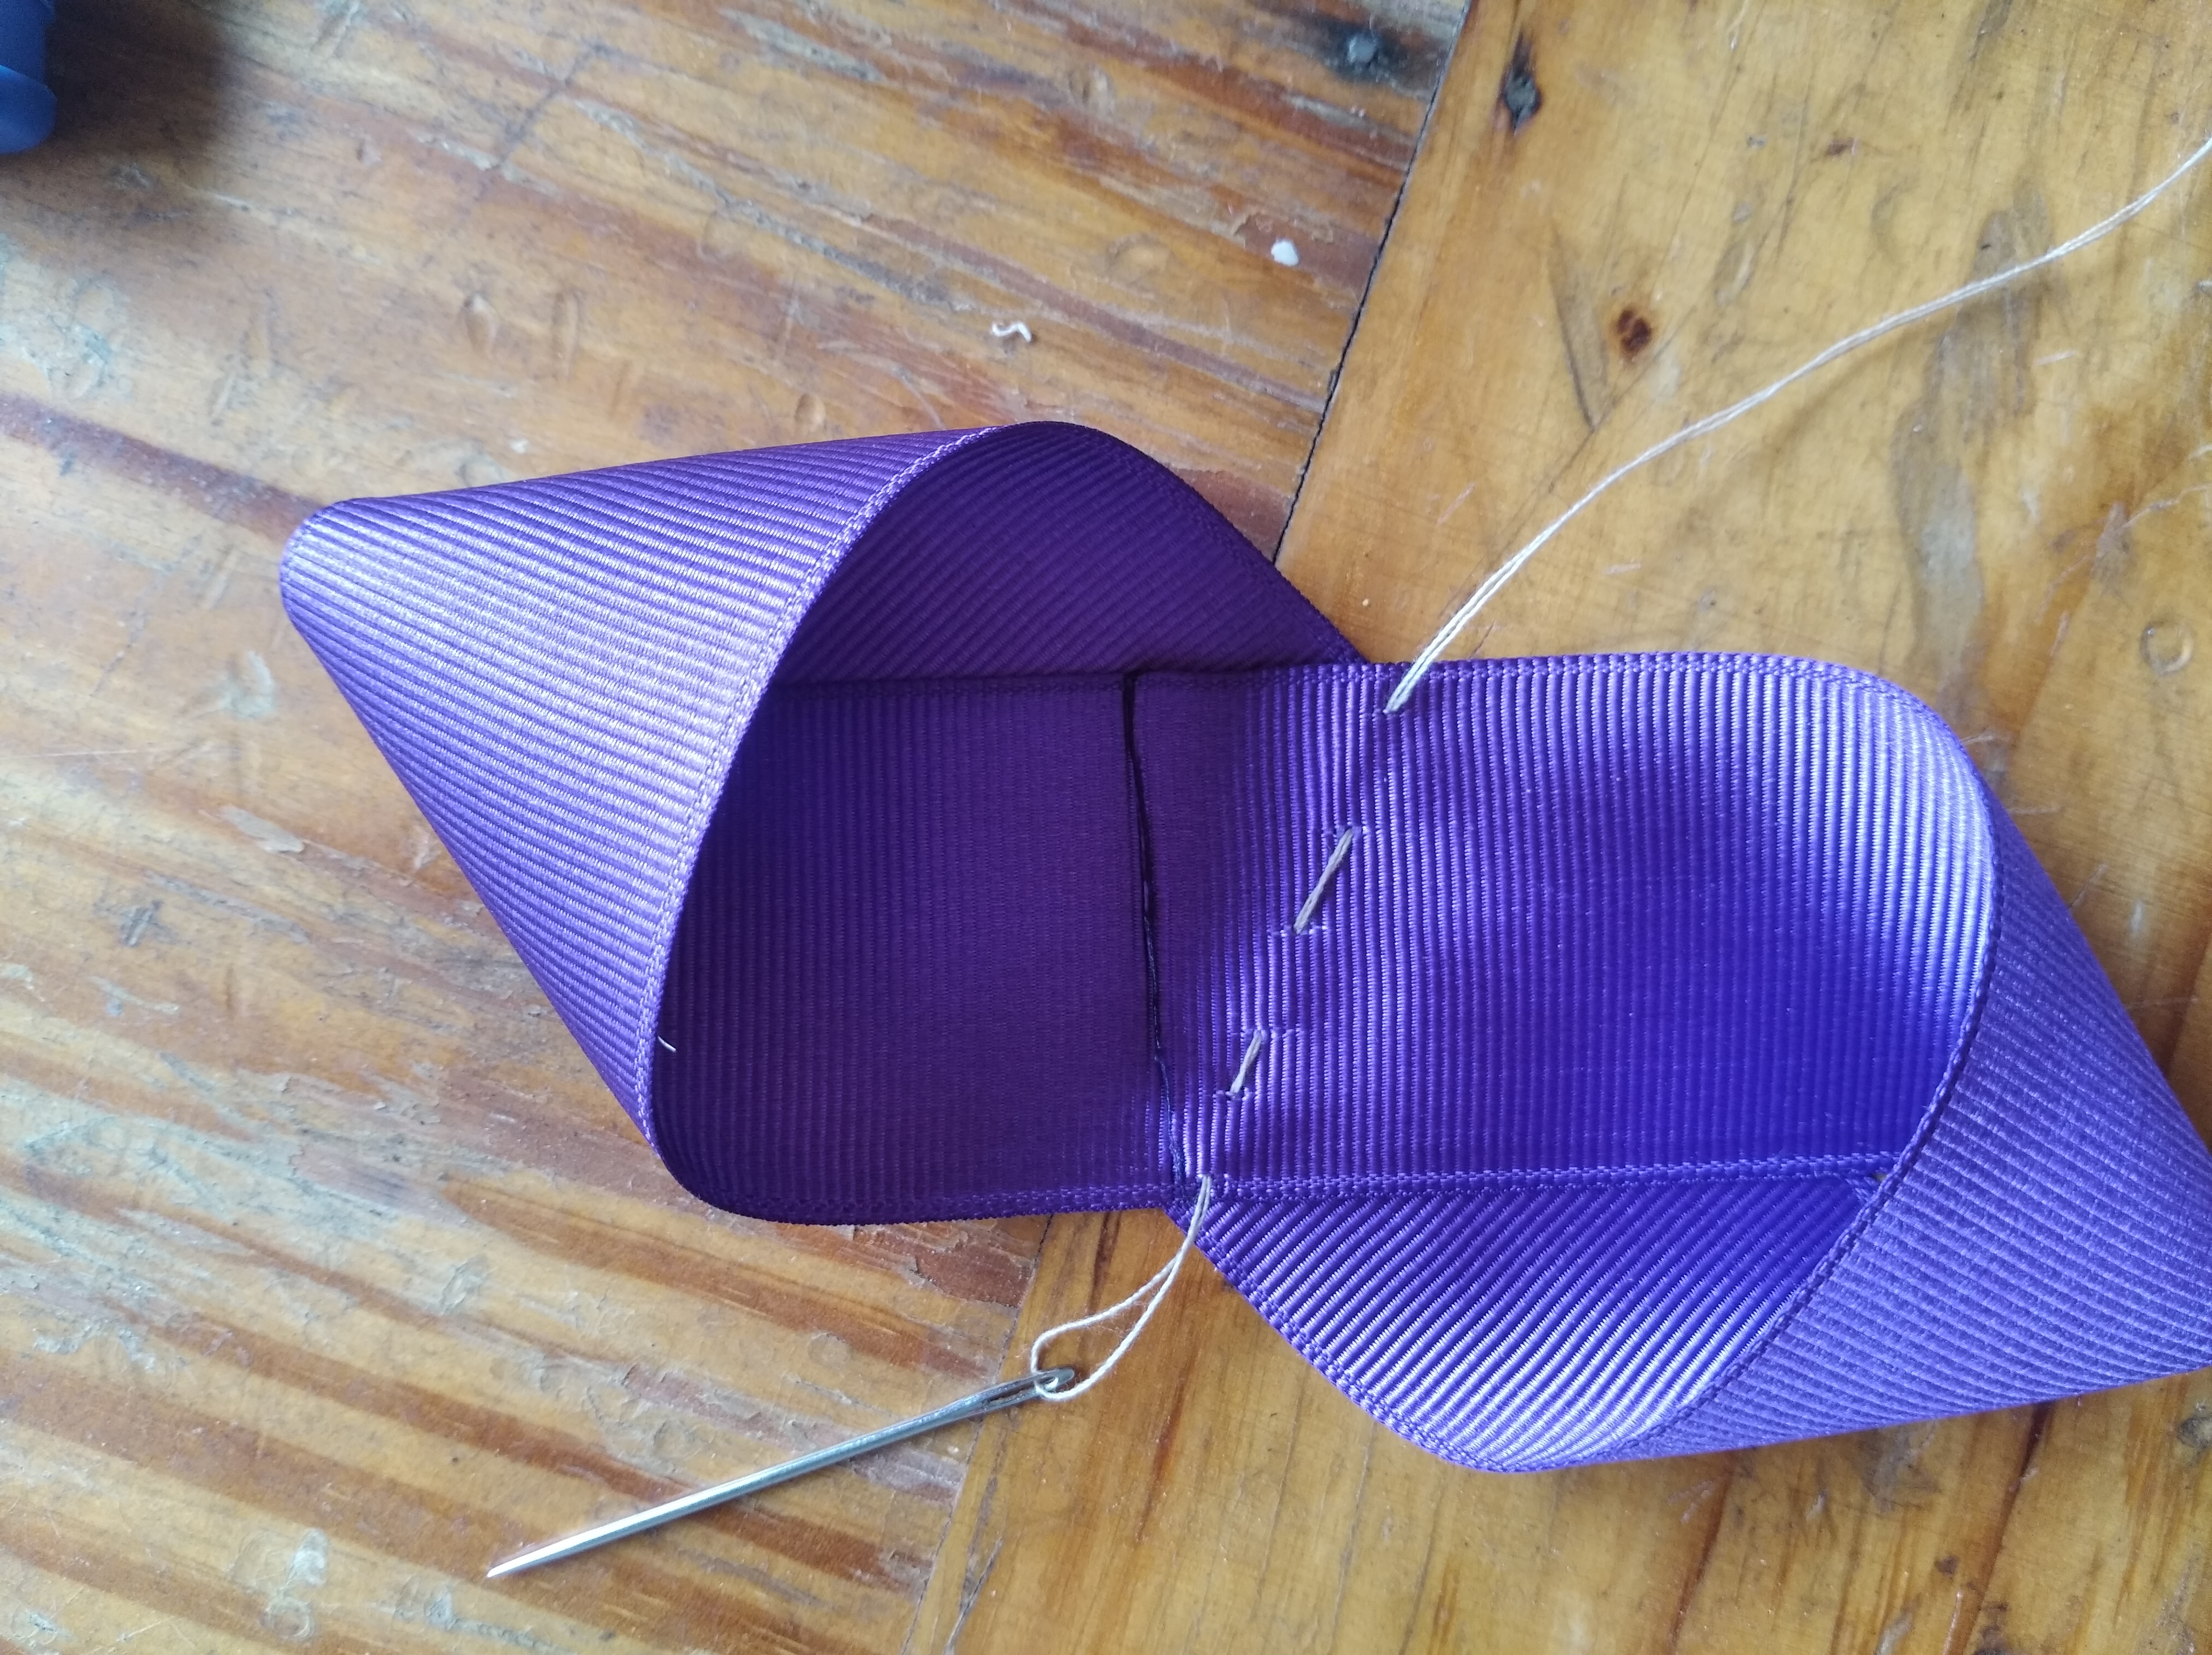
      Next, the center of the ribbon is marked and its ends are brought to the center diagonally to form an eight.


      IMG_20210331_152732.jpg

      IMG_20210331_152634.jpg
       

      Ahora, con aguja e hilo pasamos 6 puntadas por el centro. Es muy importante que la puntada de inicio debe tener el mismo sentido que el final.

      Now, with a needle and thread, we pass 6 stitches through the center. It is very important that the start stitch should have the same direction as the end.


      IMG_20210331_153001.jpg
       

      Luego, fruncimos el hilo y damos vueltas a su alrededor.

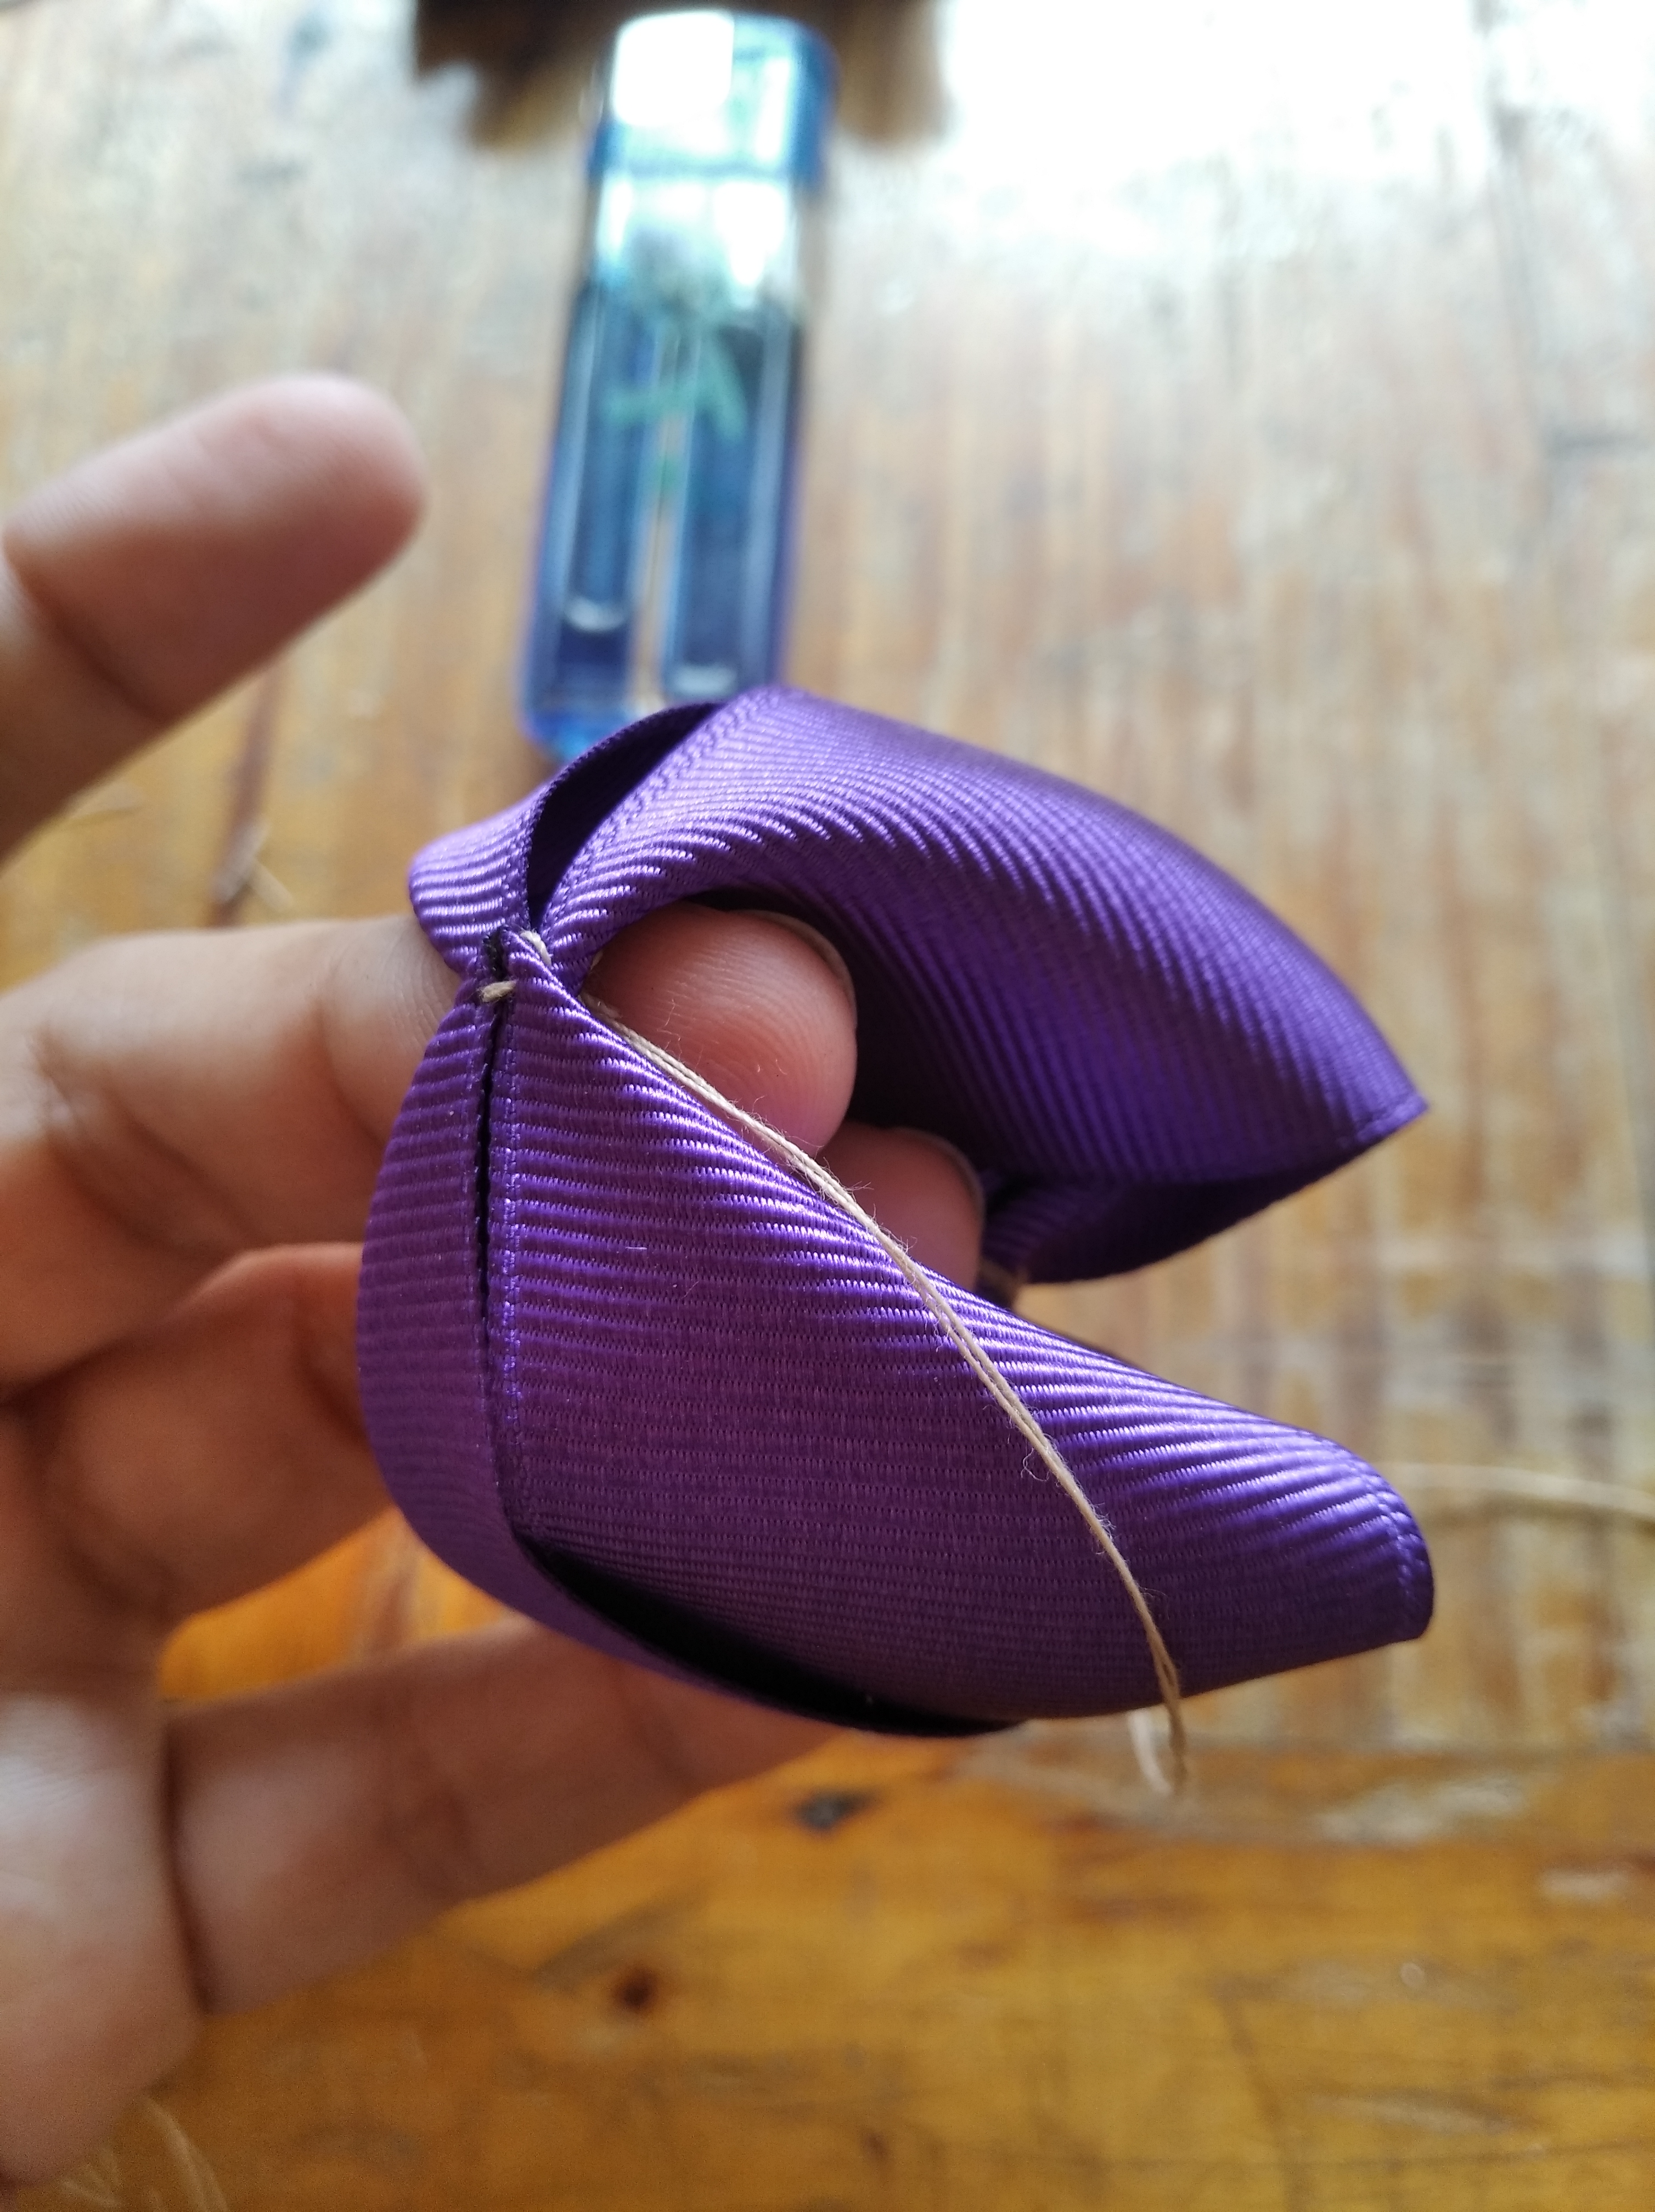
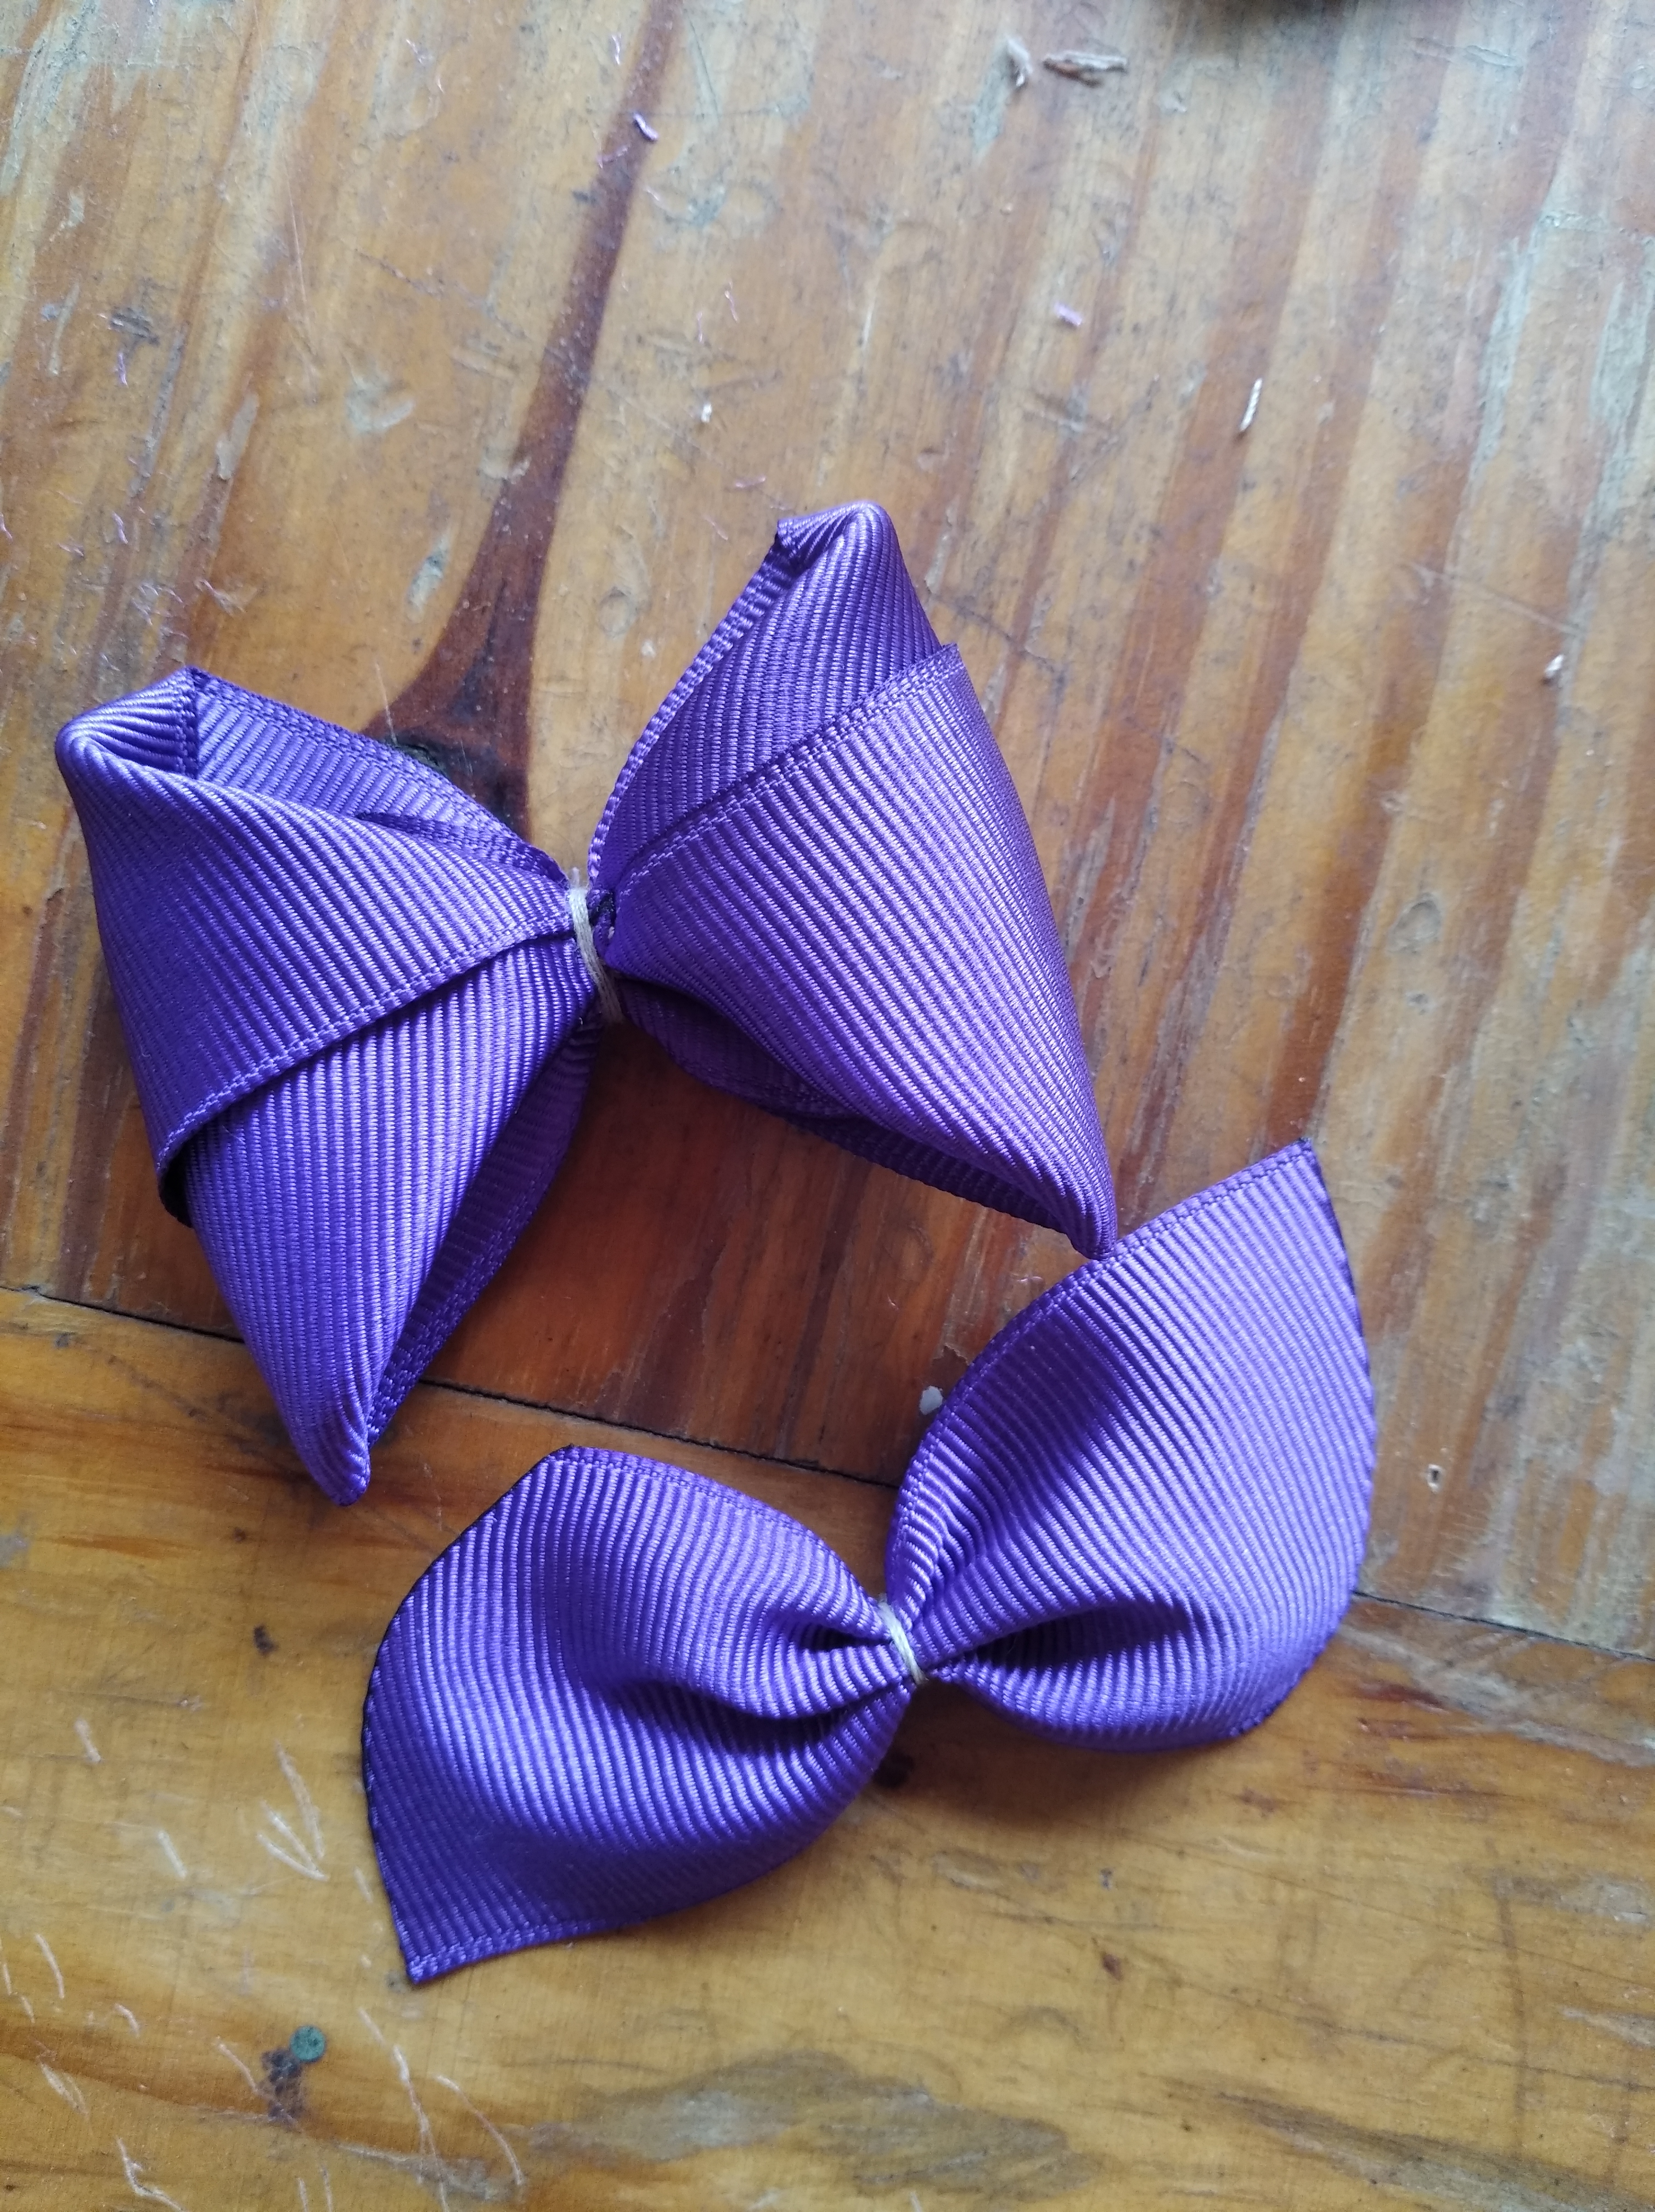
      Then we gather the thread and go around it.


      IMG_20210331_153608.jpg
       

      Seguidamente, definimos las puntas de las esquinas sellando con el encendedor.

      Next, we define the ends of the corners by sealing with the lighter.


      IMG_20210331_153156.jpg
       

      Ahora, llevamos las puntas al centro y daremos 2 puntadas con el hilo y aguja.

      Now, we bring the ends to the center and we will give 2 stitches with the thread and needle.


      IMG_20210331_153411.jpg
       

      Una vez listo, cosemos las puntas a la base del lazo.

      Once ready, we sew the ends to the base of the bow.


      IMG_20210331_153949.jpg
       

      Seguidamente, elaboramos la base del lazo con la cinta de 9 cm ya sellada y cortada en forma curva, buscamos el centro y cosemos con 6 puntadas para fruncir.

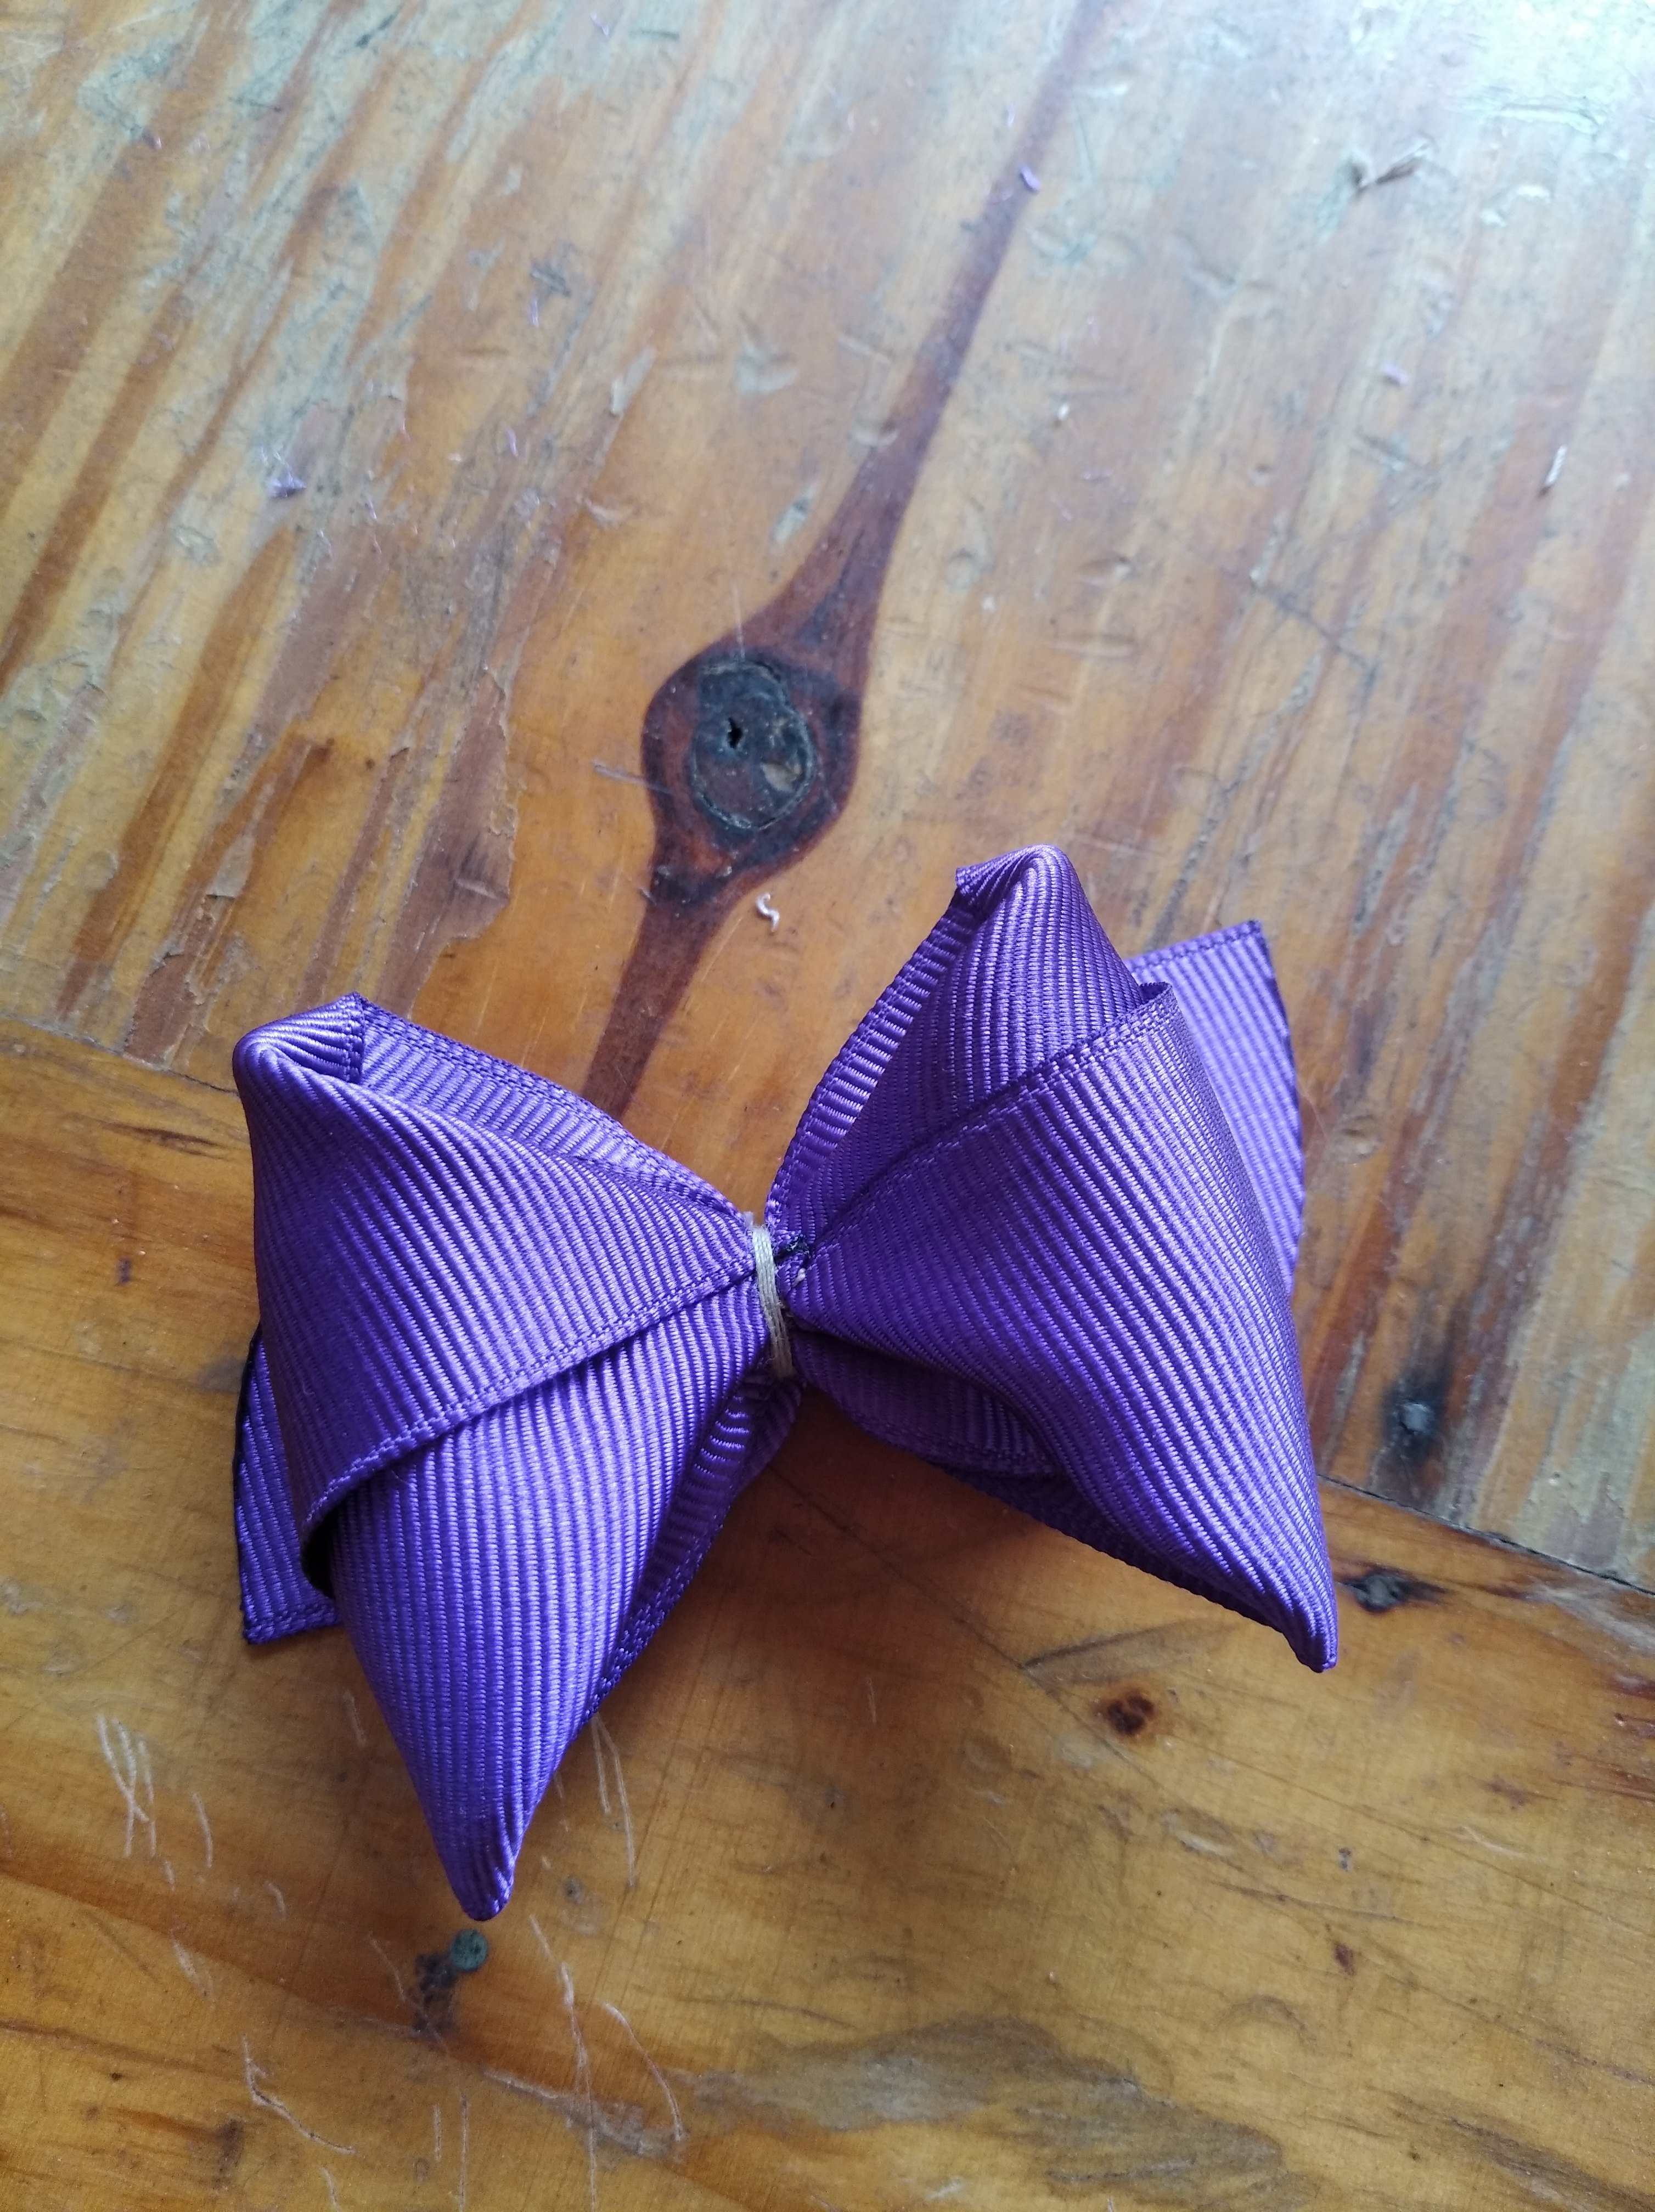
      Next, we make the base of the bow with the 9 cm ribbon already sealed and cut in a curved shape, we look for the center and sew with 6 stitches to gather.

      IMG_20210331_153755.jpg
       

      Una vez hecha la base, pegamos con silicón al lazo. Genial no?

      Once the base is made, we glue the loop with silicone. Cool no?


      IMG_20210331_153856.jpg
       

      Finalmente, pegamos el gancho a la base y se da vuelta al rededor del lazo con la cinta dorada.

      Finally, we glue the hook to the base and it turns around the loop.


      IMG_20210331_155151_1.jpg


      Este original y creativo lazo es muy fácil de hacer, y perfecto para realizarlo a las pequeñitas, llenándolas de estilo y personalidad. Sin duda es una manera muy económica de darle un gran toque de magia e incluso podemos utilizar este tutorial como material de emprendimiento, y así, reproducir muchos lazos para su venta. Recuerda que esta es una actividad maravillosa y perfecta para compartir con nuestros tiempos de cuarentena que necesitamos distraer nuestra mente en algo divertido.

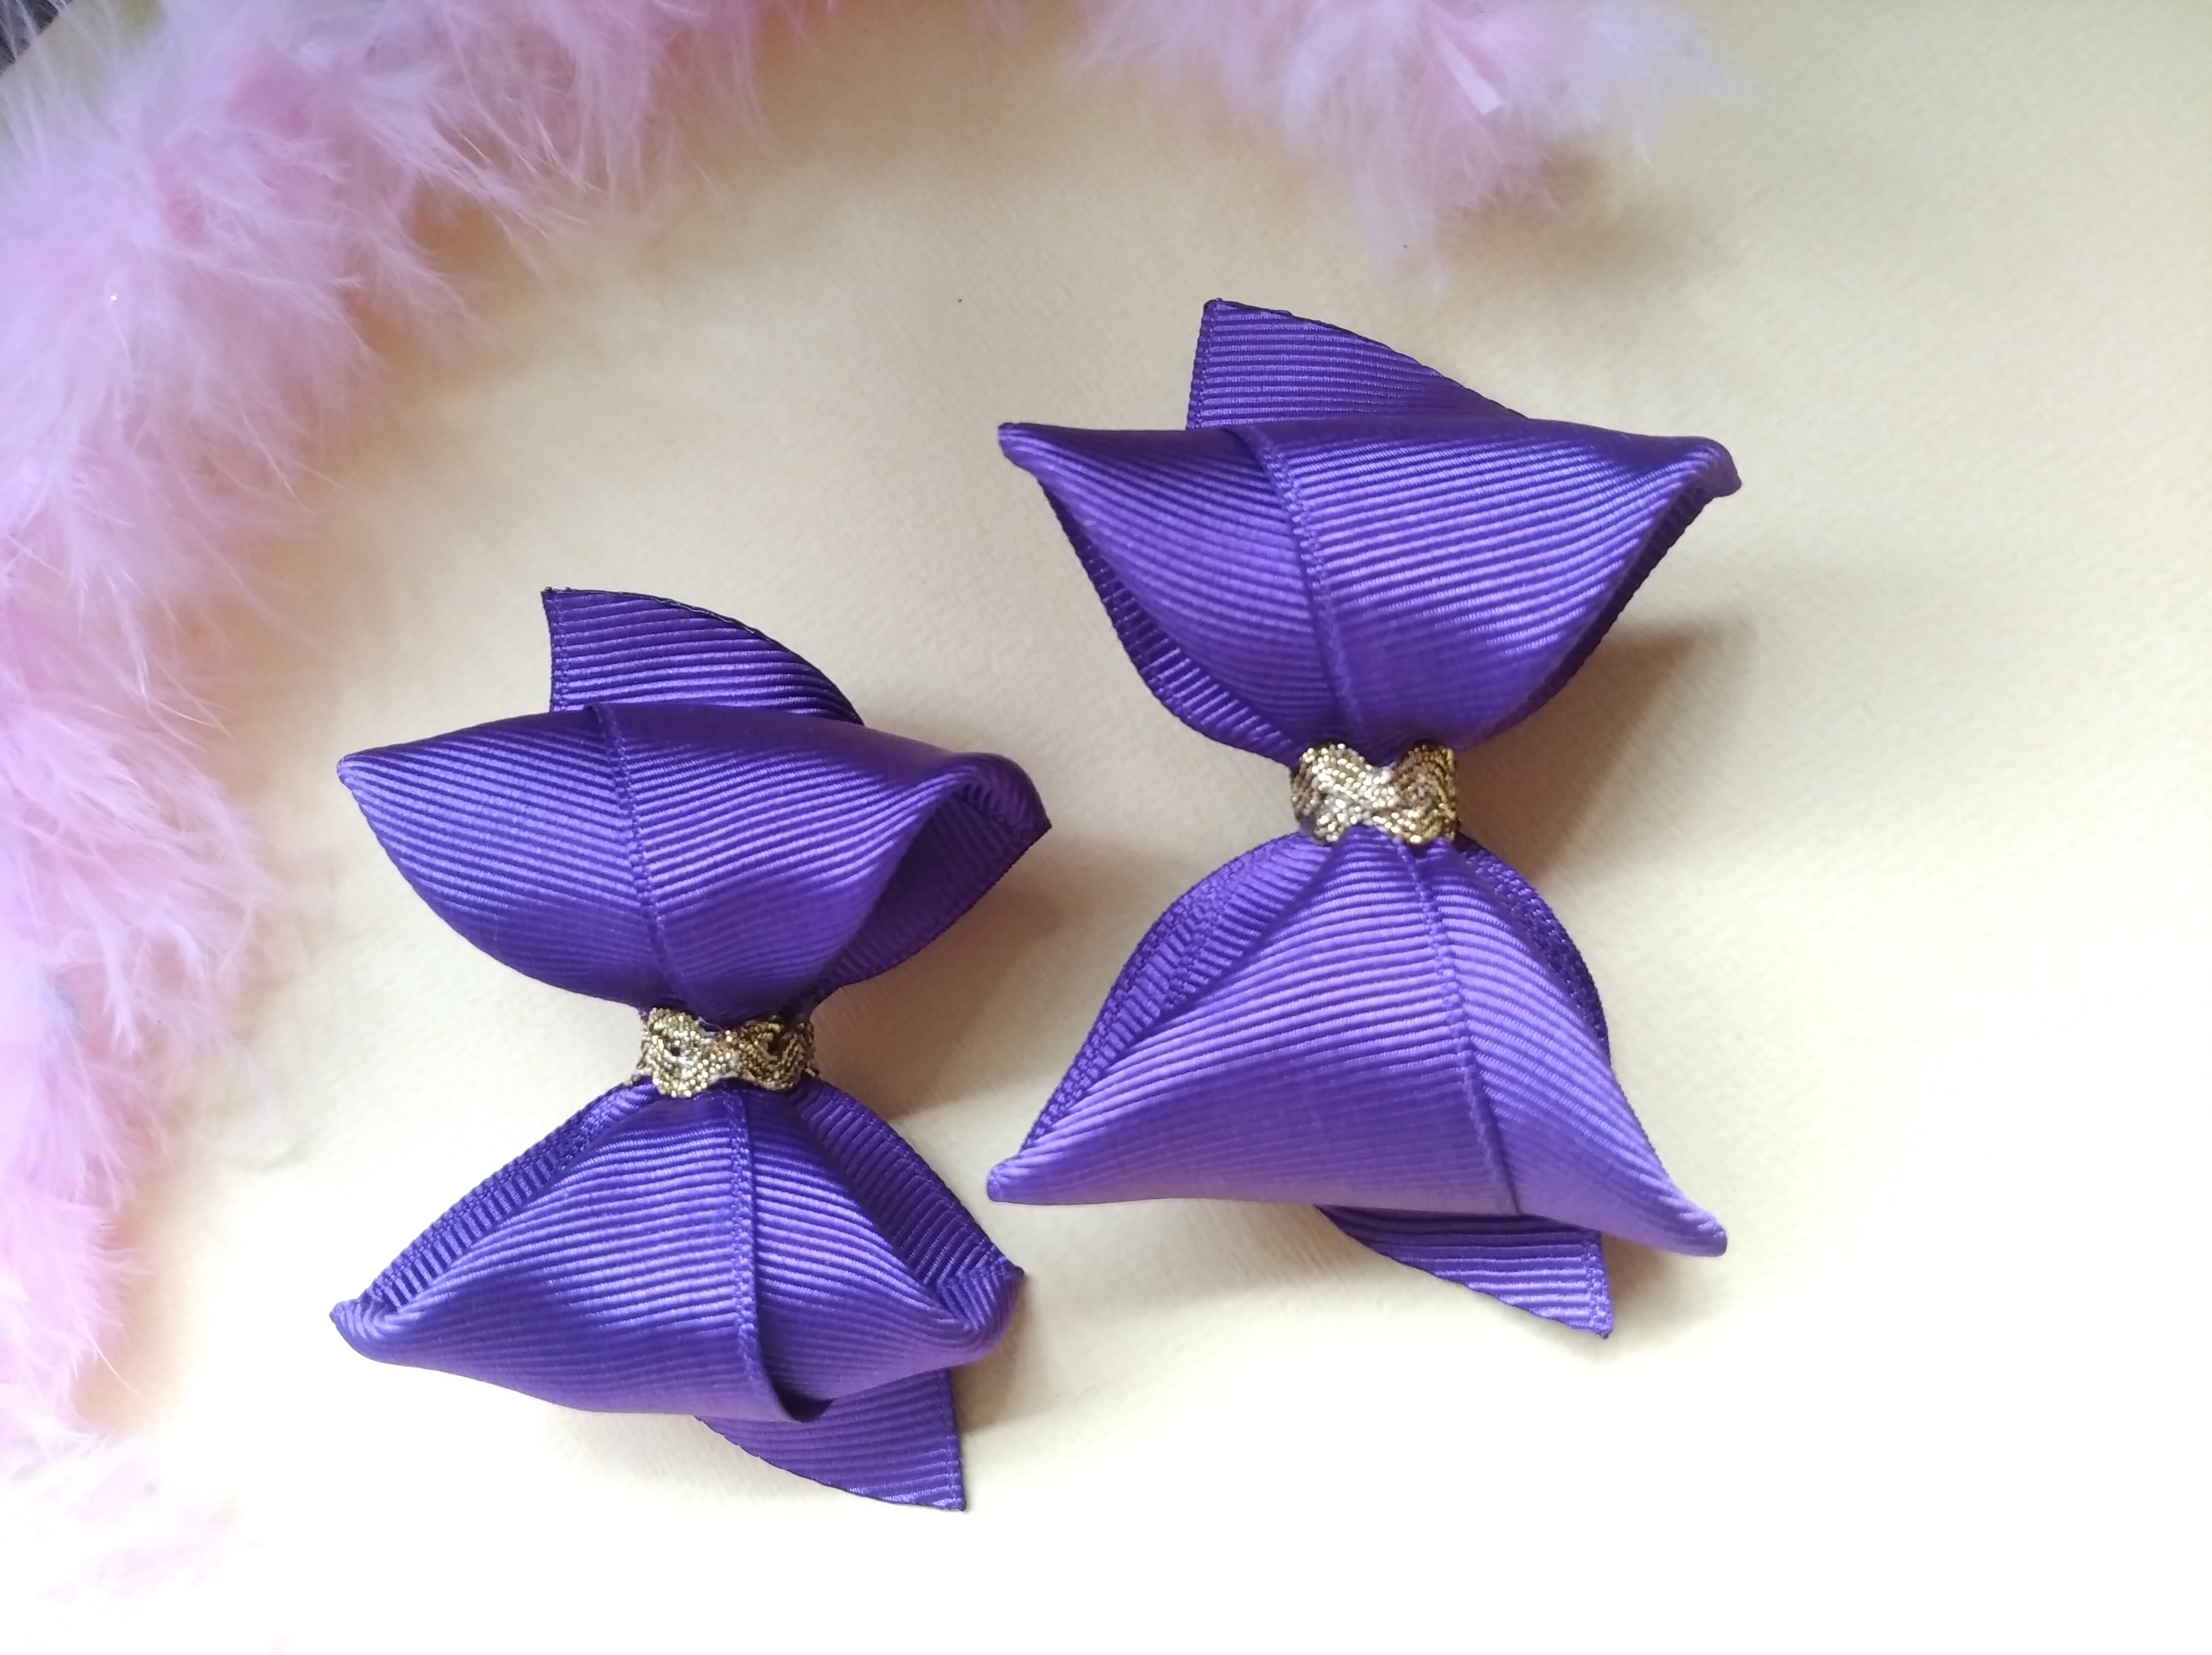
      This original and creative bow is very easy to make, and perfect for little girls, filling them with style and personality. Without a doubt, it is a very inexpensive way to give it a great touch of magic and we can even use this tutorial as an entrepreneurial material, and thus, reproduce many ties for sale. Remember that this is a wonderful and perfect activity to share with our quarantine times that we need to divert our mind to something fun.

      Gracias por acompañarme y espero que lo hayan disfrutado. ❤️

      Thanks for joining and I hope you enjoyed it.❤️

      Sort:  

      Congratulations @danellys! You have completed the following achievement on the Hive blockchain and have been rewarded with new badge(s) :

      You received more than 10 HP as payout for your posts and comments.
      Your next payout target is 50 HP.
      The unit is Hive Power equivalent because your rewards can be split into HP and HBD

      You can view your badges on your board and compare yourself to others in the Ranking
      If you no longer want to receive notifications, reply to this comment with the word STOP

      Check out the last post from @hivebuzz:

      Feedback from the April 1st Hive Power Up Day