This is a very easy-to-make ceiling lamp, which each of you can easily make with your own hands. It is indistinguishable from a purchased one, and the manufacturing costs are minimal and will allow you to save a substantial amount, considering how much ceiling lights cost now. And if you make more than one, two or three of these, then this will be a significant increase in your budget.
Esta es una lámpara de techo muy fácil de hacer, que cada uno de ustedes puede hacer fácilmente con sus propias manos. Es indistinguible de uno comprado, y los costos de fabricación son mínimos y le permitirán ahorrar una cantidad sustancial, considerando cuánto cuestan las luces de techo ahora. Y si hace más de uno, dos o tres de estos, entonces esto será un aumento significativo en su presupuesto.
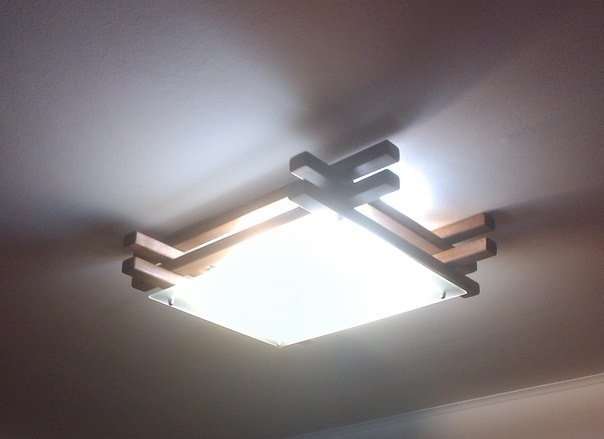
What do you need to make a lamp?
- Rectangular rails.
- 4 long bolts with nuts (It will be possible to cut with a hacksaw).
- 4 corners with plastic dowel-nails for fixing to the ceiling.
- Plexiglas.
- 2 cartridges with doom bulbs. You can take all in a single copy, or vice versa, all in 4, depending on how much light you need.
¿Qué necesitas para hacer una lámpara?
- Rieles rectangulares.
- 4 pernos largos con tuercas (Se podrá cortar con una sierra para metales).
- 4 esquinas con tacos de plástico para fijación al techo.
- Plexiglás.
- 2 cartuchos con bombillas doom. Puedes sacar todo en un solo ejemplar, o viceversa, todo en 4, según la cantidad de luz que necesites.
Production of a ceiling lamp
The first thing to do is decide on the size, given the number of your lamps. You can also choose the shape: square or rectangle. I made a rectangular lamp.
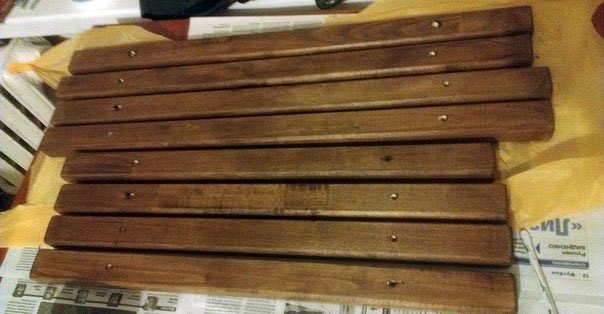
After the choice is made, we will carefully file 8 bars. Let's drill two holes in each and try to assemble the frame of the lamp. If everything suits with sandpaper or on a machine, we process the surface of wooden bars: we smooth the corners, make the tree smooth, remove all burrs.
Producción de una lámpara de techo
Lo primero que debe hacer es decidir el tamaño, dado el número de sus lámparas. También puedes elegir la forma: cuadrada o rectangular. Hice una lámpara rectangular.
Después de hacer la elección, archivaremos cuidadosamente 8 barras. Hagamos dos agujeros en cada uno e intentemos ensamblar el marco de la lámpara. Si todo se adapta con papel de lija o en una máquina, procesamos la superficie de las barras de madera: suavizamos las esquinas, suavizamos el árbol, eliminamos todas las rebabas.

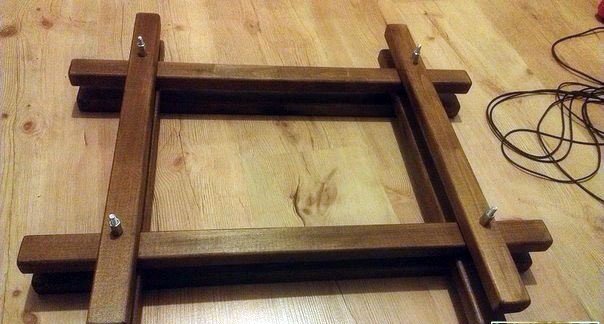
Cut out the plexiglass according to the size of the central rectangle. Carefully clear the mounting holes. Let's take a look at the frame. If everything is like - we process all the glass on both sides with sandpaper. We remove sharp corners, make the glass frosted.
Such plexiglass, processed with sandpaper, perfectly diffuses the luminous flux. The light in the room where the lamp will hang will be even and soft.
Recorta el plexiglás según el tamaño del rectángulo central. Limpie con cuidado los orificios de montaje. Echemos un vistazo al marco. Si todo es así, procesamos todo el vidrio en ambos lados con papel de lija. Eliminamos las esquinas afiladas, hacemos el vidrio esmerilado.
Tal plexiglás, procesado con papel de lija, difunde perfectamente el flujo luminoso. La luz en la habitación donde colgará la lámpara será uniforme y suave.
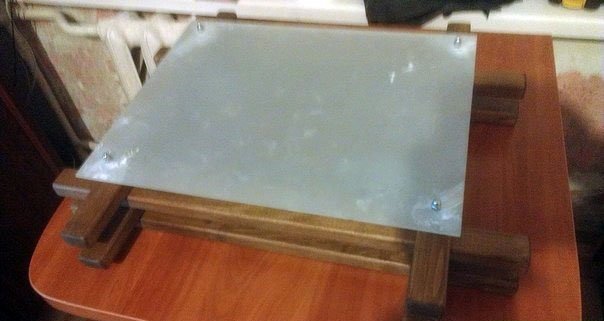
At the end, we fasten the lamp with screws, but we do not fasten the plexiglass yet. We fasten lamp holders and ceiling mounts onto self-tapping screws.
Al final, sujetamos la lámpara con tornillos, pero todavía no sujetamos el plexiglás. Fijamos portalámparas y soportes de techo en tornillos autorroscantes.
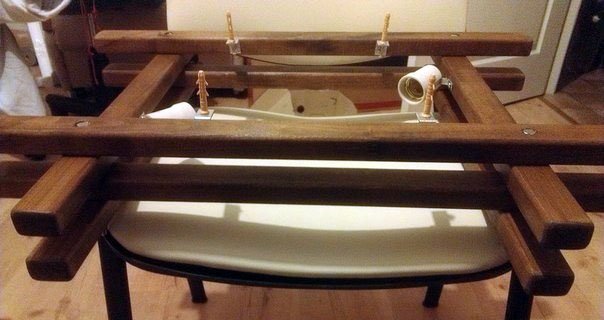
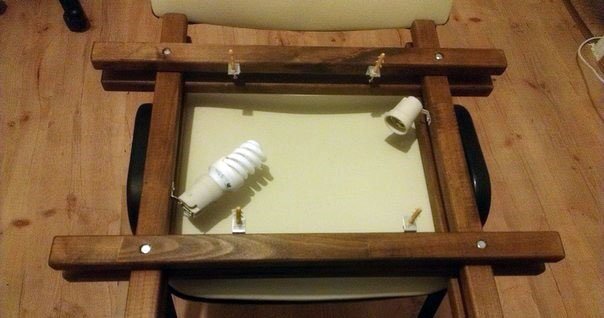
We drill holes in the ceiling for dowel-nails. We hang a lamp. We connect the wires, screw the lamps. We put on plexiglass and fix it with decorative nuts. It turns out that there is a distance between the wooden frame and the plexiglass.
That's all. A creative and original lamp is ready. I am sure that such a ceiling lamp is not only not inferior to the purchased ones, but rather even surpasses most models in appearance.
Perforamos agujeros en el techo para clavos. Colgamos una lámpara. Conectamos los cables, atornillamos las lámparas. Ponemos plexiglás y lo arreglamos con tuercas decorativas. Resulta que hay una distancia entre el marco de madera y el plexiglás.
Eso es todo. Una lámpara creativa y original está lista. Estoy seguro de que una lámpara de techo de este tipo no solo no es inferior a las compradas, sino que incluso supera a la mayoría de los modelos en apariencia.

There is also an option to apply a pattern on the plexiglass on the inside, such as a Chinese character. And then your luminary will immediately change style in a more easterly direction. But I stopped there. I like the more classic version.
También existe la opción de aplicar un patrón en el plexiglás en el interior, como un carácter chino. Y luego su luminaria cambiará inmediatamente de estilo en una dirección más hacia el este. Pero me detuve allí. Me gusta la versión más clásica.
Has sido votado por
PROYECTO ENLACE
'Conectando Ideas y Comunidades'
PROYECTO ENLACE es un proyecto de curación de habla hispana enfocado en recompensar contenido de calidad y apoyar autores en su proceso de crecimiento en HIVE.
Creemos y apostamos por el futuro de esta gran plataforma, y estamos muy emocionados de poder hacerla crecer junto a esta comunidad. Así que te invitamos a usar nuestra etiqueta ENLACE y estar atento a todas las actividades que tenemos preparadas y que estaremos publicando en breve.
¿QUIERES AUTOMATIZAR TUS GANANCIAS DE CURACIÓN? SE PARTE DEL PROYECTO ENLACE APOYANDO A NUESTRO TRAIL EN HIVE.VOTE INGRESA AQUÍ PARA CONOCER LOS DETALLES.
¿QUIERES INVERTIR ENLACE? DESCUBRE COMO HACERLO Y GENERAR INGRESOS DE FORMA SEMANAL MEDIANTE TU DELEGACIÓN DE HP AQUÍ TE EXPLICAMOS COMO.
Te invitamos a participar en nuestro servidor de Discord: https://discord.gg/3S9y7BbWfS
Atentamente
EQUIPO ENLACE 2022