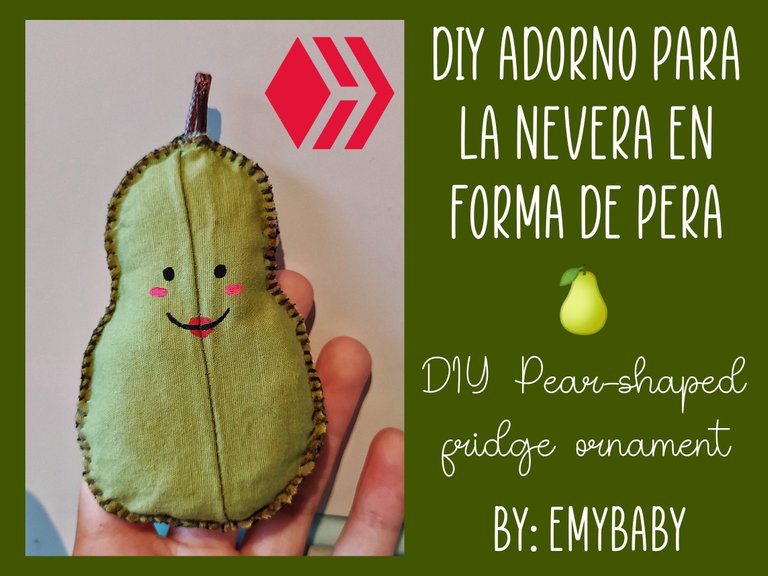

Hola amigos de esta creativa comunidad, hoy les traigo un DIY de un adorno para la nevera en forma de pera.
Es muy fácil de hacer y queda súper lindo.
Los materiales que utilicé fueron:
- Tela
- Tijeras
- Marcador
- Papel para hacer el patrón
- Hilo de coser y aguja
- Relleno
- Imán
- Temperas y pincel
Hello friends of this creative community, today I bring you a DIY of a fridge ornament in the shape of a pear.
It is very easy to make and looks super cute.
The materials I used were:
- Fabric
- Scissors
- Marker
- Paper to make the pattern
- Sewing thread and needle
- Stuffing
- Magnet
- Tempera and brush
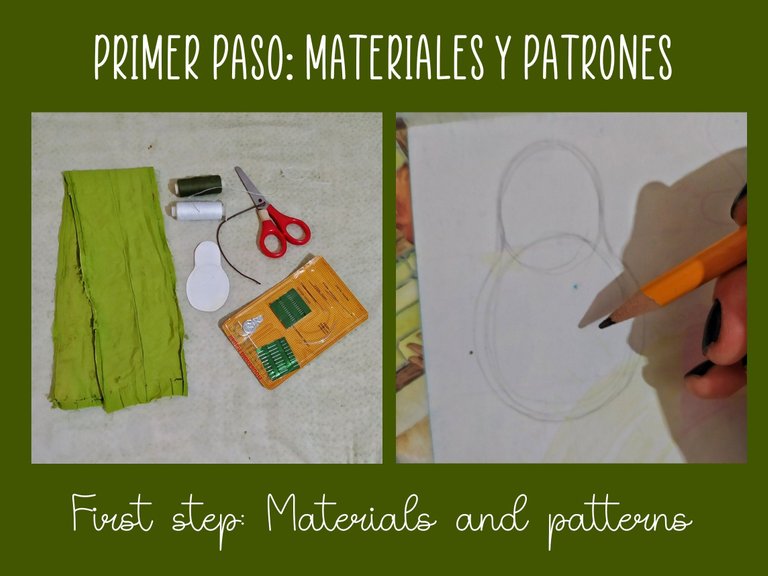
El primer paso es hacer el patrón de nuestra pera en el papel y recortar.
The first step is to make the pattern of our pear on the paper and cut it out.
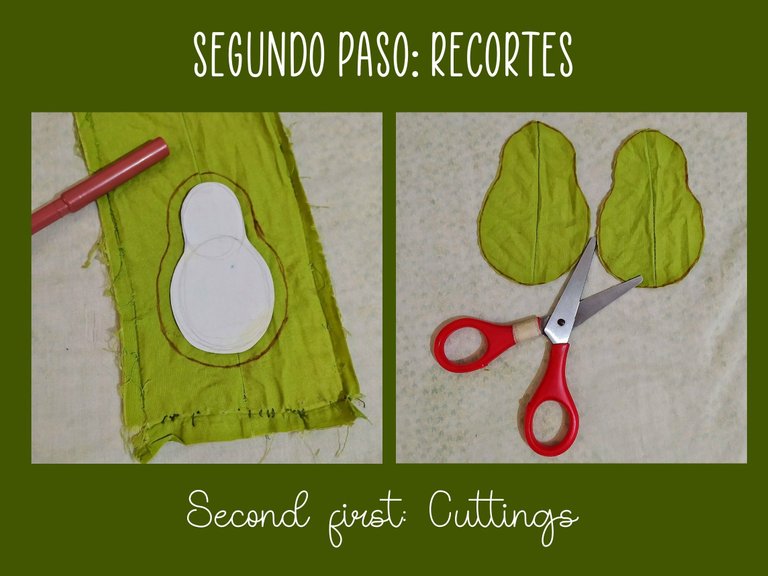
El segundo paso es marcar el patrón de la pera en la tela y sacar dos partes iguales, porque nuestra pera será acolchada.
The second step is to mark the pattern of the pear on the fabric and draw two equal parts, because our pear will be quilted.

El tercer paso consiste en colocar el hilo doble en la aguja que utilizaremos para coser, esto con la intención de que la costura se note alrededor de la pera.
The third step consists of placing the double thread in the needle that we will use to sew, this with the intention that the seam is noticed around the pear.
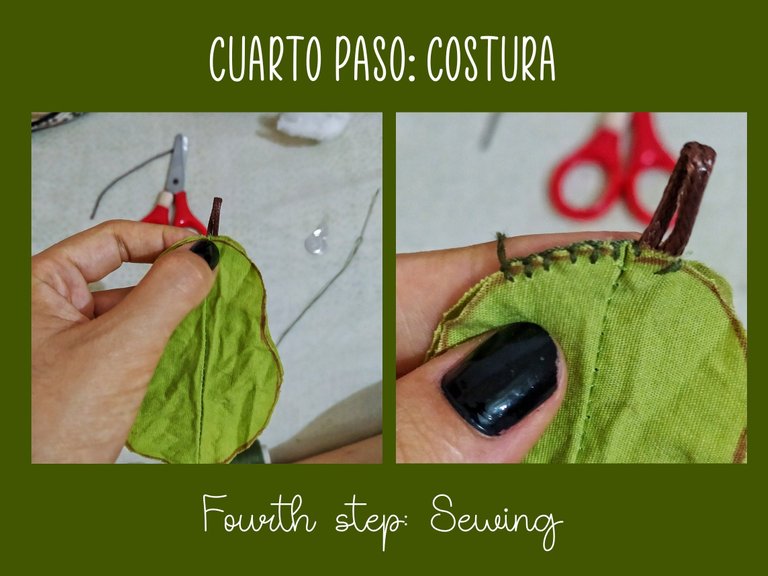
En el cuarto paso vamos a coser todo el alrededor de nuestra pera y le colocamos el cordón marrón que será su rabito.
In the fourth step we are going to sew all around our pear and place the brown cord that will be its tail.
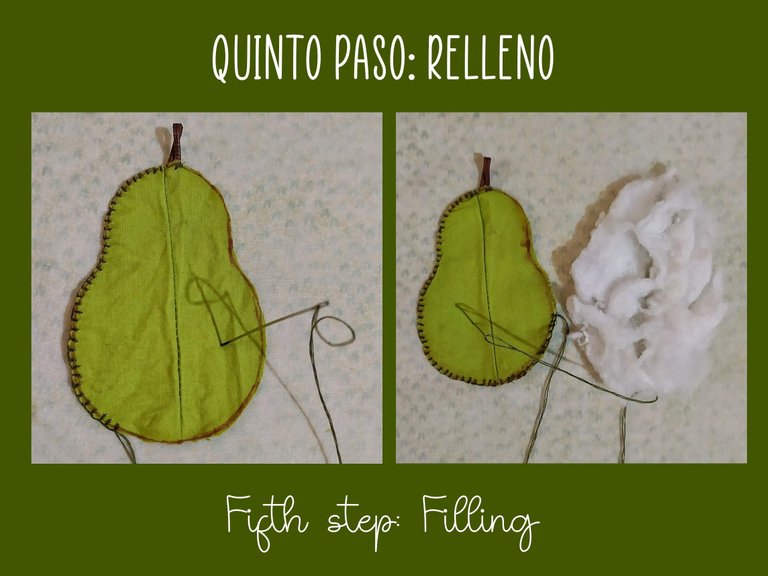
En el quinto paso, luego de coser el alrededor de la pera vamos a meterle el relleno para que quede acolchado.
In the fifth step, after sewing around the pear, we are going to stuff it with the padding to make it quilted.
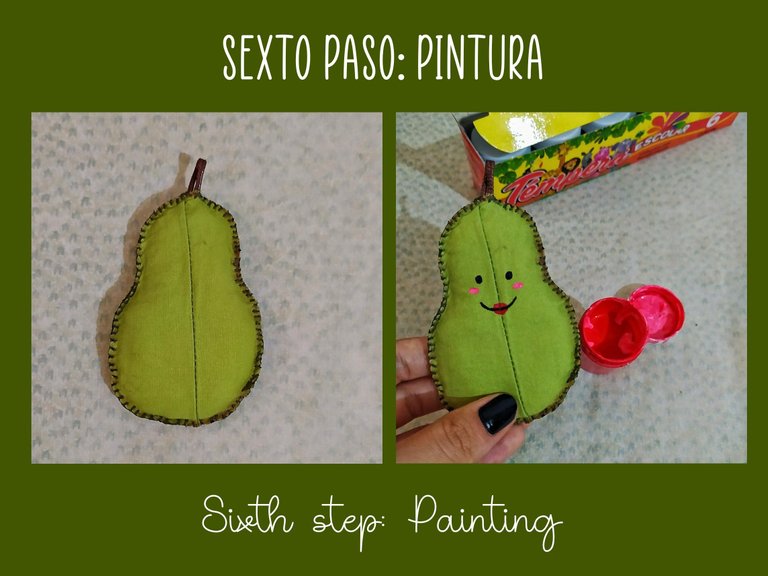
En el sexto paso con la tempera vamos a darle vida a nuestra pera, le pintamos sus labios, ojos y mejillas.
In the sixth step with the tempera we are going to give life to our pear, we paint her lips, eyes and cheeks.
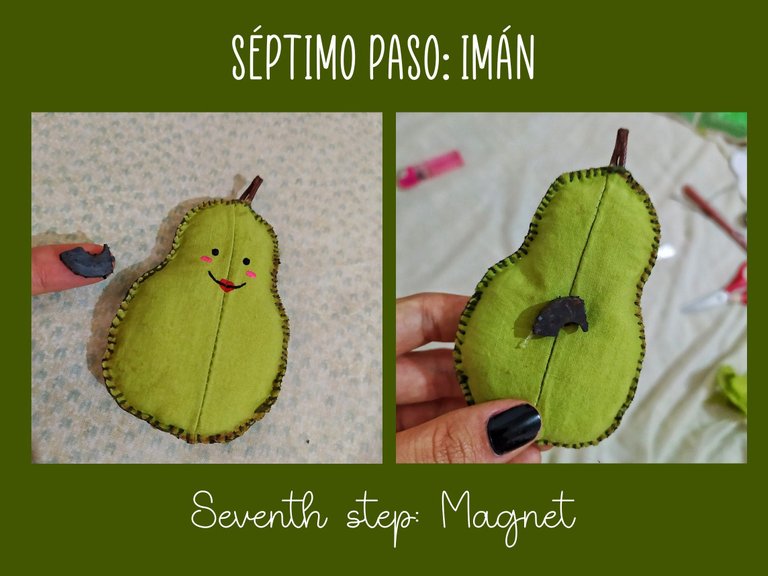
Y el séptimo y último paso es pegarle el imán para que la pera se pegue a la nevera.
And the seventh and last step is to glue the magnet so that the pear sticks to the fridge.
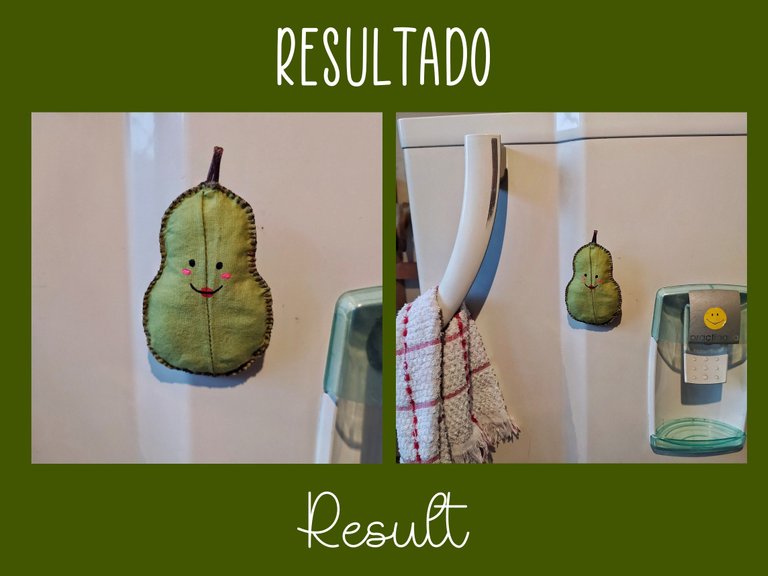
Este fue el resultado, espero que les guste y puedan recrearlo en casa. Un abrazo fuerte para todos.
This was the result, I hope you like it and you can recreate it at home. A big hug to all of you.
♡
El banner principal y las ediciones fueron elaboradas con PicsArt y Cymera
Las fotos fueron tomadas con mi celular
Traducido por DeepL
The main banner and edits were made with PicsArt and Cymera
The photos were taken with my cell phone
Translated by DeepL

The rewards earned on this comment will go directly to the person sharing the post on Twitter as long as they are registered with @poshtoken.
#posh @ocd @ocdb
That pear ornament looks so beautiful on the fridge. Nicely done!
I would like to extend an invitation for you to join the NeedleWorkMonday Community!
Every week needleworkers from around the globe get together to share our work, patterns, tips, ideas and shortcuts as we support one another. Our goal is to inspire the Hive blockchain to give crafting a try.
On Monday’s we use the #needleworkmonday tag and on all other days we use the #needlework tag without the word Monday attached. We share and post our work directly from the Community page.
We encourage our members to share the process of their work through photos. This not only validates your work but it takes us along the creative journey with you.
For more information about what we do and for our posting guidelines please visit our FAQs.
Thank you ~