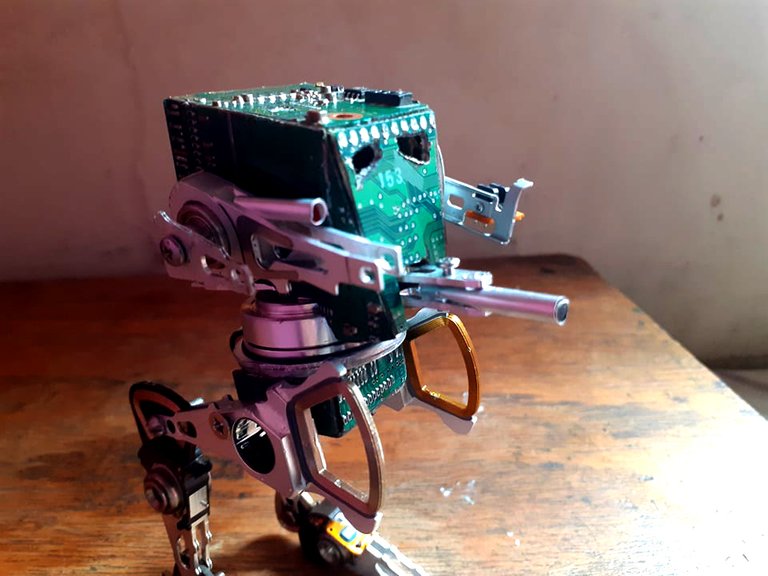
Hello friends I hope you are very well. I like this community so much that whenever I see new posts I am very impressed and it inspires me to keep working. This time I want to present my latest project. A chicken walker from Star Wars, the off-road transport vehicle used first by the Galactic Republic and then by the Empire. The AT-STs saw action at the Battle of Endor where the troops were defeated by the Ewoks. This transport vehicle is operated by two people and has a frontal plasma cannon and two rocket launchers on each side. These machines were destined for other types of missions after the defeat at Endor. My AT-ST project is built from computer parts, such as circuit boards and hard drive parts. Throughout the process they will be able to see each piece used. It has a height of 15 cm and weighs 250 gr. I hope you like it.
Hola amigos espero que se encuentren muy bien. Esta comunidad me agrada tanto ue siempre que veo nuevas publicaciones quedo muy impresionado y me inspira a seguir tabajando. Esta vez quiero presentar mi ultimo proyecto. Un caminante pollo de Star Wars el vehiculo de transporte todo terreno utilizado primero por la Republica Galactica y luego por el Imperio. Los AT-ST vieron acción en la batalla de Endor donde las tropas fueron derrotadas por los Ewoks. Este vehiculo de transporte es manejado por dos personas y cuenta con un cañon de plasma frontal y dos lanza cohetes en cada costado. Estas máquinas fueron destinadas a otro tipo de misiones luego de la derrota en Endor. Mi proyecto de AT-ST esta construido a base de partes de computadoras, como placas de circuitos y partes de disco duros. A lo largo del proceso podrán ver cada pieza utilizada. Tiene una altura de 15 cm y pesa 250 gr. Espero que sea de su agrado.
Process
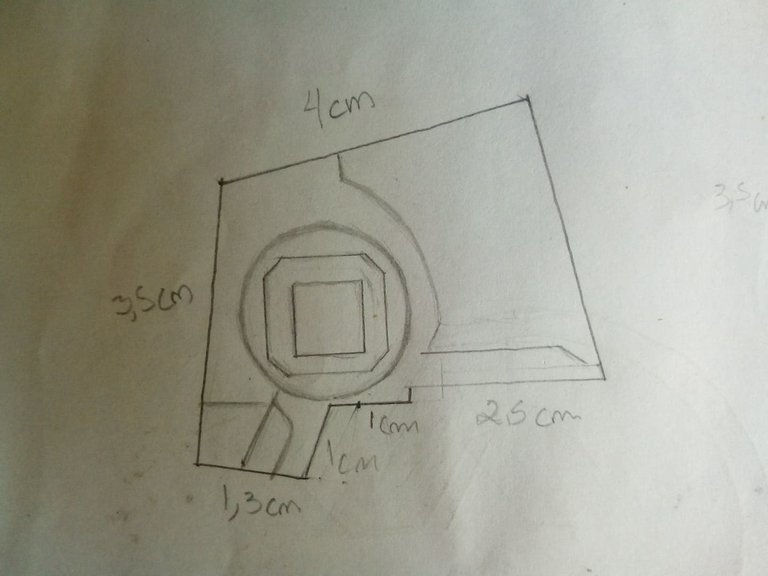
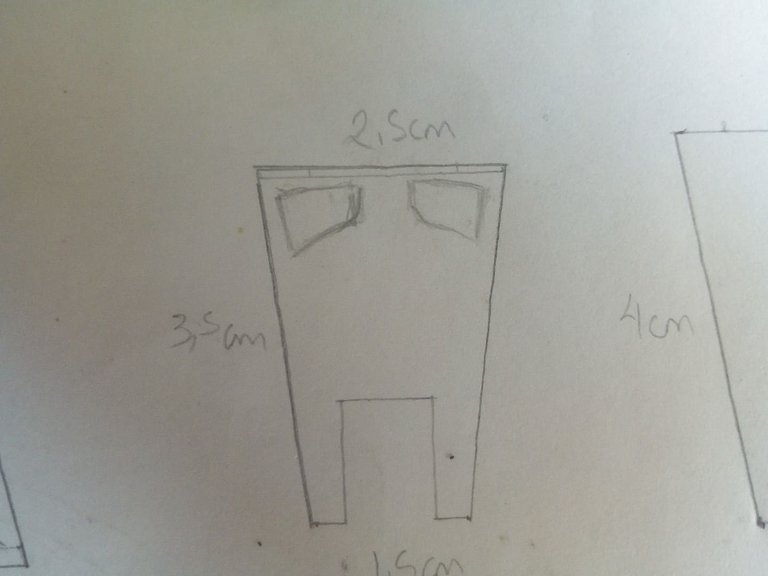
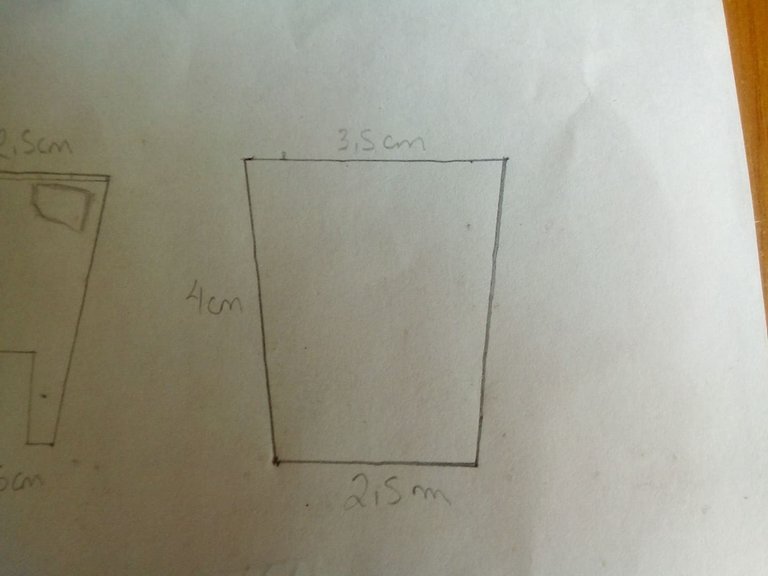
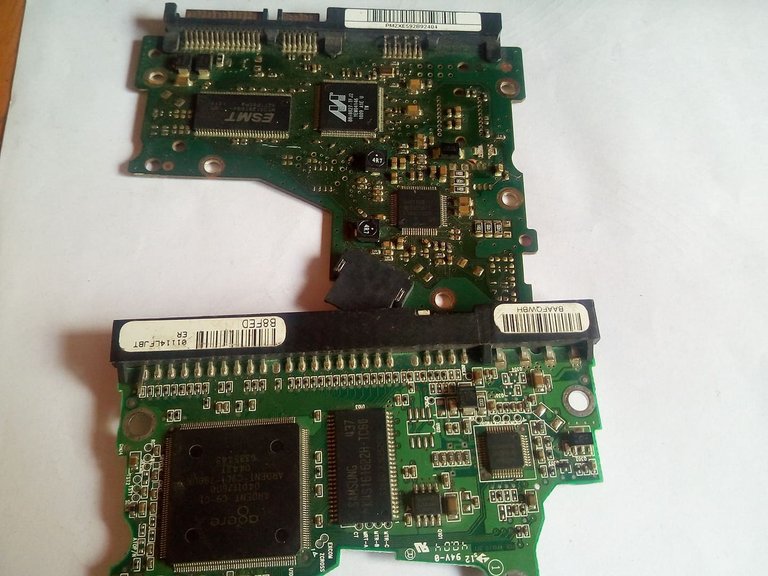
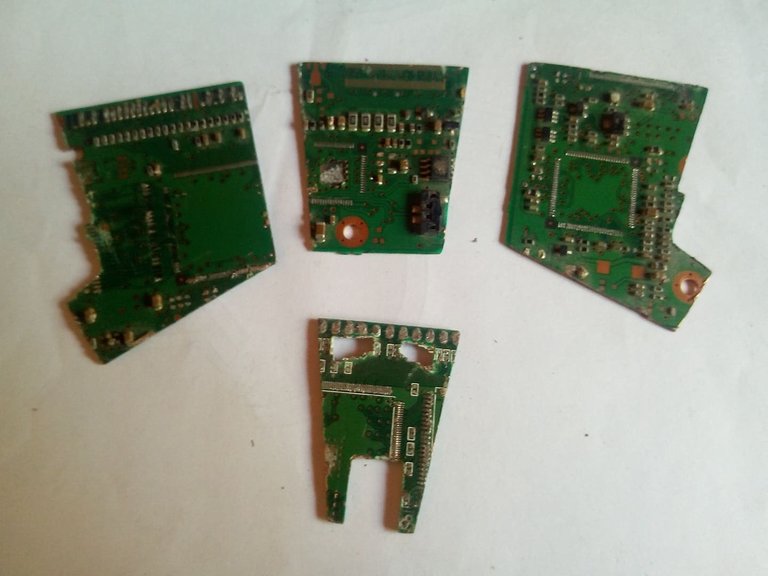
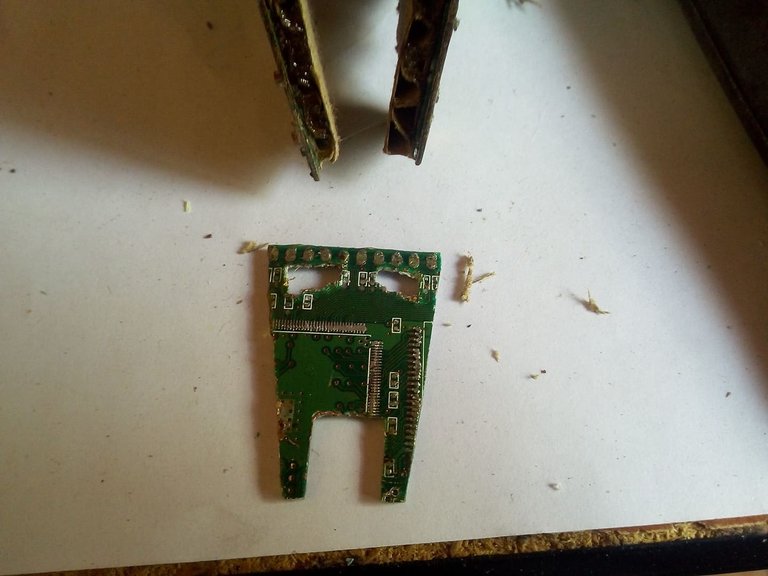
First we draw some plans to guide us. We can use scales or simply measure it to our liking depending on the materials we use. We draw the front part, the top part and the part of the sides. And then with a saw we cut the circuit boards to size.
En primer lugar dibujamos unos planos para guiarnos. Podemos utiliza escalas o simplemente medirlo a nuestro gusto dependiendo de los materiales que utilizamos. Dibujamos la parte frontal, la parte superior y la parte de los lados. Y luego con una sierra cortamos las placas de circuitos a la medida.
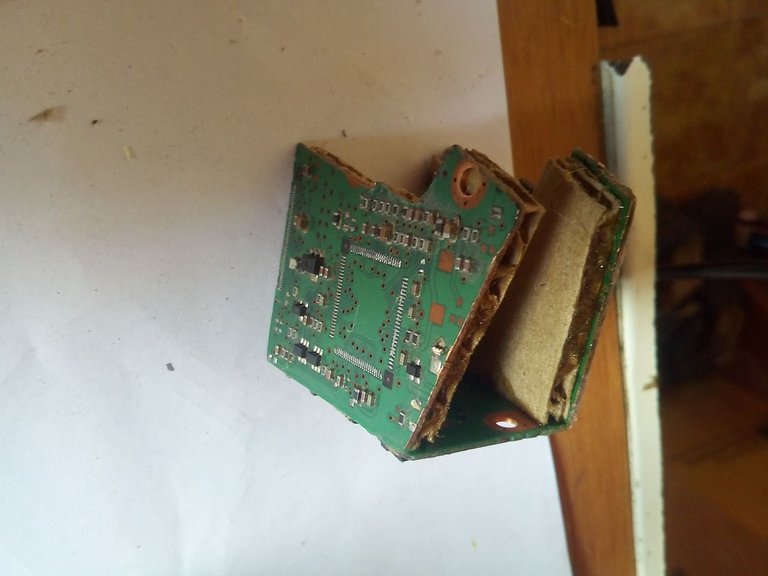
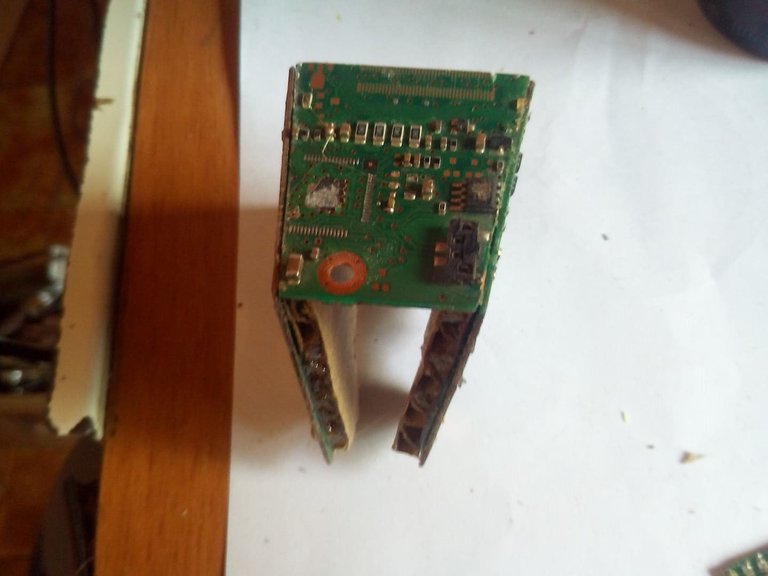
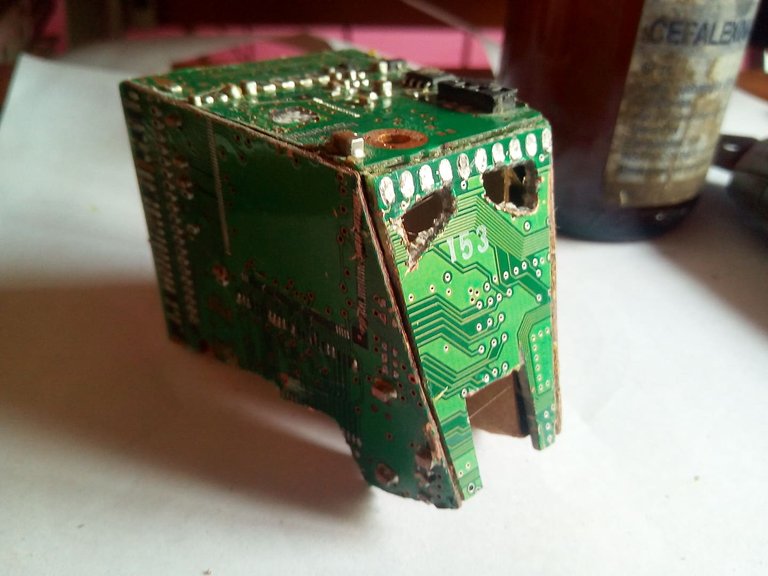
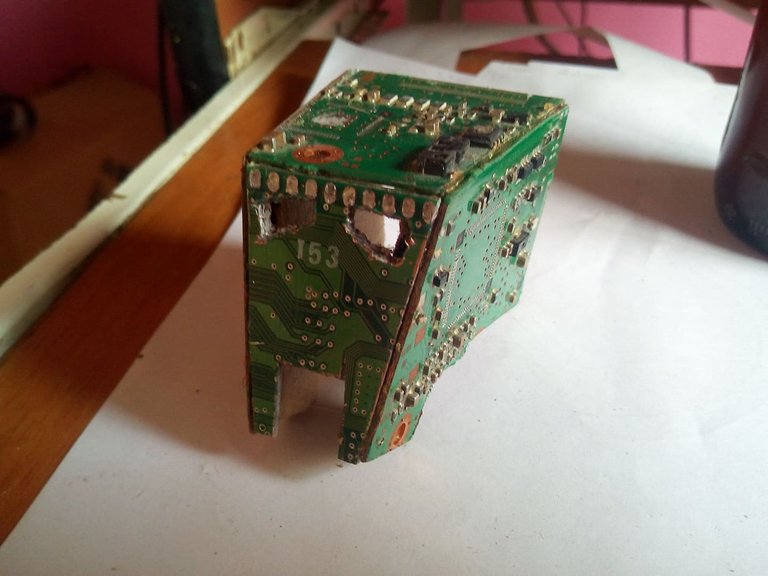
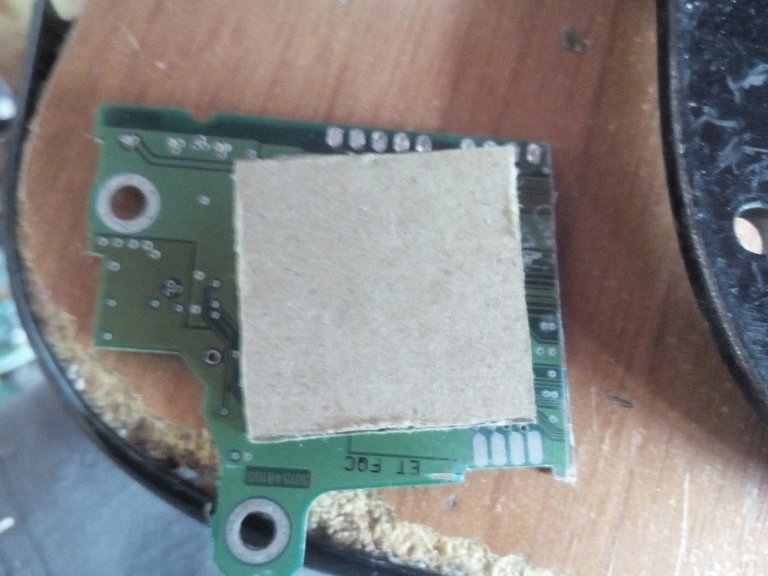
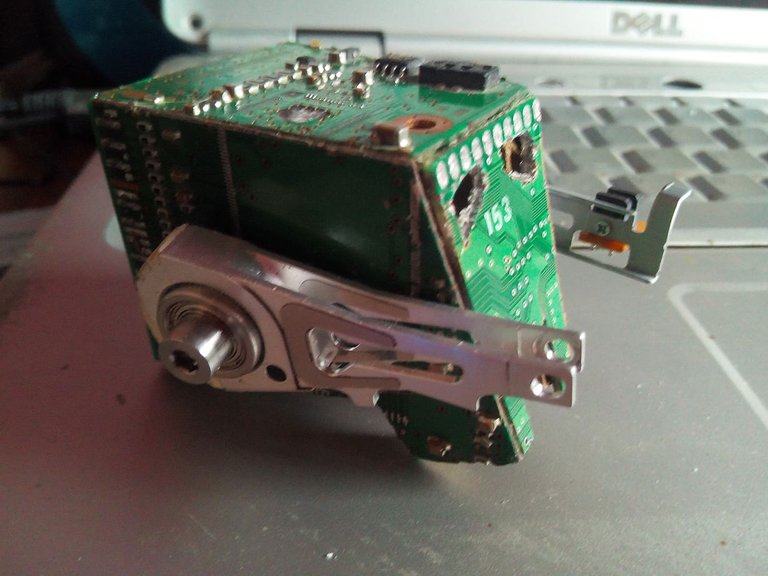
Once we have cut all the necessary parts to make the AT-ST cockpit, we proceed to assemble the parts. For that we use super glue and inside we cover it with cardboard so that the bond is stronger and does not come apart over time.
Una vez que hayamos cortados todas las partes necesarias para hacer la cabina de AT-ST, procedemos a armar las partes. Para eso utilizamos super pegamento y por dentro lo recubrimos con carton para que el pegado sea mas fuerte y no se desarme con el tiempo.
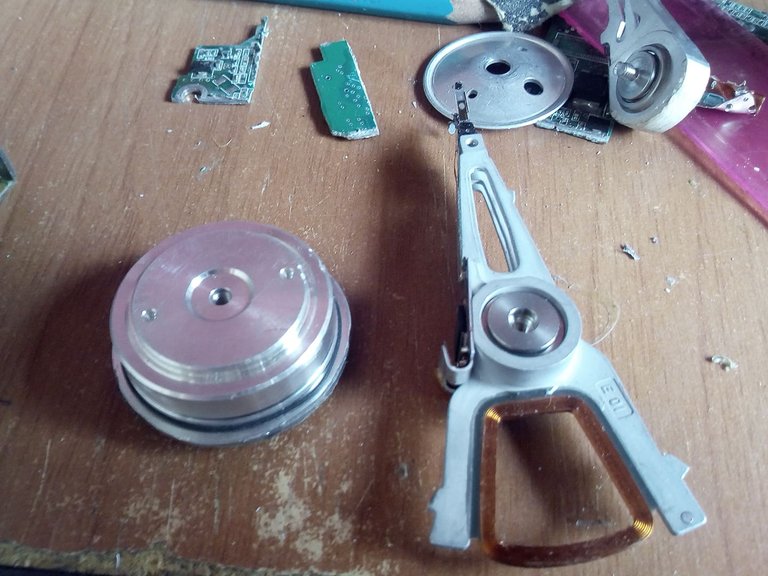
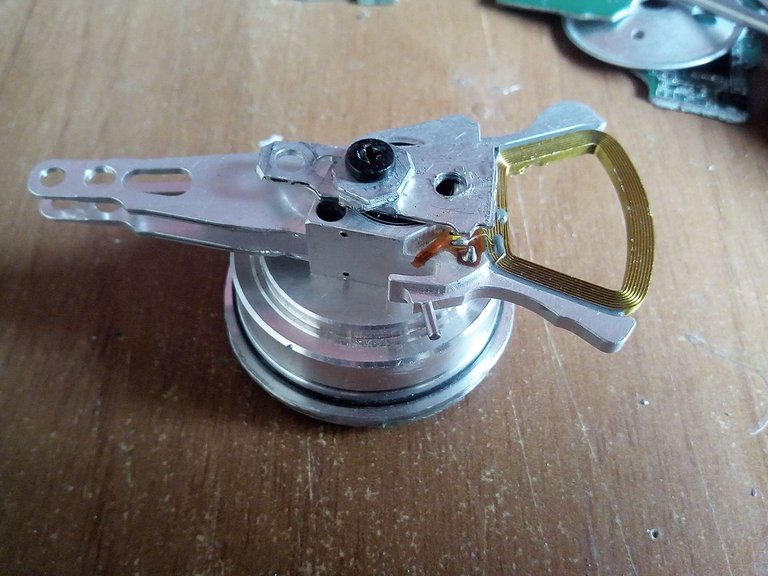
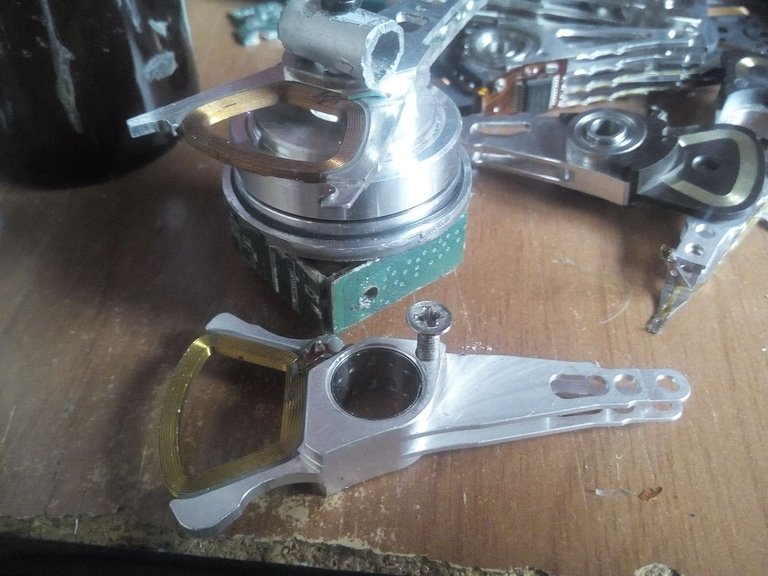
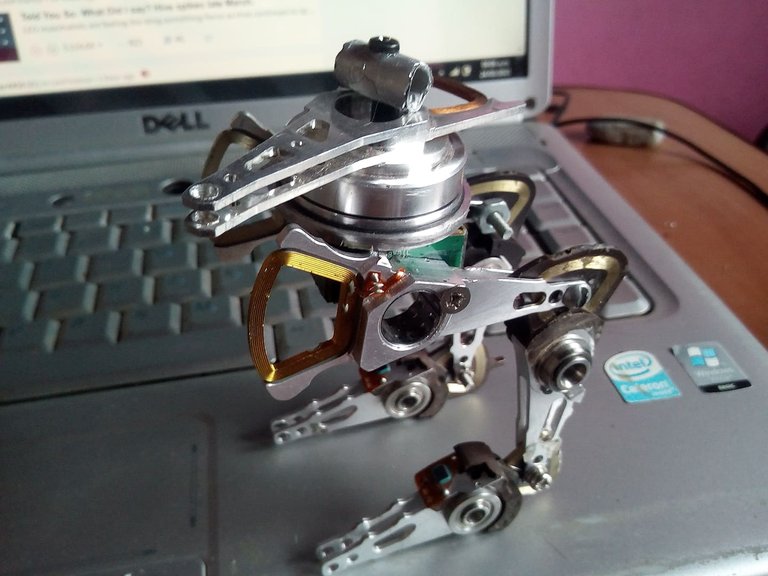
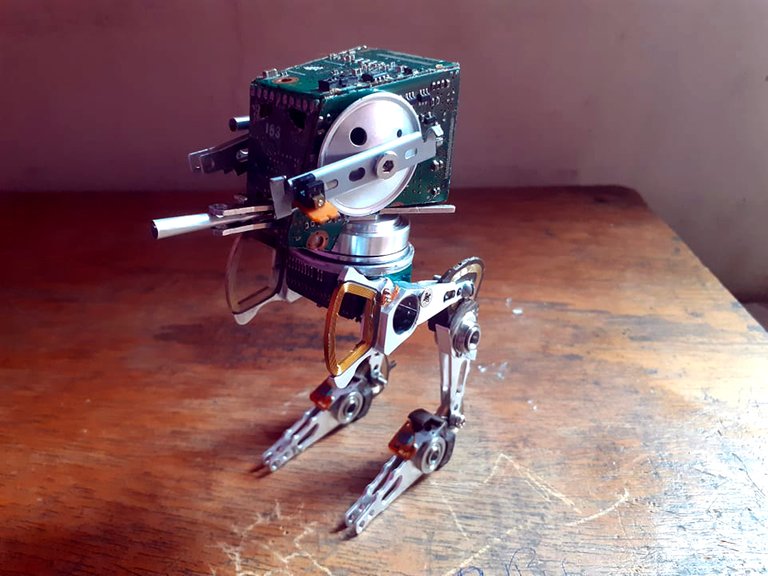
To make the base of the rotating cabin we use the motor of a hard disk and the needle that reads the hard disk. With a screw we join them to both and it will be perfect to move the cabin in any direction. Under the motor we will make a picture using the circuit board and that will serve as a base for the mechanical extremities.
Para hacer la bae de la cabina giratoria utilizamos el motor d eun disco duro y la aguja que lee el disco duro. Con un tornillo las unimos a ambas y nos quedara perfecto para mover en cualquier direccion la cabina. Debajo del motor haremos un cuadro utilizando la placa de circuitos y que nos servira de base para las extremidades mecanicas.
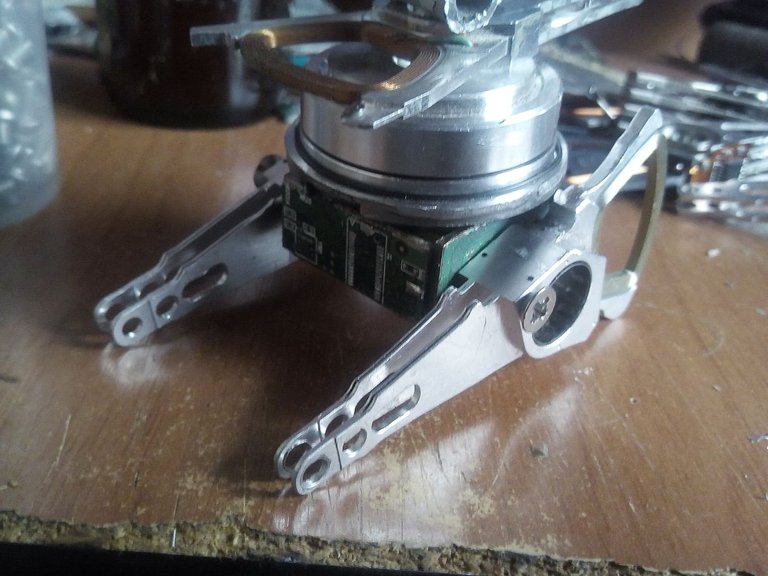

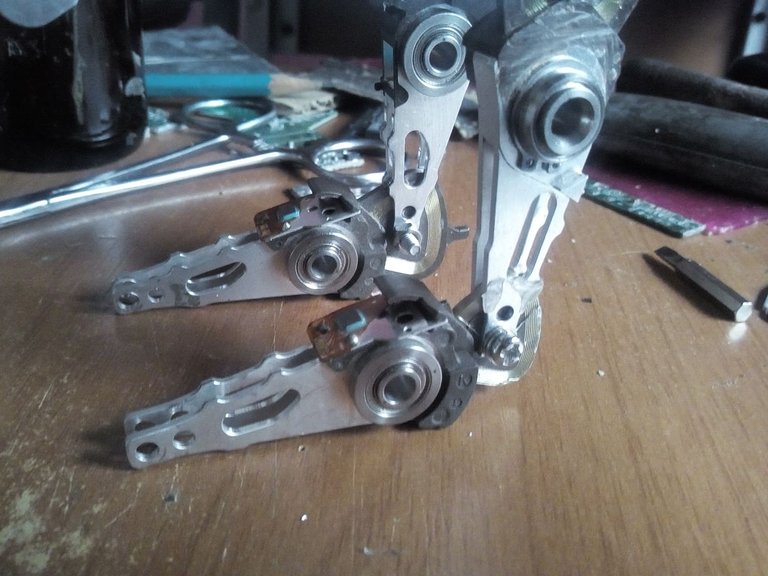
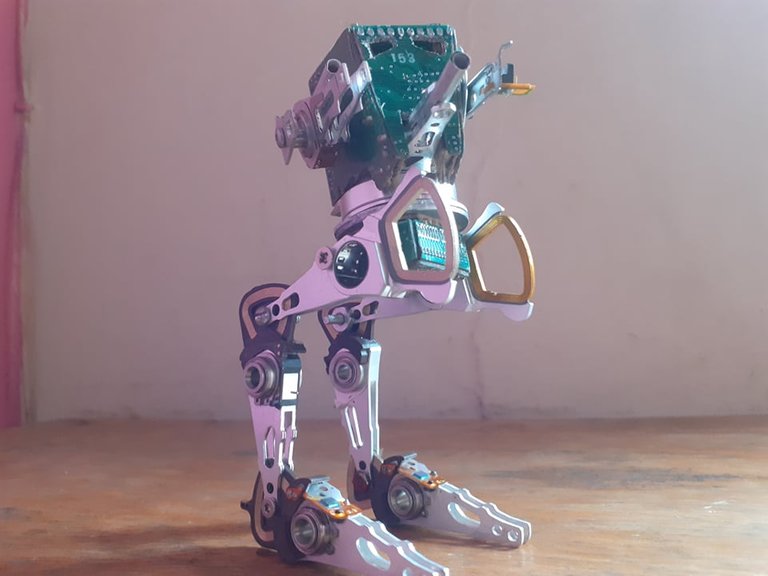
The mechanical extremities will be made with the reading needles of the hard disk. We will use a total of 6 and each of them will be fastened with screws and nuts between them to give them mobility and the base will also be attached with nuts. The great thing about these pieces is that they have many holes which makes them very versatile when building something.
Las extremidades mecanicas las haremos con las agujas lectoras del disco duro. Utilizaremos un total de 6 y cada una de ellas iran sujetadas con tornillos y tuercas entre ellas para darles movilidad y a la base tambien iran unidas con tuercas. Lo genial de estas piezas es que cuentan con muchos agujeros lo que las hace muy versatiles a la hora de construir algo.

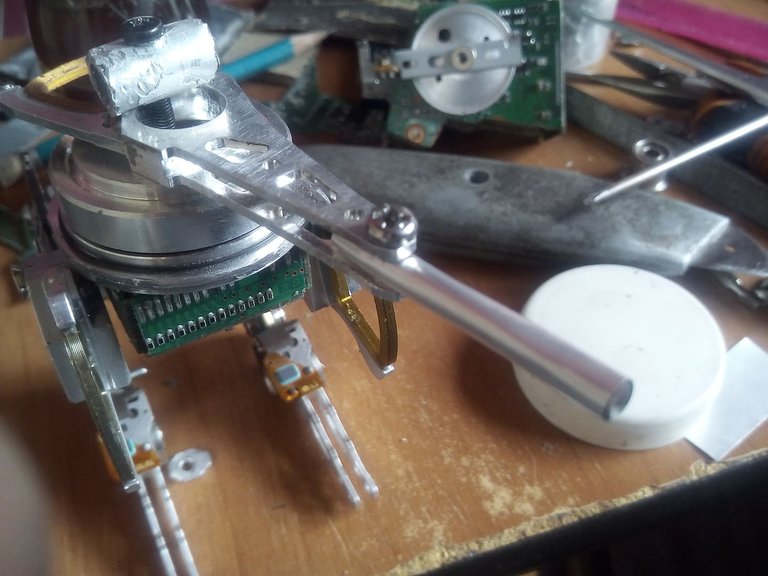
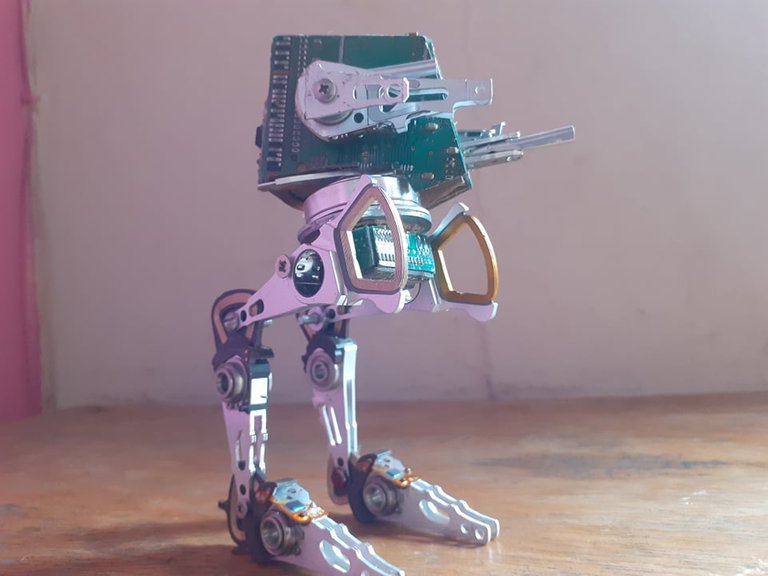
Ultimately and to finish we place the cannons that go to the sides of the cabin that fire rockets and in the front the plasma ray cannon. Then we join the cabin with the rest of the robot with a system of screws and nuts so that it is well fixed and we will have finished our AT-ST.
En ultima instancia y para finalizar colocamos los cañones que van a los lados de la cabina que disparan cohetes y en la parte frontal el cañon de rayos plasma. Luego unimos la cabina con el resto del robot con un sistema de tornillos y tuercas para que quede bien fijado y habremos terminado nuestro AT-ST.
FINAL WORK
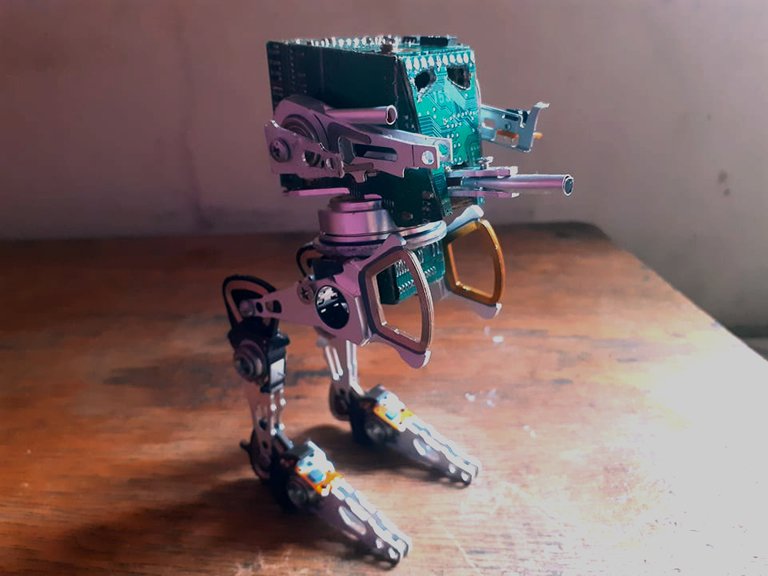

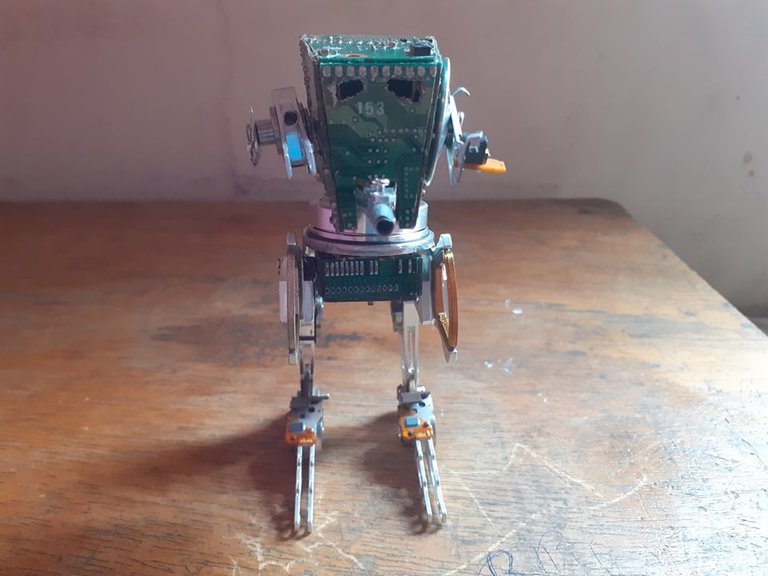
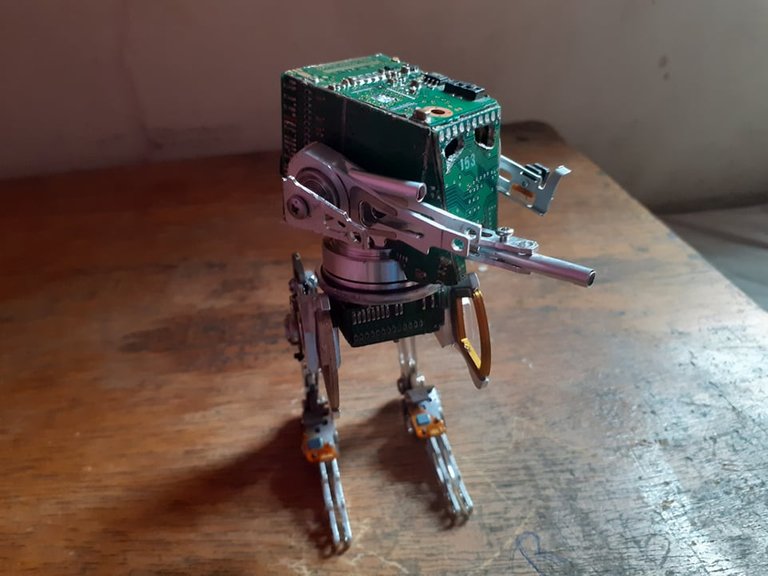
This is how our ground transportation vehicle AT-ST chicken walker has been. As you can see, the hand walk moves sideways thanks to the rotating motor of the hard disk. It has been a fascinating and beautiful piece, when looking at its parts it really looks like a robot and the weight it has for the parts used I think it is quite a lot. This has been my craft work for today. I hope you liked it a lot, I know there are a lot of Stars Wars fans in the community just like me and I know you will like this piece. If you liked it, do not forget to comment and say what you think and if you wish you can also follow me. See you soon and may the force be with you.
Así ha quedado nuestro vehiculo de transporte terrestre AT-ST pollo caminante. Como pueden observar la camina de mano se mueve para lo lados gracias al motor giratorio del disco duro. Ha sido una pieza fascinante y hermosa, al ver sus partes realmente parece un robot y el peso que tiene por las piezas utilizadas pienso que es bastante. Este ha sido mi trabajo de manualidad por hoy. Espero que les haya gustado mucho, se que en la comunidad hay muchos fans de Stars Wars así como yo y sé que esta pieza les gustará. Si te ha gustado no olvides comentar y decir que te pareció y si lo deseas tambien puedes seguirme. Hasta pronto y que la fuerza los acompañe.
Esto está demasiado genial bro! el efecto con los circuitos le queda 10/10, muy buen uso de los lectores de disco, gran publicación, saludos bro!
Estos materiales son geniales, por su diseño cualquier cosa orientado a la teconologia o a los robots quedará genial. Me alegra que te haya gustado, saludos.
Amigo es un post bastante creativo, tienes talento para crear estos modelos 3D, felicidades! saludos!
gracias hermano. Trabajar con este material te acelera la imaginación.
Thank you ! Now I know what to do from that old broken motherboard sleeping under my desk :')
Great work !!
Hope you put your motherboard to good use and see a post with what I did hehehe. Greetings
me encanta este tipo de cosas, te quedó genial...
¡Está super chingón!
Tienes un gran talento mi estimado, ¿de donde eres?.
Podría comprarte alguna :3, claro, si es que las vendes.
saludos!
Posted using Dapplr
Soy de Venezuela. Solo tendría ue revisar como es el asunto de los envíos. Que bueno que te haya gustado. Tengu muchas piezas de Star Wars ya realizadas y otras por hacer.