¡¡¡ Saludos queridos lectores y amigos !!!
Greetings dear readers and friends !!!
Saludos queridos lectores el día de hoy les traigo una de mis creaciones, fue un sencillo trabajo que realice para mi princesa mayor. Lo elaboré a finales del año pasado y por una u otra razón, no había tenido la oportunidad de compartirlo con ustedes. Fue un tapaboca que hice para una ocasión muy especial para nuestra familia. Mi niñita más grande recibiría el Sacramento de la Primera Comunión y por supuesto, necesitaba un tapaboca que combinara con su vestido. Dada las circunstancias de pandemia, obviamente, fue un acto muy sencillo y se cumplieron todas las medidas de bioseguridad. La asistencia fue restringida, a solo mamá, papá y la niña o niño que recibiría el Sacramento, esto, para evitar la aglomeración y con ello reducir la probabilidad de posibles contagios del covid-19.
Greetings dear readers, today I bring you one of my creations; it was a simple work that I made for my eldest princess. I made it at the end of last year and for one reason or another, I had not had the opportunity to share it with you. It was a mouth piece that I made for a very special occasion for our family. My oldest little girl would be receiving the Sacrament of First Communion and of course, she needed a mouthpiece to match her dress. Given the pandemic circumstances, obviously, it was a very simple event and all biosecurity measures were followed. Attendance was restricted to only mom, dad and the girl or boy who would receive the Sacrament, this, to avoid crowding and thus reduce the likelihood of possible contagion of covid-19.
El grupo de niños donde estaba mi hija, aunque ya había culminado su preparación religiosa, no habían podido tomar el Sacramento. Esto porque inicio la cuarentena y todas las actividades se paralizaron, pero, un buen día, varios meses después las retomaron. Nos avisaron con solo 15 días de antelación, la fecha y hora en que los niños tomarían su Primera la Comunión. Para mí, fue una carrera contra el tiempo, ya que me toco preparar en muy poco tiempo, todo para que mi hija estuviera hermosa en su gran día.
The group of children where my daughter was, although they had already completed their religious preparation, they had not been able to take the Sacrament. This was because the quarantine began and all the activities were paralyzed, but, one fine day, several months later, they resumed them. We were notified only 15 days in advance, the date and time when the children would take their First Communion. For me, it was a race against time, since I had to prepare everything in a very short time so that my daughter would be beautiful on her big day.
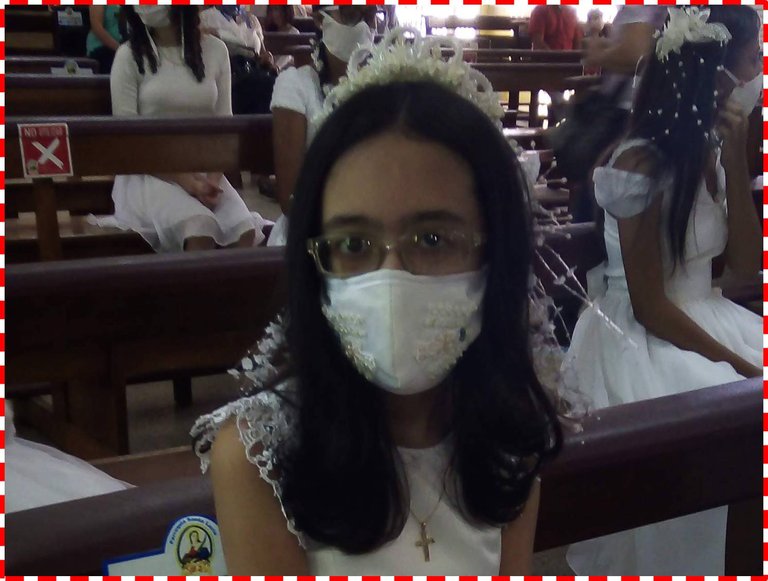

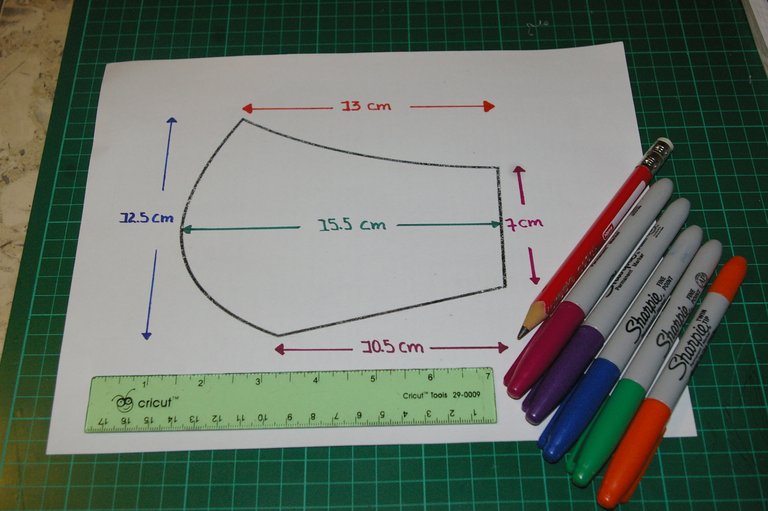
Como ya les he comentado en otras ocasiones, otra de mis pasiones es la costura y estaba frente a un nuevo reto, nunca había elaborado un vestido de comunión. Y no solo era realizar el vestido, también le adorne el tocado, es más, hasta serví de peluquera para mi princesita. Por supuesto, no podía faltar un tapaboca que combinara con el vestido y la ocasión. Así que, hoy les compartiré como elaboré ese tapaboca para su Comunión, la elaboración del vestido si Dios quiere se la compartiré en otra ocasión. Pero bueno, ya he dado mucho preámbulo, ahora pongamos manos a la obra, lo primero que debemos hacer es buscar el patrón que usaremos, porque existen varios modelos de tapabocas. En base a eso, podremos determinar la cantidad de tela que necesitaremos, en la imagen que a continuación les coloco, muestro el molde que use en este proyecto.
As I have told you on other occasions, another of my passions is sewing and I faced a new challenge, I had never made a communion dress. And it was not only to make the dress, I also adorned the headdress, in fact, I even acted as hairdresser for my little princess. Of course, I couldn't miss a mask to match the dress and the occasion. So today, I'll share with you how I made that mask for her communion. The elaboration of the dress, God willing, I will share it another time. But well, I have already given a lot of preamble, now let's get down to work, the first thing is to look for the pattern that we are going to use, because there are several models of masks. Based on that, we can determine the amount of fabric we will need, in the image below I show you the pattern I used in this project.


Ok. Basándome en el patrón que decidí usar, seguidamente listare los materiales que necesite, para confeccionar el tapaboca para la primera comunión de mi hija mayor. Sin embargo debo resaltar, que ustedes pueden usar el tipo de tela que prefieran o hacer los ajustes que deseen.
Okay. Based on the pattern I decided to use, I will now list the materials I need to make the mask for my eldest daughter's first communion. However I must emphasize, that you can use the type of fabric you prefer or make any adjustments you wish.

Materiales:
• 1 Rectángulo (28cm x 14cm) de raso de novia blanco
• 1 Rectángulo (28cm x 14cm) de tela de forro blanco
• 1 Rectángulo (28cm x 14 cm) tela POP blanco
• 30 cm Elástica delgada
• 75 cm Sesgo blanco
• Aplicaciones bordada para decorar
• Perlitas para decorar
• Hilo
• Aguja
Materials:
- 1 Rectangle (28cm x 14cm) of white bridal satin.
- 1 Rectangle (28cm x 14cm) white lining fabric
- 1 Rectangle (28cm x 14cm) white POP fabric
- 30 cm thin elastic
- 75 cm white bias
- Embroidered appliqués for decoration
- Beads for decoration
- Thread
- Needle


Una vez que ya hemos seleccionado nuestro patrón y tenemos los materiales tomamos cada rectángulo y los doblamos a la mitad. Nos quedaran cuadrados de 14cm x lado, donde marcaremos y cortaremos nuestras piezas. El hacerlo de esta forma, en este caso como la tela raso de Novia tiene derecho y revés, garantiza el no cortar las piezas de forma incorrecta. Otro detalle, sé que algunos se preguntaran por qué no tome los tres rectángulos y los doblé juntos para marcar de una vez y cortar todas las piezas. En este caso, debido al hecho que utilicé telas sedosas, estas tienden a deslizarse, así que, se corre el riesgo de cortar las piezas incorrectamente.
Once we have selected our pattern and have the materials we take each rectangle and fold them in half. We will be left with squares of 14cm x side, where we will mark and cut our pieces. Doing it this way, in this case as the Bridal satin fabric has front and back, guarantees not to cut the pieces incorrectly. Another detail, I know some of you may wonder why I didn't take the three rectangles and fold them together to mark and cut all the pieces at once. In this case, due to the fact that I used silky fabrics, they tend to slip, so, you run the risk of cutting the pieces incorrectly.

Una vez que tenemos todas las piezas cortadas, unimos basteando las piezas de la parte frontal de nuestro tapaboca, las cuales fueron cortadas en raso de novia con las piezas cortadas en tela POP. Aprovechamos también, para fijar la aplicación que colocaremos de adorno, de esta forma no se notaran las costuras.
Once we have all the pieces cut, we baste the pieces of the front part of our mask, which were cut in bridal satin with the pieces cut in POP fabric. We also take the opportunity to fix the application that we will place as an ornament, in this way the seams will not be noticed.

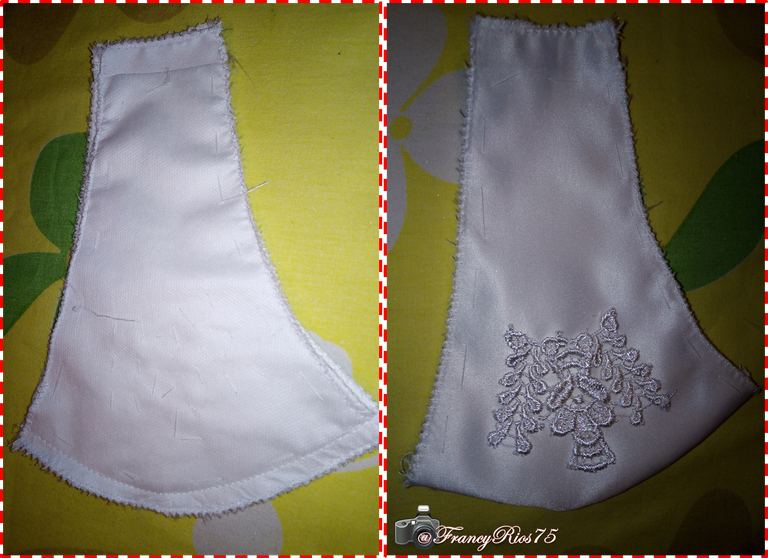

Seguidamente, tomamos las dos piezas derecha e izquierda, las cuales ya había basteado para unir las piezas de telas de raso de novia y POP. Ahora procedemos a unir con una costura por la zona de la curva central, esa parte corresponde a la zona de la nariz y boca. Ese proceso lo puede ver más claramente, en la imagen que a continuación les coloco. Además, pasamos una costura en Zip-Zap por todo el borde para ir dándole un acabado prolijo al trabajo. El mismo procedimiento lo hacemos con las dos piezas correspondientes a la parte de adentro del tapaboca, que cortamos en tela de forro.
Next, we take the two left and right pieces, which we had already basted to join the pieces of satin bridal fabric and POP. Now we proceed to join with a seam in the area of the central curve, that part corresponds to the area of the nose and mouth. You can see this process more clearly in the image below. In addition, we sew a Zip-Zap seam all around the edge to give a neat finish to the work. The same procedure is done with the two pieces corresponding to the inside of the mask, which we cut out of lining fabric.

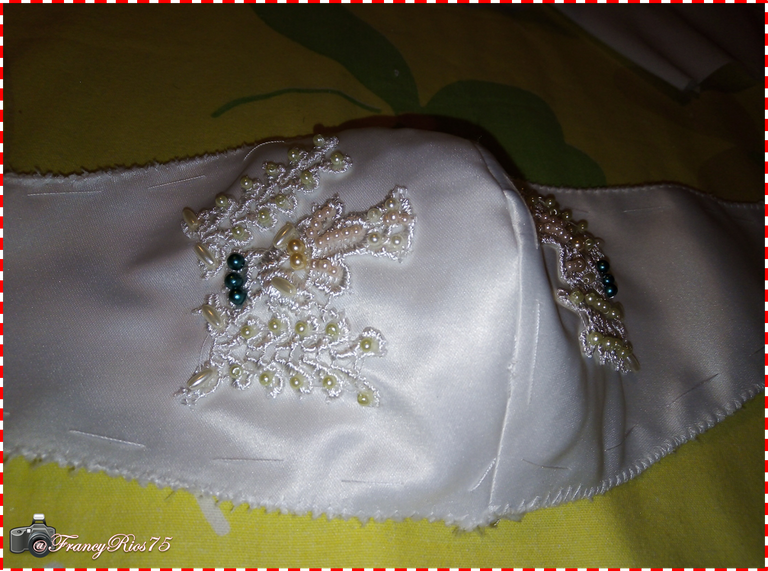

Antes de unir las dos piezas que ahora tenemos armadas, toca colocar la decoración con las perlitas, este es un detalle opcional. A mí me parece que le da un lindo toque, pero es solo cuestión de gustos, usted tiene la última palabra.
Before joining the two pieces that we now have assembled, it is time to place the decoration with the beads, this is an optional detail. I think it gives a nice touch, but it is just a matter of taste, you have the last word.

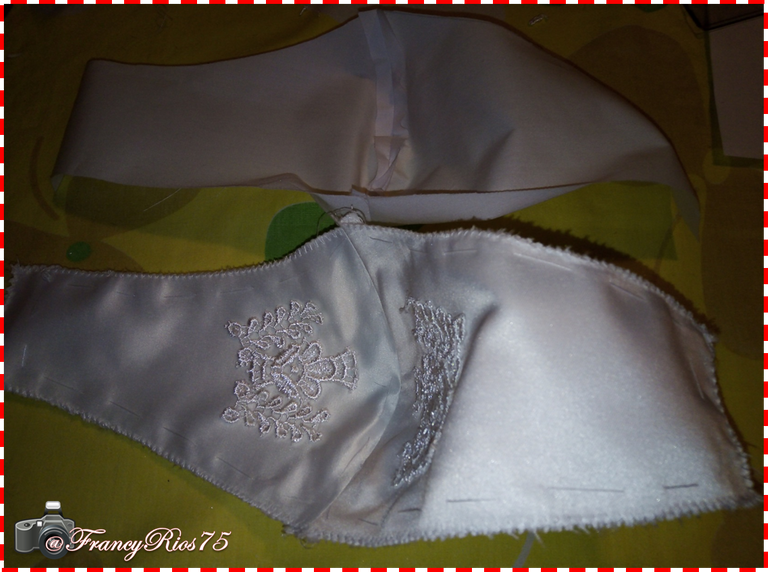

Ahora sí, tomamos las dos piezas que nos van quedando y las unimos basteando, debemos colocar revés contra revés. Seguidamente, es el momento de pegar el sesgo, que servirá para cubrir las costuras. Por la parte interna del tapaboca, debemos bastear uno de los bordes del dobladillo interno del sesgo, a nivel de la orilla superior e inferior del tapaboca. Ya realizado este proceso, podemos pasar las costuras a máquina por toda la orilla, para fijarlo de manera segura. Después de esto, volteamos el sesgo hacia la parte de adelante y pasamos un hilván y luego la costura con la máquina; les debería quedar como muestra la figura que les presento a continuación.
Now, we take the two remaining pieces and baste them together, placing them back to back. Next, it is time to glue the bias binding, which will be used to cover the seams. On the inside of the mask, we must baste one of the edges of the internal hem of the bias binding, at the level of the upper and lower edge of the mask. Once this process is done, we can machine stitch the seams along the entire edge, to fix it securely. After this, we turn the bias binding to the front side and pass a basting stitch and then the machine stitching; it should look as shown in the figure below.

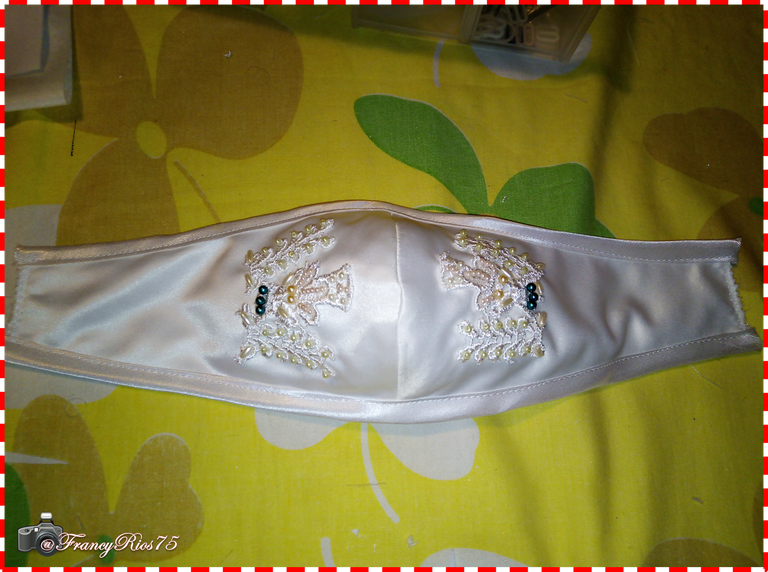

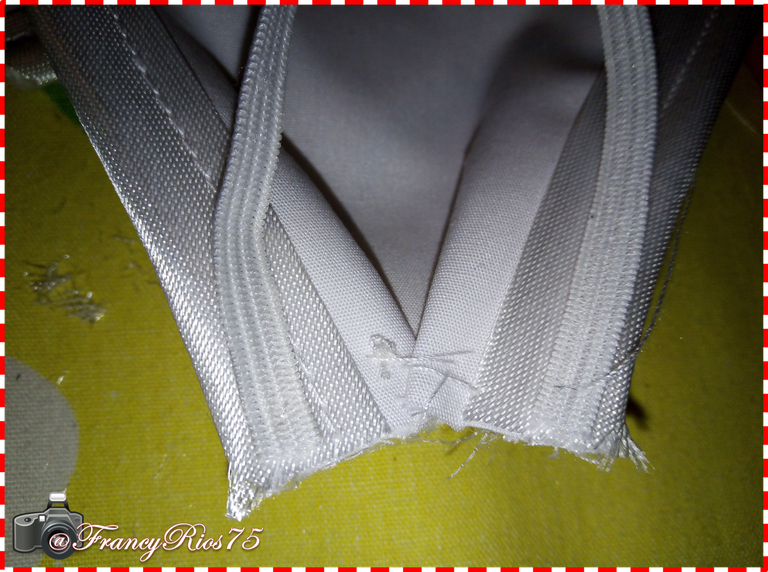
Ya tenemos nuestro tapaboca casi listo, es momento de colocar los elásticos, lo primero es hacer unos tabloncillos en la zona que van hacia las orejas. Posteriormente colocamos los dos trozos de elástico formando una especie de medio anillo como se muestra en la imagen siguiente.
Now we have our mask almost ready, it is time to place the elastics, the first thing to do is to make some little boards in the area that goes towards the ears. Then we place the two pieces of elastic forming a kind of half ring as shown in the following image.


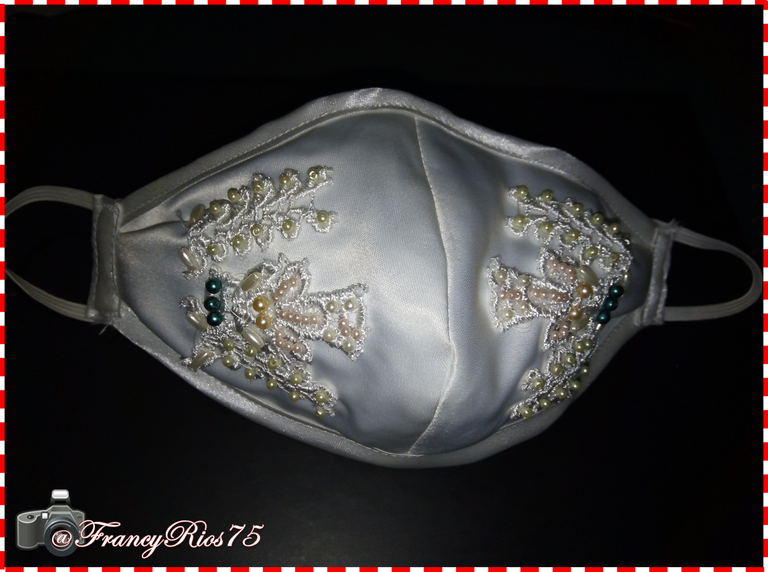
Bueno, aquí ya pueden ver el tapaboca terminado, espero les gustara el sencillo trabajo que hoy les muestro y entendieran la explicación. Trate de explicarlo de la forma más sencilla que pude, espero que les sirva para que puedan elaborar sus propios tapabocas en casa.
Well, here you can see the finished mask, I hope you like the simple work that I show you today and understand the explanation. I tried to explain it in the simplest way I could, I hope it will help you to make your own masks at home.


Por ahora me despido, esperando que tengan una feliz semana, por favor cuídense y cuiden a los suyos poniendo en práctica las medidas de bioseguridad. Dios los bendiga.
For now I say goodbye, hoping you have a happy week, please take care of yourselves and your loved ones by putting into practice the biosecurity measures. God bless you.

Contenido y fotografías de mi propiedad intelectual
Información Técnica
| Cámara | Pentax * istDL |
|---|---|
| Lente | * Pentax 18-55 |
| Iluminación | Luz Natural |
| Locación | Barcelona, Estado Anzoátegui, Venezuela |
Content and photographs of my intellectual property
Technical information
| Camera | Pentax * istDL |
|---|---|
| Lens | * Pentax 18-55 |
| Lighting | Natural Light |
| Location | Barcelona, Anzoátegui State, Venezuela |


Una pequeña obra de arte para una gran ocasión. Os deseo mucha salud y felicidad.
Gracias querido amigo @juancar347, me alegra que te gustara. Te envío un gran abrazo y bendiciones.
Congratulations, your post has been upvoted by @dsc-r2cornell, which is the curating account for @R2cornell's Discord Community. Enhorabuena, su "post" ha sido "up-voted" por @dsc-r2cornell, que es la "cuenta curating" de la Comunidad de la Discordia de @R2cornell.
Gracias por el apoyo @blessed-girl, Sr. @r2cornell y a todo el equipo @dsc-r2cornell. Bendiciones para todos.
Your content has been voted as a part of Encouragement program. Keep up the good work!
Use Ecency daily to boost your growth on platform!
Support Ecency
Vote for Proposal
Delegate HP and earn more
Gracias por el apoyo @ecency, saludos y bendiciones para todo el equipo.
Wow! So beautiful! I hope she had a beautiful day. My son has first communion in June.
That was a great day, thank goodness.
In June, there is very little left, I hope you enjoy that day as a family.Thanks @schmatz, I'm glad you liked it.