hello hive community. today I present some of my crafts with recycled material. I hope you like it!.
hola comunidad hive. hoy les presento unas de mis manualidades con material reciclado. Espero les guste!.
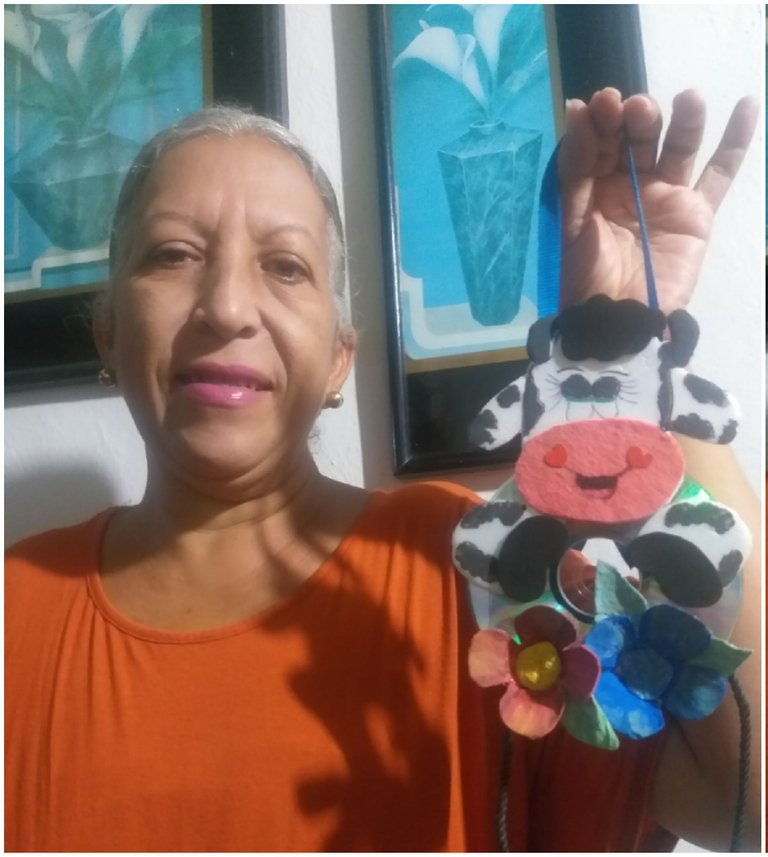
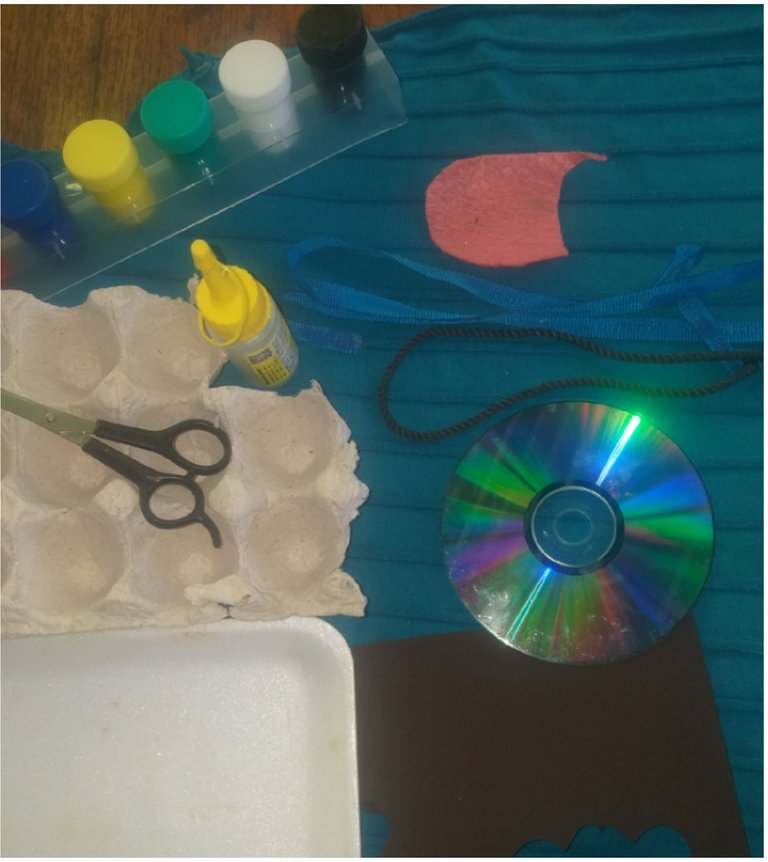
MATERIALS:
A foam tray. (tray where the cheese comes).
Piece of black foam.
Pink felt or fabric cutout.
1 C.D.
Liquid silicone or stick.
Paintings.
Egg Carton.
1 Ribbon.
MATERIALES:
Una bandeja de telgopor. (bandeja donde viene el queso).
Pedacito de foami color negro.
Recorte de fieltro o tela color rosado.
1 C.D.
Silicona liquida o en barra.
Pinturas.
Cartón de Huevos.
1 Cinta.
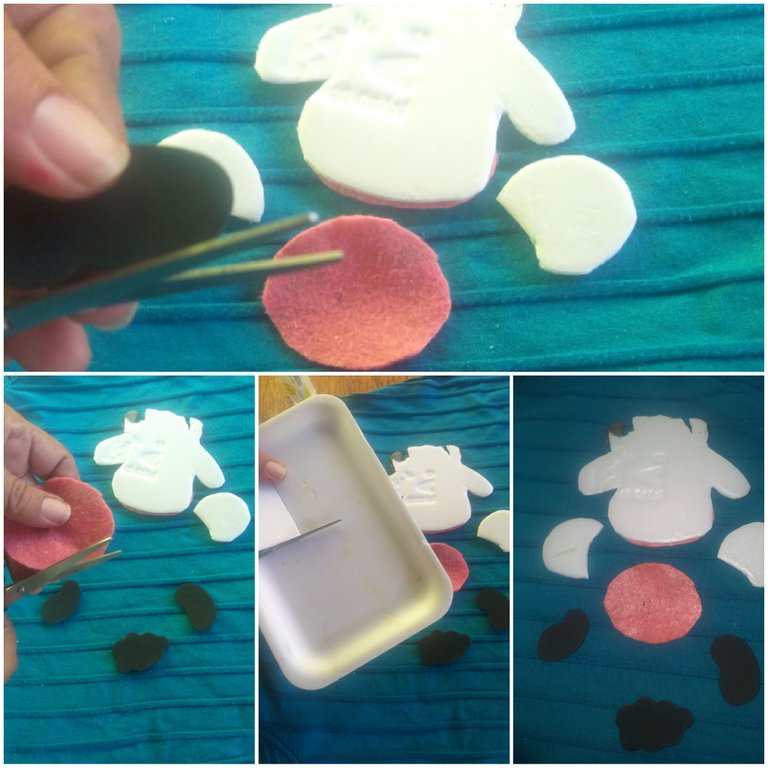
STEP 1:
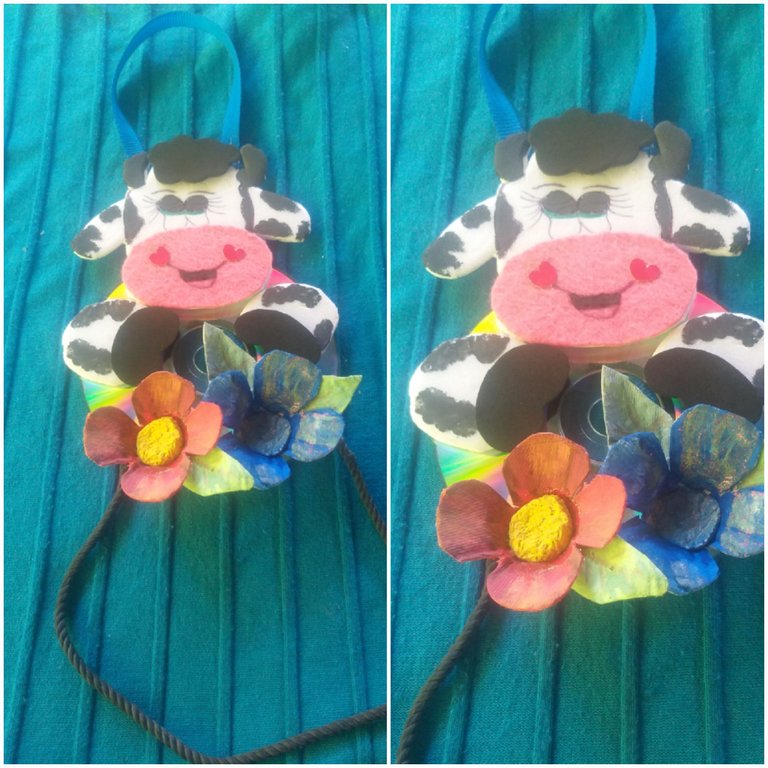
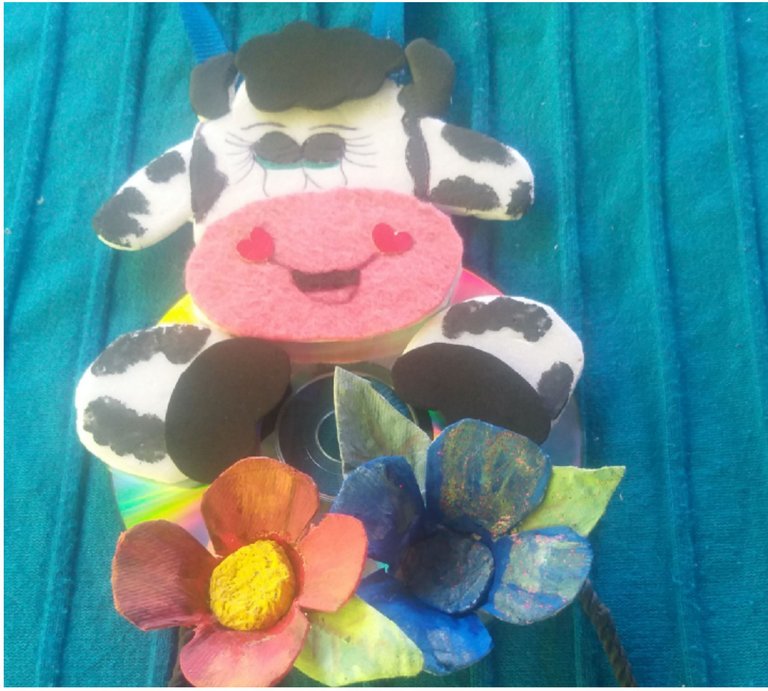
- The face and arms of the cow are cut off. In styrofoam.
- Cut the piece of pink felt or cloth into an oval shape and stick it to the face. this will make the cow's snout.
- The black foami is cut to form the hooves and the hair of the cow. the hair sticks to the head and the hooves to the arms.
PASO 1:
- Se cortan la cara y los brazos de la vaca. En el telgopor.
- Se corta el pedacito de fieltro o tela de color rosado en forma ovalada y se le pega a la carita. este va hacer el hocico de la vaca.
- Se corta el foami de color negro para formar las pezuñas y el pelito de la vaca. se le pegan el pelito a la cabecita y las pezuñas a los brazitos.
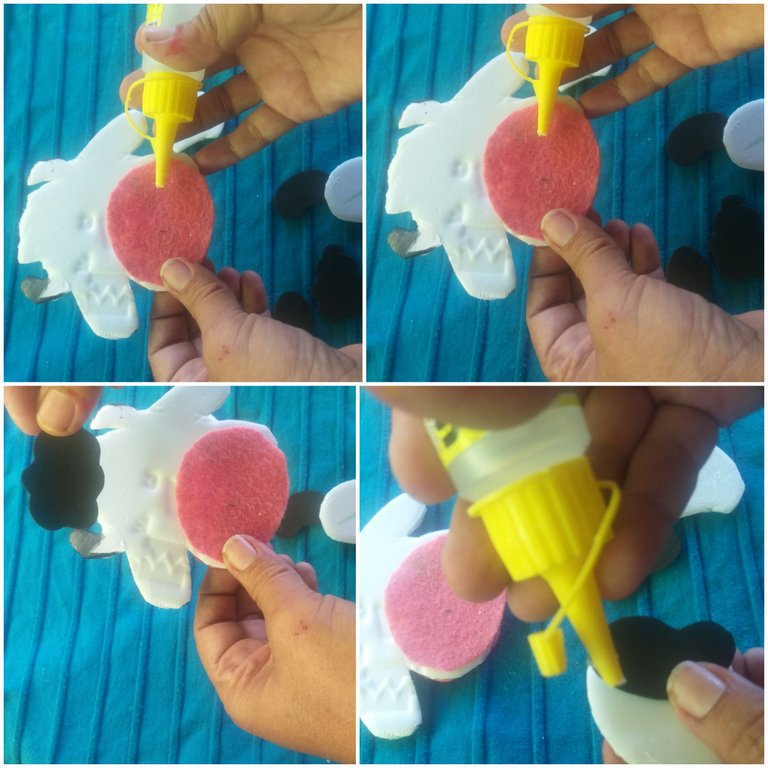
Step 2.
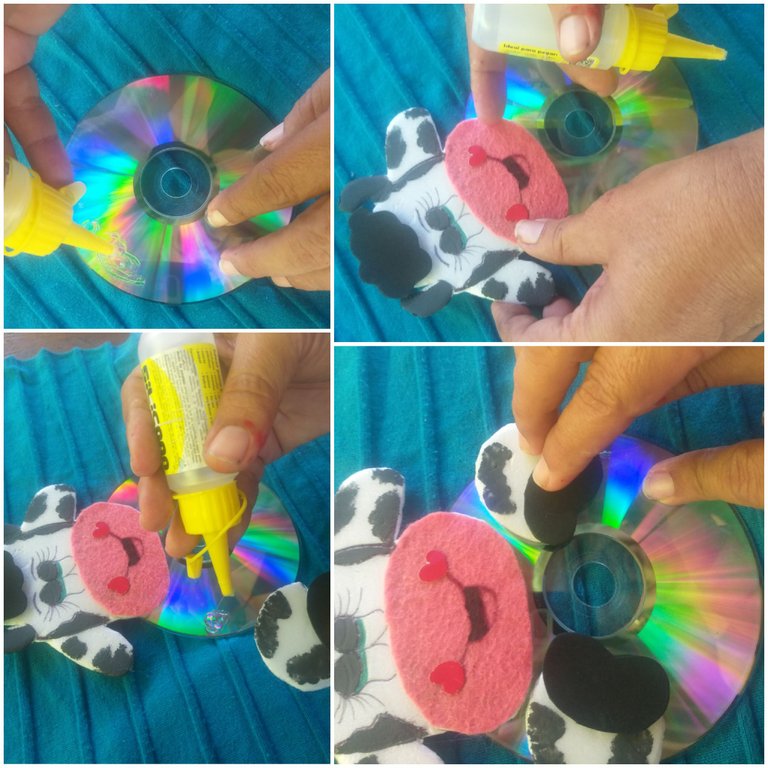
- Take the C.D. and the cow's face sticks to the front.
- The spots of the cow are painted black and the eyes are painted.
- Then the arms are placed next to the face, some spots are painted and they are glued to the C.D.
Paso 2.
- Se toma el C.D. y se le pega la carita de la vaca en la parte delantera.
- Se pintan las manchas de la vaca de color negro y los ojitos.
- Luego se colocan los brazitos al lado de la carita, se pintan unas manchitas y se pegan al C.D.
STEP 3:
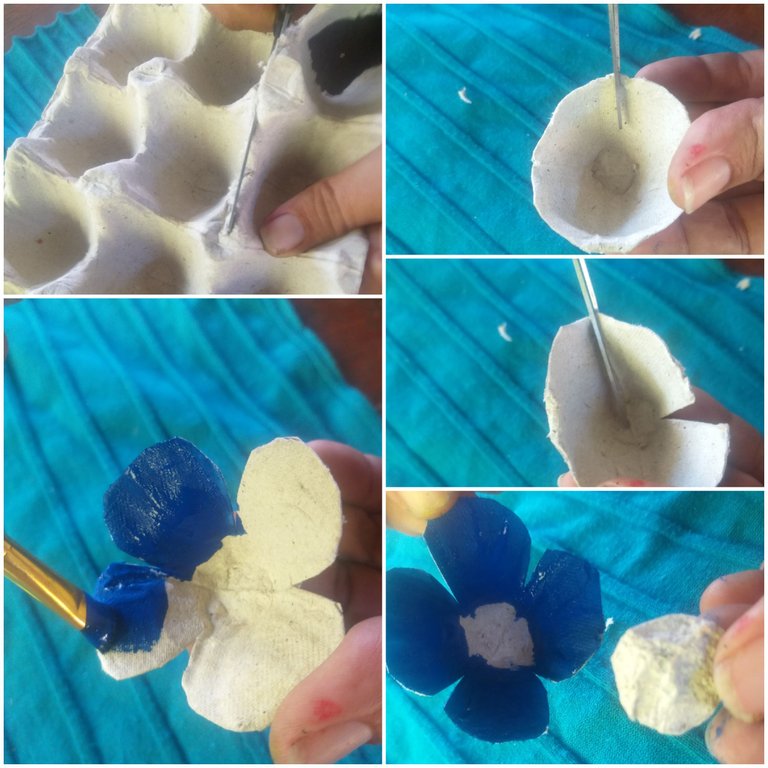
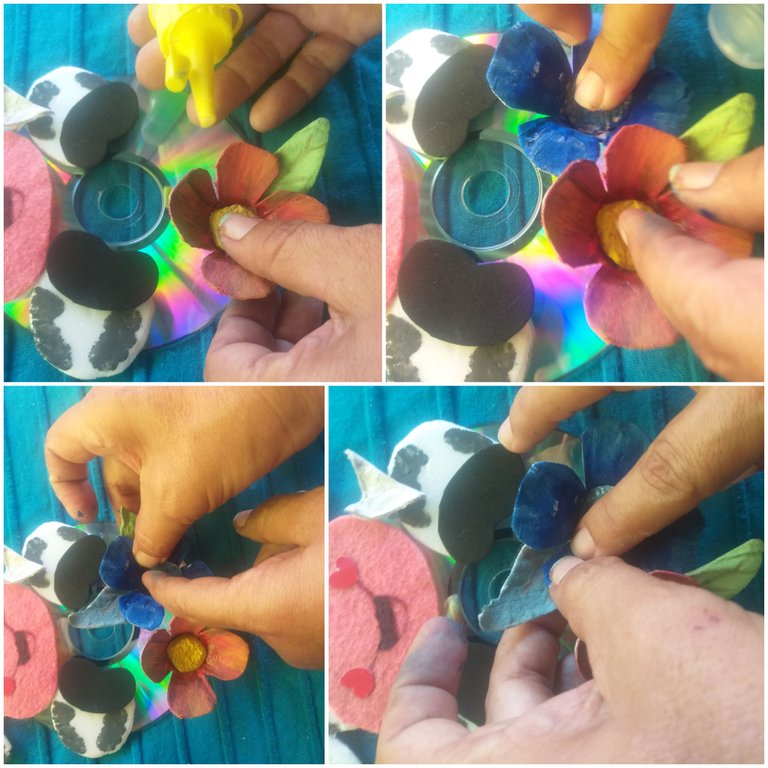
- It is pasted in the lower part of the C.D, Little flowers made with egg carton, which are going to be painted. (color of your preference.)
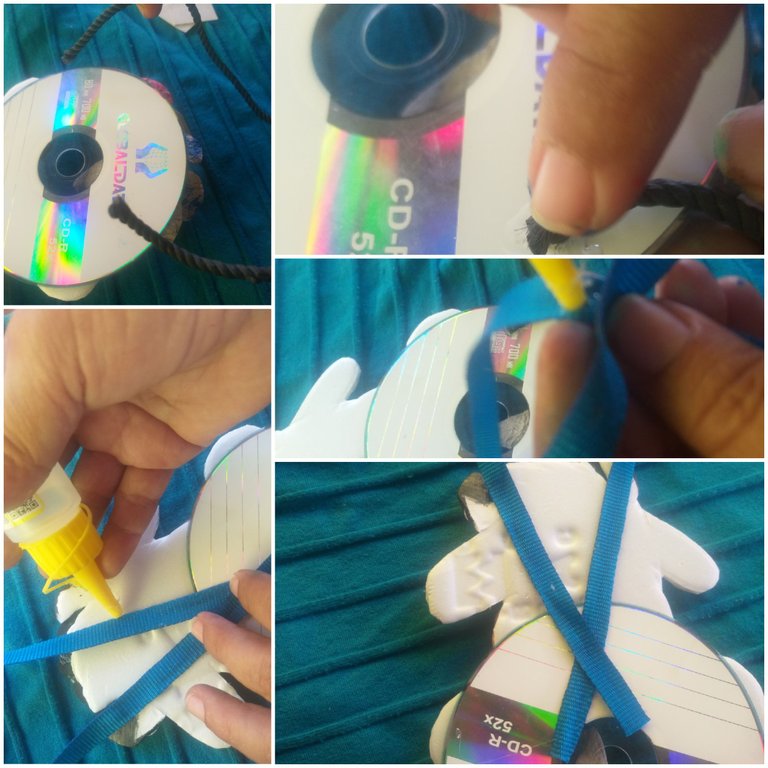
- Finally and to culminate. The string is glued on the back and in the lower part where the kitchen handkerchief will hang. securing it with a piece of cardboard or cardboard.
- At the top of the back a rope or tape is glued where it will be hung on the wall.
PASO 3:
- Se pega en la parte baja del C.D, Florecitas hechas con cartón de huevo, las cuales van a ir pintandas. (color de su preferencia.)
- Por último y para culminar. se pega la cuerdita por la parte trasera y en la parte baja donde va a ir colgado el pañuelo de cocina. asegurandola con un pedacito de cartón o cartulina.
- En la parte de arriba de la parte trasera se le pega una cuerda o cinta por donde se va a colgar en la pared.
I hope and you like it !!
espero y le guste!!
Me encantó 🤩, quedó demasiado lindo y sencillo, saludos!
Muchas gracias.!!
Thank you so much.!
Hermoso trabajo ❤
Muchas gracias.!! Espero y sigan disfrutando de mis creaciones.!
Thank you.!! I hope and continue to enjoy my creations.!