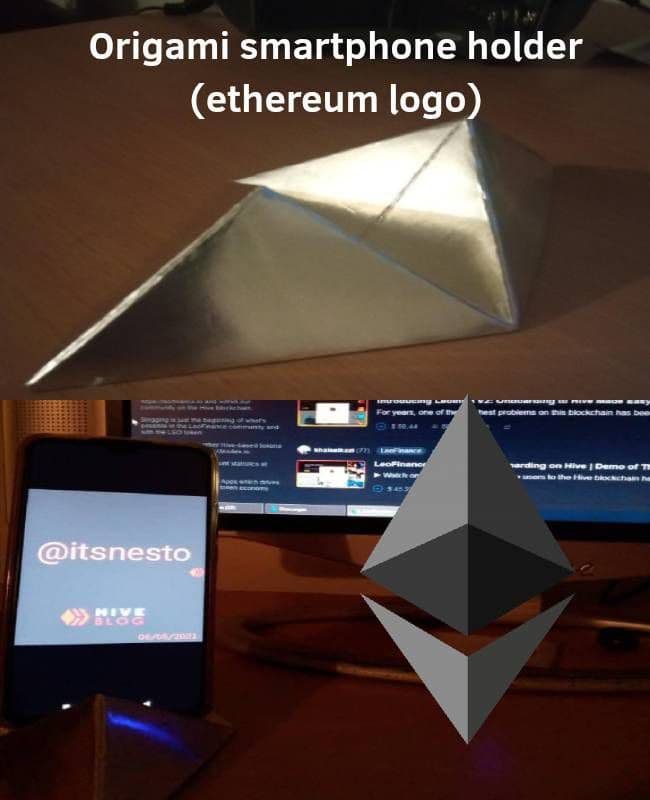
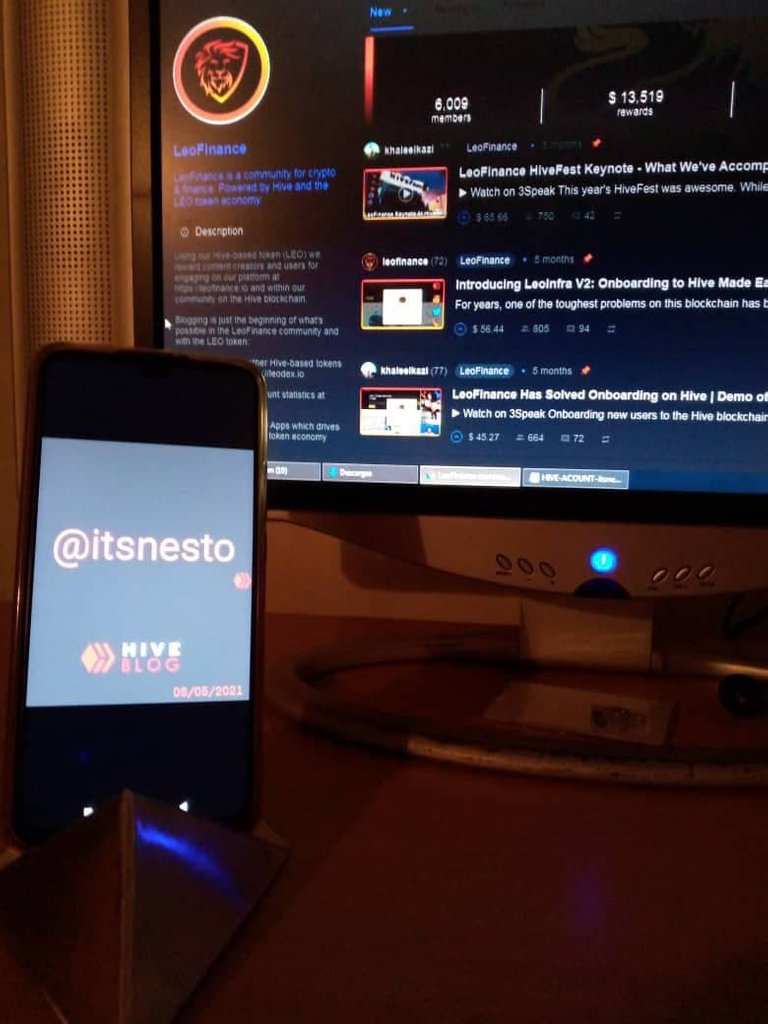
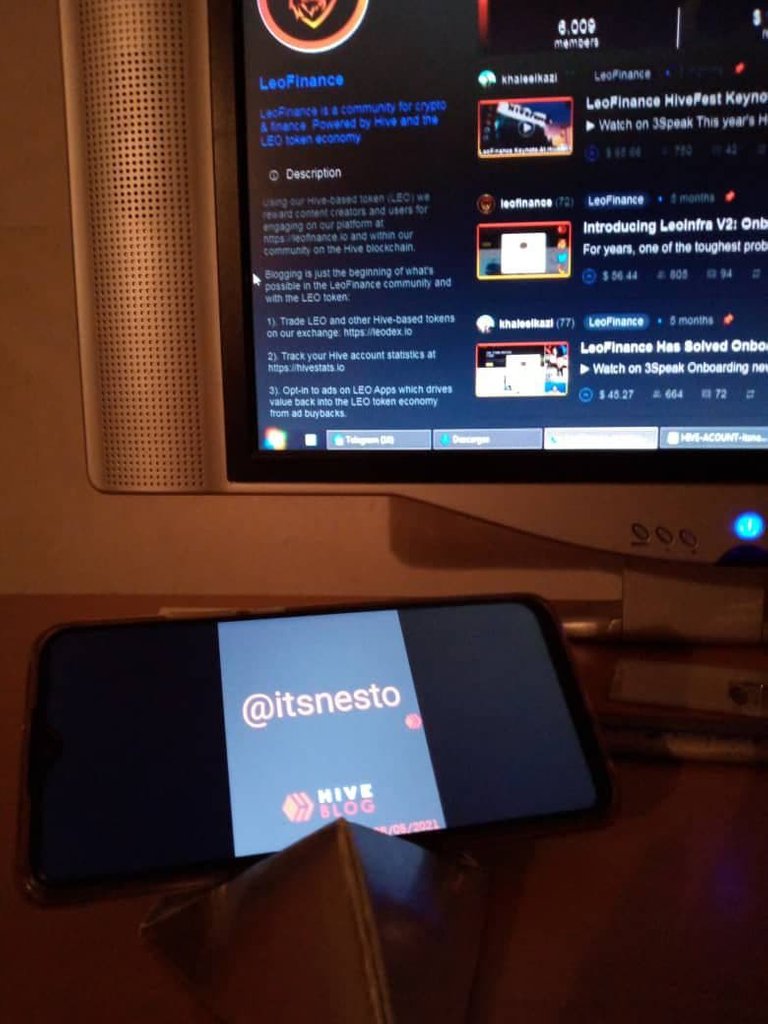
Greetings #hive community, today's post is a small and easy tutorial to make a stand for your origami mobile device, to keep it at hand always on your desk and also looks very nice as a decoration.
Lately I have noticed that my phone suffers scratches and scratches to be constantly moving on my desk, I have also noticed that sometimes I need to have it in front of me to make some kind of query in google search or just watch a video; so I decided to make this craft of a support for the same, but origami; also taking advantage of my latest hobby for cryptocurrencies I decided to have the shape of a recognized as it is the ethereum logo.
Saludos comunidad de #hive, el post de hoy es un pequeño y fácil tutorial para hacer un soporte para su dispositivo móvil de origami, para mantenerlo a la mano siempre en su mesa de trabajo y también queda muy lindo como decoración.
Últimamente me he dado cuenta que mi teléfono sufre rasguños y arañazos al estar constantemente en movimiento en mi mesa de trabajo, también he notado que en ocasiones necesito tenerlo de frente hacia mí para hacer algún tipo de consulta en el buscador de google o simplemente ver algún video; por eso he decido realizar esta manualidad de un soporte para el mismo, pero de origami; aprovechando también mi última afición por las criptomonedas he decido tenga la forma de una reconocida como lo es el logo de ethereum.
To make this craft we will simply use the following materials (some of them are optional, in case certain conditions are met by the type of paper or cardboard we are going to use):
- Cardboard or some type of resistant paper.
- Ruler for measurements (optional).
- Pencil to make a guide line.
- Cutter (optional in case it is necessary to make cuts in the measurements).
- object with rounded tip (optional to mark the folds well).
Para realizar esta manualidad simplemente haremos usos de los siguientes materiales (algunos son opcionales, en caso de que se cumplan ciertas condiciones que debe llevar el tipo de papel o cartulina que vayamos a utilizar):
-Cartulina o algún tipo de papel resistente.
-regla para las medidas (opcional).
-lápiz para realizar algún trazo de guía.
-cuter (opcional por si hay necesidad de hacer cortes en las medidas).
-objeto de punta redondeada (opcional para marcar bien los doblez).
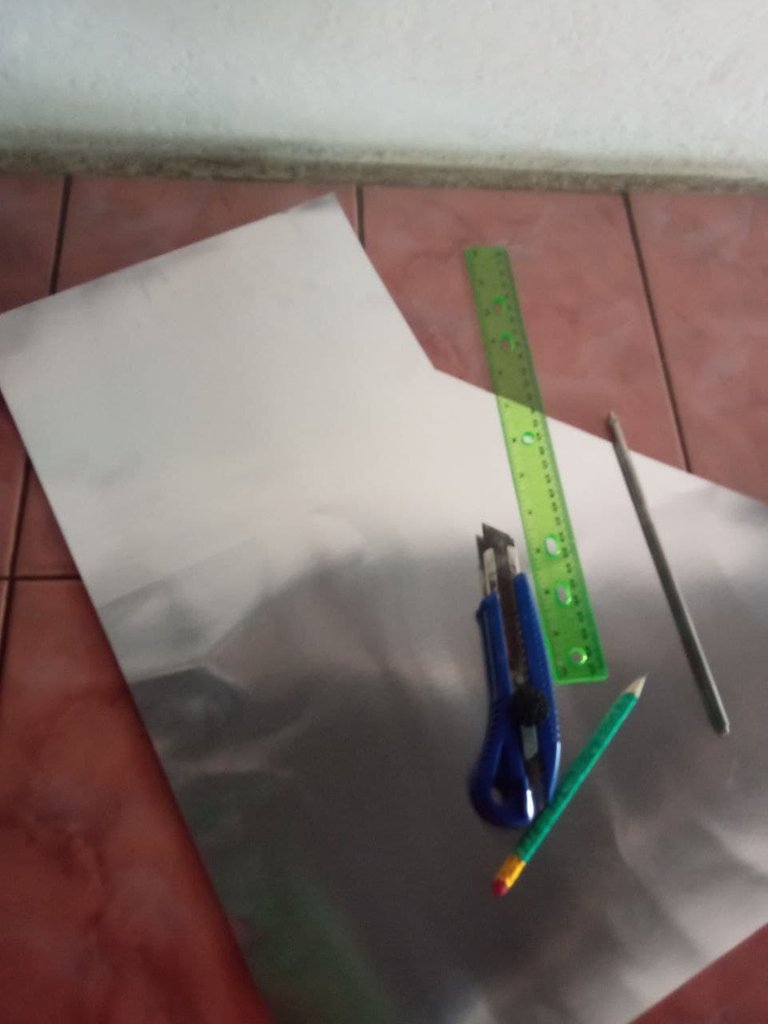
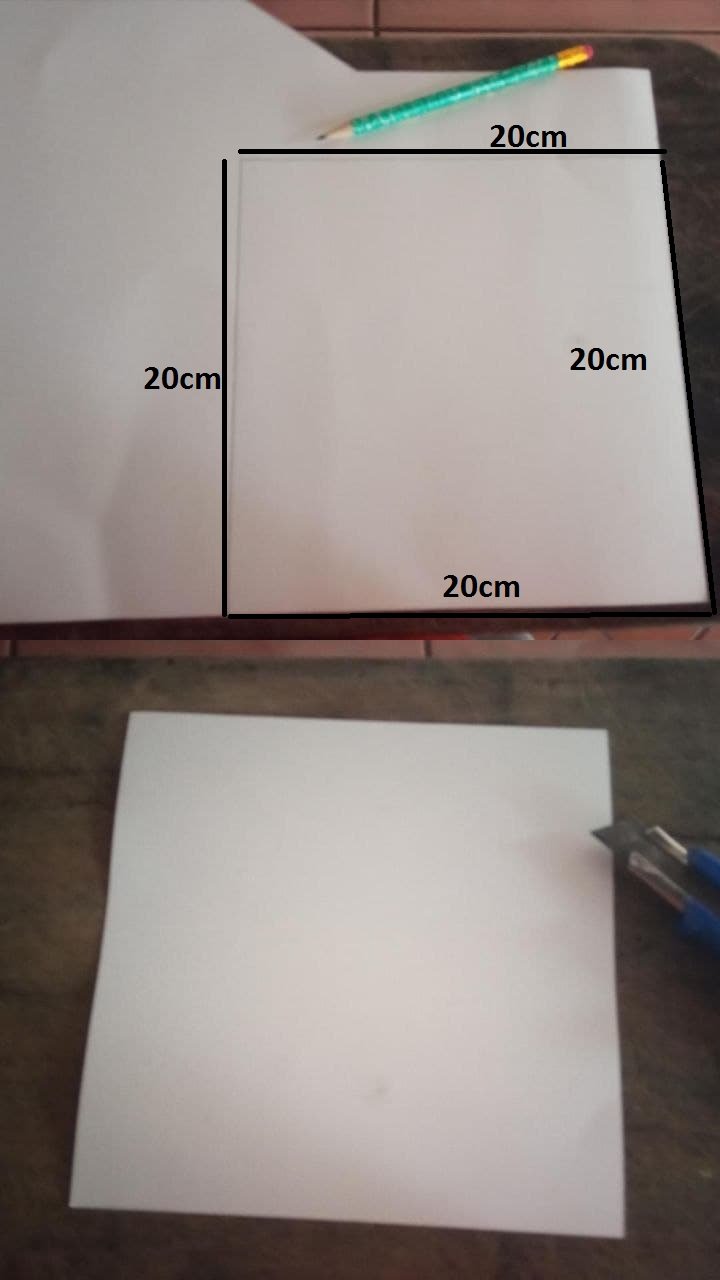
To begin with, if the material we are going to use is large, we must make a 20cmx20cm square to start working, then we cut it and it should look like this.
Para comenzar, si el material que vayamos a utilizar es de gran tamaño debemos realizar un recuadro a las medidas de 20cmx20cm para comenzar a trabajar, luego cortamos y nos debería quedar así.
After we have the box with the measurements we will begin to make the first fold that will go right in the middle of the sheet, exactly at 10 cm. If it is a little difficult, we can use the ruler to mark just where the fold will go so that the final project does not suffer any distortion.
Luego de tener el recuadro con las medidas comenzaremos por realizar el primer doblez que ira justo a la mitad de la hoja, exactamente a los 10 cm. Si se les dificulta un poco podemos hacer uso de la regla para marcar justo donde ira el doblez y así no sufra ningún tipo de distorsión el proyecto final.
note: if the type of material to be used is single-sided, we must make sure that when we start making the first folds towards what model we want our base for the mobile to look like.
nota: si el tipo de material a utilizar es de una sola cara, debemos asegurarnos que el momento de comenzar hacer los primeros doblez hacia qué modelo queremos que se vea nuestra base para el móvil.
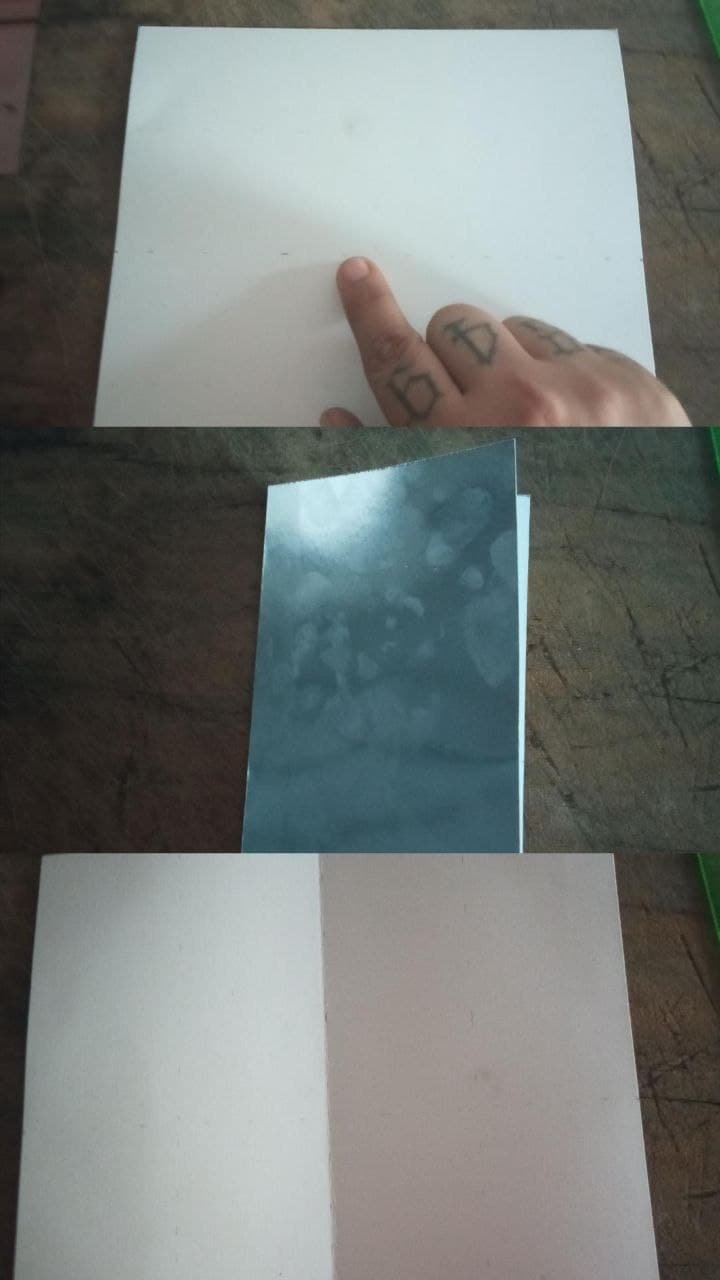
Then we must do the same on the other side, we look for the middle again at 10cm, we are guided by the ruler and we will make a fold again.
Luego debemos hacer lo mismo por el otro lado, buscamos nuevamente la mitad a los 10cm, nos guiamos de la regla y volveremos hacer un doblez.
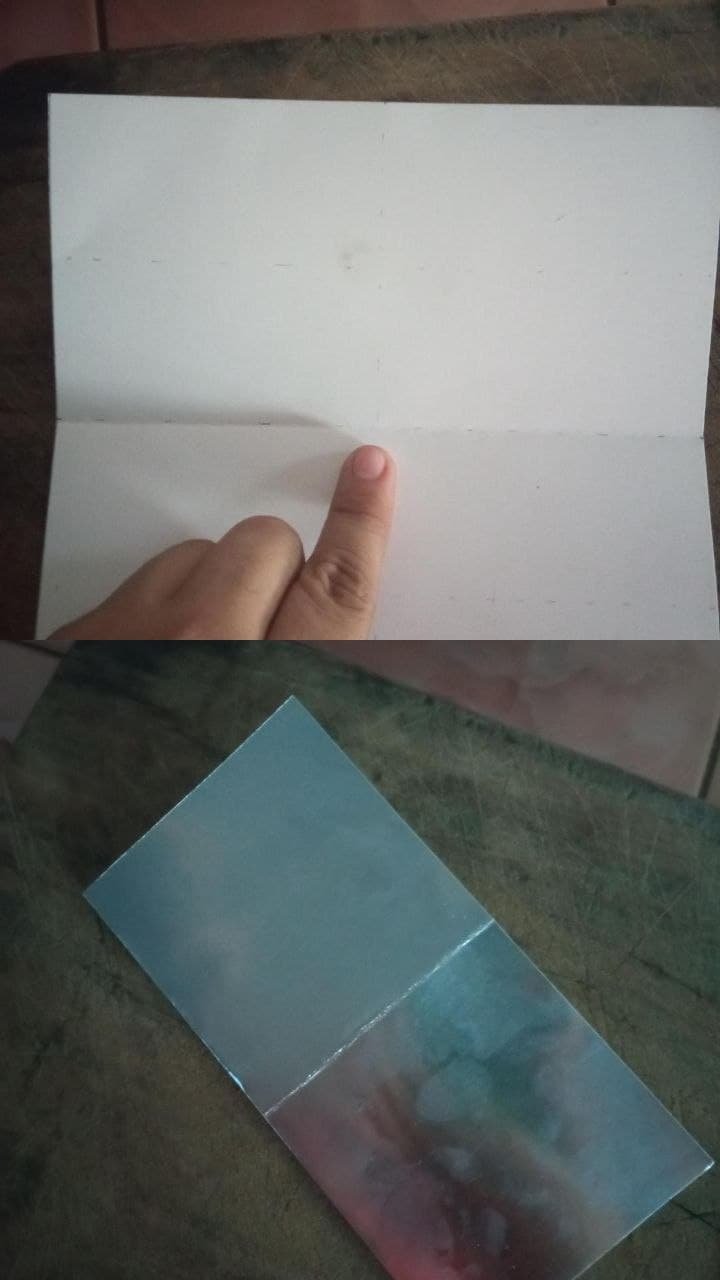
Since we have the sheet divided into 4 squares of the same size, we must divide the entire sheet to a smaller size. Using the ruler as a guide, we can position ourselves in any of the 10cm halves to place half of it (at 5cm) and bring the fold to the middle of the whole sheet, then we must do the same with the other side, guided by the following image.
Ya que tenemos la hoja dividida en 4 cuadrados del mismo tamaño, debemos dividir la hoja completa a un menor tamaño. Utilizando la regla como guía, podemos posicionarnos en cualquiera de las mitades de 10cm para ubicar la mitad de la misma (a los 5cm) y llevar el doblez hacia la mitad de la hoja completa, luego debemos hacer lo mismo con el otro lado, guíate de la siguiente imagen.
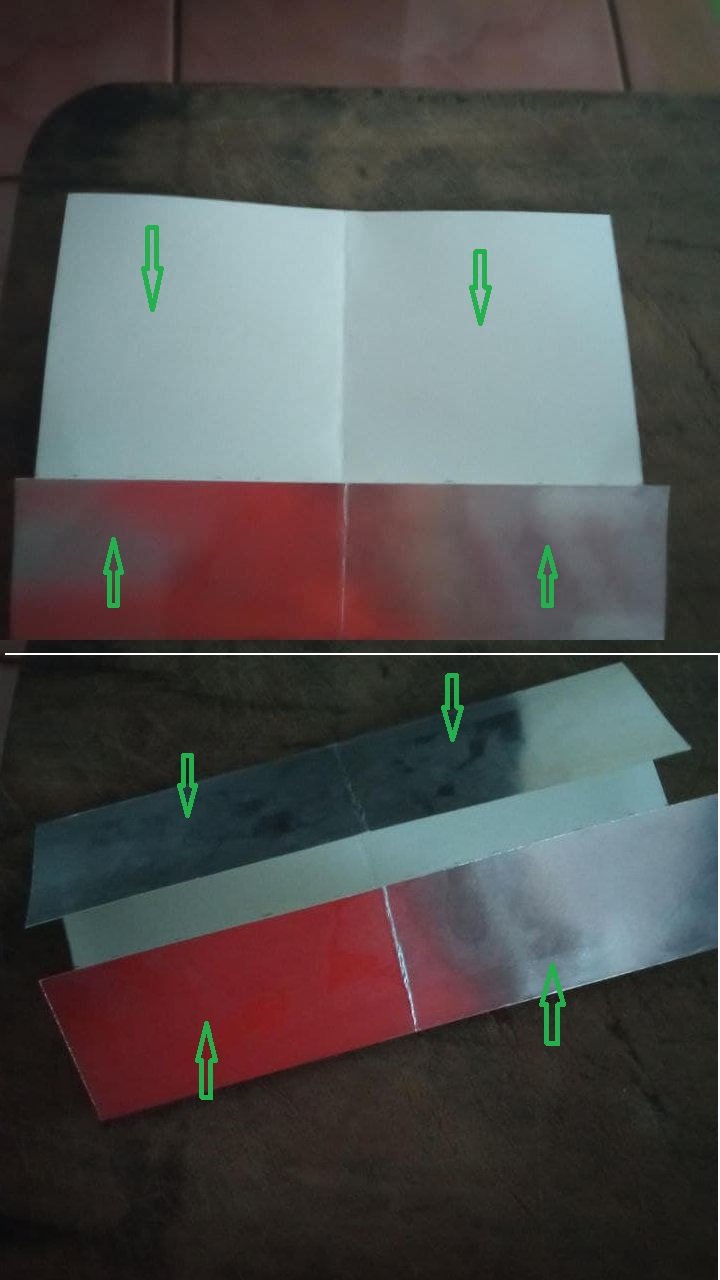
After we have this shape, the next folds to make will be as follows. From "L1" (we will indicate as L1, L2 the sides of the figure divided by a half) we will take the equines marked as "A" and we will make the fold that reaches the point "B" of the image shown below. Then we will repeat this step again, but taking the side "C" towards "D" represented in the image.
Luego que tenemos esta forma, los siguientes dobleces a realizar serán los siguientes. Del “L1” (señalaremos como L1, L2 a los lados de la figura divididos por una mitad) tomaremos las equinas marcadas como “A” y haremos el doblez que llegue al punto “B” de la imagen mostrada a continuación. Luego volveremos a repetir este paso, pero llevando el lado “C” hacia el “D” representados en la imagen.
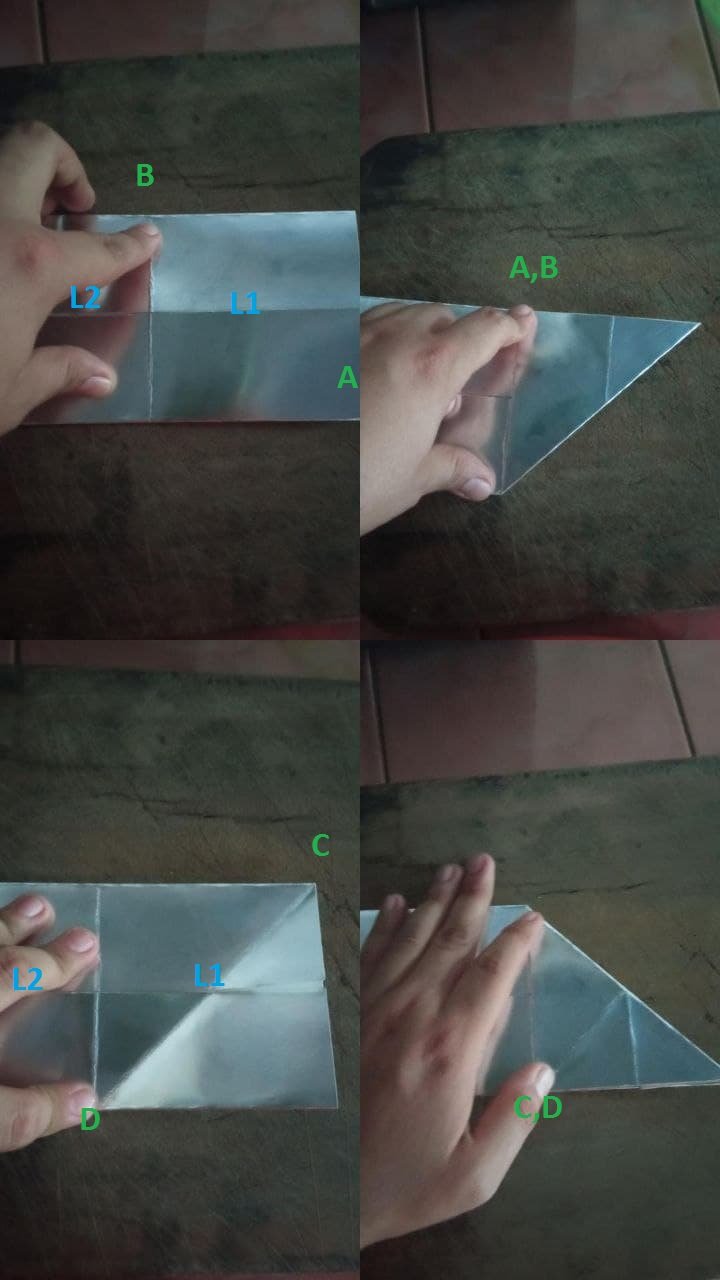
Then, in "L2" we must do practically the same process, leading from point "A" to point "B", and from point "C" to point "D".
Después, en “L2” debemos hacer prácticamente el mismo proceso, llevando desde el punto “A” al punto “B”, y desde el punto “C” al punto “D”.
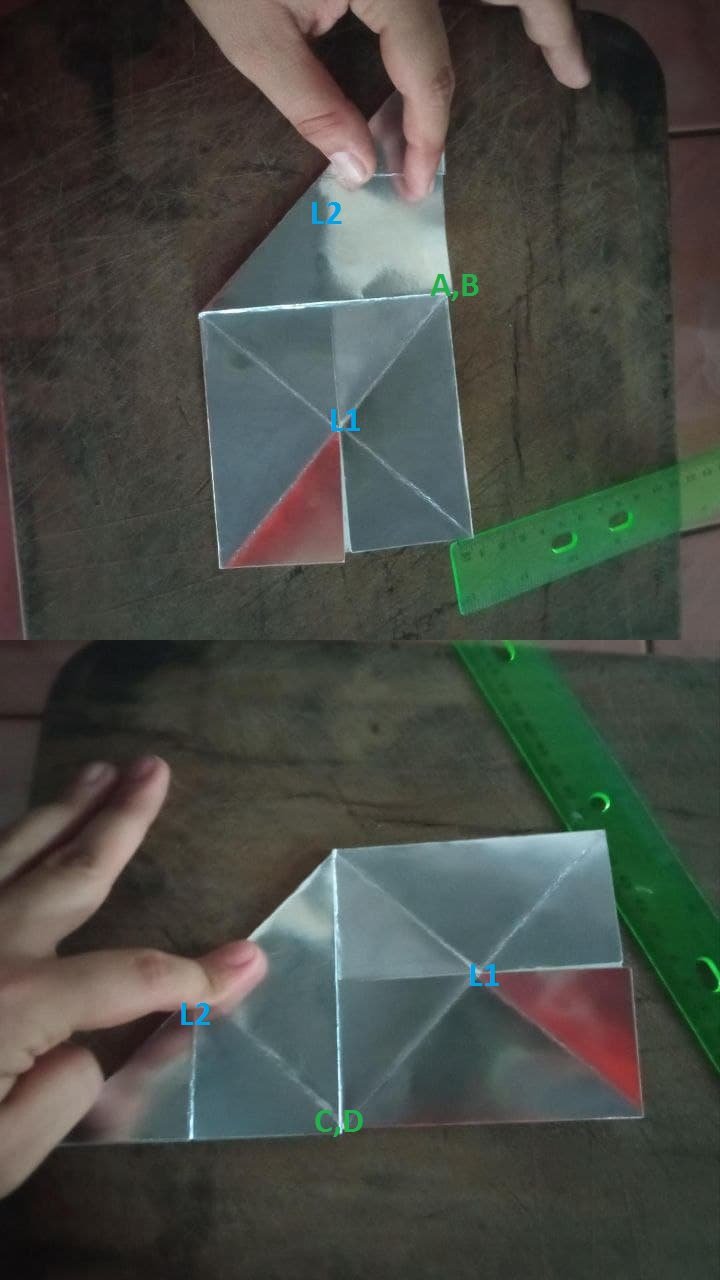
It should look like this:
Nos debe quedar de la siguiente forma:
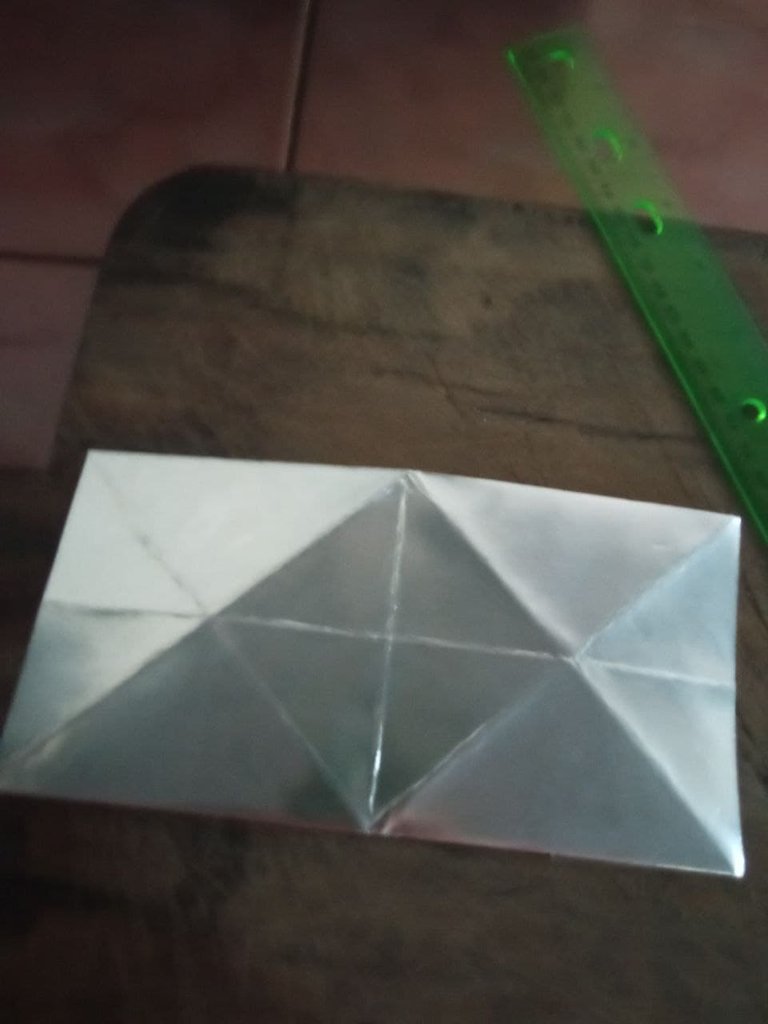
Once we have our paper or cardboard, we will join the folds of point A and B so that the middle (represented in the figure as "M") goes to the bottom. We also adjust the corners (E1, E2) towards the inside of the paper to get a figure similar to the fourth image with the peaks (P1, P2).
Después, que tengamos así nuestro papel o cartulina, lo que haremos será unir los doblez del punto A y B para que el medio (representado en la figura como “M”) vaya hacia la parte inferior. Ajustamos también las esquinas (E1, E2) hacia dentro del papel para conseguir una figura similar a la cuarta imagen con los picos (P1, P2).
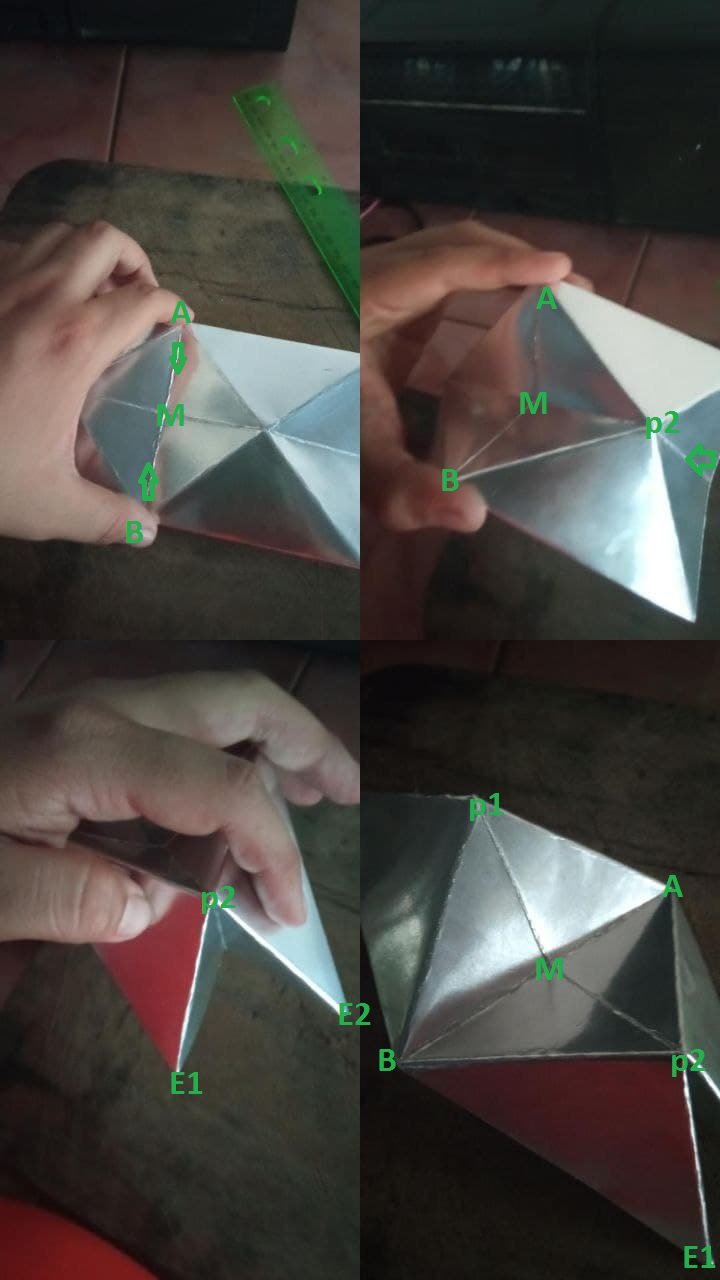
At this point we are almost done, we just need to join E1 and E2 into one, as shown in the picture. We lift one of the parts of the fold (D1) and there we put the other corner inside and close the fold as shown in the image.
A este punto ya casi hemos terminado, solo nos queda unir las E1 y E2 en uno solo, como se muestra en la imagen. Levantamos una de las partes del doblez (D1) y allí metemos la otra esquina dentro y cerramos el doblez como se muestra en la imagen.
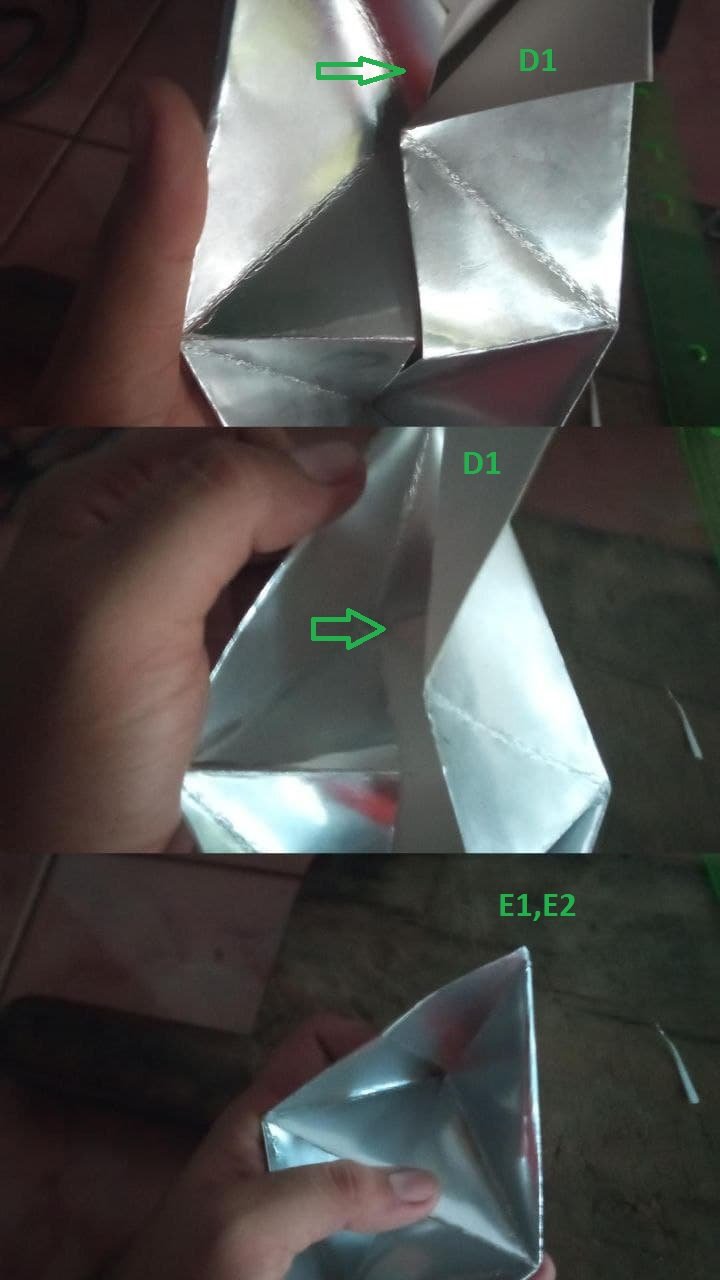
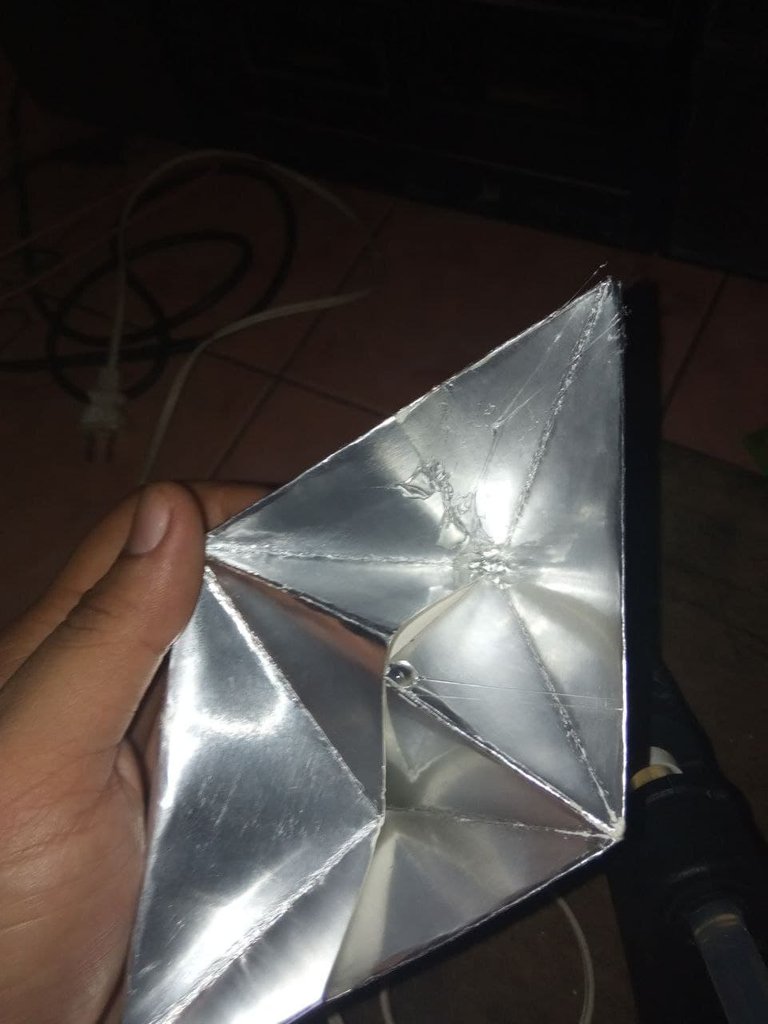
We repeat for the other side the same union of the corners; depending on our type of material, to make it more resistant and durable we will use some type of silicone or glue to join the two corners that we have made on the inside.
Repetimos para el otro lado la misma unión de las equinas; dependiendo nuestro tipo de material, para hacerlo más resistente y duradero utilizaremos algún tipo de silicona o pegante para unir las dos equinas que hemos realizado por la parte interior.
Our final result should look like this, a shape similar to the ethereum logo
Nuestro resultado final debe quedar asi, una forma parecida al logo de ethereum
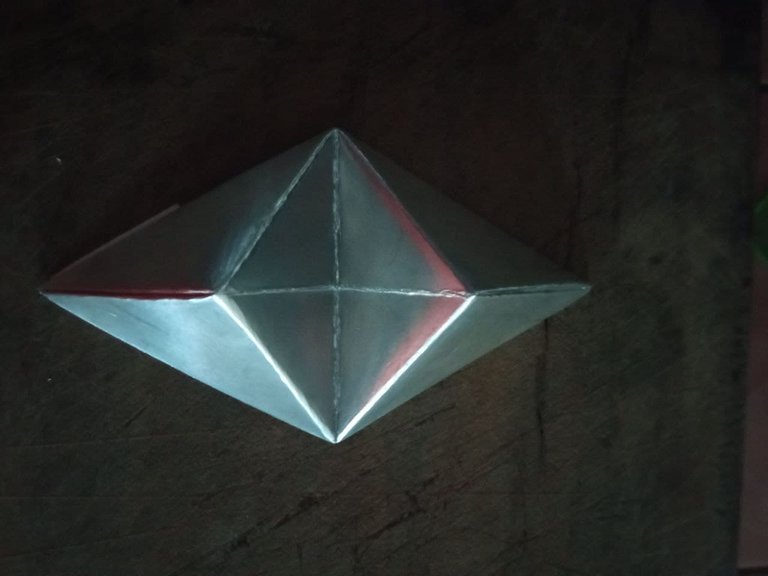
And so easy and economical with recycled material we will get a base for our phone that serves as an ornament and also refers to the world of cryptocurrencies. I invite you to make this and other crafts that you can get soon on my #Hive blog.
Y así de fácil y económico con material reciclado conseguiremos una base para nuestro teléfono que sirve como adorno y también hace referencia al mundo de las criptomonedas. Te invito a realizar esta y otras manualidades que puedes conseguir próximamente en mi blog de #Hive.
Thank you for taking the time to read and view my content, in the comments I look forward to your photos of today's project.
Gracias por tomarte el tiempo de leer y ver mi contenido, en los comentarios espero sus fotos del proyecto de hoy.
Debo confesar que el origami y yo no somos amigos peero lo voy a intentar a ver que tal me va. Gracias por compartir el paso a paso.