BIENVENIDOS A MI BLOG 💖
WELCOME TO MY BLOG 💖


Hola mis queridos amigos de Hive.blog espero siempre se encuentren bien.
Hello my dear friends from Hive.blog I hope you are always well.
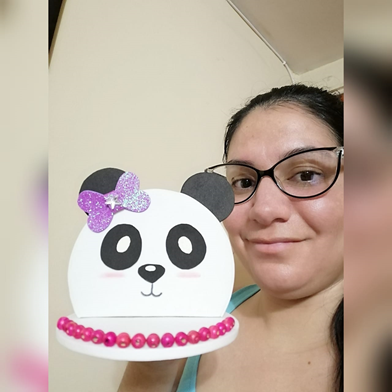
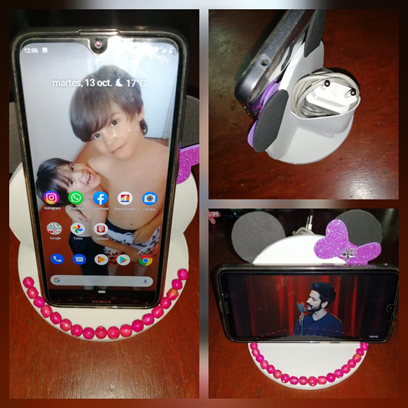
En esta oportunidad haremos un porta- celular y cargador con la hermosa forma de un oso panda kawaii.
Quedaras encantada (o) con el resultado de este trabajo. No solo se ve bello sino la gran utilidad del mismo.
This time we will make a cell phone holder and charger with the beautiful shape of a kawaii panda bear. You will be delighted with the result of this work. It not only looks beautiful but the great utility of it.
Lo mejor de este trabajo es que son muy pocos los materiales que debemos usar.
The best thing about this work is that there are very few materials that we must use.
Sin más que decir acompáñame a hacer este paso a paso.
Without more to say join me to do this step by step.

1.- 2 CD.
1.- 2 CD.
2.- Pistola y barra de silicón.
2.- Gun and silicone stick.
3.- Goma eva.
3.- Eva rubber.
4.- Tijeras.
4.- Scissors .
5.- Regla.
5.- Ruler.
6.- Lápiz.
6.- Pencil.
7.- Puntero (opcional).
7.- Pointer (optional).
8.-Pintura acrílica.
8.-Acrylic paint
9.- Pinceles.
9.- Brushes.

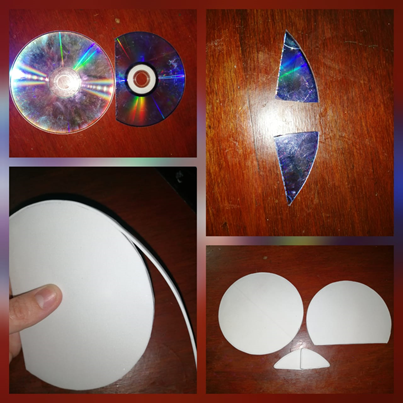
Primer paso: tomamos uno de los CD y cortamos una parte, la medida es de 10 cm de largo. Luego con goma eva Lo cubrimos por ambos lados y en sus orillos, lo mismo hacemos con el CD entero y con los dos triángulos que serán para el soporte.
First step: we take one of the CDs and cut a part, the measurement is 10 cm long. Then with eva rubber We cover it on both sides and on its edges, we do the same with the entire CD and with the two triangles that will be for the support.
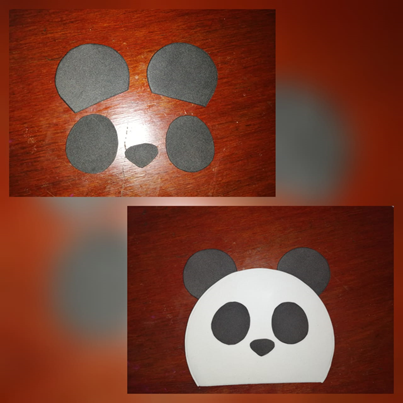
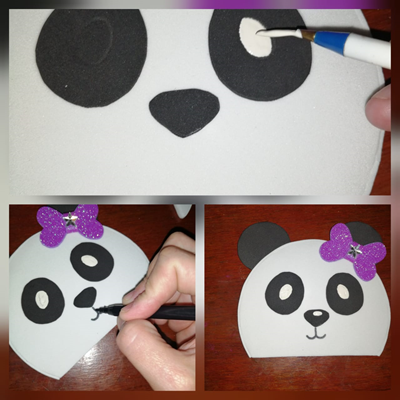
Segundo paso:con goma eva negra hacemos las orejas, ojos y nariz del panda.
Second step: with black eva rubber we make the ears, eyes and nose of the panda.
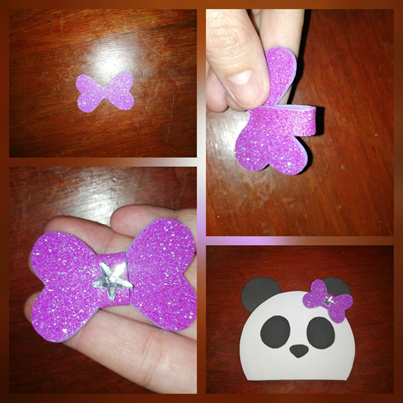
Tercer paso: en este paso yo le hice un lazo a mi panda, si tu quieres no se lo hagas ya que es opcional. Realice en foami un lazo de corazón y en el centro le pegue una cinta de la misma goma eva y una estrella.
Third step: in this step I made a bow to my panda, if you want do not do it as it is optional. Make a heart bow in foami and in the center stick a ribbon of the same eva rubber and a star.
Cuarto paso: con pintura acrílica pintamos los ojos y con marcador su boca mas un poco de rubor para las mejillas del panda.
Fourth step: with acrylic paint we paint the eyes and with a marker its mouth plus a little blush for the panda's cheeks.
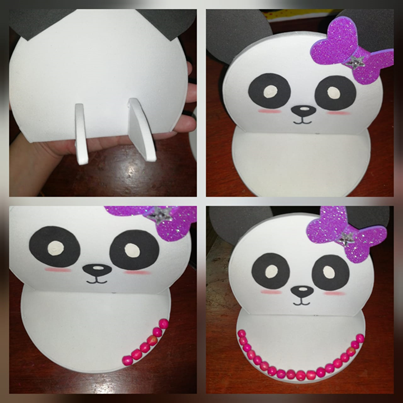
Quinto paso: en esta parte pegamos los dos triángulos que cubrimos de goma eva al comienzo en la parte de atrás del panda, luego lo pegamos en el CD completo y por ultimo pegamos unas pepitas por todo el orillo.
Fifth step: in this part we paste the two triangles that we covered with eva rubber at the beginning on the back of the panda, then we paste it on the complete CD and finally we paste some seeds all over the selvage.
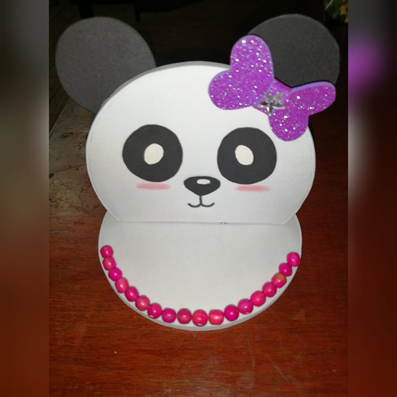
Para finalizar recortamos un rectángulo como de 12 cm y lo pegamos en la parte de atrás donde iría ubicado el cargador. Observar las imágenes.
To finish, we cut out a rectangle about 12 cm and we glue it on the back where the charger would be located. Look at the images.
Todas las fotos son de mi autoria/ All photos are my authorship
Nos vemos en un próximo post, me despido con amor 😍 @jayoxaju.
See you in a next post, I say goodbye with love 😍 @jayoxaju.

Congratulations @jayoxaju! You have completed the following achievement on the Hive blockchain and have been rewarded with new badge(s) :
You can view your badges on your board and compare yourself to others in the Ranking
If you no longer want to receive notifications, reply to this comment with the word
STOP