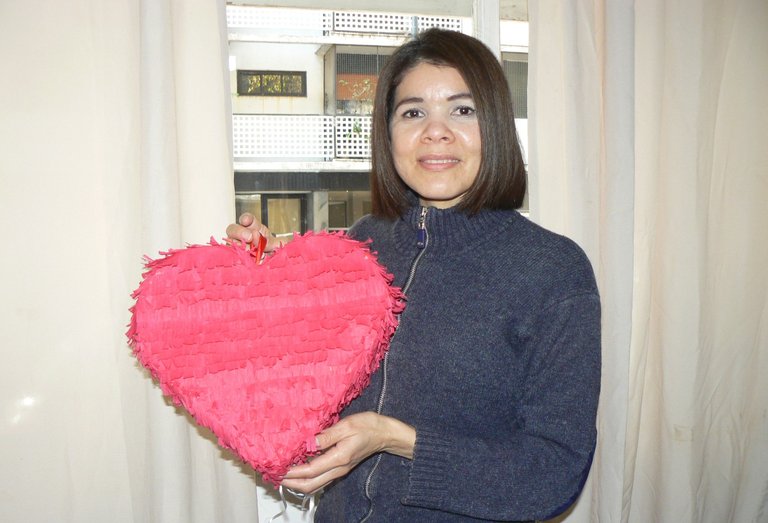
¡Hola apreciados!
Me da mucho gusto saludarlos; como ya han visto en ocasiones anteriores mi trabajo en la elaboración de las piñatas, les resumo un poco acerca de cómo me surgió esta idea de trabajar con piñatas; y es que cuando comenzó la pandemia me había quedado sin empleo y pues, de tanto pensar y pensar le pedí a Dios una idea y se me presentó esta oportunidad. Así fue como empecé y cada día continuo aprendiendo más al respecto, así como también estoy aprendiendo de esta maravillosa plataforma, pero les informo que apenas estoy comenzando a aprender en ambas actividades.
Bueno, ya les conté un poco, ahora vamos a lo que hoy quiero compartirles sobre cómo realicé esta piñata en forma de corazón.
Materiales:
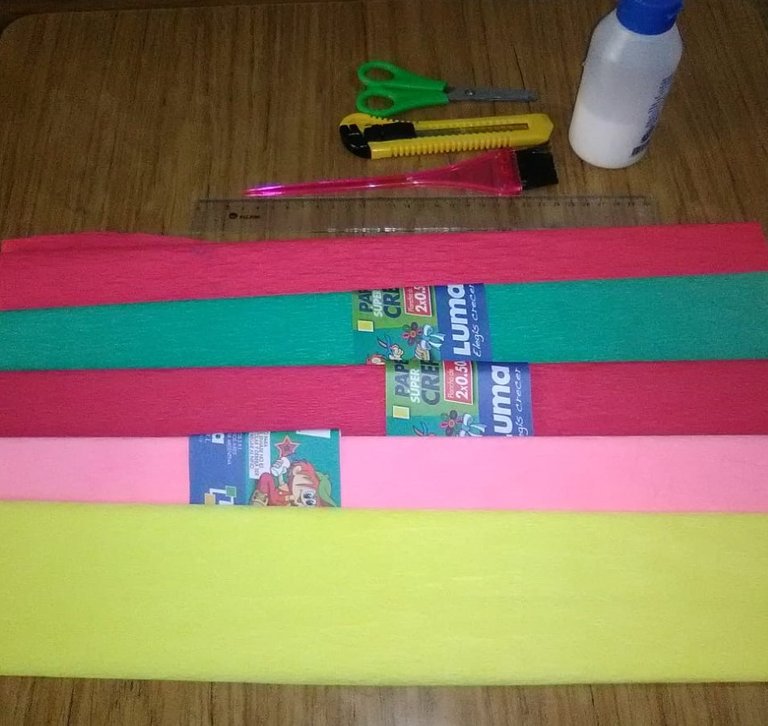
Un molde de papel en forma de corazón.
Cartón de caja común de supermercado.
Bolígrafo
Tijera
Cúter
Pegamento
Papel periódico
Regla
Silicón liquido frío
Papel crepé color rojo
Cinta para el agarre
Engrapadora
Procedimiento:
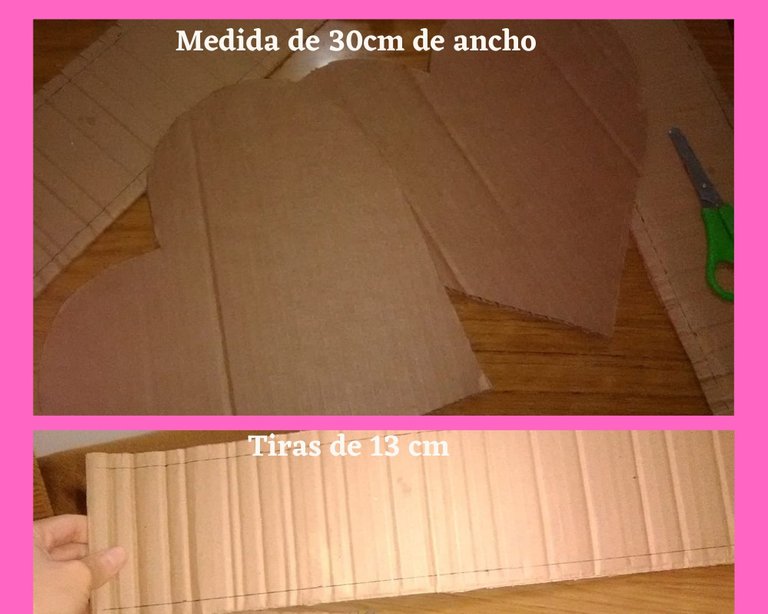
Calqué el molde de corazón en dos tapas, para ambos lados; luego, medí las dos tiras de 13 cm cada una para usar 1,5cm para engrapar y pegar ambas partes, así que esta vez me quedó un grosor de 11 cm de ancho por cada cinta.
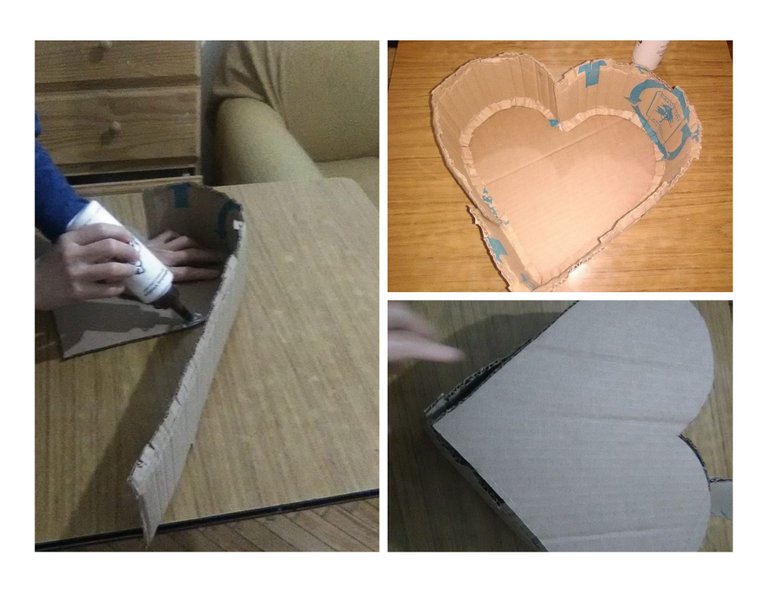
Empecé a unir las tiras apoyándome con la engrapadora y le puse pegamento para pegar madera, puse ambas tapas, coloqué cintas, abrí una ranura por donde ingresan los dulces y juguetes y coloqué soga para colgar y otras cintas abajo para halar, en caso de no quieran romper la piñata y dejarla de recuerdo.
Empapelé con mi engrudo que preparé; acá les dejo el link para que vean cómo se prepara el engrudo para empapelar piñatas, que también se podría usar para otras manualidades hechas en papel.
CÓMO PREPARAR ENGRUDO PARA EMPAPELAR PIÑATAS
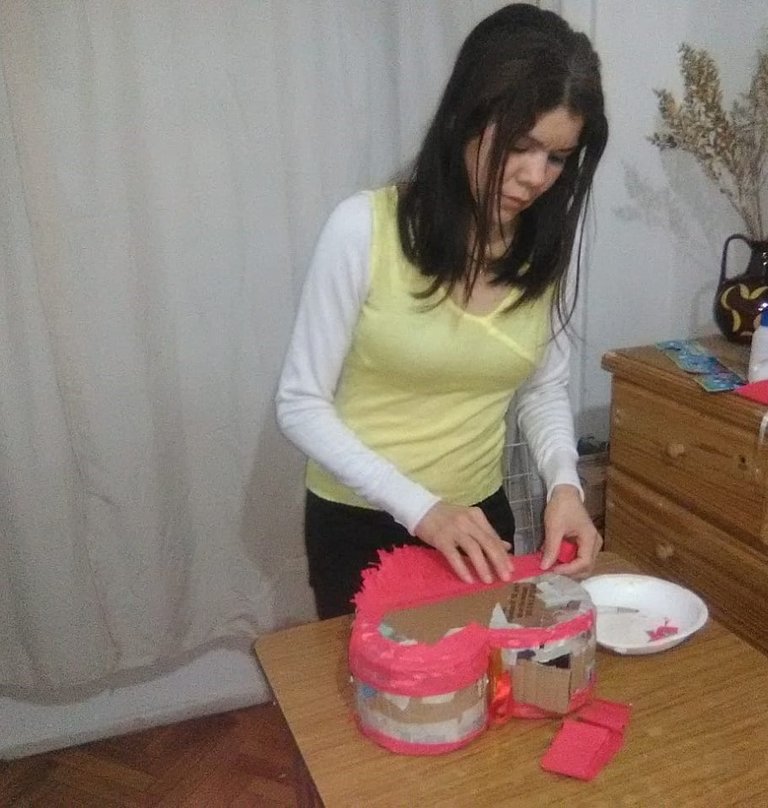
Continuamos con el procedimiento de la piñata en forma de corazón. Comencé a pegar el papel seleccionado, que en este caso fue el color rojo hasta completarla.
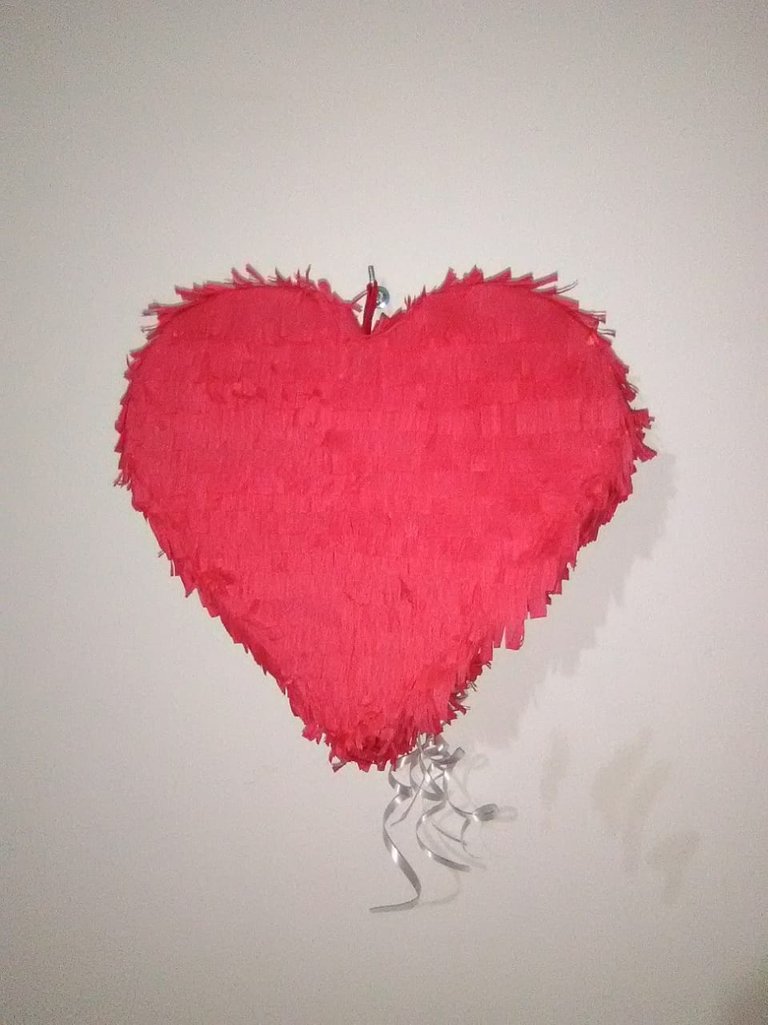
Así debería quedar nuestra piñata en forma de corazón.
Te agradezco por haber estado aquí en mi blog y espero te haya sido de utilidad.
Un abrazo; sea Dios concediendo tu éxito, mi éxito!
Maríg,
How to make a heart-shaped piñata

Hello dear ones!
It gives me great pleasure to greet you; as you have already seen in previous occasions my work in the elaboration of piñatas, I will summarize a little about how this idea of working with piñatas came to me; when the pandemic began I was unemployed and after so much thinking and thinking I asked God for an idea and this opportunity presented itself to me. That's how I started and every day I continue to learn more about it, as well as I am learning about this wonderful platform, but I inform you that I am just beginning to learn in both activities.
Well, I already told you a little bit, now let's go to what I want to share with you today about how I made this heart-shaped piñata.
Materiales:

A paper mold in the shape of a heart.
Ordinary supermarket cardboard box.
Pen
Scissors
Cutter
Glue
Newspaper
Ruler
Cold liquid silicone
Red crepe paper
Grip tape
Stapler
Procedure:
I traced the heart mold in two covers, for both sides; then, I measured the two strips of 13 cm each to use 1.5cm to staple and glue both parts, so this time I was left with a thickness of 11 cm wide for each tape.

I started to join the strips with the stapler and put glue to glue wood, put both lids, put ribbons, opened a slot where the candy and toys enter and put rope to hang and other ribbons below to pull, in case they do not want to break the piñata and leave it as a souvenir.

I wallpapered with my paste that I prepared; here is the link to see how to prepare the paste to wallpaper piñatas, which could also be used for other paper crafts.
How to prepare paste for piñatas
We continue with the procedure of the heart-shaped piñata. I started gluing the selected paper, which in this case was the red color until it was completed.

This is what our heart-shaped piñata should look like.

I thank you for being here on my blog and I hope it has been useful to you.
A hug; may God grant your success, my success!
Maríg.
Note:
All photos are from my personal album, taken from my Alcatel cell phone model 5044R.
Translation by: Translated with www.DeepL.com/Translator (free version)
Images edited by: https://www.canva.com/es_ar/crear/
Thank you for sharing this amazing post on HIVE!
non-profit curation initiative!Your content got selected by our fellow curator @rezoanulvibes & you just received a little thank you via an upvote from our
You will be featured in one of our recurring curation compilations and on our pinterest boards! Both are aiming to offer you a stage to widen your audience within and outside of the DIY scene of hive.
Join the official DIYHub community on HIVE and show us more of your amazing work and feel free to connect with us and other DIYers via our discord server: https://discord.gg/mY5uCfQ !
If you want to support our goal to motivate other DIY/art/music/homesteading/... creators just delegate to us and earn 100% of your curation rewards!
Stay creative & hive on!
Buen trabajo amiga, A mi también me encanta hacer piñatas. Cuando mi hijo cumple años y se las hago.
Buen trabajo amiga, A mi también me encanta hacer piñatas. Cuando mi hijo cumple años y se las hago.
Buen trabajo amiga, A mi también me encanta hacer piñatas. Cuando mi hijo cumple años y se las hago.
Gracias amiga, que bueno.