
ESPAÑOL
ESGLISH
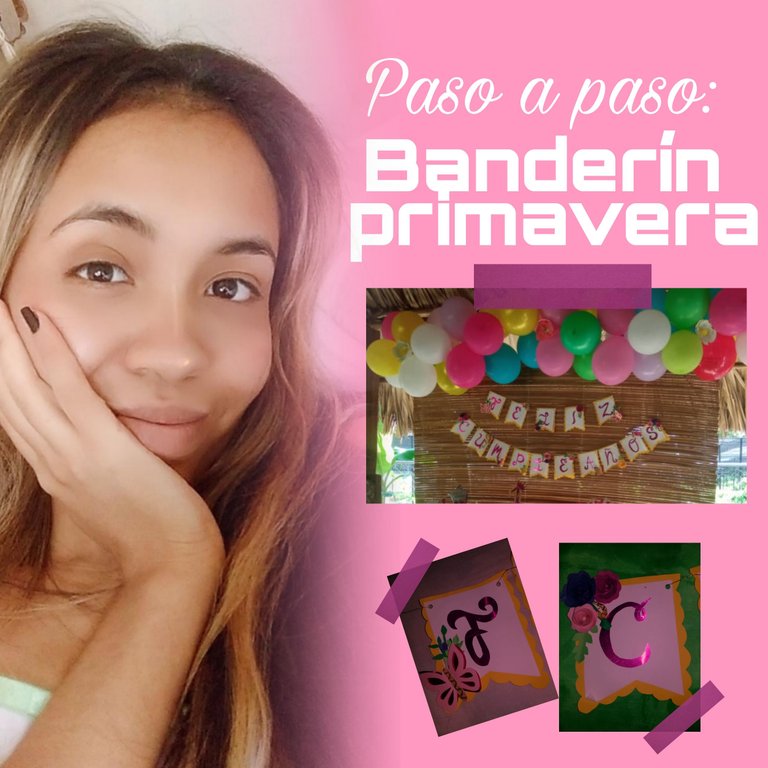
Hola gente bonita de Hive, hace días les mostré una coronita de flores y mariposas que hice para el cumpleaños de mi ahijada y hoy les traigo un banderín con el mismo motivo.
Este día fue muy especial porque Aída cumplió un añito y que bonito es poder alegrar a los demás con tus creaciones.
Empecemos con el tutorial:
Materiales:
Cartulinas escolares:
° Fucsia, morada, verde, rosada, blanca y amarillo.
Cartulina metalizada.
Silicon liquido
Tijeras
Lapiz
Cordón.
Procedimiento:
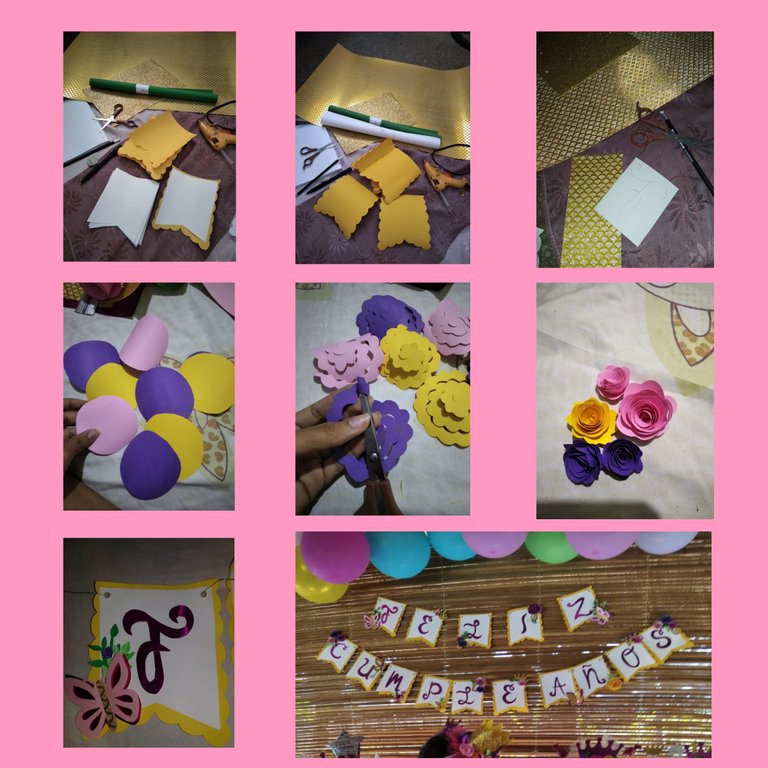
Para comenzar corté la forma original de los banderínes en blanco 15 en total ya que dirá feliz cumpleaños.
Utilizando esta referencia marqué en la cartulina amarilla, pero estos los corté 1 centímetro más grande e hice formas curvas como una nube en todo el borde.
Una vez listo los 15 banderines, marqué las letras por el al revés de la cartulina metalizada. (Traté de buscar una letra de corrida para que fuese más elegante.
Hice las flores para decorar, cortando círculos, después corté los mismo en forma de espiral hacía adentro y por último enrollé.
Las mariposas las hice en relieve utilizando dos tipos de cartulina.
Y para finalizar con la ayuda del saca huecos, perfore todos los banderínes en los lados e introduje un cordón dorado.
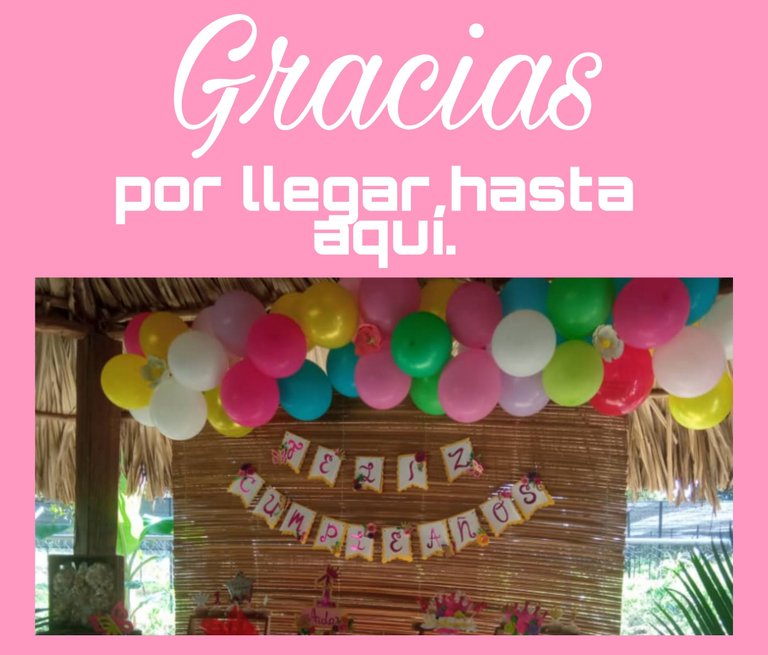
Así quedó nuestro banderín primavera, es un motivo muy bonito para un cumpleaños de niña al aire libre. Espero les guste la idea y la pongan en práctica, nos vemos en un próximo post❤️
Hello beautiful people from Hive, days ago I showed you a crown of flowers and butterflies that I made for my goddaughter's birthday and today I bring you a banner with the same motive.
This day was very special because Aída was one year old and how beautiful it is to be able to make others happy with your creations.
Let's start with the tutorial:
Materials:
School cards:
° Fuchsia, purple, green, pink, white and yellow.
Metallic cardboard.
Silicon liquid
Pair of scissors
Pencil
Cord.
Procedure:
To start I cut out the original shape of the 15 blank banners in total as it will say happy birthday.
Using this reference I marked on the yellow cardboard, but these I cut 1 centimeter larger and made curved shapes like a cloud around the edge.
Once the 15 flags were ready, I marked the letters on the back of the metallic card. (I tried to find a running letter so that it was more elegant.
I made the flowers to decorate, cutting circles, then I cut them in a spiral inward and finally rolled up.
I made the butterflies in relief using two types of cardboard.
And to finish with the help of the hole punch, pierce all the flags on the sides and inserted a golden cord.
This is how our spring pennant was, it is a very nice reason for a girl's birthday outdoors. I hope you like the idea and put it into practice, see you in a next post❤️
All images were created with PicsArt ||Todas las imágenes fueron creadas con PicsArt