¡Feliz día, tarde o noche mis amigo Hivers!
Hoy quiero mostrarles como transforme un bolígrafo sencillo en uno moderno y elegante con una decoración práctica y fácil, con materiales que probablemente tengas en casa.
Happy day, afternoon or evening my friend Hivers!
Today I want to show you how I transformed a simple pen into a modern and elegant one with a practical and easy decoration, with materials you probably have at home.


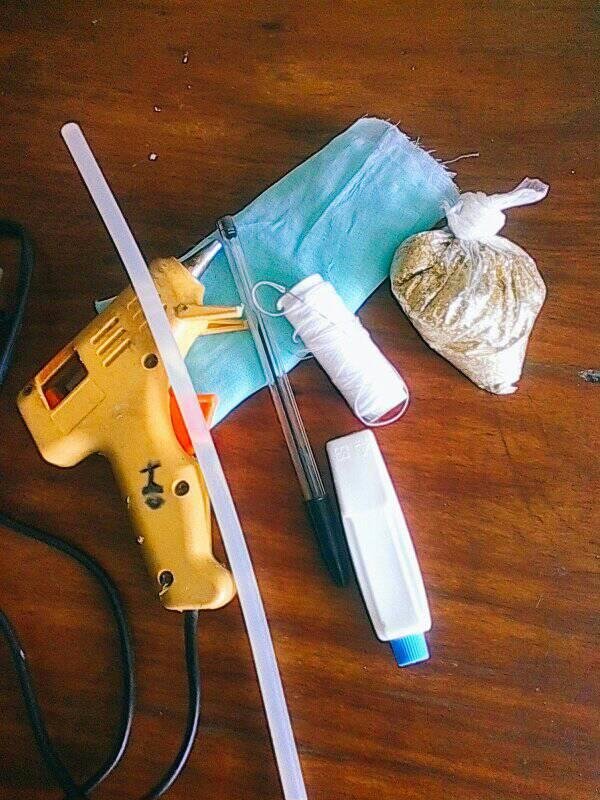
- Un bolígrafo
- Escarcha
- Tela
- Silicón en barra
- Pega blanca
- Cinta decorativa


- A ballpoint pen
- Frosting
- Fabric
- Silicone stick
- White glue
- Decorative tape



Lo primero que realice fue sacar el tapón y la carga de tinta de la caña.
The first thing I did was remove the cap and the ink load from the cane.
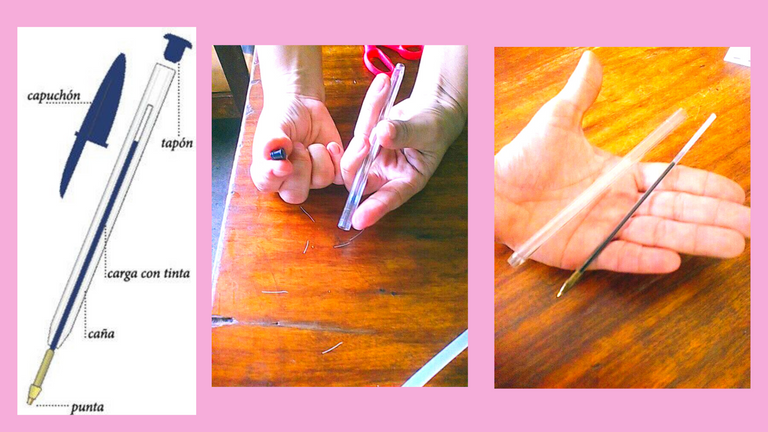
Fuente imagen de partes del boligrafo

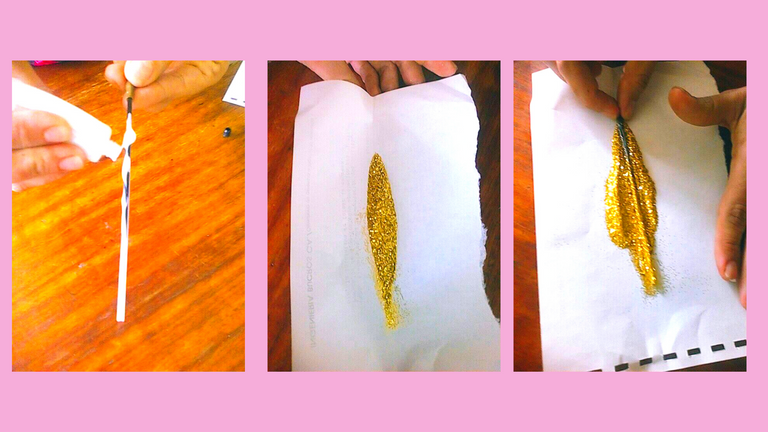
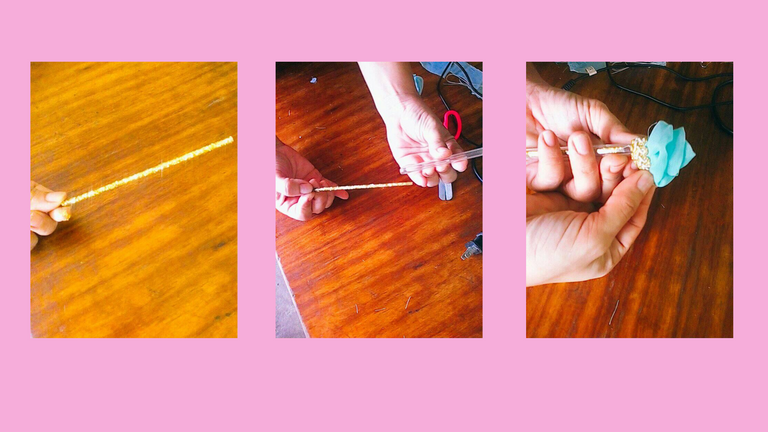
Posteriormente cubrí con la pega blanca toda la parte correspondiente a la carga de tinta, tomé un trozo de hoja blanca y agregue un poco de escarcha, aquí coloque la pieza del bolígrafo, esparcí e en ella la escarcha y deje secar. Cuando ya la escarcha había secado completamente procedí a introducirlo en la caña.
Then I covered with the white glue all the part corresponding to the ink load, I took a piece of a white sheet and added a little frost, here I placed the piece of the pen, I spread the frost on it and let it dry. When the frost had dried completely I proceeded to insert it into the cane.

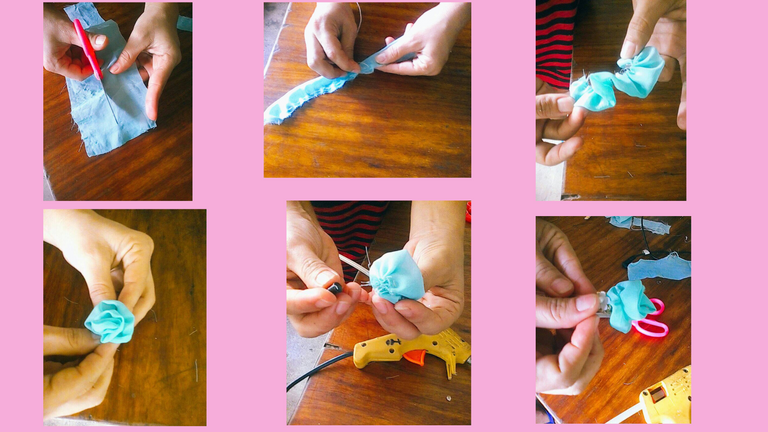
Luego recorte de la tela una tira no muy gruesa, le hice una costura sencilla para luego corrugarla. Una vez hecho esto forme lindas rosa que luego pegue con silicón en el tapón del lapicero.
Then I cut out a not very thick strip of fabric, I made a simple seam and then corrugated it. Once this was done, I formed pretty roses that I then glued with silicone on the cap of the pencil.

Finalmente decoré la base del tapón con cinta y unas flores pequeñas.
Finally, I decorated the base of the cap with ribbon and some small flowers.

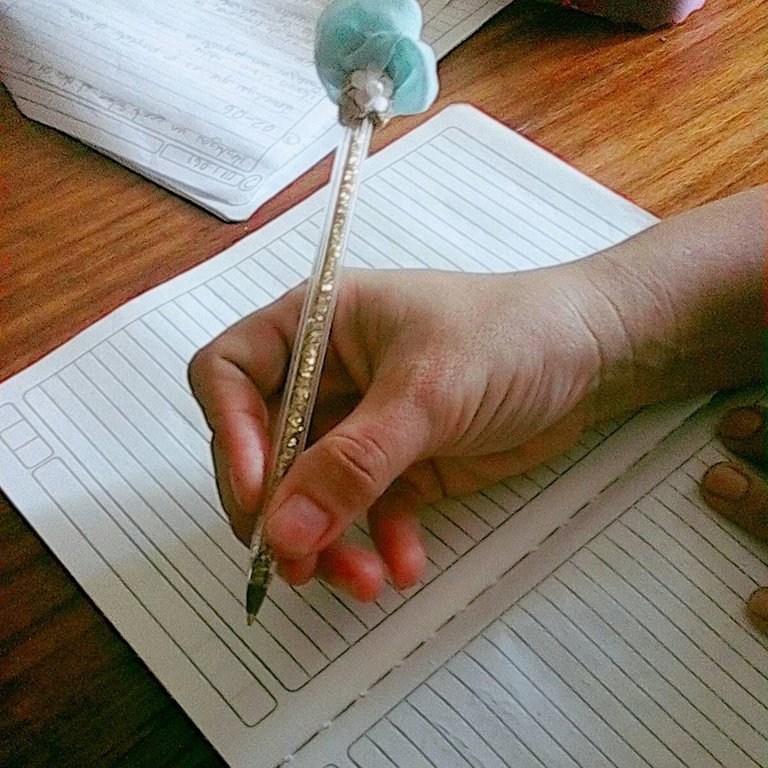
Y ahora aquí tenemos el resultado, puedo utilizar y lucir mi lindo bolígrafo para firmar actas, cuaderno de actividades, asistencias entre otros, espero que te guste mi publicación y puedas realizarla.
And now here we have the result, I can use and show off my nice pen to sign minutes, activity notebook, attendance among others, I hope you like my publication and you can make it.



Congratulations @melvys2710! You have completed the following achievement on the Hive blockchain and have been rewarded with new badge(s) :
Your next target is to reach 2750 upvotes.
You can view your badges on your board and compare yourself to others in the Ranking
If you no longer want to receive notifications, reply to this comment with the word
STOPCheck out the last post from @hivebuzz:
Support the HiveBuzz project. Vote for our proposal!