
Versión Español
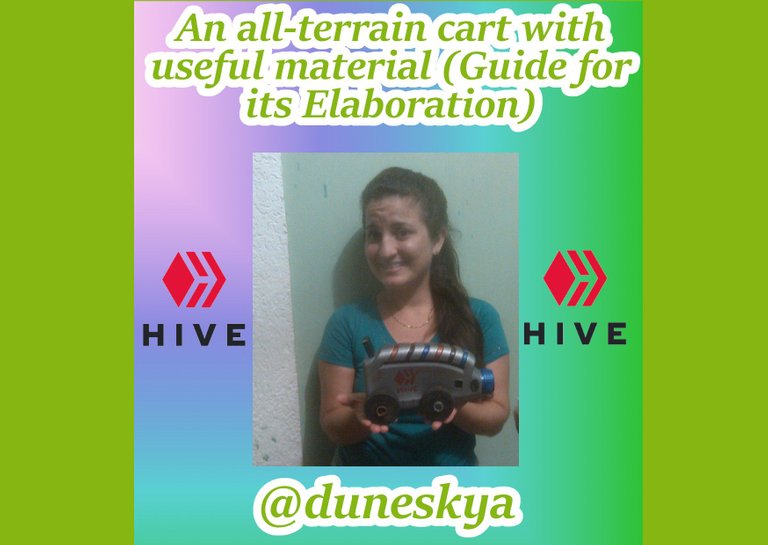
Un carro todo terreno con material de provecho (Guía para su Elaboración)
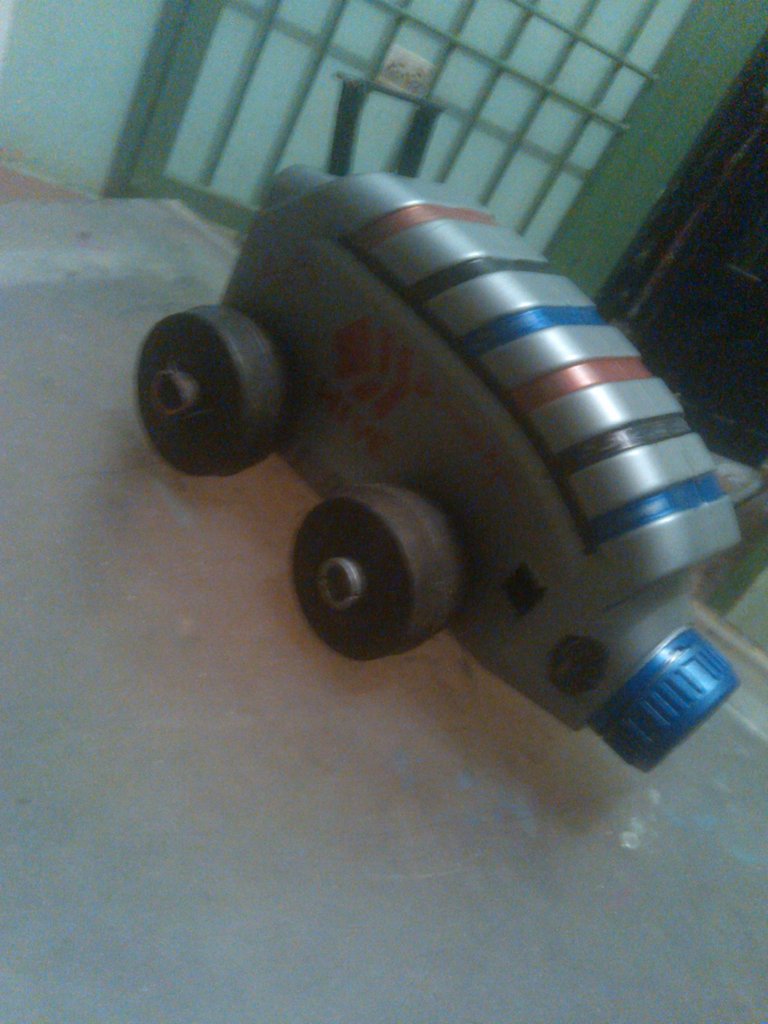
Un inmenso saludo para toda la grandiosa comunidad de HIVE; el arte de las manualidades es dejar que la imaginación trabaje de forma liberada, sin ponernos limites, tomando cualquier elemento para plasmar nuestra creatividad. Es por eso que en esta ocasión quiero compartir con todos ustedes este magnífico carro todo terreno que realice con material de provecho, fue todo un proceso fácil de realizar, con pasos muy sencillos y haciendo uso de pocos materiales, sin dejar de ser un trabajo muy especial.
Para la elaboración de este carro todo terreno, los materiales utilizados fueron los siguientes:
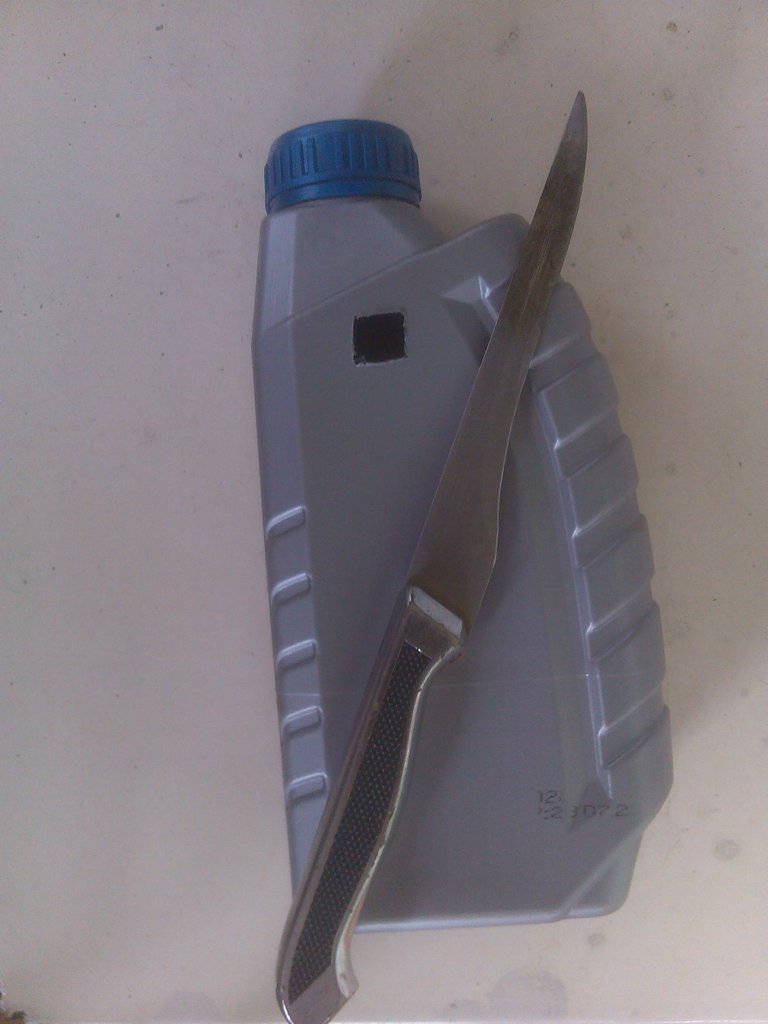
- 01 envase de aceite para carros (Vacío y totalmente limpio)
- 01 marcador Permanente color Negro
- 01 marcador Permanente color Azul
- 01 marcador Permanente color Rojo
- 01 cuchillo
- 12 cm de alambre
- 01 pinza
- 01 segueta
- 01 Barra de Silicone.
- 01 Yesquero
- 03 paletas de madera, cada una de 4 cm de largo.
- 02 Tubos de aluminio de 12 cm c/u y un diámetro de 1/4 Pul. (La medida de los tubos puede variar de acuerdo a la necesidad de cada persona, de igual forma se puede utilizar tubos de cualquier otro material)
- 04 gomas en forma de circulo, cada una con un orificio en el medio el cual tenía un diámetro de ¼ Pul, las cuales funcionaran como ruedas, se puede utilizar cualquier otro elemento en forma de circulo lo importante es que tengan el mismo diámetro las cuatro.

Pasos para la elaboración del carro todo terreno:
01.Utilizando el cuchillo con mucho cuidado se realiza un corte cuadrado de 1cm en ambos lados del envase de aceite, este corte hará la similitud de una ventana.
02.Nuevamente haciendo uso del cuchillo se realiza dos cortes en formas de cruz en ambos lados del envase, estos cortes tienen una separación de 10 cm entre ellos, ya que servirán para pasar los tubos.

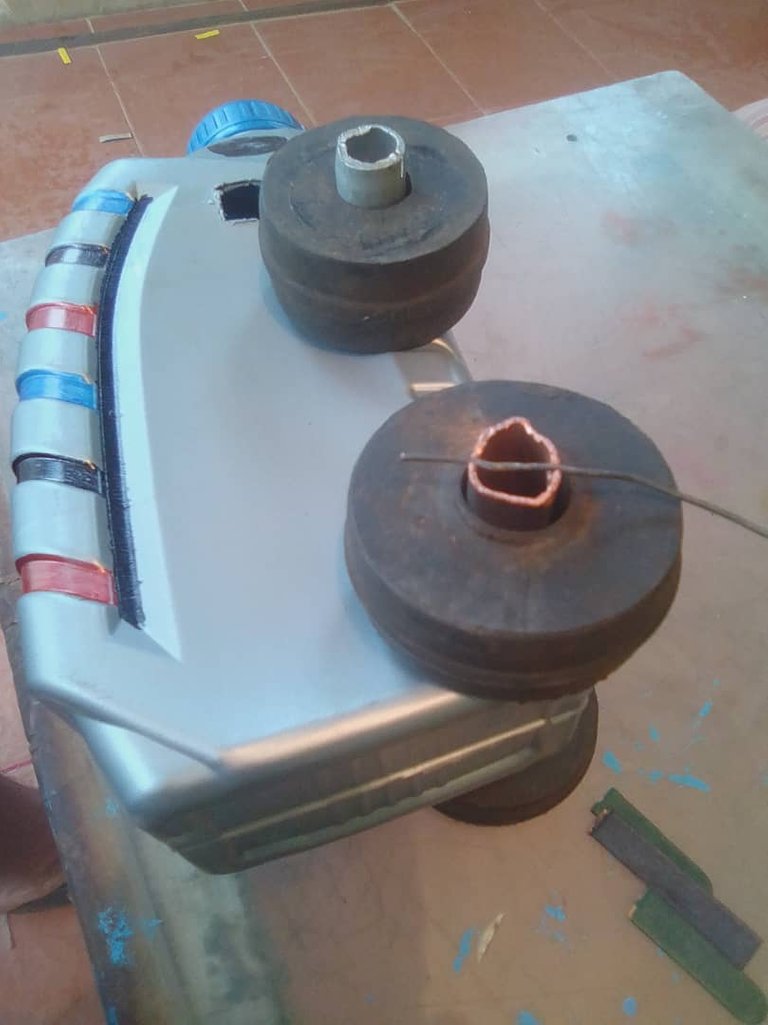
03.Con la segueta hacemos unos pequeños cortes transversales en los extremos de cada tubo de manera que nos sirvan de canal para insertar un pedazo de alambre.
04.Tomamos los tubos de 12cm de largo y lo pasamos entre los cortes en formas de cruz para de esa manera atravesar el envase, estos tubos no servirán de eje para colocar las ruedas.
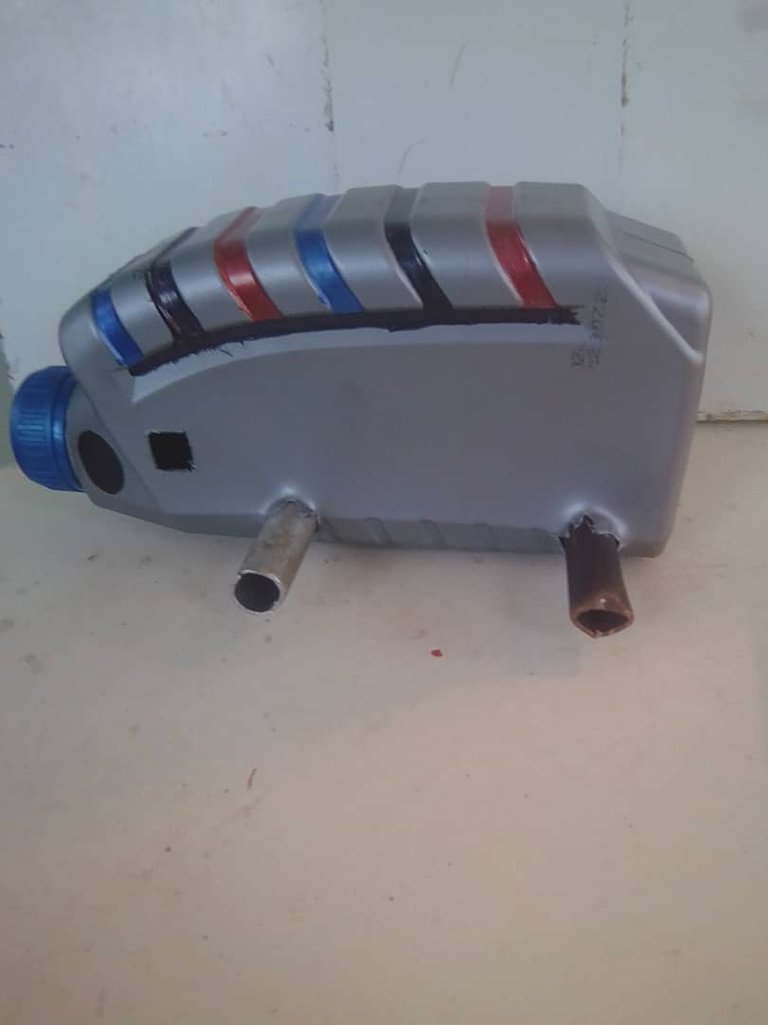
05.Insertamos las 4 ruedas de gomas en cada uno de los extremos de los tubos que sobresalen del envase.
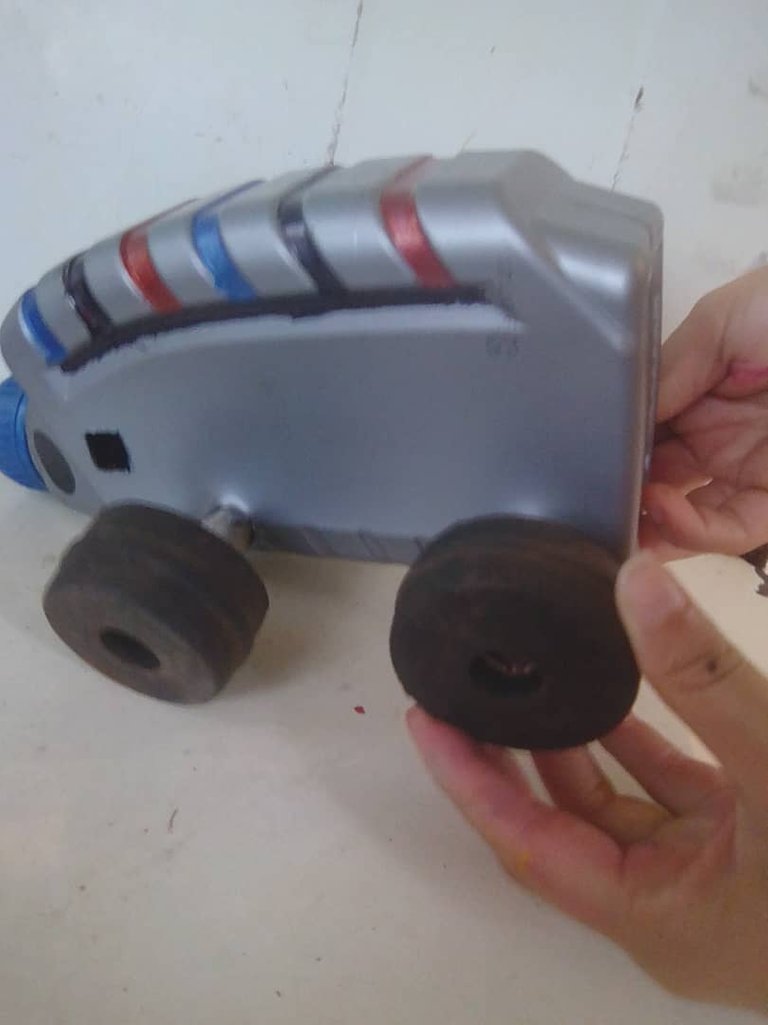
06.Seguidamente insertamos pedazos de alambre en los canales que tienen los tubos en los extremos, con estos evitaremos que se salgan las ruedas.
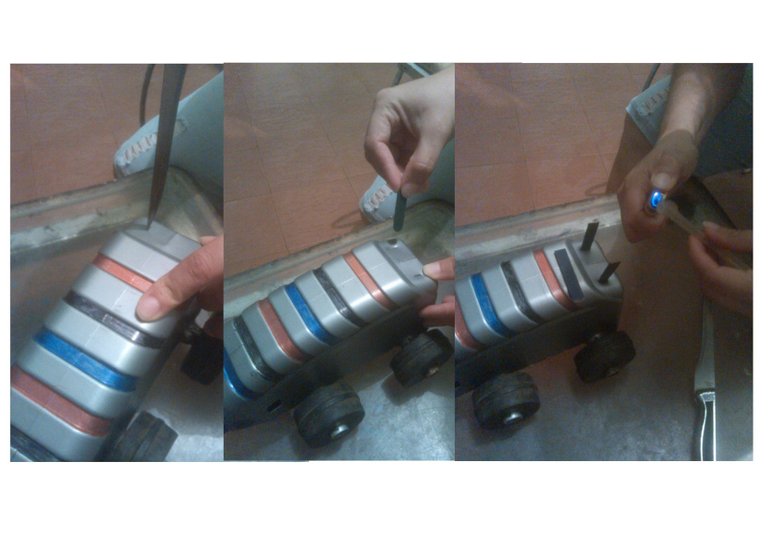
07.Utilizando nuevamente el cuchillo realizamos dos cortes en la parte de superior del envase, luego insertamos dos paletas en estas ranuras, para después haciendo uso del silicón pegamos otra paleta sobre estas dos ya insertadas.
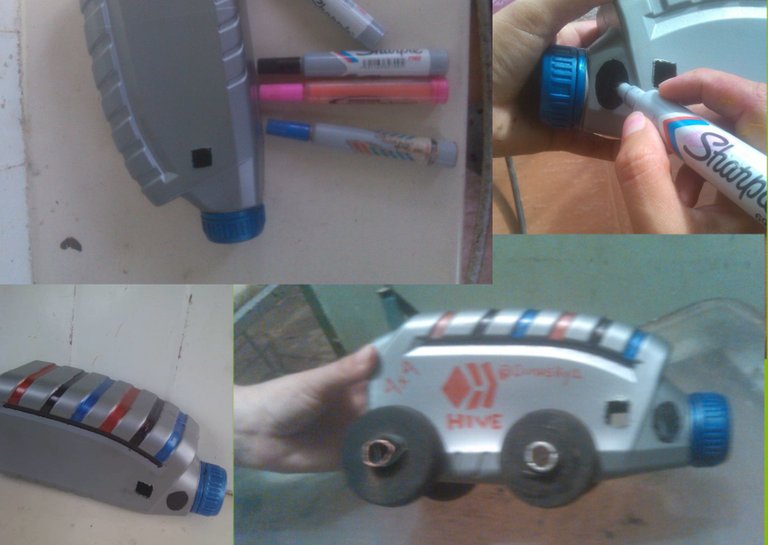
08.Por último, utilizando los marcadores permanentes se pinta de forma libre la superficie del envase, a este carro todo terreno se le pinto el espectacular logo de HIVE y de forma intercalada se pintaron franjas de diferentes colores en la parte superior.
Amigos de Hive los invito a realizar este practico y didáctico carro todo terreno, el cual es una fabulosa pieza de entretenimiento.
Fotos de mi propiedad
Motivado a que el ingles no es mi idioma nativo, he utilizado el sitio web deepl.com para traducir mi contenido.

English Version
An all terrain trolley with useful material (Guide for its elaboration)

An immense greeting to all the great community of HIVE; the art of handicrafts is to let the imagination work freely, without limits, taking any element to express our creativity. That is why this time I want to share with all of you this magnificent all terrain car that I made with useful material, it was an easy process to perform, with very simple steps and using few materials, without ceasing to be a very special job.
For the elaboration of this all terrain car, the materials used were the following:
- 01 container of oil for cars.
- 01 car oil container (Empty and totally clean).
- 01 black permanent marker
- 01 marker Permanent Blue color
- 01 permanent marker Red color
- 01 knife
- 12 cm of wire
- 01 clamp
- 01 saw
- 01 Silicone rod.
- 01 tinder
- 03 wooden pallets, each one of 4 cm long.
- 02 aluminum tubes of 12 cm each and a diameter of 1/4 inch (the size of the tubes may vary according to the needs of each person, and tubes of any other material can also be used).
- 04 rubber bands in the shape of a circle, each one with a hole in the middle which had a diameter of ¼ inch, which will work as wheels, you can use any other element in the shape of a circle, the important thing is that they have the same diameter the four.

Steps for the elaboration of the all-terrain carriage:
01.Using the knife very carefully make a square cut of 1cm on both sides of the oil container, this cut will make the similarity of a window.

02.Again using the knife, make two cuts in cross shapes on both sides of the container, these cuts have a separation of 10 cm between them, as they will serve to pass the tubes.

03.With the saw we make some small transversal cuts in the ends of each tube so that they serve us as a channel to insert a piece of wire.
04.We take the 12cm long tubes and pass them between the cuts in cross shapes in order to cross the container, these tubes will not serve as axle to place the wheels.

05.We insert the 4 rubber wheels in each of the ends of the tubes that protrude from the container.

06.Next we insert pieces of wire in the channels that have the tubes at the ends, with these we will avoid that the wheels come out.

07.Using again the knife we make two cuts in the upper part of the container, then we insert two pallets in these slots, then using the silicone we glue another pallet on these two already inserted.

Finally, using the permanent markers the surface of the container is painted freely, this all terrain car was painted with the spectacular logo of HIVE and in an intercalated way we painted stripes of different colors on the top.

Friends of Hive I invite you to make this practical and didactic all terrain car, which is a fabulous piece of entertainment.
Photos of my property
Because English is not my native language, I have used the website deepl.com to translate my content.
Translated with www.DeepL.com/Translator (free version)