Hello, wonderful creative people on Nerday community!
I am @djynn (pronounce as Jin). This is my first time posting in this community. I hope you like it.
I completed a couple more classes on Skillshare so I thought I should give the new skills a try.
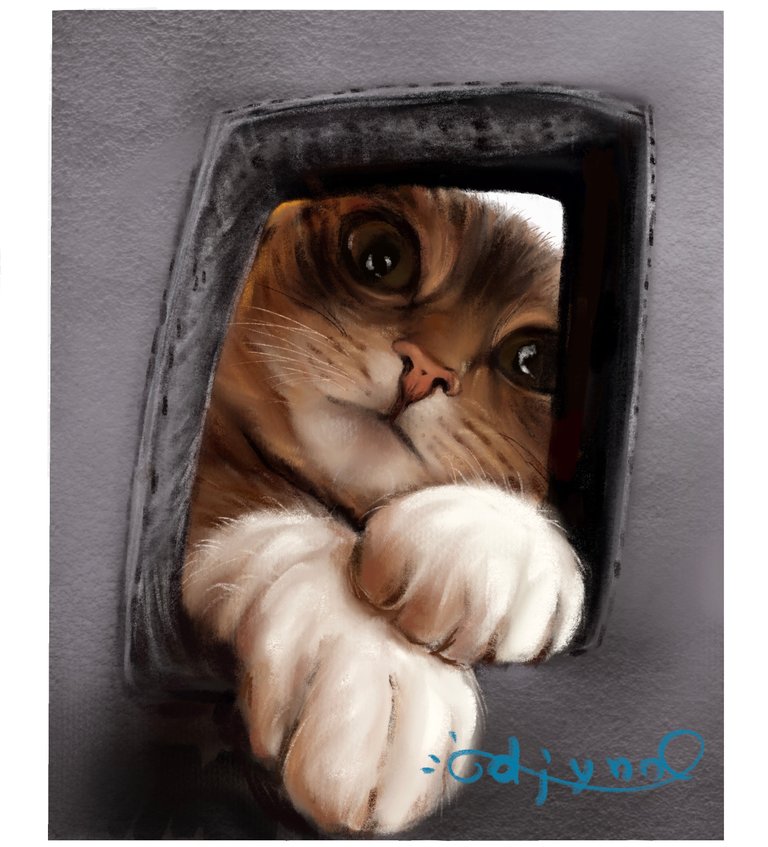
The model today is my kitty, Pepper. She is so cute and she was being naughty in this photo biting and peeking out of the hole on the back of my daughter’s chair.
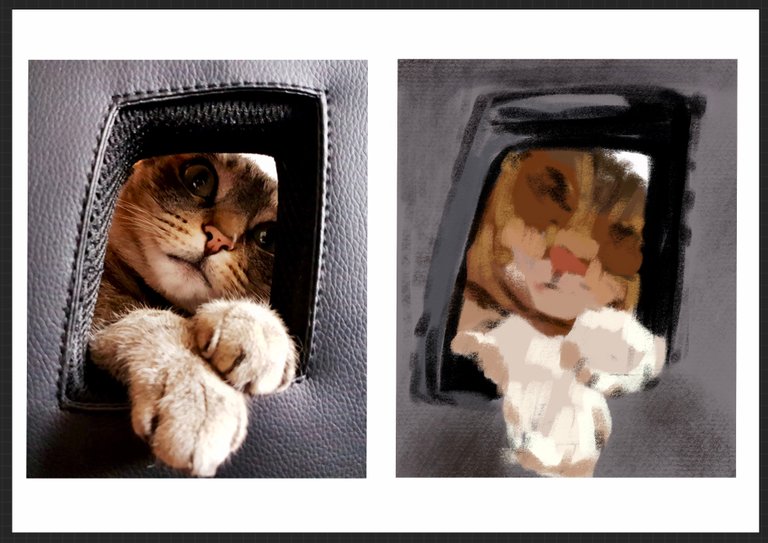
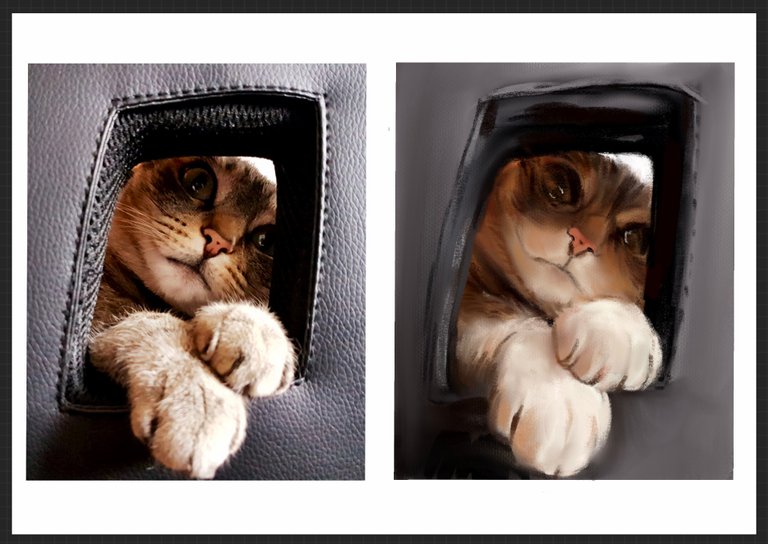
On the Procreate screen, I have my reference photo on the left and a drawing surface on the right. Procreate doesn’t have the sub window. I was always wondering where to have my reference. Having a reference on the phone beside the iPad works but it can be annoying. I think having the reference photo on the same canvas solve lots of problems and save time. I wonder if I can do this on Clip Studio as well.
Skillsahreの授業をいくつか終えたので、習ったことを試してみようと思います。
モデルは我が家の美猫ペッパーです。娘ちゃんの椅子の背もたれに空いている穴で遊んでいる写真です。
そして今日使うのはProcreate。
同じキャンバス上の左側にペッパーの写真、右側には同じサイズの枠を作り、この上に描いていきます。
Procreateはザブウィンドウがなく、参考にする写真をどこに置くか困っていましたが、こうすることで解消されました。
スマホ片手に描くのは大変ですからね。
Clip Studioにはサブウィンドウのオプションがありますが、同じように描くことも出来るかな。。。

I’m going to skip the sketch today. I always wanted to try this method!!!
After preparing the canvas with the background colour, I used the dropper tool to pick the colour from the reference and applied the colour on my canvas.
さてさて、今日はスケッチをすっ飛ばして描きます!この描き方、やってみたかったんです!!!
キャンバスを背景色に塗ってから、スポイトツールを使いペッパーの写真から色をもらって大まかに色を置いて行きます。
I drew some horizontal and vertical lines to make sure all the parts are on the right spot. I noticed the face was too long and the nose was too big so I adjusted. Although, I realized that I wasn’t doing this quite right but I got OK result ;)
水平&垂直線を引いてそれぞれのパーツが写真と同じ位置にあるか確認します。顔が長すぎたり、鼻が大き過ぎたので直しました。
でもこれ、ちょっとやり方違うかも。
まあ、直せたのでいいのですが、笑
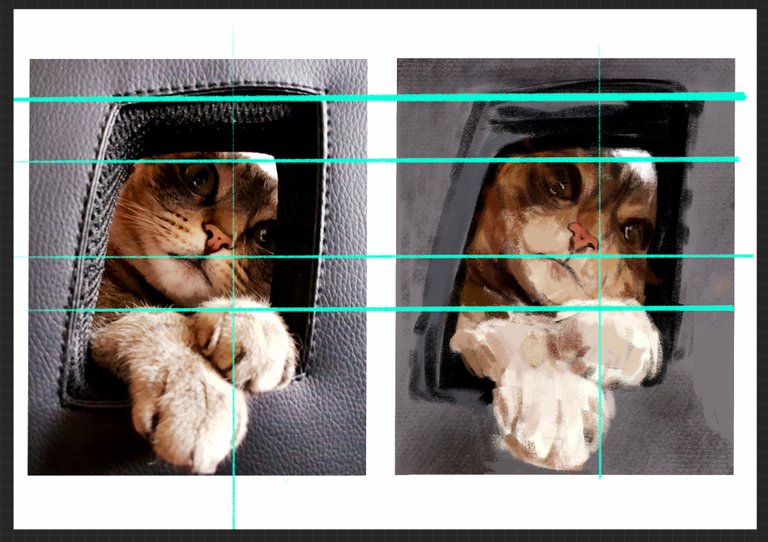
I might have to go back to the lesson to make sure if I’m doing this right 🤯
I drew a grid on the reference then duplicated it this time. Then moved it over to my drawing.
I adjusted each parts to fit into the grid.
I also blended the colour here.
う〜む、、、授業の受け直しかな。。。写真の上にグリッドを描いて複製してから、描いてる方に移動させて、、、🤯
グリッドを見ながら修正して、大まかに置いた色をブレンドしました。

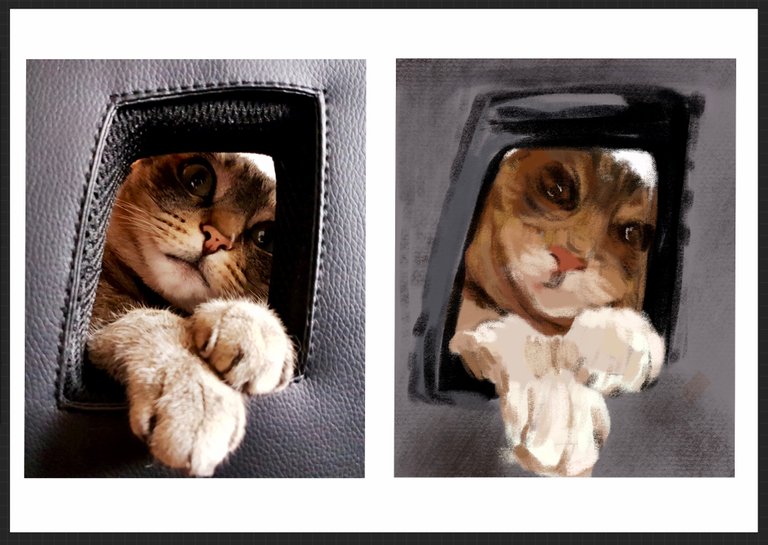
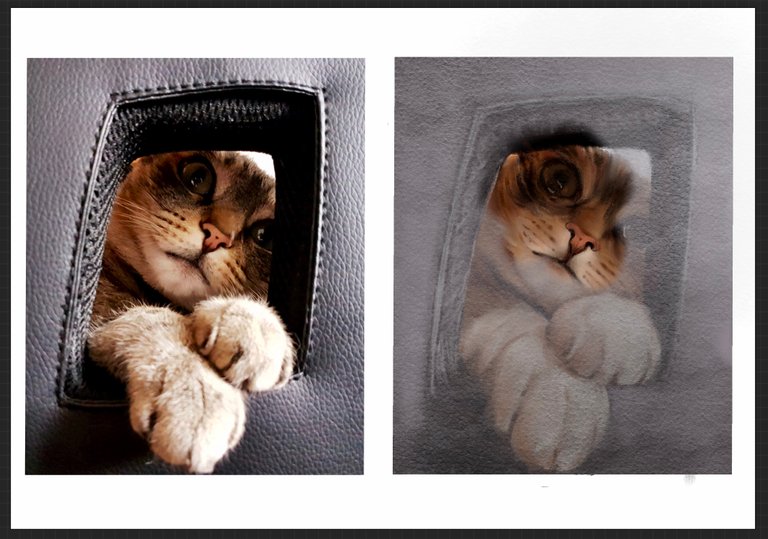
I kind of like the rough painted look (5th photo) but I kept adding more details and blending.
5枚目の写真のようなザクザクっと描いた感じも好きなのですが、さらに色を置いてブレンドする作業を続けます。
I usually use many layers when I draw digitally but I used only a few layers this time. I worked on the duplicated layers and when I liked it I merged it down.
On this layer, I added the texture of the chair and erased the part of it to reveal the cat then merged down.
普段デジタルでイラストを描く時はたくさんレイヤーを使うのですが、今回は2、3枚で描いてます。複製したレイヤーに描き足して、気に入ったら結合します。
このレイヤーでは椅子の模様を全体に入れてから、必要ないところは消して結合しました。
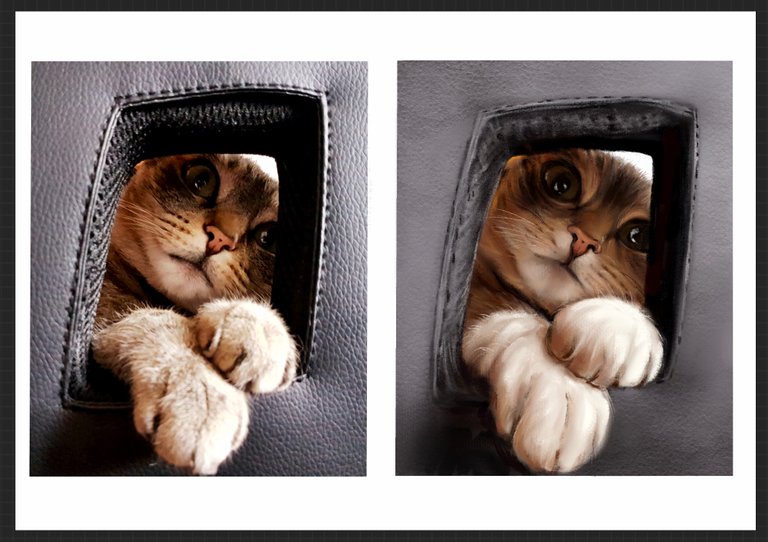
I added some more details and the drawing/painting of my sweet Pepper is finished.
Oops, I forgot to use the grid at the end. My drawing is a little bigger than the reference but I hope you can tell that it is Pepper.
更に細かい部分を描き込んでペッパーの出来上がりです。
後になって再度グリッドを使わなかったことに気が付きました。ちょっと大きさが違いますが、ペッパーに見えるかな〜
Tools used : iPad, Apple Pencil, Procreate, photo from my gallery
画材 : iPad、アップルペン、Procreate、ペッパーの写真

So nice cat portrait ^_^
Thank yo so much!!!
You did an amazing job!! 😻 Pepper must be very prrrrrrroud!!!
Thank you!
Thanks for the retweet as well!
すごい作品!こんなにiPadを使いこなせたらどんどん楽しくなりそうですね^_^
iPad大活躍です。skillshareもすごく良いです。本当にどんどん楽しくなってきています!
お久しぶりです~!っていうか・・・何これ!!!
ペッパーちゃん、写真かと思ったら絵じゃないですか!
いつの間にこんなに画力を上げて!すげぇ~
動物の毛の部分とか滅茶苦茶難しいと思うんだけど・・・
やっぱりセンスのある人はすごいなぁ~
お久しぶりです!!!ありがとうございます!
ipadとprocreateがすごいのかもしれません。描いておいて自分でも驚いています、笑
すごい!すごいの一言です!!
毛のふんわりした感じまで再現されてて、素晴らしいです。
機材とソフトウェアを使いこなしているのが流石です!!
たくさん描いてもっと上手くなりたいのでコメント励みになります。
ありがとうございます。嬉しいです!
Pepper looks incredible as a digital cat! Your artistic creations are fabulous! @djynn
Thank you so much!!!