Es la hora de Manualidades | Creativas Libretas de Notas hechas con CD's


Today i want to share with you again those creative and recycling ideas that i enjoy so much in my moments of artistic madness. Especially in these times of quarantine and holidays, in the company of children, it is ideal to let our imagination fly, dust off those drawers we have at home full of artifacts from 80's and 90's like cassettes, CD's, DVD's ... that maybe you were about to throw away without knowing that you can turn them into small canvases, fill them with color and bring them back to life, but this time, in a completely different version, a super cool notebooks, unique and fun.
Hoy nuevamente quiero compartir contigo esas ideas creativas y de reciclaje que tanto disfruto en mis momentos de locura artística. Sobretodo en estos tiempos de cuarentena y festividades, en compañía de los niños, es ideal dejar volar nuestra imaginación, desempolvar aquellos cajones que tenemos en casa llenos de artefactos de los 80 y 90 como cassetes, CD's, DVD's... que quizás estabas a punto de tirar a la basura sin saber que puedes convertirlos en pequeños bastidores, llenarlos de color y traerlos de nuevo a la vida, pero esta vez, en una versión completamente distinta, unas super cool libretas de notas, únicas y divertidas.

Fun Projects
Proyectos Divertidos
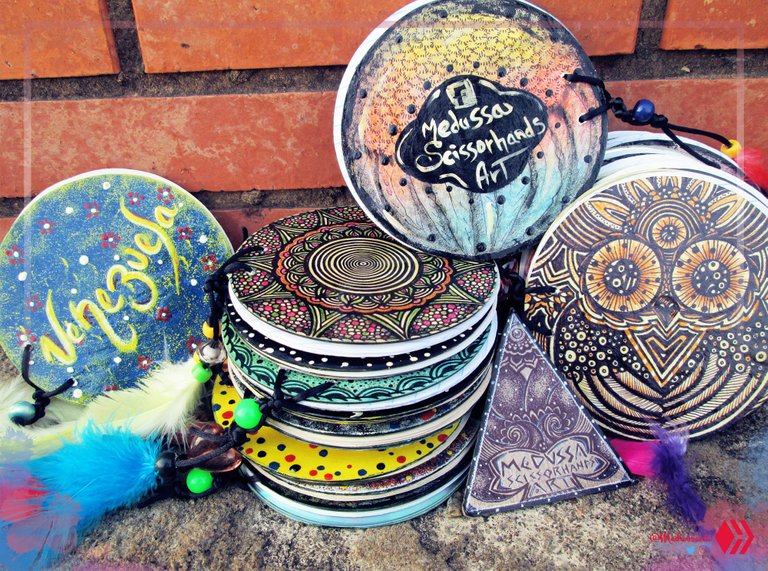
Some time ago, while i was looking at what to do with all those CD's that i had at home and that were "no longer of any use", this interesting idea came to me. And as many of you have seen in my previous blogs, i love recycling. This was the first time i started experimenting with this particular material, i did it as a test and it turned out to be a lot of fun. Join me in this step by step so you can also have fun creating your own notebook.
Hace ya bastante tiempo atrás mientras observaba qué hacer con todos esos CD's que tenía en casa y que ya "no me servían de nada" vino a mí esta interesante idea. Y como muchos ya habrán visto en mis anteriores blogs, me fascina reciclar. Esta fue la primera vez que comencé a experimentar con este material tan particular, lo hice en modo de prueba y resultó ser muy divertido. Acompáñame en este paso a paso para que tú también te diviertas creando tu propia libreta.

Step 1: Materials
Paso 1: Materiales
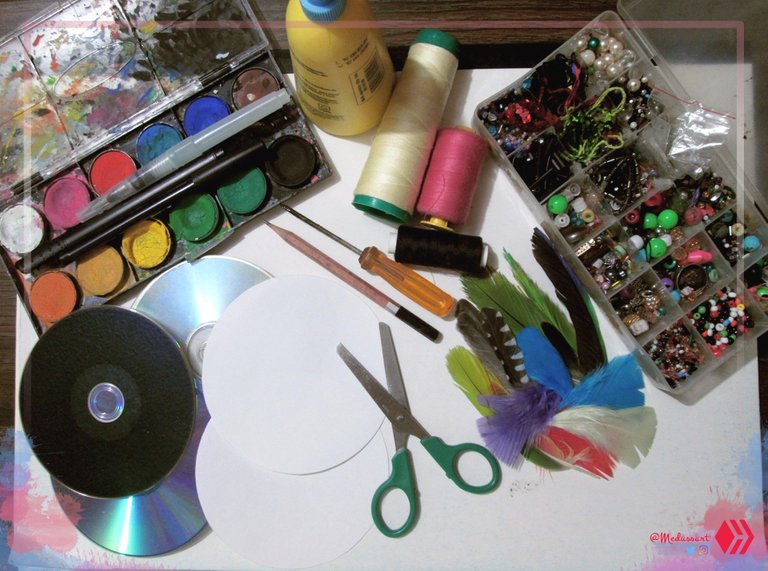
The materials i needed to this project were:
Los materiales que necesité para este proyecto son:
- CD's, DVD's- Drawing paper, cardboard or some paper with 200g or more to prepare the surface.(You can paint directly over the plastic surface with special paintings but i prefer to paint over the paper so i used this way)
Cartulinas o cualquier papel preferiblemente de 200gr o más para preparar la superficie.(Puedes pintar directamente sobre el plástico con pinturas especiales pero en mi caso lo hice de esta manera)
- Scissors
Tijeras
- Glue (I used the white or the scholar one)
Pegamento ( yo utilicé pegamento escolar, el que todos tenemos en casa)
- Our favorites materials to draw such as pencils, crayons, ink pen, watercolor paintings, soft pastel chalks, acrylics,etc.
Nuestros materiales favoritos para dibujar: lápices, colores, bolígrafos, acuarelas, tizas pastel, acrílicos,etc.
- Spray colourless Varnish
Barniz transparente en spray
- Recycled paper to fill our notebook
Papel reciclado para rellenar nuestra libreta.
- A soldering iron or you can use a screwdriver to make the holes in plastic. For the paper, we use a paper punch.
Un Cautín o puedes usar un destornillador para realizar los agujeros en plástico. Para el papel, usamos un agujerador de papel.
- Nylon Thread or any Thread of your preference.
Hilo de nylon o cualquier cordón, cuerda de su preferencia.
- Decorative elements of your preference(Optional)
Elementos decorativos (opcional)

Step 2: Creative Process
Paso 2: Proceso Creativo
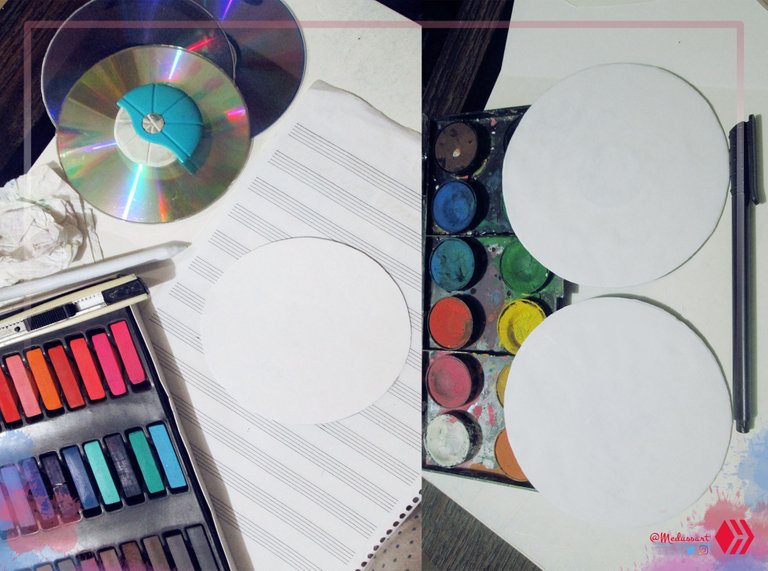
Prepare our Small Canvases by adding a good layer of glue on the surface of the CD and placing the paper previously cut with the measurements of the CD. Preferably wait 12 hrs or until the surface is completely flat and feels warm and not cold. As i mentioned before, you can create your design directly on the plastic surface with proper techniques but in my case i needed to work on paper.
Preparar nuestro pequeño lienzo agregando una buena capa de pegamento sobre la superficie del CD y colocando el papel previamente recortado con las medidas del mismo. Preferiblemente esperar 12 hrs o hasta que la superficie esté completamente plana y se sienta cálida y no fría. Cómo mencioné anteriormente, puedes crear tu diseño directamente en la superficie plástica con técnicas apropiadas pero en mi caso necesitaba trabajar sobre papel.

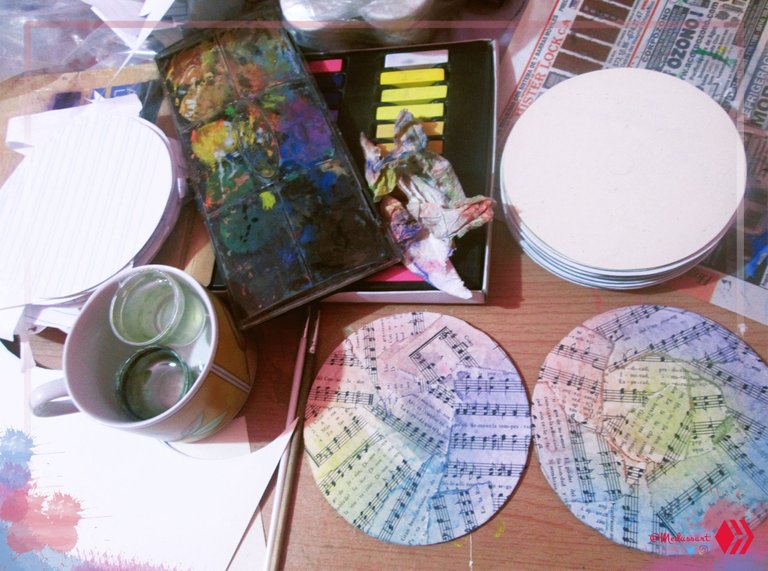
Select our design and artistic techniques. Once our canvas is ready, we can use all the techniques we want, we can mix them until we get multiple designs as I did, each one has a different design and techniques, from collage, watercolors, coloring pencils, etc.
Seleccionar nuestro diseño y técnicas artísticas. Una vez preparado nuestro lienzo, podemos usar todas las técnicas que queramos, podemos mezclarlas hasta obtener múltiples diseños como lo hice yo, cada uno posee un diseño y técnicas diferentes, desde collage,acuarelas,colores,etc.

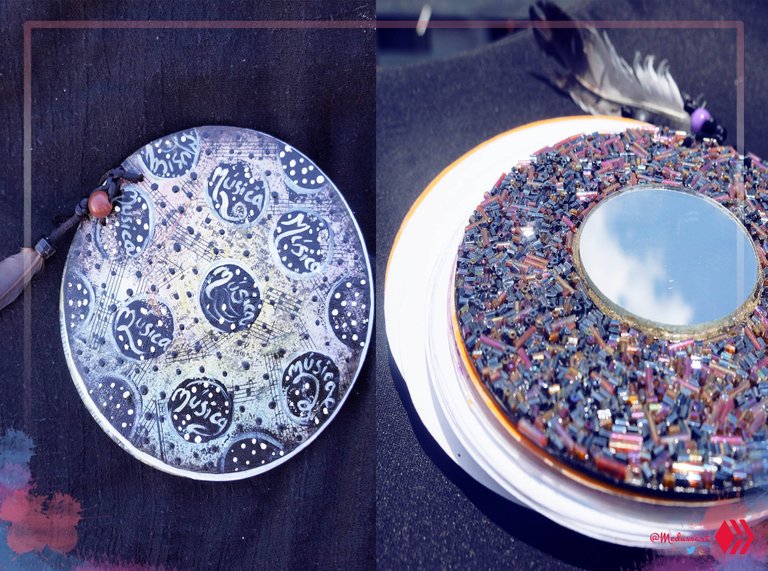
Protect your design if required. In my case i used the varnish i had at home, those common carpentry varnishes (not diluted with any chemical). But the most recommendable are spray varnishes, preferably colourless, if they are the special ones for drawing much better, since with certain techniques such as inks,water-based markers, we could damage our work. So if your design does not require varnish, do not use it unless you have done a test on a small piece of paper to see how it reacts with your technique.
Protege tu diseño si lo requiere. En mi caso usé el barniz que tenía en casa, esos comunes de carpintería (espeso y no diluido con ningún químico). Pero lo más recomendable son barnices en aerosol preferiblemente transparente, si son los especiales para dibujo mucho mejor, ya que con ciertas técnicas como tintas o marcadores a base de agua, podríamos dañar nuestro trabajo. Así que si tu diseño no requiere de barnizado, no lo uses a menos que hayas hecho alguna prueba en un pedacito de papel para ver cómo reacciona con tu técnica.

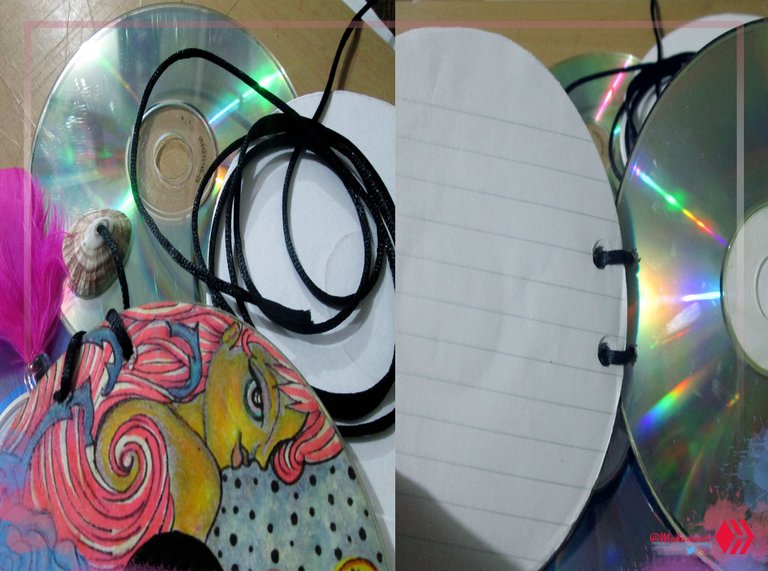
Making the holes. Depending on your design, consider where you will make the holes so that you don't damage your creation. As i didn't have a soldering iron, i simply used a screwdriver and heating it with the kitchen flame i could make holes in the plastic; it is recommended to place underneath a towel or cloth that you don't use, to serve as a pillow for the CD so as not to break it during the process. The hole should be made from the side where we made the design.
Hacer los agujeros. Dependiendo de tu diseño, considera el lugar donde realizaras los agujeros de tal manera que no dañes tu creación. Como no poseía un Cautín, simplemente utilicé un destornillador y calentándolo con la llama de la cocina pude agujerar el plástico;recomendable colocar debajo una toalla o tela que no uses, que sirva como almohada del CD para no quebrarlo durante el proceso. El agujero debe hacerse desde el lado donde hicimos el diseño.

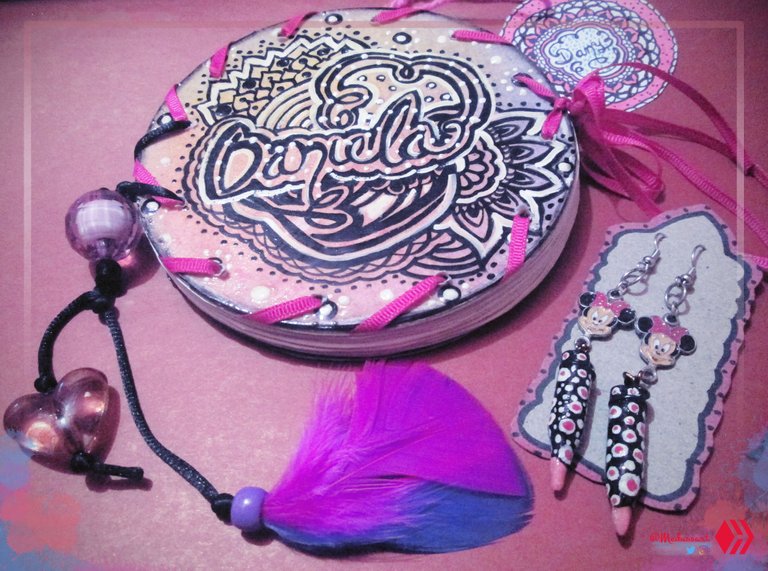
Assemble and Decorate. Finally we only have to assemble our canvases, cover and back cover, the recycled paper previously cut to size and with their holes, using the thread or rope of our preference, assembled everything and we can place other decorative elements of our choice.
Ensamblar y Decorar. Finalmente sólo nos queda ensamblar nuestros lienzos, tapa y contratapa, las hojas recicladas previamente recortadas a medida y con sus agujeros, usando el hilo o cuerda de nuestra preferencia, unimos y podemos colocarle otros elementos decorativos de nuestra elección.

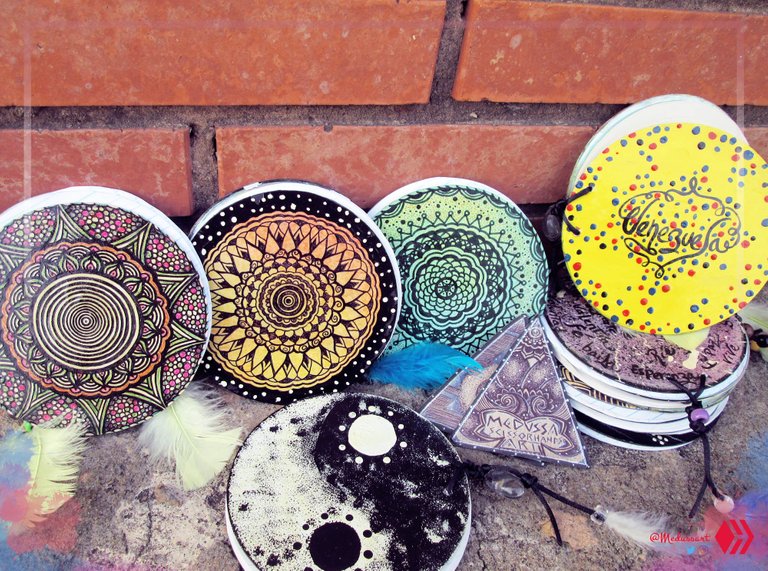
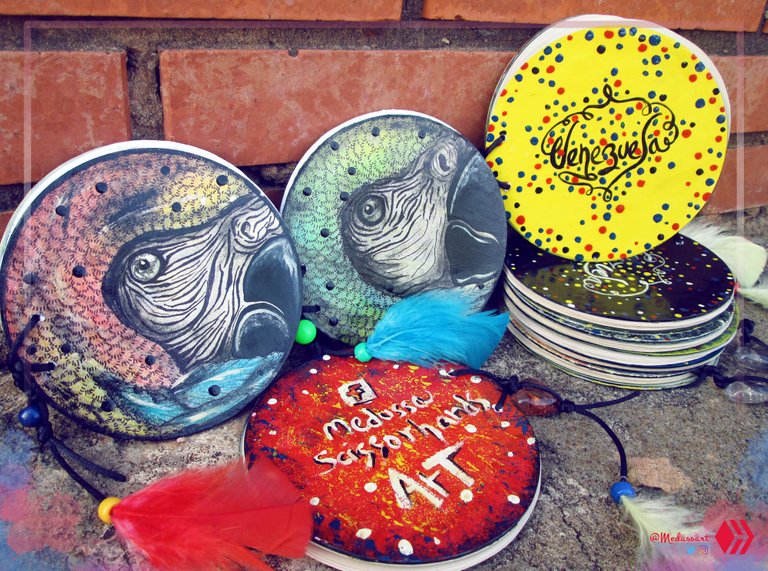
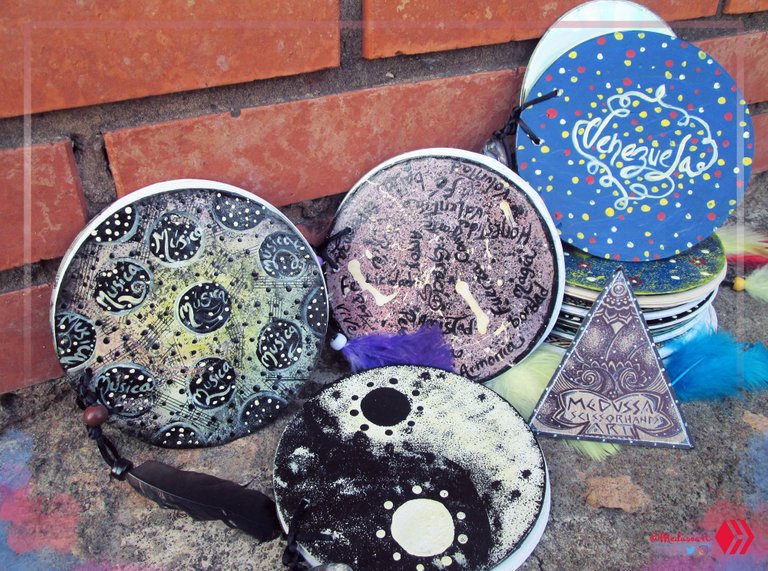
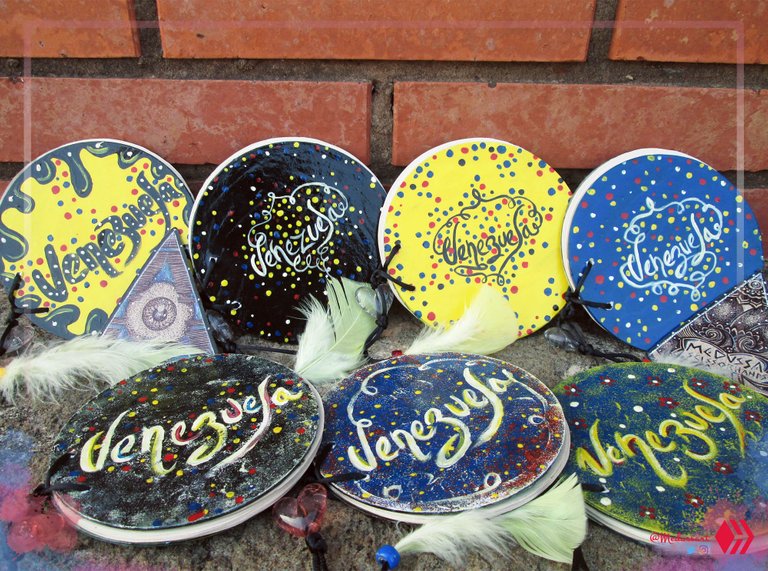

And that's all for today. Dare to create fun things by recycling materials that we all have at home. I'm always amazed at how much we can create and transform using what we often call "junk".
HAPPY HOLIDAYS!!!
Y eso fue todo por hoy. Atrévete a crear cosas divertidas reciclando materiales que todos tenemos en casa. Siempre me sorprendo de todo lo que podemos crear y transformar usando eso que muchas veces llamamos "basura".
FELICES FIESTAS!!!

Thank you for visiting and take a look of my little artistic corner!
¡Gracias por visitar y curiosear mi pequeño rincón artístico !

NFTSHOWROOM
SignArt
GhostmarketCome and Visit My #Cryptoart gallery at

Credits - Créditos
Translation
All the content
Text, design, photography, all done by me.
Todo el contenido
Texto, diseños, fotografía son de mi autoría.
Ay me encanta, esto es una belleza definitivamente, es una manera de reciclar maravillosa y, aparte de todo es una actividad bastante recreativa. 😍
Sii! Es súper divertido crear cosas nuevas con estos materiales tan particulares XD, es adictivo ♥️ Saludos y un fuerte Abrazo ;)
Muchas Gracias ☺️ ♥️
Congratulations @medussart! You have completed the following achievement on the Hive blockchain and have been rewarded with new badge(s) :
Your next target is to reach 20000 upvotes.
You can view your badges on your board and compare yourself to others in the Ranking
If you no longer want to receive notifications, reply to this comment with the word
STOPCheck out the last post from @hivebuzz:
Fantastic work. See you on Blurt ! https://Blurtter.com
Thanks 🤩!
This is so creative. Not only the original idea but the finished products as well. The variety it awesome. Something for everyone.
Thank you for your comment. Yes, Recycling is definitely an interesting way to create cool things that everyone can enjoy. ;) Greetings!
Those are so beautiful and creative i must say @medussart. Are those for selling on your shop?
Thank you ;) I'm glad you like it. Well this project was more like recycling experiment, but probably I should sell them. I made another one then, playing with 3d effect using paper,this is my favorite, i think more complex and delicated to sell. you can take a look in this old post👇 ☺️
https://peakd.com/hive-148441/@medussart/design-project-part-iii-the-final-result-or-proyecto-de-diseno-parte-3-el-resultado-final