.jpg)

Español
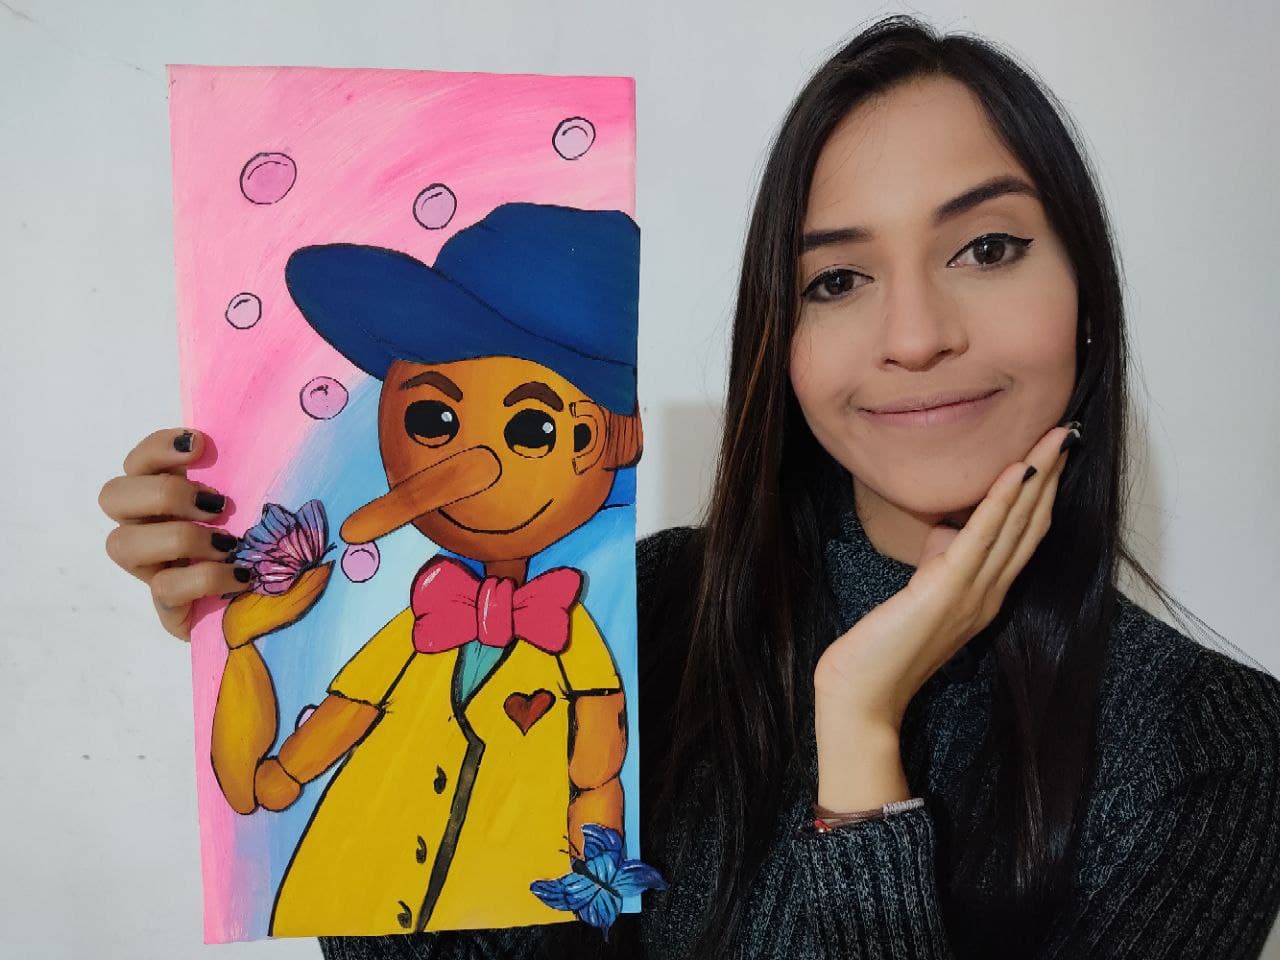
Hola hermosa familia HIVE ❤️ Feliz y bendecido año nuevo para todos, el día de hoy les traigo otro nuevo divertidísimo tutorial donde aprenderemos a realizar un hermoso cuadro de un elegante niño de madera (pinocho), una perfecta imagen para decorar nuestras paredes favoritas dando ese toque creativo y personal, y lo mejor de todo es que esta hecho de materiales súper económicos y muy fáciles de conseguir. Así que, los invito a seguir disfrutando de este divertido trayecto, perfecto para el desarrollo de la creatividad de todos, especialmente de nuestros niños.
English
Hello, beautiful HIVE family ❤️ Happy and blessed new year to all, today I bring you another new hilarious tutorial where we will learn to make a beautiful picture of an elegant wooden child (Pinocchio), a perfect image to decorate our favorite walls giving that creative and personal touch, And the best of all is that it is made of super cheap materials and very easy to get. So, I invite you to continue enjoying this fun journey, perfect for developing everyone's creativity, especially our children.
¿Qué están esperando?
Gracias a esta técnica podemos crear nuestro propio cuadro de pinocho, además, una hermosa obra hecha en casa es una manera creativa y muy económica de darle un toque de alegría a nuestro entorno. Antes de comenzar no olvidemos lavarnos nuestras manos.
What are they waiting for?
Thanks to this technique we can create our own Pinocchio painting, in addition, a beautiful work made at home is a creative and very inexpensive way to give a touch of joy to our surroundings. Before we start, let's not forget to wash our hands.
[Materiales | Materials]
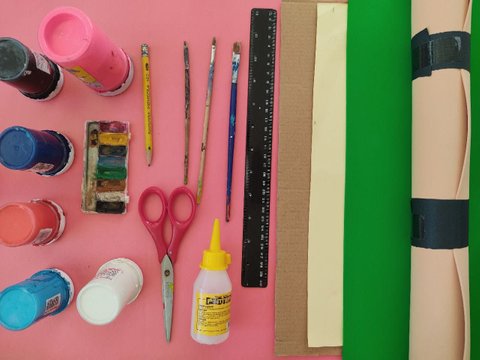
Para realizar esta linda obra necesitaremos:
- Moldes.
- Foamy o goma eva.
- Papel vegetal o calco.
- Lamina de cartón.
- Regla.
- Lápiz.
- Marcador.
- Tijera.
- Cúter.
- Pincel o brocha.
- Pinturas.
- Silicón liquido o pegamento.
To make this cute work we will need:
- Molds.
- Foamy or eva foam.
- Vegetable paper or tracing.
- Cardboard sheet.
- Rule.
- Pencil.
- Bookmark.
- Scissors.
- Cutter.
- Brush or brush.
- Paintings.
- Liquid silicone or glue.
Procedimiento (paso a paso)
Process (step by step)

Primero, dibujamos un tierno pinocho con una gran nariz y con una ropa muy divertida, en este caso, le dibuje un lindo sombrero y un lazo muy grande y elegante.
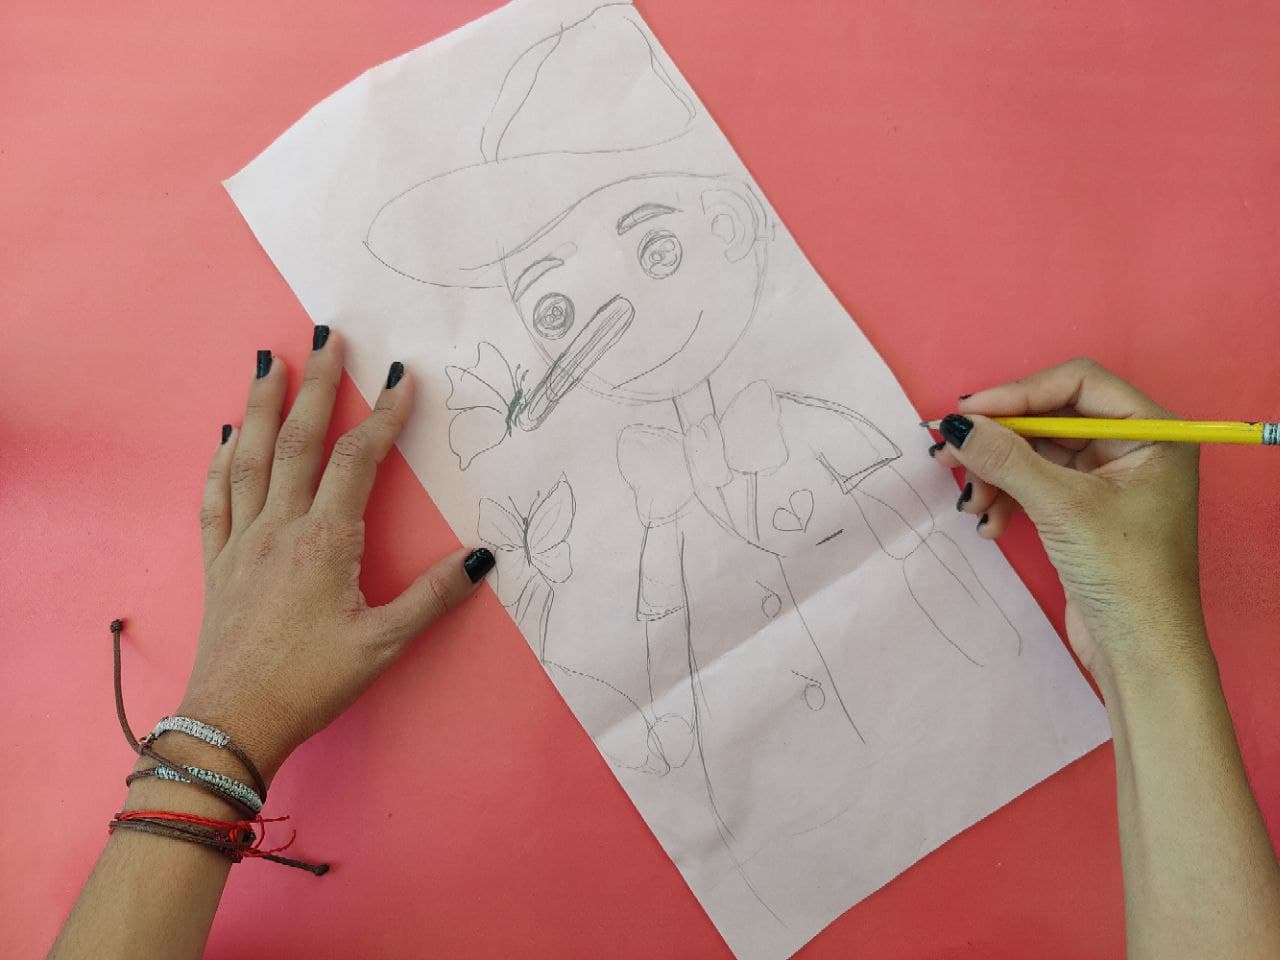
First, we draw a cute Pinocchio with a big nose and with very funny clothes, in this case, I drew him a nice hat and a very big and elegant bow.
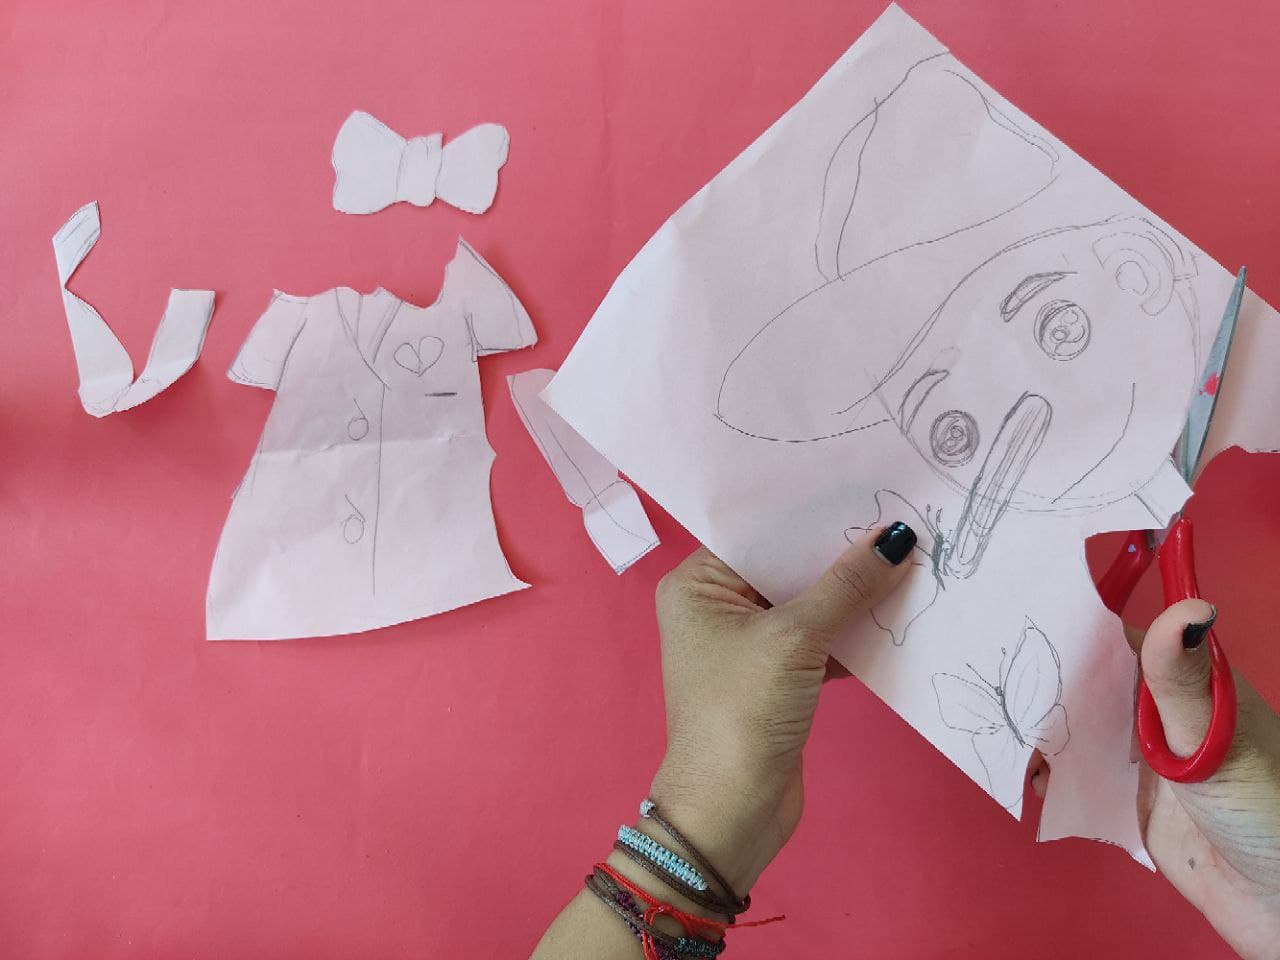
Seguidamente, recortamos nuestro dibujo separando su cabeza, sombrero, ropa, y brazos.
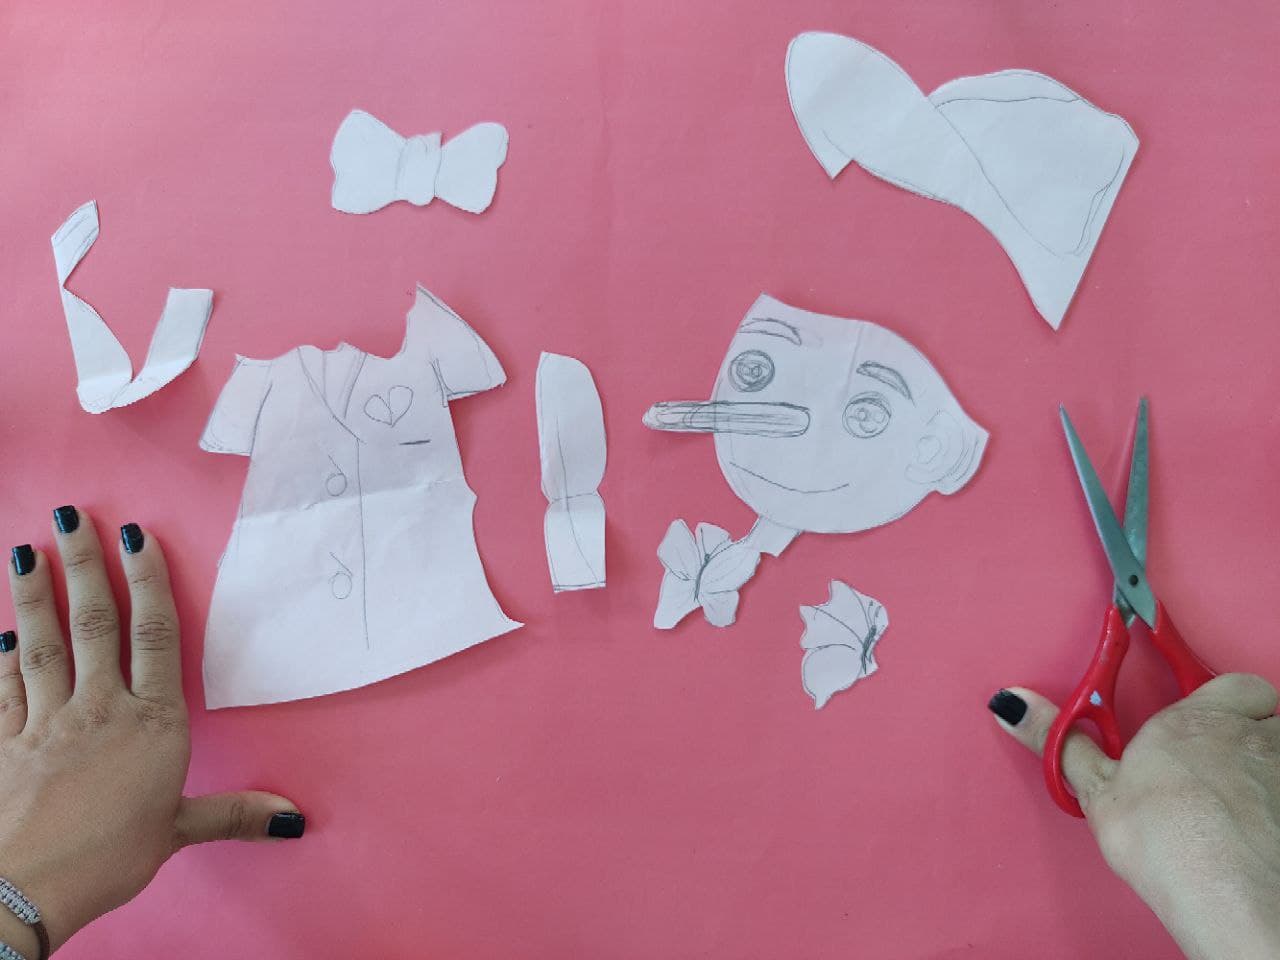
Next, we cut out our drawing separating its head, hat, clothes, and arms.
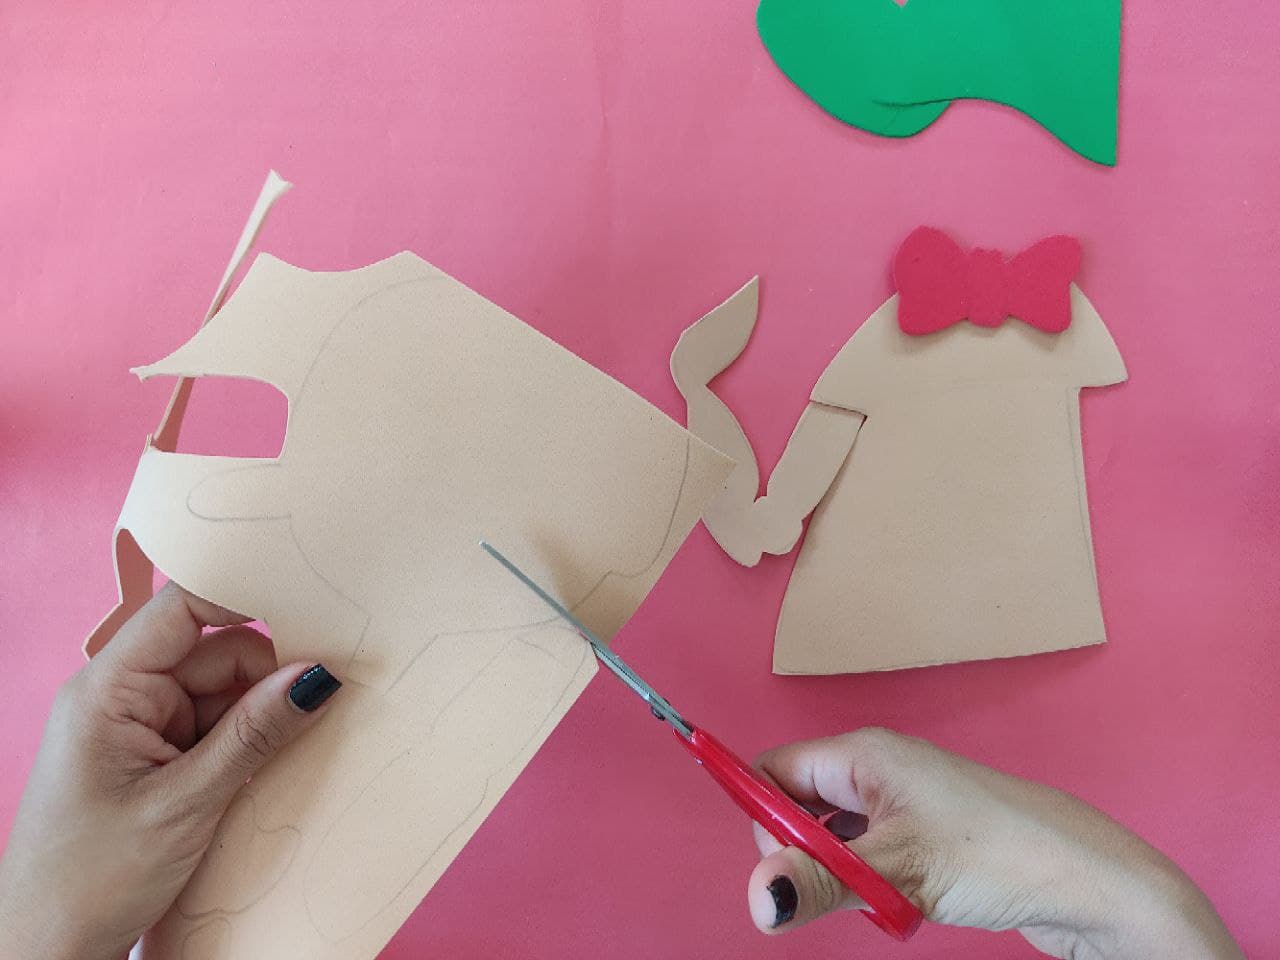
Ahora, transferimos las figuras obtenidas a los distintos foamy de acuerdo con el color que deseamos usar para estas formas, después recortamos con mucho cuidado.
Now, we transfer the figures obtained to the different foamy according to the color we want to use for these shapes, then we cut out very carefully.
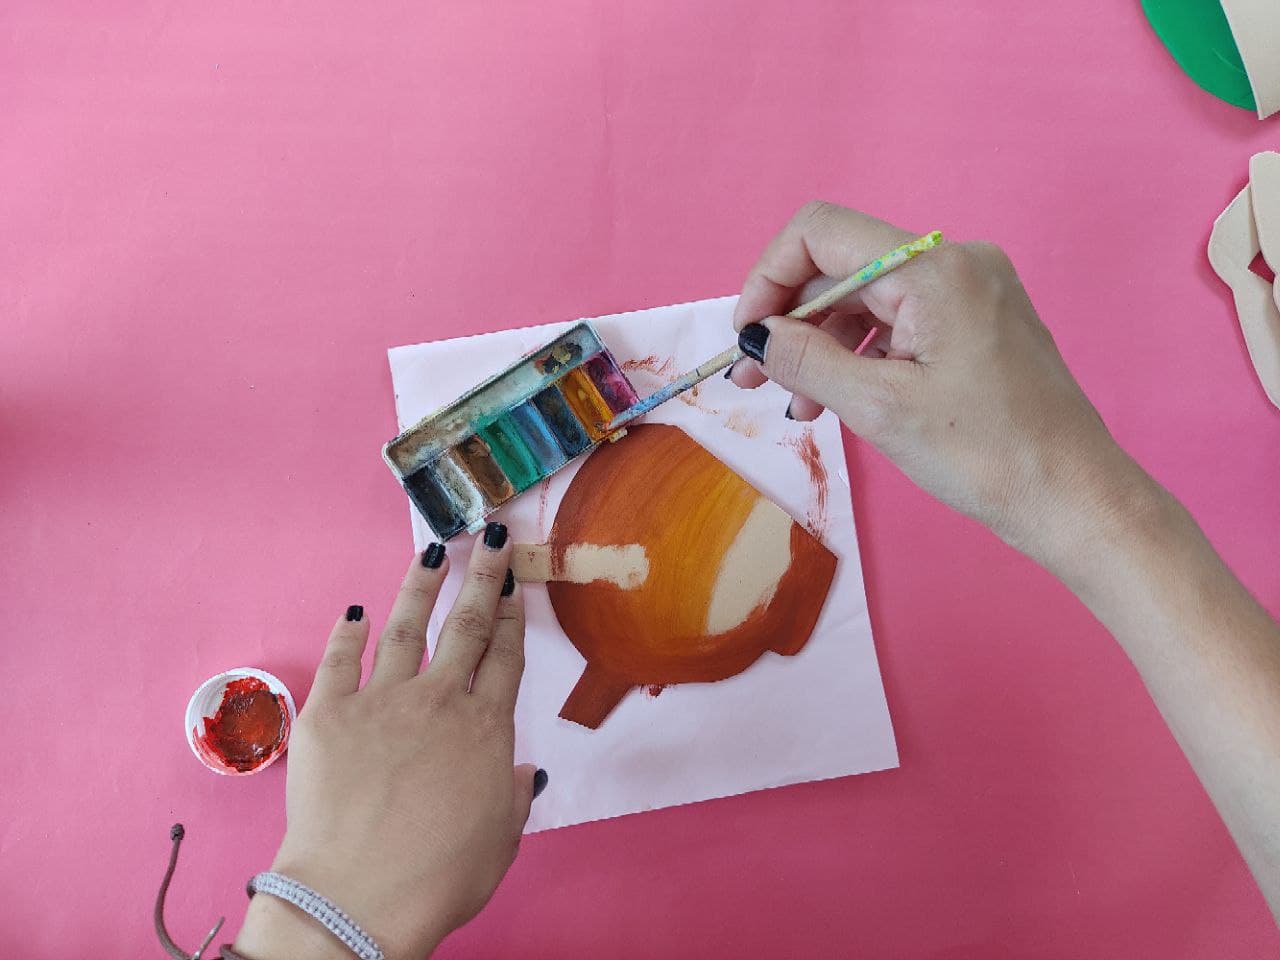
Ahora, comenzamos a pintar la cara y brazos de este lindo hombre de madera, utilizando tonos de color amarillo, naranja y marrón, de manera que su color simule al de la madera.
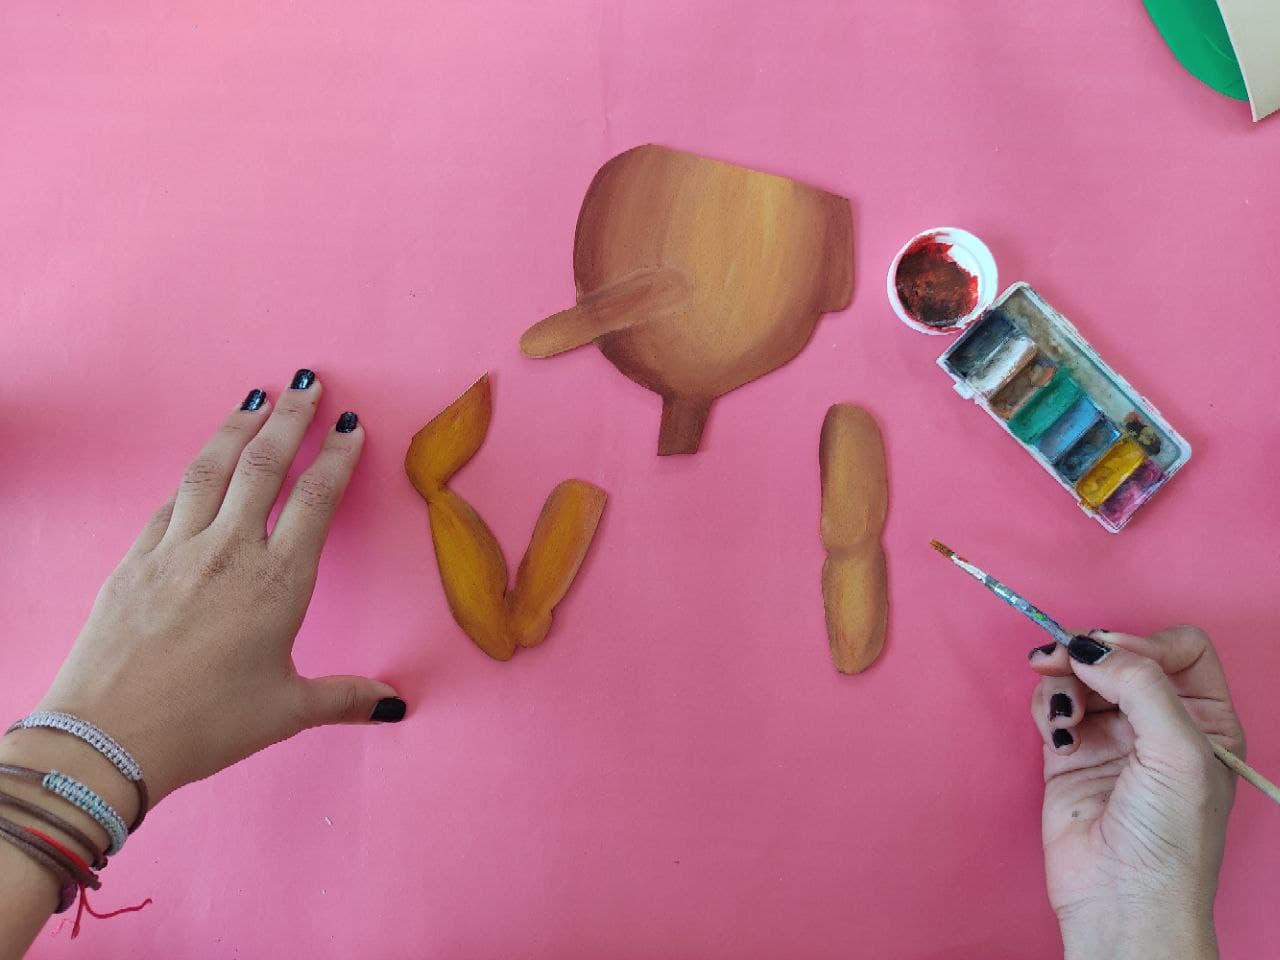
Now, we begin to paint the face and arms of this cute wooden man, using shades of yellow, orange, and brown, so that his color simulates that of wood.
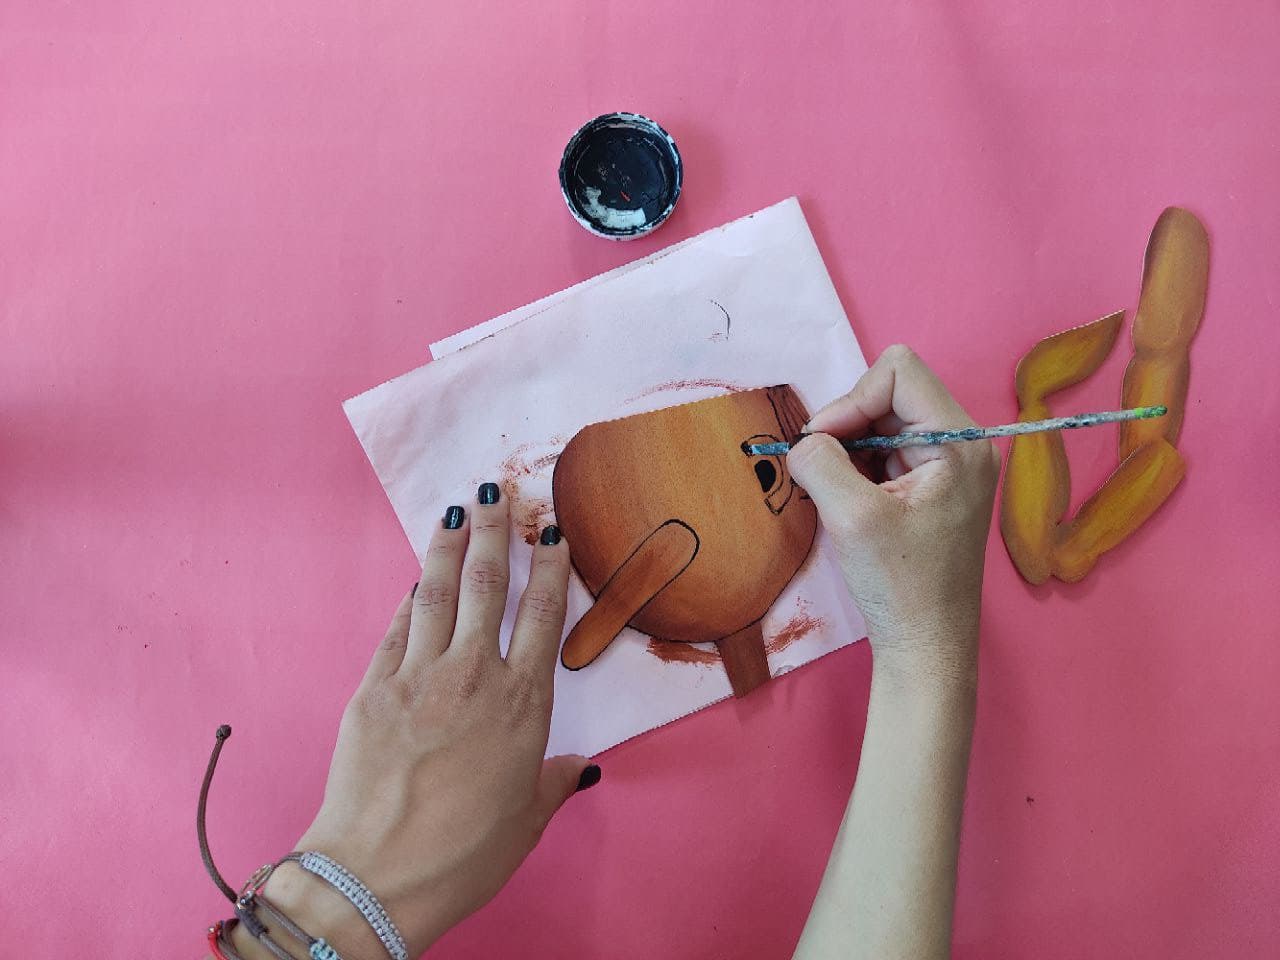
Luego, definimos todos los detalles de su cara con color negro, o marrón utilizando el pincel fino, y no olvidemos la nariz tan peculiar de pinocho.
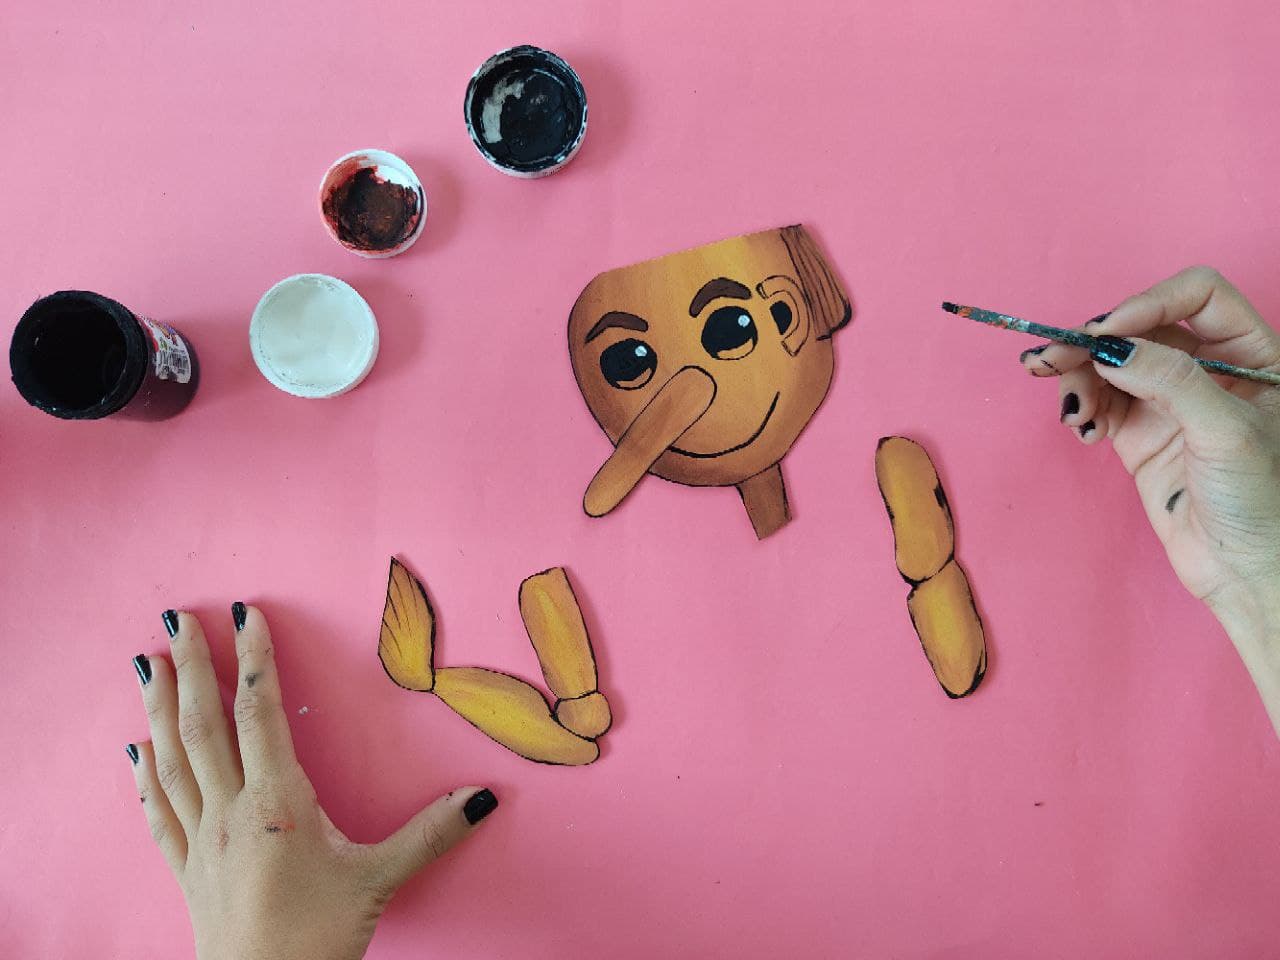
Then, we define all the details of his face with black or brown using the fine brush, and let's not forget Pinocchio's peculiar nose.
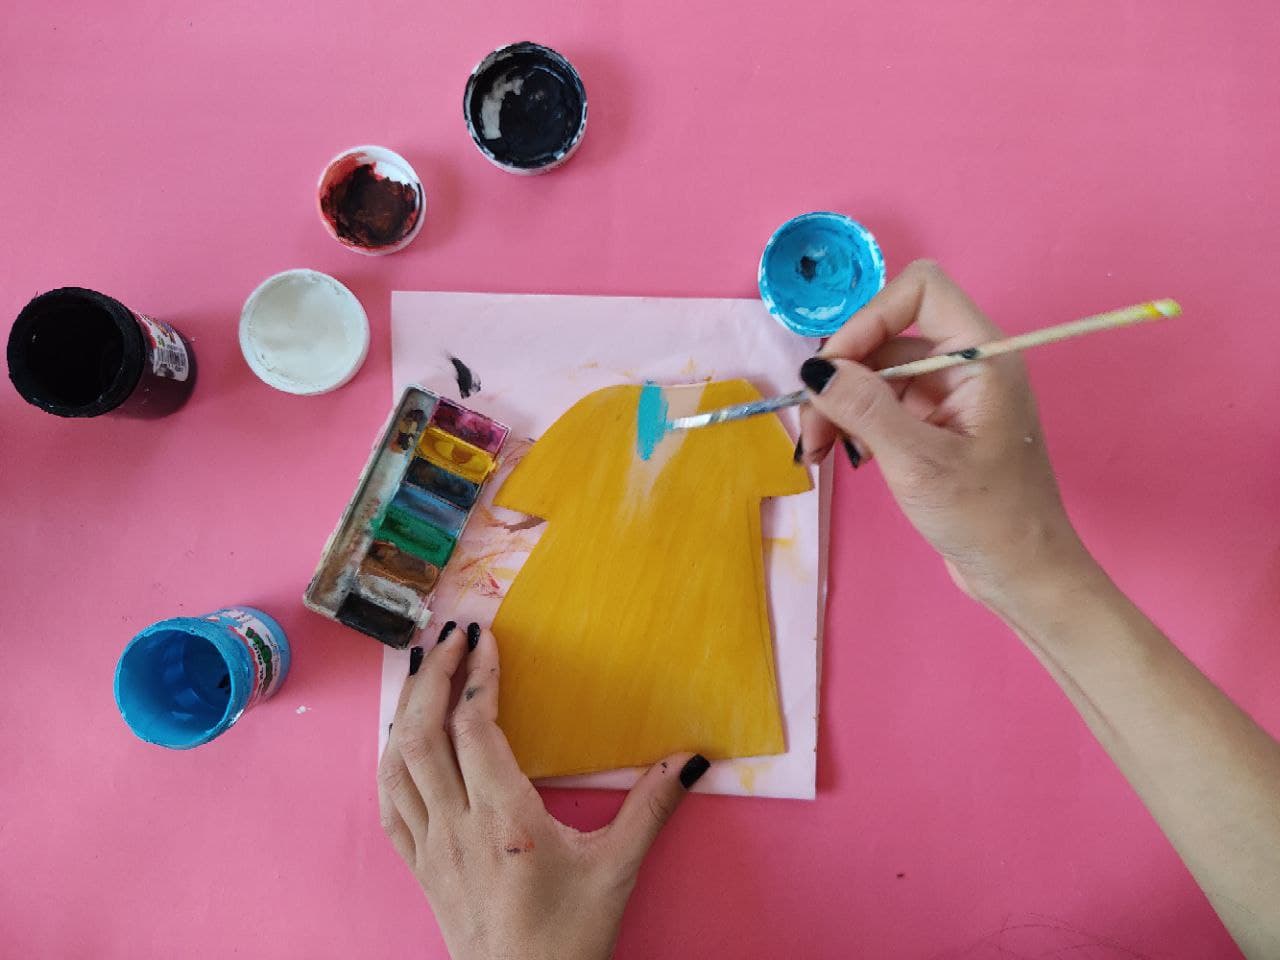
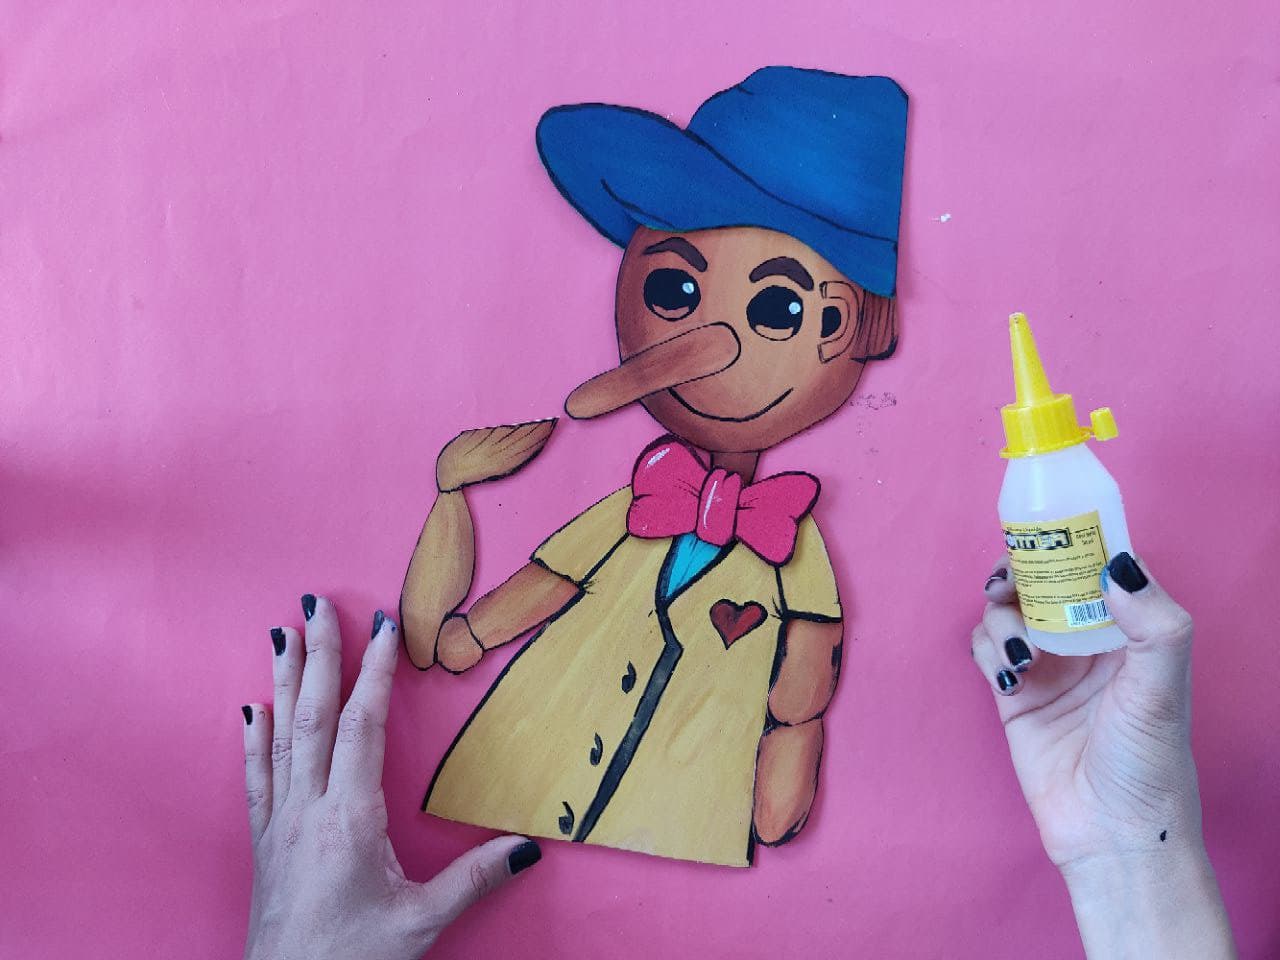
Seguidamente, pintamos la camisa de color amarillo y elaboramos una pequeña bufanda de color azul. Luego, pintamos los bordes de color negro, también opte por pintar un lindo corazón rojo decorativo.
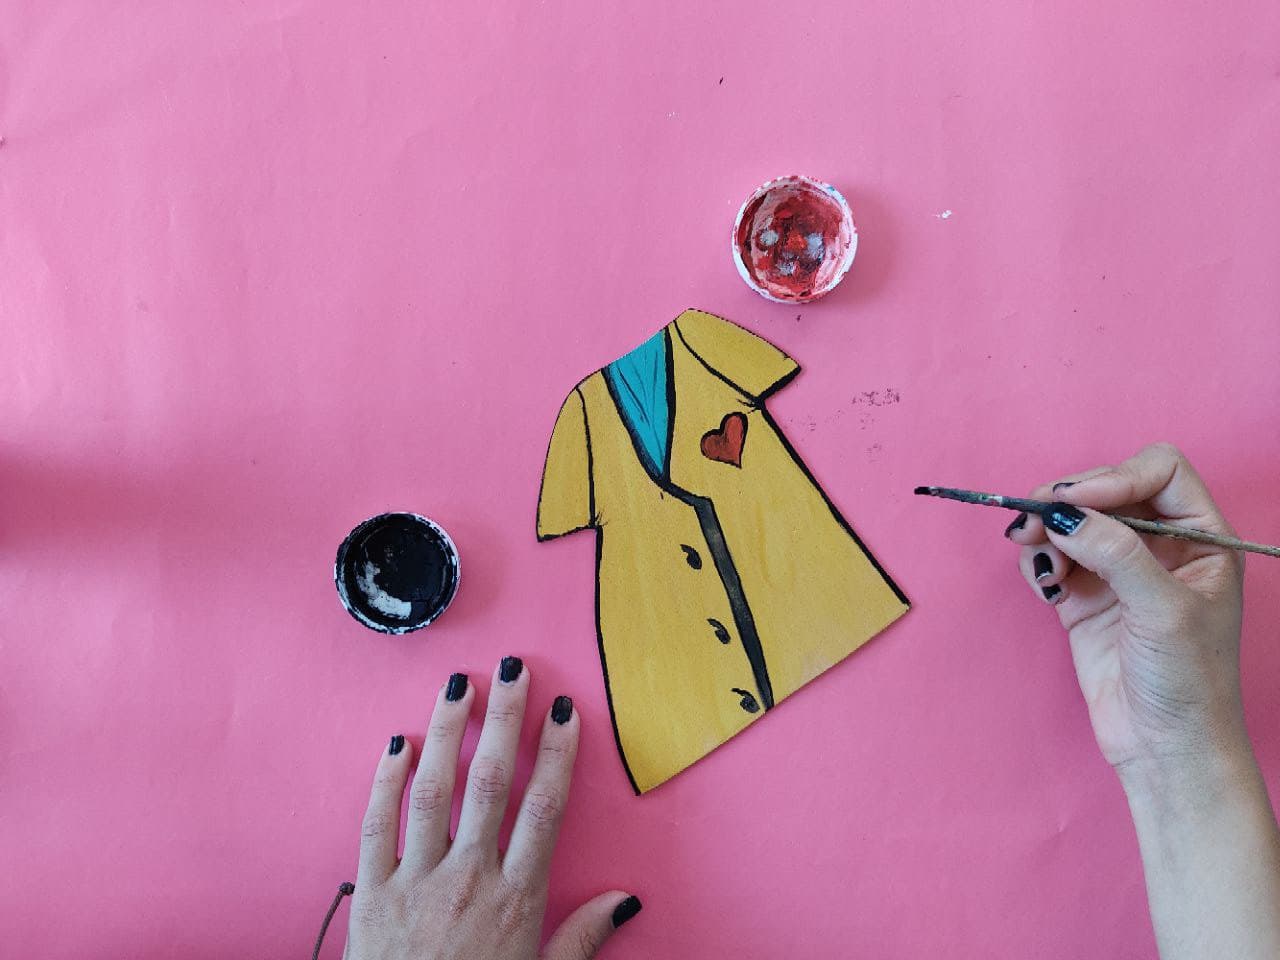
Next, we paint the shirt yellow and make a small blue scarf. Then we paint the edges black, I also chose to paint a cute decorative red heart.
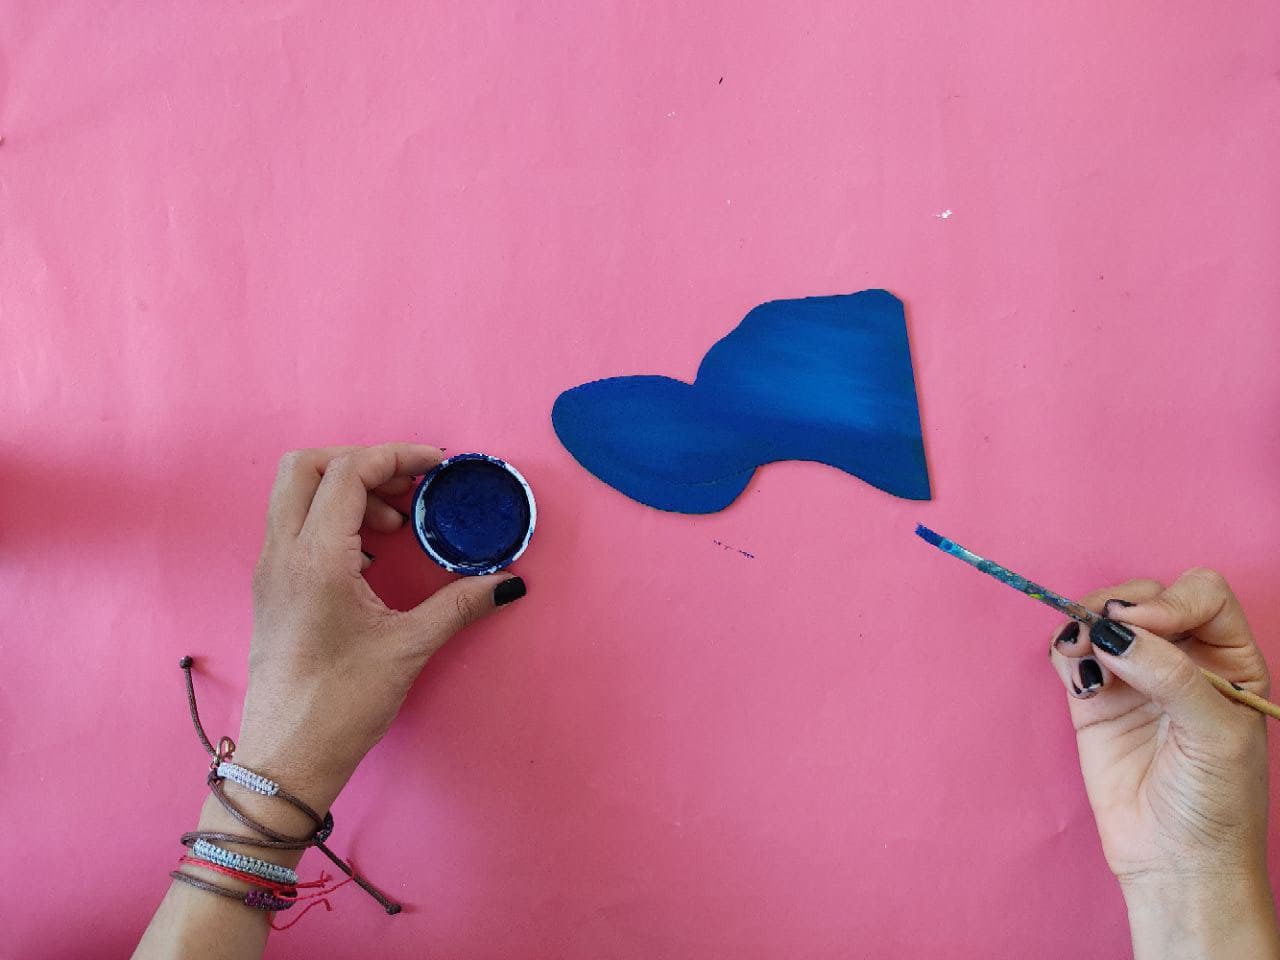
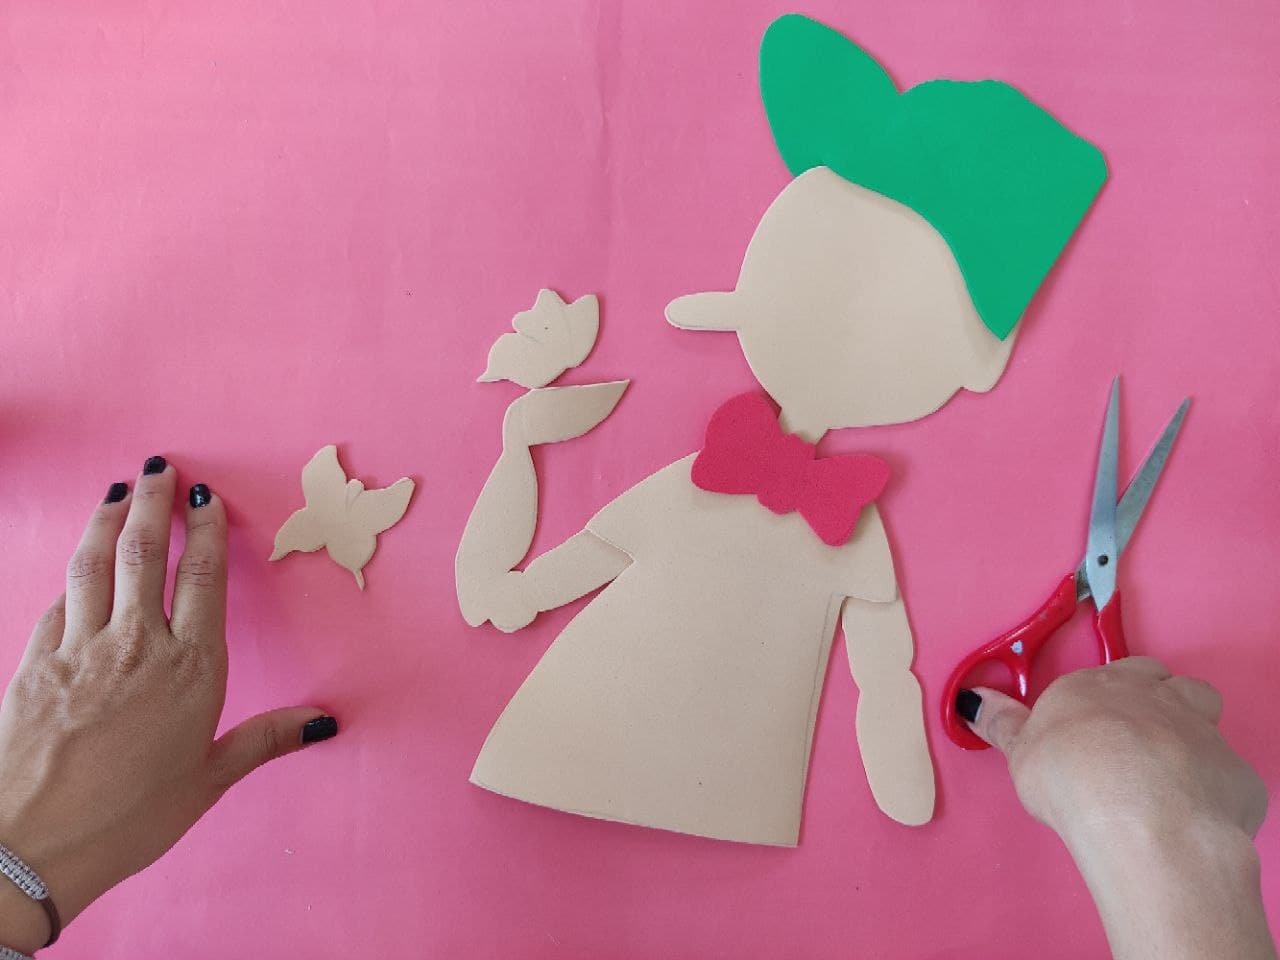
Luego, pintamos el sombrero de color azul marino muy intenso, sin olvidar marcar sus bordes de negro.
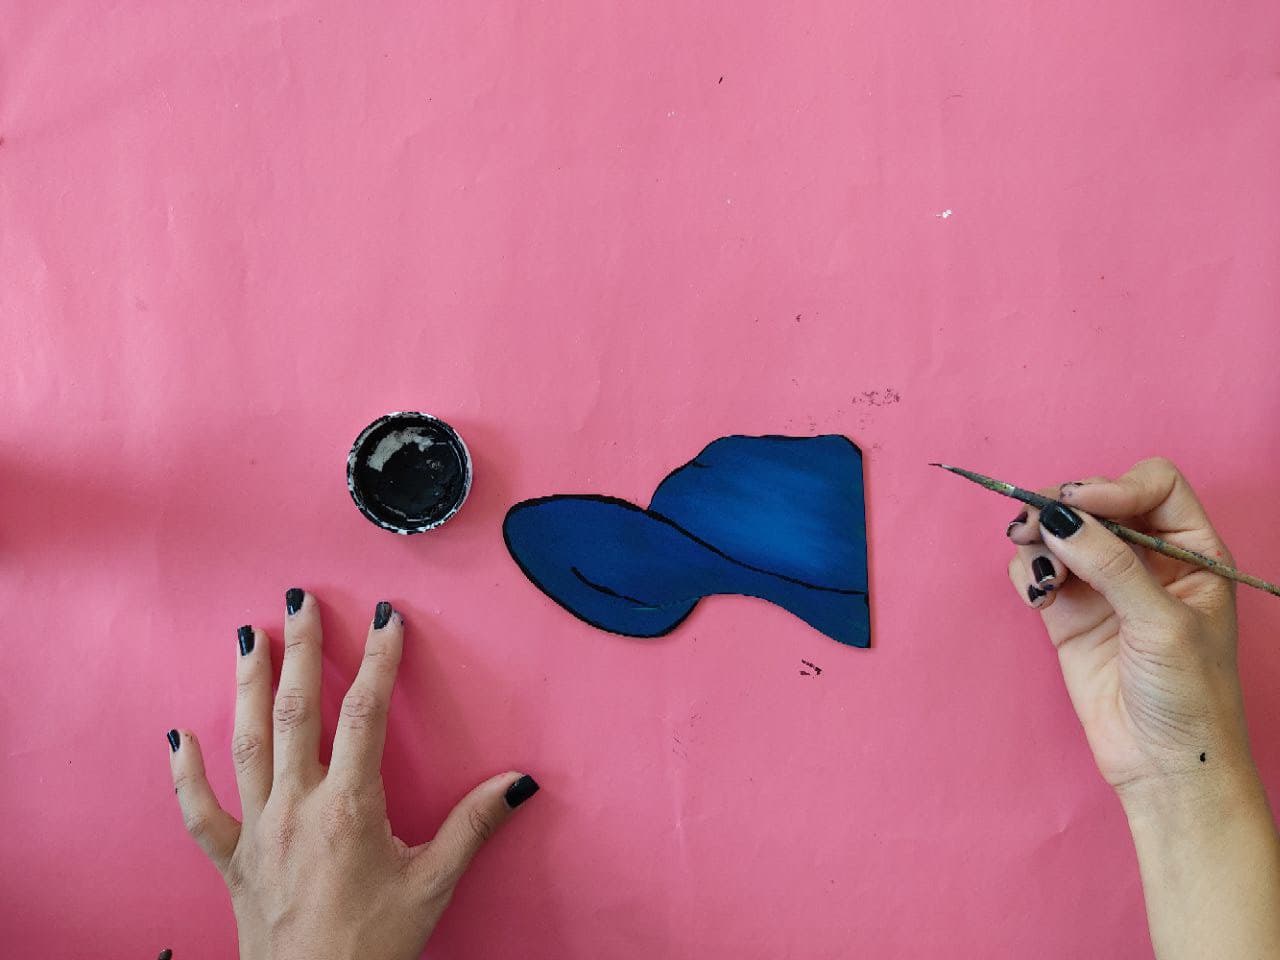
Then, we paint the hat in a very intense navy blue, without forgetting to mark its edges in black.
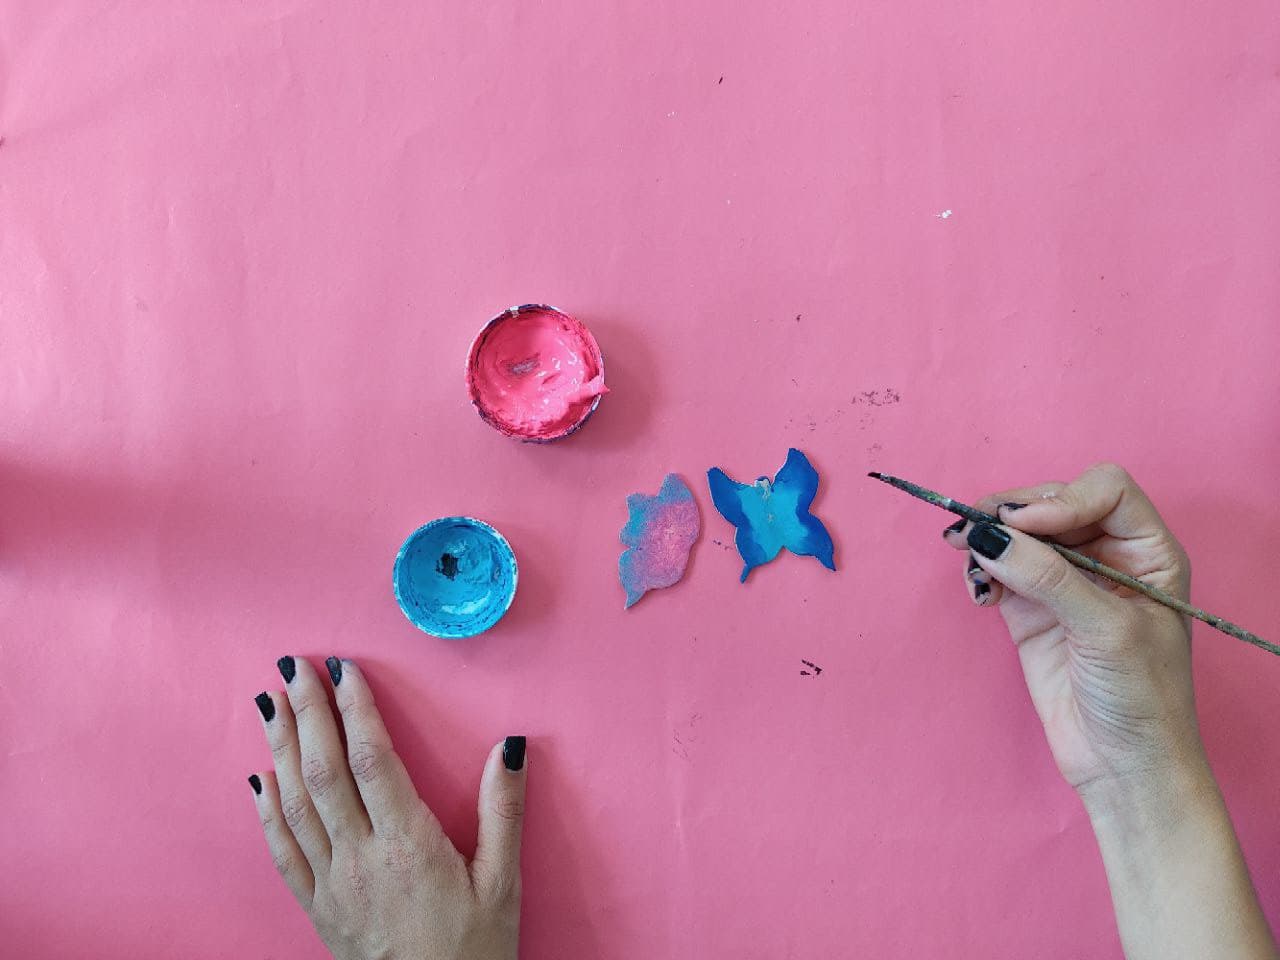
Ahora, fabricamos unas coloridas y pequeñas mariposas, está vez opte por elaborar contrastes hermosos con color fucsia, azul y lila. Y pintamos los bordes y detalles en color negro.

Now, we make some colorful and small butterflies, this time I chose to make beautiful contrasts with fuchsia, blue, and lilac. And we paint the edges and details in black.
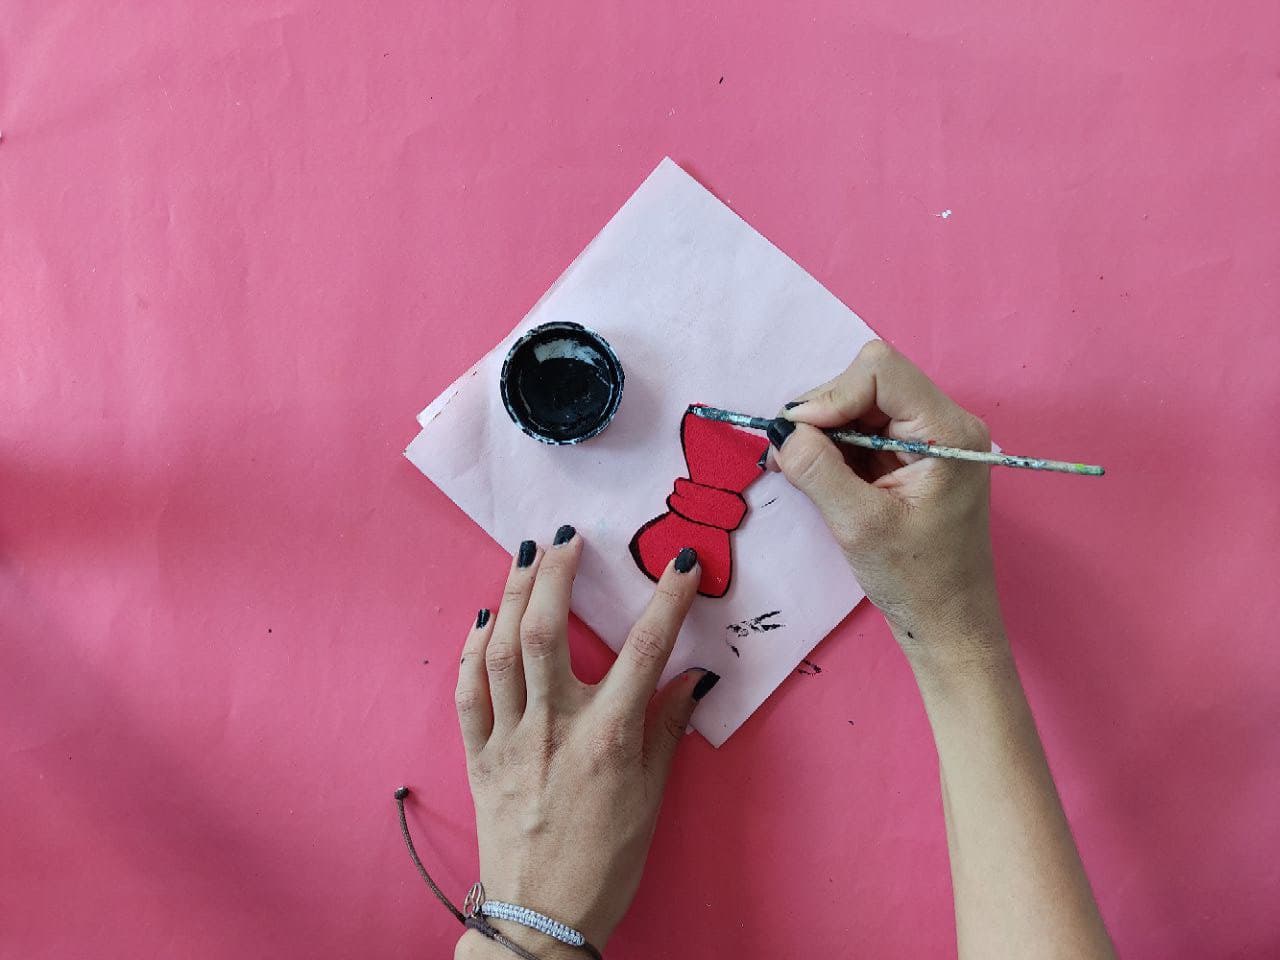
También, elaboramos una linda corbata en forma de lazo y de color rojo muy hermoso para decorar este elegante pinocho.
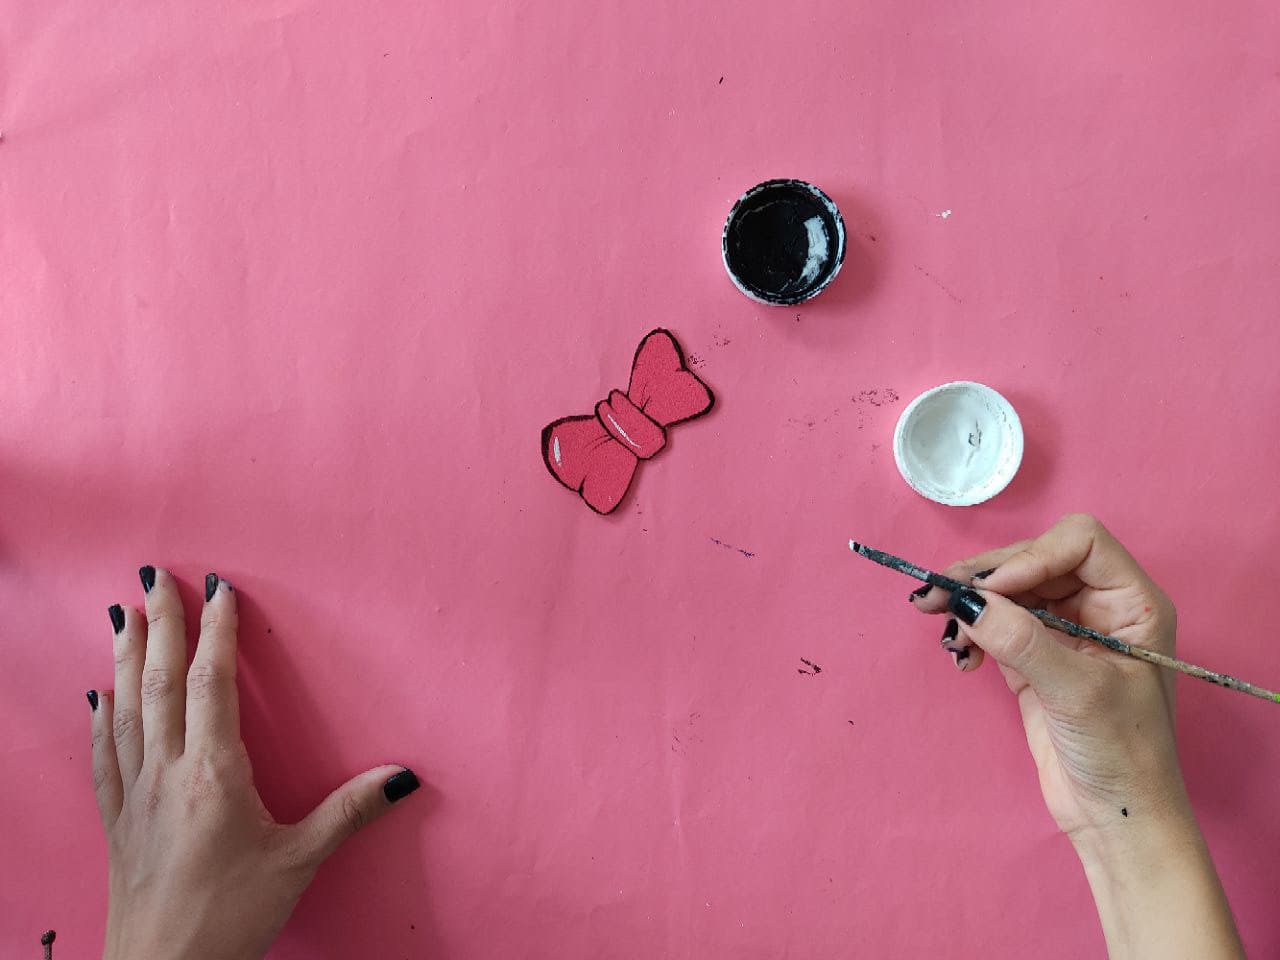
Also, we made a cute bow tie in a very beautiful red color to decorate this elegant Pinocchio.
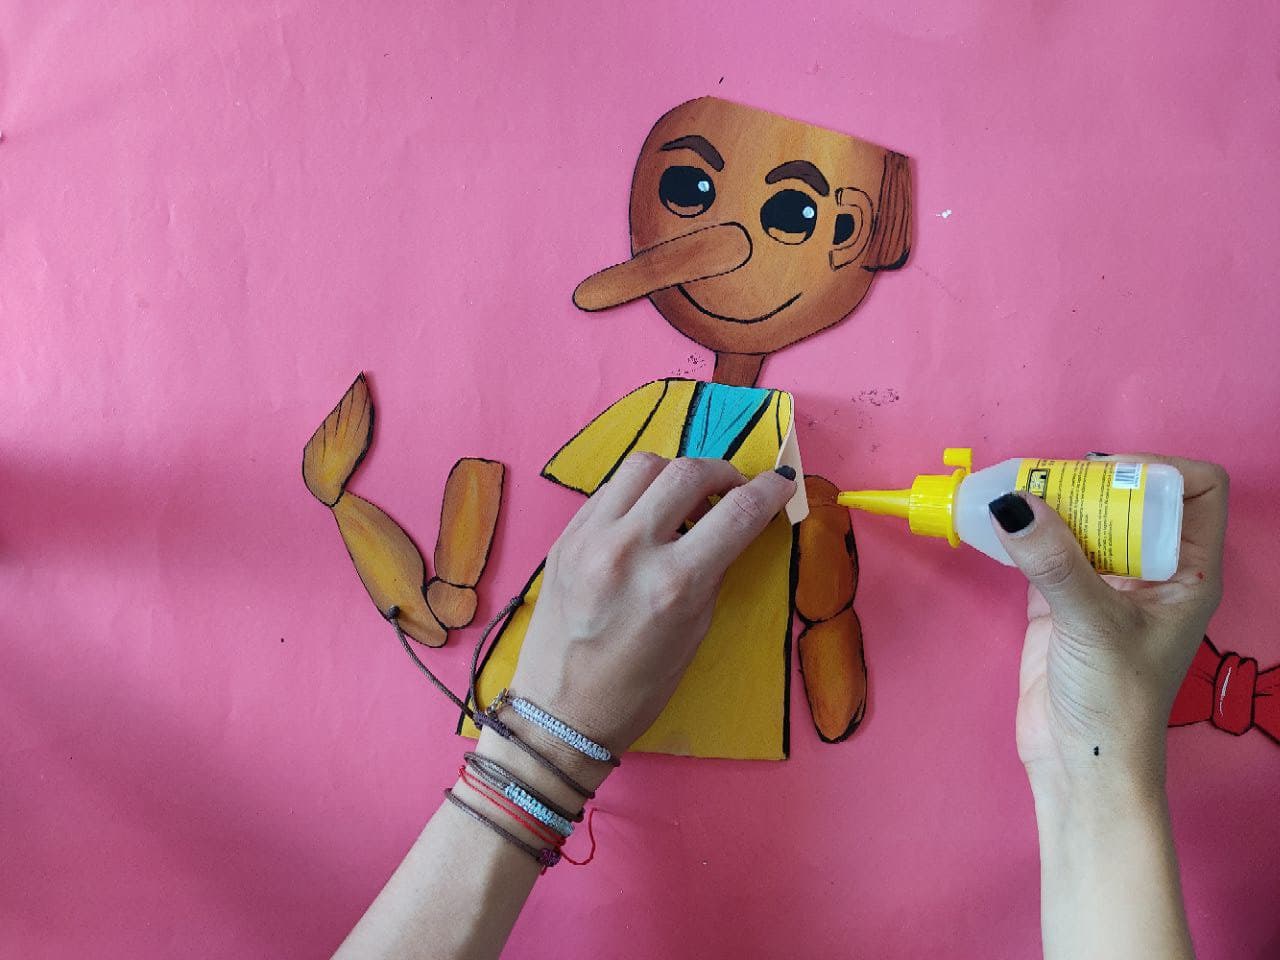
Ahora, armamos a pinocho pegando cada parte en el lugar adecuando, asegurándonos que todo quede muy bien pegado.
Now, we assemble Pinocchio by gluing each part in the appropriate place, making sure that everything is very well glued.

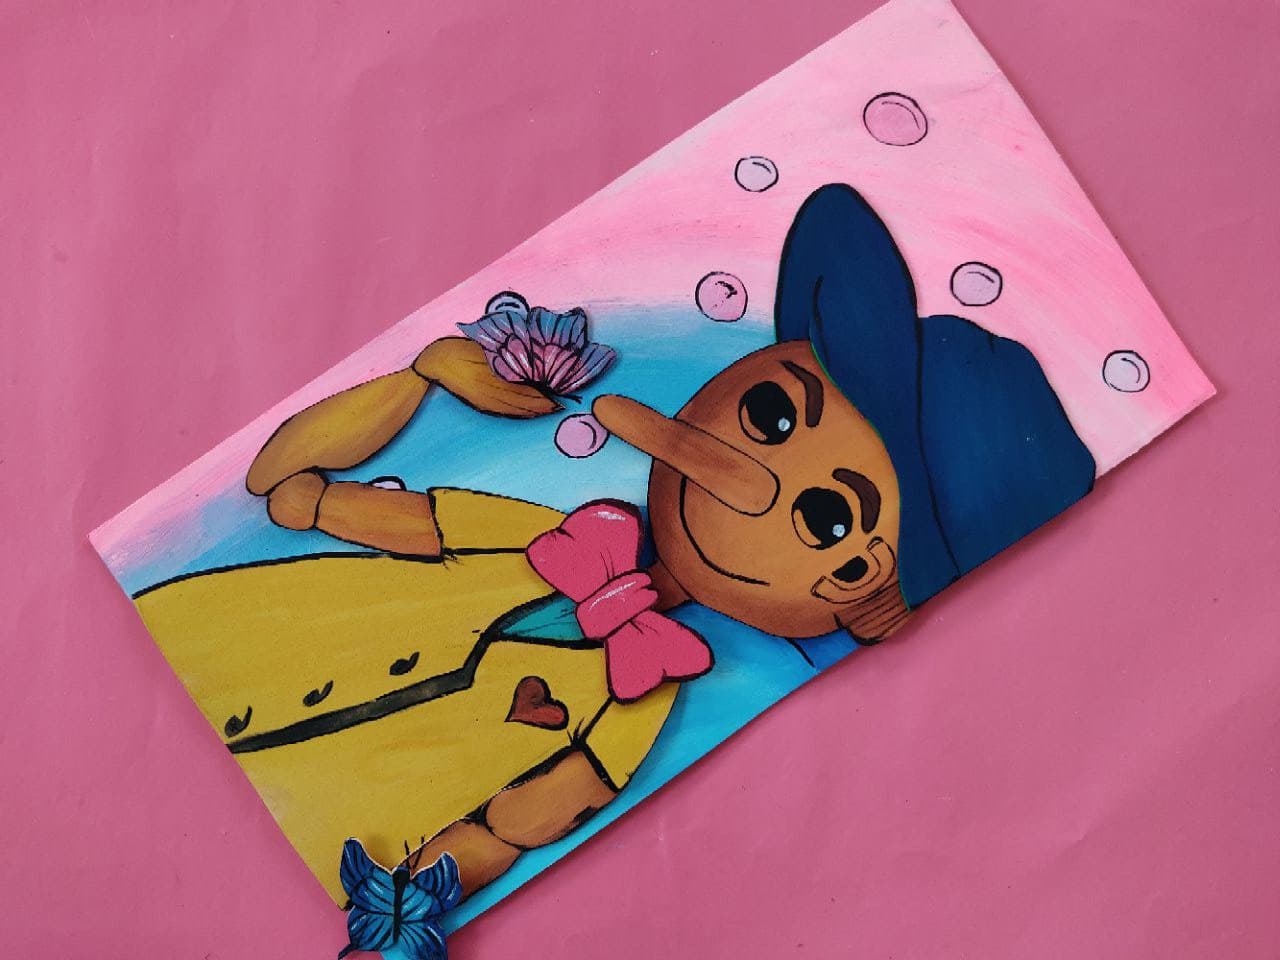
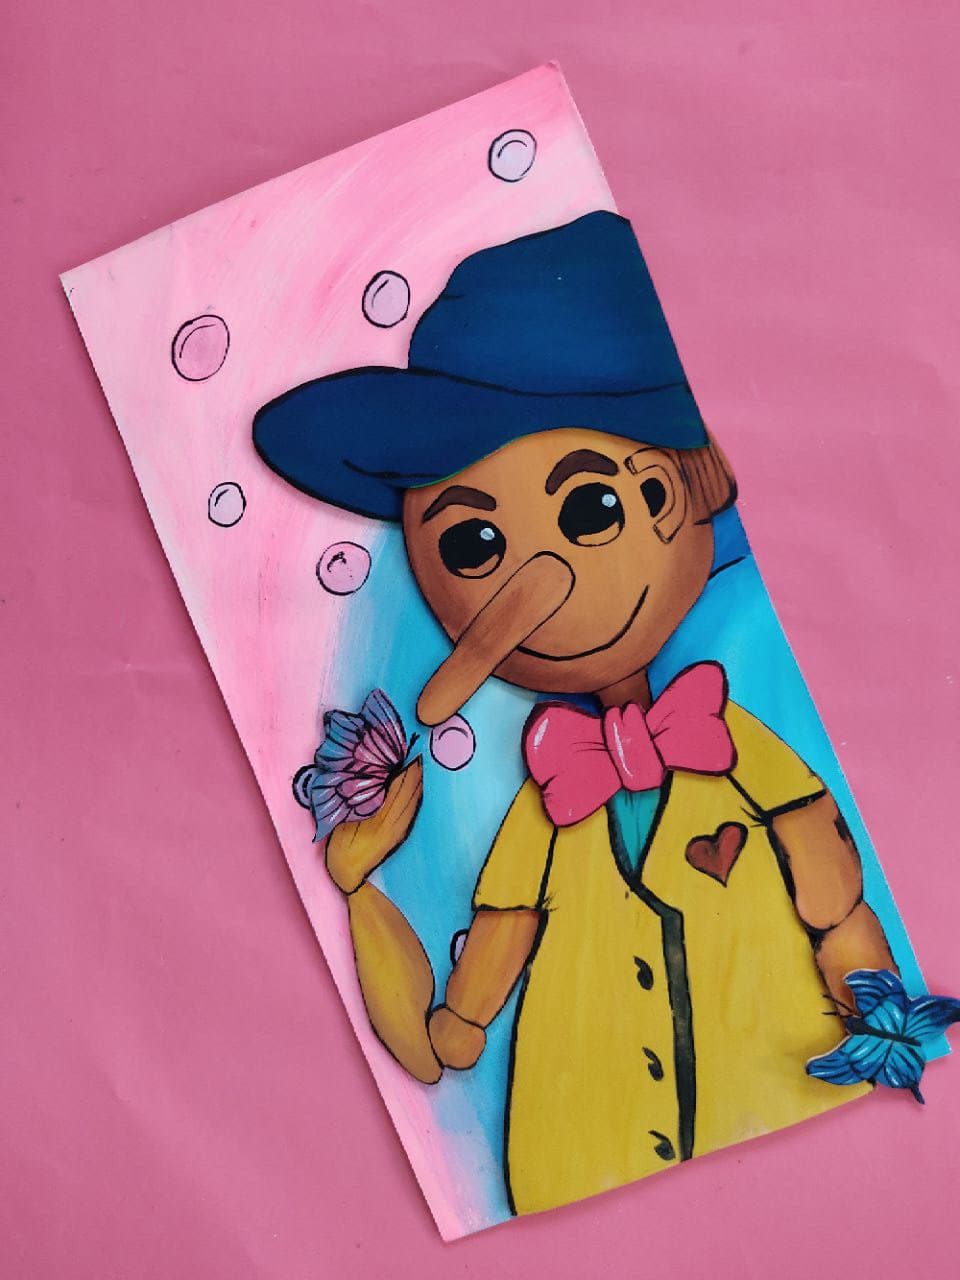
Seguidamente, fabricamos una base de cartón 30cm por 20cm y la pintamos de hermosos colores en forma de arcoíris, y elaboramos algunas burbujas para decorar. Luego, marcamos los bordes de las burbujas de esta linda base con el pincel de punta fina.
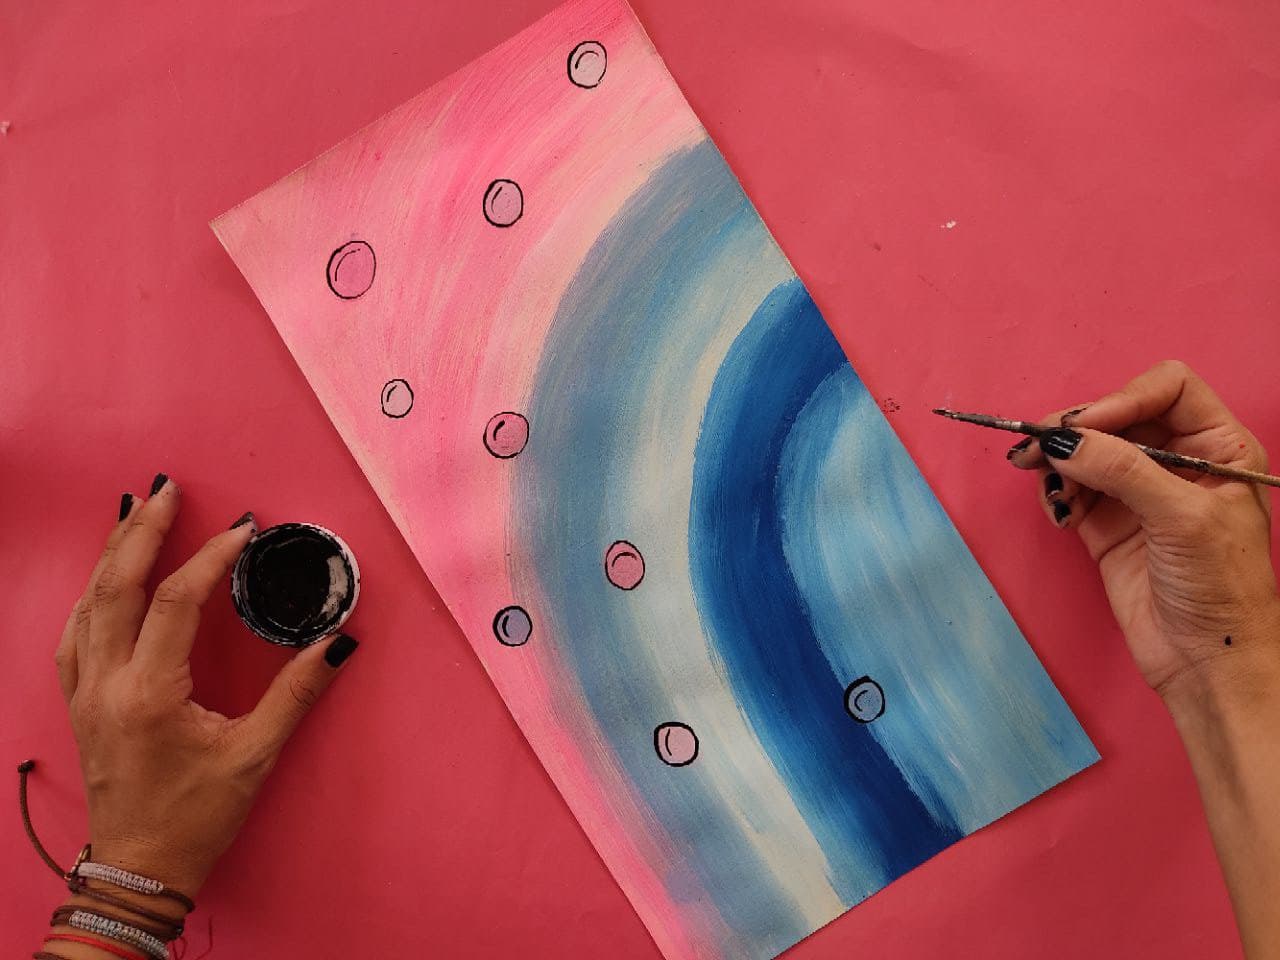
Next, we make a 30cm by 20cm cardboard base and paint it in beautiful colors in the shape of a rainbow, and make some bubbles to decorate. Then we mark the edges of the bubbles on this cute base with the fine tip brush.
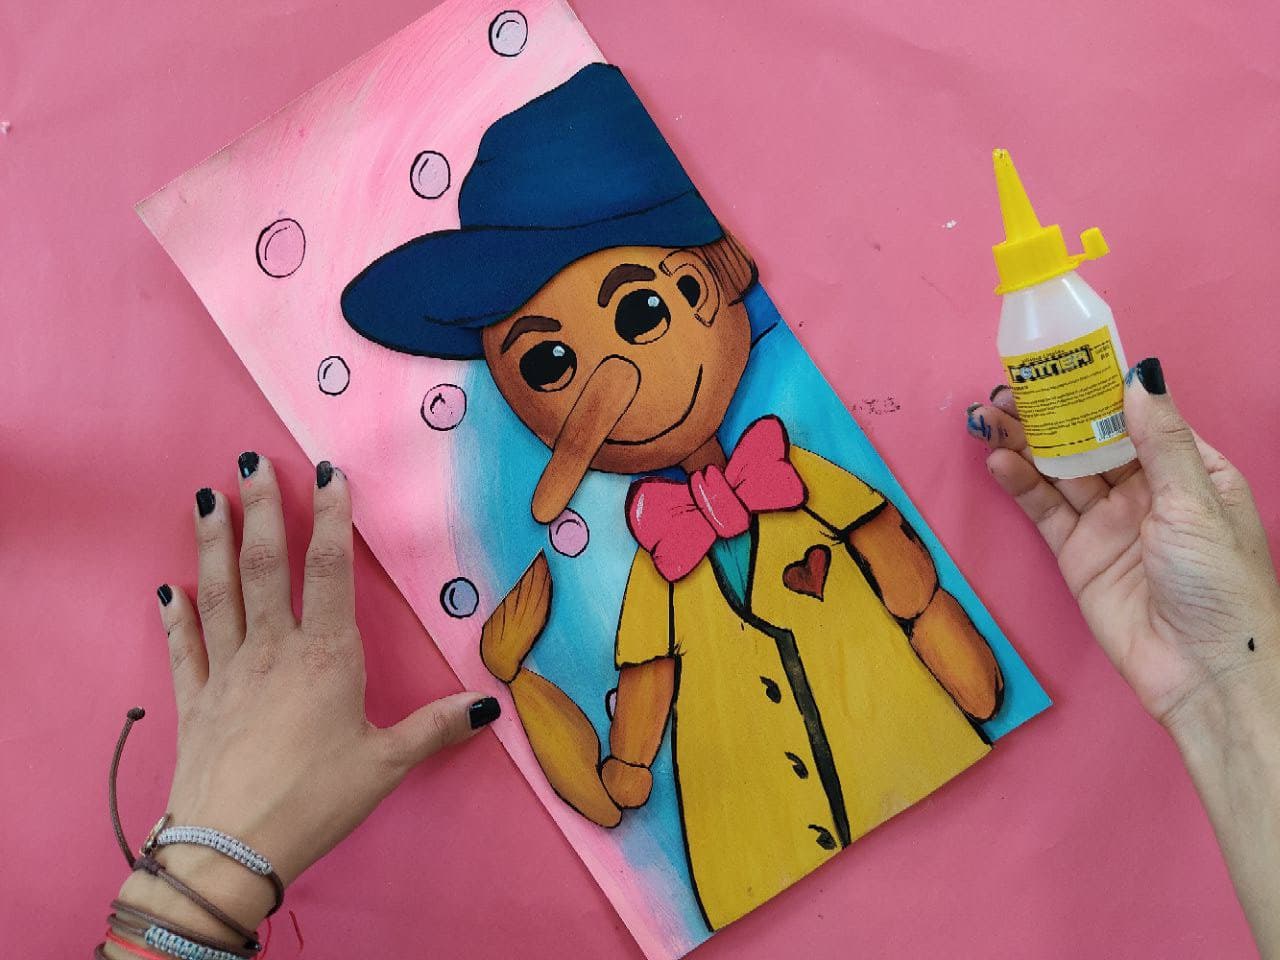
Ahora, pegamos al niño de madera sobre la base que hemos pintado, y pegamos las mariposas ubicando una sobre su mano, y otra por la parte inferior del cuadro.
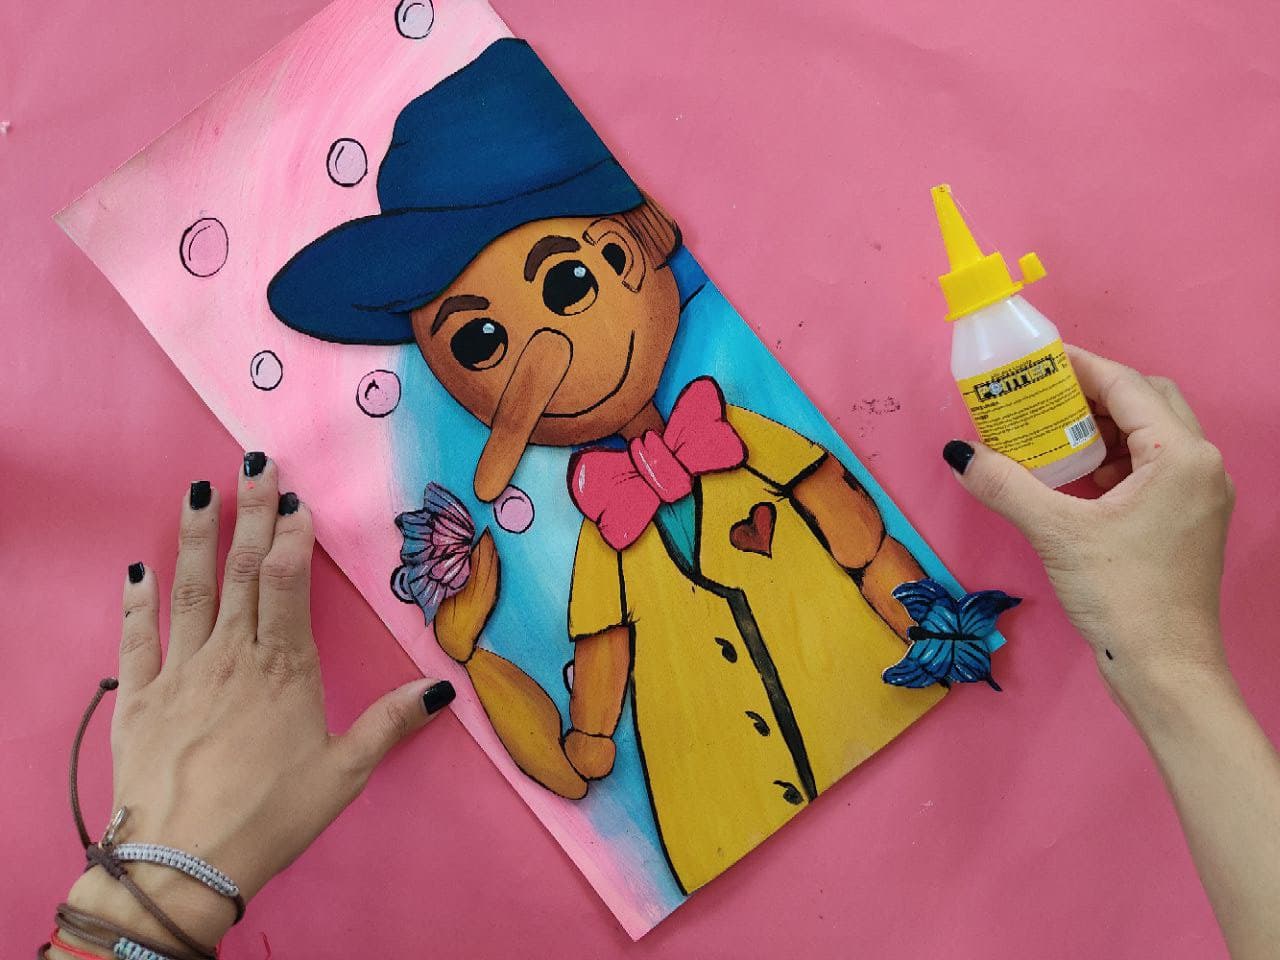
Now, we glue the wooden child on the base that we have painted, and we glue the butterflies placing one on his hand, and another on the bottom of the painting.
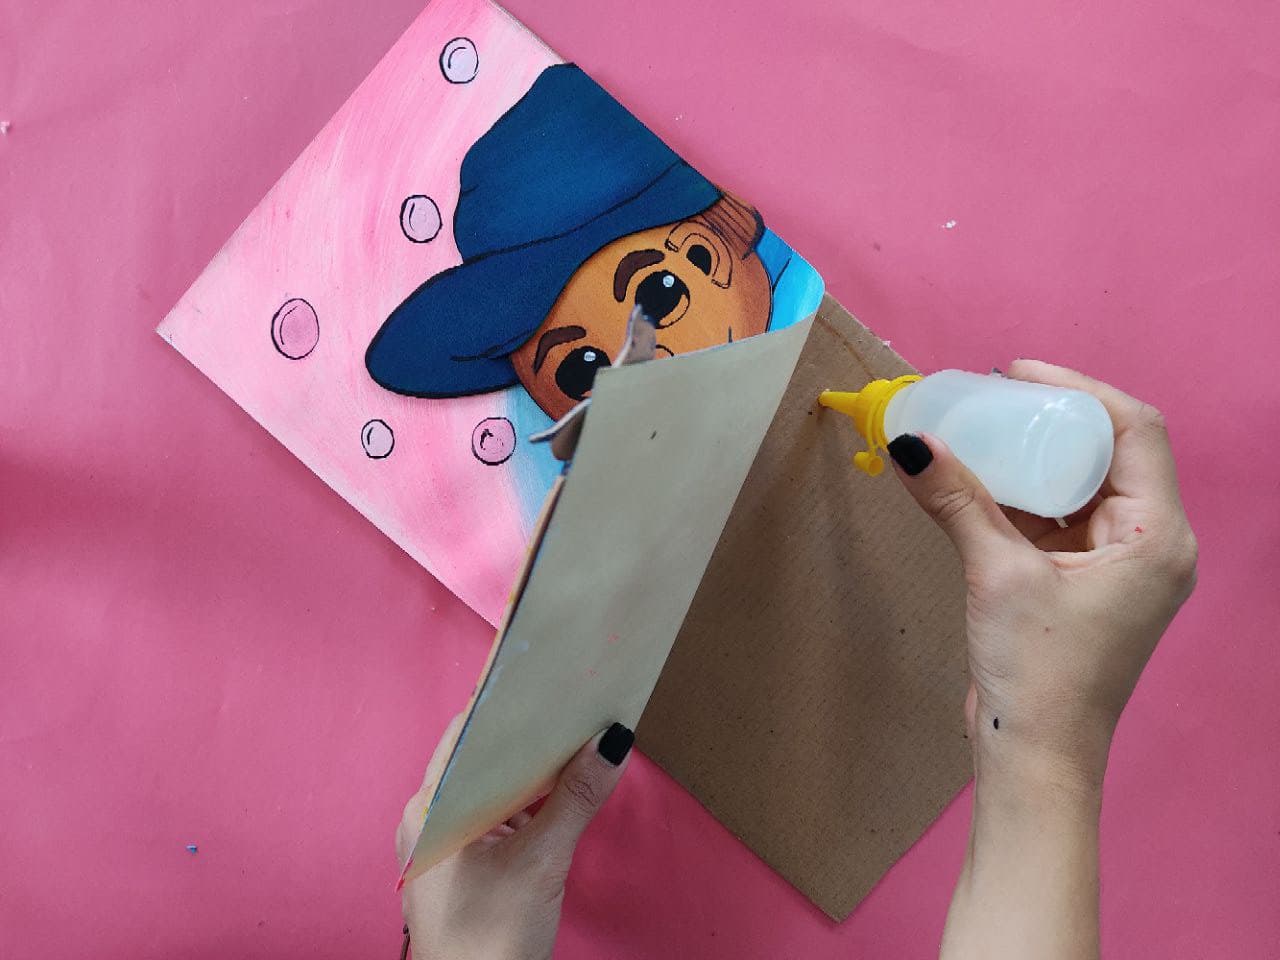
Finalmente, pegamos nuestro lindo cuadro sobre una base de cartón más gruesa para darle a esta linda obra más firmeza.
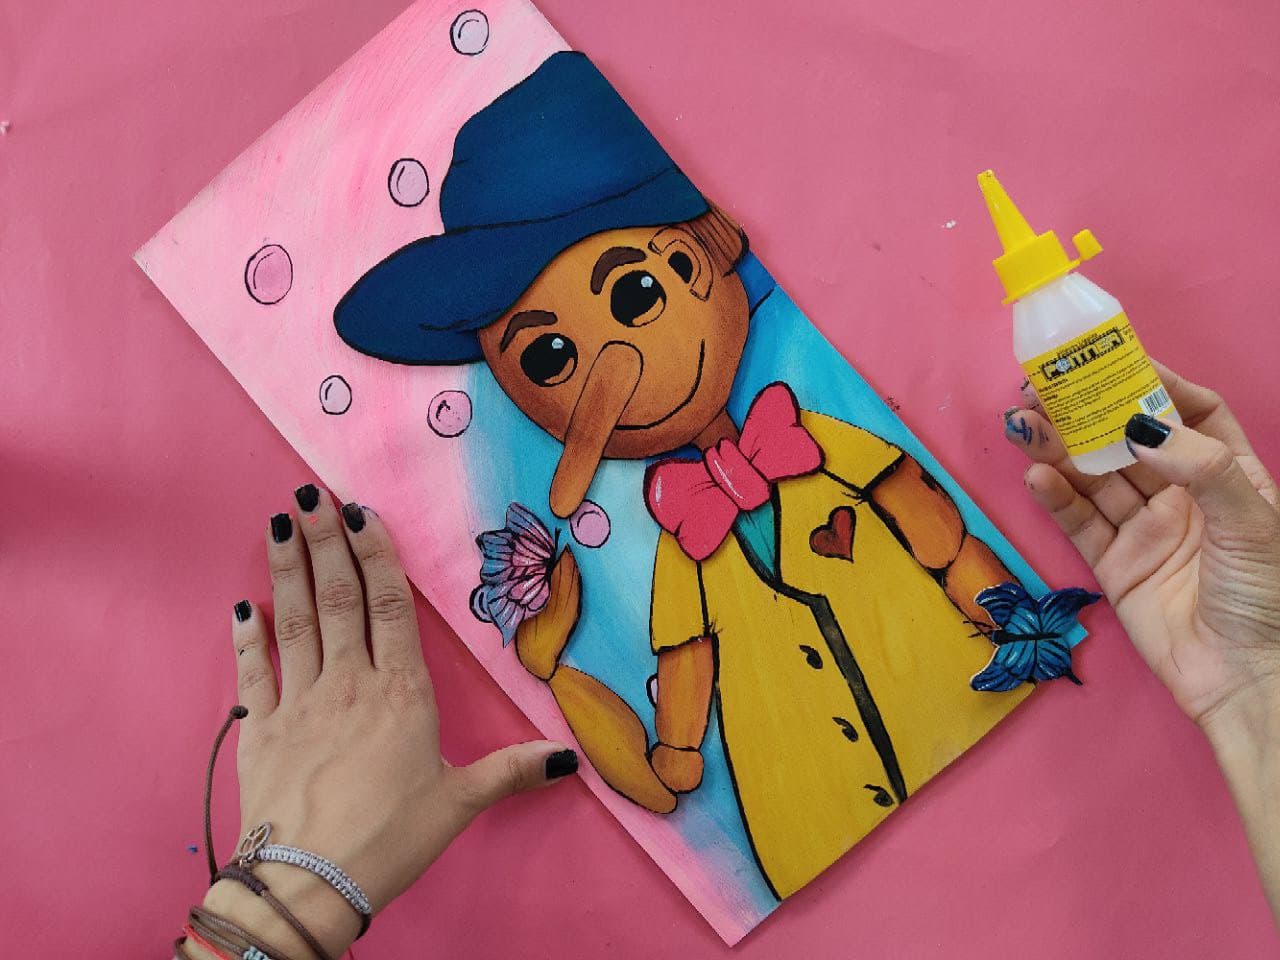
Finally, we glued our cute painting on a thicker cardboard base to give this beautiful piece more firmness.
.jpg)
.jpg)
Gracias por acompañarme y espero que lo hayan disfrutado. ❤️
Thanks for joining and I hope you enjoyed it.❤️
.jpg)
.jpg)
.jpg)
.jpg)
.jpg)
.jpg)
.jpg)
.jpg)
.jpg)
.jpg)
.jpg)
.jpg)


my twt #posh