.jpeg)

Español
Hola hermoso HIVE ❤️ Hoy les traigo un nuevo paso a paso donde les mostrare como realizar una caja guarda lazos para nuestras niñas, realmente útil para que ellas guarden sus accesorios favoritos y así, darle un creativo orden a su habitación y lo mejor de todo es que está hecha con materiales de reciclaje, muy económicos y fáciles de conseguir, así que, no esperemos más y comencemos este año nuevo desarrollando nuestra creatividad al máximo.
English
Hello, beautiful HIVE ❤️ Today I bring you a new step by step where I will show you how to make a box keeps ties for our girls, really useful for them to keep their favorite accessories and thus, give a creative order to their room and the best of all is that it is made with Recycling materials, very cheap and easy to get, so let's not wait any longer and start this new year developing our creativity to the fullest.
¿Qué están esperando?
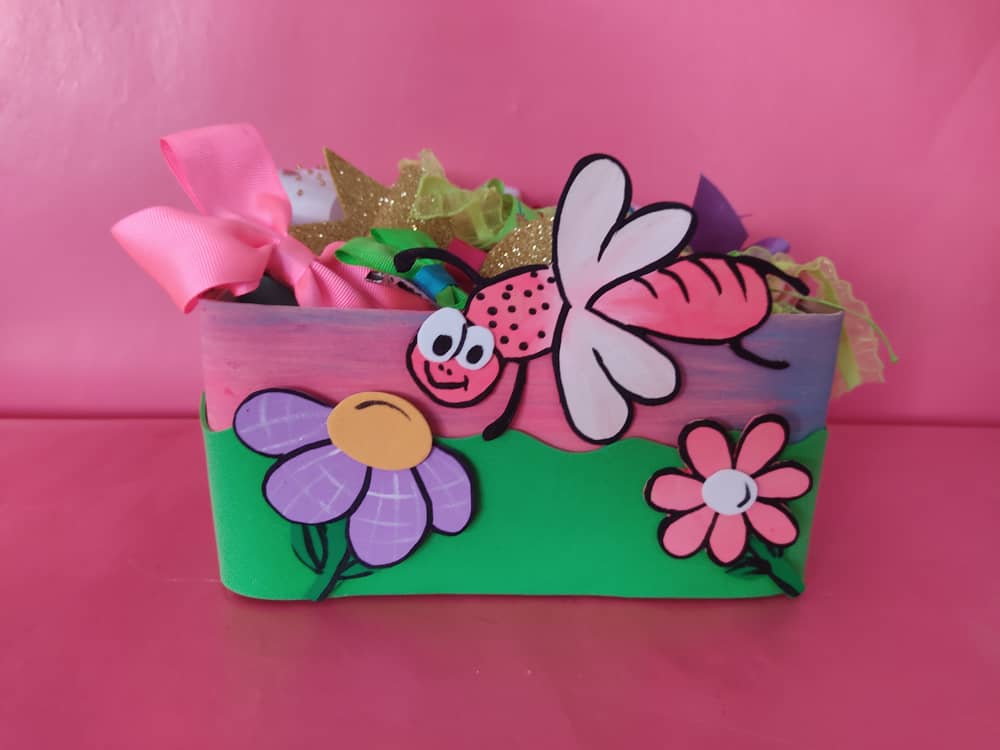
Gracias a esta útil técnica podemos realizar fácilmente nuestra propia caja guarda lazos para que nuestras niñas guarden todos sus accesorios más preciados, y así, darle un toque personal, creativo y hermoso a la decoración su habitación. Genial no? Antes de comenzar no olvidemos lavarnos nuestras manos.
What are they waiting for?
Thanks to this useful technique we can easily make our own box keeps ties so that our girls can keep all their most precious accessories, and thus, give a personal, creative and beautiful touch to decorating their room. Cool no? Before we start, let's not forget to wash our hands.
[Materiales | Materials]
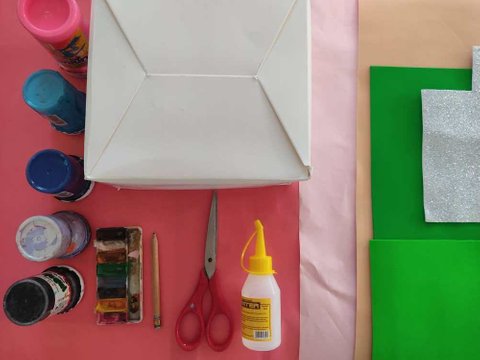
Para realizar esta linda obra necesitaremos:
- Foamy o goma eva.
- Lápiz de grafito.
- Pinturas.
- Pinceles.
- Tijera.
- Caja de cartón reciclada.
- Pegamento o silicón liquido.
To make this cute work we will need:
- Foamy or eva foam.
- Graphite pencil.
- Paintings.
- Brushes.
- Scissors.
- Recycled cardboard box.
- Glue or liquid silicone.
Procedimiento (paso a paso)
Process (step by step)
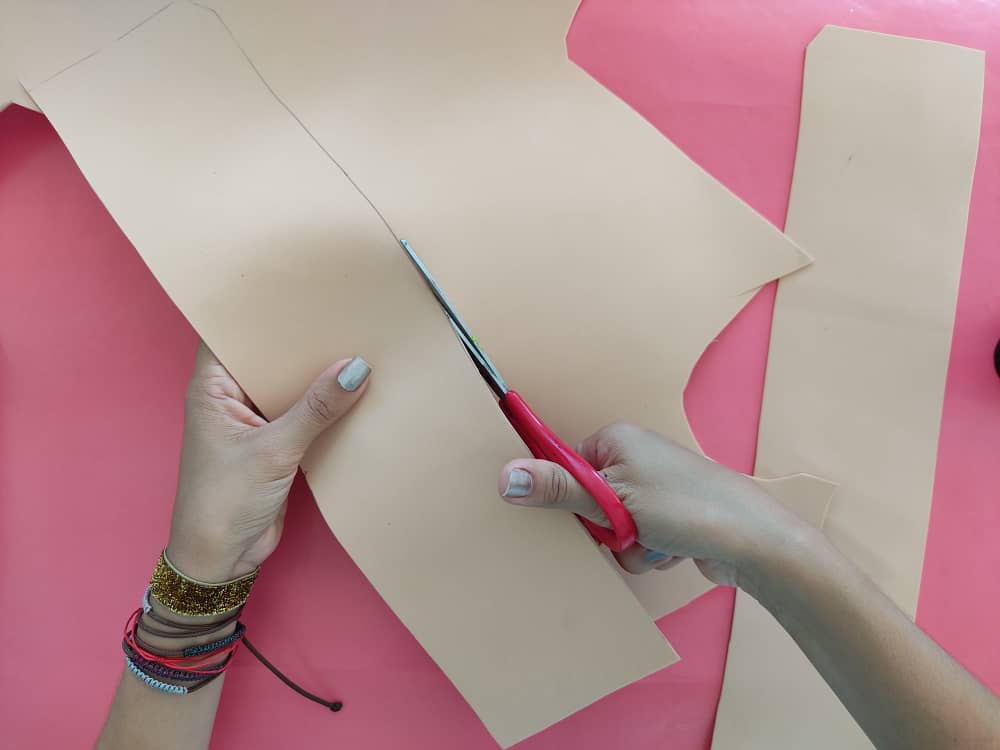
Primero, elaboramos dos tiras de 7cm por 20cm, utilizando la regla para que queden bien rectas, y así forrar nuestra caja de manera Perfecta.
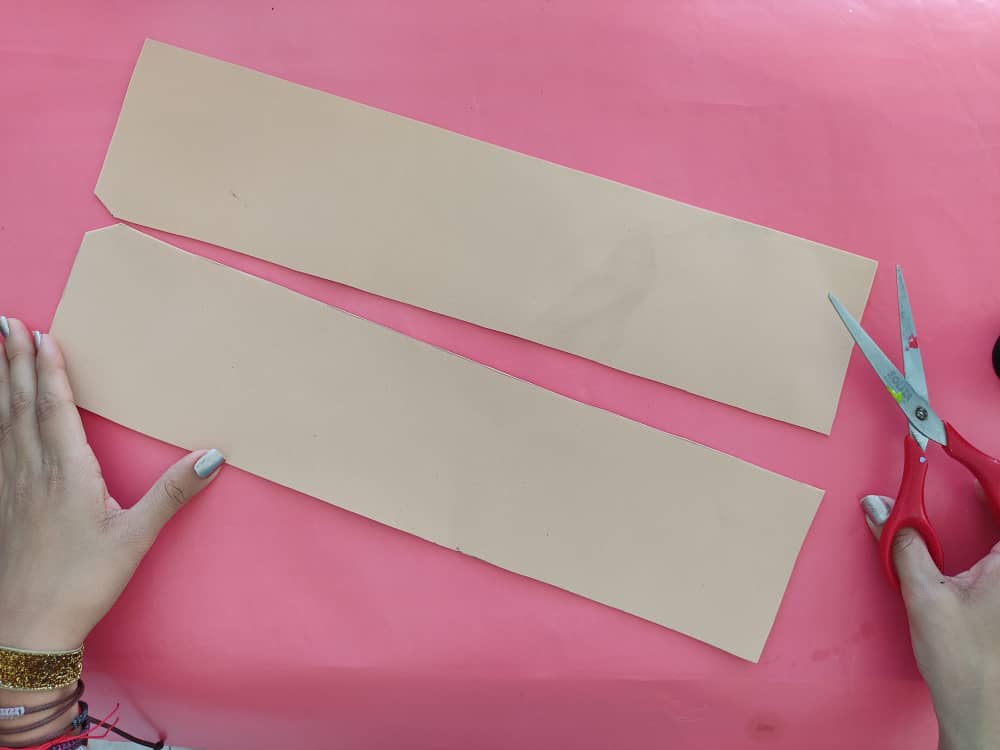
First, we make two strips of 7cm by 20cm, using the ruler to make them straight, and thus line our box in a Perfect way.
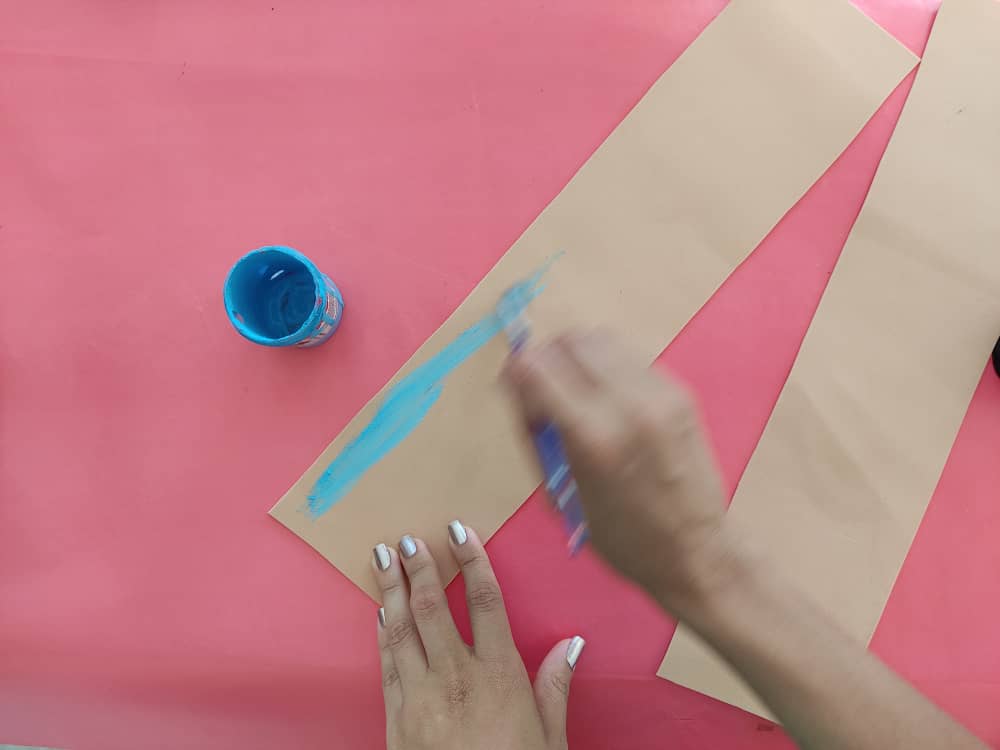
Luego, pintamos la mitad de cada una de las tiras de los colores que deseamos en este caso opte por pintarlas con colores azul y rosa.
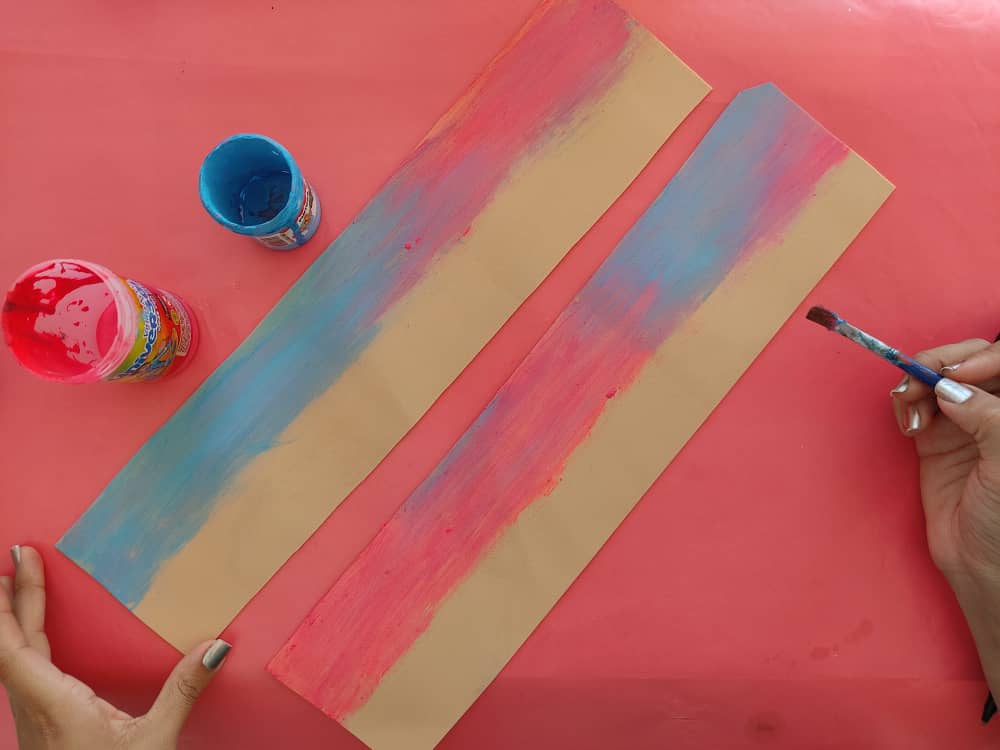
Then, we paint half of each of the strips in the colors we want, in this case, choose to paint them blue and pink colors.
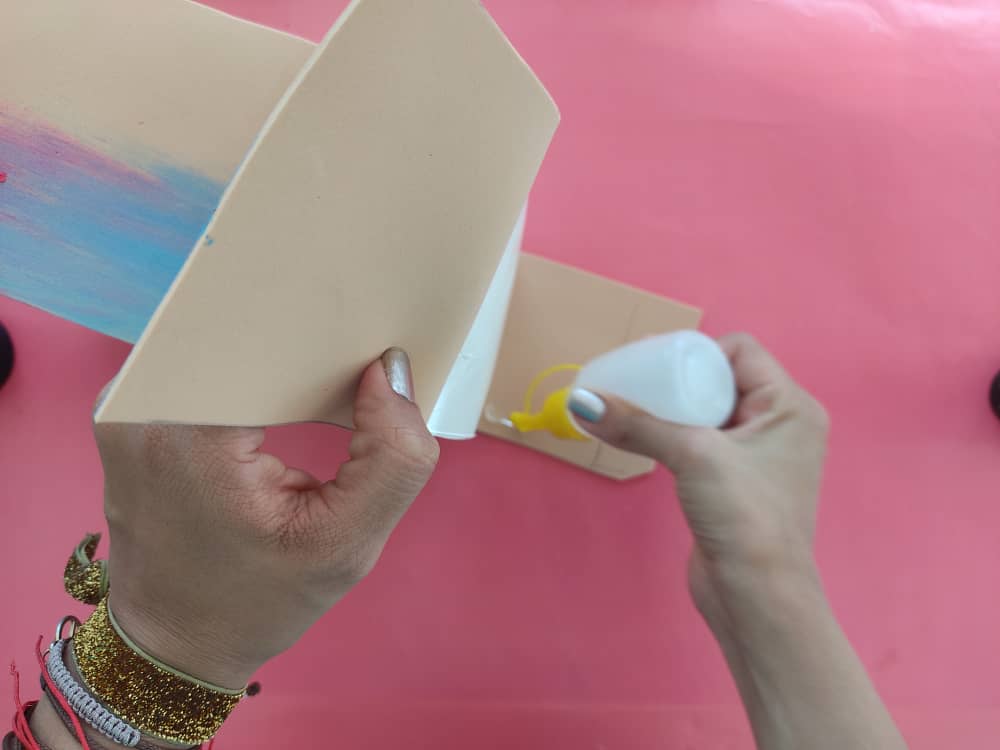
Después, forramos nuestra caja con las tiras que hemos pintado de manera que la mitad que está sin pintar quedé hacia abajo.
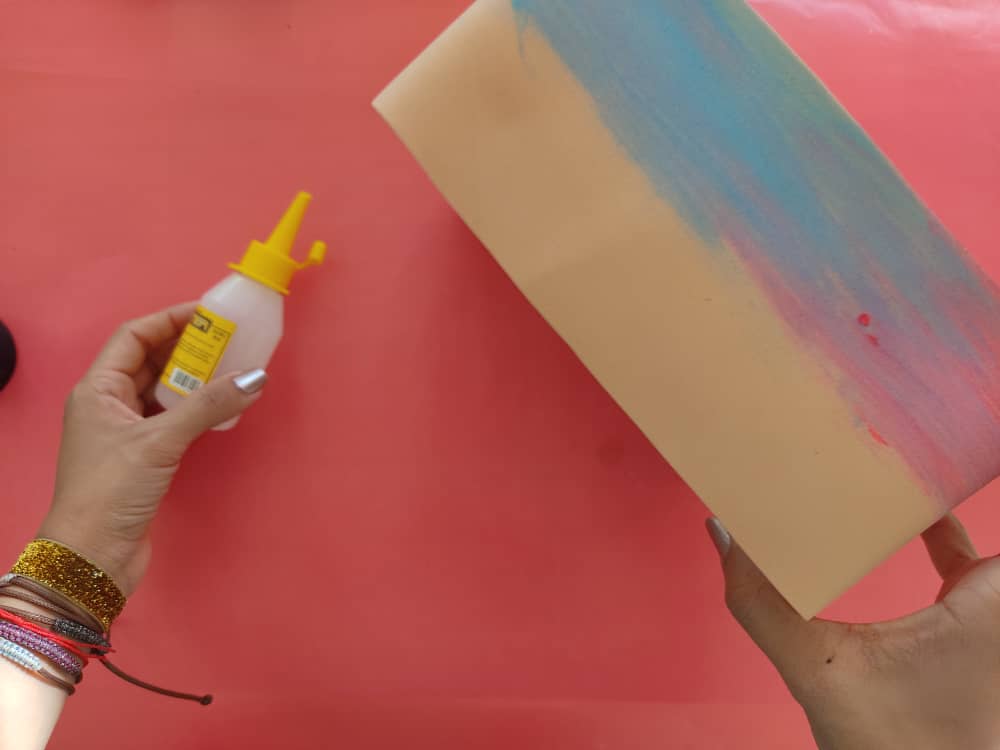
Then, we line our box with the strips that we have painted so that the half that is unpainted was down.
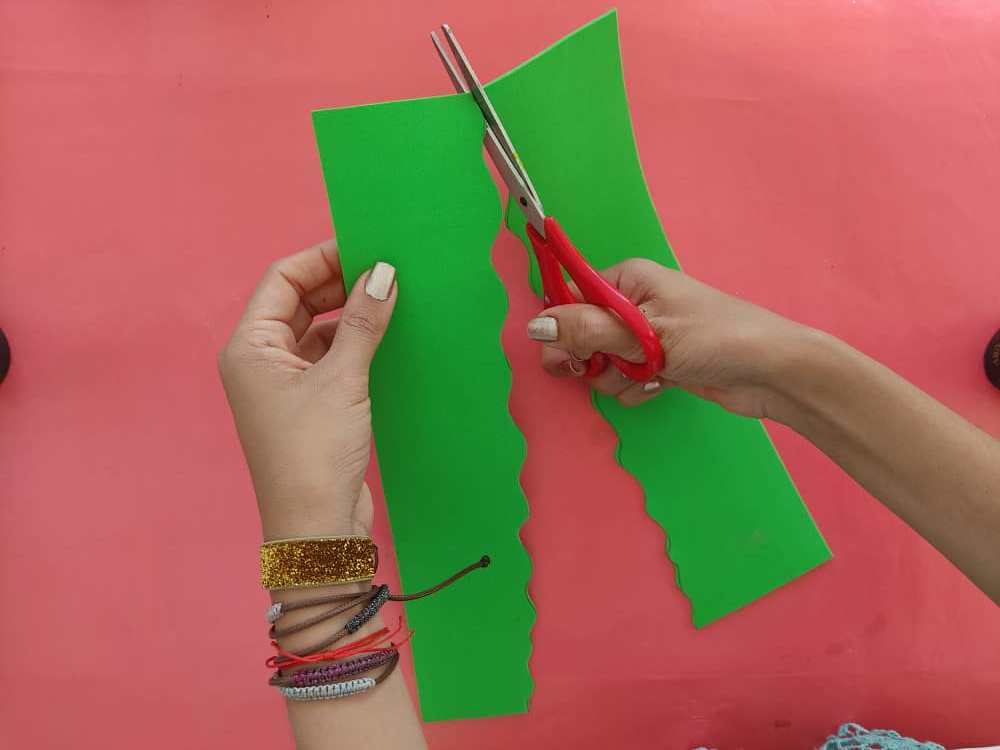
Luego, recortamos otras tiras en color verde de 3,5cm de ancho y 20cm de largo.
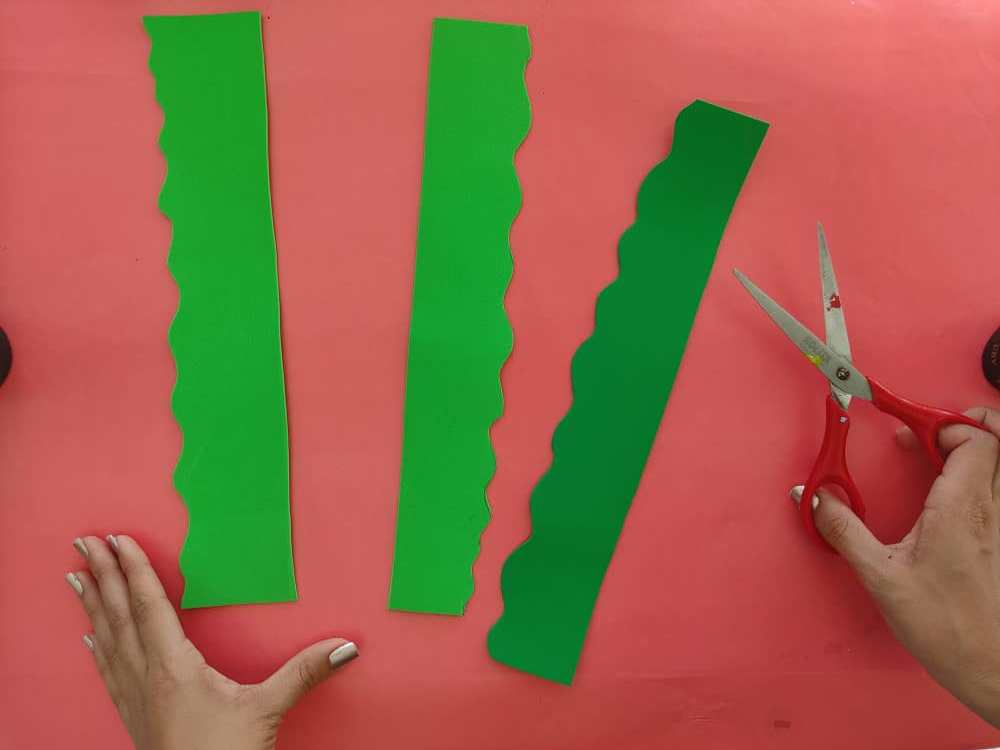
Then, we cut other strips in green 3.5cm wide and 20cm long.
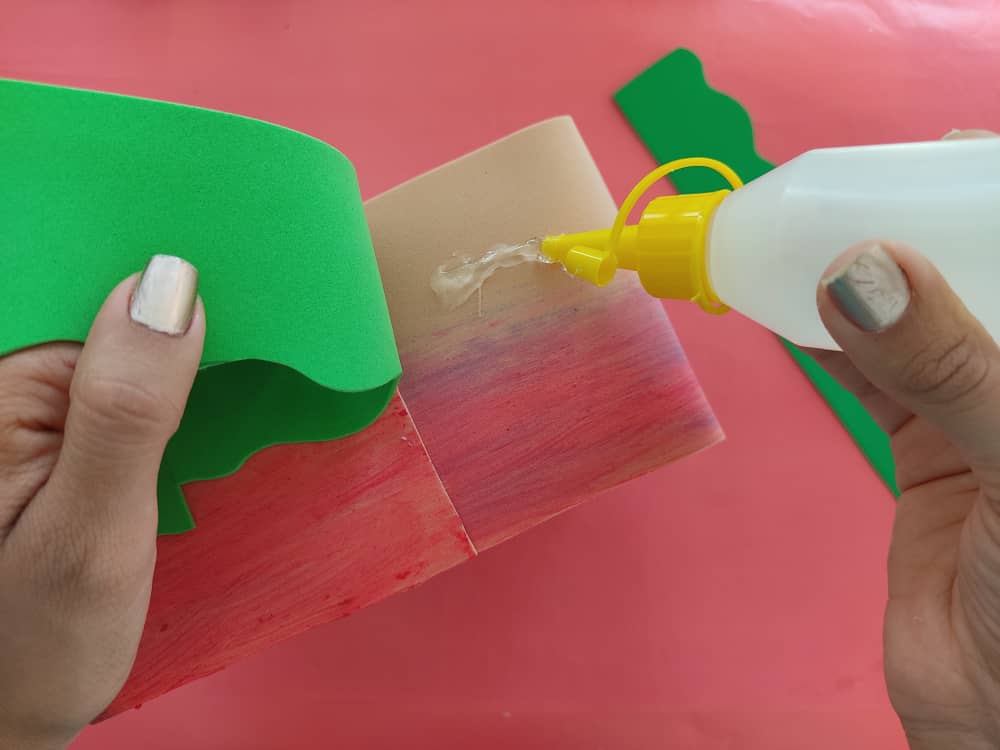
Ahora, pegamos estas lindas tiras de color verde sobre la parte de las tiras que están sin pintar y así cubrimos completamente la caja.
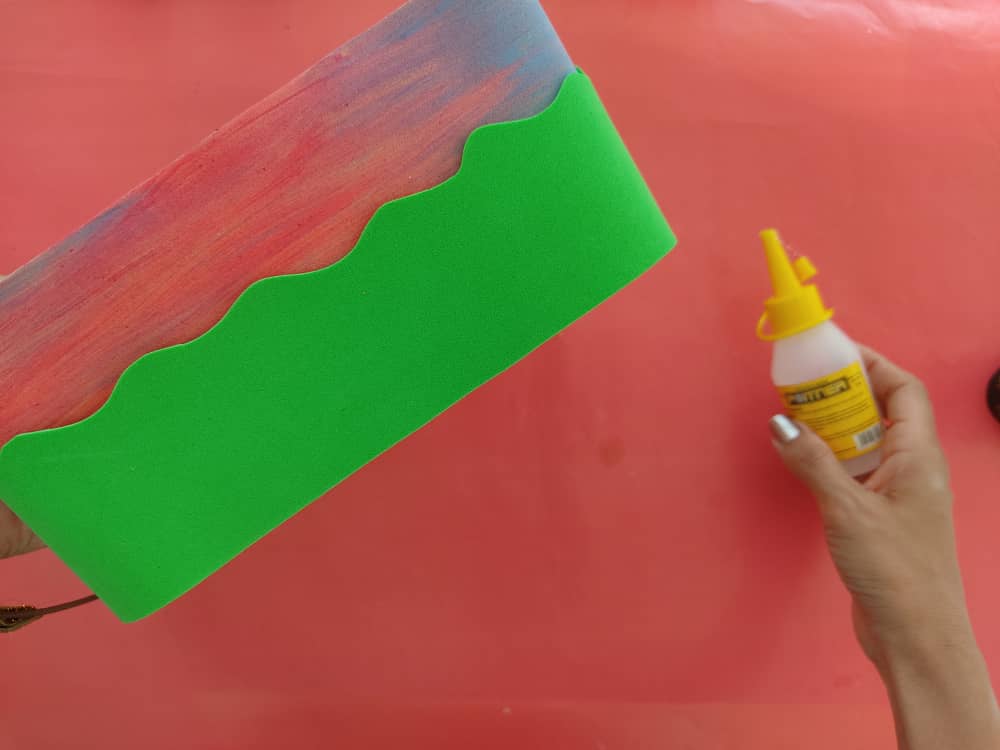
Now, we glue these cute green strips on the part of the strips that are unpainted and thus completely cover the box.
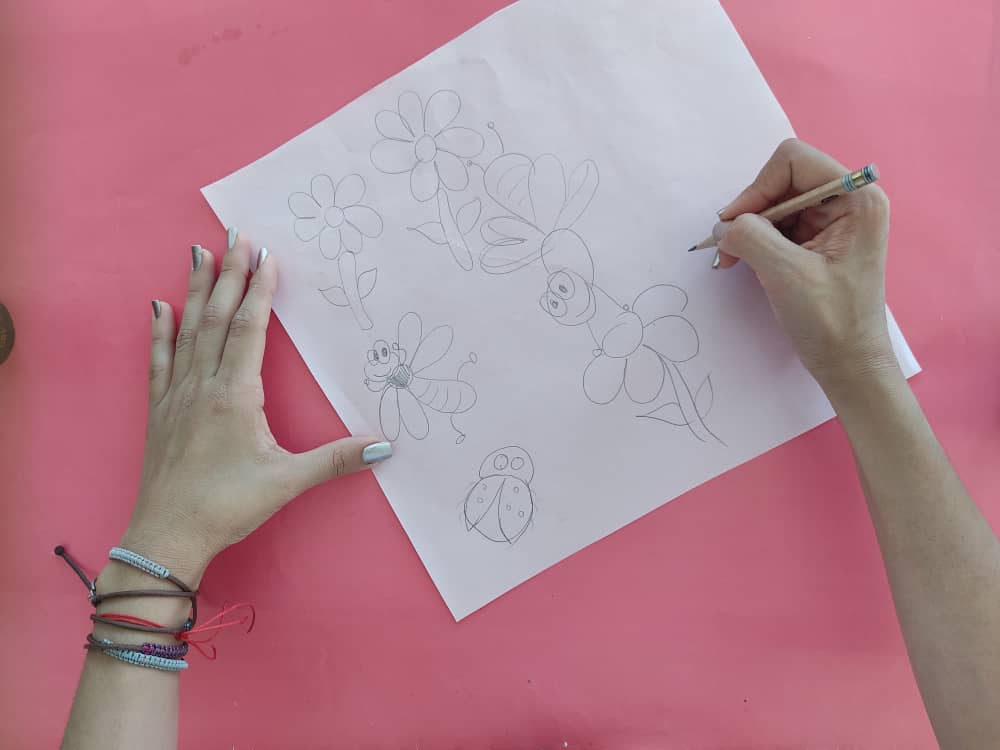
Seguidamente, elaboramos en papel unos hermosos moldes de libélulas, flores y una mariquita para decorar nuestra caja.
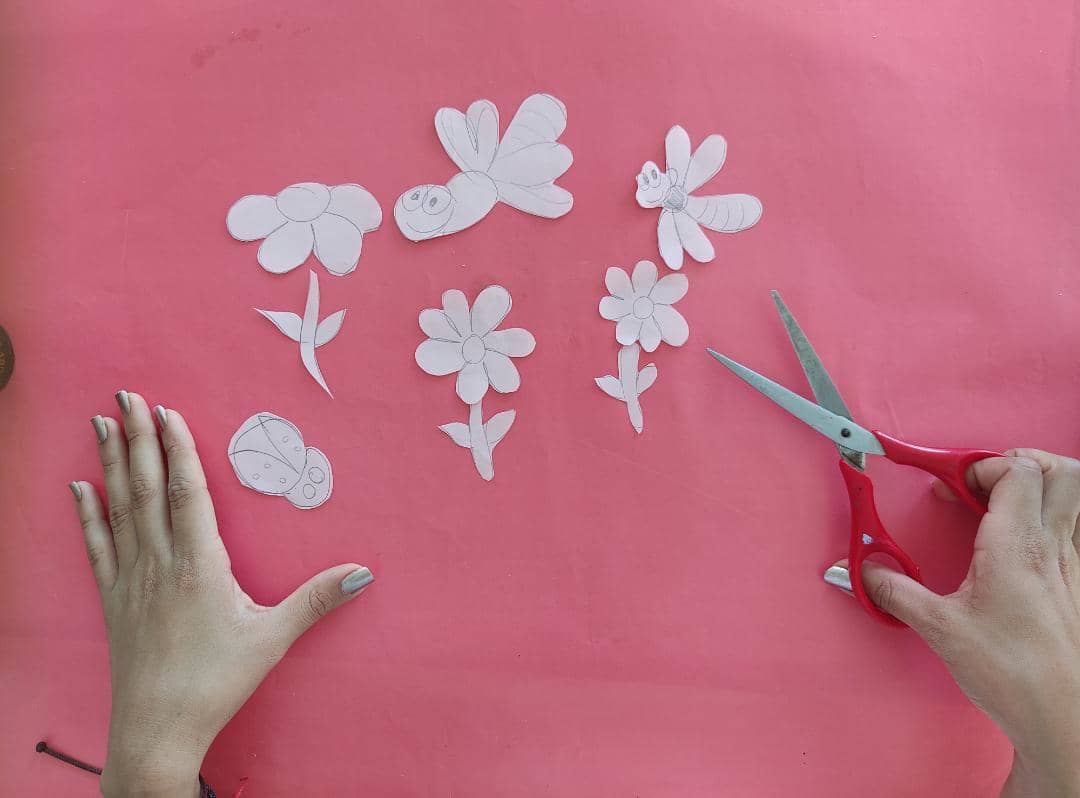
Next, we make beautiful molds of dragonflies, flowers, and a ladybug on paper to decorate our box.
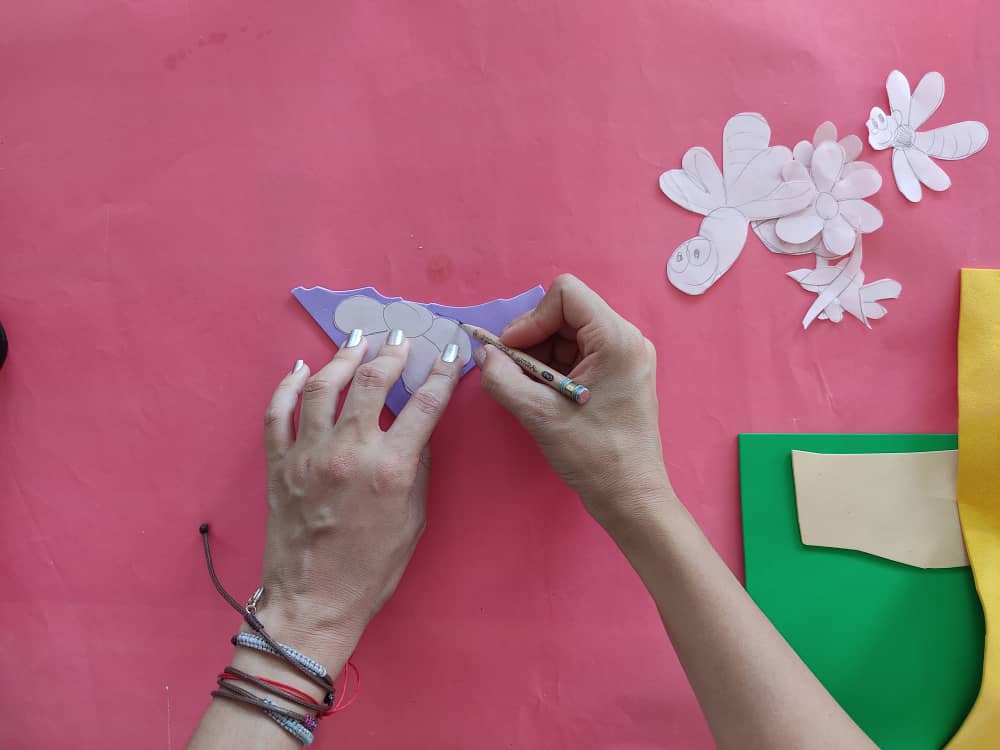
Ahora, transferimos estos pequeños moldes a los diferentes retazos de foamy en los colores que más nos gusten.
Now, we transfer these small molds to the different foamy pieces in the colors that we like the most.
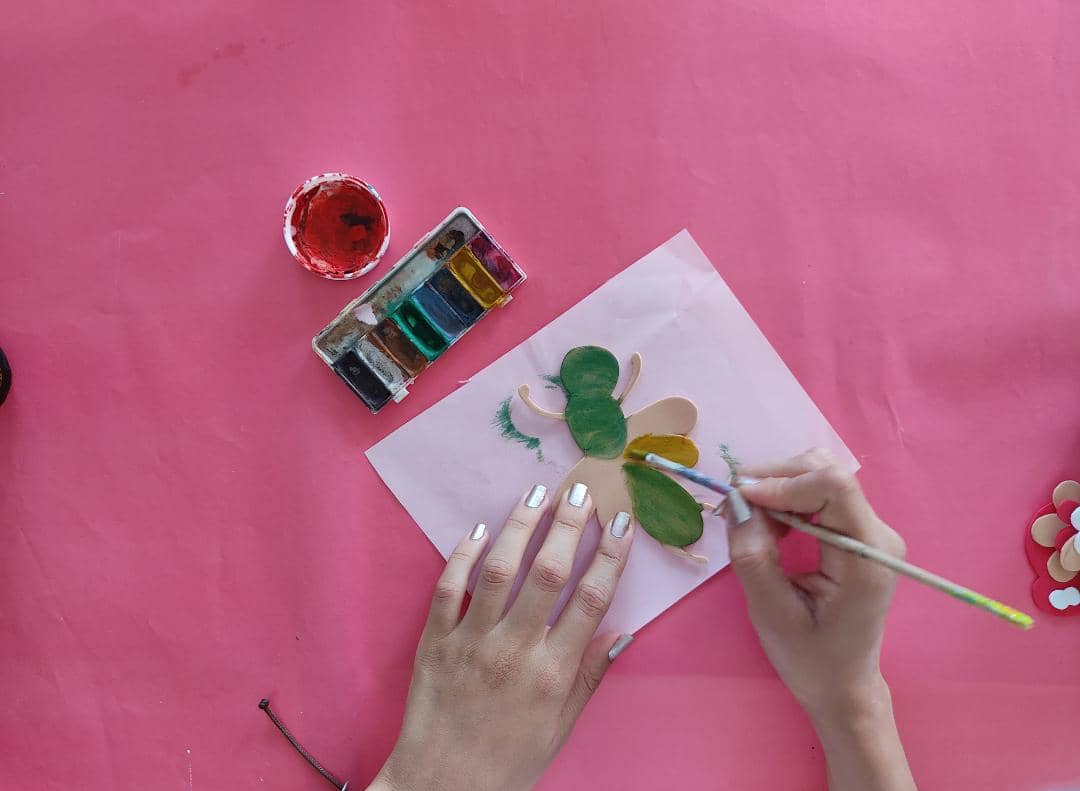
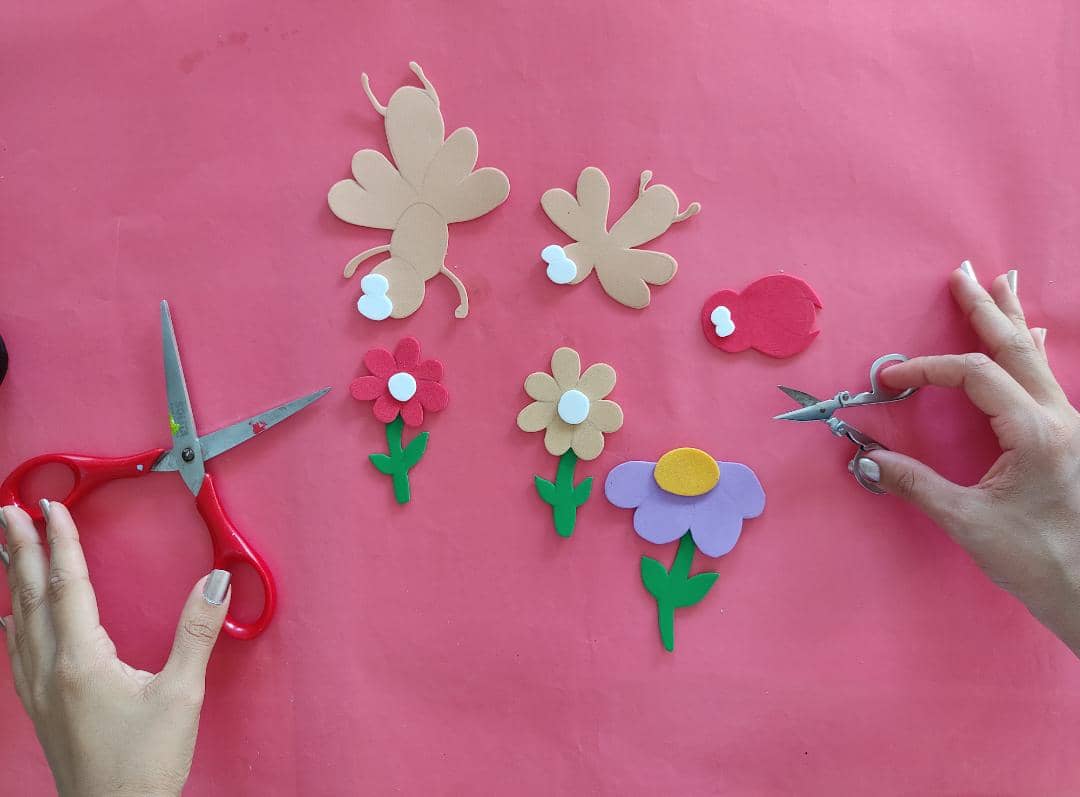
Luego, de esto pintamos las libélulas de hermosos colores, en esta oportunidad decidí usar mucho rosa, que a las niñas les encanta.
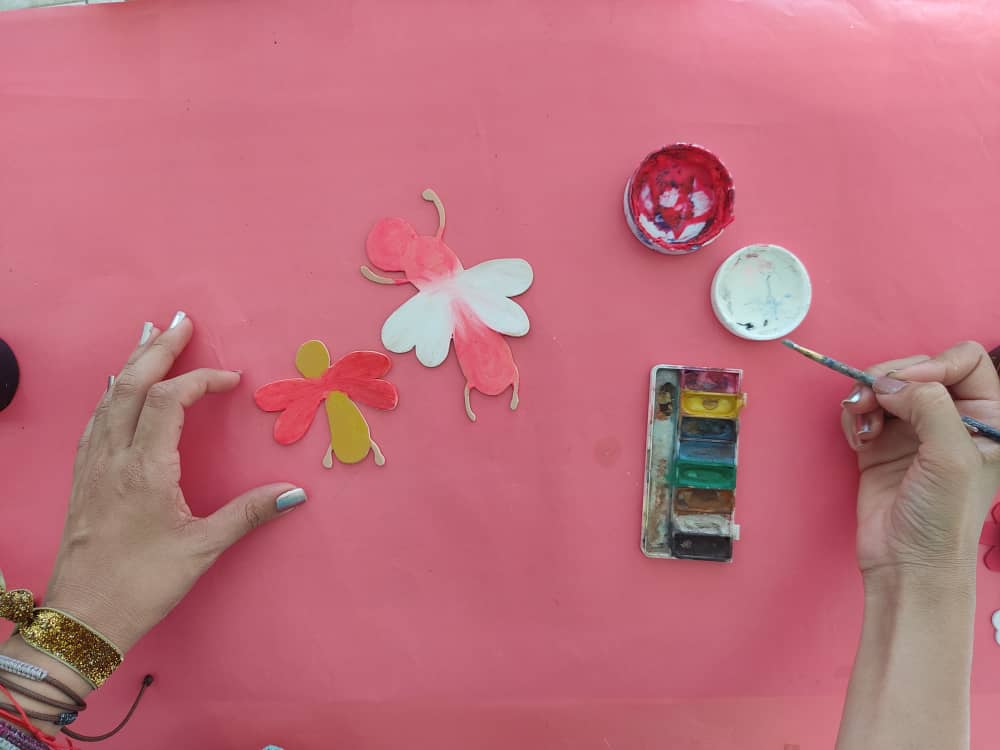
Then, from this, we painted the dragonflies in beautiful colors, this time I decided to use a lot of pink, which the girls love.
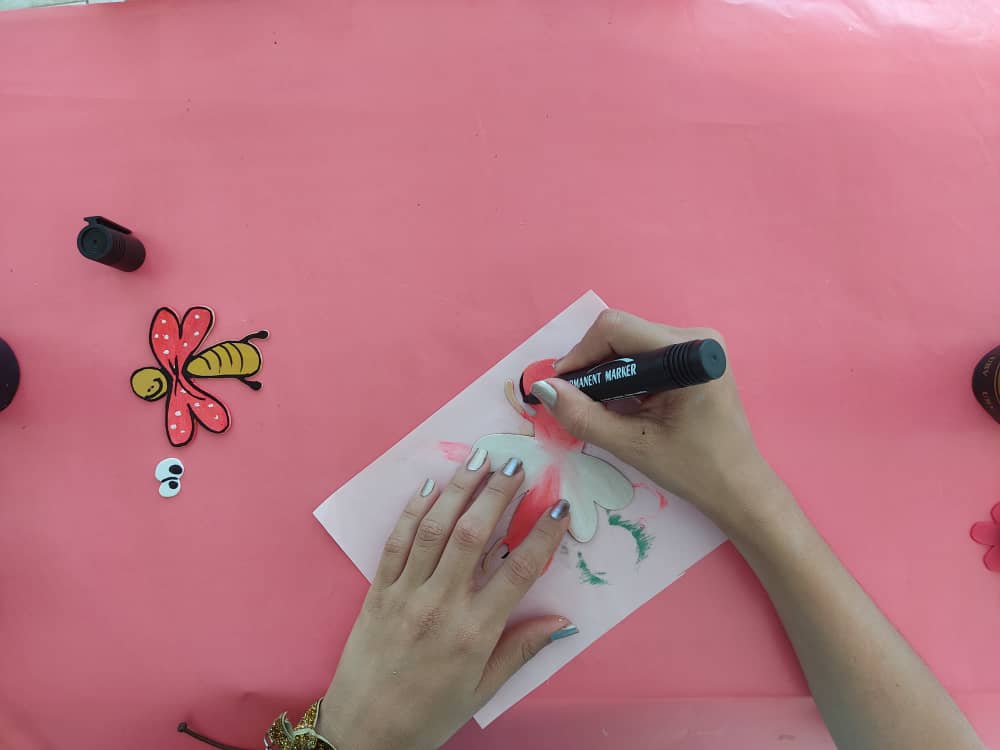
Seguidamente, marcamos los bordes de estas libélulas con el marcador de punta fina sin olvidar los ojos de estos divertidos animalitos.
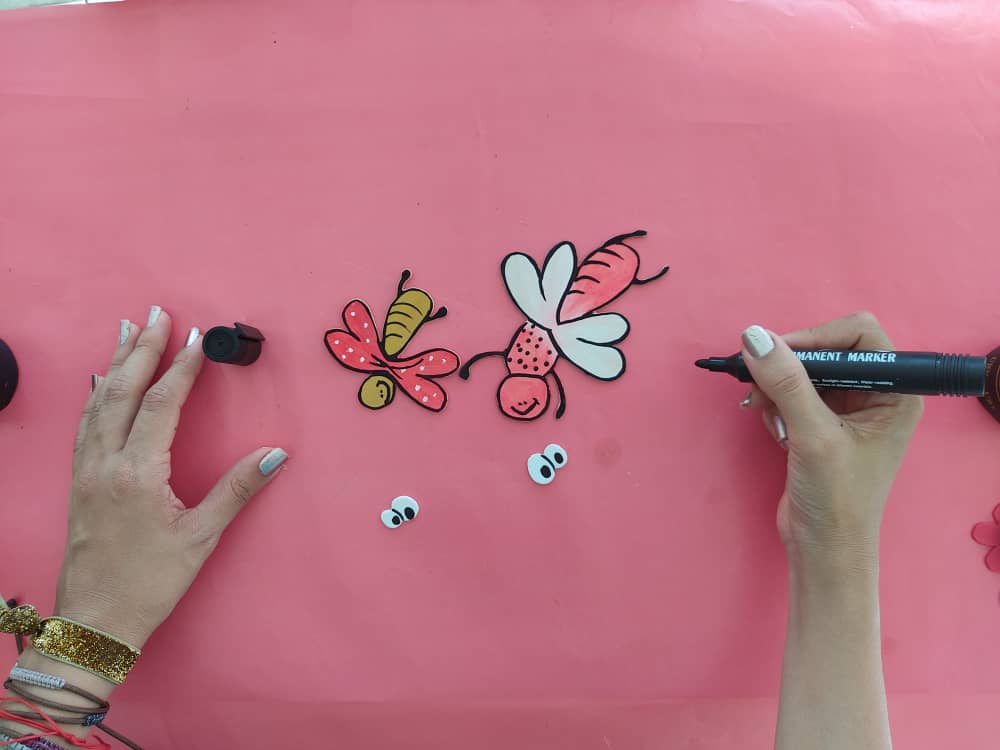
Next, we mark the edges of these dragonflies with the fine point marker without forgetting the eyes of these funny little animals.
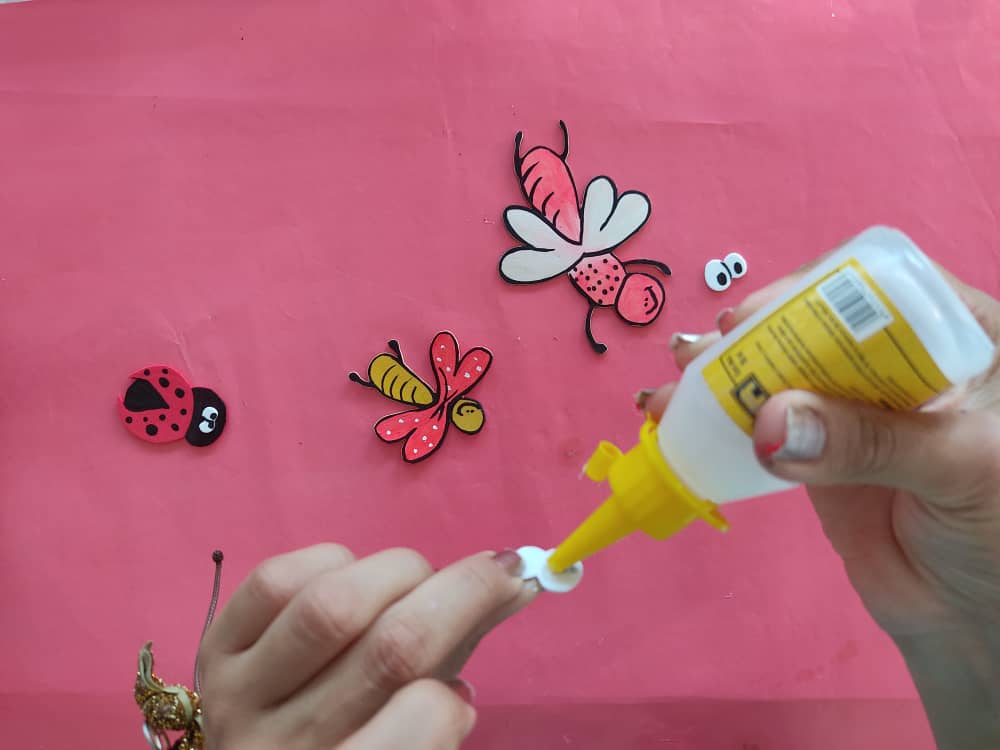
Ahora, armamos estos lindos animalitos con la ayuda del silicón líquido.
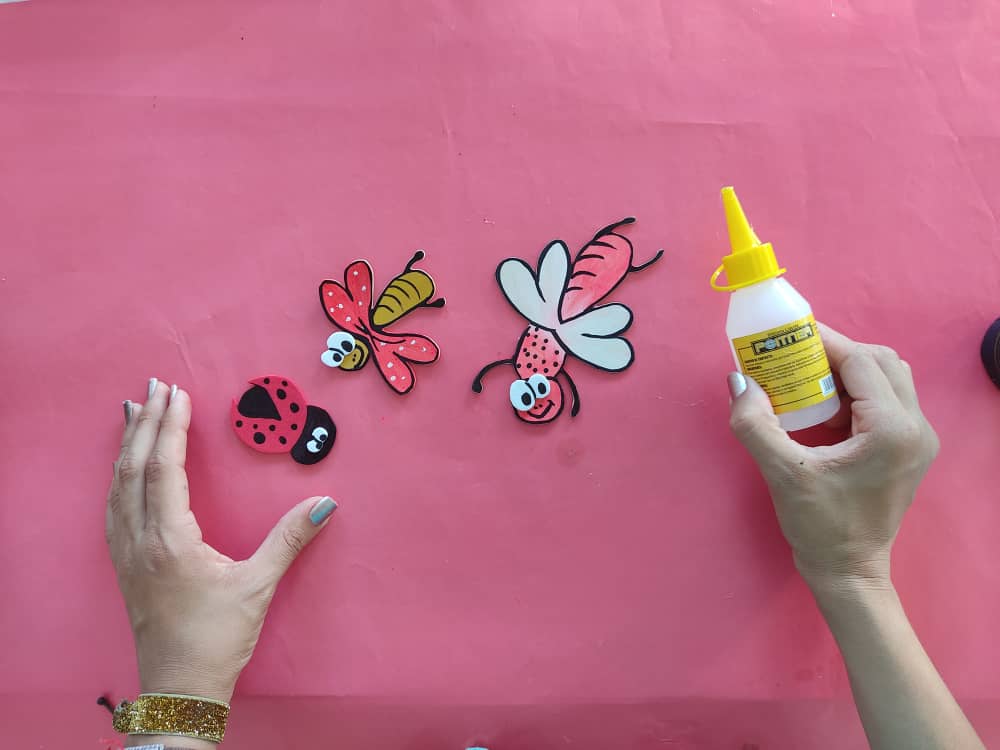
Now, we assemble these cute little animals with the help of liquid silicone.

Después, definimos algunos detalles con color blanco para las flores y marcamos sus bordes con el marcador negro de punta fina.
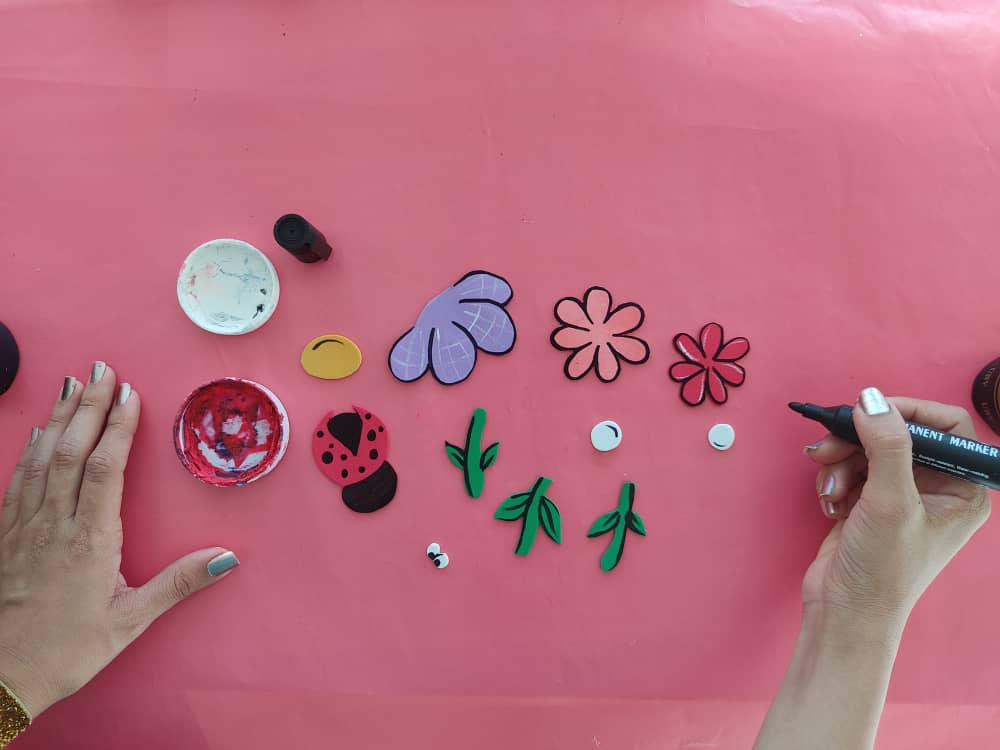
After, we define some details with white color for the flowers and mark their edges with the black fine-tipped marker.
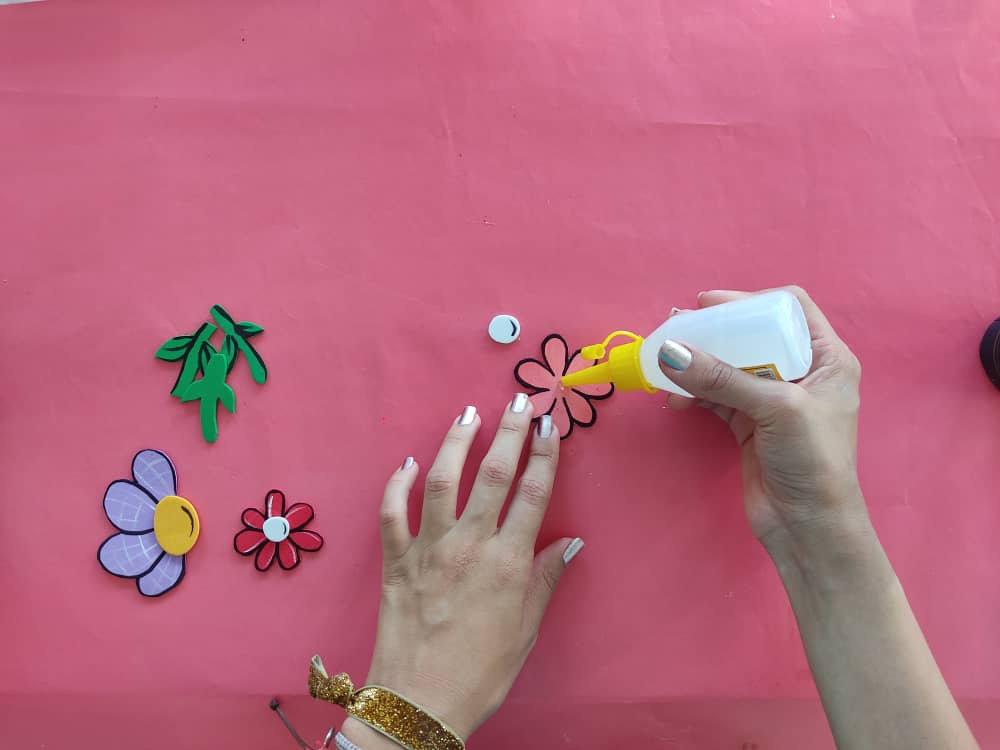
Seguidamente, armamos las lindas flores pegando cada parte en su lugar.
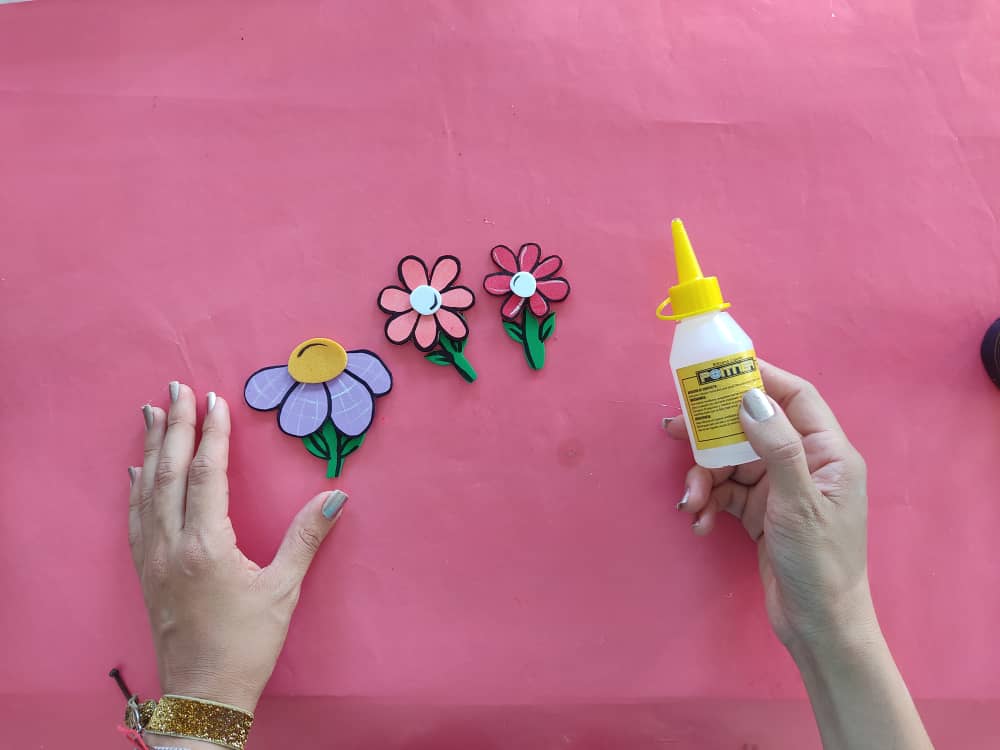
Next, we assemble the beautiful flowers by gluing each part in its place.
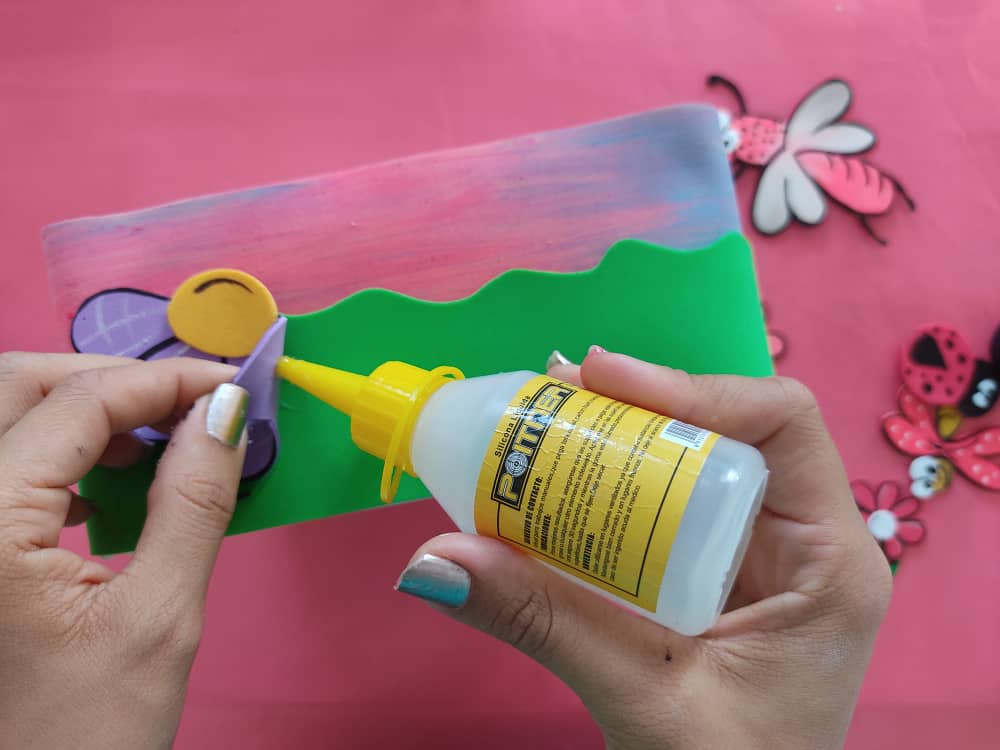
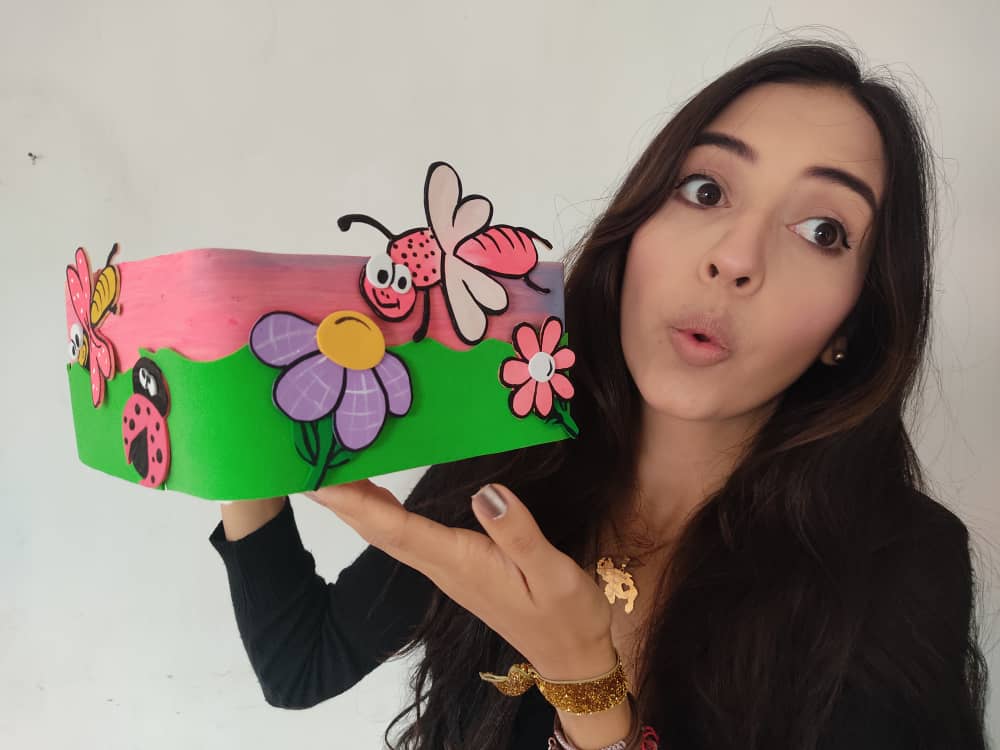
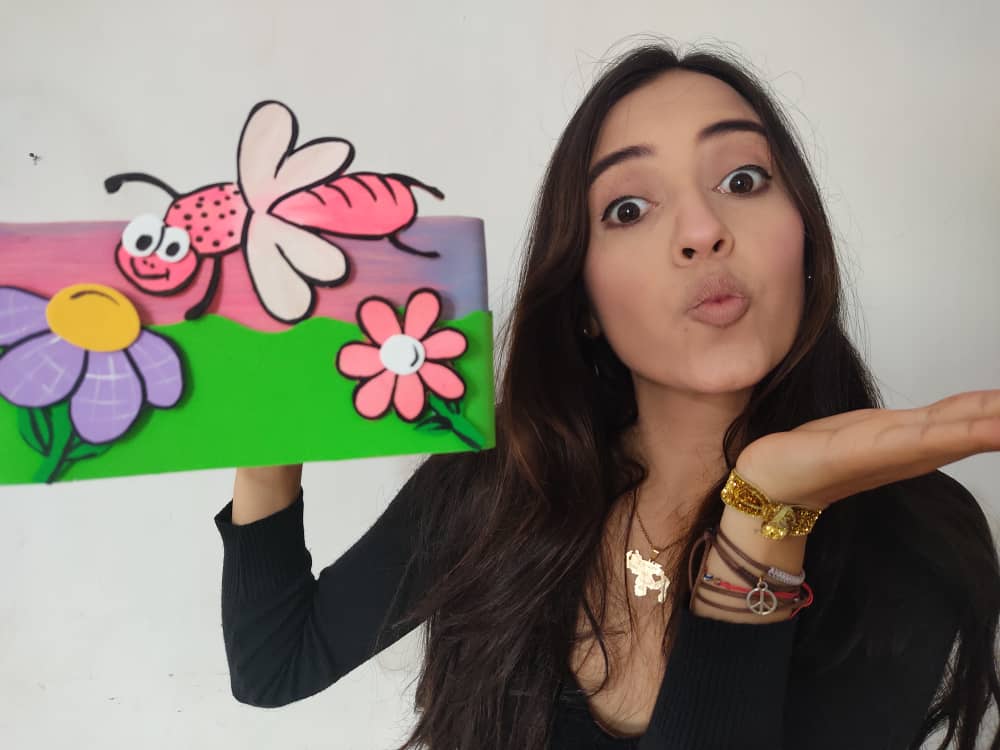
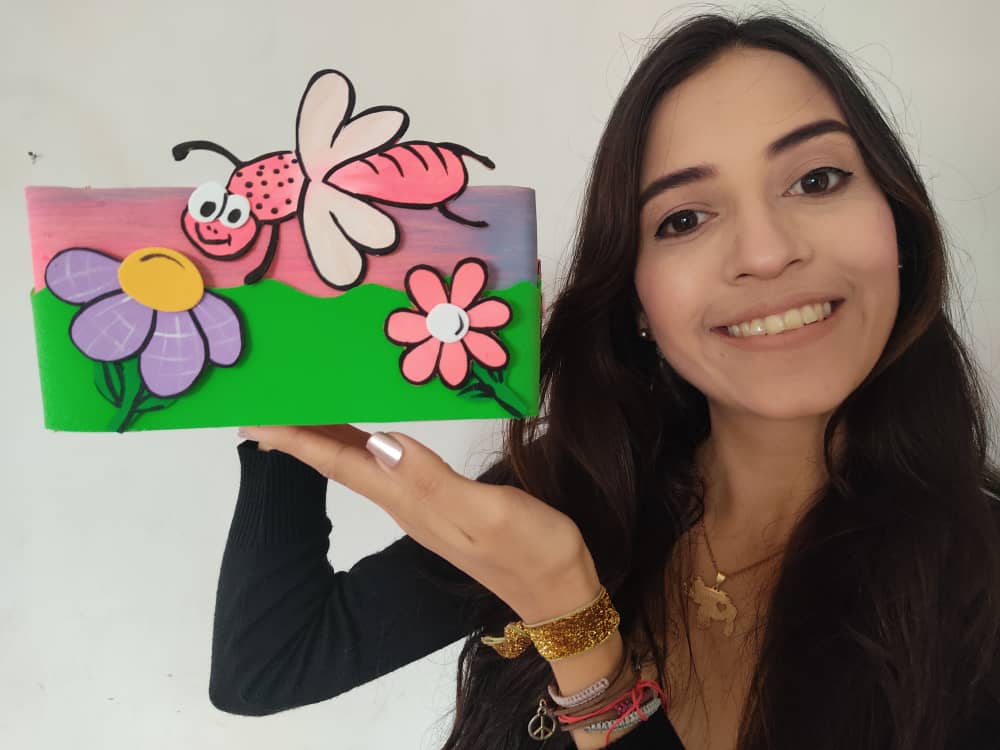
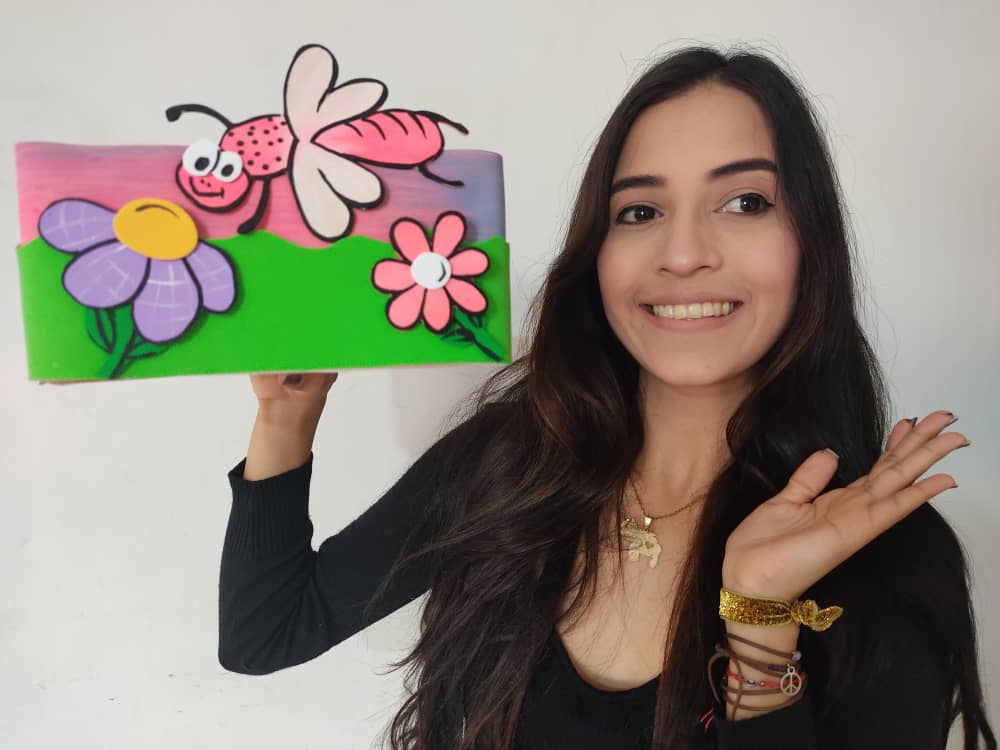
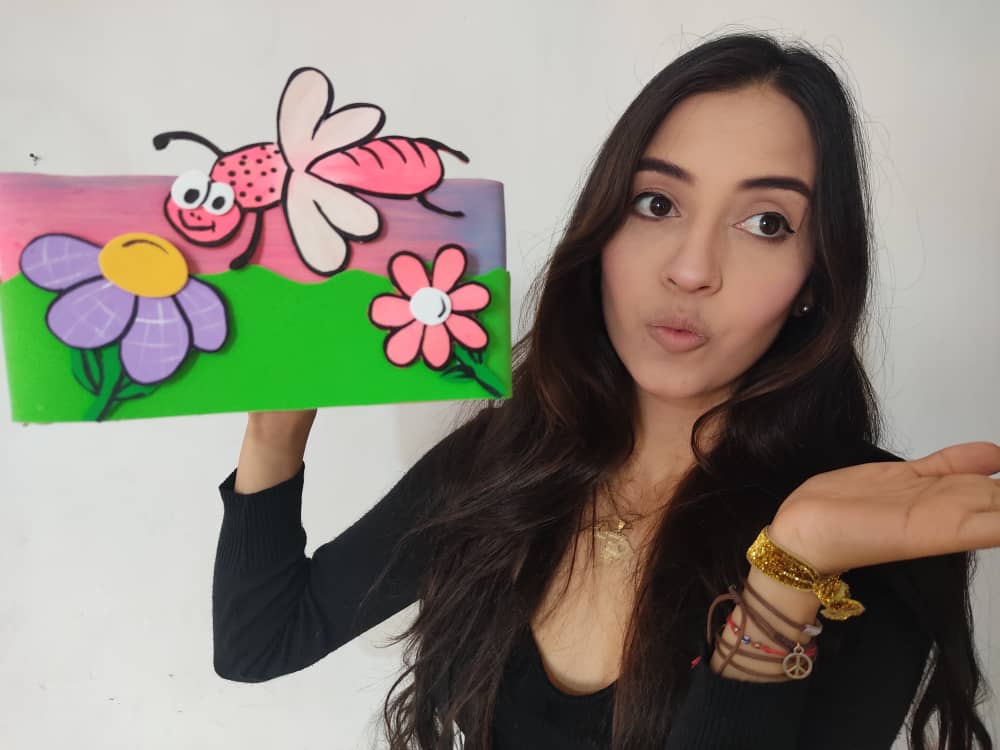
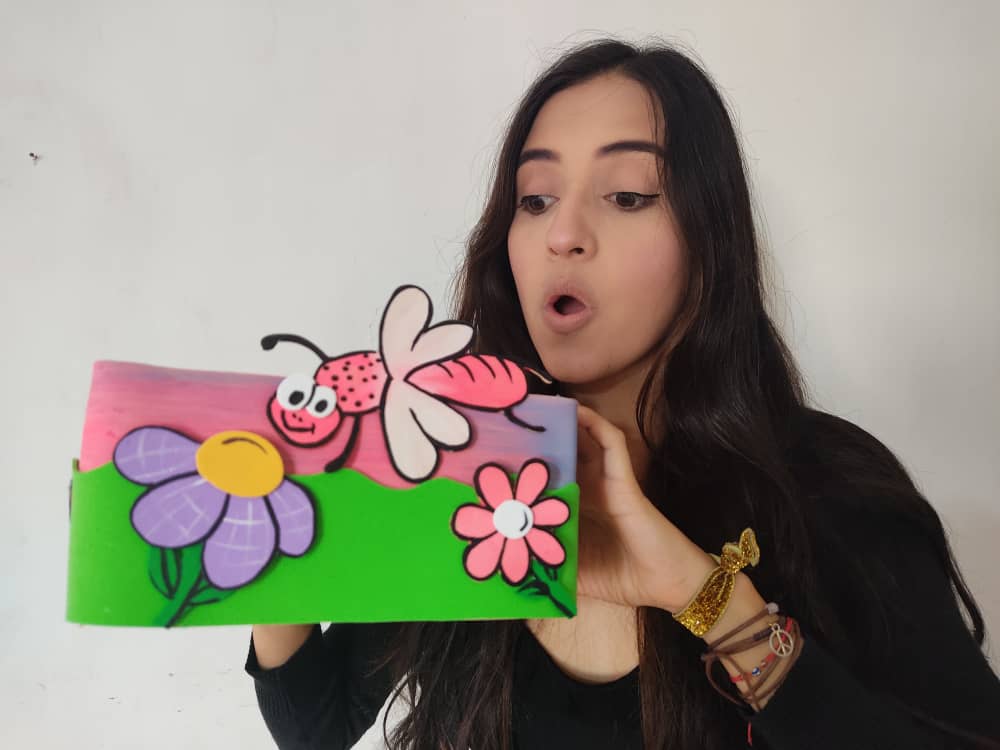
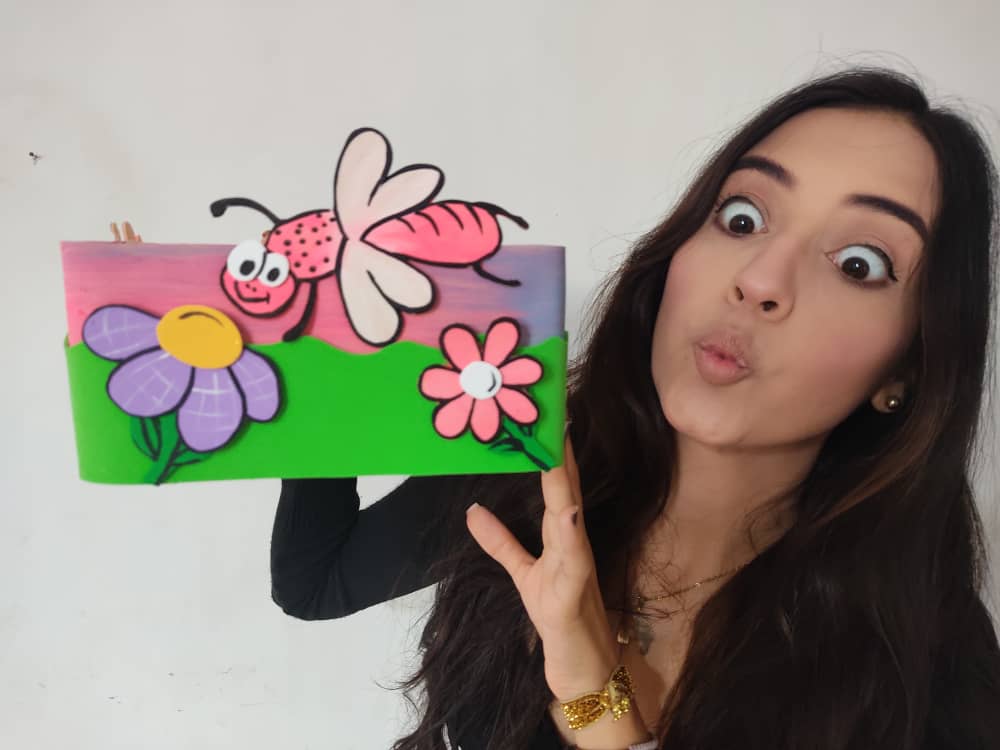
Finalmente, decoramos nuestra caja pegando cada una de las figuras que hemos elaborado.
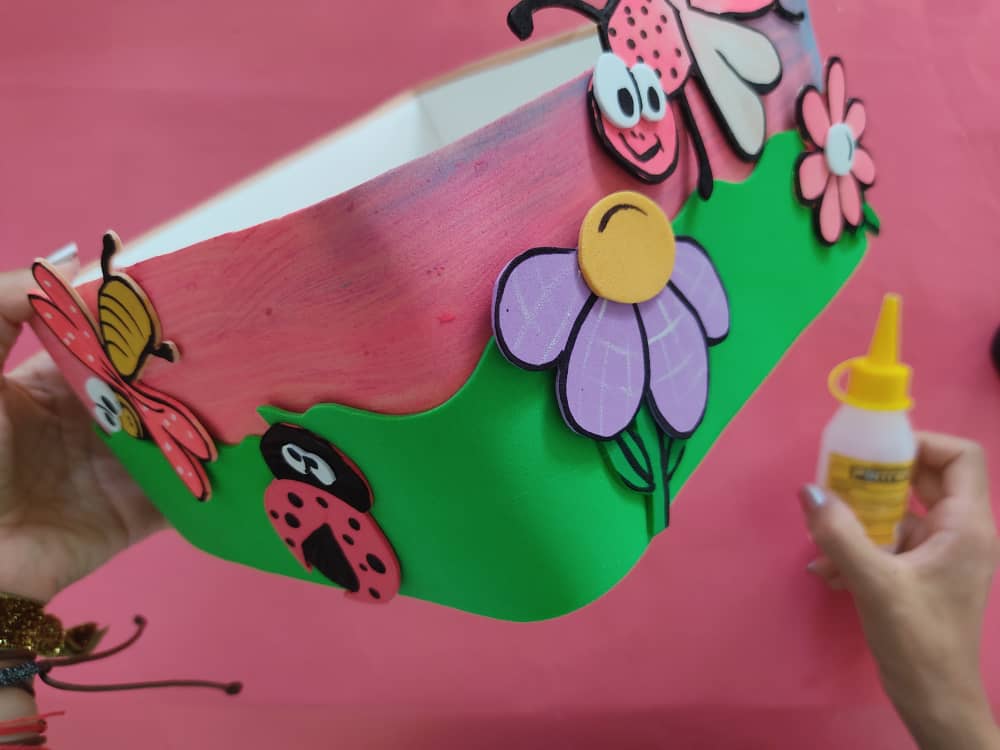
Finally, we decorate our box by gluing each of the figures that we have made.
Gracias por acompañarme y espero que lo hayan disfrutado. ❤️
Thanks for joining and I hope you enjoyed it.❤️
.jpeg)
.jpeg)
.jpeg)
.jpeg)
.jpeg)
.jpeg)
.jpeg)


Wow, awesome publication and tutorials.
I think I can try this when I need it
I do some similar work too.