Greetings to all this beautiful community! 👋
This year I wanted to do something different and have something new to welcome 2024. I researched many photos to find something suitable for the occasion and, above all, that I can do it! haha.
I'm going to try to explain it and I hope you understand, the quantities will depend on each neck, and some details I was putting together to personal taste, improvising.
Saludos a toda esta hermosa comunidad.
Este año quise hacer algo diferente y tener algo nuevo para recibir el 2024. Investigué muchas fotos para encontrar algo indicado para la ocasión y, sobre todo, que yo lo pueda hacer! jaja.
Voy a tratar de explicarlo y espero que se entienda, las cantidades van a depender de cada cuello, y algunos detalles lo fui armando a gusto personal, improvisando.

Wearing the necklace in the new year/ Luciendo el collar en año nuevo
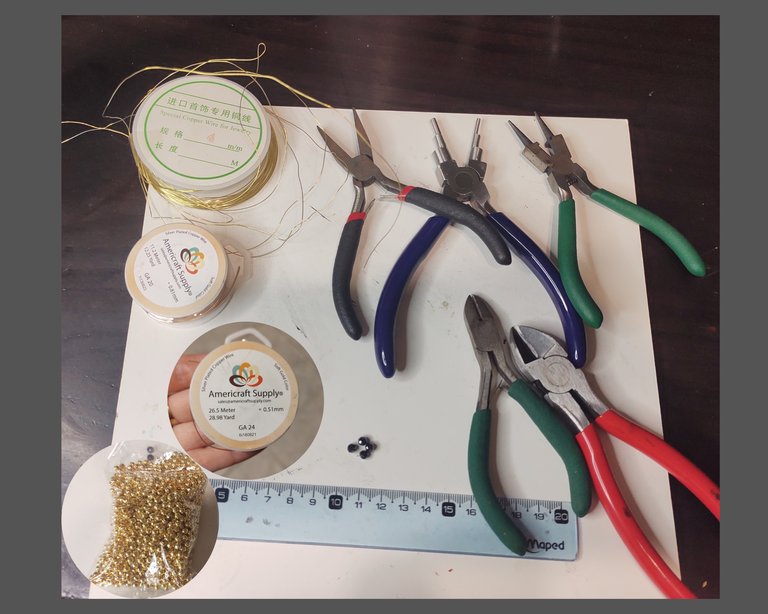
Materials.
- Small size rock crystal (quantity needed).
- Golden beads (quantity needed)
- Wire gauges 20, 24 and 4mm.
- Closing hook (optional)
- Ruler
- Tweezers for bijouterie
Other essential ingredients: - Patience 🤭
- Faith in oneself 💪
Materiales
- Cristal de roca tamaño pequeño (cantidad necesaria).
- Perlas doradas (cantidad necesaria)
- Alambre calibres 20, 24 y de 4mm
- Gancho de cierre (opcional)
- Regla
- Pinzas de bijouterie
Otros ingredientes indispensables:
- Paciencia 🤭
- Fé en uno mismo 💪
Step 1:
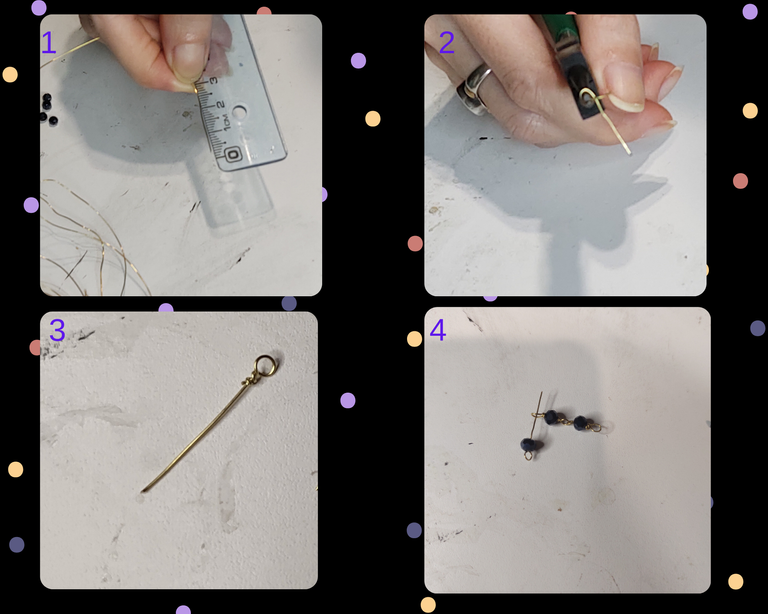
With the 4mm wire, cut several pieces of 3 cm each (Image 1), depending on the amount of crystals and beads to be used. Make a loop with each piece in order to thread each piece (Images 2, 3 and 4).
Paso 1:
Con el alambre de 4mm, cortar varios trozos de 3 cm cada uno (Imagen 1), dependiendo de la cantidad de cristales y perlas a usar. Realizamos un “loop” (una vuelta) con cada trozo para poder enhebrar cada pieza (Imágenes 2, 3 y 4).
Step 2:
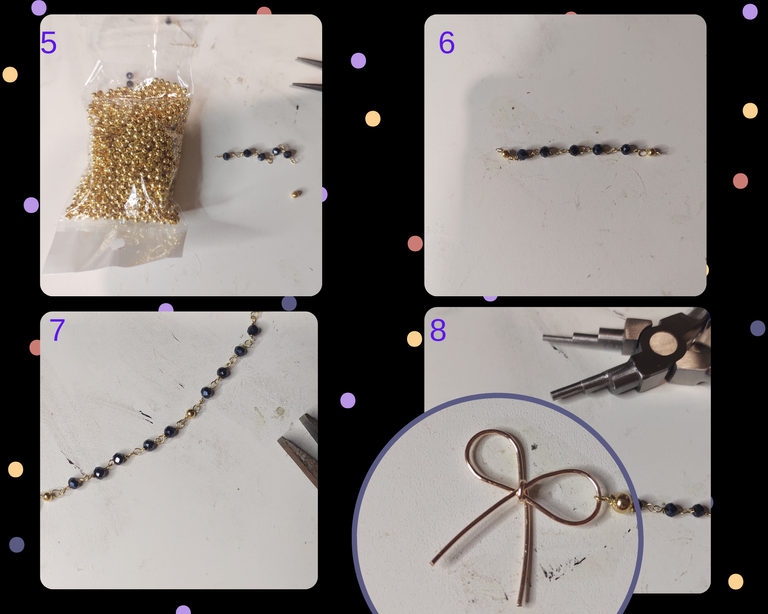
As you will see in Figure 5, every five crystals, I threaded a golden pearl, giving the result in Figure 6. I then repeated Step 1 twice per side (Figure 7), obtaining a total of 13 pieces on each chain (as you will see in Figure 14).
Paso 2:
Como podrán ver en la figura 5, cada cinco cristales, enhebré una perla dorada, dando el resultado de la figura 6. Luego repetí el Paso 1 dos veces por lado (figura 7), obteniendo un total de 13 piezas en cada cadena (como se podrá observar en la figura 14).
Step 3:
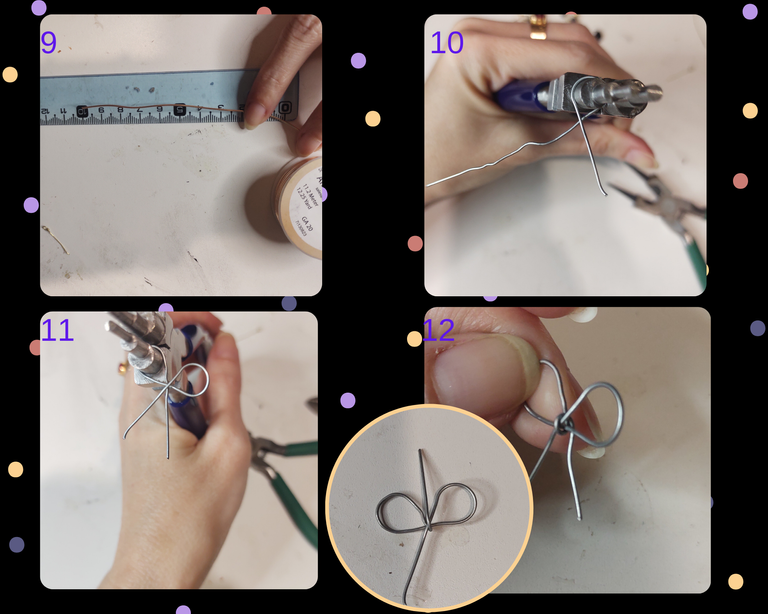
Making the bow: use 20 gauge wire (picture 8), cut 10 cm (picture 9), and with the 6 in 1 pliers take the same at 4 cm and make a turn and do the same on the other side, as shown in figures 10 and 11. To finish, with the longest leg, make a turn on itself in the middle part towards the back, as shown in figure 12.
Paso 3:
Realización del moño: usar alambre calibre 20 (imagen 8), cortar 10 cm (imagen 9), y con la pinza 6 en 1 tomar el mismo a 4 cm y realizar una vuelta y hacer lo mismo del otro lado, como se muestra en las figuras 10 y 11. Para finalizar, con la patita más larga, realizar una vuelta sobre sí mismo en la parte media hacia atrás, como se ve en la figura 12.
Step 4:
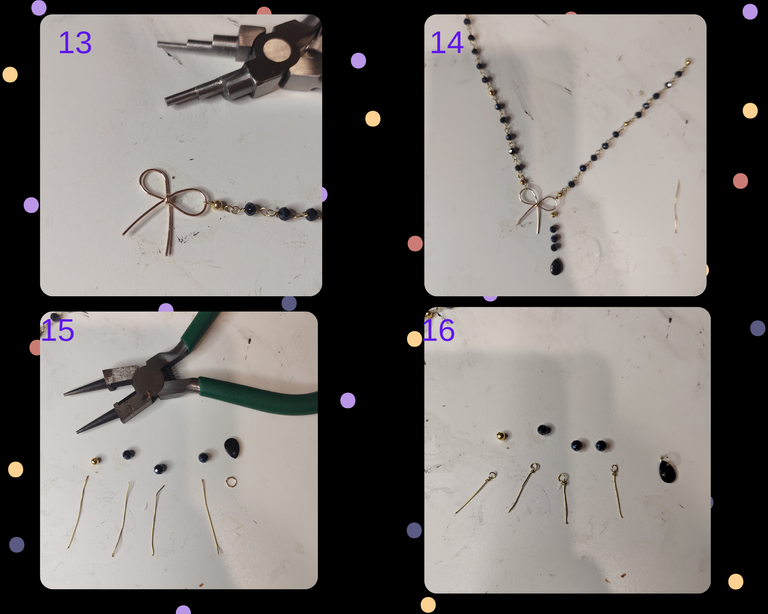
Hook onto the bow both chains, as shown in images 13 and 14. Additionally, I decided to attach an extra chain to one of the loops of the bow, as seen in figures 14, 15, 16 and 17, following the same procedure as STEP 1.
Paso 4:
Enganchar en el moño ambas cadenas, como se muestra en las imágenes 13 y 14. Adicionalmente, decidí colocar una cadena extra en uno de los lazos del moño, como se observa en las figuras 14, 15, 16 y 17, siguiendo el mismo procedimiento del PASO 1.
Step 5:
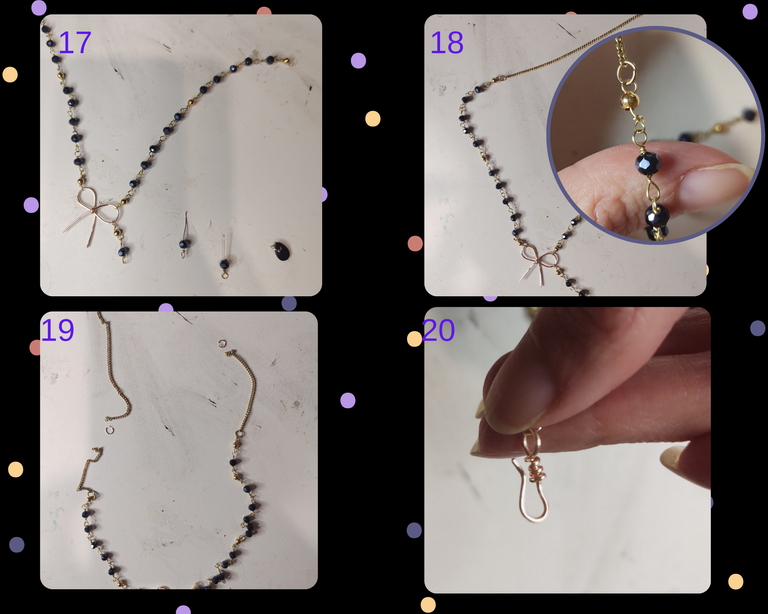
To finish, I attached two chains with small rings made from 24-gauge wire (Figures 18 and 19).
Paso 5:
Para finalizar, coloqué dos cadenas con argollas pequeñas realizadas con alambre calibre 24 (figuras 18 y 19).
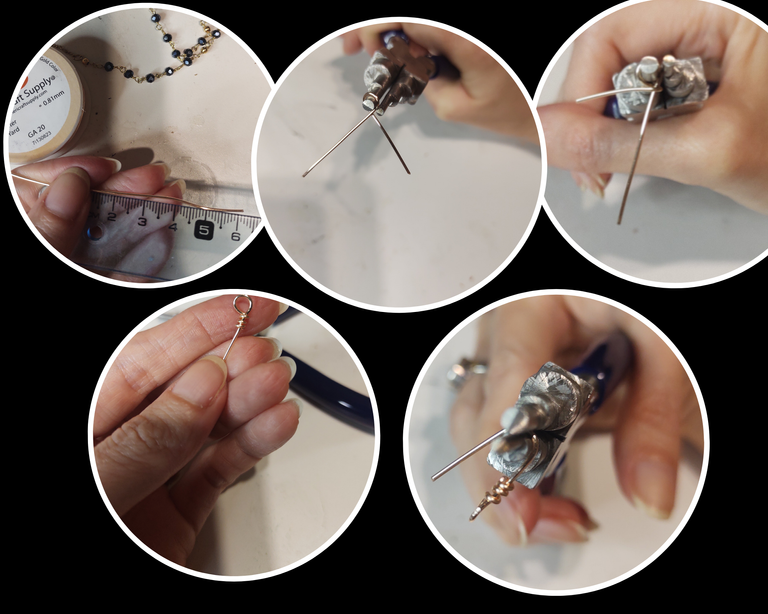
Optional step: Since I didn't have a locking hook, I looked for inspiration on youtube, and made one with 20 gauge wire (image 20), following the steps shown in the next image.
Paso opcional: Debido a que no tenía un gancho de cierre, busqué inspiración en youtube, y fabriqué uno con alambre calibre 20 (imagen 20), siguiendo los pasos que muestro en la próxima imagen.
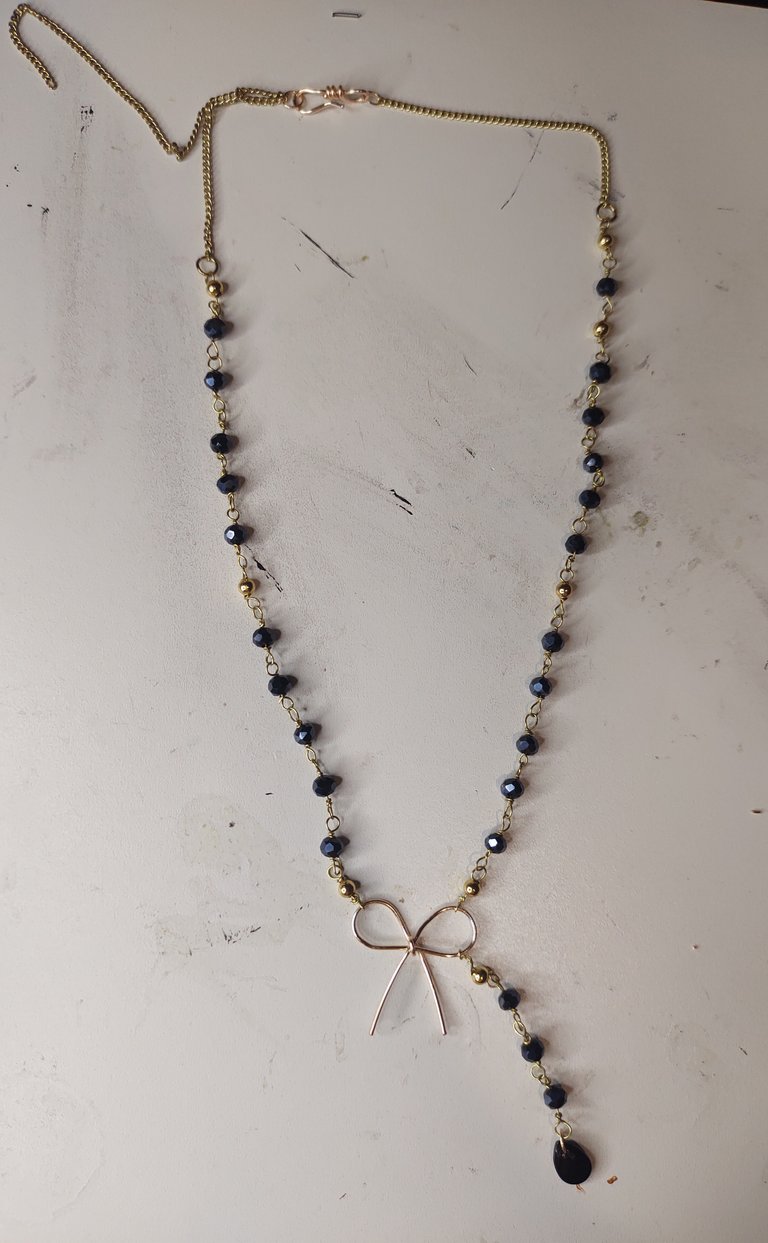
Final result/Resultado final
I think that was all, I hope you liked it. Soon I will tell you about new projects so we can get down to work. HAPPY 2024! 💫Hugs and kisses. Agustina.
Creo que eso fue todo, espero les haya gustado. Próximamente les contaré nuevos proyectos para que nos pongamos manos a la obra. FELIZ 2024!💫Abrazos y besos. Agustina.
All the pictures are my own and were taken with my mobile /Todas las Fotos son de mi autoría y fueron tomadas con mi celular.
Congratulations @agus-jujuy! You have completed the following achievement on the Hive blockchain And have been rewarded with New badge(s)
Your next target is to reach 100 upvotes.
You can view your badges on your board and compare yourself to others in the Ranking
If you no longer want to receive notifications, reply to this comment with the word
STOPCheck out our last posts:
You are really specialize on this. You have so many tools. The necklaces look so beautiful. You really try weldone
Thank you very much! I try to learn by watching others do the same ☺️