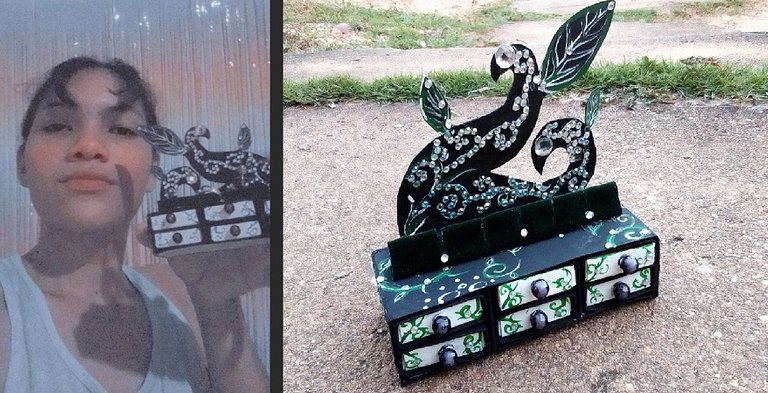
¡Muy buenos días querida comunidad de peakd! 😊 En este día les quiero compartir una linda y creativa forma de elaborar un elegante joyero, utilizando cajitas de cartón, lentejuelas, y piedras acrílicas, que crean este elegante y único joyero, similar a unas grandes y oscuras hiedras cubierta con lentejuelas a sus alrededores como si fueran unas brillantes gotas de agua.
Good morning dear peakd community! 😊 On this day I want to share a beautiful and creative way to make an elegant jewelry box, using cardboard boxes, sequins, and acrylic stones, which create this elegant and unique jewelry box, similar to large dark ivy covered with sequins around it like if they were shiny droplets of water.
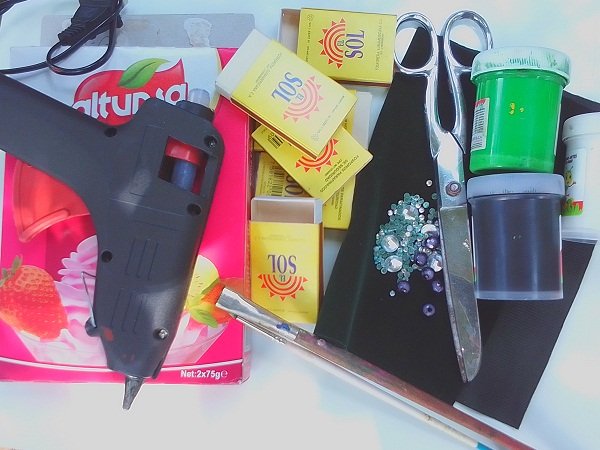
Materiales:
- Pistola de silicón.
- Caja de cartón grande y cajas pequeñas de fósforos.
- Pinceles.
- Tela de gamuza, verde oscuro.
- Tijera.
- Lentejuelas.
- Piedras acrílicas redondas.
- Pinturas al frío, verde, negro y blanco.
Materials:
- Silicone gun.
- Large cardboard box and small boxes of matches.
- Brushes.
- Suede fabric, dark green.
- Scissors.
- Sequins.
- Round acrylic stones.
- Cold paints, green, black and white.
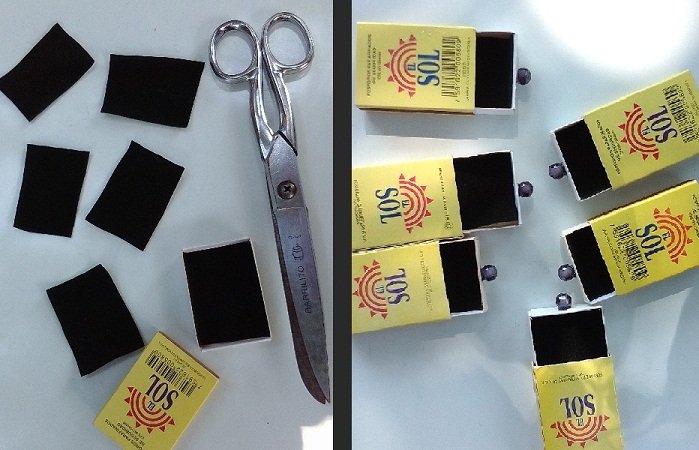
Empezamos haciendo los compartimientos o cajones de nuestro joyero, para ello recortamos seis cuadritos de la tela de gamuza, los fijamos en el interior de los compartimientos de las cajitas de fósforos y le adherimos en el frente las piedritas acrílicas como perilla, la insertamos en sus respectivas cajas, y de este modo obtendremos los cajones de nuestro joyero.
We begin by making the compartments or drawers of our jewelry box, for this we cut out six squares of the suede fabric, we fix them inside the compartments of the matchboxes and we adhere the acrylic stones to the front as a knob, we insert it into their respective boxes, and in this way we will obtain the drawers of our jewelry box.
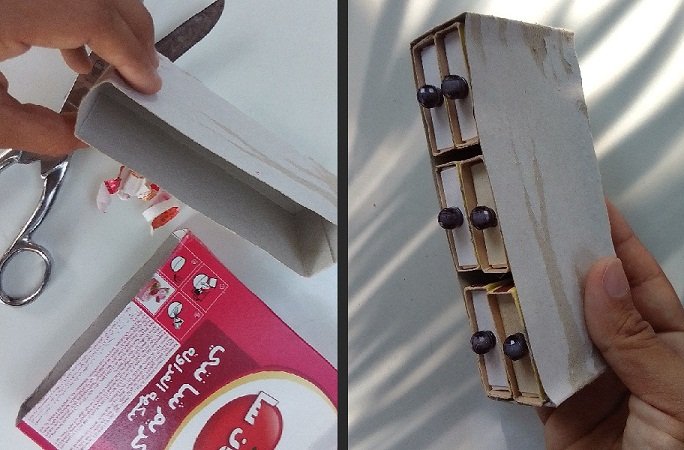
Dividimos a la mitad la caja grande, para luego quitarle la envoltura plástica y así dejarla completamente descubierta, ya lista, le fijamos en su interior los cajones.
We divide the large box in half, and then remove the plastic wrap and thus leave it completely uncovered, ready, we fix the drawers inside.
Ahora que la mayor parte esta lista, comenzaremos haciendo unos cuantos detalles, en el trozo de cartón sobrante recortamos una figura similar a unos arabescos de hiedra con sus respectivas hojas, también hacemos un cilindro de cartón, el cual forraremos con gamuza verde y le abriremos unas zanjas para así colocar nuestros anillos. Ahora, situamos los arabescos de cartón al joyero, para así darle un tono oscuro acompañado de hiedras verdes y blancas que rodean el joyero y sus cajones, al secar las figuras fijaremos las lentejuelas a los lados y el cilindro en el centro de nuestro joyero.
Now that most of it is ready, we will start making a few details, in the leftover piece of cardboard we cut out a figure similar to ivy arabesques with their respective leaves, we also make a cardboard cylinder, which we will cover with green suede and open. ditches to place our rings. Now, we place the cardboard arabesques in the jewelry box, in order to give it a dark tone accompanied by green and white ivies that surround the jewelry box and its drawers. When the figures are dry, we will fix the sequins on the sides and the cylinder in the center of our jewelry box.
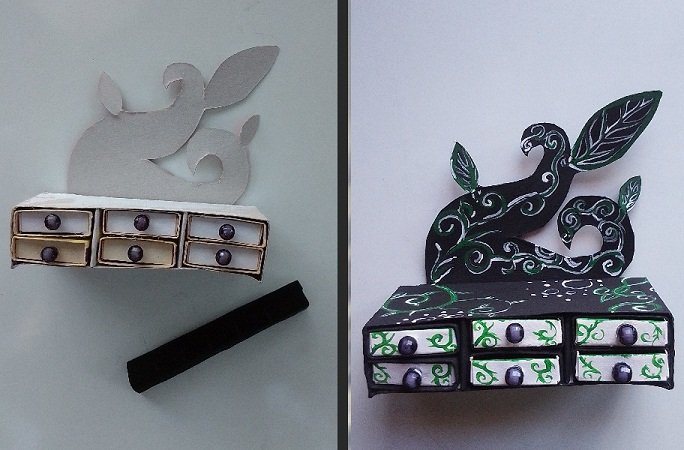
De esta forma hemos terminado con la elaboración de este maravilloso y llamativo joyero. Fácil, rápido y útil joyero, el cual luce a simple vista nuestras prendas y mantiene en orden nuestros anillos y pulseras, tanto fuera como dentro de sus cajones.
In this way we have finished with the elaboration of this wonderful and striking jewelry box. Easy, fast and useful jewelry box, which shows off our clothes at a glance and keeps our rings and bracelets in order, both outside and inside your drawers.
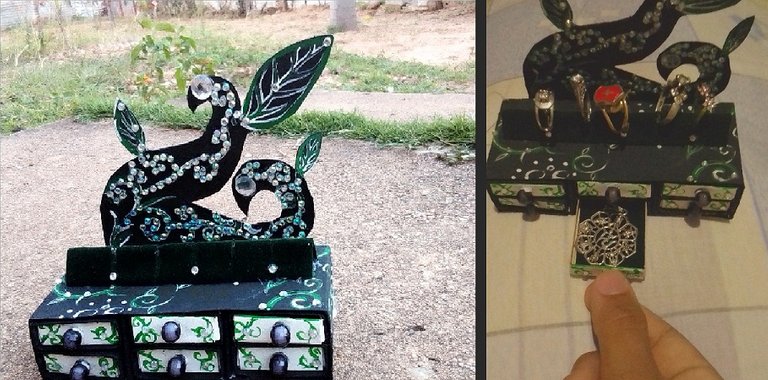
Con ello damos por terminada nuestra obra, espero que esta manualidad sea de su agrado, los invito a que nos sigan acompañando próximamente a mas de estas magnificas ideas, ¡Nos vemos pronto! ❤️ ¡Que pasen un feliz día!
With this we end our work, I hope that this craft is to your liking, I invite you to continue accompanying us soon for more of these magnificent ideas, see you soon! ❤️ Have a happy day!
Las fotografías 📷 son de nuestra autoria y fueron tomadas con un teléfono inteligente (ZTE Blade L130) y editadas en Paint y Paint Tool SAI por @albakriz.
The photographs 📷 are of our authorship and were taken with a smartphone (ZTE Blade L130) and edited in Paint and Paint Tool SAI by @albakriz.
Traducción: traductor de Google.
Translation: translate Google.