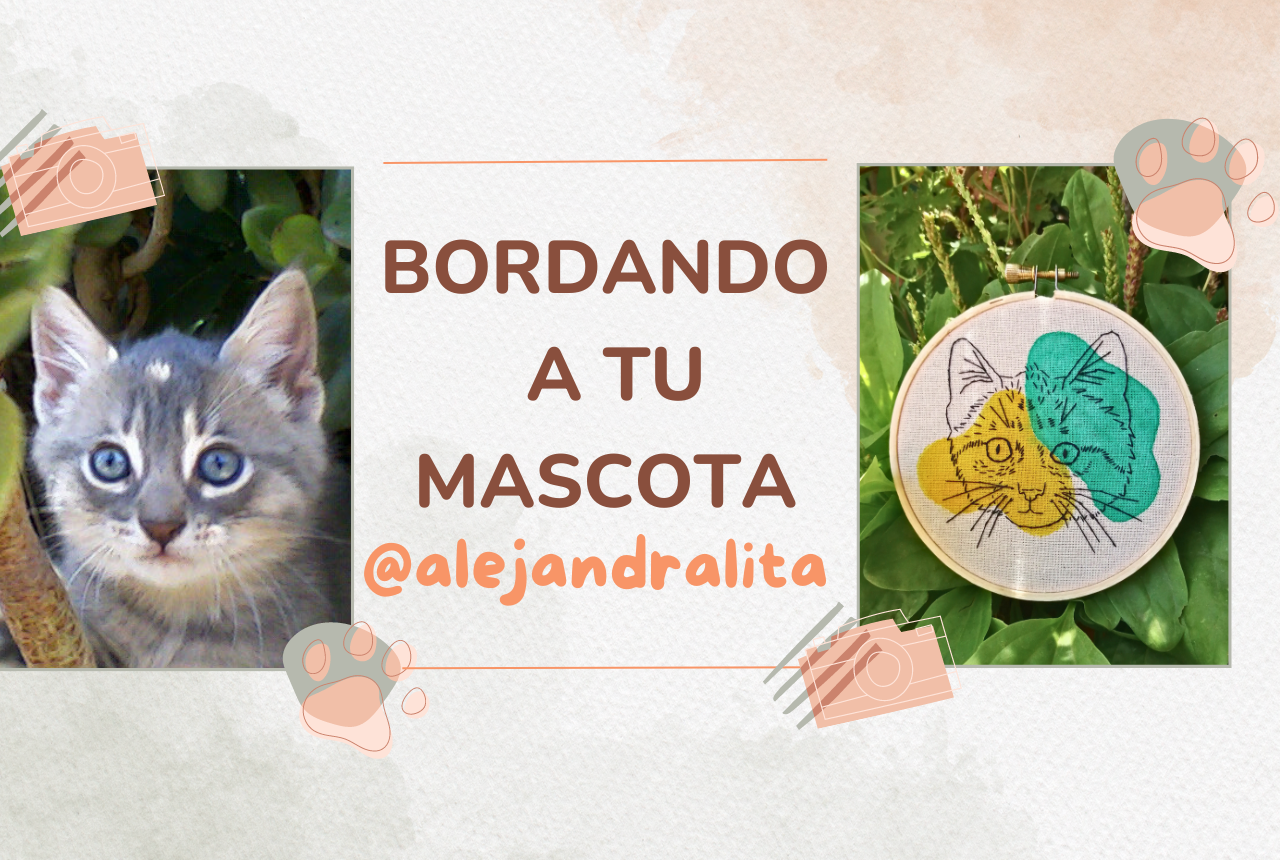
Saludos a toda la comunidad de Hive Diy.
Hace ya unos años estoy trabajando en mi emprendimiento Amankim en donde vendemos productos para los amantes de los animales. Siempre me han pedido cuadros bordados. Y muchos quieren aprender y no pueden porque realmente se les hace complicado aprneder puntadas y saber las tonalidades de hilos a usar. Asi que se me ocurrió crear un proyecto para principiantes con una puntada basica pero de igual manera hermoso que conmemore a nuestras bellas mascotas. 🤗
Greetings to the entire Hive Diy community. For a few years now I have been working on my venture Amankim where we sell products for animal lovers. They have always asked me for embroidered paintings. And many want to learn and cannot because it is really difficult for them to learn the tips and know the shades of threads to use. So I thought of creating a beginner-friendly project with a basic but still beautiful stitch that commemorates our beautiful pets. 🤗
Materiales / Materials
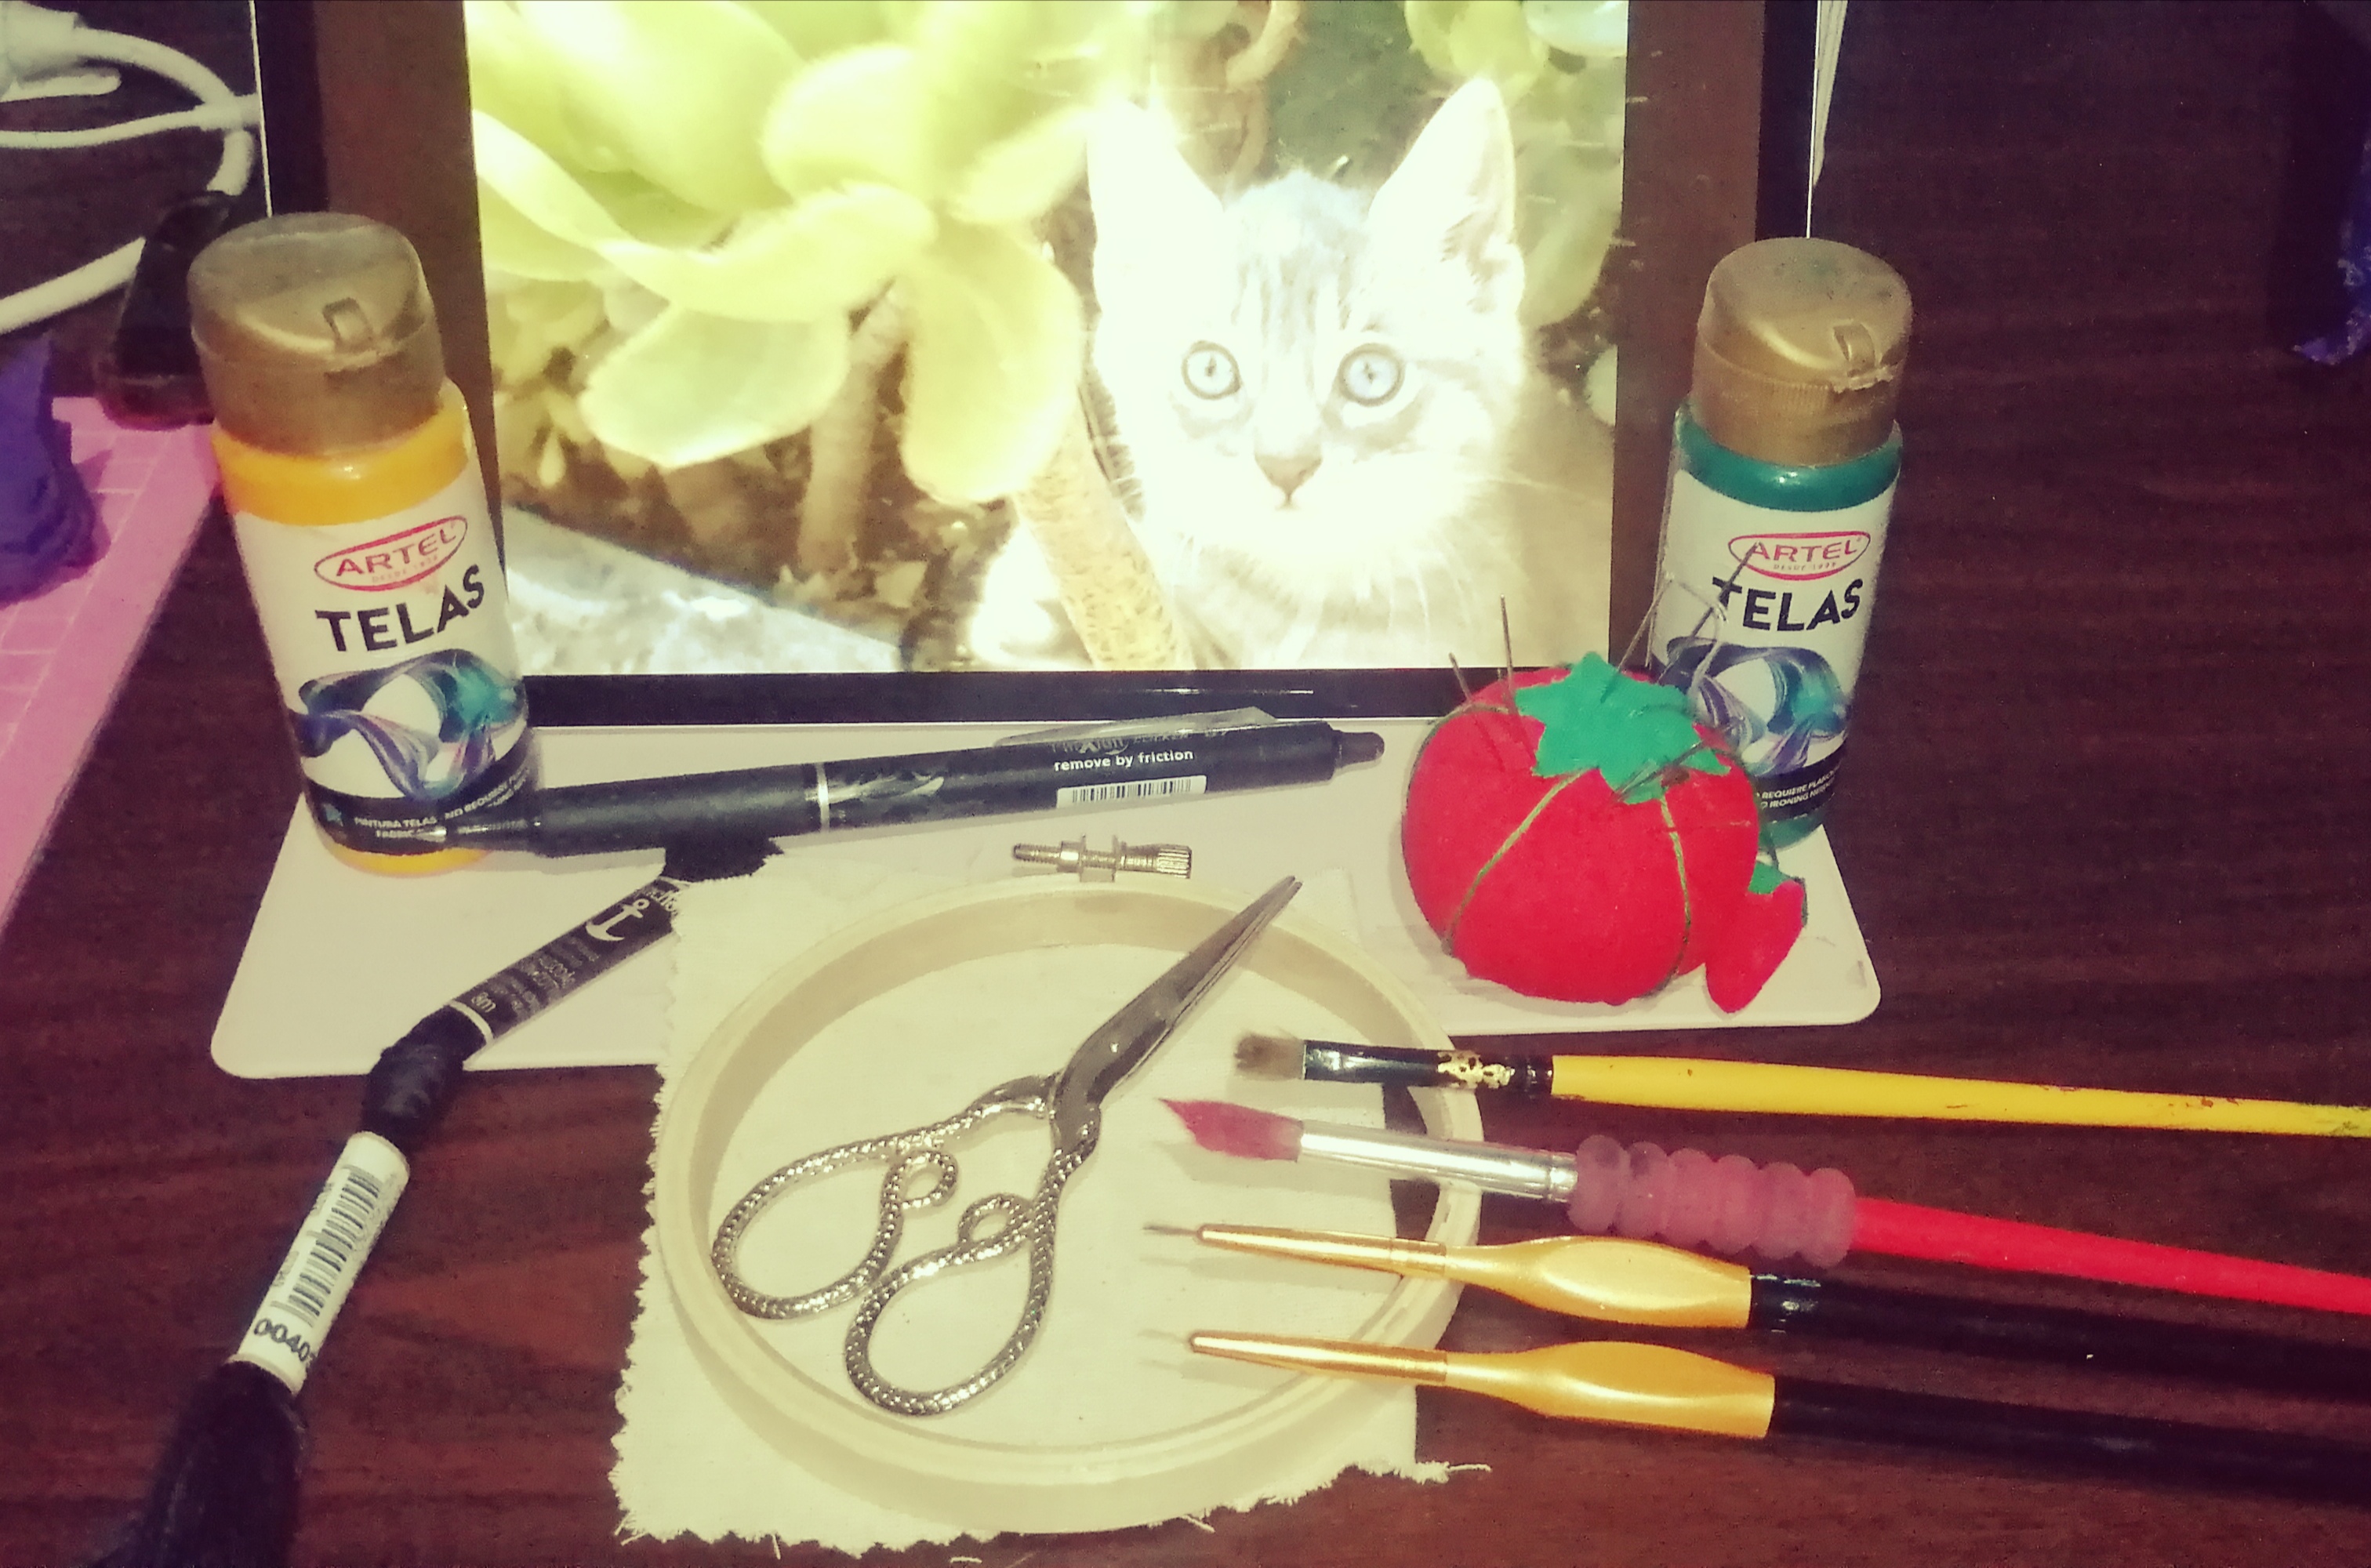
- Tela crea o tela manta
- 1 Bastidor de 10 cm
- Hilos de bordar negro
- Agujas
- Lapiz de tinta termosensible (se borran con calor)
- Pinturas de tela amarillo y verde
- Tijera
- Plancha
- Foto de tu mascota
- Tableta digital (Si no tienes, no importa! La ventana será tu aliada 😉)
- Creates or blanket fabric
- 1 frame of 10cm
- Black Embroidery threads
- Needles
- Thermosensitive ink pencil (can be erased with heat)
- Yellow and green fabric paints
- Scissors
- Iron
- Photo of your pet
- Digital Table (If you don't have one its donesn't matter. The Windows will be your ally.
|
|

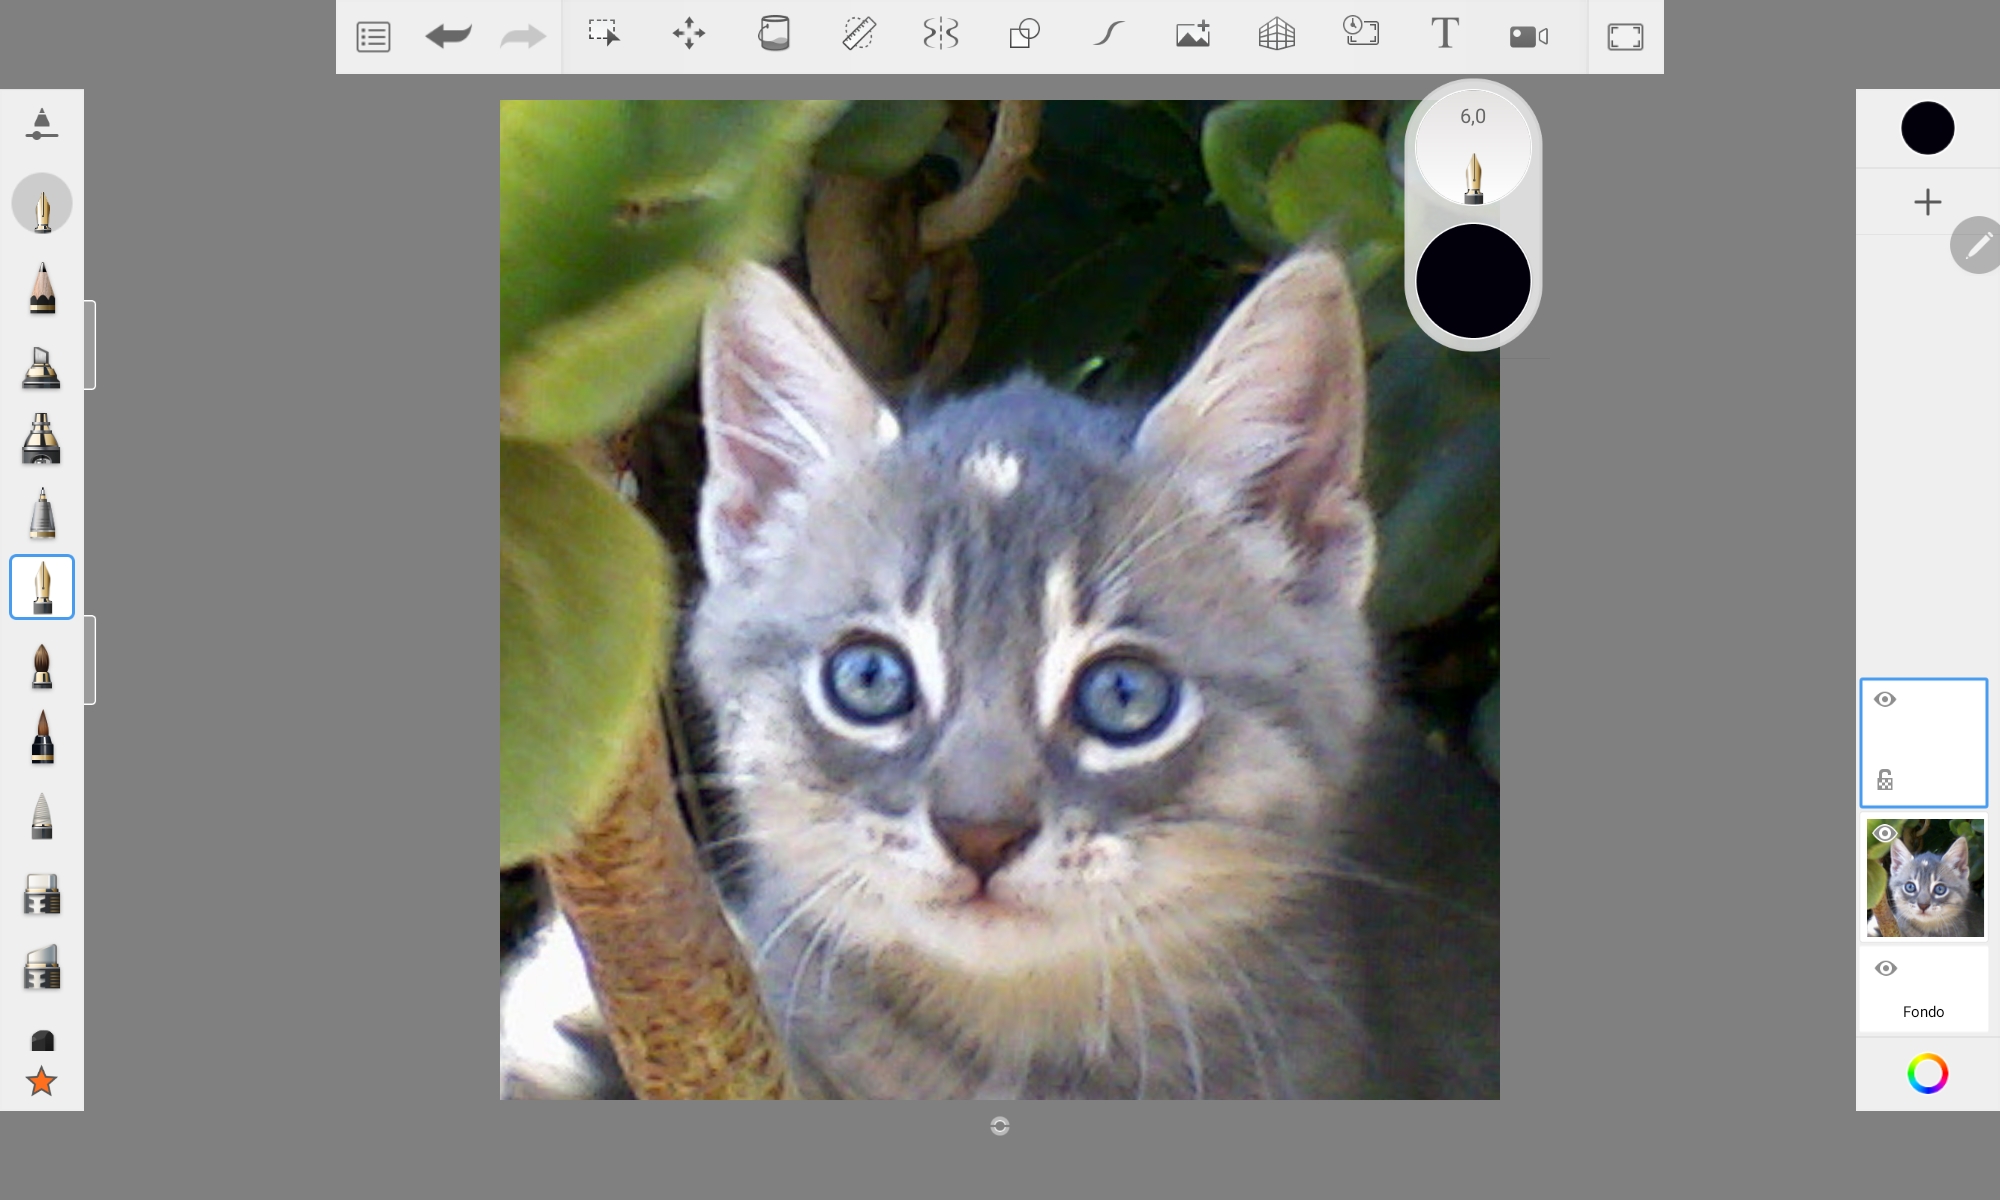
Empezamos abriendo el programa de dibujo que tengas en tu tableta, yo use Sketchbook (o imprimiendo la foto y poniendo otro papel blanco arriba lo pegas en la ventana)
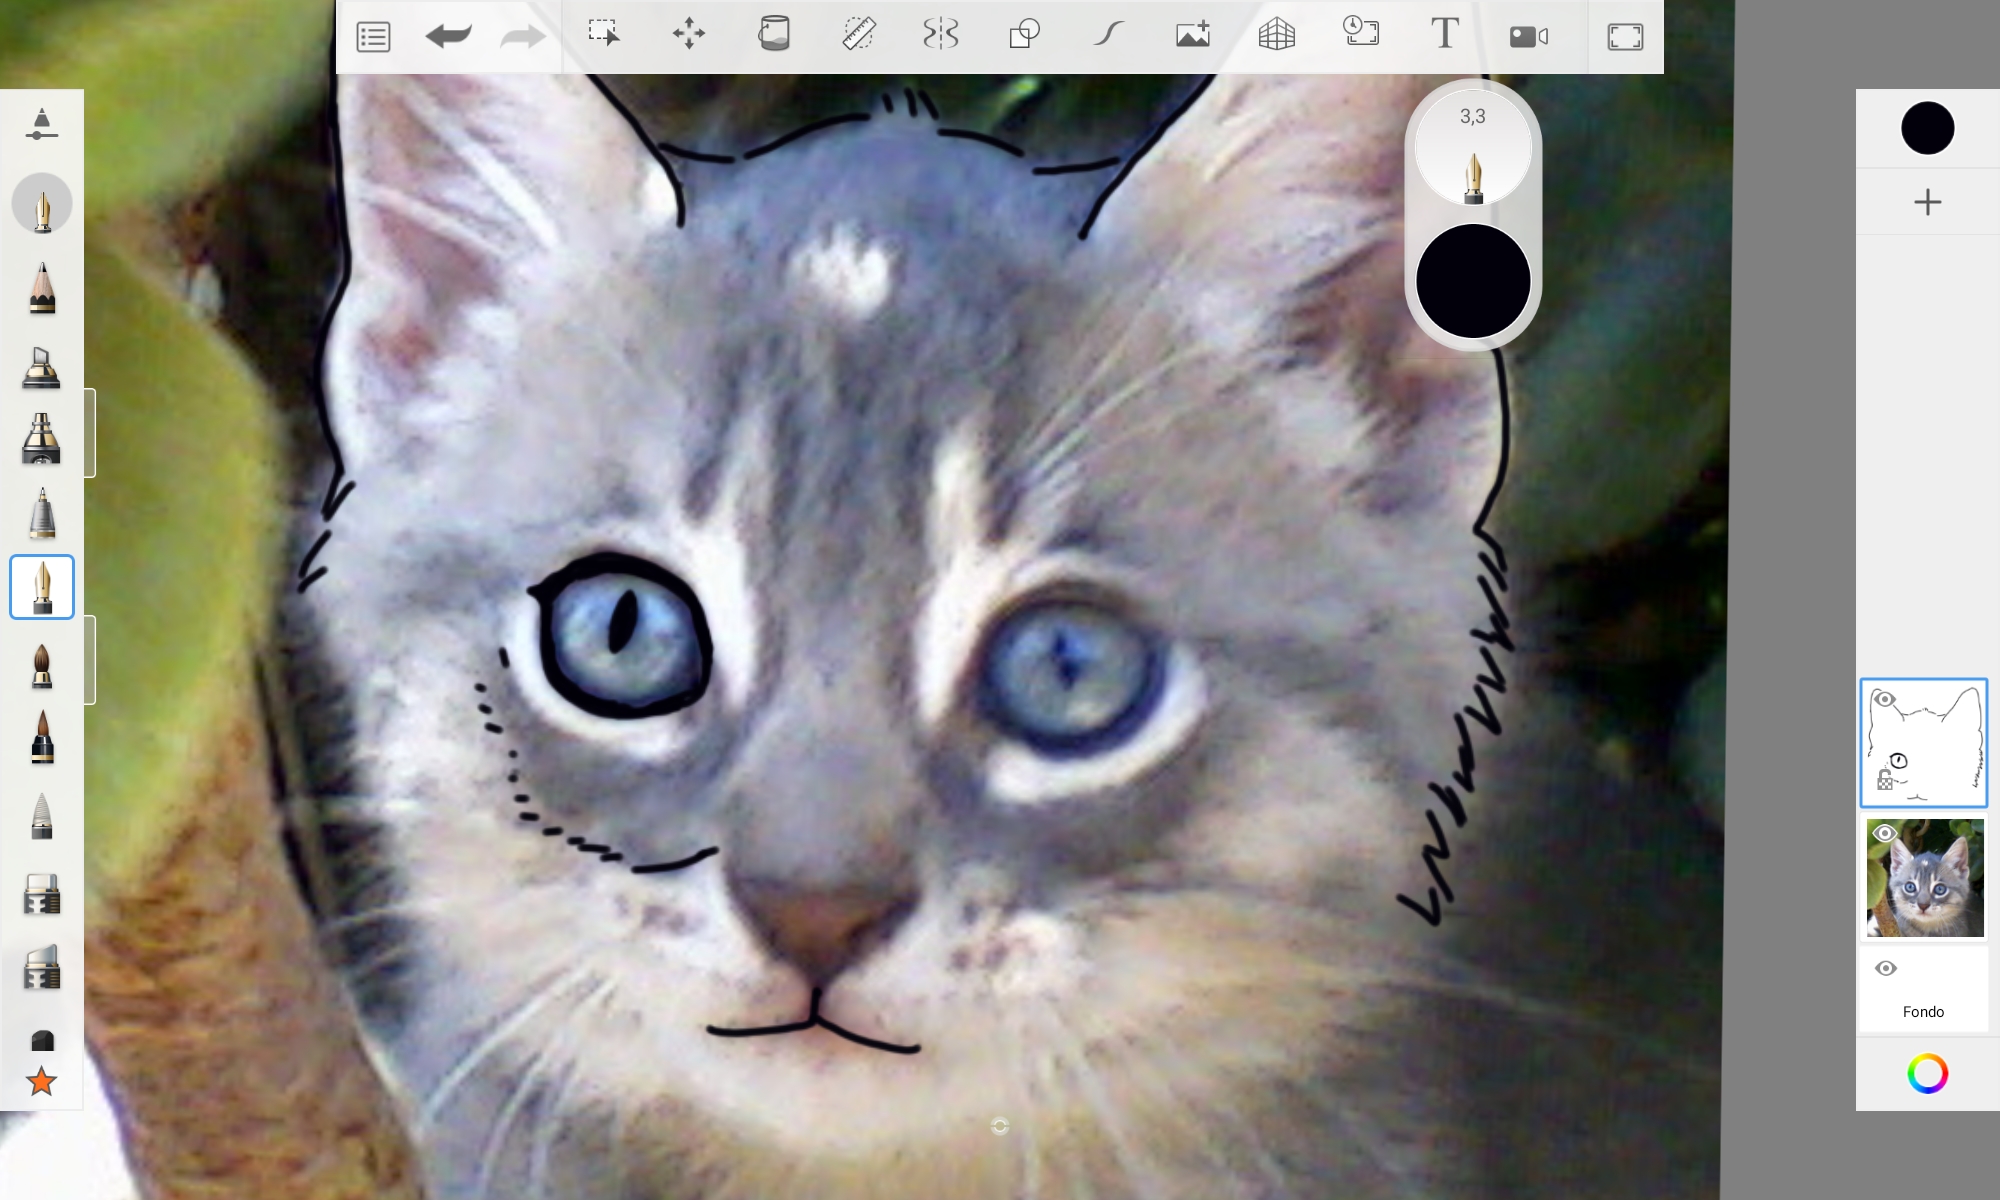
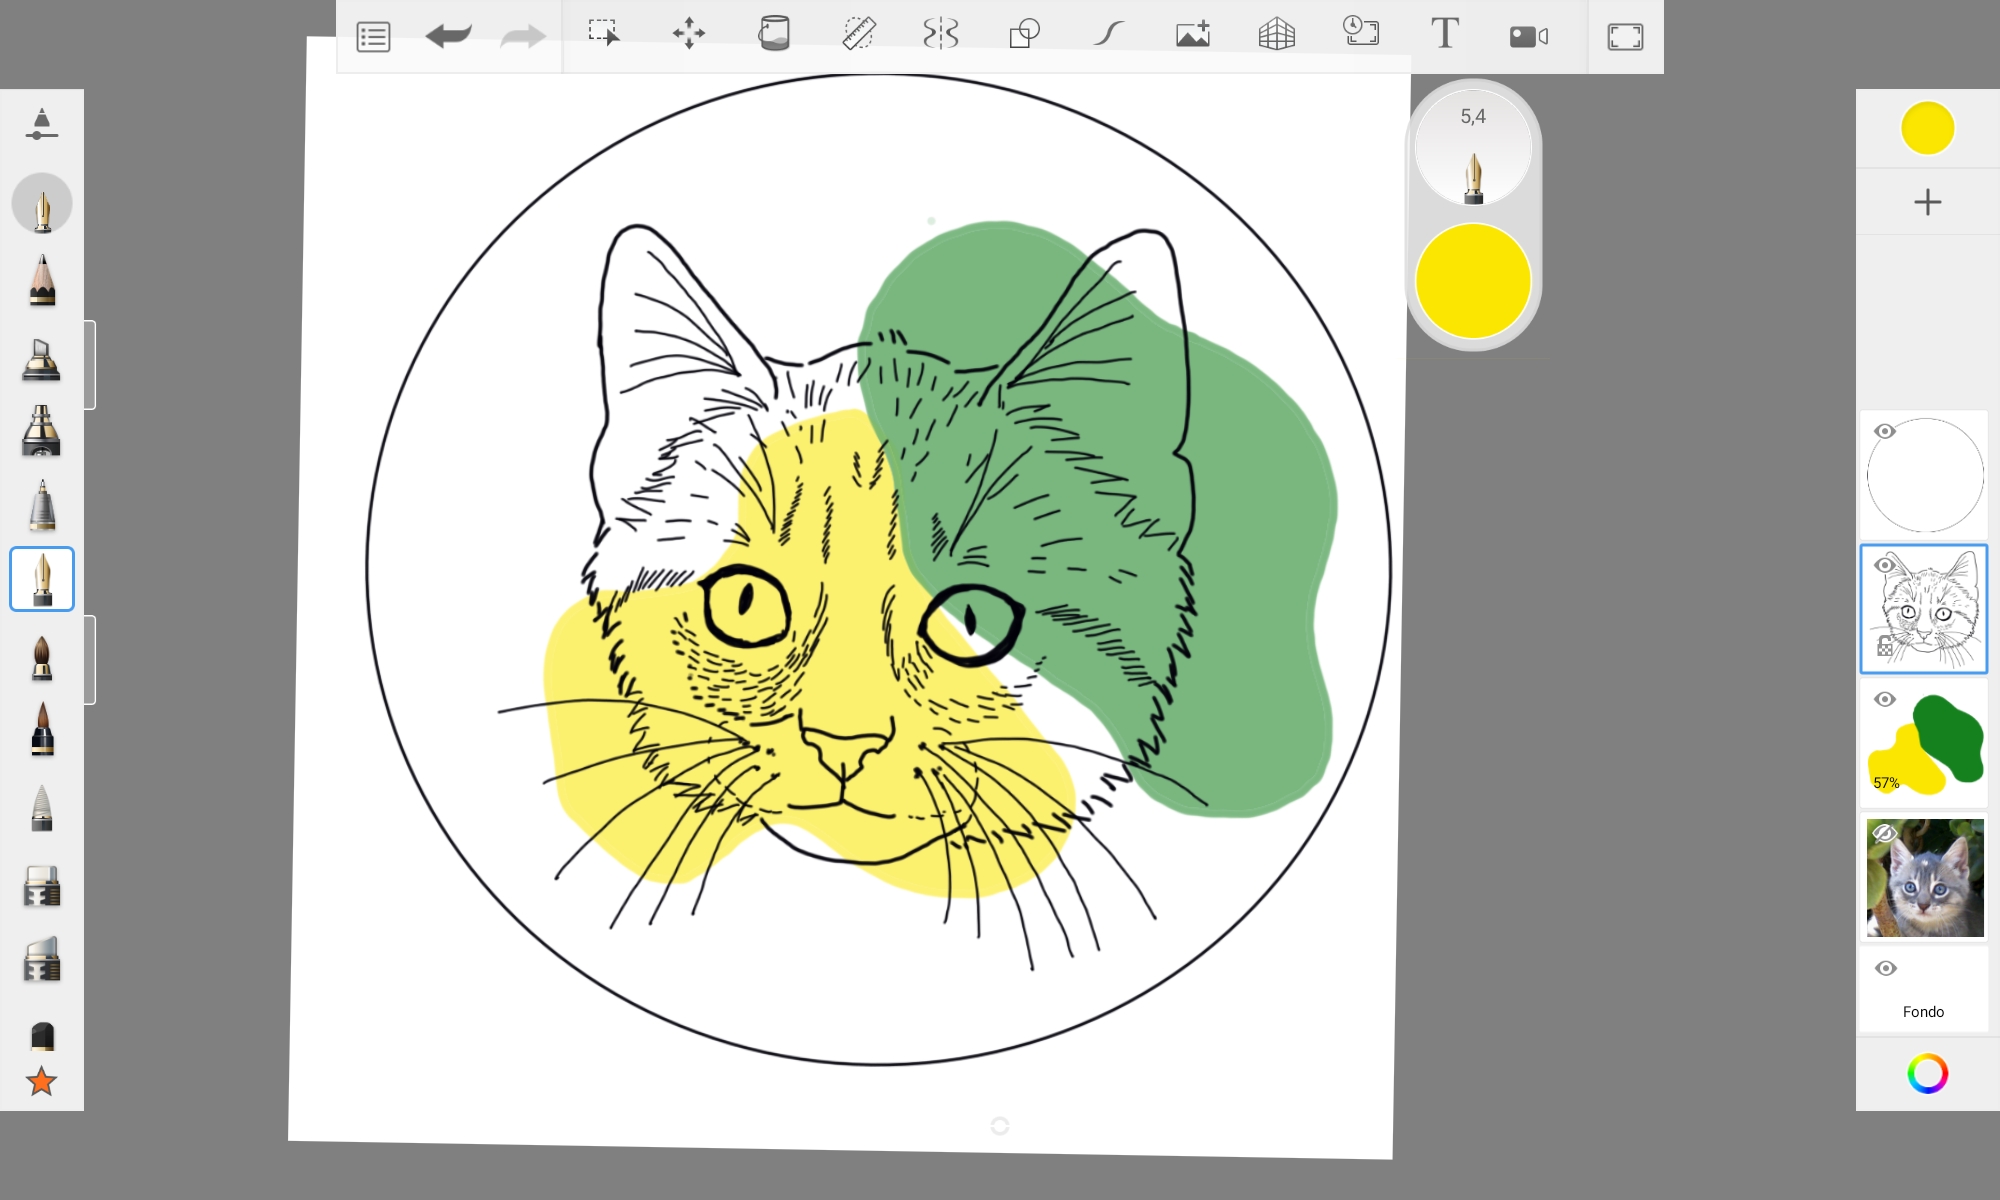
Luego veremos los rasgos principales de tu mascota. En mi caso es un lindo gatito que se me fue al cielo 🥺 su nombre era Gang-Kimo por eso que quiero retratarlo era un gato hermoso y buenachon.
Las orejas, la nariz, los ojos y la boca se marcan completos. Al rededor de su rostro hacemos lineas puntiagudas que asemejen pelaje y agregamos las manchas que tengan con pequeñas lineas y los bigotitos no deben faltar, aunque tu gato tenga muchos bigotes no agregues todo ya que parecera que una raña se lo esta comiendo jajaja máximo serían unos 6 bigotes por lado 🤭
We start by opening the drawing program you have on your tablet, I used Sketchbook (or printing the photo and putting another white paper on top and sticking it in the window) Then we will see the main features of your pet. In my case he is a cute kitten that went to heaven his name was Gang-Kimo that's why I want to portray him, he was a beautiful and good-natured cat. The ears, nose, eyes and mouth are marked complete. Around their face we make pointed lines that resemble fur and add the spots they have with small lines and the whiskers should not be missing, even if your cat has many whiskers, do not add everything since it will look like a spider is eating it hahaha, the maximum would be a few. 6 mustaches per side 🤭
|
|
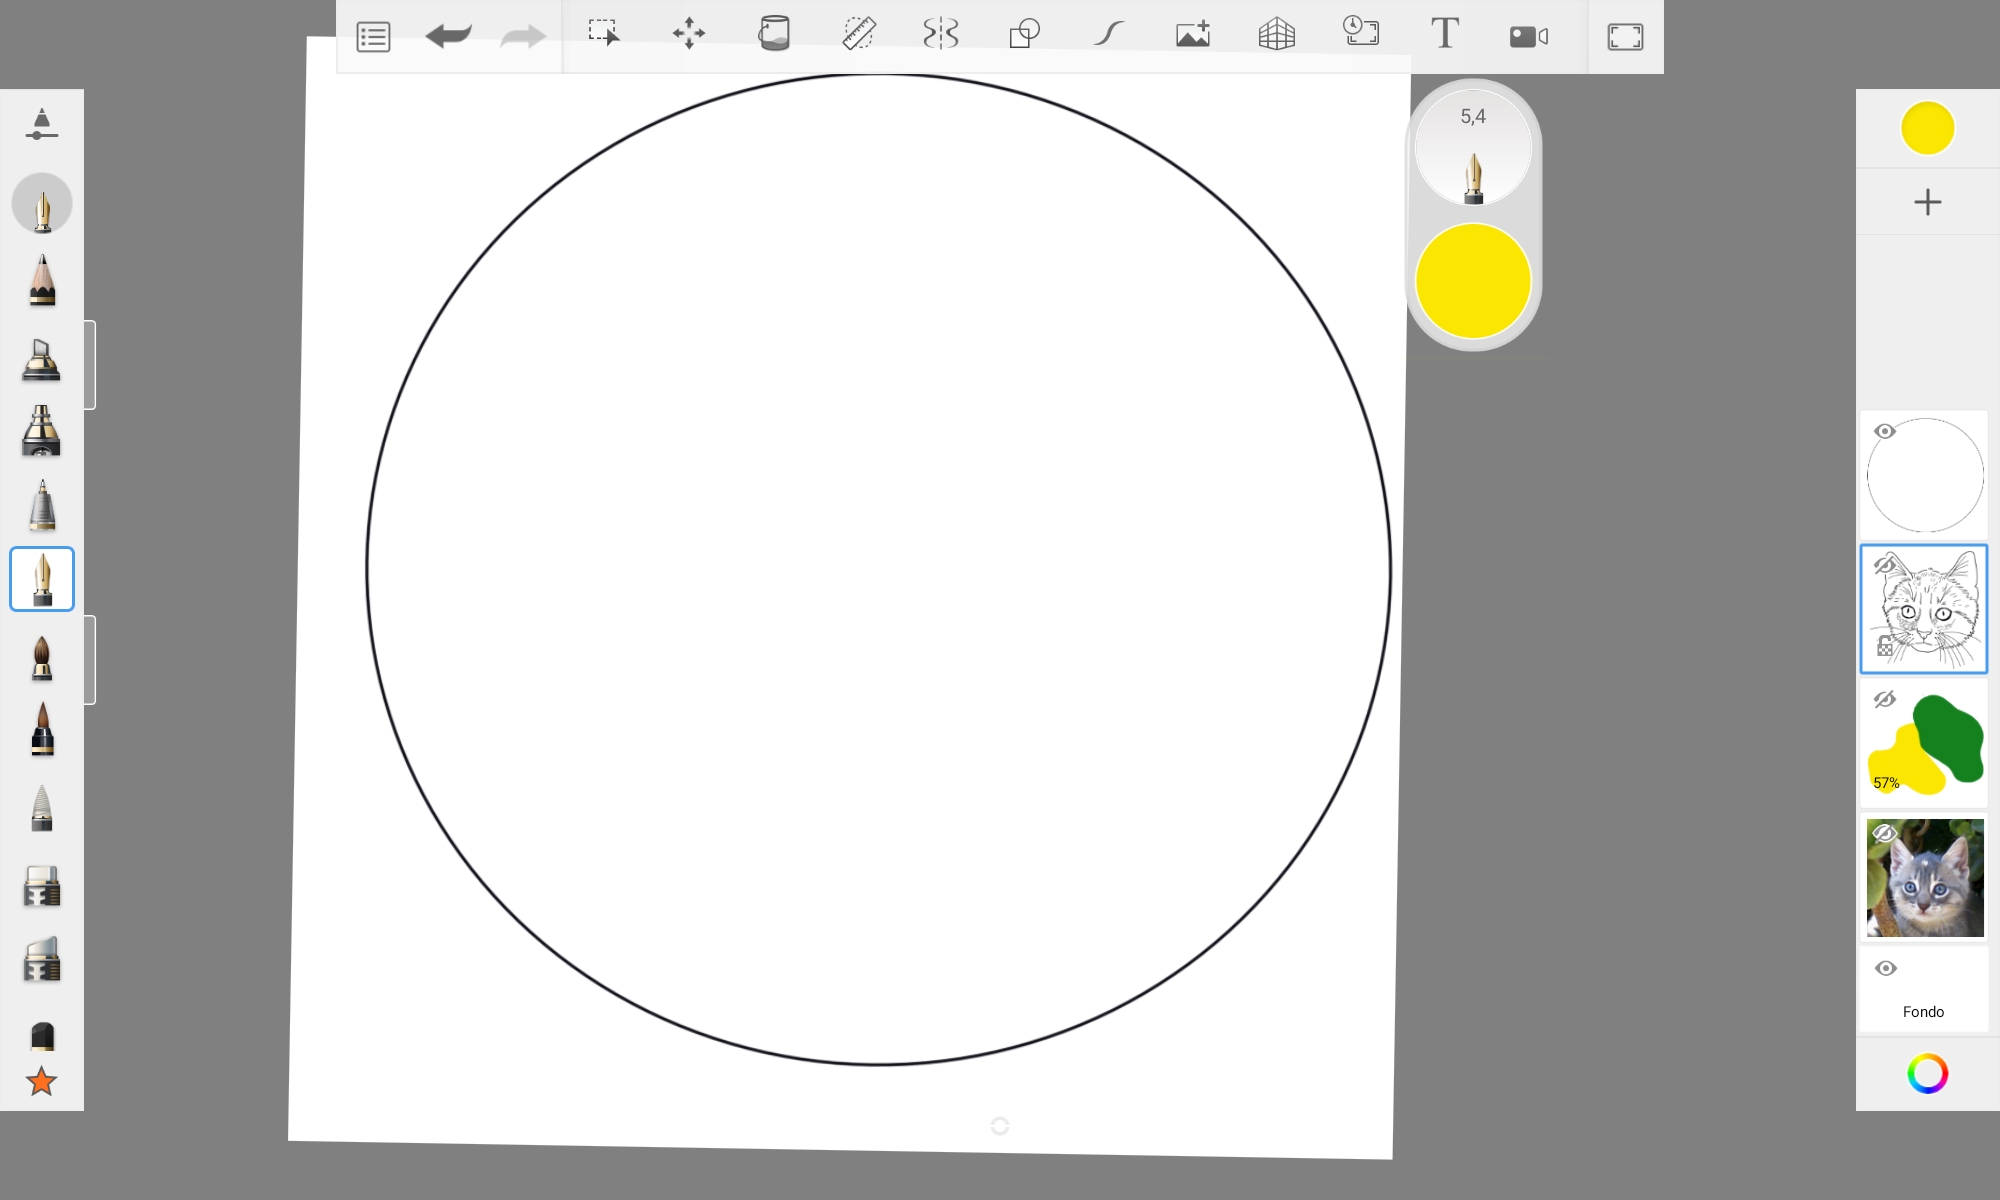
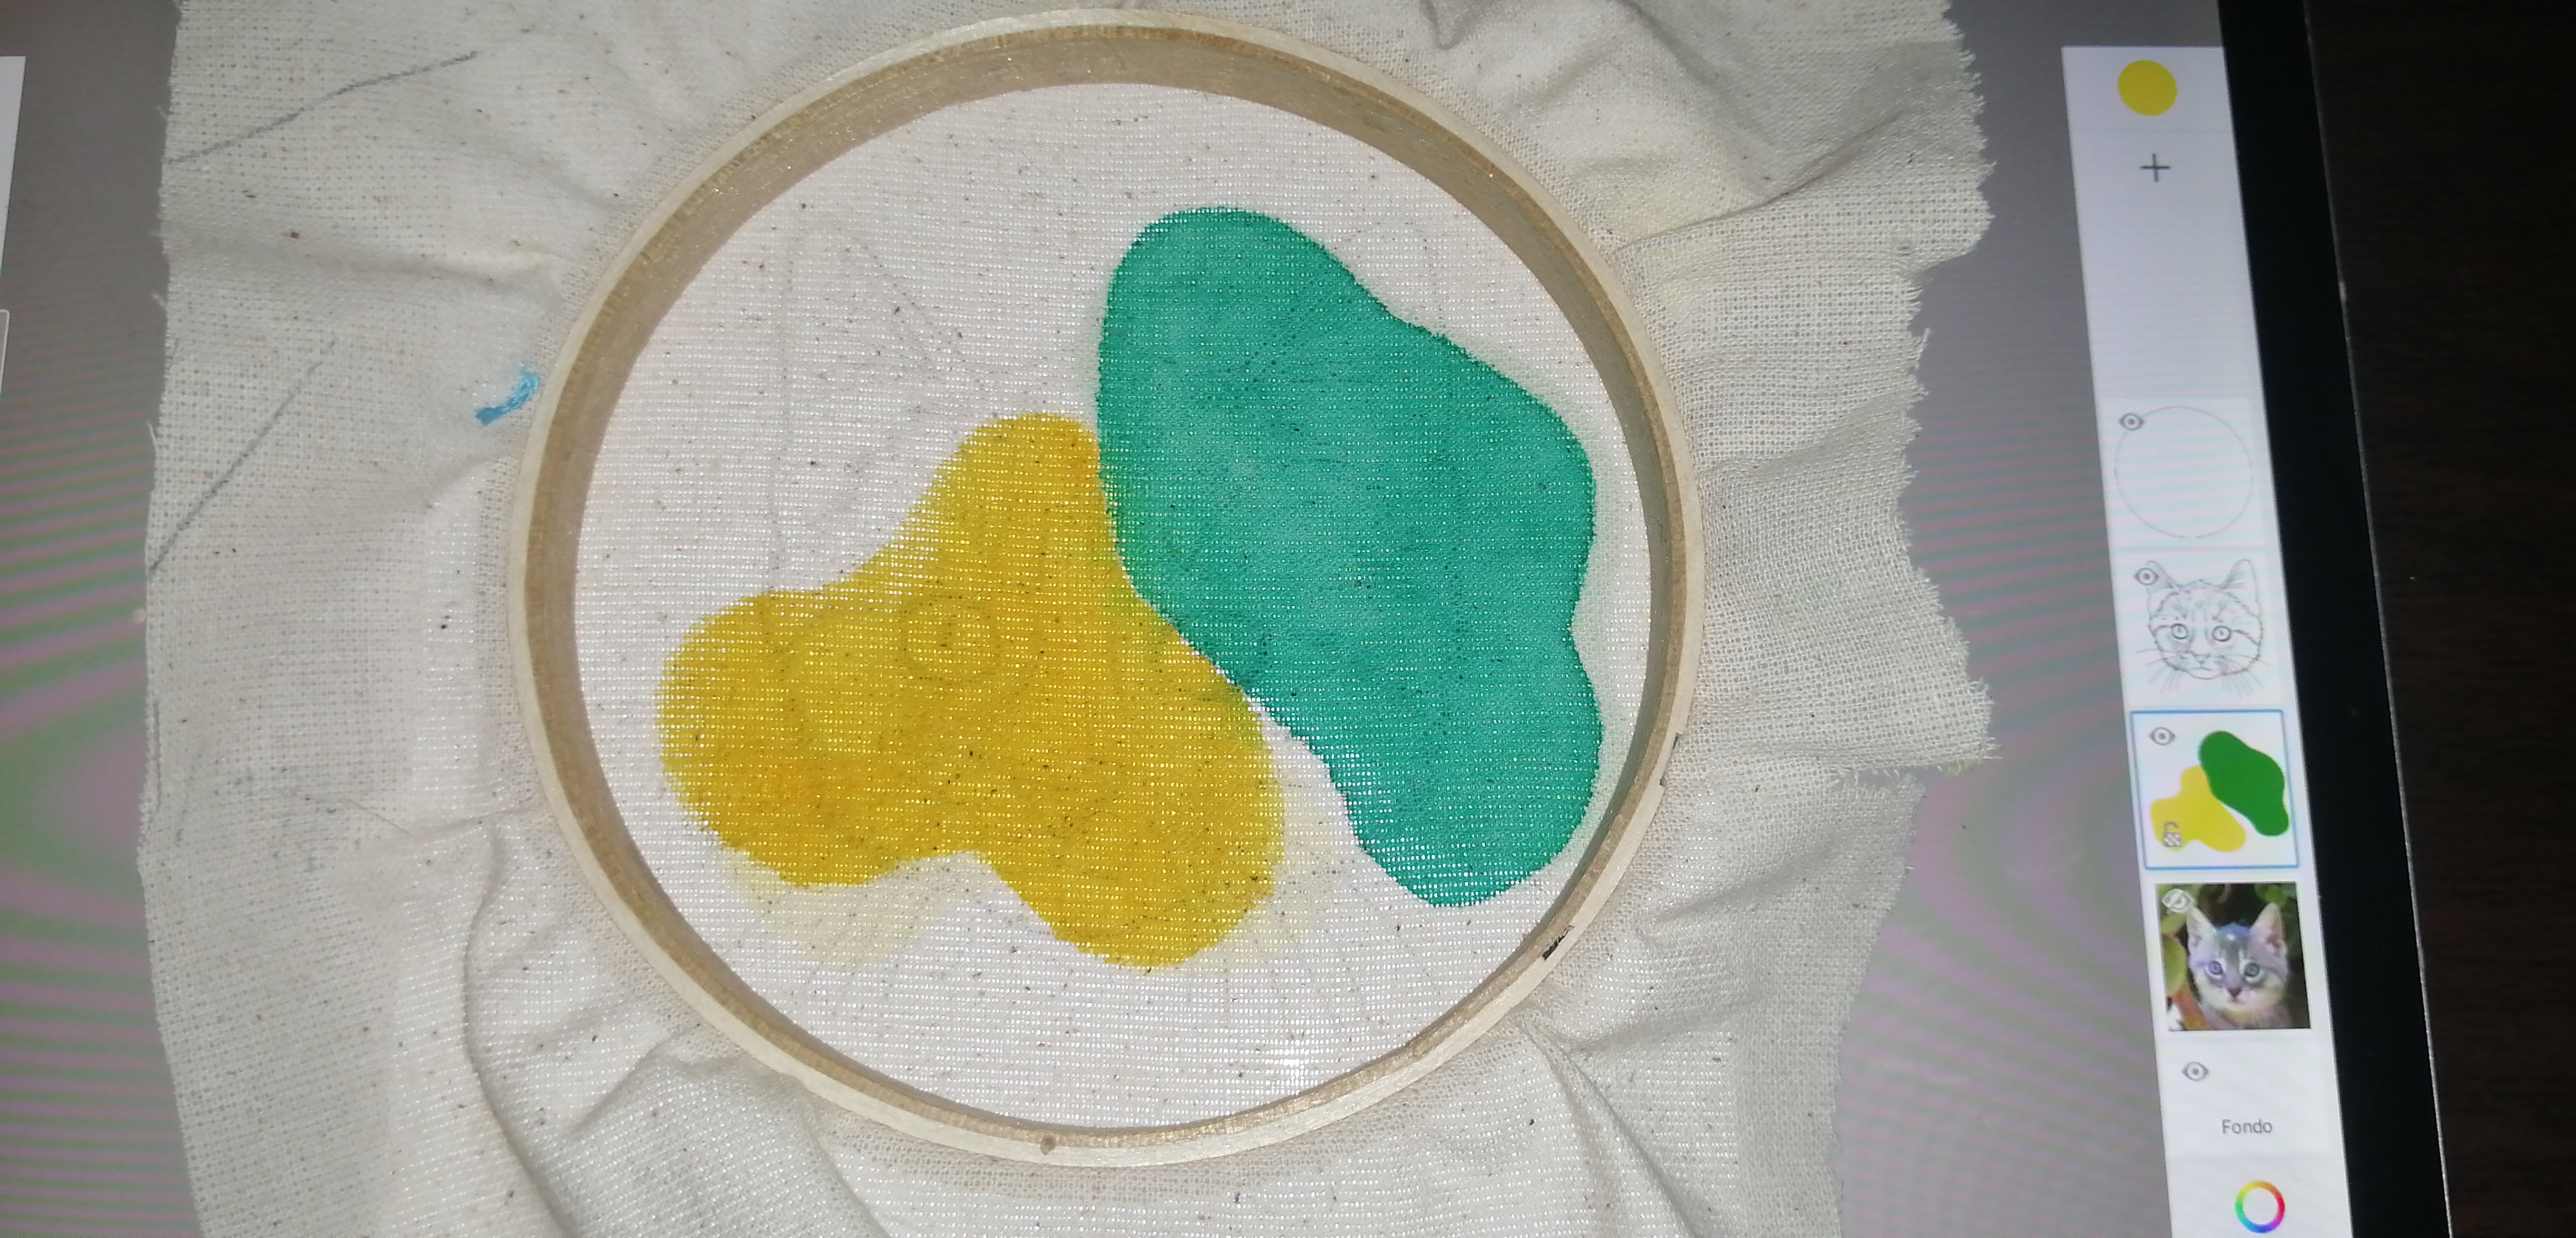
Ya estamos listos, ahora hacemos un circulo que asemeje el aro del bastidor y hacemos manchas amorfas. Y eliges tus colores favoritos y lo pintas. Y quedaría algo así.
We are ready, now we make a circle that resembles the ring of the frame and we make amorphous spots. And you choose your favorite colors and paint it. And it would be something like this.
|
|
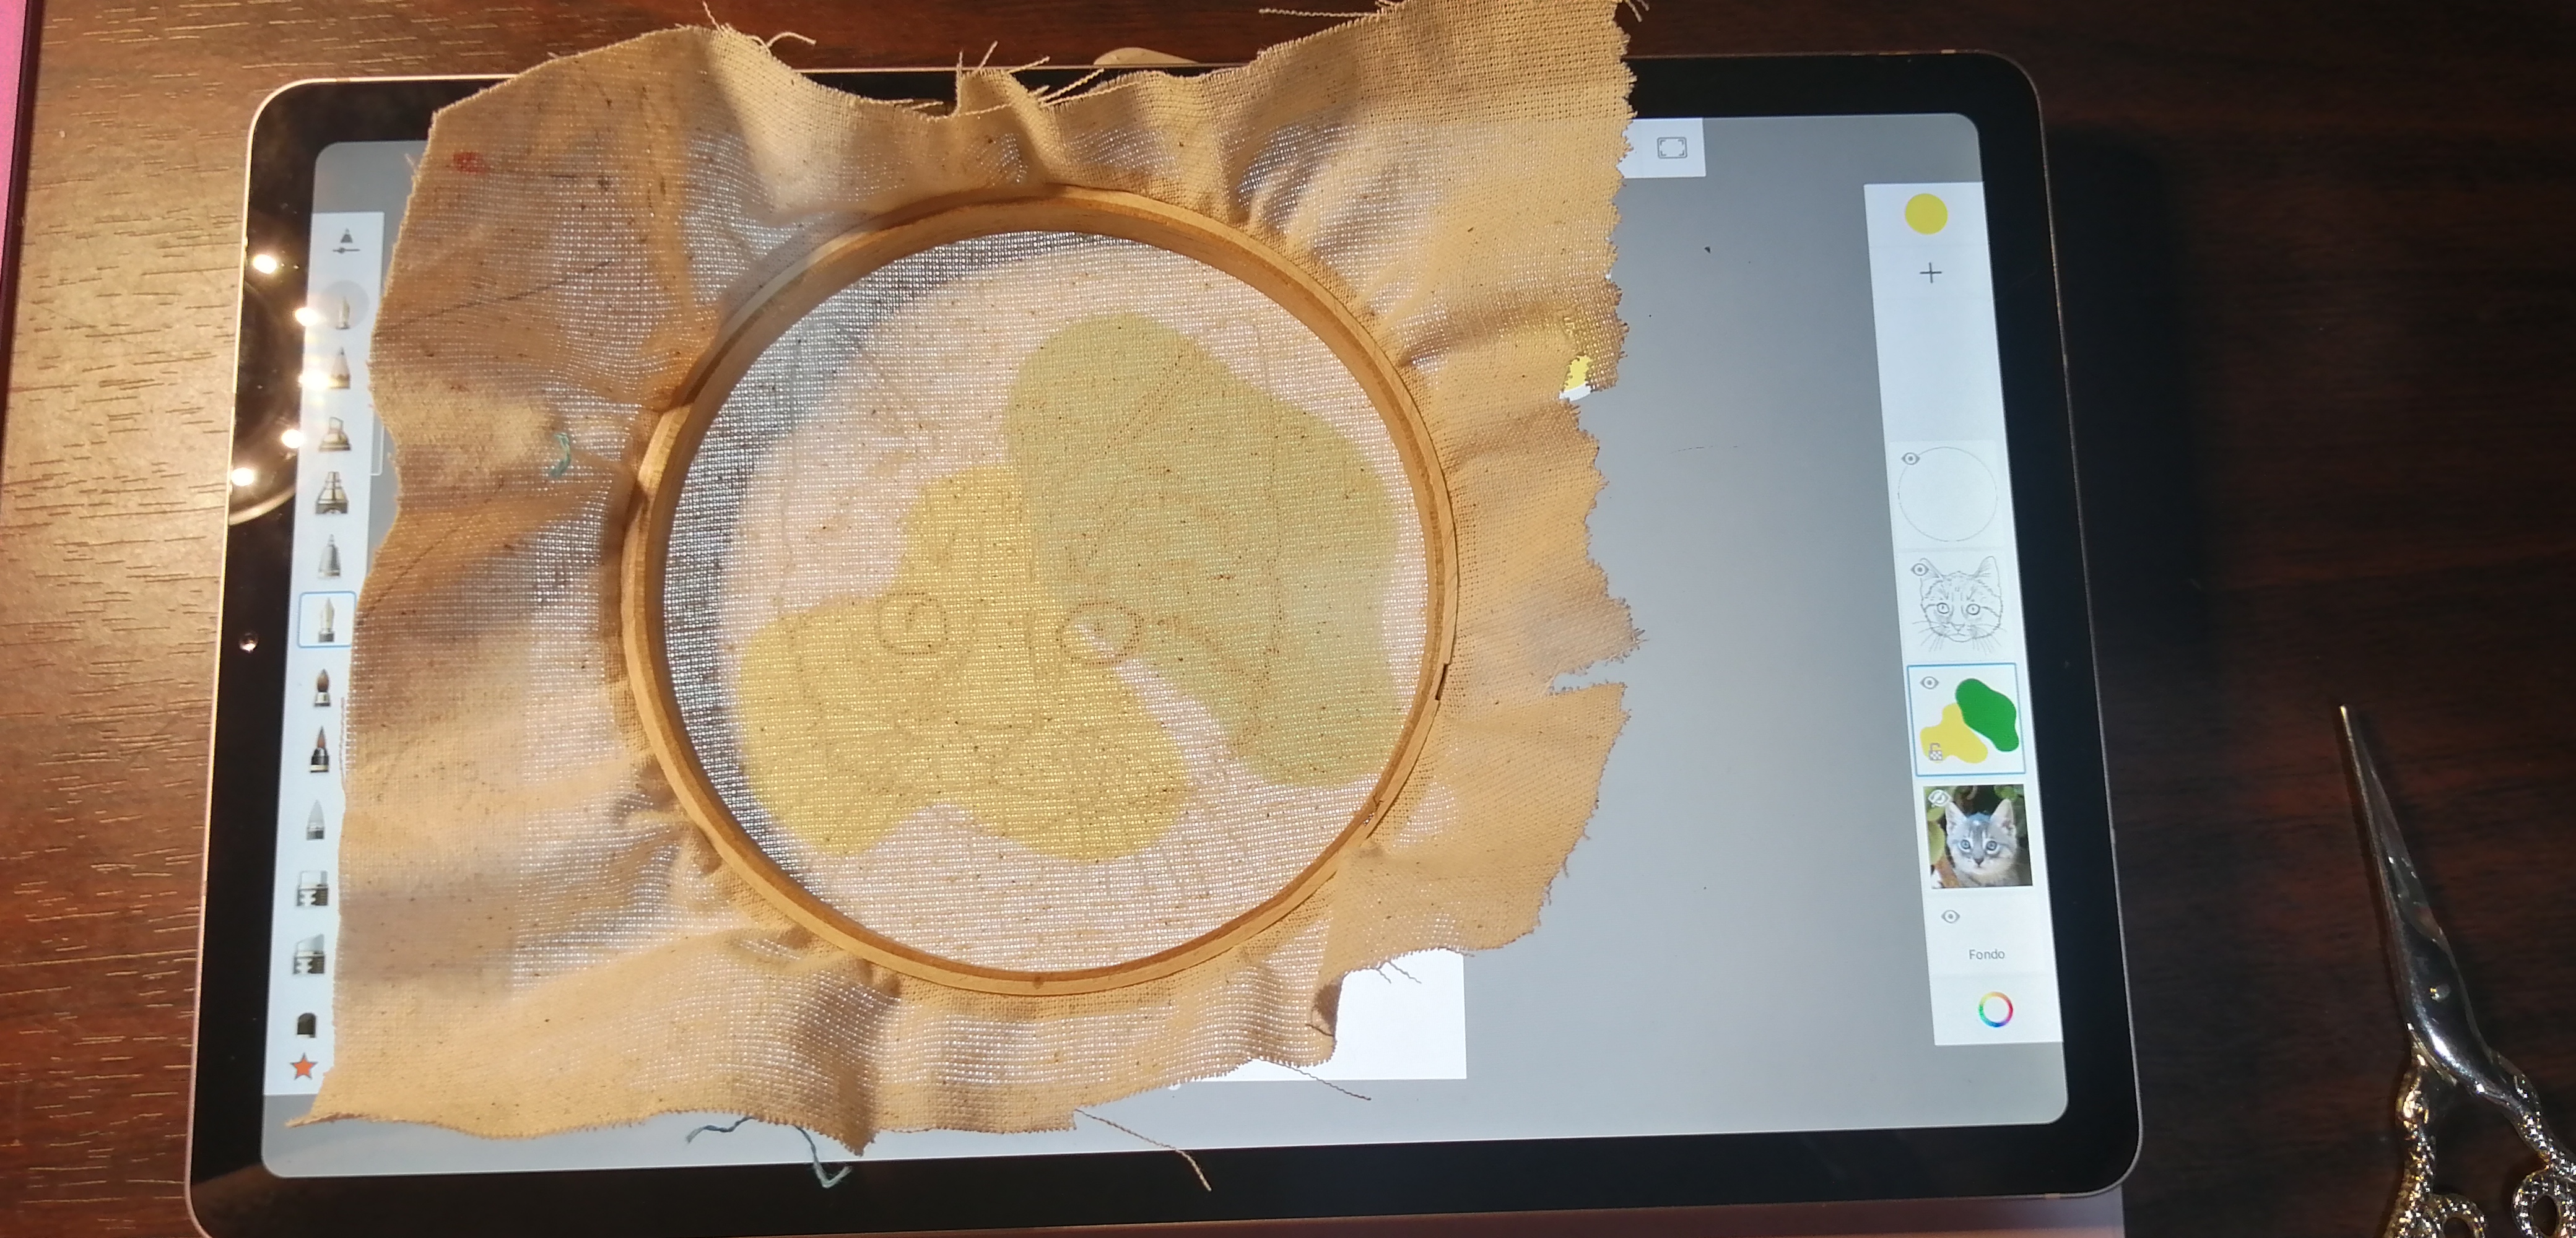
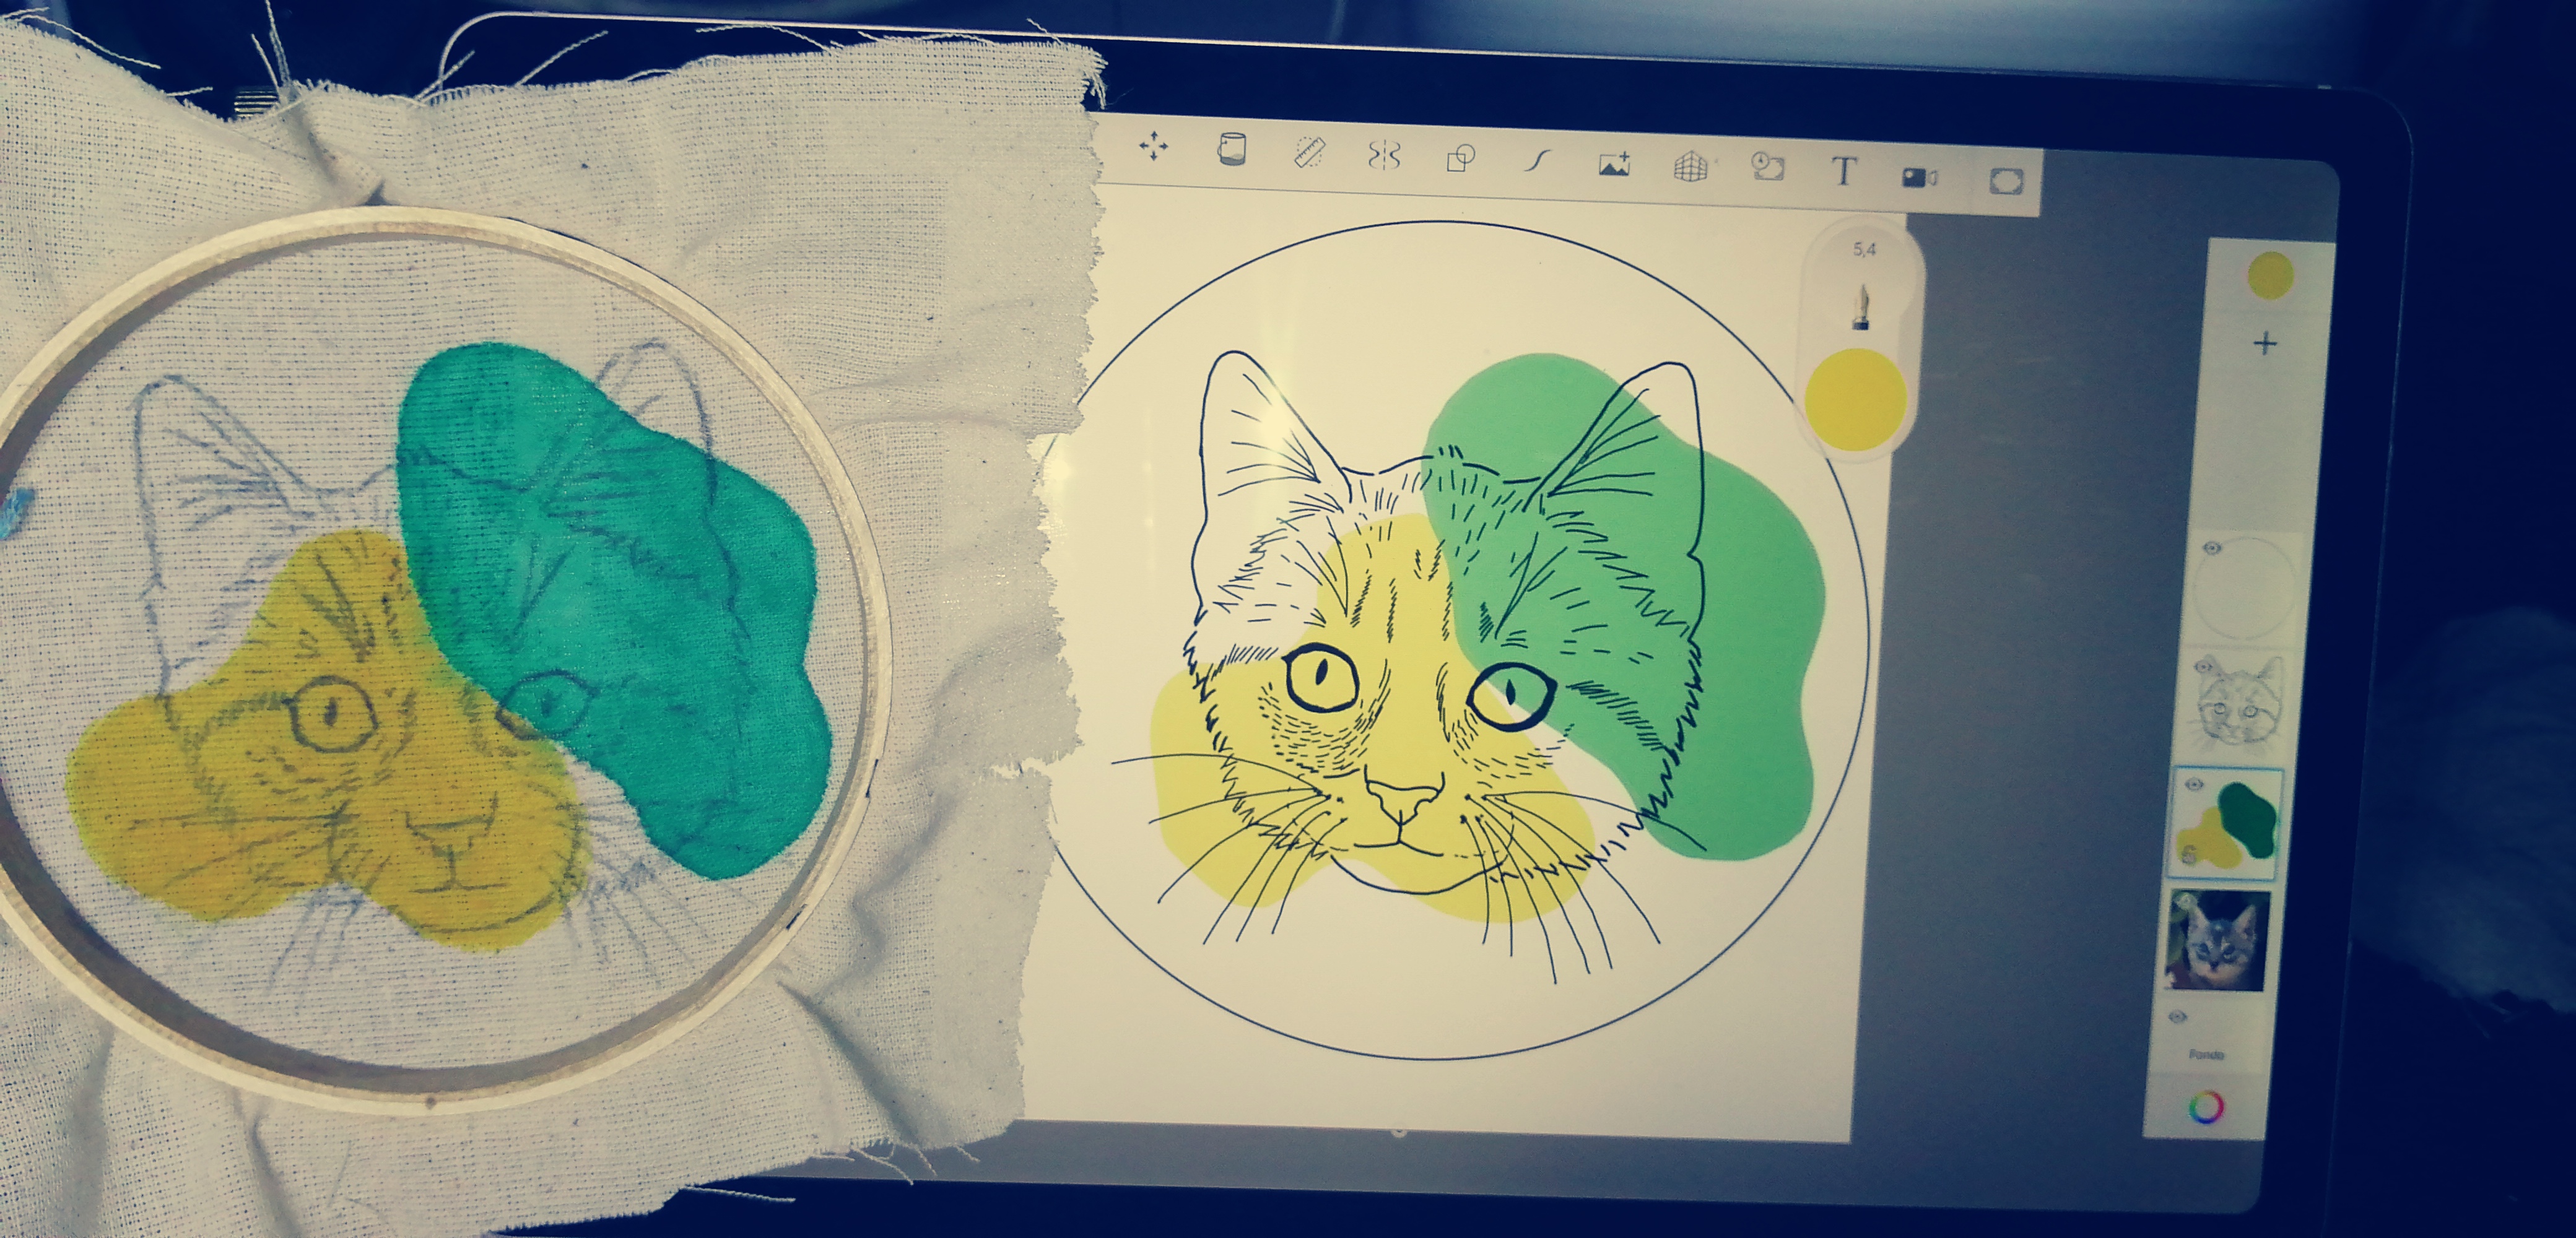
Ahora ponemos la tela en el bastidor y lo damos vuelta y ponemos en la tableta para empezar a calcar solo las manchas.
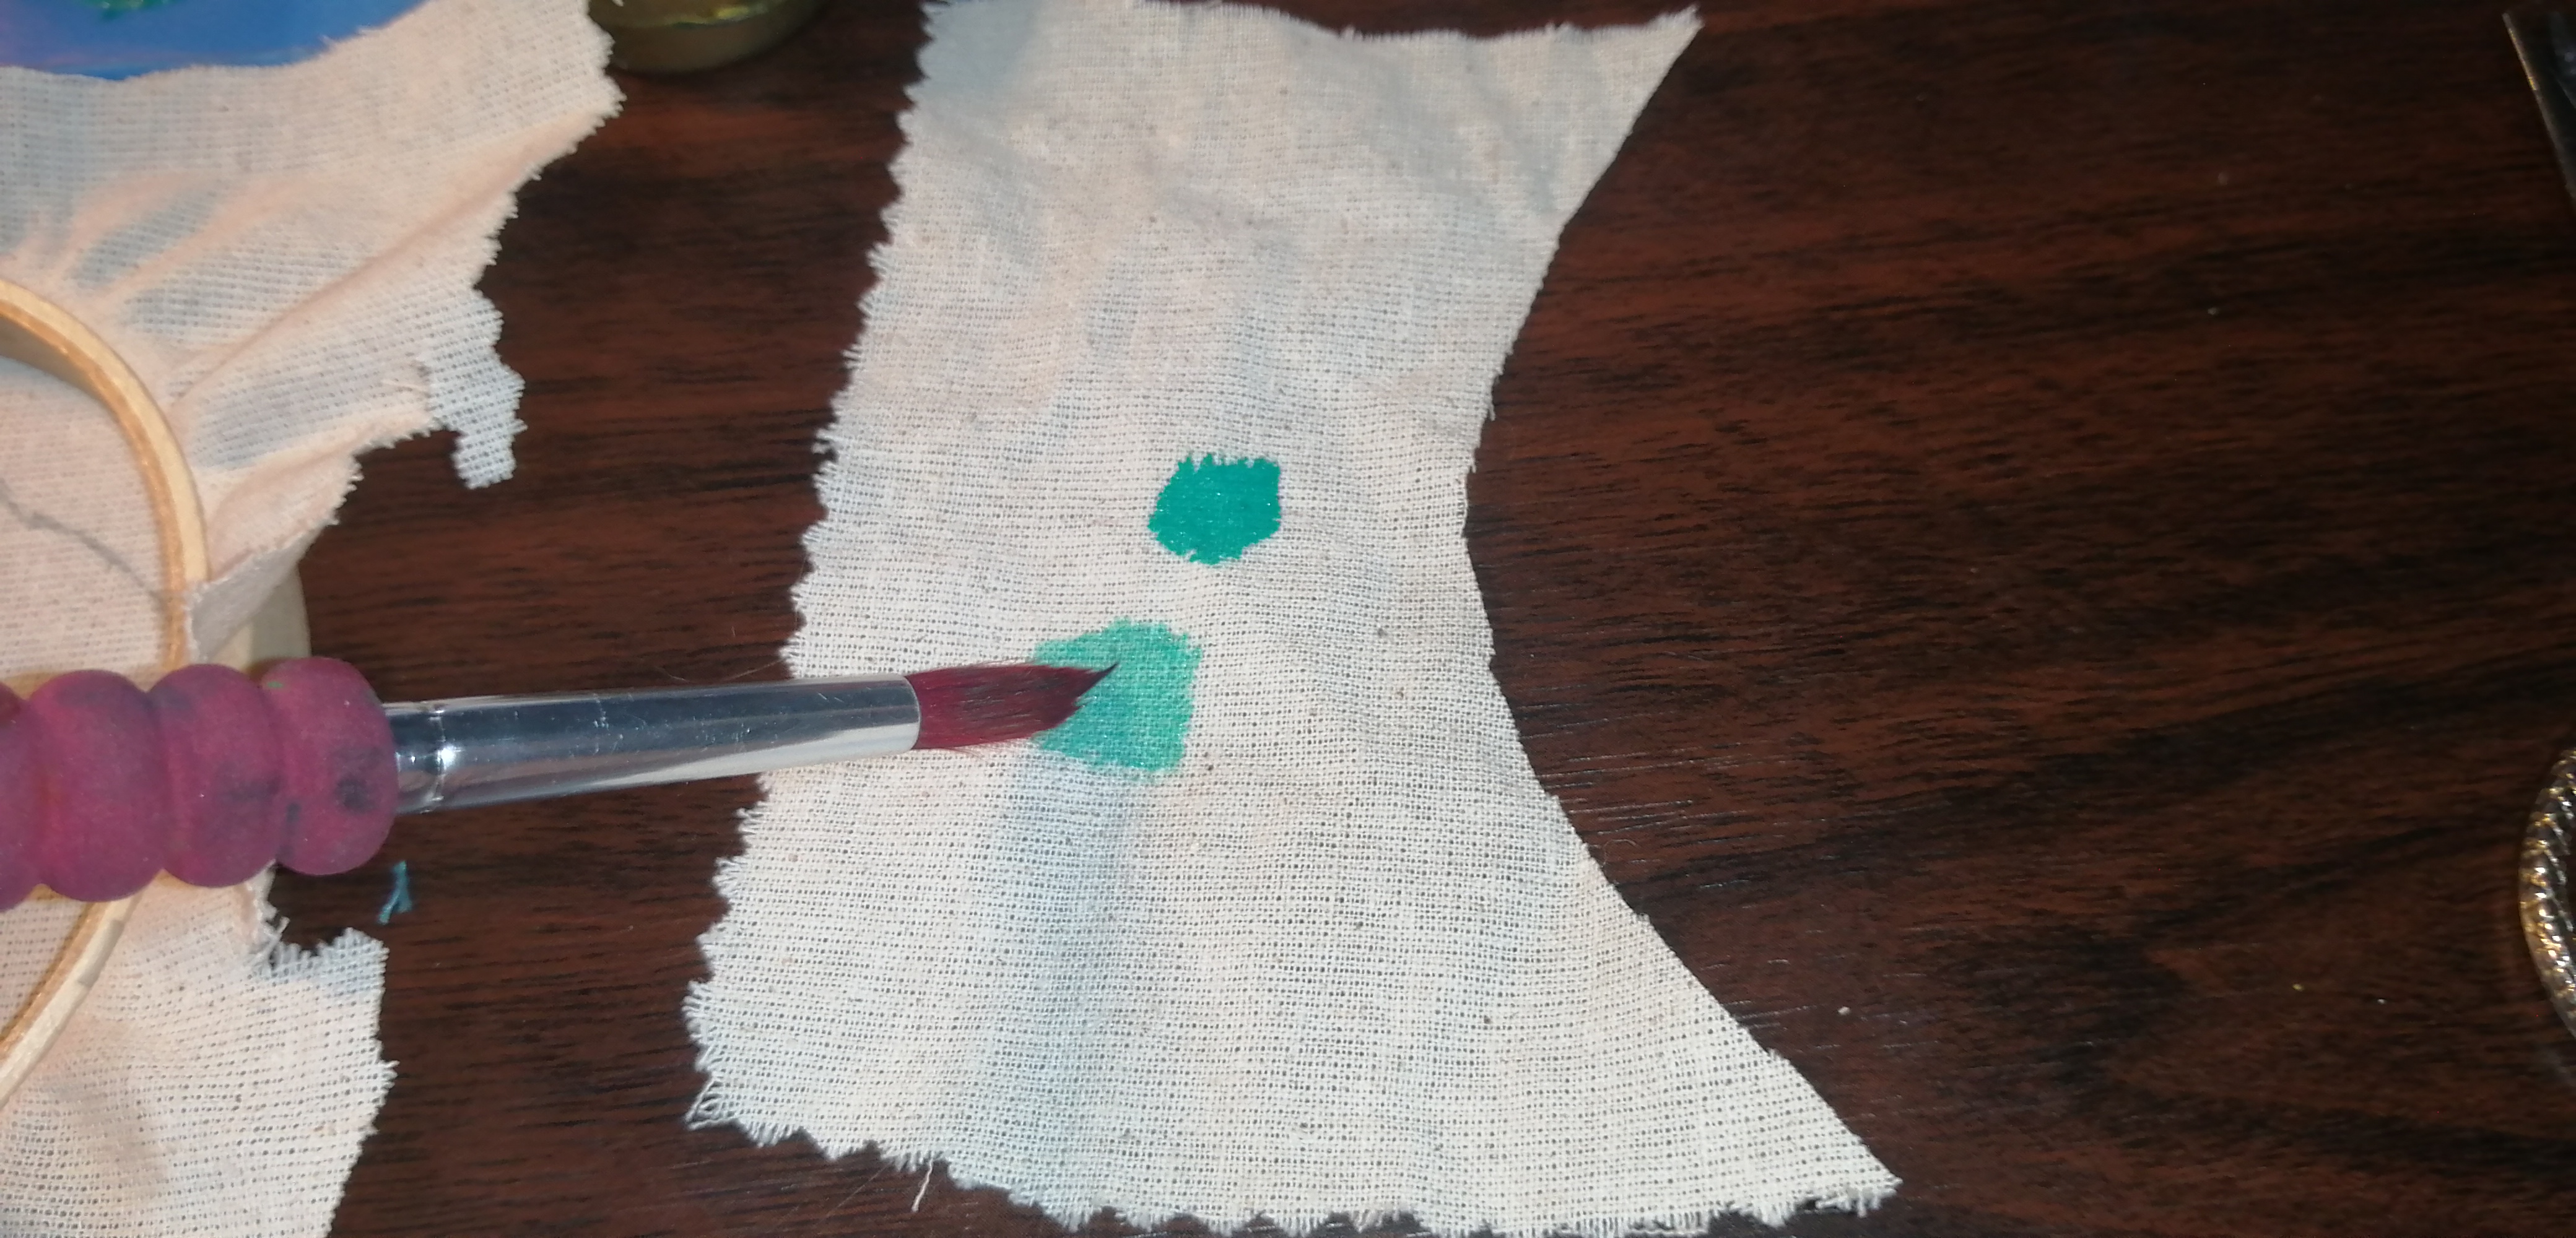
Empezamos buscando el tono ideal en una tela extra, cuando hayas encontrado tu color ideal vamos a pintar lentamente. Cuando termines espera que seque y pasamos la plancha para sacar las lineas del rotulador.
Now we put the fabric on the frame and turn it around and put it on the tablet to start tracing just the stains. We start by looking for the ideal tone on an extra fabric, when you have found your ideal color we will paint slowly. When you finish, wait for it to dry and iron it to remove the marker lines.
|
|
|
|
|
|
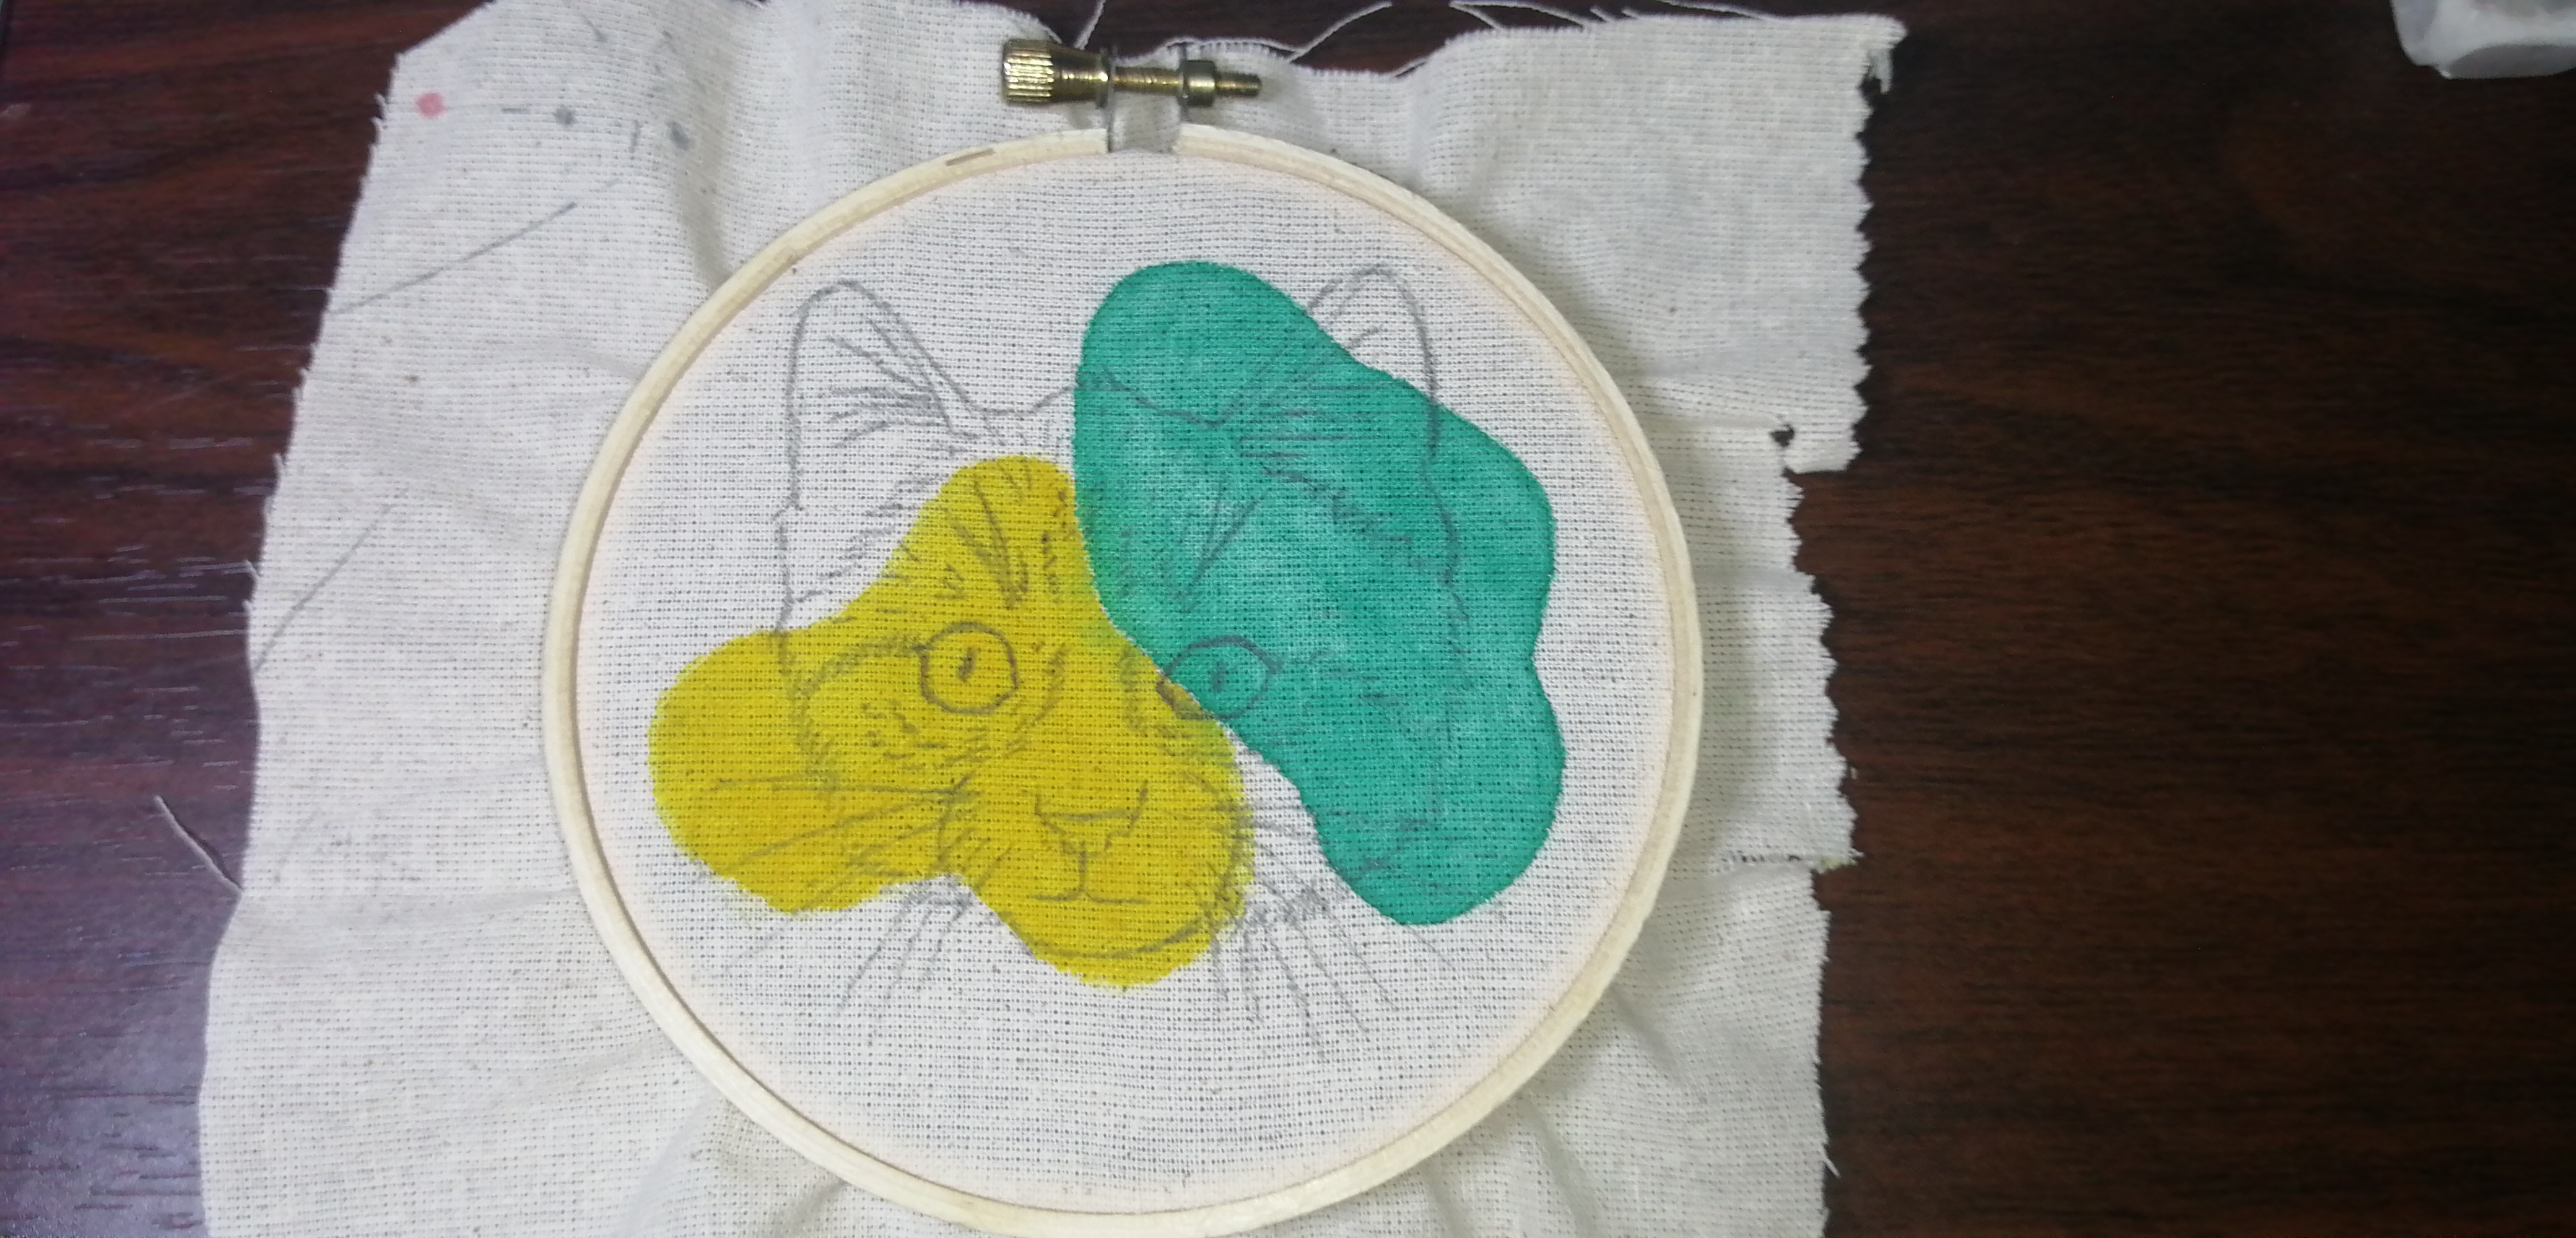
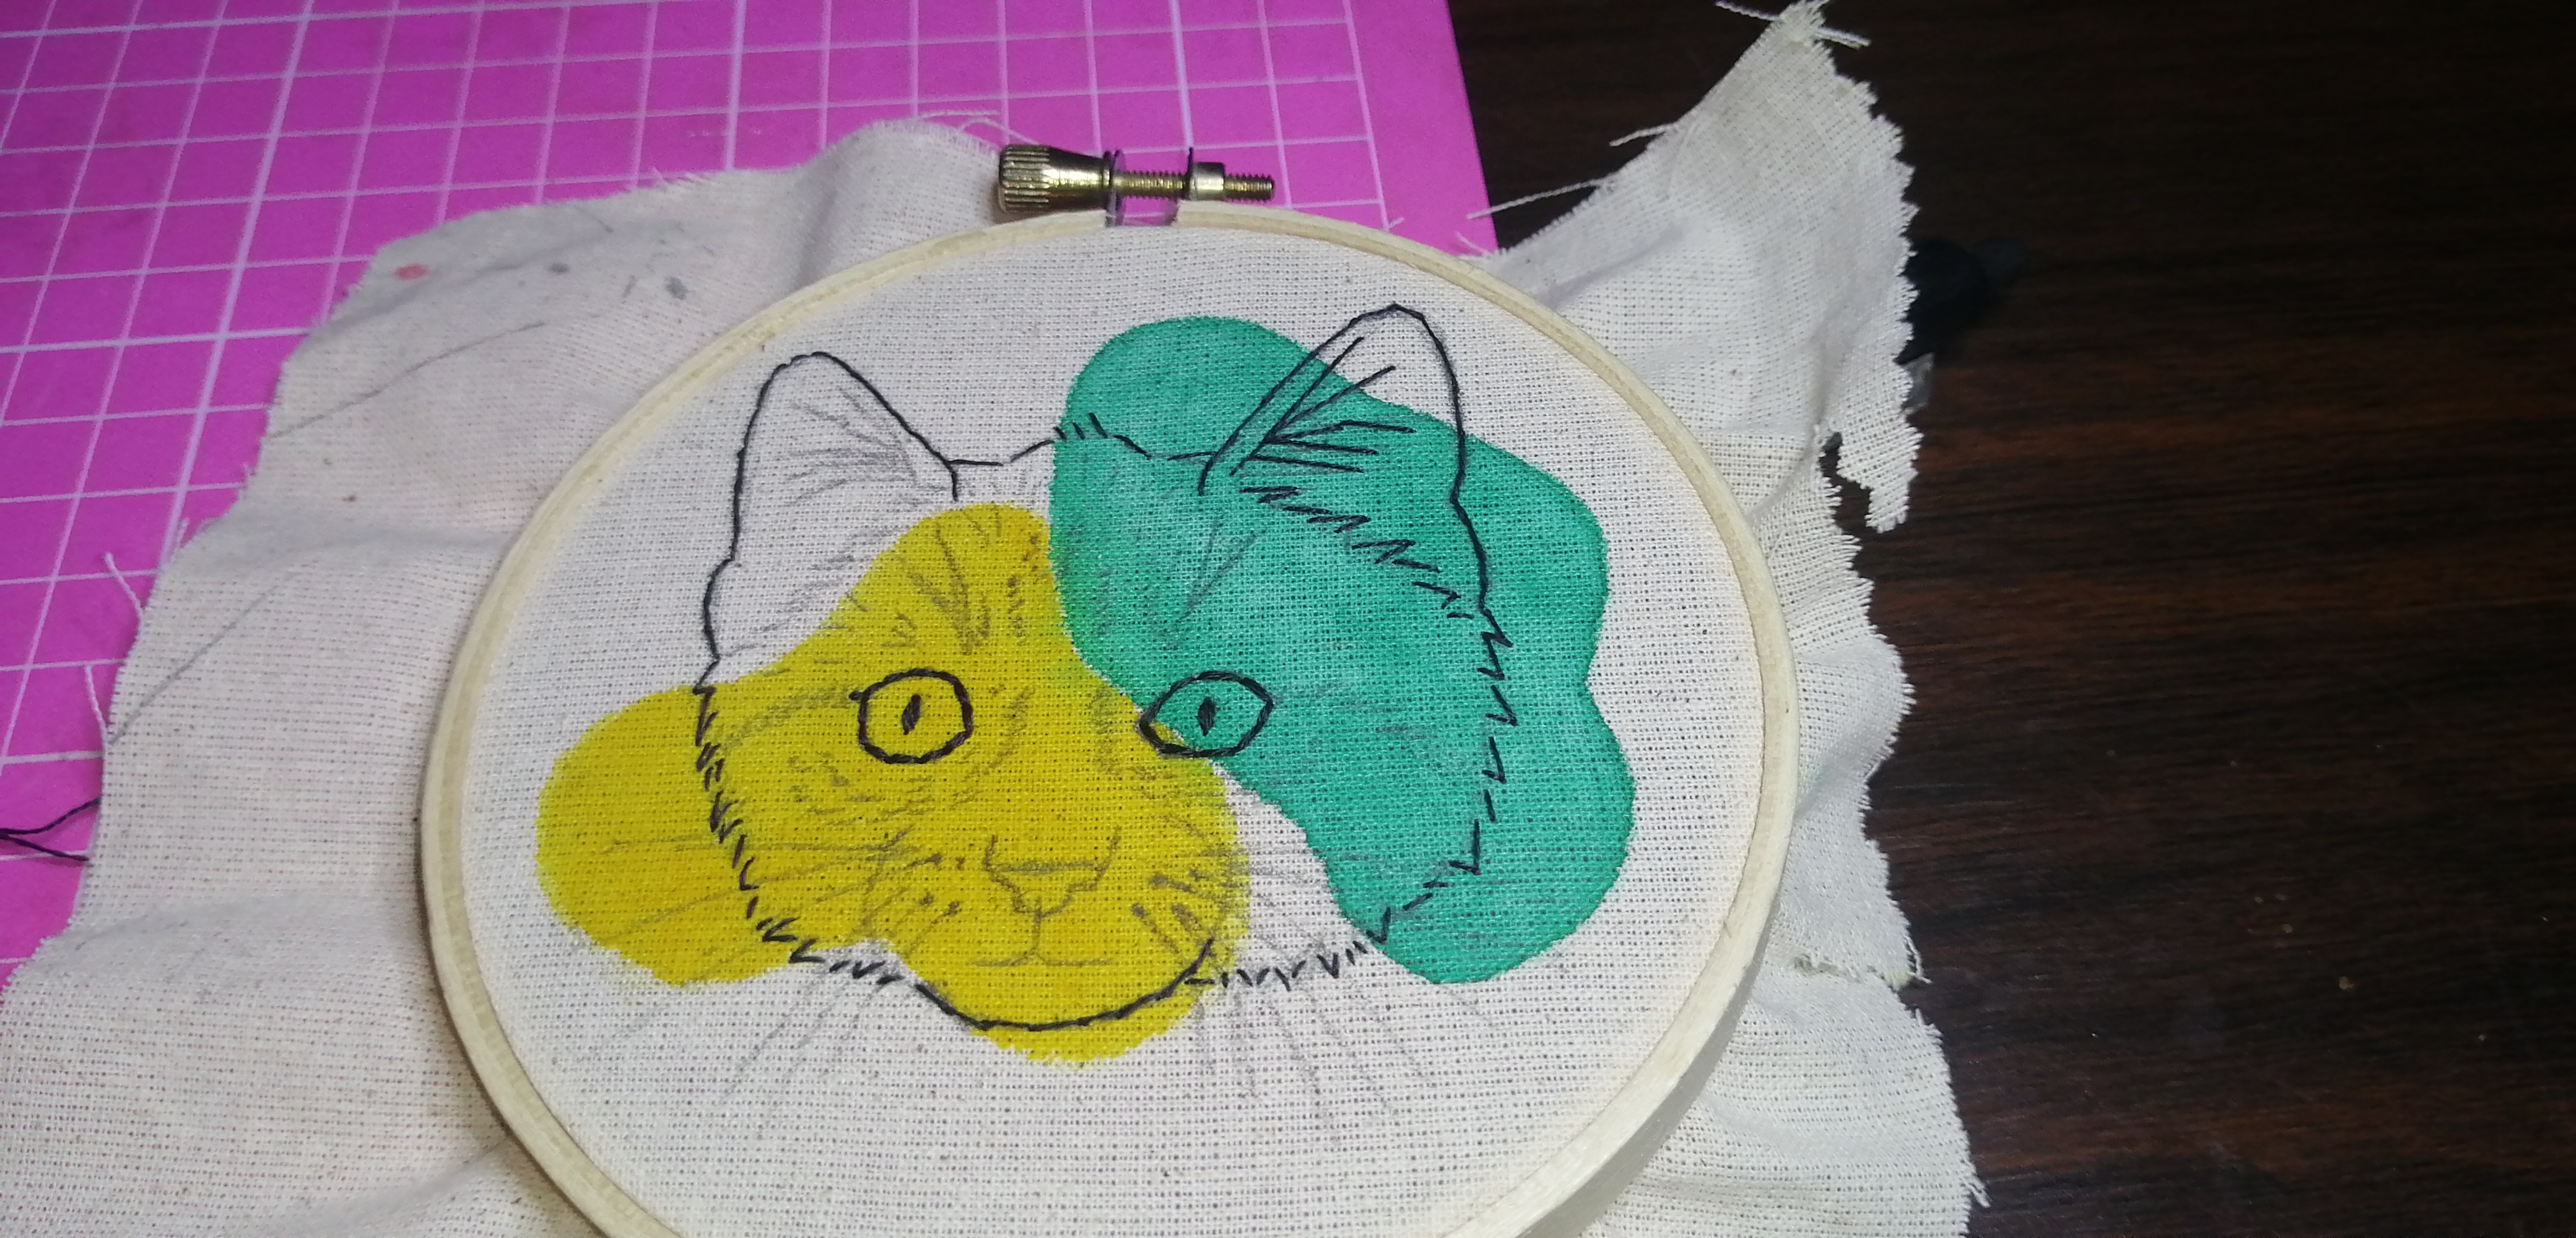
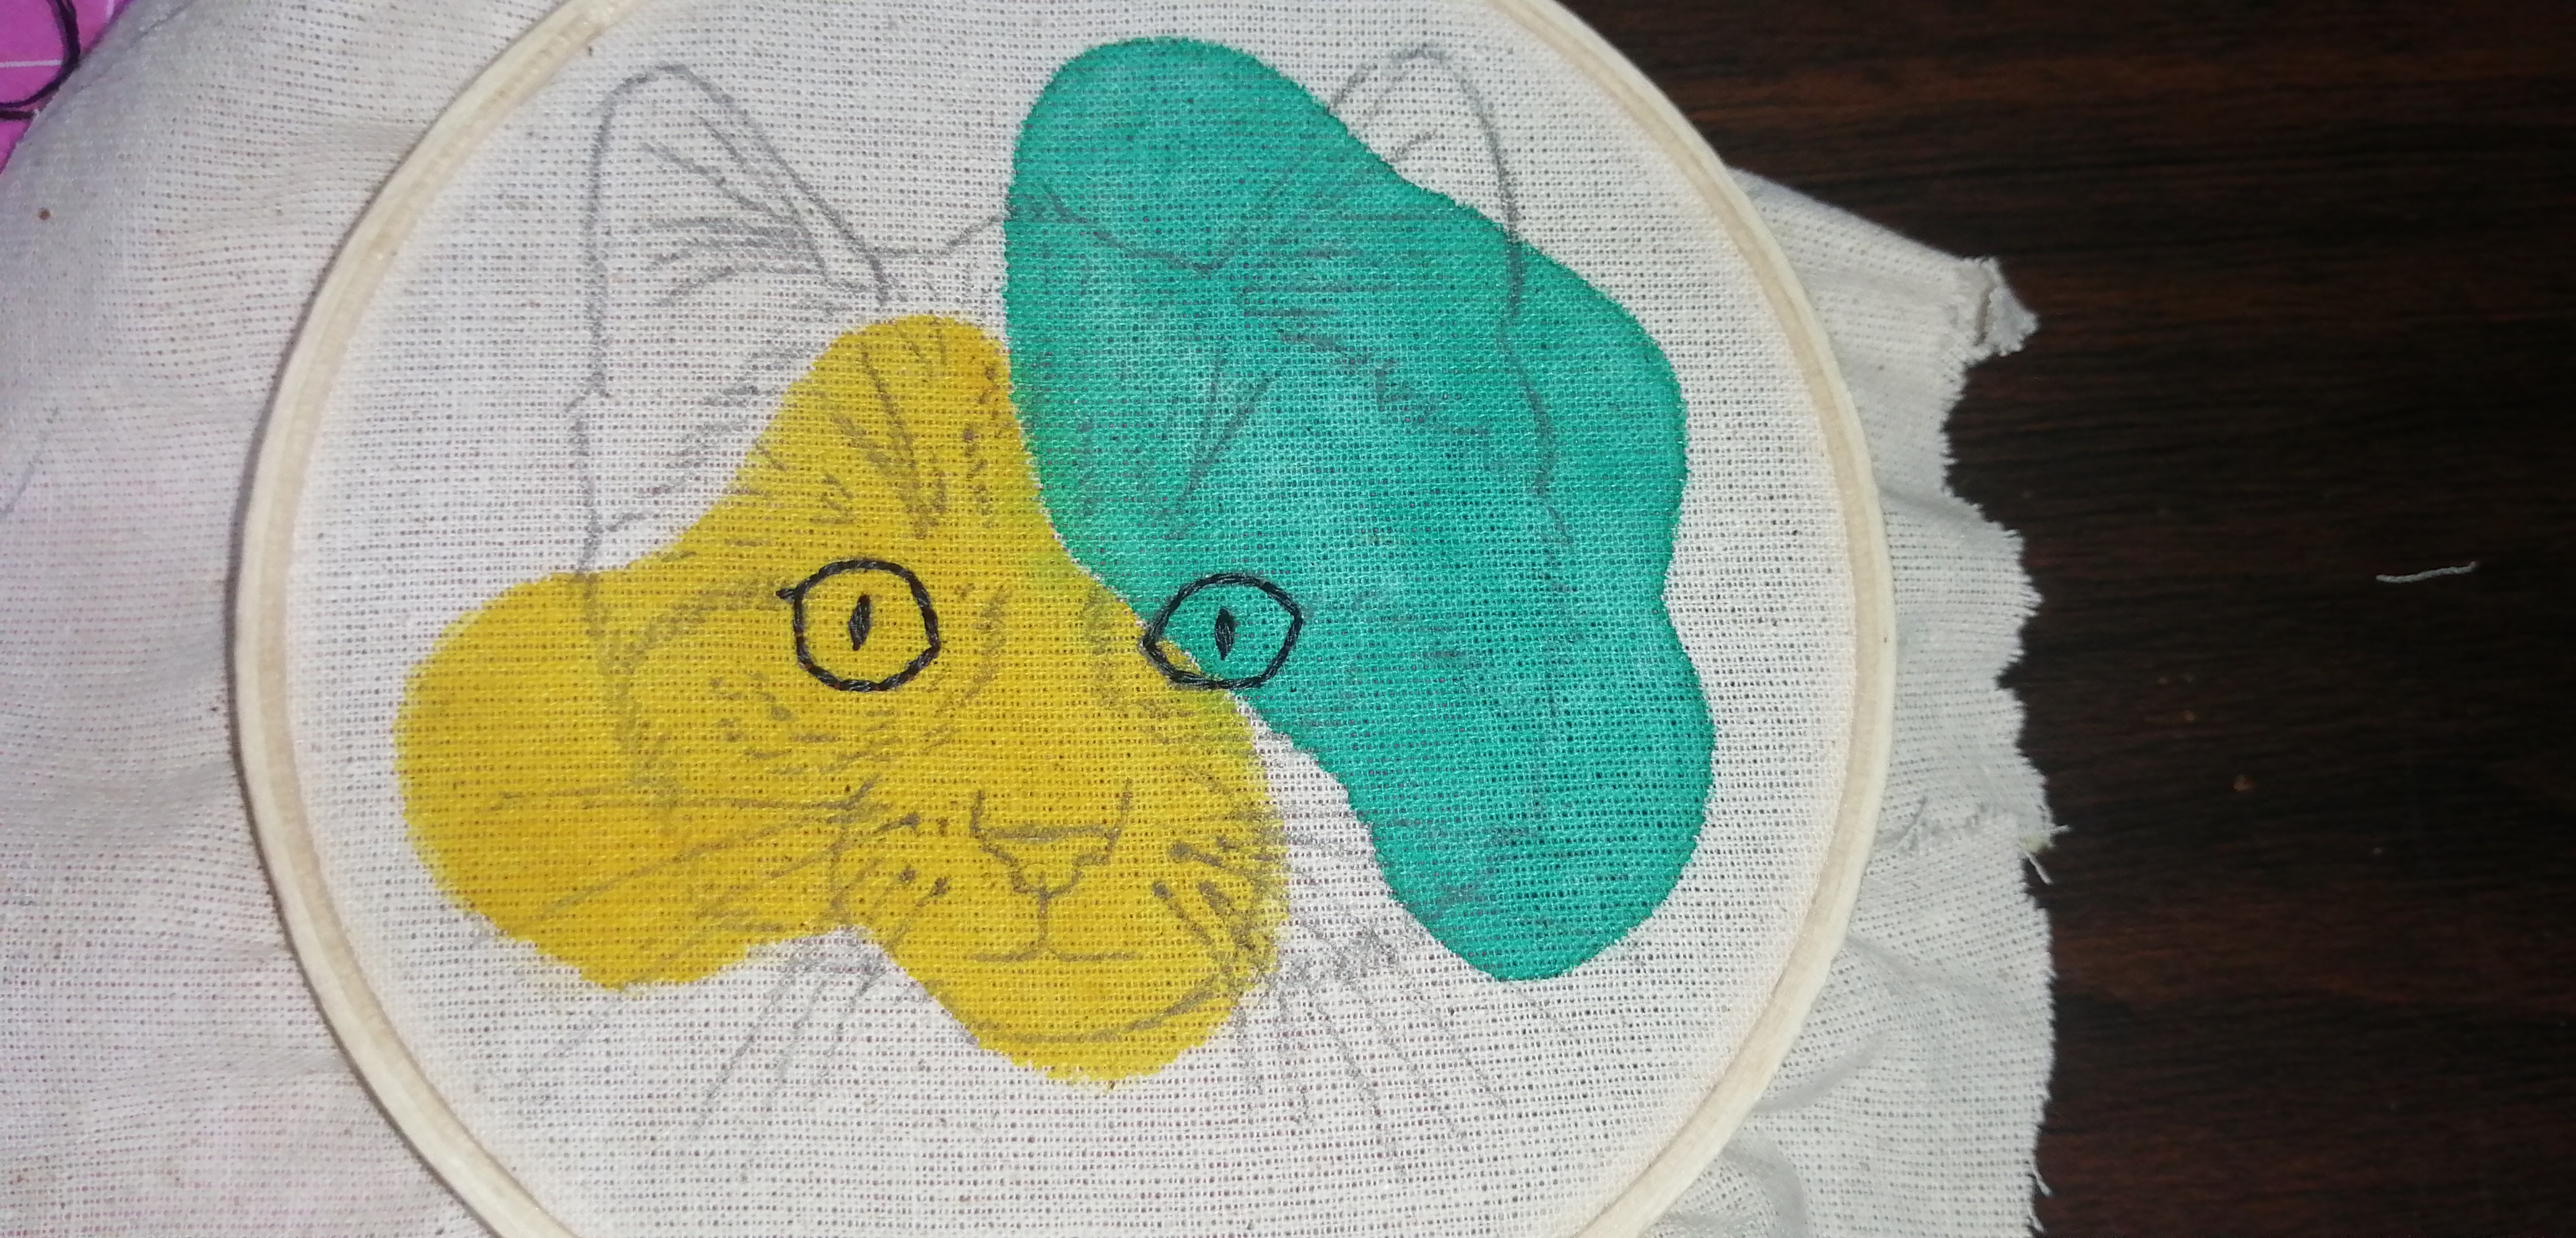
Ahora volvemos a repetir el proceso de calco pero con el gato.
Ya marcado empezamos a bordar con 2 hebras las lineas más gruesas, en mi caso son los ojos.
Bordaremos con la puntada: punto atrás.
Las lineas delgadas las haremos con una sola hebra.
Now we repeat the tracing process again but with the cat. Once marked, we begin to embroider the thickest lines with 2 strands, in my case they are the eyes. We will embroider with the stitch: back stitch. We will make the thin lines with a single strand.
Un tips para que no se hagan tantos nudos al final del bordado cuando termines tu puntada, por la parte de atrás solo debes entrelazar los hilos esto hara que el hilo quede firme y no se salga.
A tip to avoid making so many knots at the end of the embroidery when you finish a flower, on the back side you only have to interlace the threads so that the thread remains firm and does not come out.

|
|
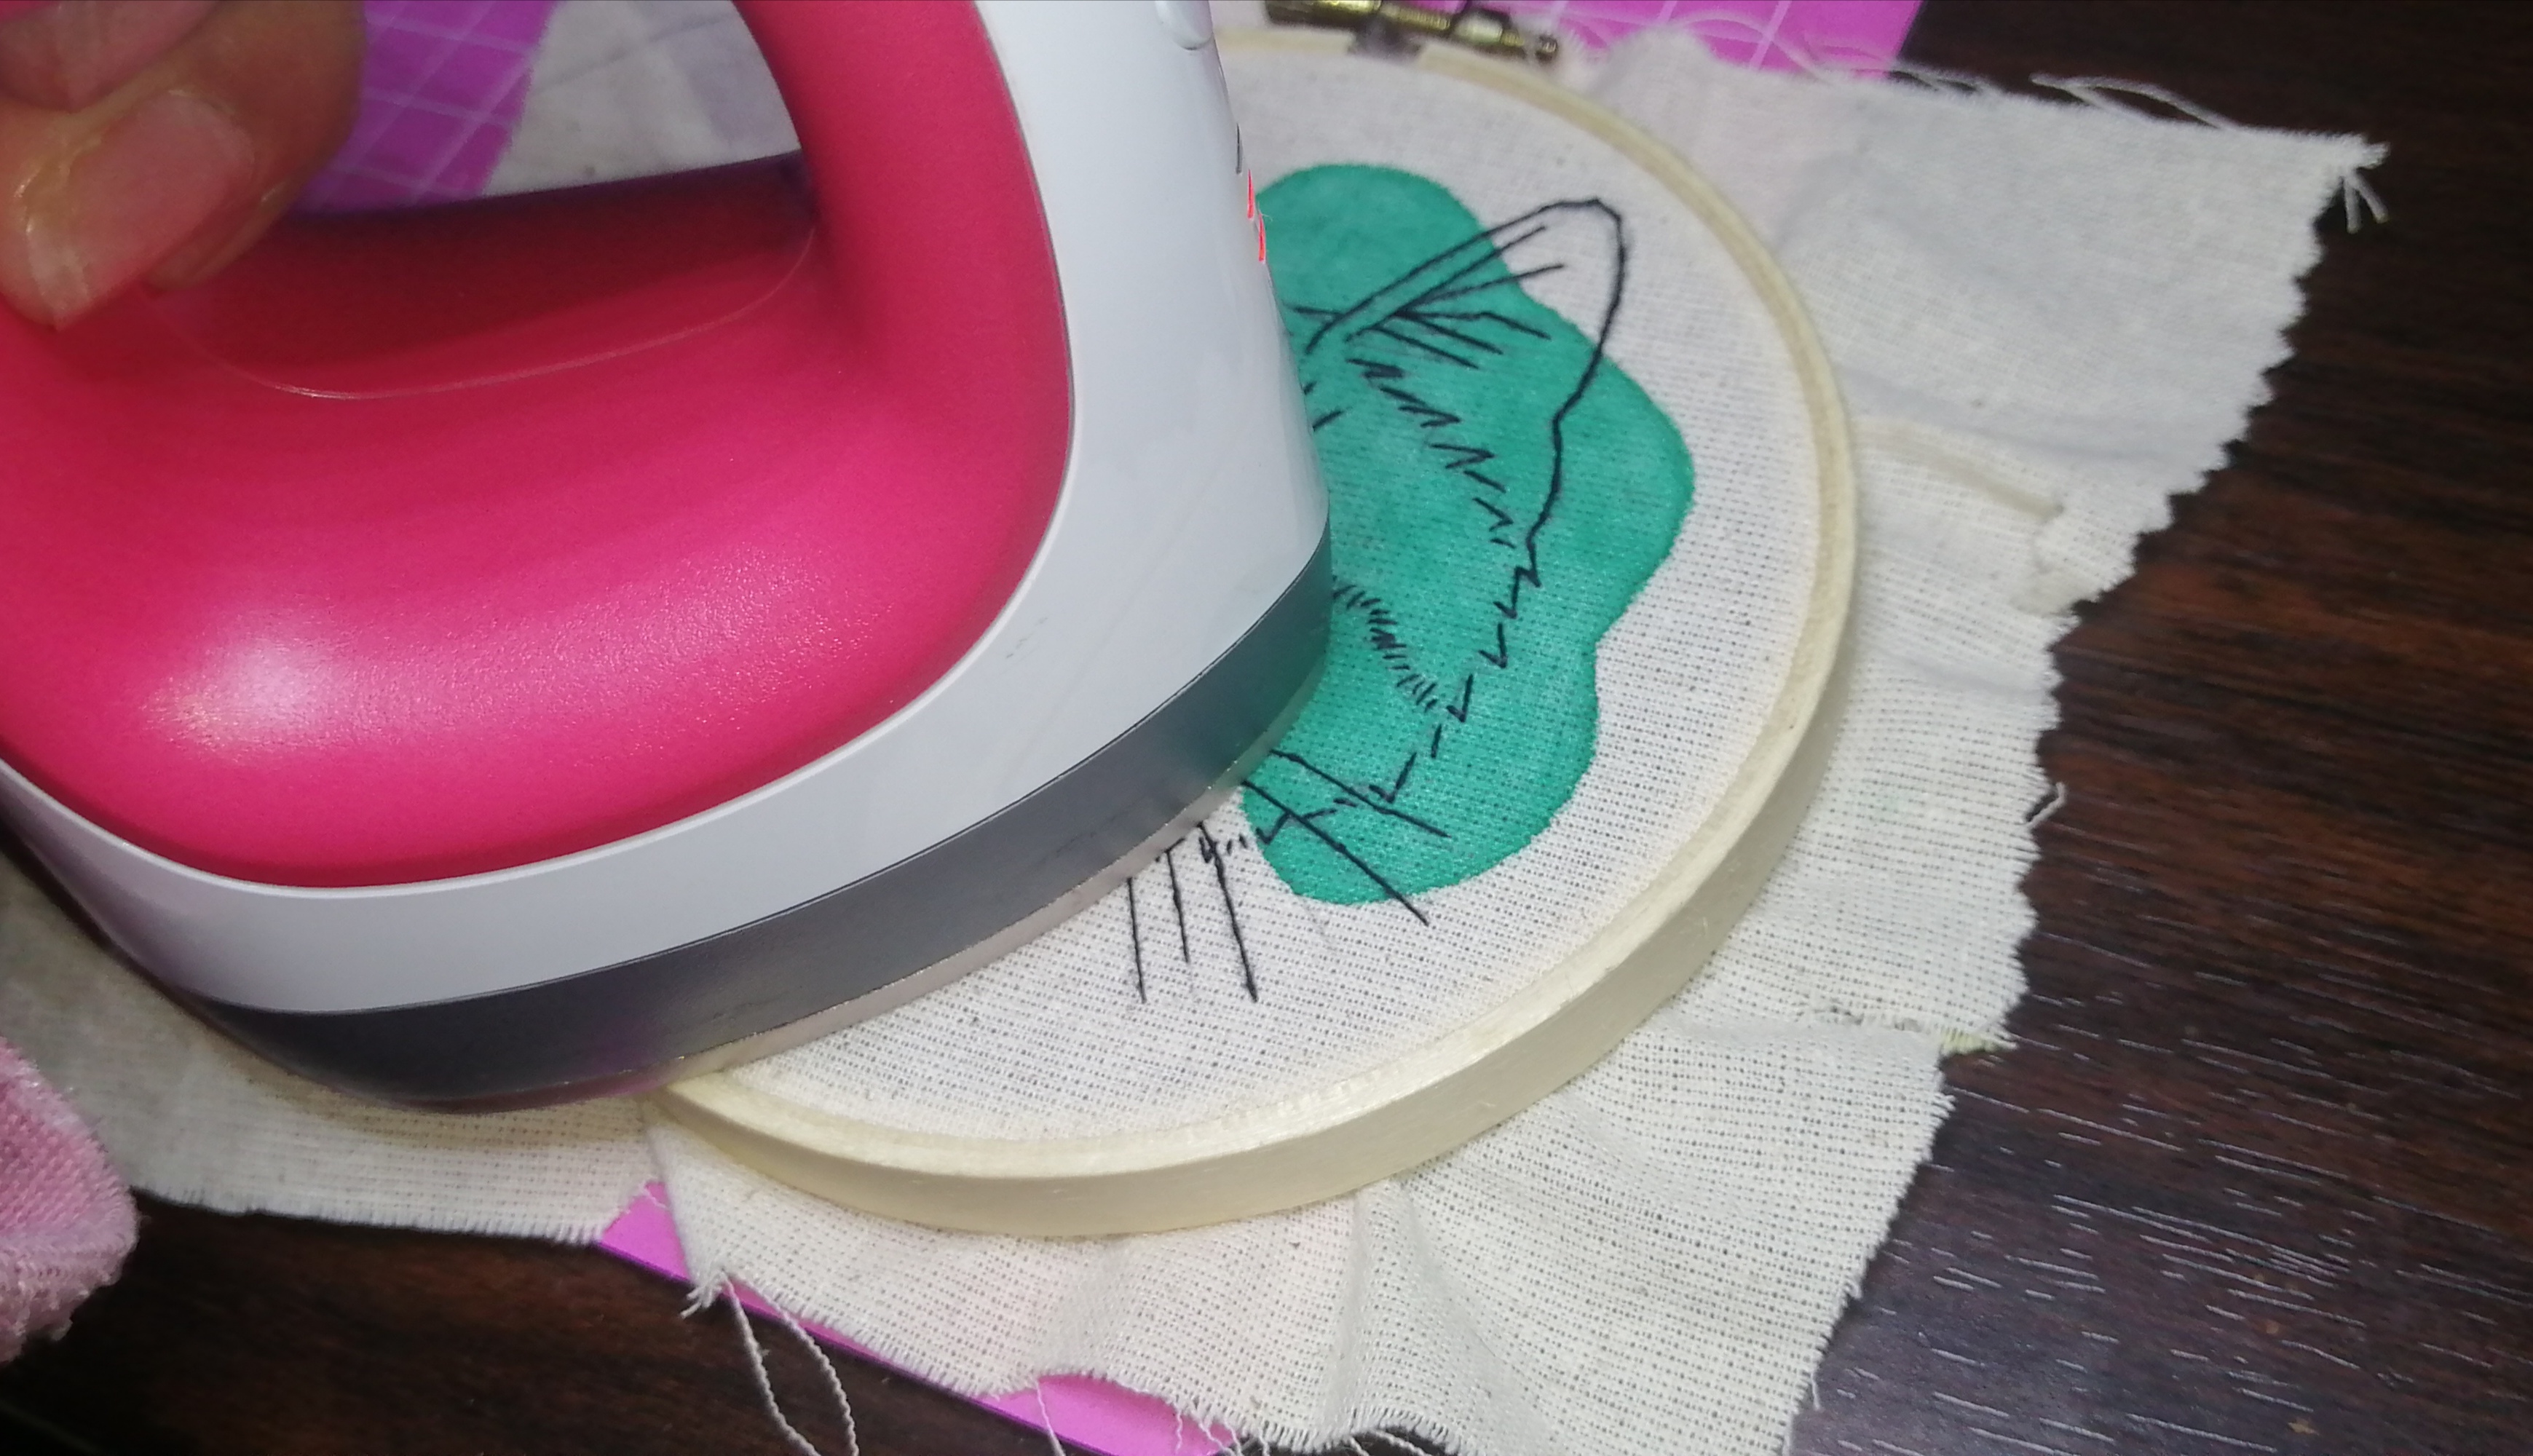
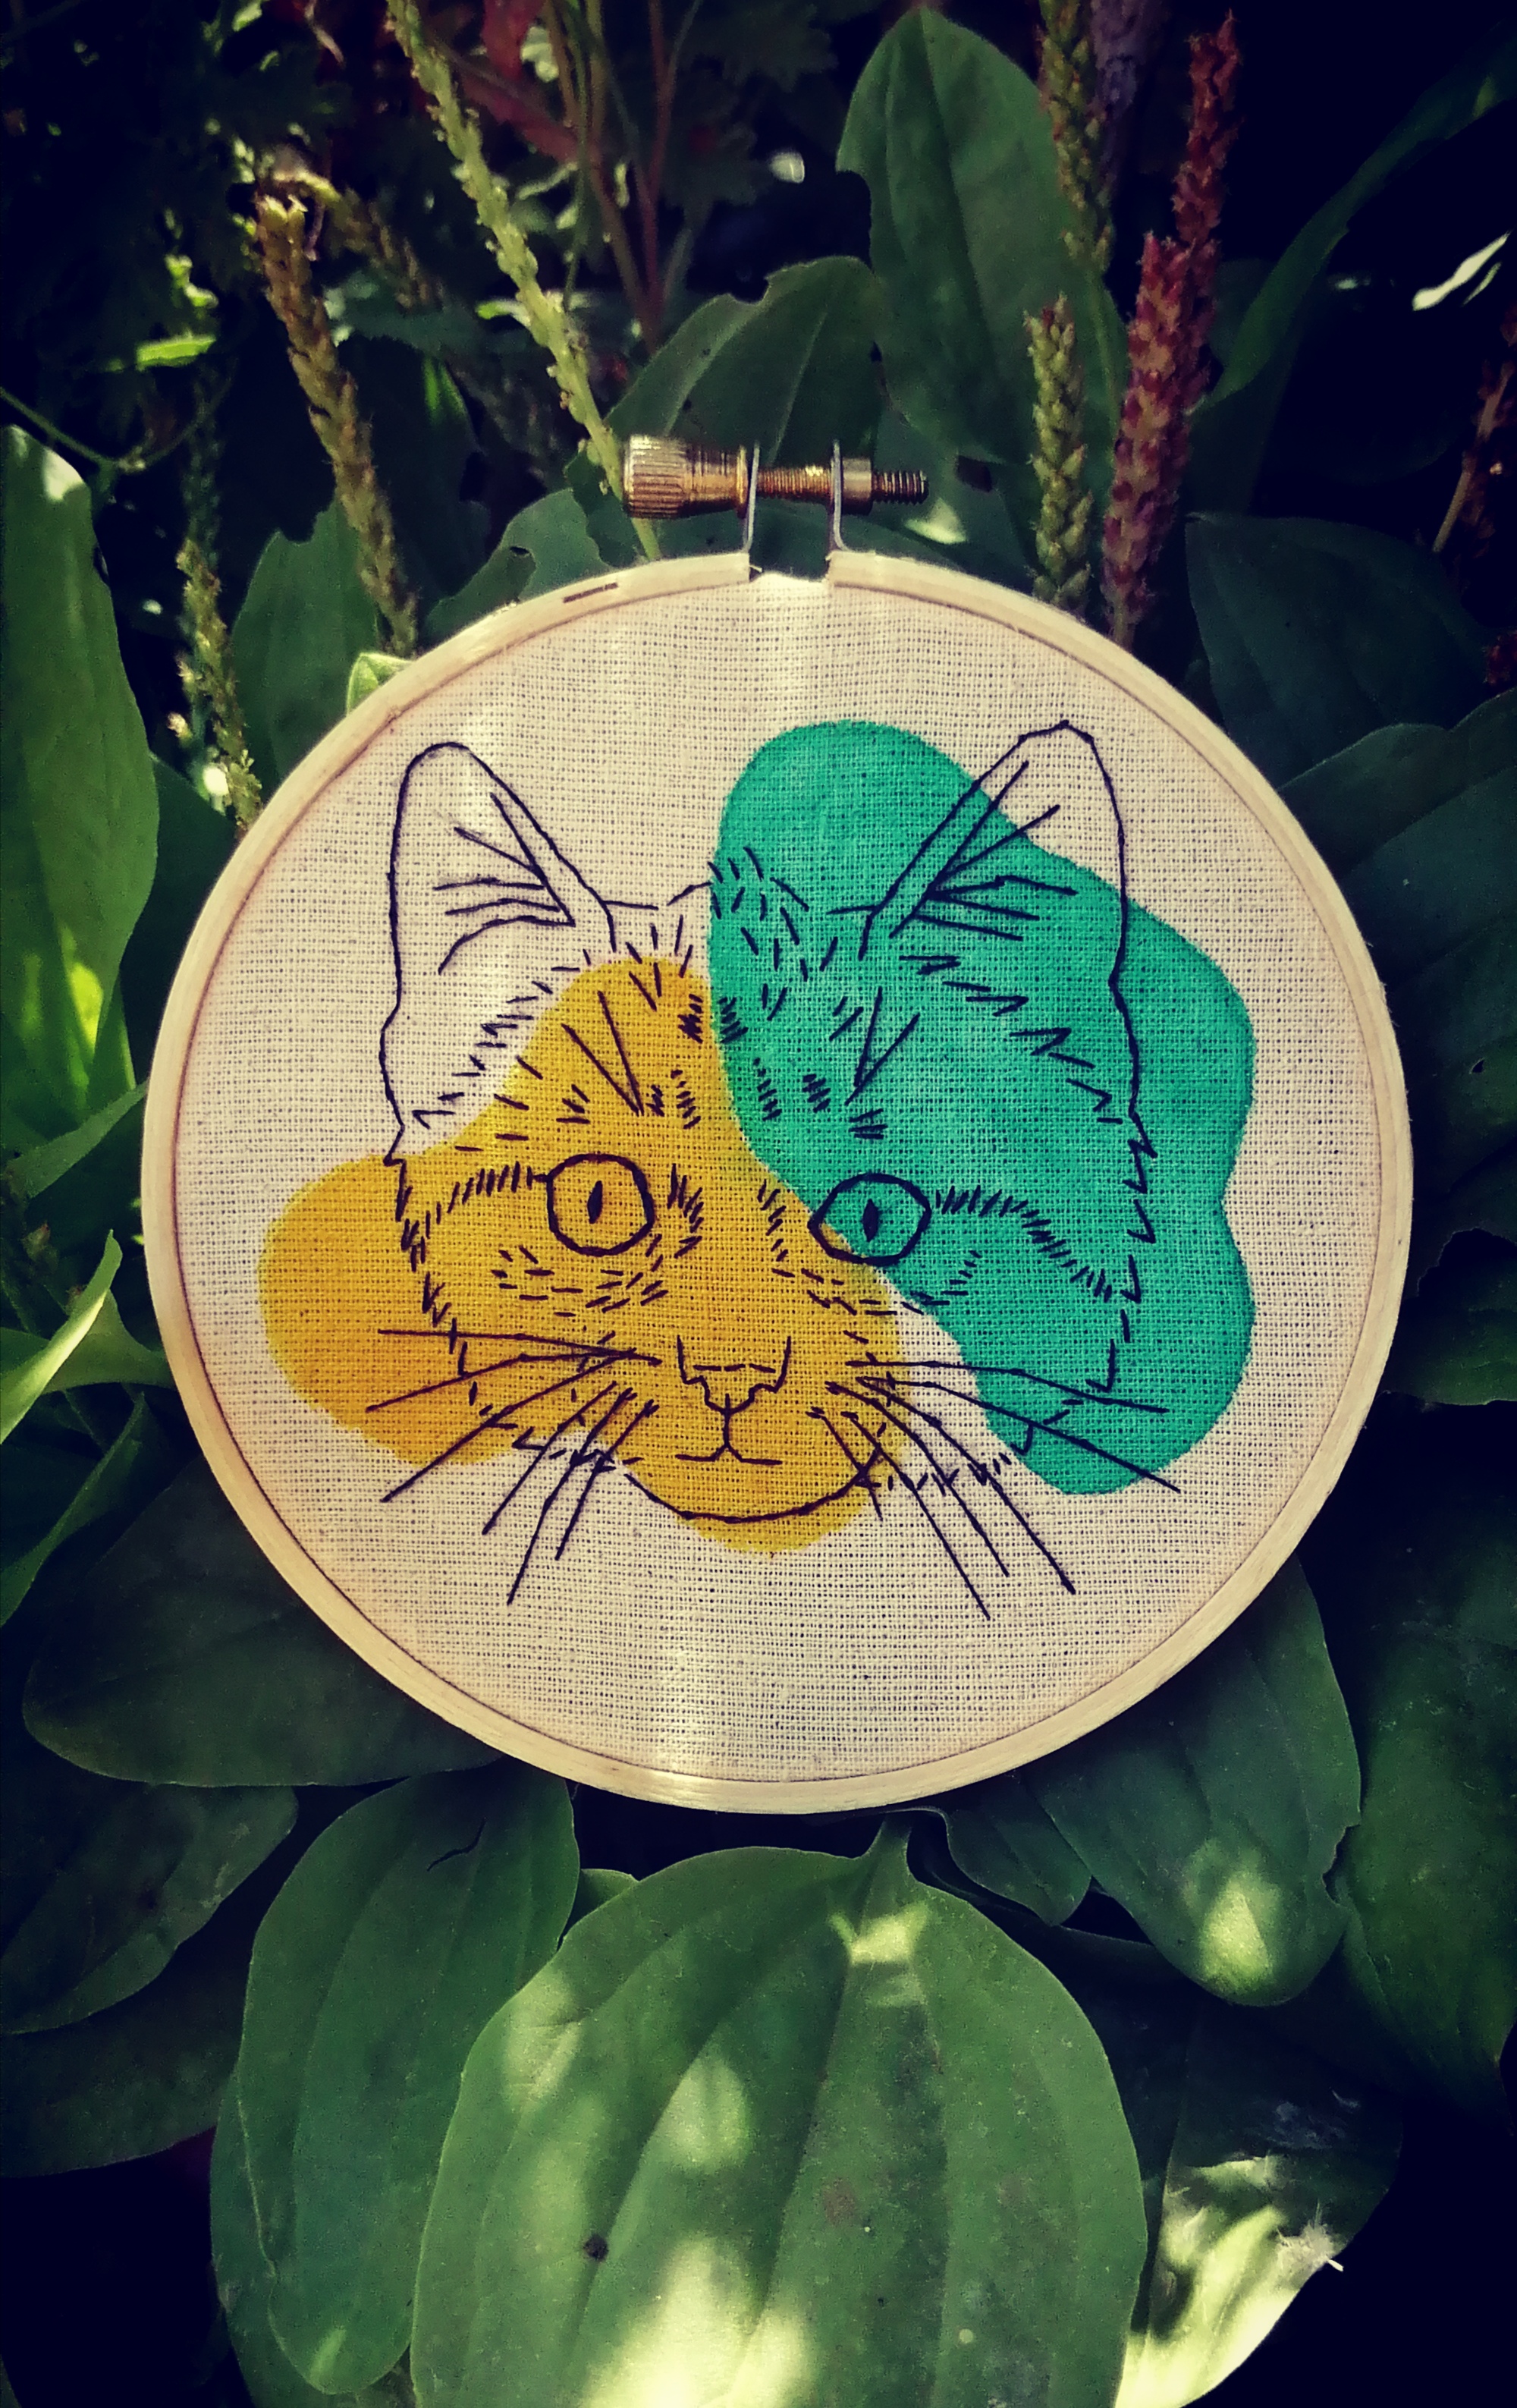
Y ya esta listo nuestra bella mascota!
Planchamos nuevamente para sacar el excedente de el rotulador.
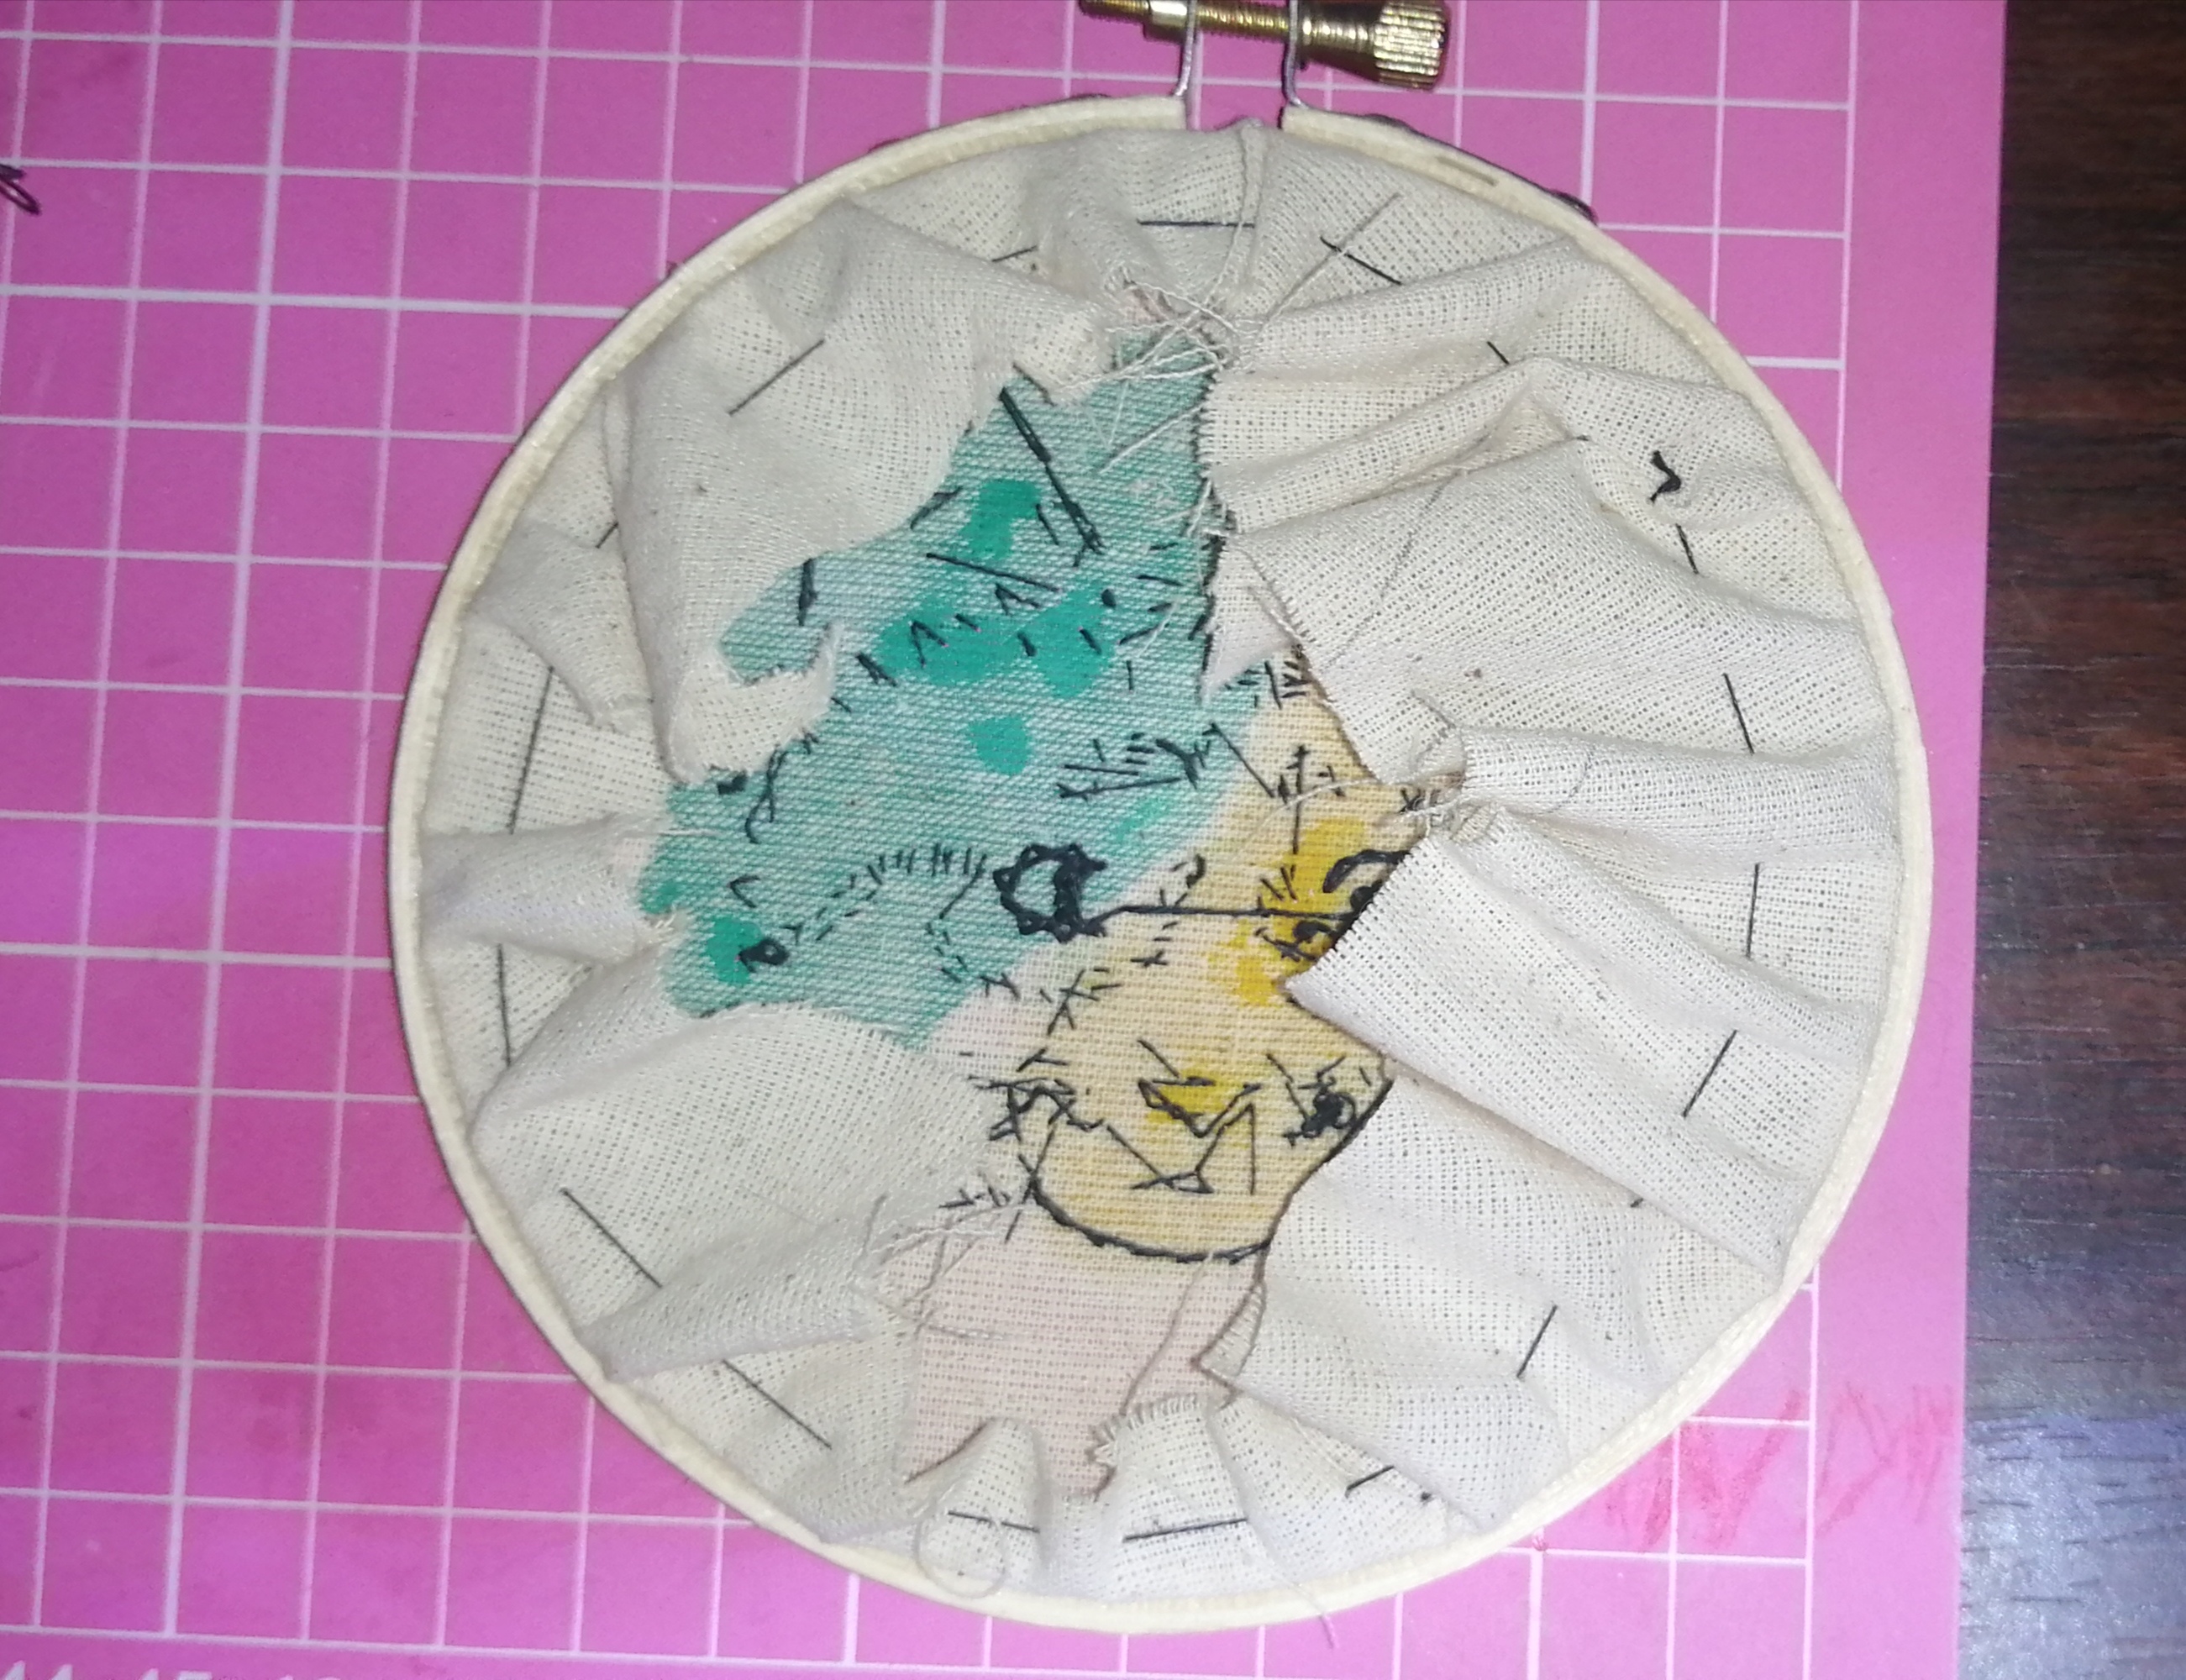
Y para terminar Atrás del bordado puedes puedes cortar la tela redonda y cortar todo su alrededor en pequeños trazos. Y pegar con silicona caliente. Otra manera por si quieres sacar la tela del bastidor en algún momento, es hacer una puntada despunte y apretar el hilo lo más que puedas, esto hara que tu tela restante quede redondeada.
And our beautiful pet is ready! We iron again to remove the excess of the marker. And to finish, behind the embroidery you can cut the round fabric and cut everything around it in small strokes. And glue with hot silicone. Another way, if you want to remove the fabric from the hoop at some point, is to make a top stitch and tighten the thread as much as you can, this will make your remaining fabric rounded.
|
|
|

|
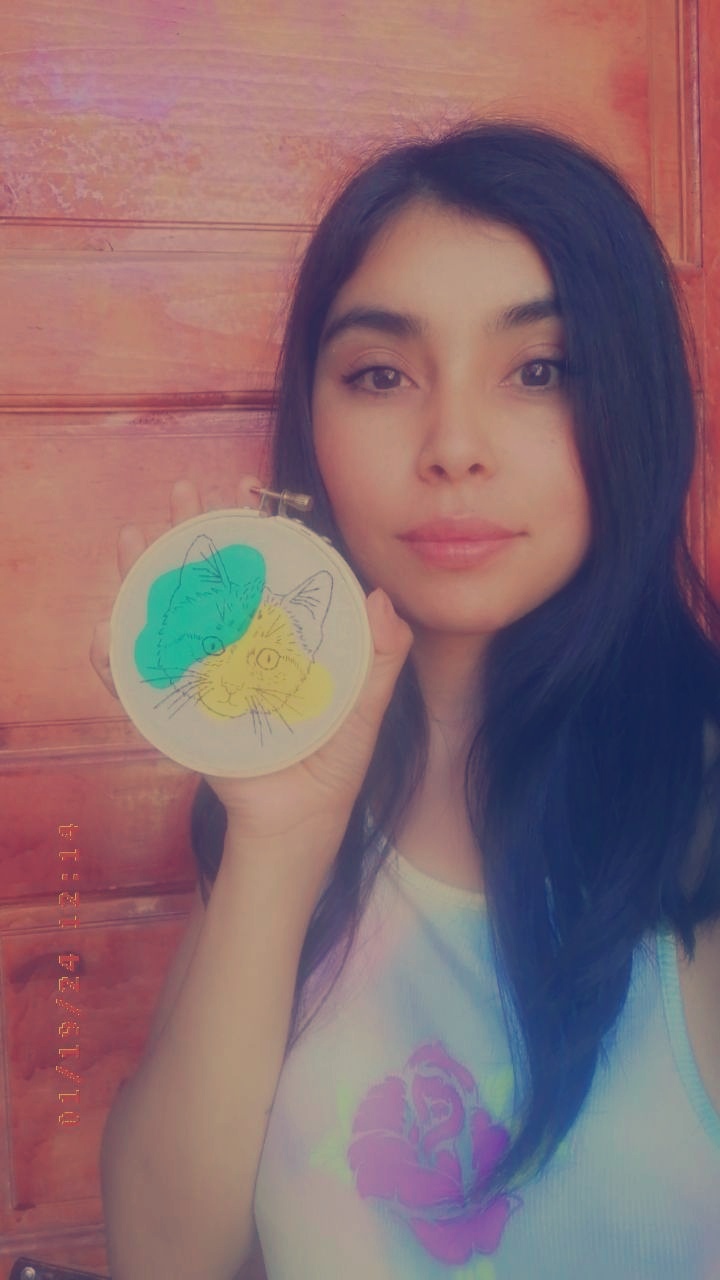
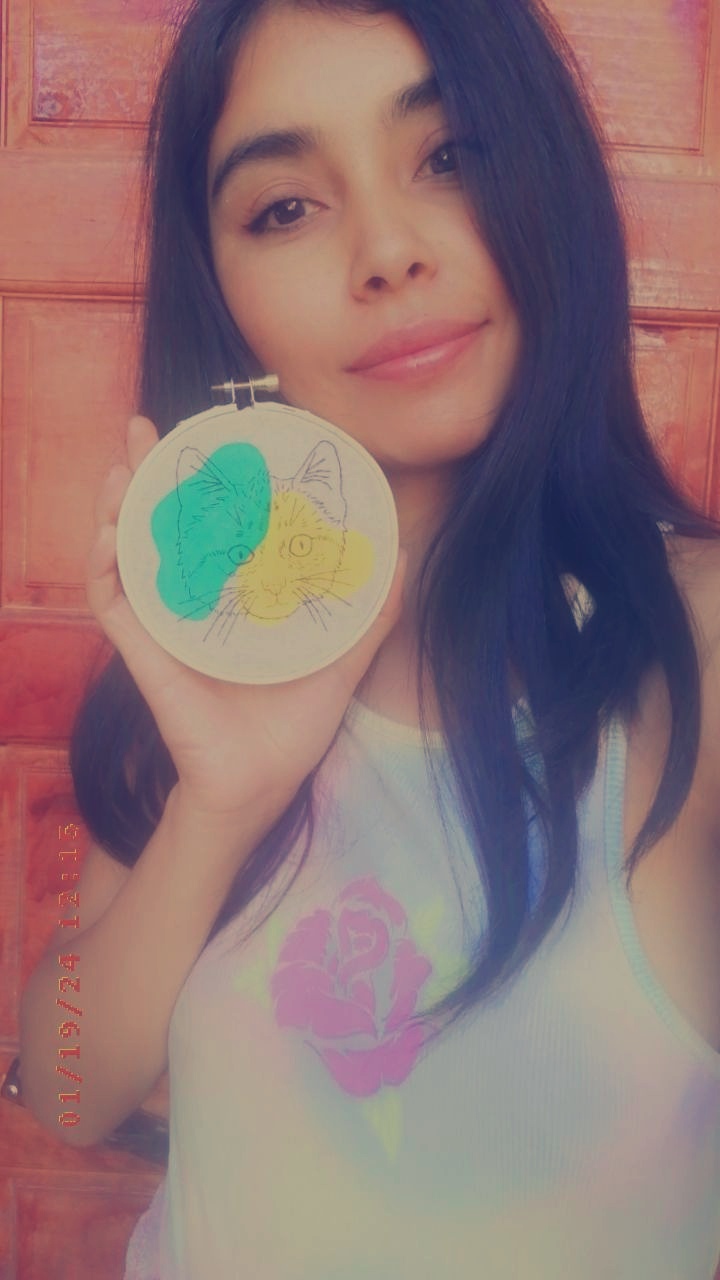
El resultado final 😍 mi Kimo esta listo!
Ojala te atrevas a crear este lindo y conmemorativo proyecto. Comentame si alguna vez has tenido un animalito que marco tu vida? Te gustaría retratarlo? Los leo 😉🤗
The final result 😍 my Kimo is ready! I hope you dare to create this beautiful and commemorative project. Tell me, have you ever had a little animal that marked your life? Would you like to photograph it? I read them 😉🤗
Todas las Imágenes son de mi autoria.
Traducido al inglés con Google traductor.
All images are my own.
Translated into english with google traslator.
Tan bonito el Gang-Kimo , recuerda que ese era su nombre.😁
Yo soy mala para bordar, y esto se ve bueno para una principiante como yo.
Está genial tu publicación.
🤗 Si mi panzon era regalón. Lee el post pue si puse el nombre 😆
Oye deberá, si lo leí, pero no me di cuenta de esa parte. 🤭
Wuo! Que buen trabajo. Me ha gustado incluso la paleta de colores que escogiste.
Muchas gracias! 🤗🐾
Wooo que chulo te quedo, me gusta ver todo tipo de manualidades.
Yo tengo un programa de conociendo hivers, si te gustaria participar
!PIZZA
Hola muchas gracias 🤗 claro que sí me gustaría participar 😊
como te puedo contactar por discord o twitter?
igual si me contactas a mi ambos son misticogama
Congratulations @alejandralita! You have completed the following achievement on the Hive blockchain And have been rewarded with New badge(s)
Your next target is to reach 50 posts.
Your next target is to reach 2250 upvotes.
You can view your badges on your board and compare yourself to others in the Ranking
If you no longer want to receive notifications, reply to this comment with the word
STOPTo support your work, I also upvoted your post!
Congratulations, your post has been upvoted by @dsc-r2cornell, which is the curating account for @R2cornell's Discord Community. Enhorabuena, su "post" ha sido "up-voted" por @dsc-r2cornell, que es la "cuenta curating" de la Comunidad de la Discordia de @R2cornell.
Excelente trabajo quedo muy bonito..
Muchas gracias 😊
Muy buena idea, me encanta el proceso y su sencillez, el resultado es hermoso. Saludos
Sí, es simple para personas que no manejen tanto puntadas complejas. Pero el resultado de todas maneras es lindo 😁
Me gusta la idea, es un hermoso detalle para las mascotas el resultado es genial.
Muchas gracias si un resultado muy bonito 🤗 espero se animen a hacerlo.
Te quedo hermoso felicidades
Saludos mi respeto por tu trabajo amiga se ve que es complicado 😜 admiro mucho tus habilidades para esas manualidades y tu amor por las mascotas 🤩
Awww muchas gracias eso que este era el simple 🤭 pronto subire uno nivel alto.
¡¡¡Buen trabajo!!! Gracias por publicar tu excelente contenido en Hive Diy.
$PIZZA slices delivered:
(1/5) @misticogama tipped @alejandralita
Me encanta!! Se ve tan tierno