It's time to make our girls fall in love, beautiful necklace to wear on Halloween 🖤♥️🕷️🕸️🕷️🕸️ .
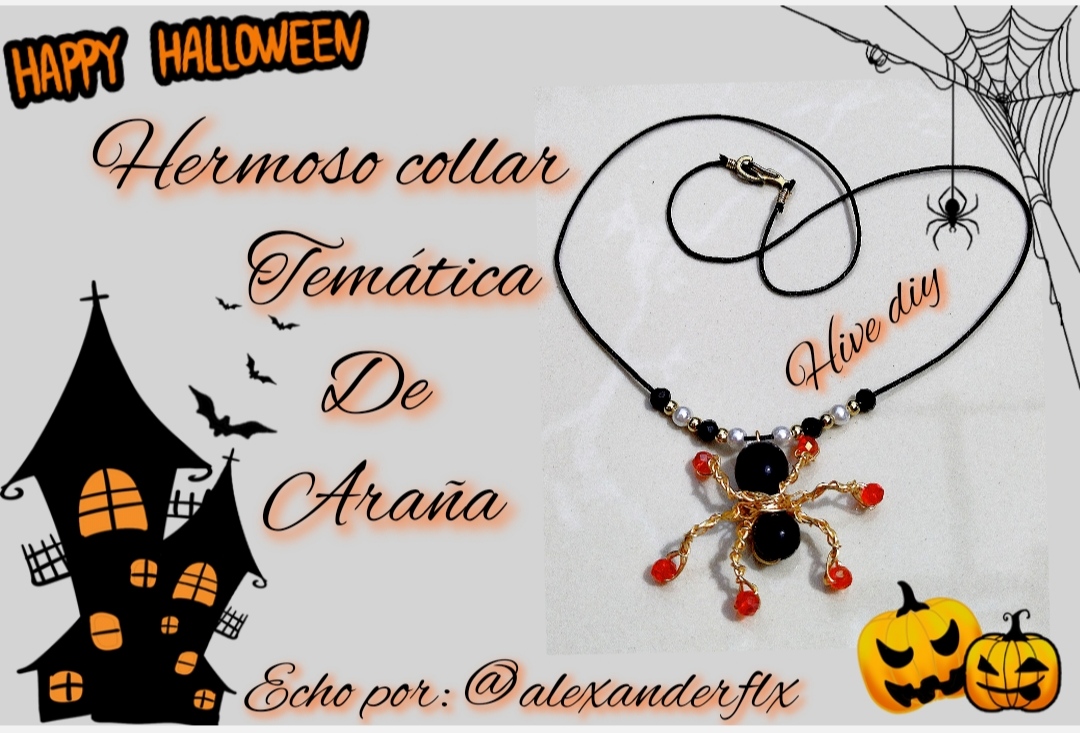
Hola feliz tarde espero se encuentren la tarde de hoy quiero compartir con ustedes un hermoso collar este collar tiene un hermoso dije de araña super tenebroso pero muy amigable está echo con piedras alambre hilo chino y mucho amor, tenía tiempo sin publicar en esta hermosa comunidad ya que cuando empecé en la plataforma me dedicaba a utilizar la técnica de alambrismo de otra forma pero bueno debemos adaptarnos y trabajar con lo que tenemos como yo no conseguí el material con el que trabajaba decidí utilizar este que es un poco más caro me funciona pero lo estoy utilizando en piezas como este hermoso collar bueno espero les guste esta echo con mucho cariño.
Hello, happy afternoon, I hope you find yourself this afternoon. I want to share with you a beautiful necklace. This necklace has a beautiful spider pendant, super dark but very friendly. It is made with stones, Chinese thread, and a lot of love, I had a long time without posting on this beautiful community because when I started on the platform I dedicated myself to using the wire technique in another way but well we must adapt and work with what we have as I did not get the material I was working with I decided to use this one which is a little more expensive It works but I'm using it in pieces like this beautiful necklace, well I hope you like it, it's made with love.
What do we need.
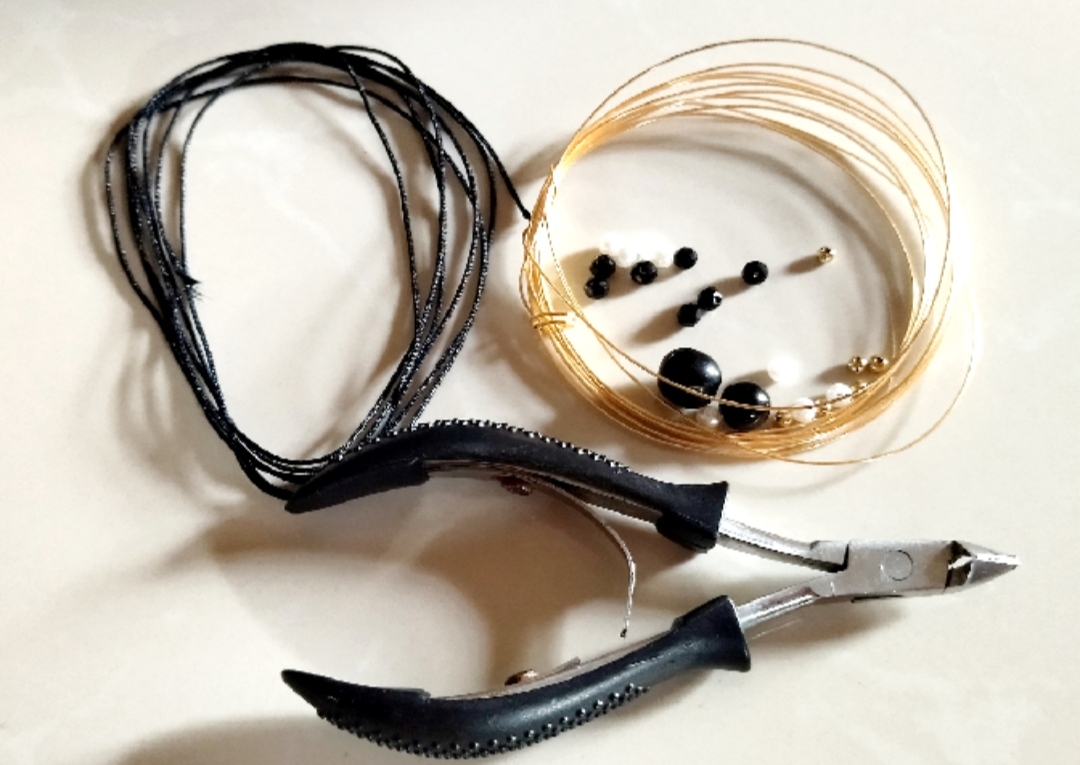
- piedras de bisutería
- alambre para bisutería calibre 22 y calibre y 26
- pinzas
-hilo chino
jewelry stones
22-gauge and 26-gauge jewelry
tweezers
chinese thread
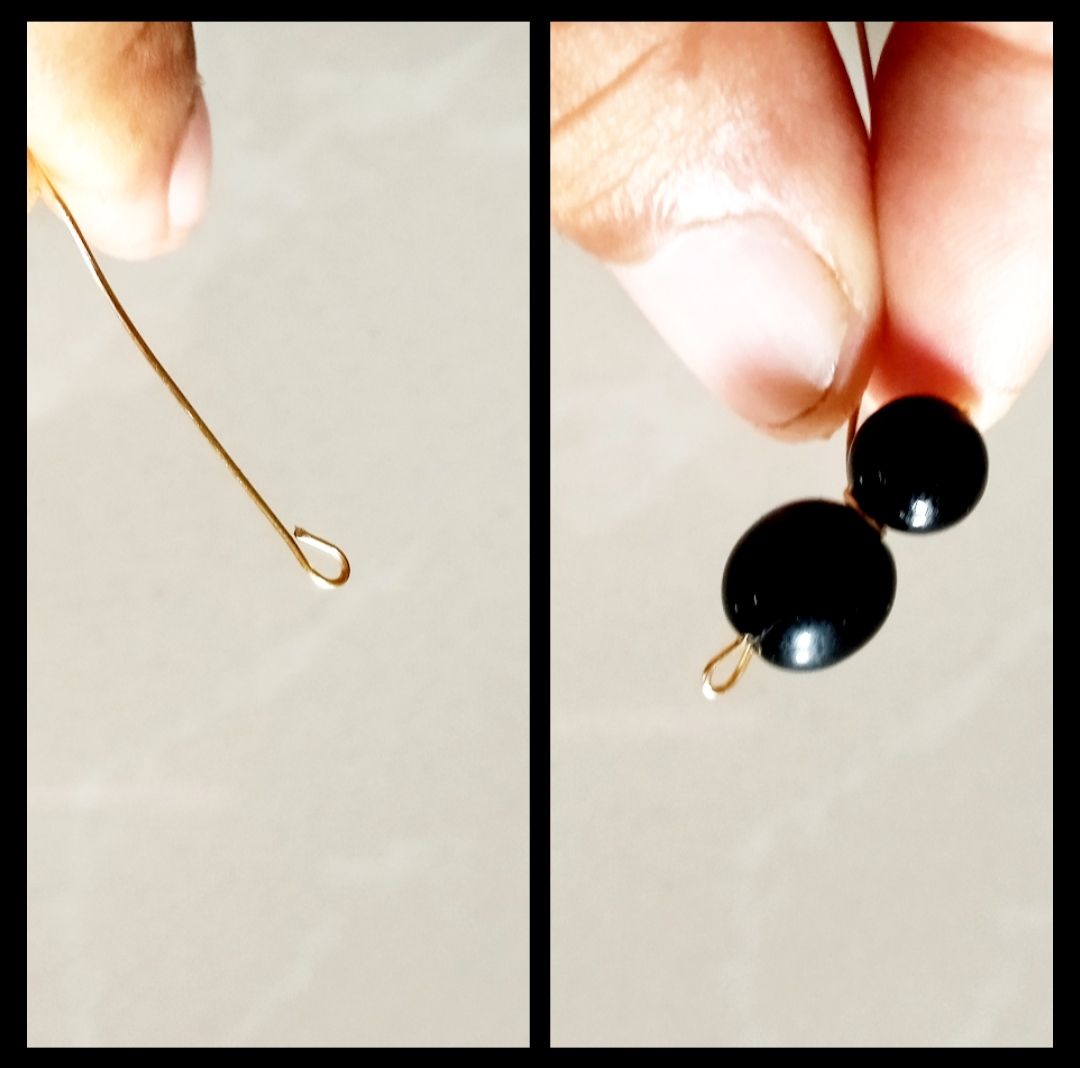
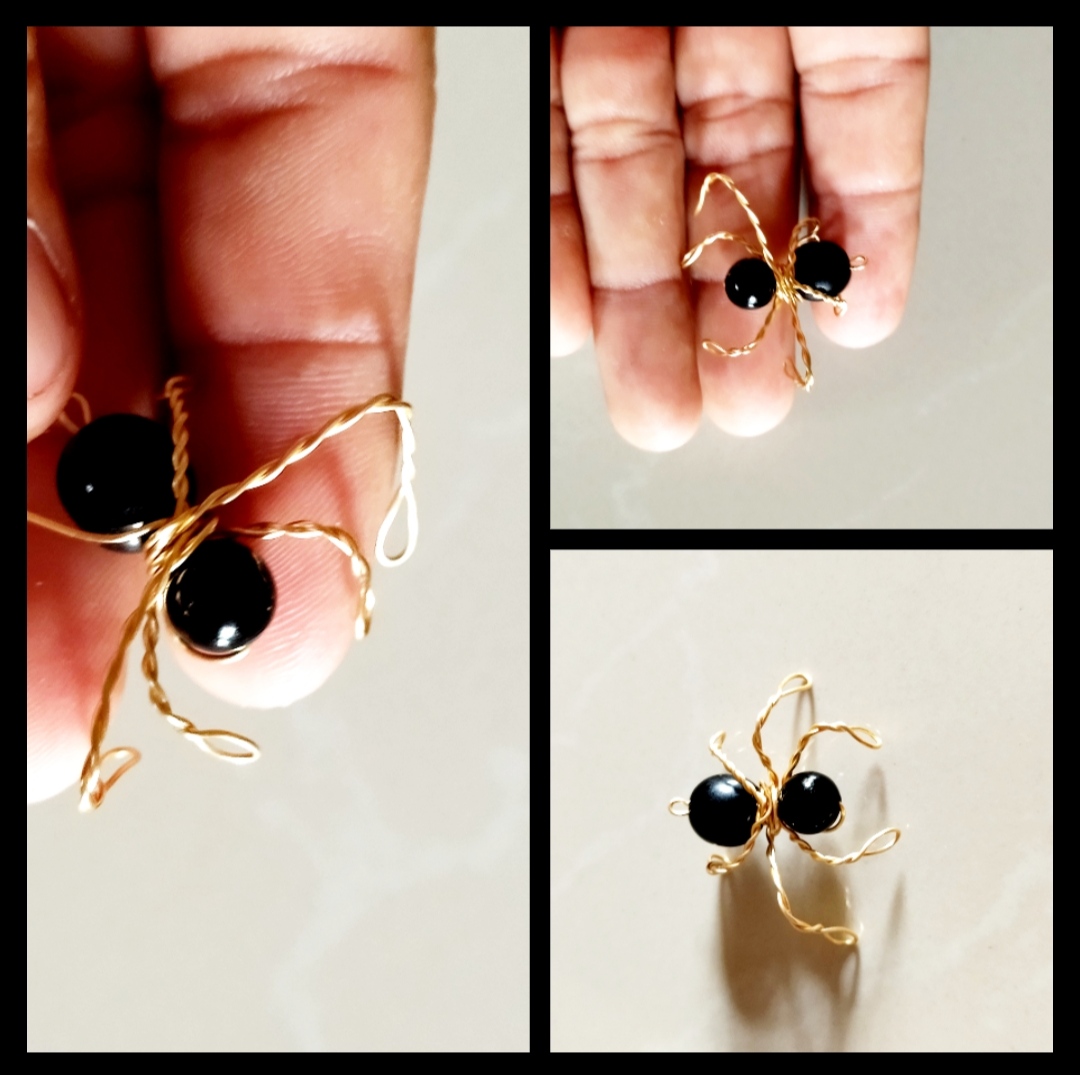
Paso 1:Para nuestro primer paso cortaremos un trozo de alambre calibre veintidós cortaremos cincuenta centímetros luego de tener el sabré con nuestras pinzas doblaremos un poco haciendo un redondo después meteremos las dos piedras negras la más grande primero luego la más pequeña luego nos regresamos y damos una vuelta en medio de las dos piedras apretamos muy bien para que no se suelten .
Step 1: For our first step we will cut a piece of twenty-two caliber wire, we will cut fifty centimeters after having the saber with our pliers, we will bend a little making a round, then we will insert the two black stones, the largest first, then the smallest, then we We go back and make a turn in the middle of the two stones, we press very well so that they do not come loose.
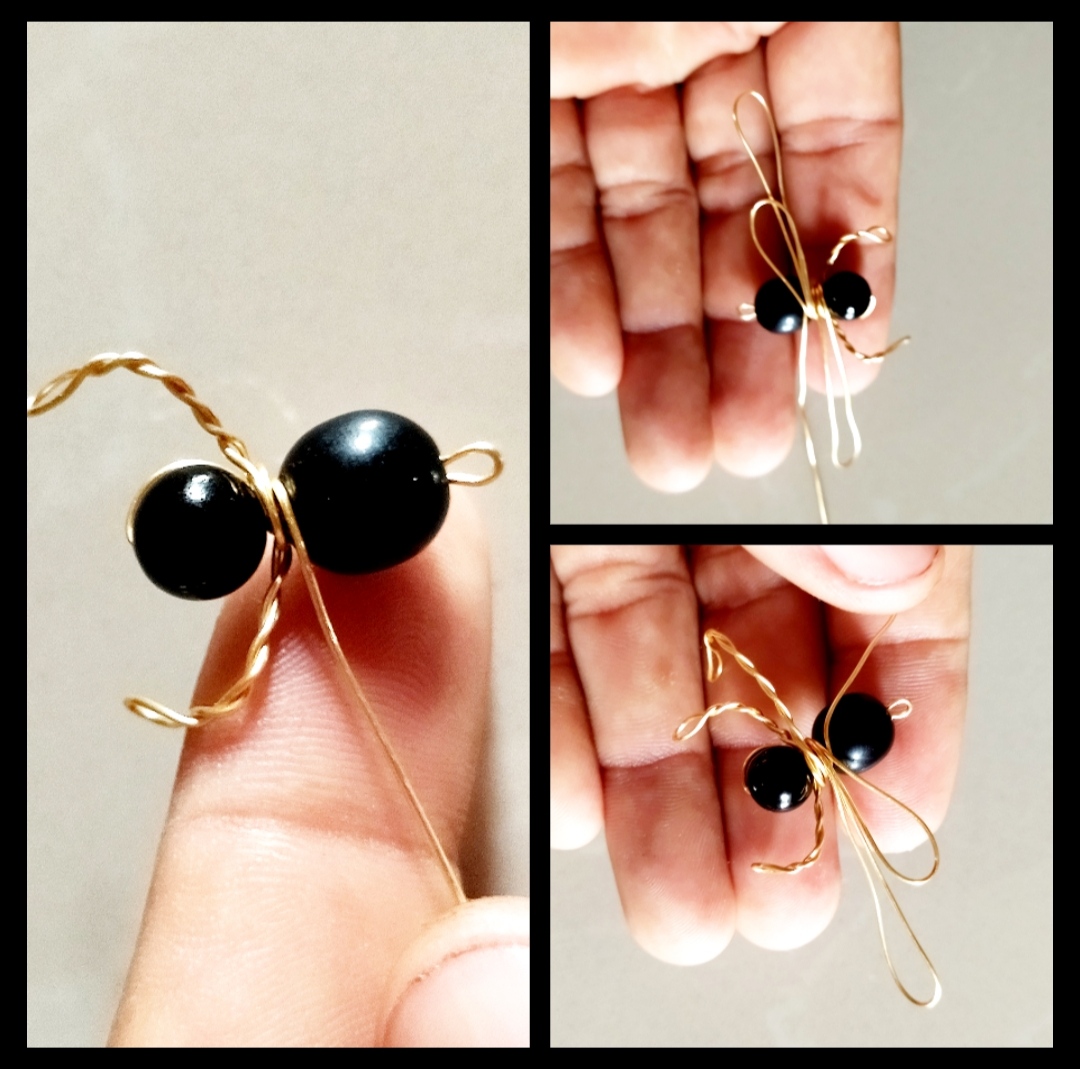
Paso 2: para nuestro segundo paso seguiremos trabajando con el mismo alambre calibre veintidós por eso cortamos bastante alambre, en este apdo aremos las patas de la araña como la aremos tomamos el alambre y lo pondremos hacia un lado del cuerpo de la araña luego dejamos un pedazo no muy grande y regresamos al cuerpo le damos una vuelta en medio de las dos piedras y como pueden ver nos queda. Don alambre para hacer la pata solo debemos entorchar un poco de la misma manera que vemos en la foto del mismo modo aremos la otra para las patas del medio las aremos un poco más grande pero utilizando el mismo modo igual que las de atrás solo aunque las dos de atrás son pequeñas también no debemos olvidar doblar un pedacito hacia abajo eso lo podemos hacer para por para o alfinal .
Step 2: for our second step we will continue working with the same twenty-two gauge wire so we cut a lot of wire, in this section we will make the legs of the spider how we will make it we will take the wire and put it towards one side of the body of the spider then we leave a piece that is not very large and we return to the body, we turn it around in the middle of the two stones and as you can see we are left with it. Don wire to make the leg we just have to twist a little in the same way that we see in the photo in the same way we will make the other one for the middle legs we will make them a little bigger but using the same way as the back ones only although the two of the back ones are small, we must also not forget to fold a little bit downwards, we can do that for, for, or at the end.
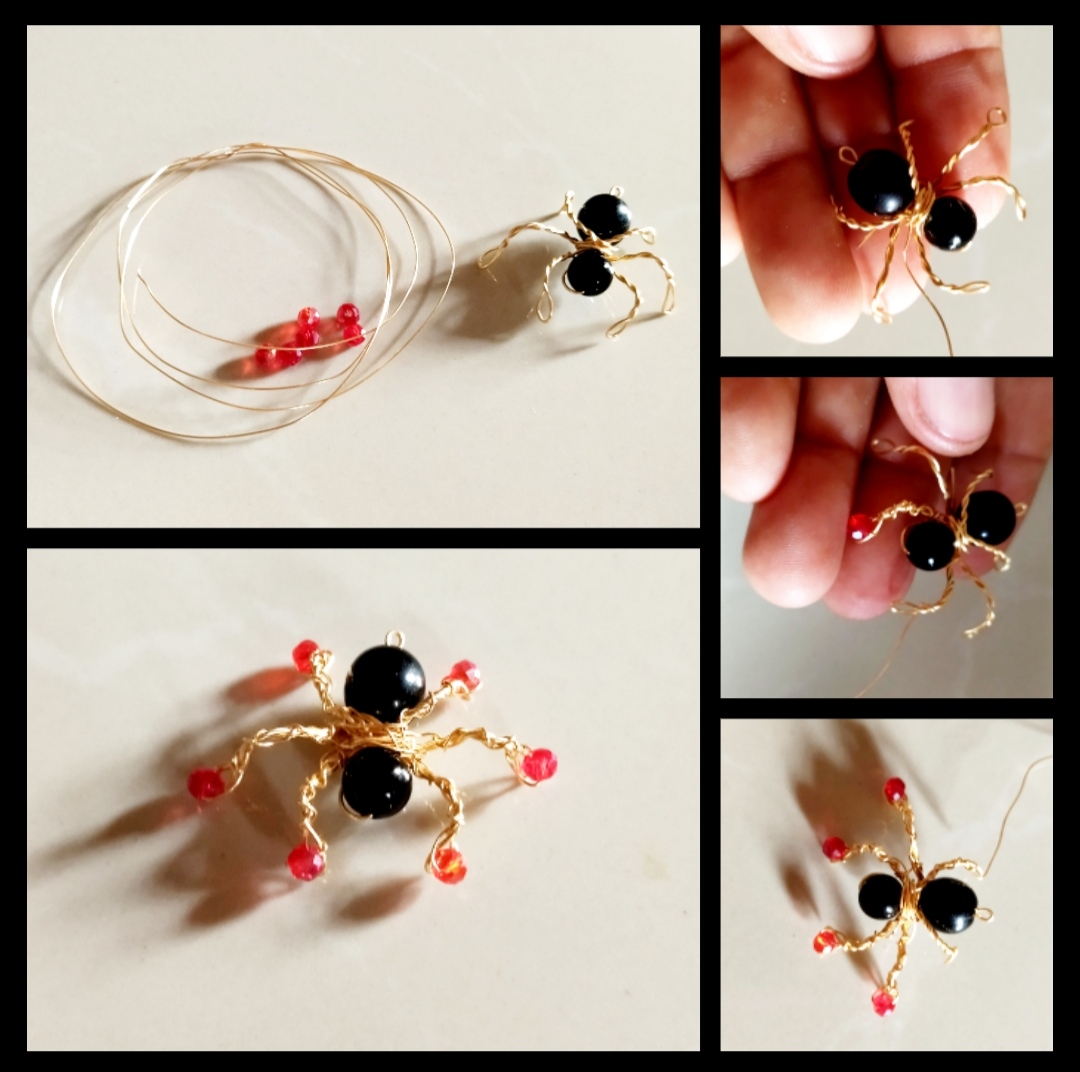
Paso 3: En este paso solo decoraremos nuestra araña este fue un paso de última hora ya que pende que la araña estaba un poco simple así que decidí adornarla con piedras rojas Leda un toque elegante como pondremos las piedras en cada pata de alarma para este paso cortaremos un trozo de alambre calibre veintiséis este es un poco más delgado y es más manejable lo primero que debemos hacer es tomar la punta y dar unas vueltas en medio de la araña apretamos muy bien y aseguramos luego entorcharemos el alambre en una de las patas cuello lleguemos a la punta de la pata meteremos una piedra roja la pondremos justo en la punta de la pata le damos unas vueltas a el alambre apretamos muy bien y regresamos al cuerpo de la araña entorchando de igual manera el alambre y así aremos en nuestras seis patas al final le damos unas vueltas al alambre apretamos muy bien para que no se suelte y listo ya tenemos el dije con forma de araña .
Step 3: In this step we will only decorate our chandelier this was a last minute step since it seems that the chandelier was a bit simple so I decided to decorate it with red stones It gives an elegant touch as we will put the stones on each alarm leg For this step we will cut a piece of twenty-six gauge wire, this is a little thinner and more manageable, the first thing we must do is take the tip and wrap it around the middle of the spider a few times, tighten it very well and make sure, then we will twist the wire into one of the the legs neck let's get to the tip of the leg we will put a red stone we will put it right on the tip of the leg we will turn the wire a few times we press very well and return to the body of the spider twisting the wire in the same way and so we will work on our six legs at the end we give a few laps to the wire we press very well so that it does not come loose and ready we already have the pendant in the shape of a spider.
Paso 4:Ya casi estamos listo para este paso pondremos nuestro dije en el collar para hacer el collar tomaremos el hilo chino las piedras y nuestra tenebrosa araña lo primero que debemos hacer es meter el hilo en el agujero que dejamos en la parte de atrás de ala araña el redondo que hicimos en el primer paso luego meteremos las piedras las piedras las podemos meter en el orden que queremos y listo nuestro hermoso collar, espero que a las chicas les guste es un gusto compartir con ustedes, será asta la próxima que tengan una feliz tarde y un tenebroso Halloween 🖤🖤♥️♥️🕷️🕷️🦇🦇🕸️🍓🍓🍓.
Step 4: We are almost ready for this step, we will put our pendant in the necklace to make the necklace, we will take the Chinese thread, the stones and our dark spider, the first thing we must do is put the thread in the hole that we left in the part from behind the spider wing the round we made in the first step then we will put the stones the stones we can put them in the order we want and ready our beautiful necklace, I hope the girls like it it is a pleasure to share with you, it will be until next time have a happy afternoon and a spooky Halloween 🖤🖤♥️♥️🕷️🕷️🦇🦇🕸️🍓🍓🍓.
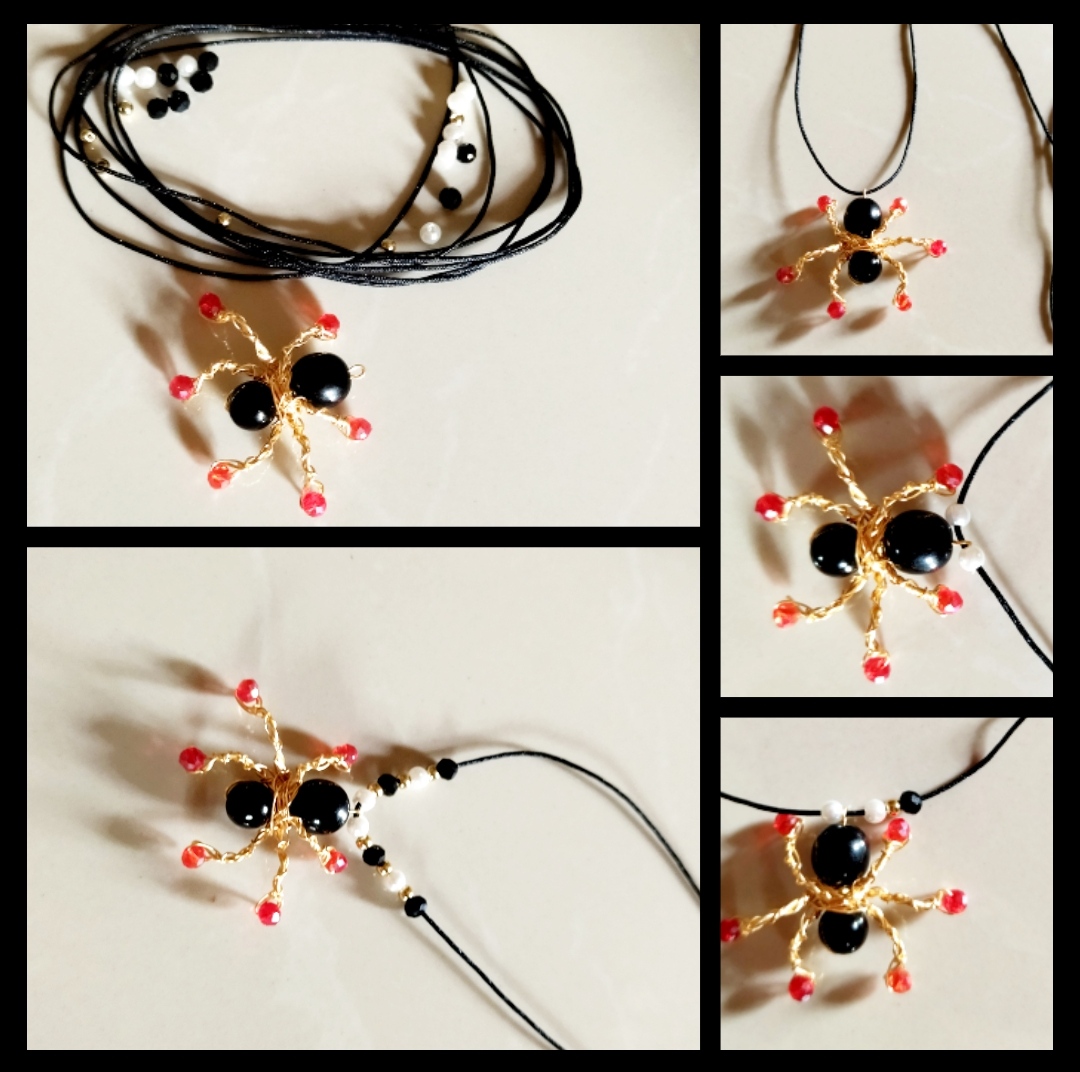
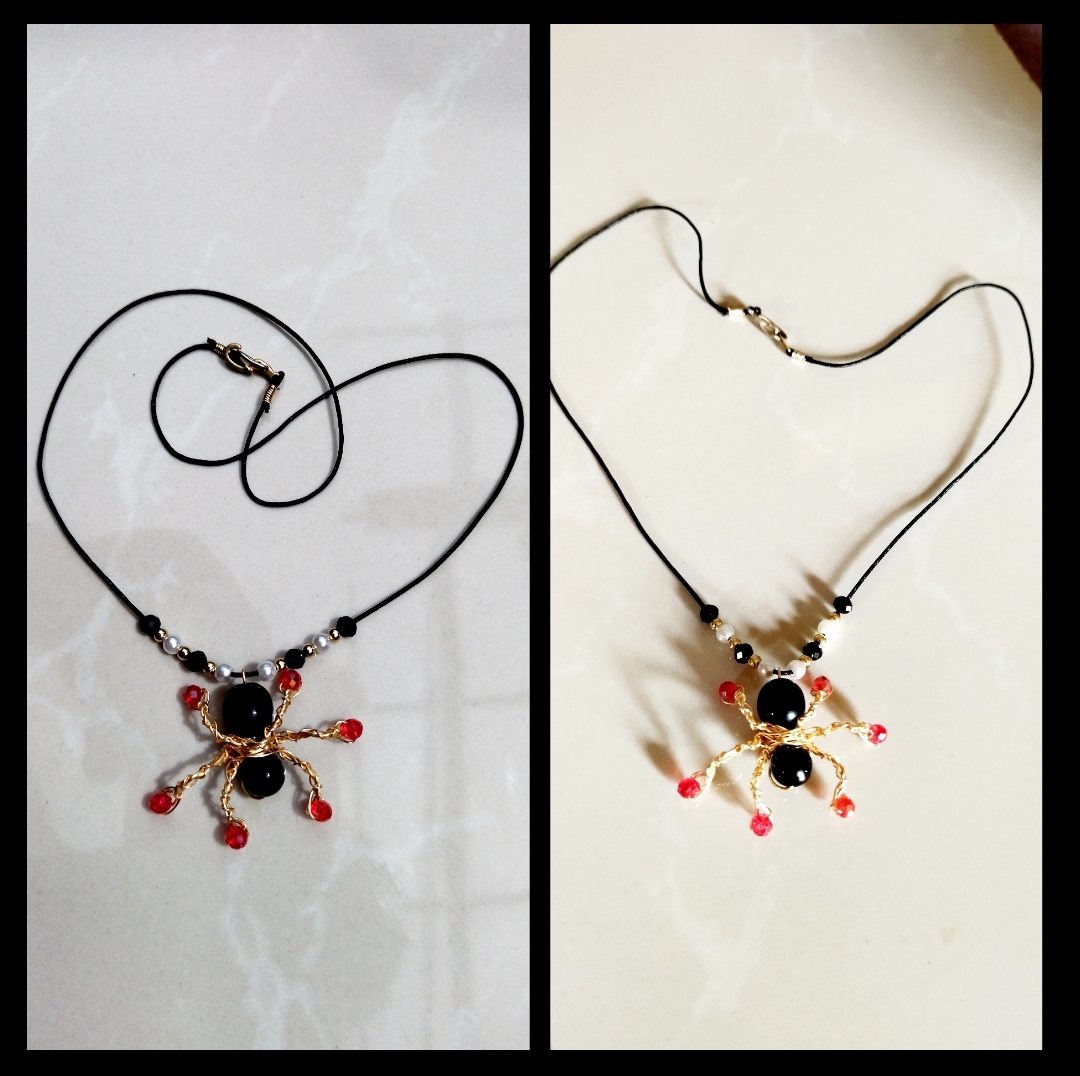
listo nuestros hermoso collar , espero que a las damas les guste, fue un gusto compartir con ustedes .
ready our beautiful necklace, I hope the ladies like it, it was a pleasure to share with you
Todas las Fotos son de mi autoría y fueron tomadas con mi Celular Redmi 9T
All Photos are my authorship and were taken with my Redmi 9T Cellphone
Hola Alexander! Estaba paseando por tu blog👁️👁️👀🕵️🕵️🕵️ las prendas (joyerías, accesorios, bisutería...) que haces son muy , muy lindas. Las quiero todas🙊
Este collar también está hermoso.
Explicas muy bien el procedimiento, para todos aquellos que quieran hacerlo tienen un buen tutorial. Felicidades.
Hola feliz día muchas gracias por visitarme muchas chicas les gusta lo que ago y es un gusto mara mi saber que les gusta y que les gustaría usar una de ellas muchas gracias, feliz dia
maravilloso, como todo lo que te propones hacer. gracias por cada publicacion, es un verdadero tesoro poder obtener en Hive tus grandes propuestas en accesorios.
Hola muchas gracias siempre será un gusto compartir con ustedes.🍓🍓🖤♥️❤️❤️👑👑👑👍☺️☺️
Te ha quedado muy hermoso, querido amigo @alexanderflx, Felicidades y suerte cariño.
Hola gracias, que tengas feliz día ☺️☺️😉😉😉😉
Que lindo y delicado quedó tu trabajo, me encanta. Felicidades,gracias por compartir tu linda idea 🕷️
Hola muchas gracias siempre será un gusto compartir con ustedes ❤️❤️👑👑👑🌹🌹🌹🌹😊😊😊
Esta si que es una verdadera araña jaja 😄😍...te quedó hermosa y muy simpática por los colores que usaste, como está hecha con alambre le da ese aspecto de realismo cómo si estuviera parada realmente sobre sus patitas. Espero no dejes de compartir me encanta leerte y ver tus bonitos trabajos @alexanderflx 💕un saludito y feliz día!!!
Hola feliz día, jajajaja si es un poco realista y las piedras que coloque en las patas le da un toque especial y muy llamativo, siempre será un gusto compartir con ustedes😉 yo espero seguir mirando y leyendo tus comentario, muchas gracias por tu visita es un placer.❤️❤️🌹🌹🌹👑👑👑👑👑🌹🌹🍓🍓🍓🍓🍓🍓🍓🍓🍓🍓🍓🍓🍓🍓
that actually ended up looking real good with just a couple wires and beads 😃 makes for a more affordable and creative Halloween accessory to match with the costumes 😁 thank you for sharing about your work on this!

!ALIVE https://d.buzz
You Are Alive so I just staked 0.1 $ALIVE(3/10)@alexanderflx! to your account on behalf of @ilovewintergem.
The tip has been paid for by the We Are Alive Tribe
 through the earnings on @alive.chat, feel free to swing by our daily chat any time you want.
You can support the new proposal (#240) on Peakd, Ecency, or using HiveSigner.
Thank you!Dear @alexanderflx, sorry to jump in a bit off-topic.May I ask you to review and support the new proposal (https://peakd.com/me/proposals/240) so I can continue to improve and maintain this service?