Time for decoration, copper wire art
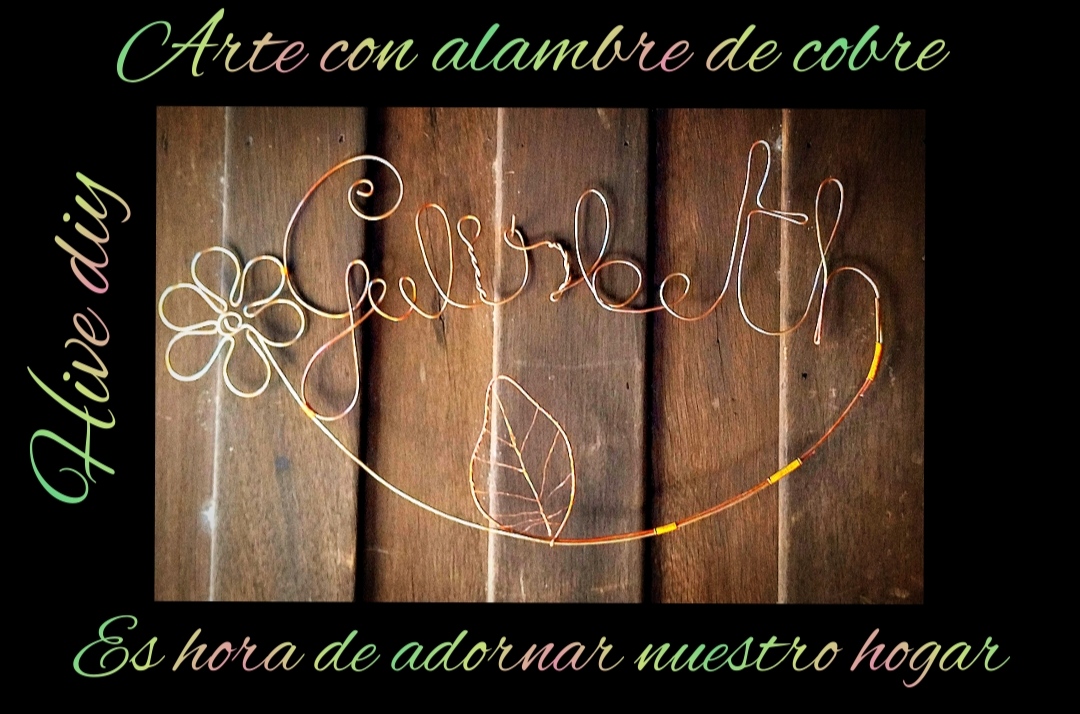
Hola buenos días espero se encuentren bien un fuerte abrazo para todos tenía mucho tiempo sin publicar pero ya estoy de regreso y con muchas ideas espero les guste, el día de hoy quiero compartir con ustedes y demostrarle que podemos hacer lo que queramos con un trozo de albre y un poco de creatividad, arte con alambre de cobre, está ves realizaremos un letrero pero con nuestro nombre yo puse el nombre de mi mamá ya que ella quería un letrero con su nombre para la entrada de la casa a si que pondremos manos a la obra espero les guste.
Hello, good morning, I hope you are well, a big hug for everyone, I had not published for a long time, but I am back and with many ideas, I hope you like it, today I want to share with you and show you that we can do whatever we want with a piece of wire and a bit of creativity, art with copper wire, this time we will make a sign but with our name I put my mother's name since she wanted a sign with her name for the entrance of the house so we will get to work I hope you like it.
What do we need.
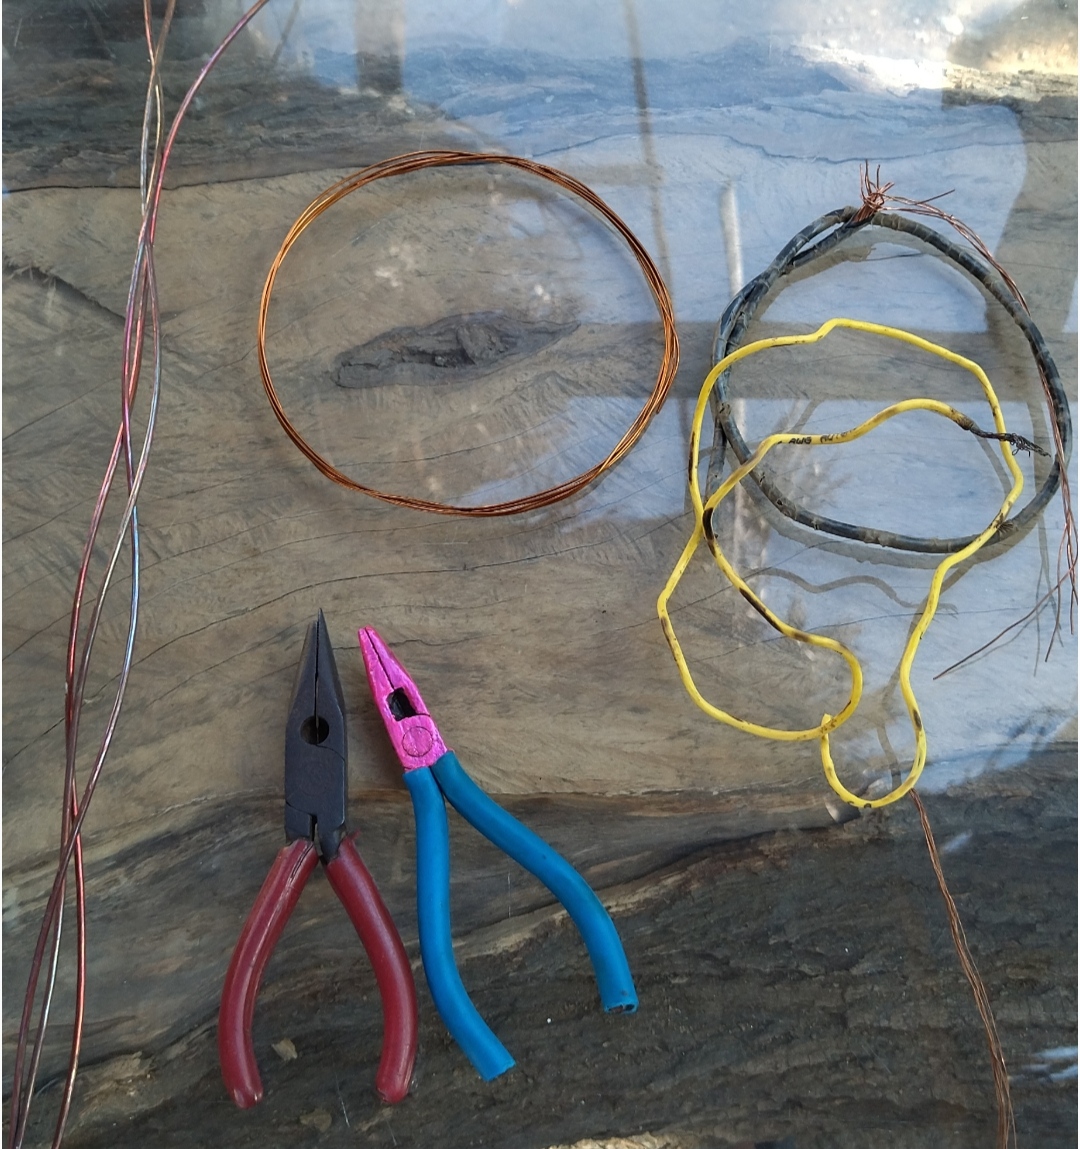
- tenazas
- alambre de cobre grueso y fino
- pincers
- coarse and fine copper wire
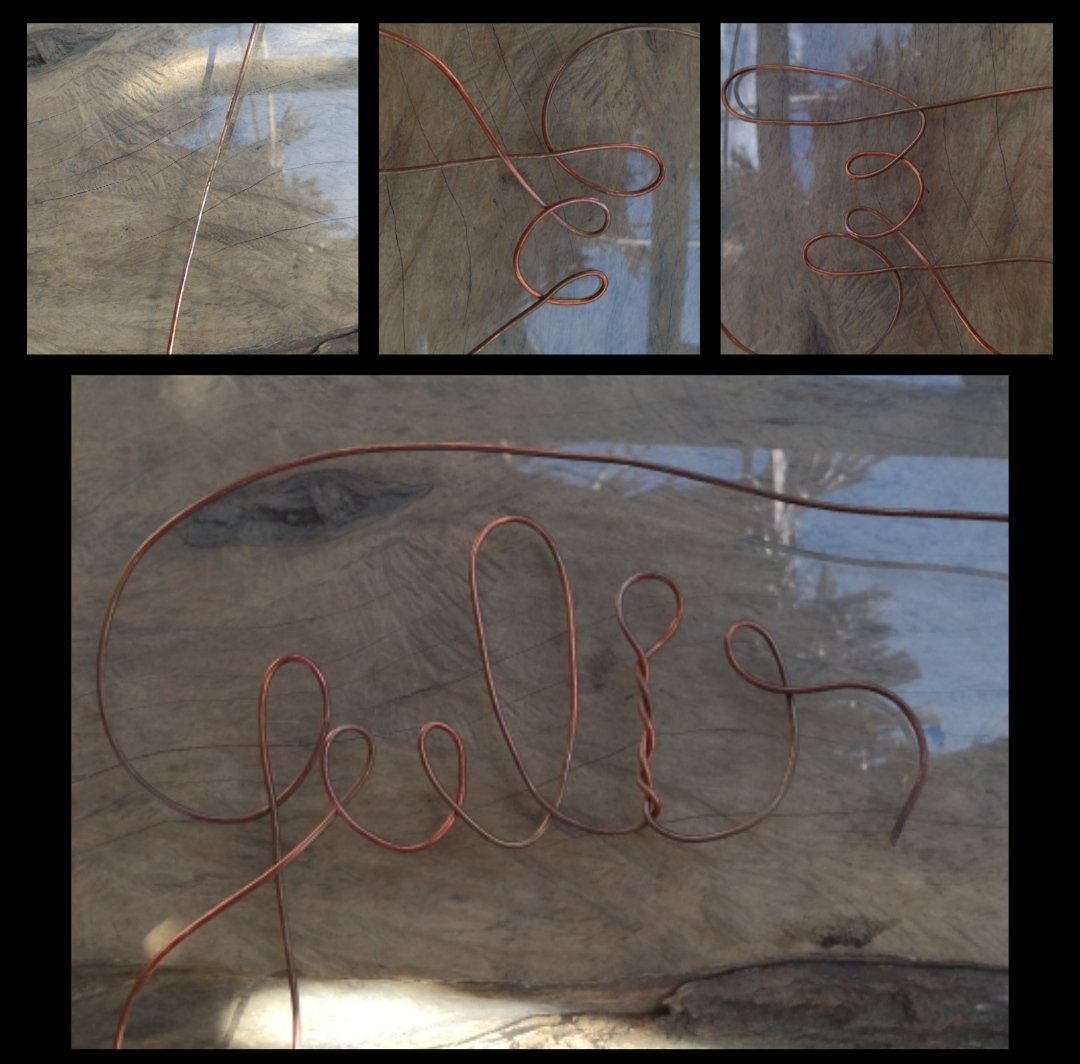
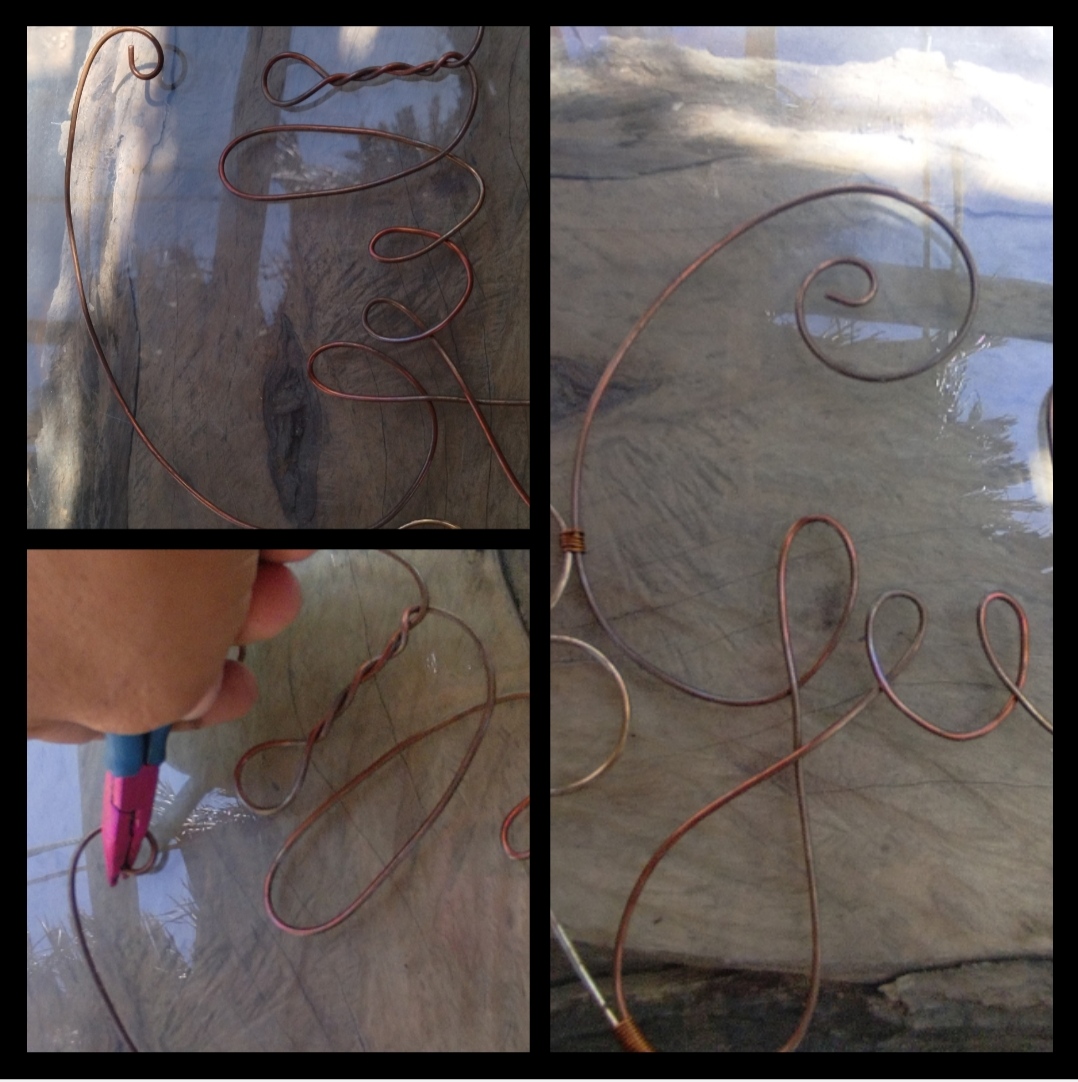
Paso 1: Para nuestro primer paso tendremos en cuenta lo grande que será nuestro nombre para así no tener que empatar el l alambre entonces para este primer paso cortaremos un trozo de alambre lo suficientemente largo yo lo corte de un metro y medio y desde hay parti a doblar el alambre para darle forma de letras como pueden ver si sabemos escribir recorrido será mucho más fácil y si no podemos escribir el nombre que queremos en un papel y de hay sacaremos la idea para nuestro letrero .
Step 1: For our first step we will take into account how big our name will be so as not to have to tie the wire so for this first step we will cut a piece of wire long enough I cut it one and a half meters and From there we have to bend the wire to give it the shape of letters, as you can see, if we know how to write, it will be much easier, and if we cannot write the name we want on a piece of paper, we will get the idea for our sign from there.
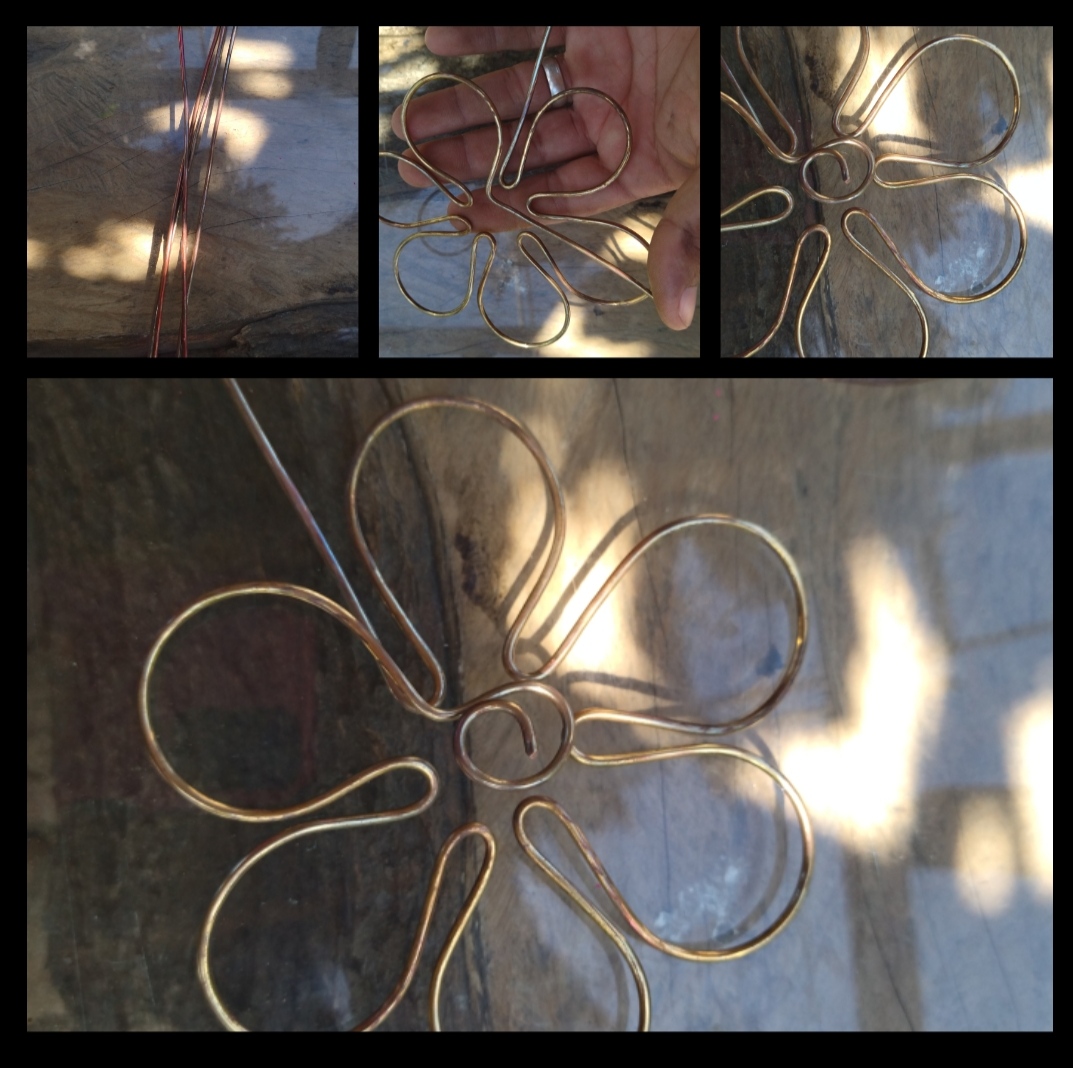
Paso 2: Para este segundo paso cortaremos unos trozos de albre un poco largos yo corte barios para ya así no volver a cortar, tomaremos uno de los trozos y aremos una flor muy fácil con algo redondo aremos los pétalos así nos quedaran del mismo tamaño luego de hacer la flor yo también hice una hoja para darle un poco de creatividad a nuestro letrero .
Step 2: For this second step we will cut some pieces of albre a little long and I will cut barium so as not to cut again, we will take one of the pieces and we will make a very easy flower with something round we will make the petals so that we will have the same size after making the flower I also made a leaf to give our sign a bit of creativity.
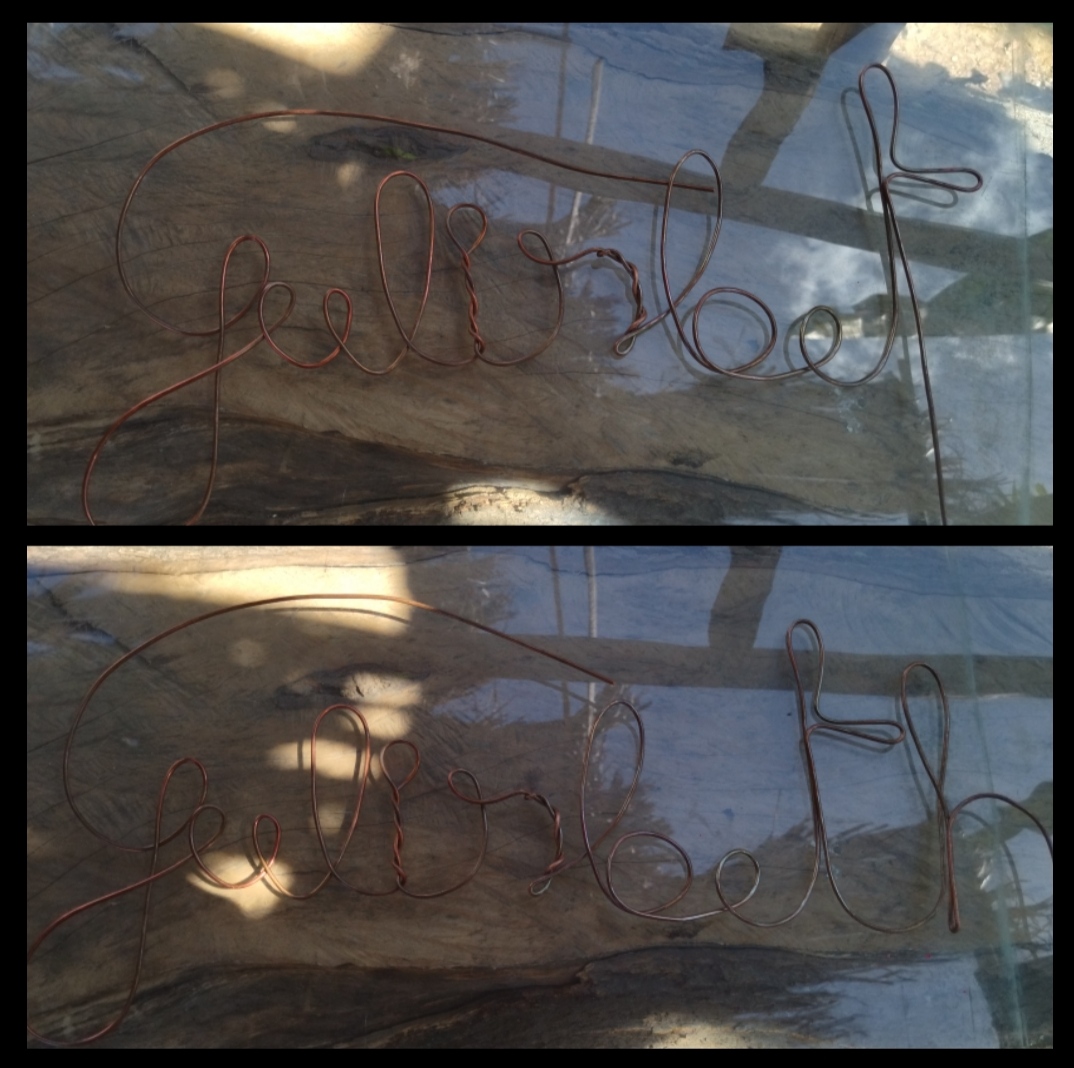
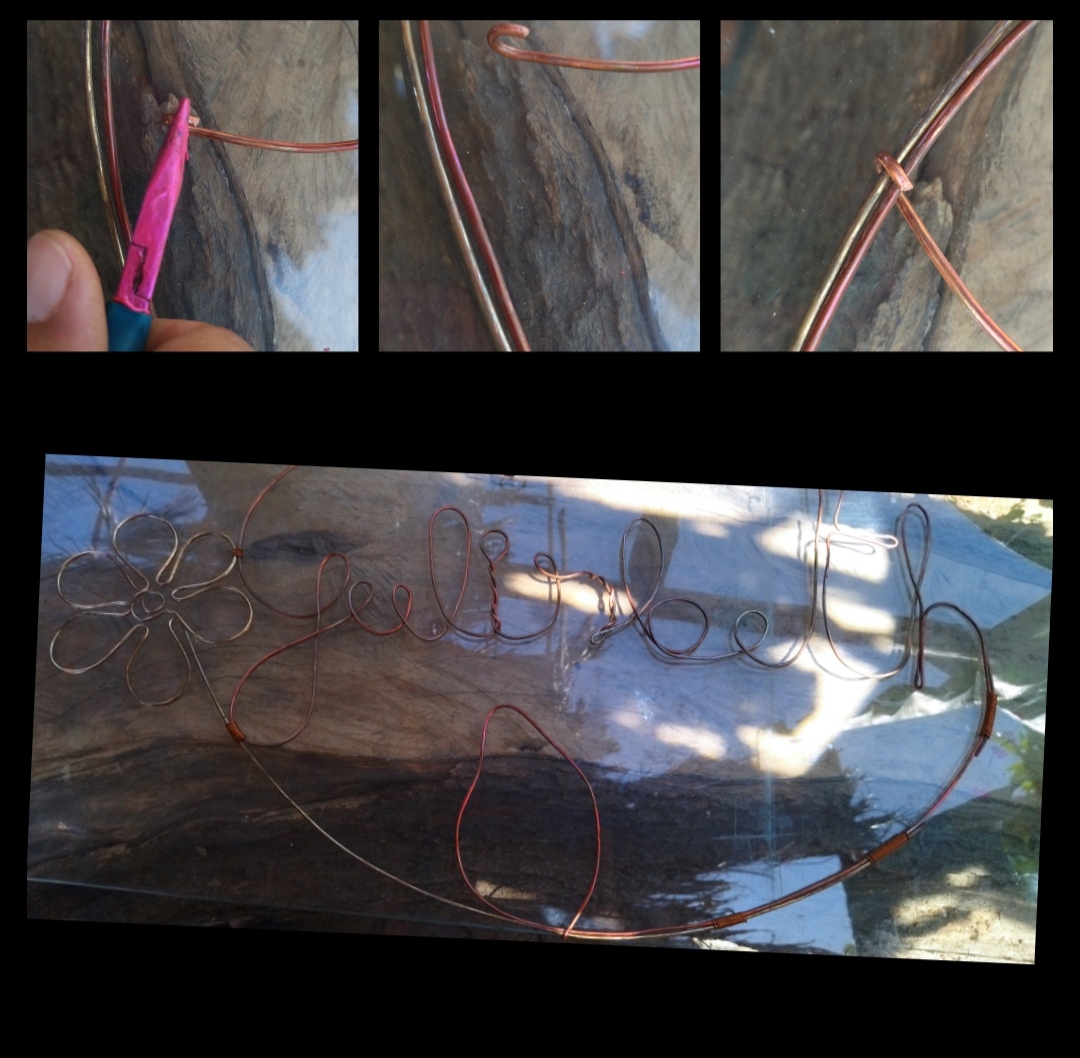
Paso 3: Para este paso solo nos dedicaremos a unir la flor y la hoja a nuestro nombre cortaremos un trozo de alambre delgado para amarrar nuestras piezas ya teniendo bien amarrada doblaremos la puntica de nuestra hoja y la engancharemos para que nos quede más segura, ya casi listo le daremos forma de aspiral a la punta que nos quedó en la parte de las letras le podemos dar la forma que queramos yo solo la le di forma de espiral. .
Step 3: For this step we will only dedicate ourselves to joining the flower and the leaf to our name, we will cut a piece of thin wire to tie our pieces, already having it well tied, we will bend the point of our leaf and we will hook it so that it remains more sure, almost ready we will give it the shape of an aspiral to the tip that was left in the part of the letters we can give it the shape we want I just gave it a spiral shape.

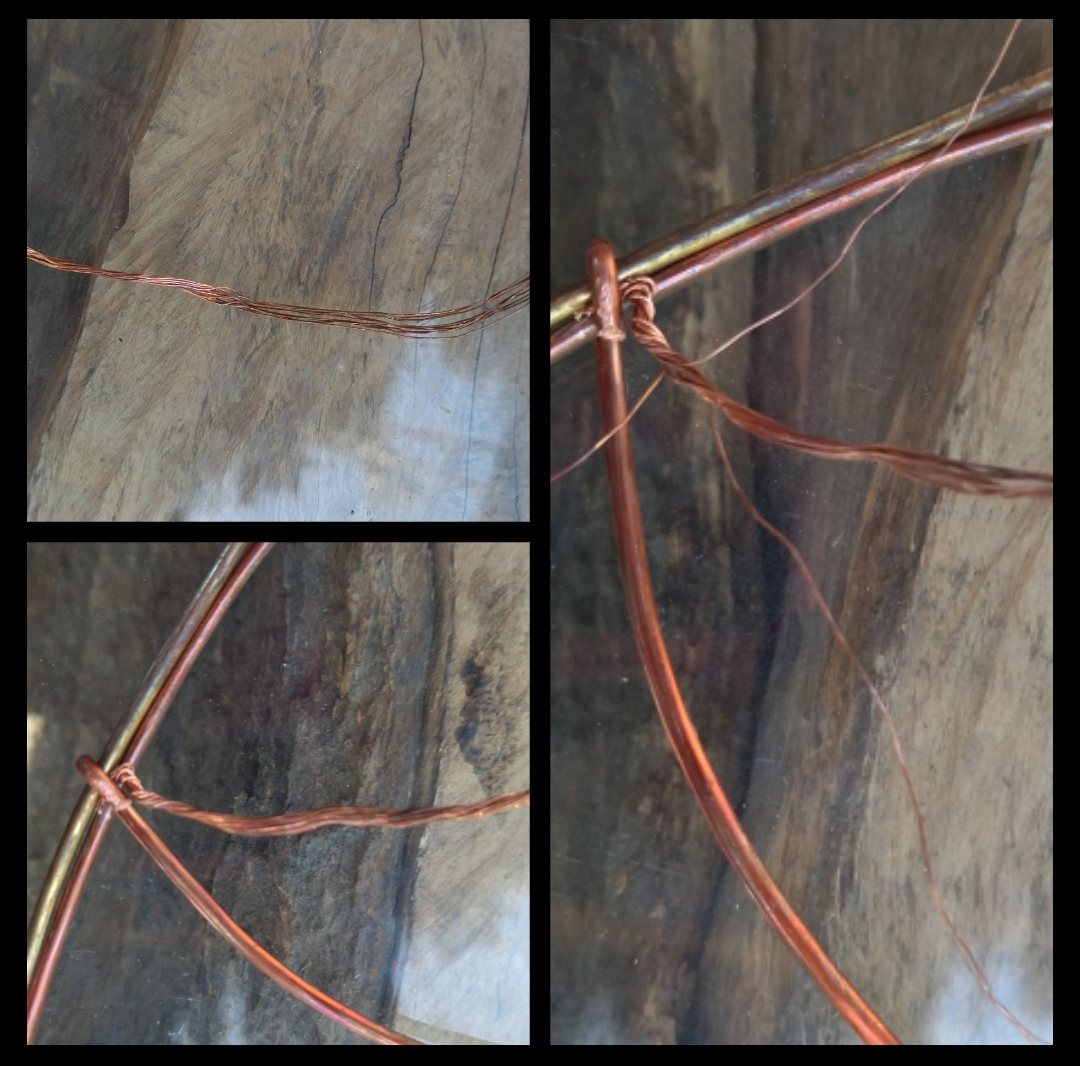
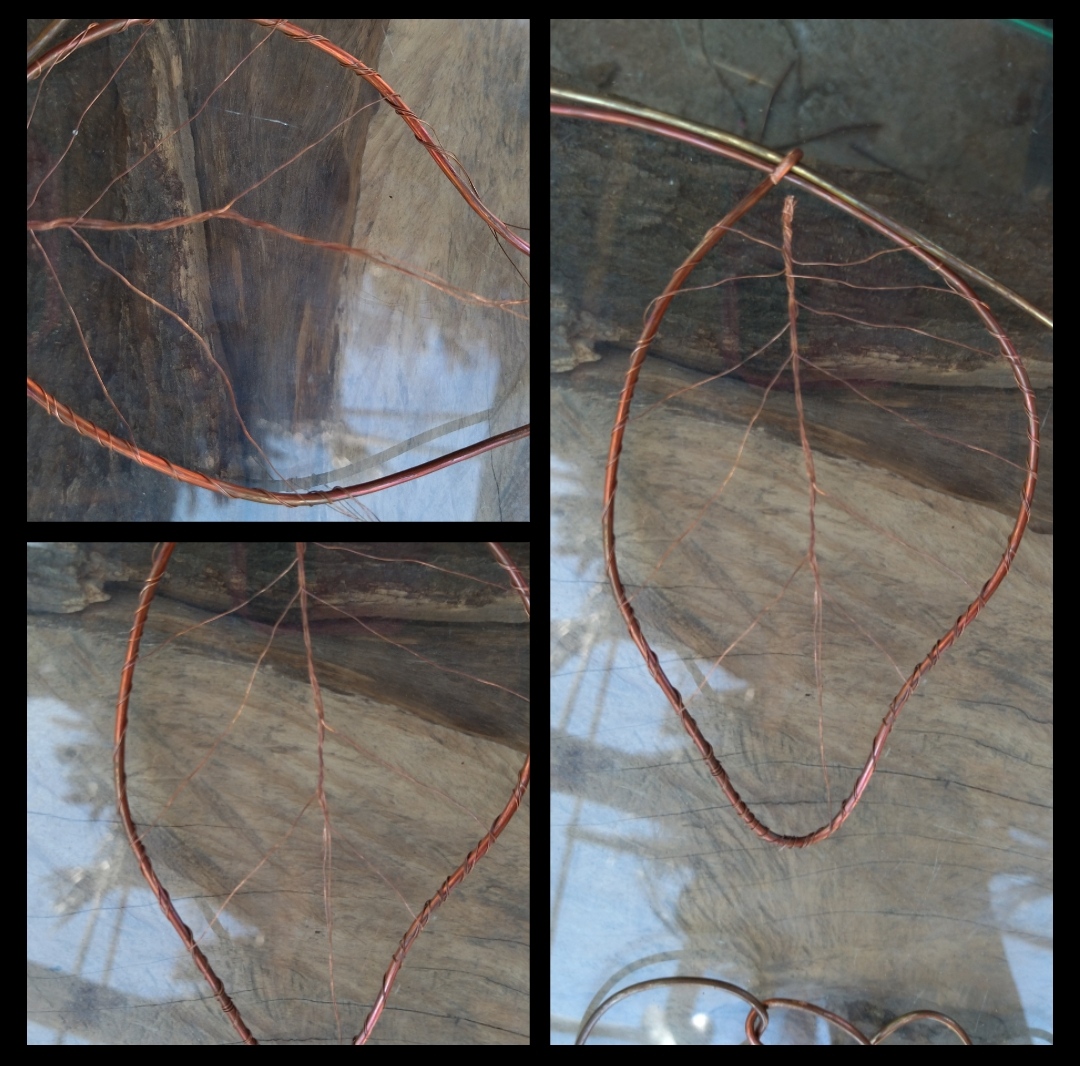
Paso 4:Ya estamos casi terminando solo le daremos un poco más de creatividad a nuestro letrero,cortaremos un trozo de alambre delgado en este caso corte un trozo de este alambre delgado es muy delgado y tiene muchos pelitos para poder hacer este paso necesitamos un alambre así, ya teniendo el trozo de alambre pondremos una punta en nuestra hoja en la parte de abajo y separamos los pelos y iremos dándole vueltas al los borde de nuestra hoja para darle esta forma se parece más a una hoja de esta manera espero les guste bueno y así terminamos nuestro letrero.
Step 4: We are almost done we will just give our sign a little more creativity, we will cut a piece of thin wire in this case cut a piece of this thin wire it is very thin and has many hairs to be able to do this step we need a wire like this, already having the piece of wire we will put a point in our leaf at the bottom and separate the hairs and we will go around the edges of our leaf to give it this shape it looks more like a leaf in this way I hope you like it good and so we finish our sign.
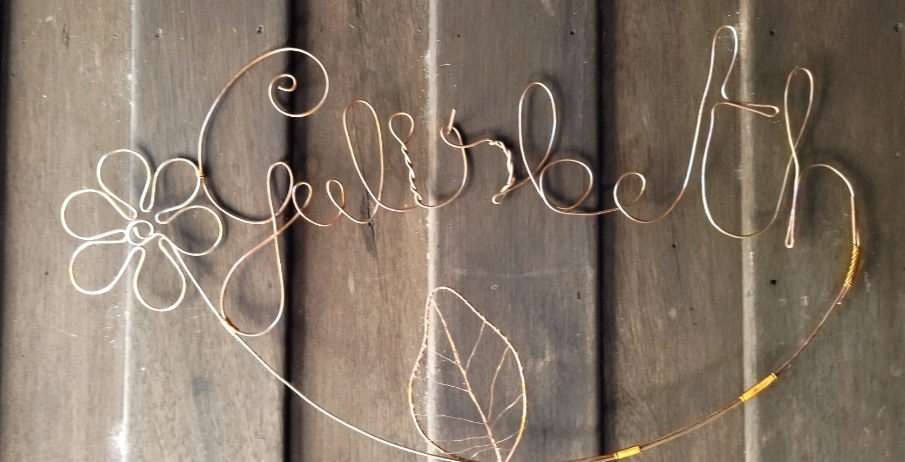
lista nuestro hermoso letreros , espero que a las damas les guste, fue un gusto compartir con ustedes .
list our beautiful signs, I hope the ladies like it, it was a pleasure to share it with you.
Todas las Fotos son de mi autoría y fueron tomadas con mi Celular Redmi 9T
All Photos are my authorship and were taken with my Redmi 9T Cellphone
Hola amigo!
Que lindo arte, me encanta lo vintage esto tiene una aire a esas cosas que me gustan mucho!
Estas letras con ese fondo de madera luce estupendo!
Buen trabajo!
Saludos
Hola, gracias meda mucho gusto saber que te gusto,☺️👍👍 no te alejes mucho de seguro traeré muchas cosas lindas como esta no te las pierdas ☺️☺️☺️☺️
Pero que belleza! admiro mucho estos dones y habilidades artesanales. Sigue mostrando tu arte, saludos.