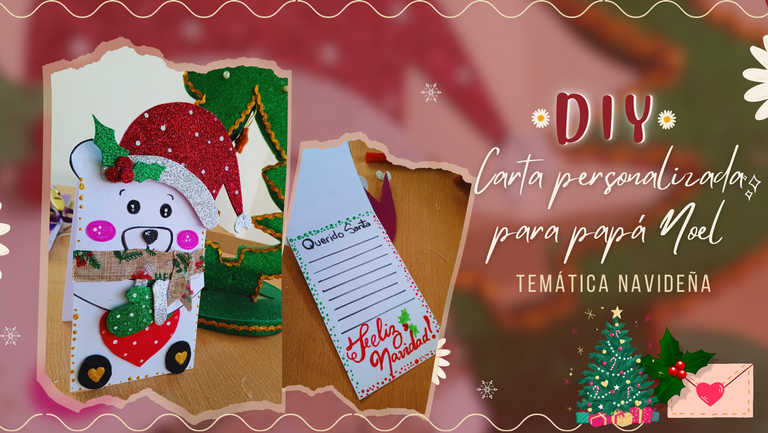
Hace un par de años se ha vuelto tradición para mi hacer una tarjeta especial con motivo de ser usada como la carta del niño Jesús que Lionella completará y por supuesto que esta vez no podia ser la excepción.
Dentro de sus gustos este año ella queria que fuese un osito navideño, asi que poniendo manos a la obra y con muy pocos materiales que tenía a la mano en el momento logre hacerle su tan esperada carta, la cual ella misma lleno con sus deseos para estas navidades..
Sin más aquí te muestro el proceso creativo✨🎅🏻
Hello creative friends 🎄✨ I hope you are doing well and have had a wonderful day, we are doing quite well here thank God.
A couple of years ago it has become tradition for me to make a special card on the occasion to be used as the baby Jesus letter that Lionella will complete and of course this time could not be the exception.
Among her tastes this year she wanted it to be a Christmas bear, so getting down to work and with very few materials I had on hand at the time I managed to make her long awaited letter, which she filled with her wishes for Christmas.
Without further ado here is the creative process✨🎅🏻

Materiales:
- Hoja de cartulina blanca
- Foami escarchado rojo, verde y plateado
- Foami liso rojo
- Marcadores
- Silicón
- Cinta navideña
Materials:
- Sheet of white card stock
- Red, green and silver frosted Foami
- Red plain Foami
- Markers
- Silicone
- Christmas ribbon

✨ Paso a Paso | Step by Step✨
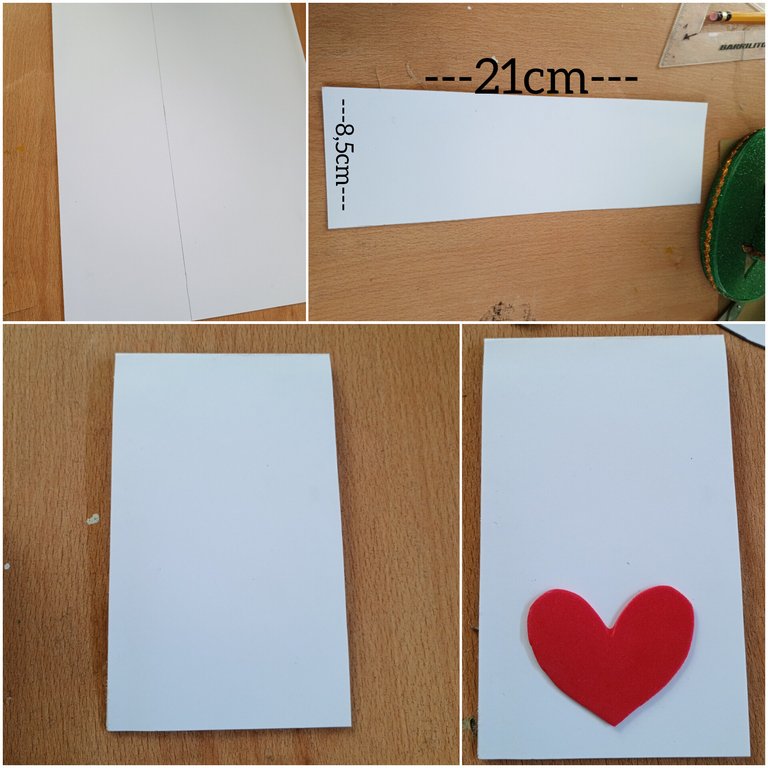
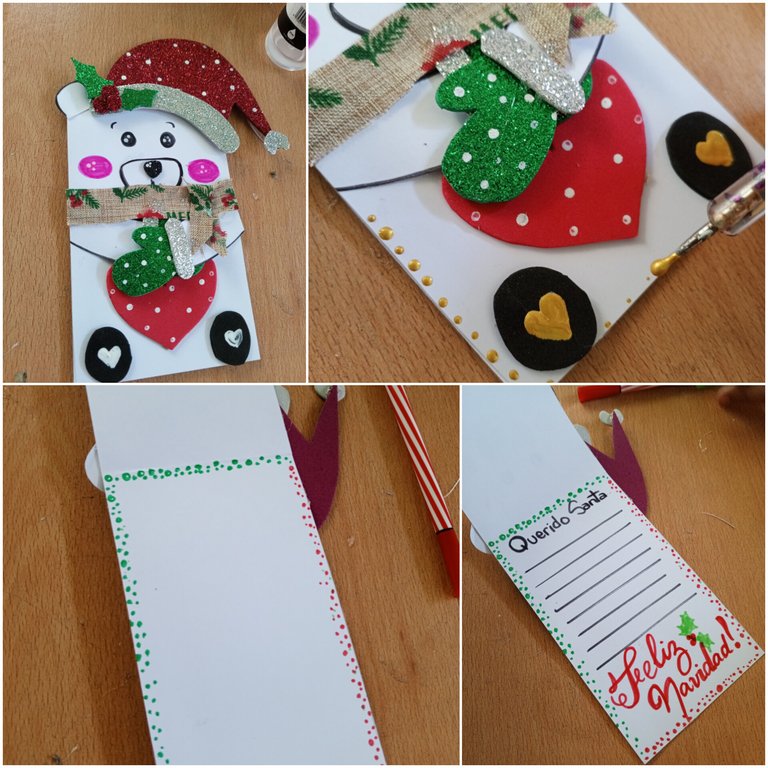
✨ En una hoja de cartulina medi 8,5cm×21cm o bien puede ser por el largo completo de la hoja, realicé una línea en esta medida para luego recortar y proceder a doblar a la mitad es decir a los 10,5cm y marque muy bien el doblez. Luego en lo que seria la parte frontal pegue un corazón de foami rojo.
✨ On a sheet of cardboard measuring 8.5cm×21cm or it can be the full length of the sheet, I made a line in this measure and then cut and proceed to fold in half, that is to say at 10.5cm and mark the fold very well. Then on the front side I glued a red foami heart.
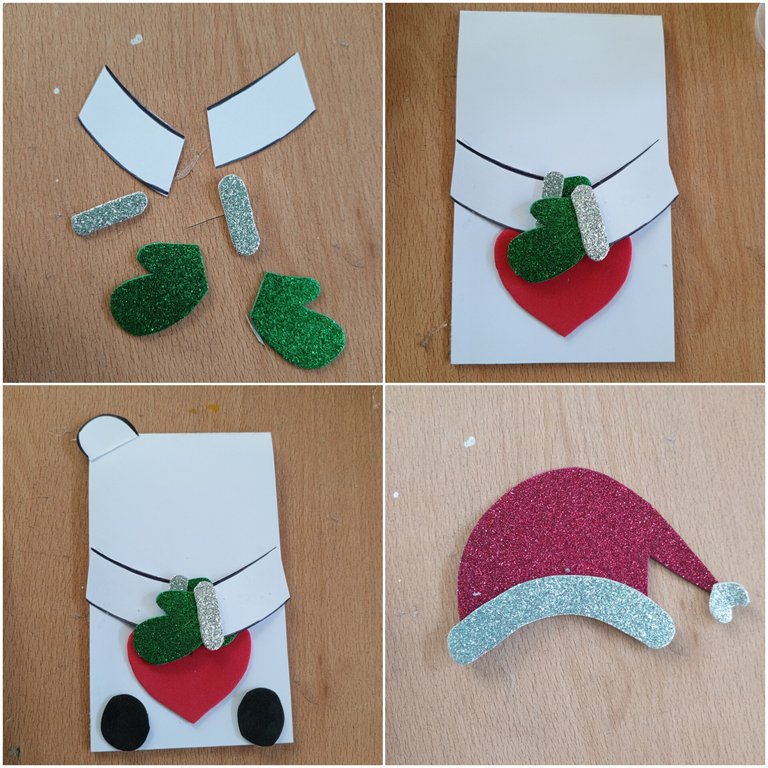
✨ En cartulina blanca hice dos bracitos, en foami verde escarchado dos guantes junto con detalles plateados y pegué justo sobre el corazón. Adicional pegué las patitas del osito en negro y tambien su orejita.
✨ En foami rojo realicé el gorro de navidad con sus detalles plateados.
✨ In white cardboard I made two little arms, in frosted green foami two gloves with silver details and glued right over the heart. Additionally I glued the little bear's paws in black and also his little ear.
✨ In red foami I made the Christmas hat with silver details.
✨ Pegué el gorro en la parte que no habia colocado orejita, y en cartulina blanca realice el hocico el cual delinee y difumine primero con marcador negro, ubiqué en su lugar y pegué una mini nariz de foami negro escarchado. Además con marcadores realice los ojos y las mejillas; luego con pintura al frio blanca di pequeños puntos de luz, asi como realicé tambien puntos en el gorro de navidad y en el corazón central a modo de hacerlo lucir un poco más llamativo.
✨ I glued the hat on the part where I had not placed the ear, and on white cardboard I made the muzzle which I outlined and blurred first with black marker, placed in place and glued a mini nose of frosted black foami. Also with markers I made the eyes and cheeks; then with white cold paint I gave small dots of light, as well as I also made dots in the Christmas hat and in the central heart to make it look a little more striking.
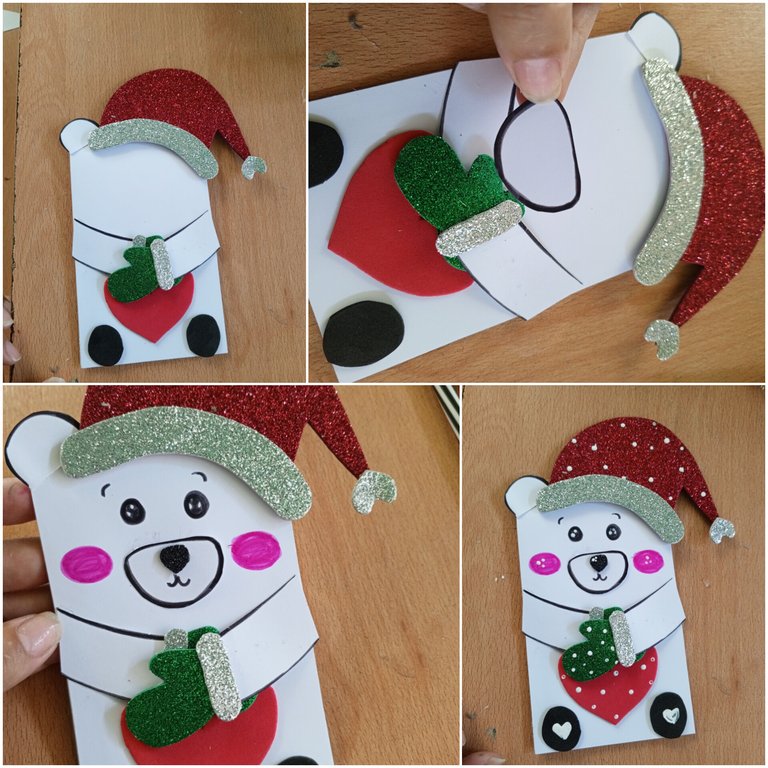
✨ Por poco se me olvida la bufanda y para ello utilice un retazo de cinta navideña que recorte y pegué (nada complicado). Seguidamente con la ayuda de un puntero y pintura dorada decore todo el alrededor con puntitos.
✨ Para la parte interna utilicé marcadores para decorar tanto los bordes, como para escribir la frase Querido Santa seguido de un par de lineas y finalizando conFeliz Navidad. De esta forma práctica podemos realizar una carta personalizada a Santa.
✨ I almost forgot the scarf and for this I used a piece of Christmas ribbon that I cut out and glued (nothing complicated). Then with the help of a pointer and gold paint I decorated all around with dots.
✨ For the inside I used markers to decorate both the edges and to write the phrase Dear Santa followed by a couple of lines and ending with Happy Christmas. In this practical way we can make a personalized letter to Santa.

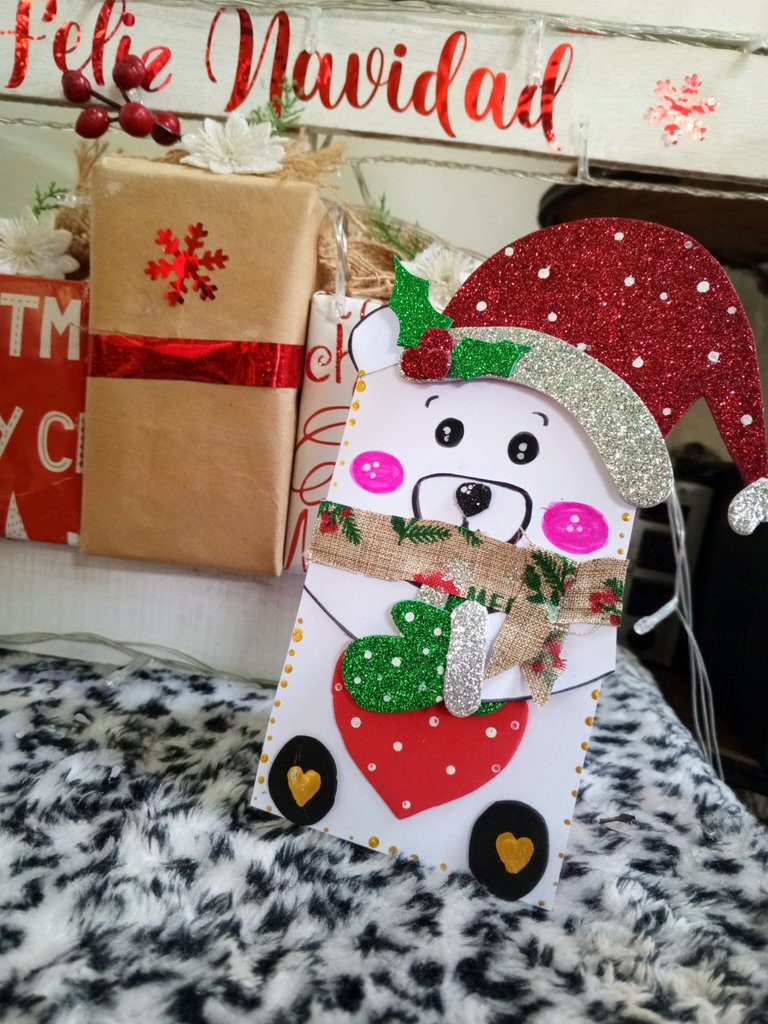
Resultado | Result✨🧣
Una vez que comenzamos con pequeñas tradiciones es importante mantenerlas en el tiempo y eso solo depende de nosotros, siento que en comparación a la que he hecho los años anteriores está está muy sencilla pero es tal y como mi princesa la pidio y eso me hace feliz, además es algo que todos podemos hacer para de alguna forma hacer sentir especiales a nuestros pequeños. Sin mas, espero que les guste ¡Hasta una próxima oportunidad 🎅🏻🎄!
Once we start with small traditions it is important to keep them over time and that only depends on us, I feel that compared to what I have done in previous years is very simple but it is just as my princess asked for it and that makes me happy, plus it's something we can all do to somehow make our little ones feel special. Without further ado, I hope you like it See you next time 🎅🏻🎄!
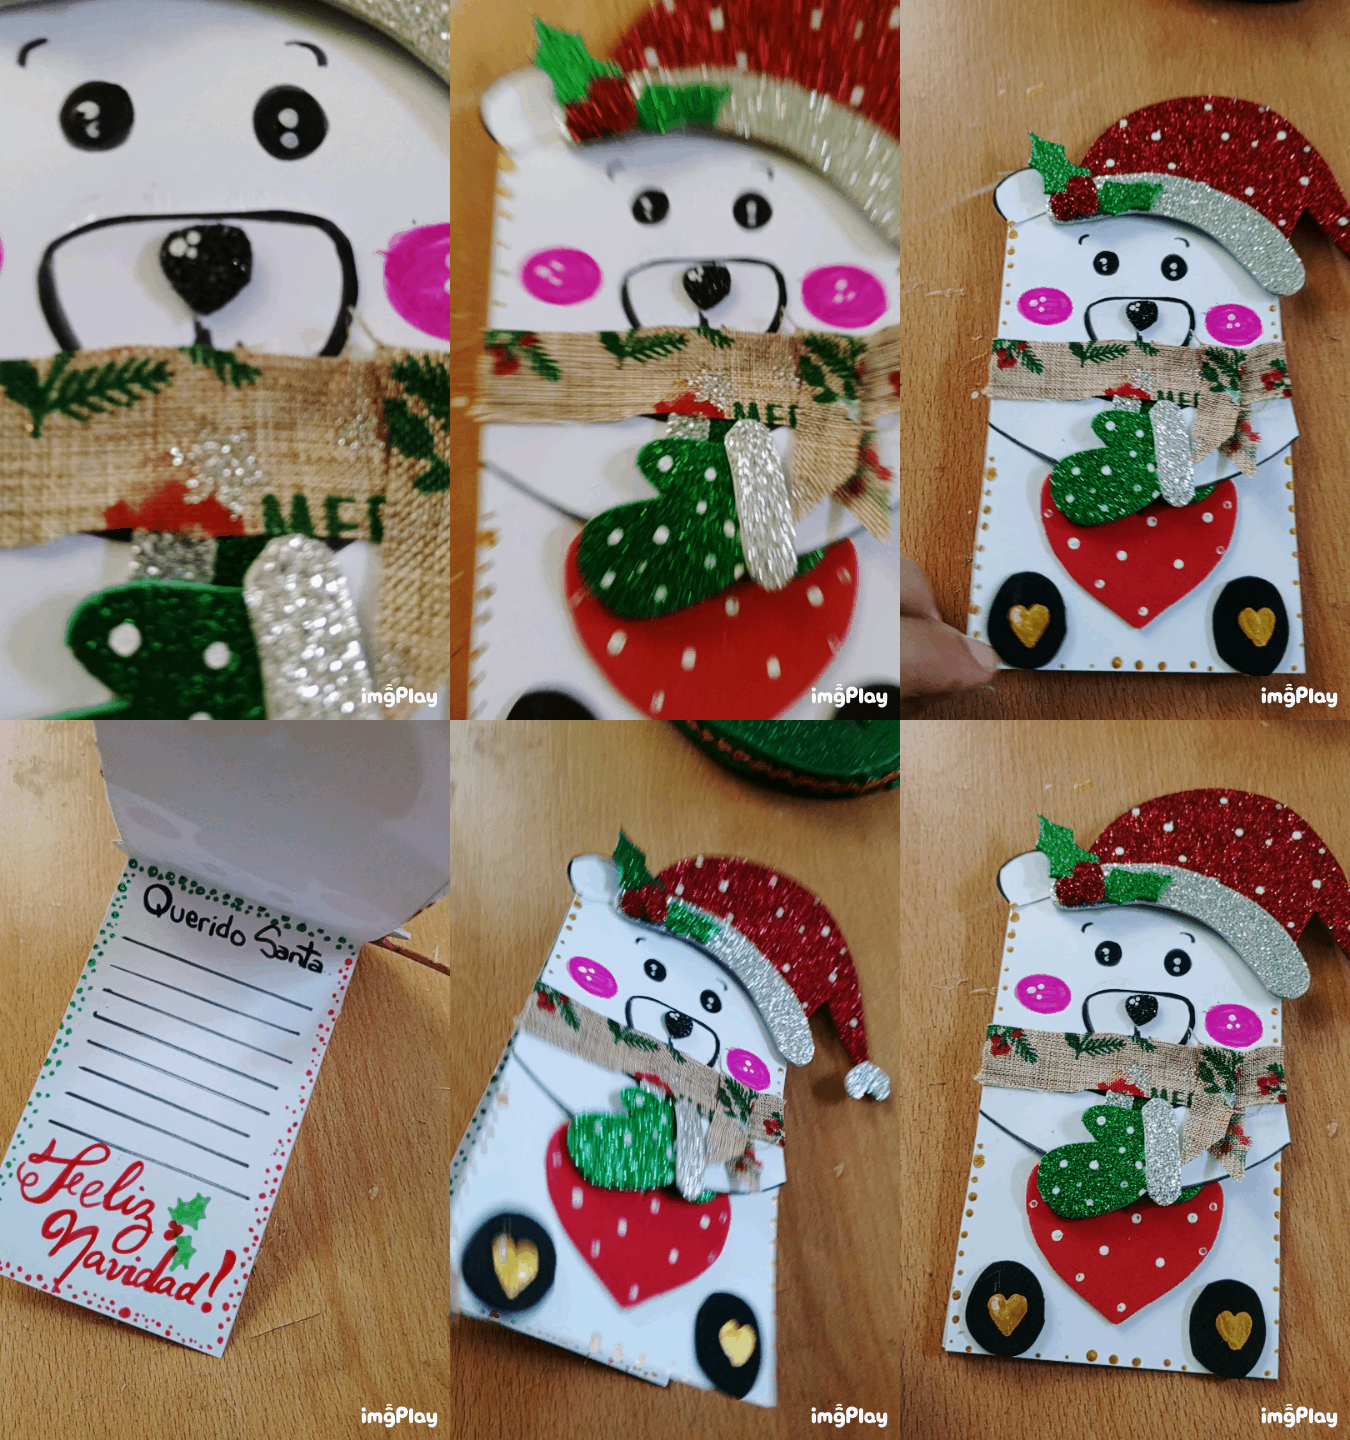

📷Ediciones | Editing in Canva and Picstar
✨Traducciones | Translations in Deepl
Posted Using InLeo Alpha
Que bella amiga, quizá sientas que está más sencilla que los años anteriores pero realmente te quedó hermosa. Espero que a Lio la encante y se emocioné al escribir sus deseos ❤️🥰
Que hermosa tarjeta Ami. Olivia quiere una para hacer la suya a Santa 🥰🥰
Que bonita amiga. Bendiciones 🤗.
Me encantó, está hermosísima amiga. Seguramente tu niña quedó encantada con su cartita. Siempre tan detallista. 🤗🤗🤗
Te quedó hermosa Ami!! Yo quedé enamorada. Es súper original y es muy Lio 💕
Amé cada detallito.✨
Que tarjeta más bonita. Imagino que el niño que la use para pedir su regalo a santa, quedará encantado. Muy bonito
Que linda esta manera de que tu pequeña haga la carta para pedir sus regalos, me encanta cuando las mamis se esmeran para mantener esa linda tradición en casa 🎁☃️