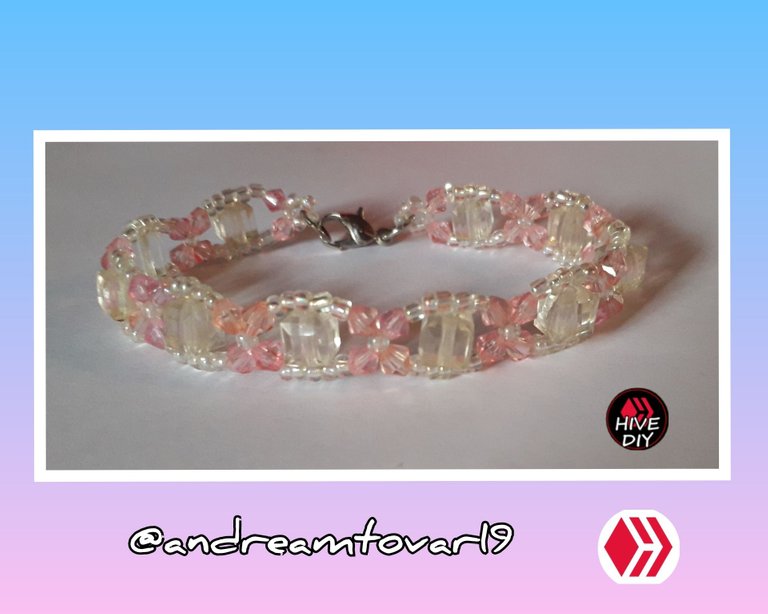
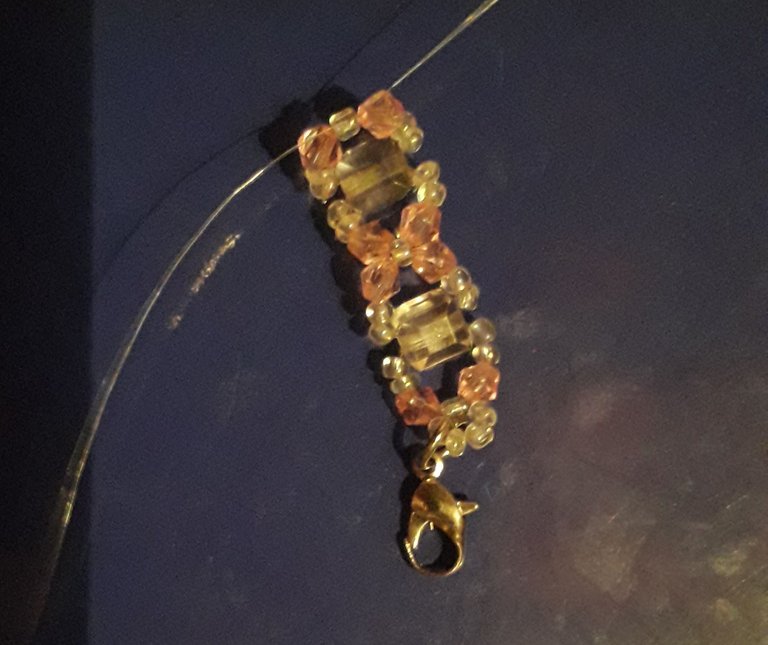
Buenos días querida comunidad de Hive, en esta hermosa mañana quiero compartirles los pasos para hacer una pulsera hecha con cristales en forma de cubo. Esta pulsera es muy sencilla y bella para las jóvenes y niñas coquetas, además es una pulsera muy original por los cristales en forma de cubo, los cuales no son muy comunes en donde yo vivo, aunque no he visto a muchas personas usando pulseras de bisutería desde hace más de 5 años, solo unas pocas personas he visto con pulseras de este material, normalmente hoy en día he visto más joyería que bisutería 😅.
Esta pulsera se tarda en hacer entre 30 minutos y 1 hora, puede que piensen que es difícil por el tiempo que tarda una persona en hacerla, pero la pulsera en tiene pasos de muy fácil entendimiento y fácil de realizar, pero los últimos pasos pueden tardar debido a que hay que volver a pasar el hilo por los pasos y como las mostacillas tienen un orificio pequeño puede que tardemos en hacer pasar el hilo por los agujeros, especialmente en donde hay cruces ya que se va a pasar el hilo cuatro veces por el mismo orificio de las mostacillas en los cruces, además, es importante decir que el último paso se realiza por estética de la pulsera, para no ver un espacio en blanco entre los cubos de cristal pequeños, sino para ver las mostacillas continuas a lo largo de la pulsera.
Sin más que decir, empecemos a hacer la pulsera.
Los materiales que vamos a necesitar son:
- Mostacillas
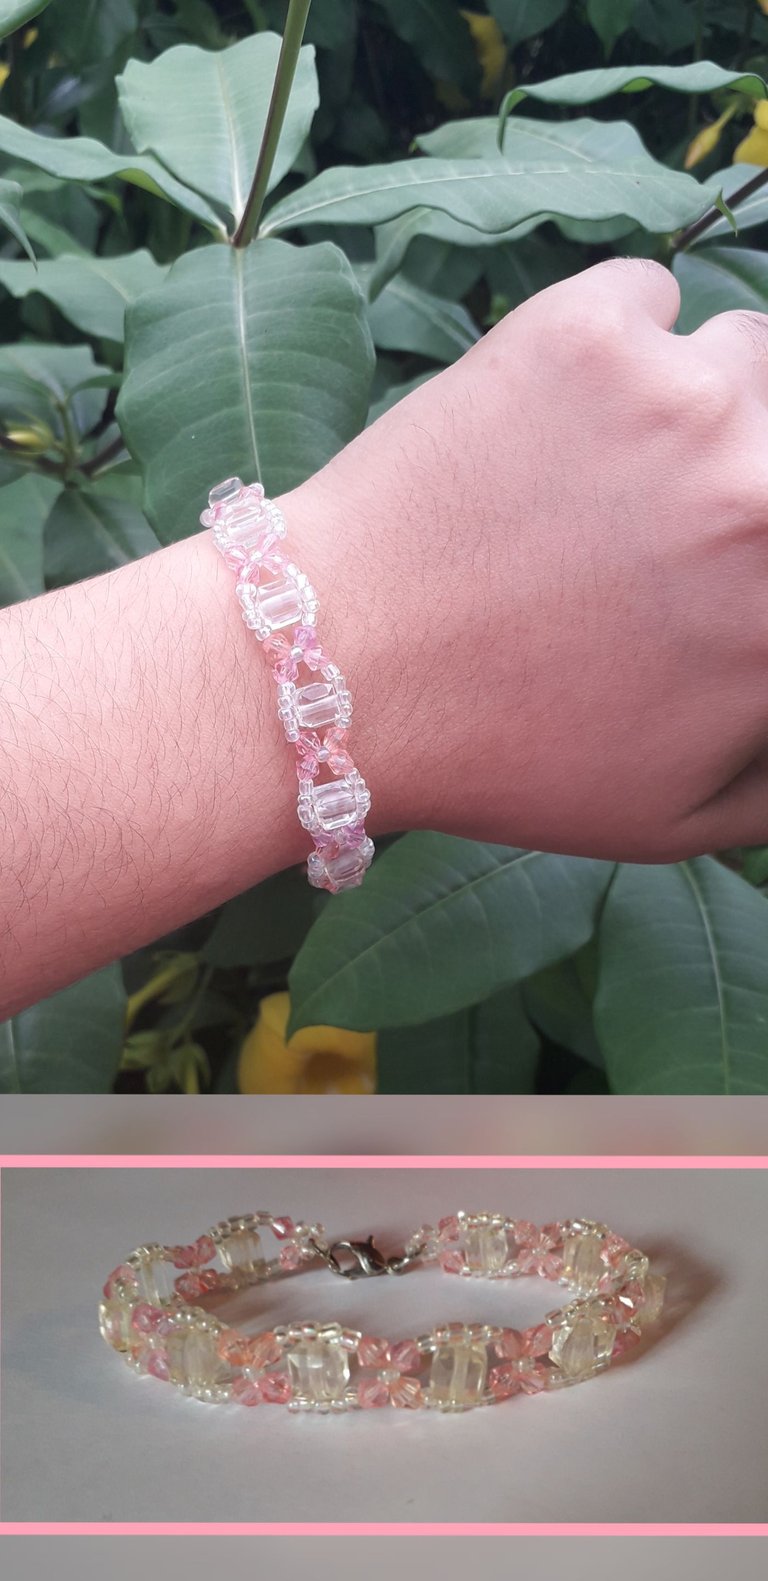
- 40 Cristales rosados de 3 mm
- 10 Cubos de cristal pequeños
- Broche y argolla
- 1.5mt de nylon 0.4
Ahora empecemos a hacer la pulsera
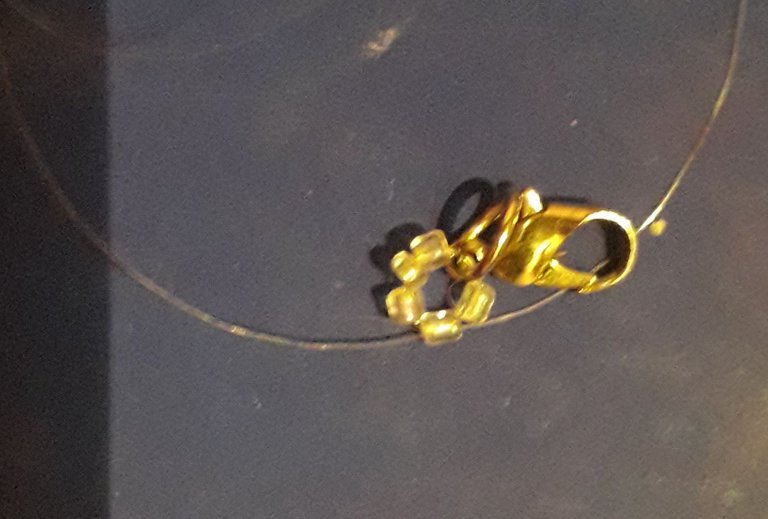
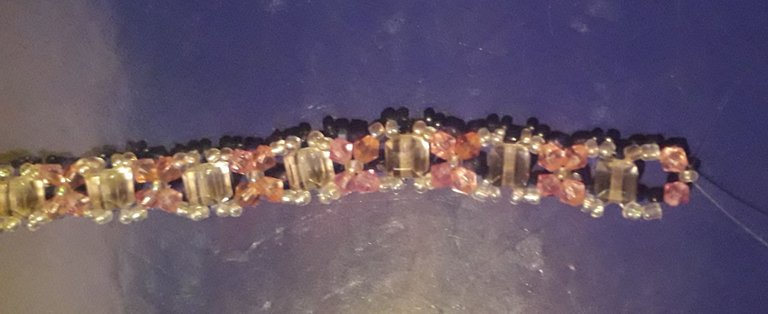
1- Para iniciar insertamos el broche y 5 mostacillas para luego cruzar en la última mostacilla que insertamos.
2- Insertamos un cristal y dos mostacillas de cada lado y cruzamos por un cubo de cristal.
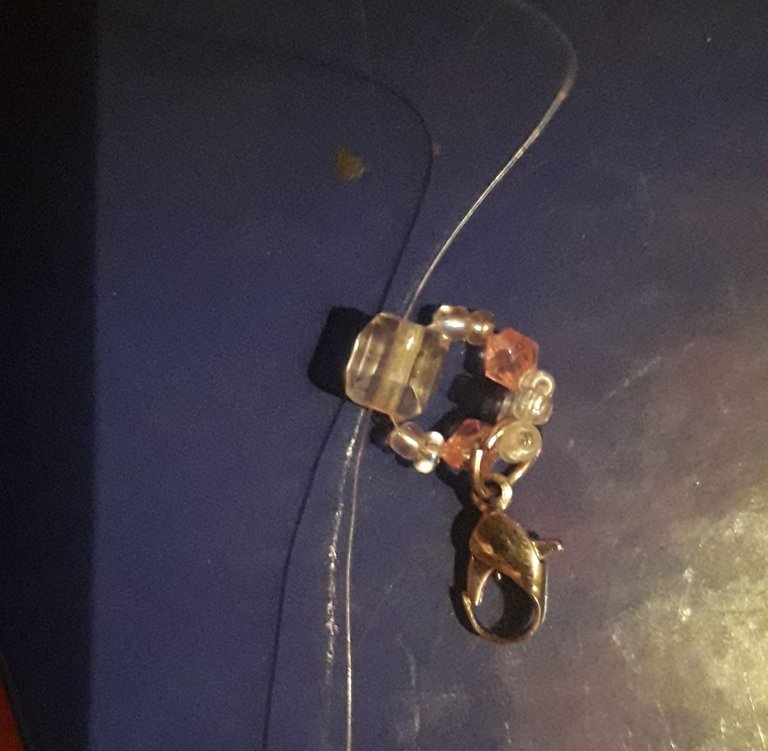
3- Añadimos 2 mostacillas y un cristal de cada lado para luego cruzar por una mostacilla.
4- Insertamos un cristal y dos mostacillas de cada lado y cruzamos por un cubo de cristal, es decir, repetimos el paso 2.
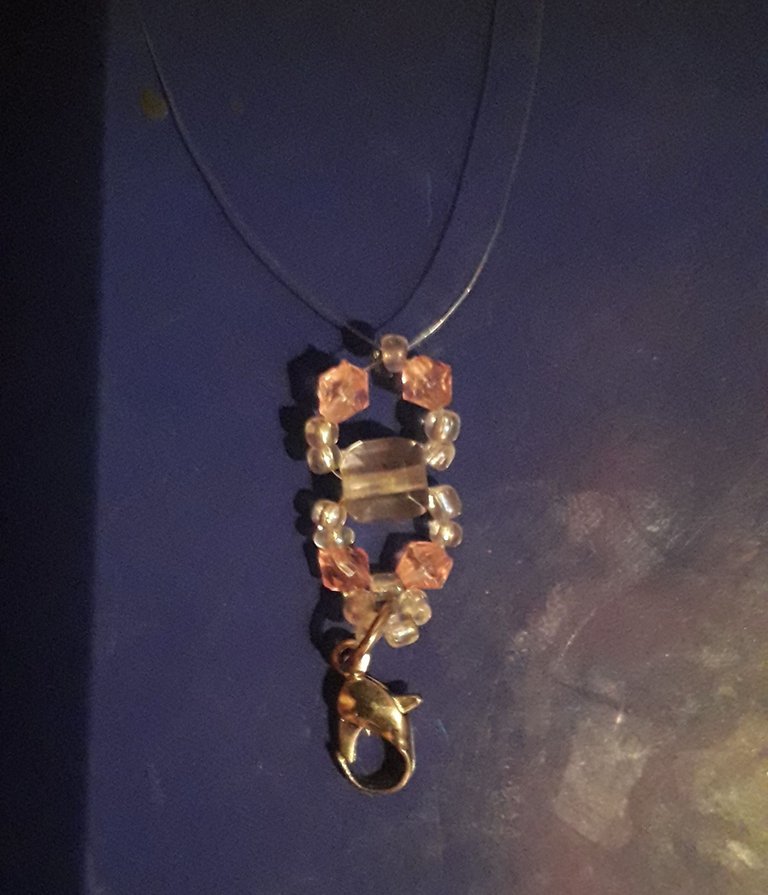
5- Luego repetimos los pasos 2 y 3 hasta conseguir el largo que se ajuste a nuestra mano y paramos en el cruce con una mostacilla para hacer la anilla.
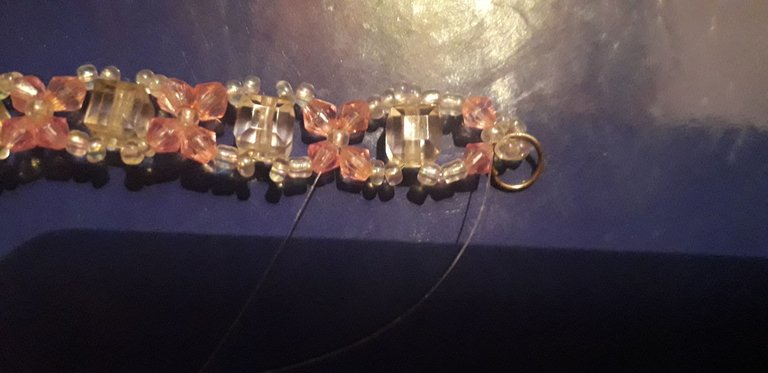
6- Para hacer esta anilla añadimos la argolla y 4 mostacillas por un lado para proceder a cruzar por la mostacilla en que terminamos el paso anterior, quedando otra vez donde terminamos el paso anterior.
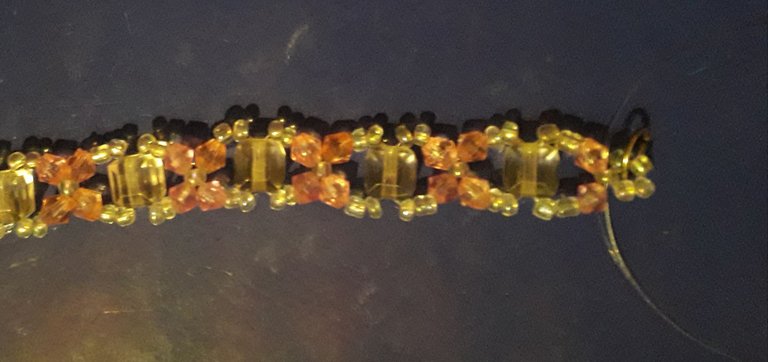
7- Ahora toca la parte de regresarnos en todos los pasos que hemos hecho hasta ahora, por lo cual con cada hilo nos devolvemos hasta las mostacillas al lado del cubo, añadimos una mostacilla y pasamos a las mostacillas que se encuentran de frente al hilo que insertamos, cruzamos por la mostacilla y seguimos pasando por las mostacillas siguientes para insertar otra mostacilla y pasar por las mostacillas del frente.
8- Repetimos el paso 7 con los 2 nylon hasta llegar a donde iniciamos la pulsera en el paso 1 para luego anudar y cortar los hilos sobrantes.

Espero que les haya gustado y que puedan hacerla en casa.
- Las imágenes son de mi autoría y fueron tomadas con la cámara de un celular Samsung Galaxy J6
- El traductor que usé fue DeepL
- También use el editor de fotos Polish.
Good Morning dear Hive community, on this beautiful morning I want to share with you the steps to make a bracelet made with cube-shaped crystals. This bracelet is very simple and beautiful for young and flirty girls, it is also a very original bracelet because of the cube shaped crystals, which are not very common where I live, although I have not seen many people wearing costume jewelry bracelets since more than 5 years ago, only a few people I have seen with bracelets of this material, normally nowadays I have seen more jewelry than costume jewelry 😅.
This bracelet takes about 30 minutes to 1 hour to make, you may think it is difficult because of the time it takes a person to make it, but the bracelet in has steps that are very easy to understand and easy to make, but the last steps may take time because you have to pass the thread back through the steps and since the beads have a small hole it may take time to get the thread through the holes, especially where there are crosses as it will pass the thread four times through the same hole of the beads in the crosses, in addition, it is important to say that the last step is done by aesthetics of the bracelet, not to see a blank space between the small glass cubes, but to see the continuous beads along the bracelet.
Without further ado, let’s start making the bracelet.
The materials we are going to need are:
- Beads
- 40 pink crystals of 3 mm
- 10 small crystal cubes
- Brooch and ring
- 1.5mt of 0.4” nylon.
Now let’s start to make the bracelet…
1- To start we insert the clasp and 5 beads and then cross on the last bead that we inserted.
2- Insert a crystal and two beads on each side and cross over a crystal cube.
3- We add 2 beads and a crystal on each side and then cross through a bead.
4- We insert one crystal and two beads on each side and cross through a crystal cube, that is, we repeat step 2.
5- Then we repeat steps 2 and 3 until we get the length that fits our hand and we stop at the crossing with a bead to make the ring.
6- To make this ring we add the ring and 4 beads on one side to proceed to cross through the bead where we finished the previous step, remaining again where we finished the previous step.
7- Now it is time to go back in all the steps we have done so far, so with each thread we go back to the beads on the side of the cube, add a bead and go to the beads that are in front of the thread we inserted, cross through the bead and continue passing through the following beads to insert another bead and go through the beads in front.
8- Repeat step 7 with the 2 nylons until we get to where we started the bracelet in step 1 and then knot and cut the excess threads.
I hope you liked it and that you can make it at home.
- The images are my own and were taken with the camera of a Samsung Galaxy J6 cell phone.
- The translator I used was DeepL
- I also used Polish photo editor.
esta muy bonita @andreamtovar19, te felicito!
Que bonita prenda @andreamtovar19 , me gusto mucho tu explicación. sigue así. besos y abrazos
Está muy bonita andrea...podrías hacer dos, que se complementen para que las parejas de enamorados las usen.
Congratulations @andreamtovar19! You have completed the following achievement on the Hive blockchain and have been rewarded with new badge(s):
Your next target is to reach 400 upvotes.
Your next payout target is 50 HP.
The unit is Hive Power equivalent because post and comment rewards can be split into HP and HBD
You can view your badges on your board and compare yourself to others in the Ranking
If you no longer want to receive notifications, reply to this comment with the word
STOPTo support your work, I also upvoted your post!
Support the HiveBuzz project. Vote for our proposal!
esta muy linda y delicada
Thank you for sharing this post on HIVE!
Your content got selected by our fellow curator rezoanulvibes & you received a little thank you upvote from our non-profit curation initiative. Your post will be featured in one of our recurring curation compilations which is aiming to offer you a stage to widen your audience within the DIY scene of Hive.
Next time make sure to post / cross-post your creation within the DIYHub community on HIVE and you will receive a higher upvote!
Stay creative & hive on!
Está muy bonita y se ve super fina también ✨✨ excelente elección de las piedritas 😍