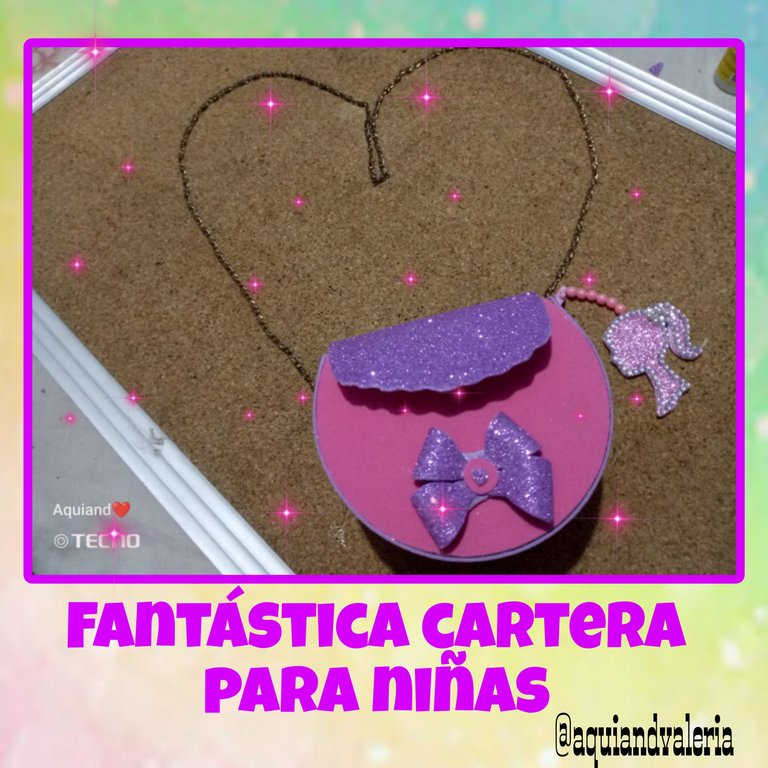
Feliz noche a todos mis amigos de DIY, en esta oportunidad paso por acá para mostrarles el paso a paso de la elaboración de una fabulosa carterita para niñas con material de reciclaje, cuya prenda es propicia para usar a propósito del mes de Barbie, a continuación manos a las tijeras.
Happy evening to all my DIY friends, this time I'm stopping by to show you step by step how to make a fabulous little purse for girls with recycled material, which garment is appropriate to use for the month of Barbie, then hands to the scissors.
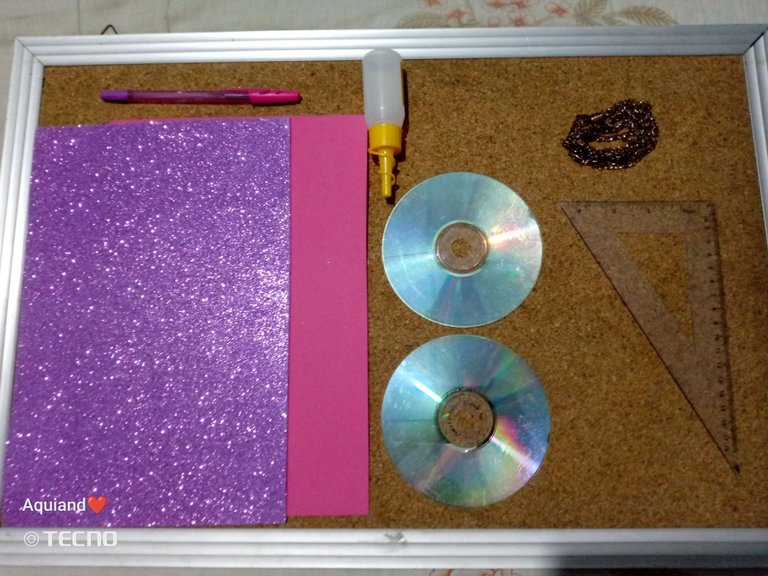
✓ Tijeras (se me pasó colocarlas entre los materiales).
✓ Silicón.
✓ Foami morado escarchado y rosado normal.
✓ Regla.
✓ Lápiz o lapicero.
✓ 2 CD'S.
✓ 1 cadena dorada o plateada.
✓ Scissors (I forgot to place them among the materials).
✓ Silicone.
✓ Purple frosted and regular pink foami.
✓ Ruler.
✓ Pencil or pencil.
✓ 2 CD'S.
✓ 1 gold or silver chain.
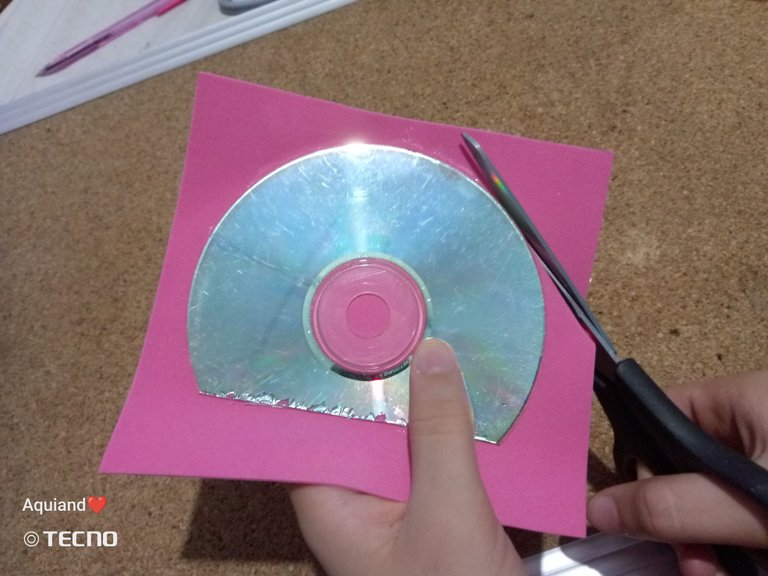
1- Comenzamos cortando nuestros 2 CD'S a la medida de tu preferencia, pero no los dejes muy pequeños, con cuidado para no cortarnos.
1- We start by cutting our 2 CD'S to the size of your preference, but do not leave them too small, being careful not to cut ourselves.

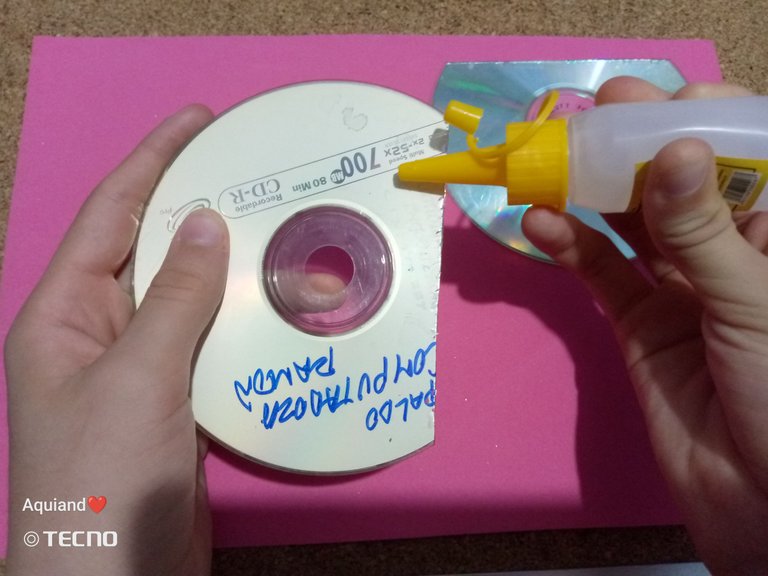
2- Pegamos nuestros CD'S al foami dejando un pequeño espacio debajo del corte.
2- We glue our CD's to the foami leaving a small space under the cut.
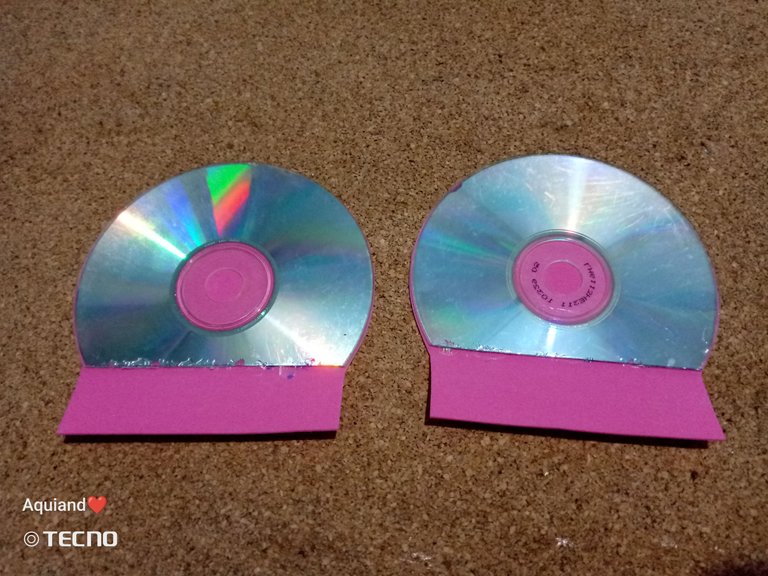
3- Cuando estén bien pegados al foami cortamos al rededor recordando que tenemos que dejar el espacio debajo del corte de nuestros CD'S.
3- When they are well glued to the foami we cut all around remembering that we have to leave the space under the cut of our CD'S.
Nos va a quedar algo así.
We will be left with something like this.
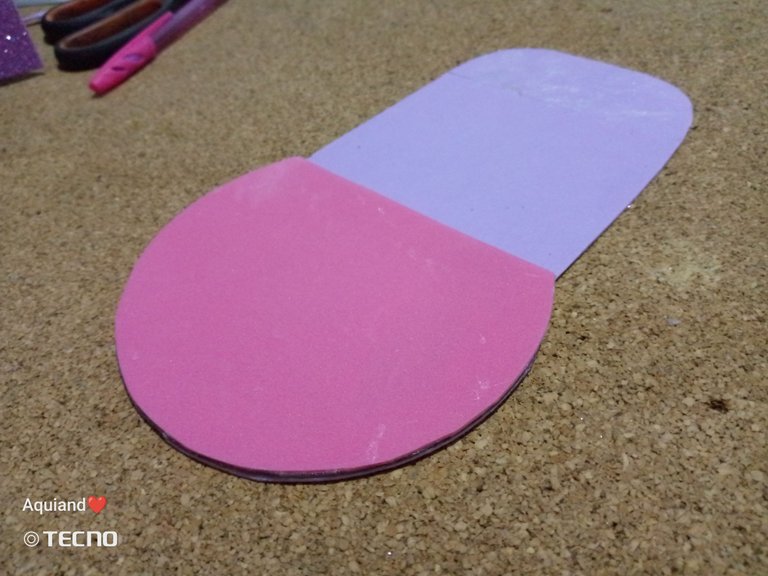
4- Vamos a pegar ese resto de foami al los CD'S.
4- We are going to glue the rest of the foami to the CD's.
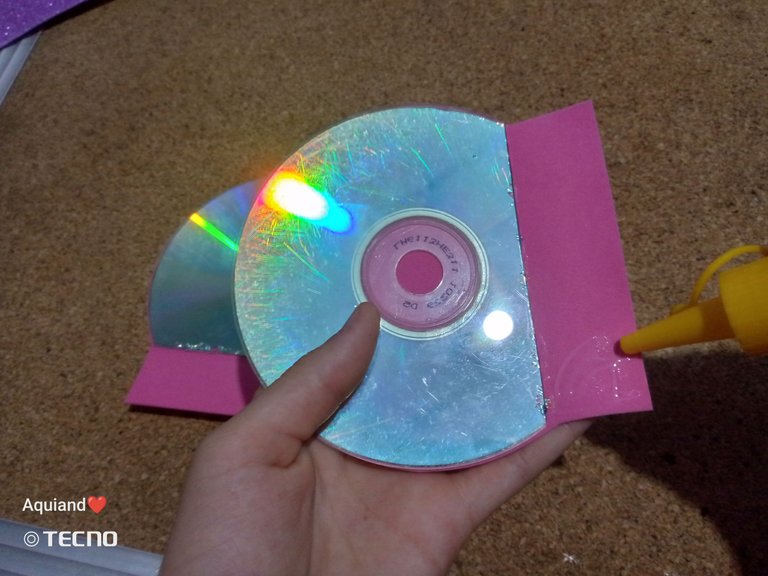
Así nos va a quedar luego de pegar.
This is what it will look like after gluing.

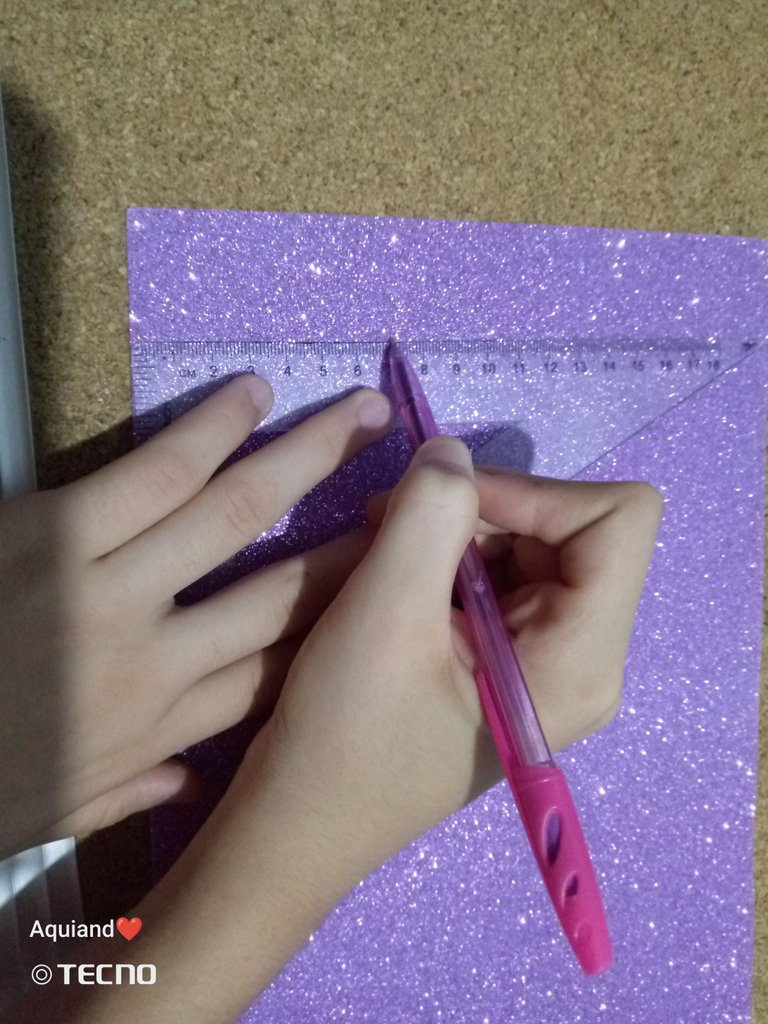
5- Ahora marcamos una tira de 7 centímetros en nuestro foami morado para cortar.
5- Now we mark a 7-centimeter strip on our purple foami to cut.
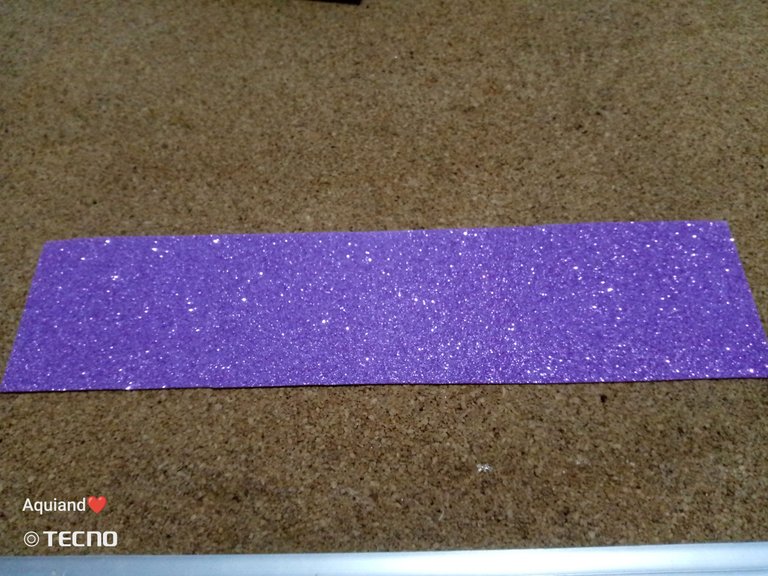
6- Procedemos a cortar nuestra tira.
6- We proceed to cut our strip.
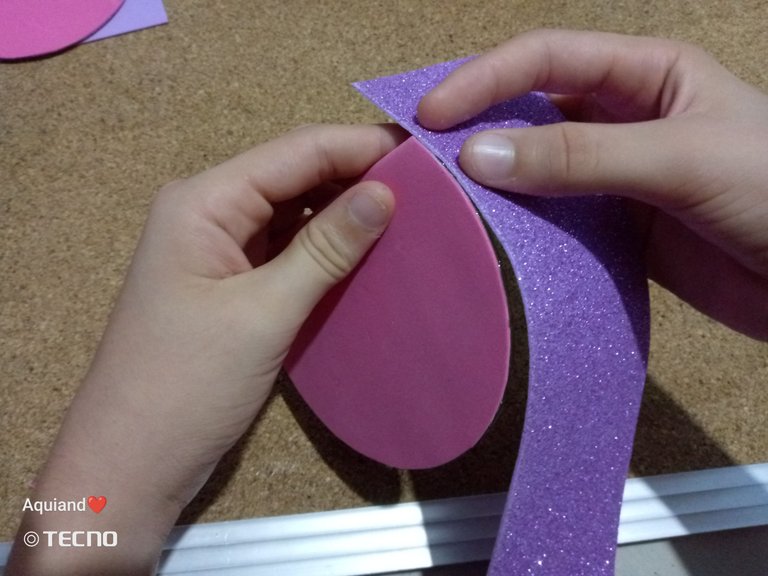
7- Vamos a pegarle esa tira a los 2 CD'S, pero uno con la parte rosada hacia afuera y el otro con la parte rosada hacia adentro.
7- We are going to glue that strip to the 2 CD'S, but one with the pink side out and the other with the pink side in.
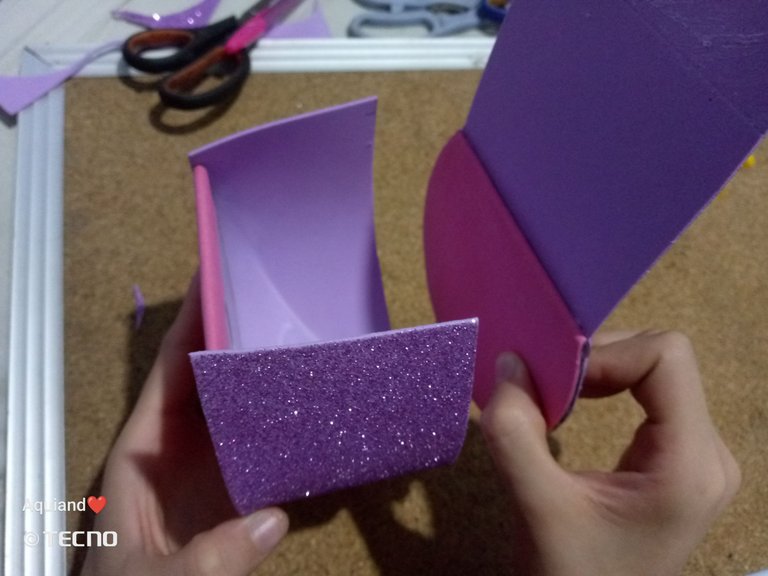
8- pegamos uno de los CD'S a el foami morado escarchado cubriendo la parte donde no tiene foami, y luego cortamos.
8- Glue one of the CD's to the frosted purple foami covering the part where there is no foami, and then cut it.
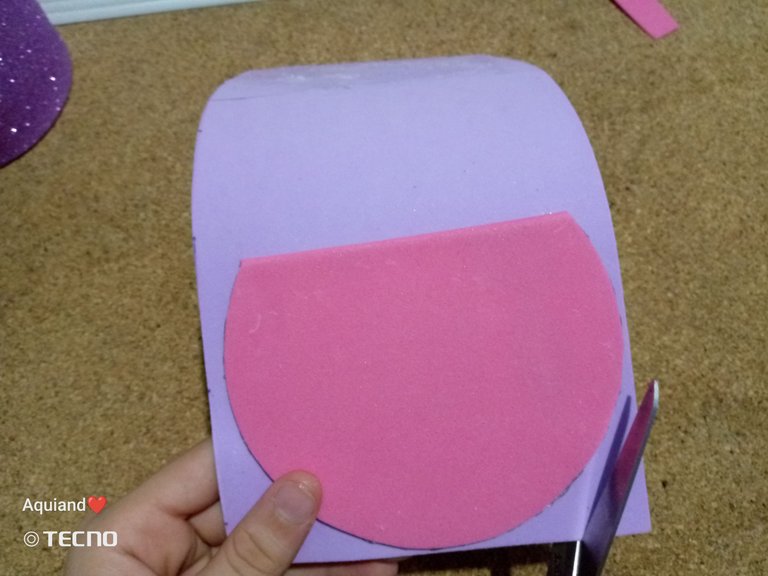
9- Luego de cortar nos quedará algo así. Esa será la solapa de nuestra cartera.
9- After cutting we will have something like this. That will be the flap of our wallet.
10- Colocamos silicón alrededor de todo el CD para unirlo a la otra parte de la cartera que pegamos anteriormente.
10- Place silicone around the entire CD to attach it to the other part of the wallet that we glued previously.
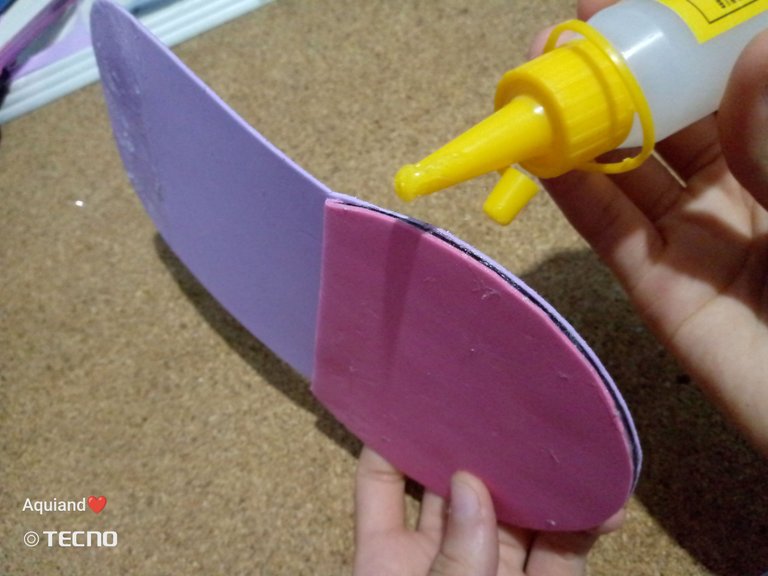
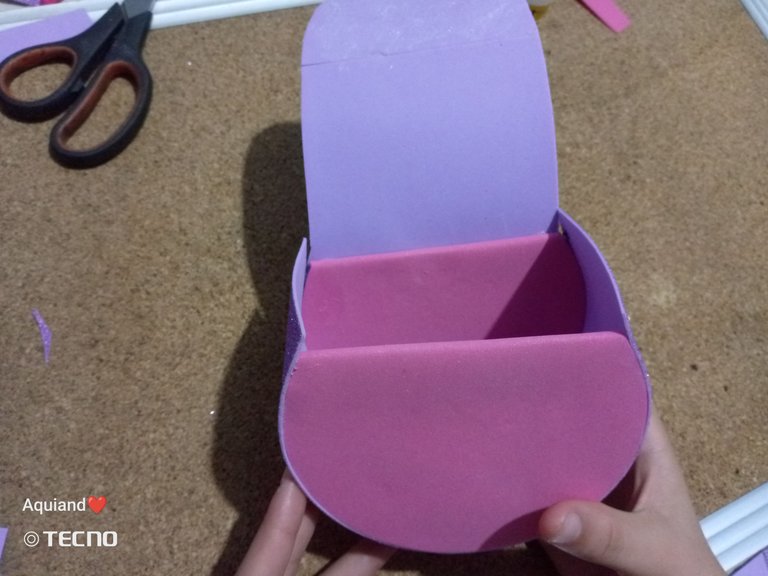
11- Ahora sí, pegamos para que la cartera vaya tomando forma.
11- Now we glue so that the wallet takes shape.
12- Tiene que verse algo así.
12- It should look something like this.
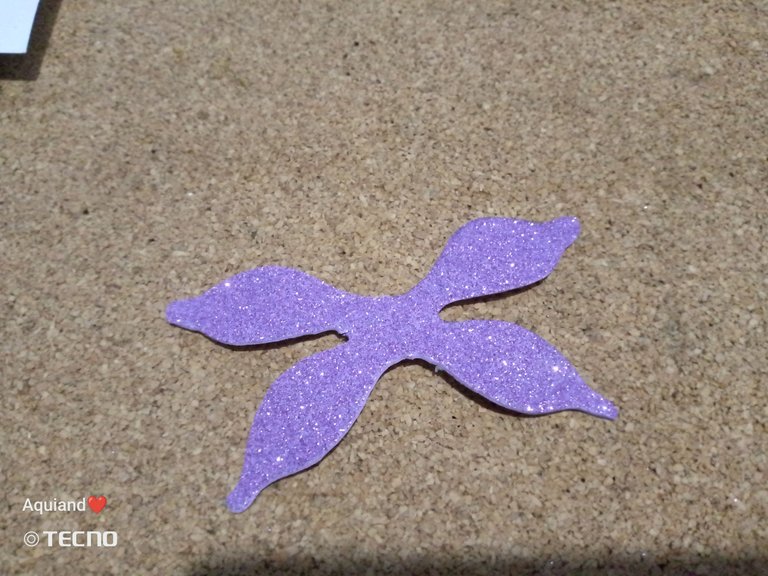
13- Ahora cortaremos un molde como este para armar el lazo que va a decorar nuestra cartera.
13- Now we will cut a mold like this one to make the ribbon that will decorate our wallet.
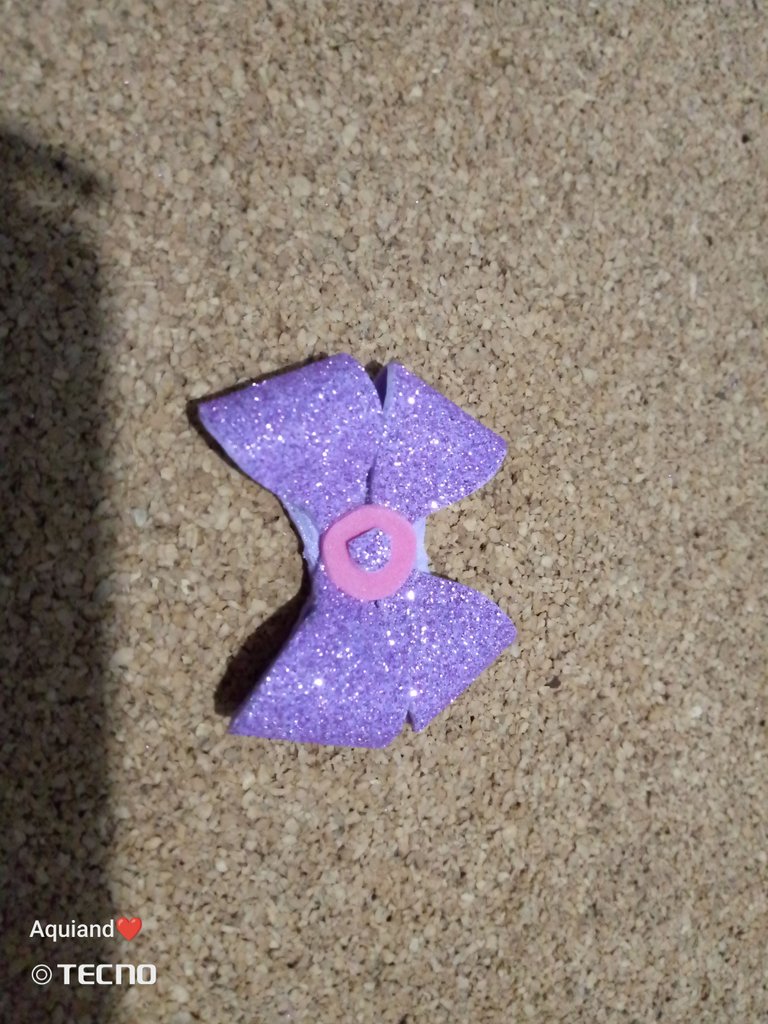
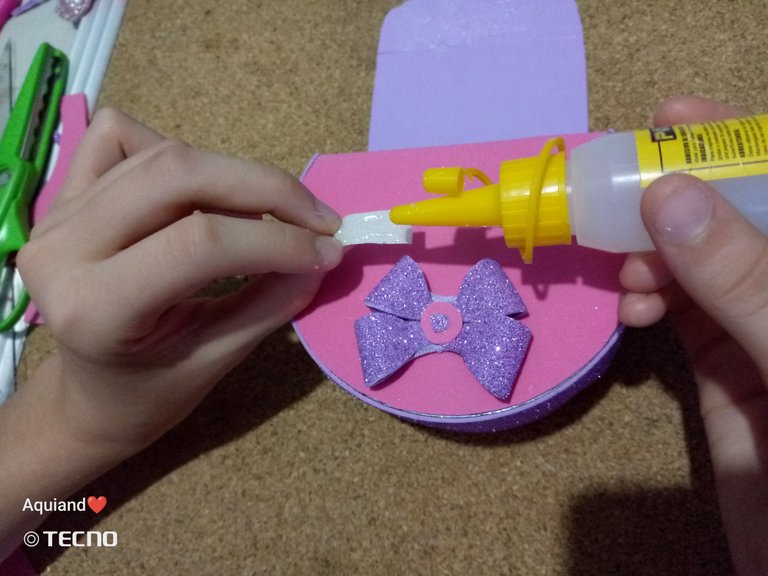
14- Llevamos todas las puntas del molde hacia el centro y decoramos con círculos de foami.
14- Bring all the ends of the mold to the center and decorate with foami circles.
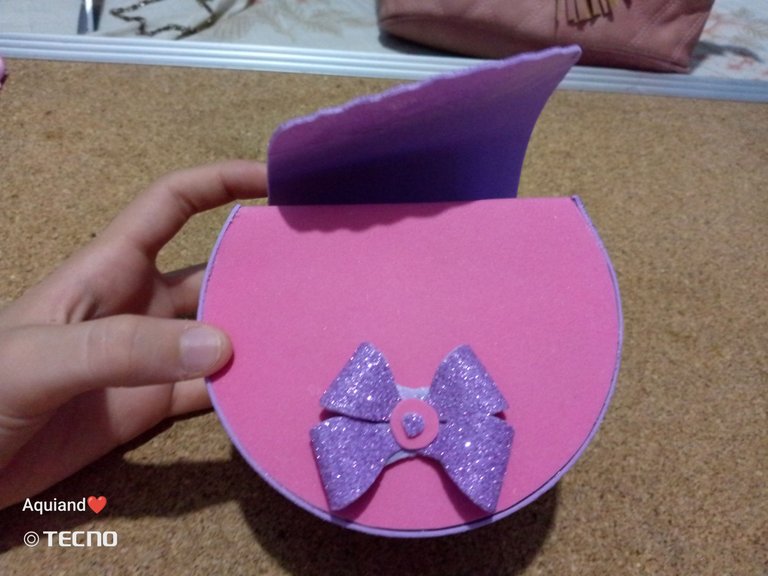
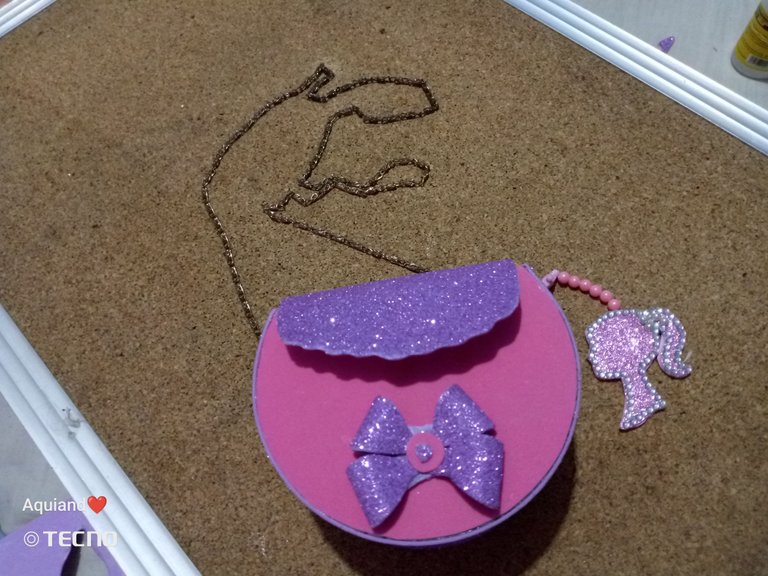
15- Pegamos el lazo a nuestra cartera y así vamos.
15- We glue the ribbon to our wallet and so we go.
16- Luego tomamos nuestro cierre mágico para pegarlo a la cartera.
16- Then we take our magic zipper to attach it to the wallet.
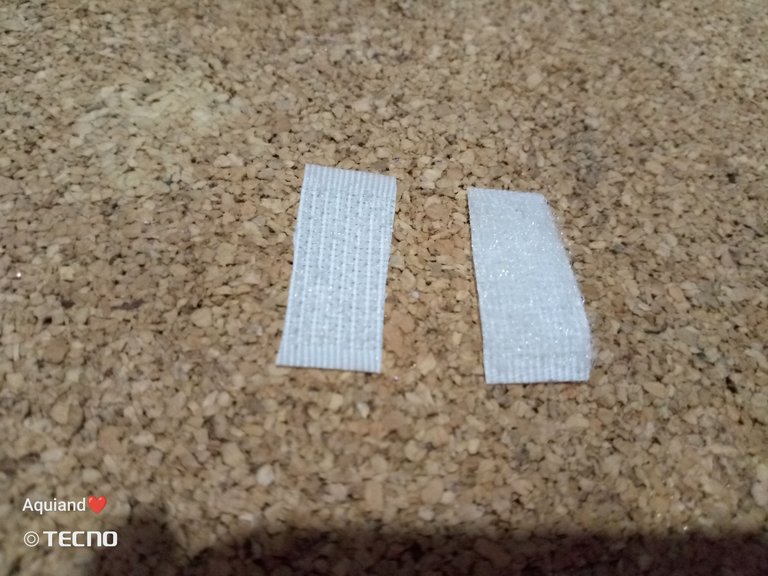
17- Pegamos el cierre para poder abrir y cerrar nuestra cartera.
17- We glue the zipper to be able to open and close our wallet.
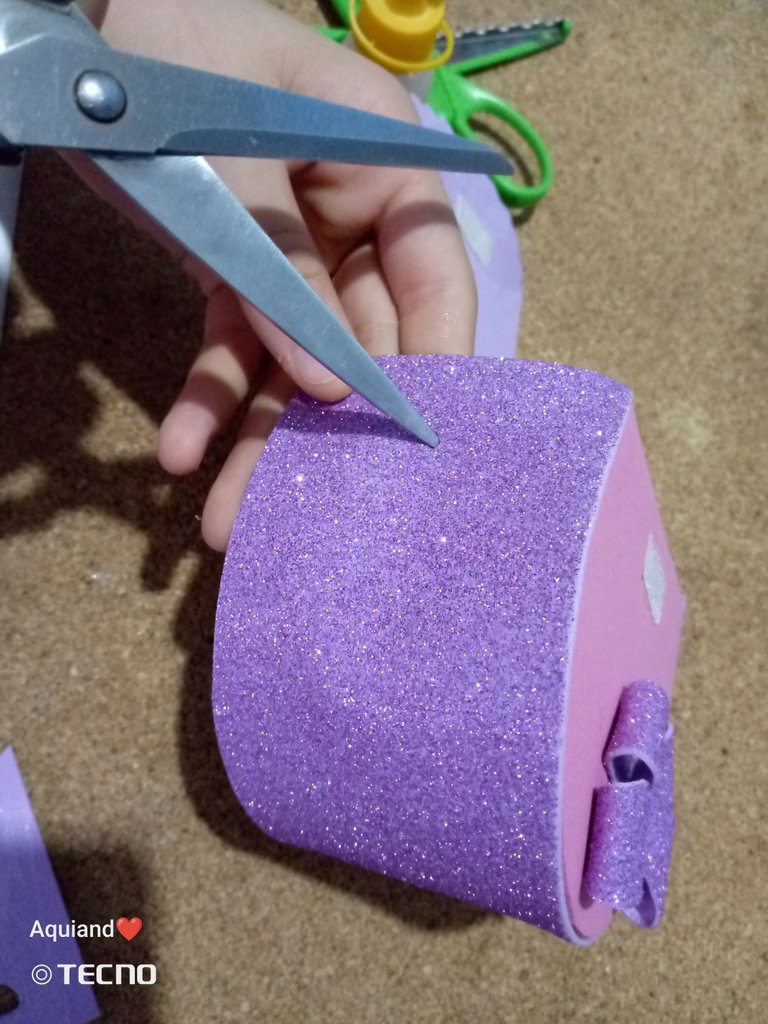
18- Con ayuda de nuestras tijeras abriremos un huequito en cada lado de nuestra cartera para poder pasar la cadena.
18- With the help of our scissors we will open a small hole in each side of our wallet to be able to pass the chain.
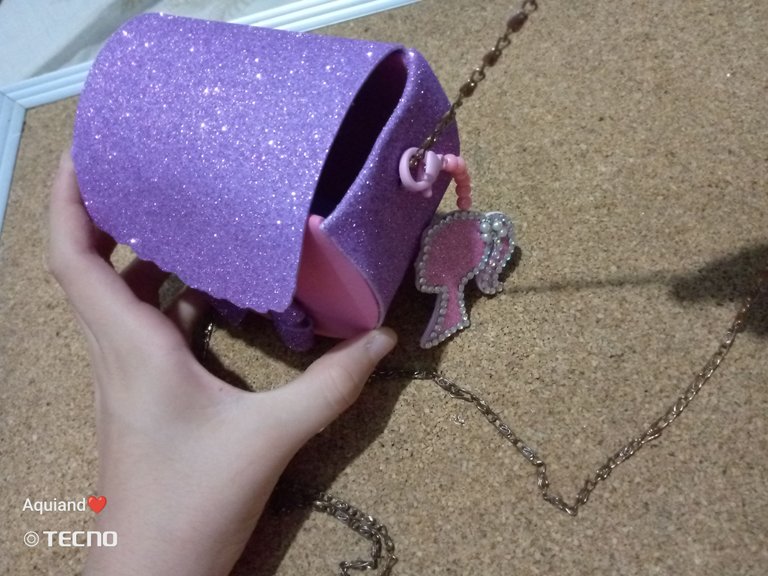
19- Procedemos a pasar la cadena por los huequitos que hicimos, con cuidado para no romperla.
19- We proceed to pass the chain through the holes we made, being careful not to break it.
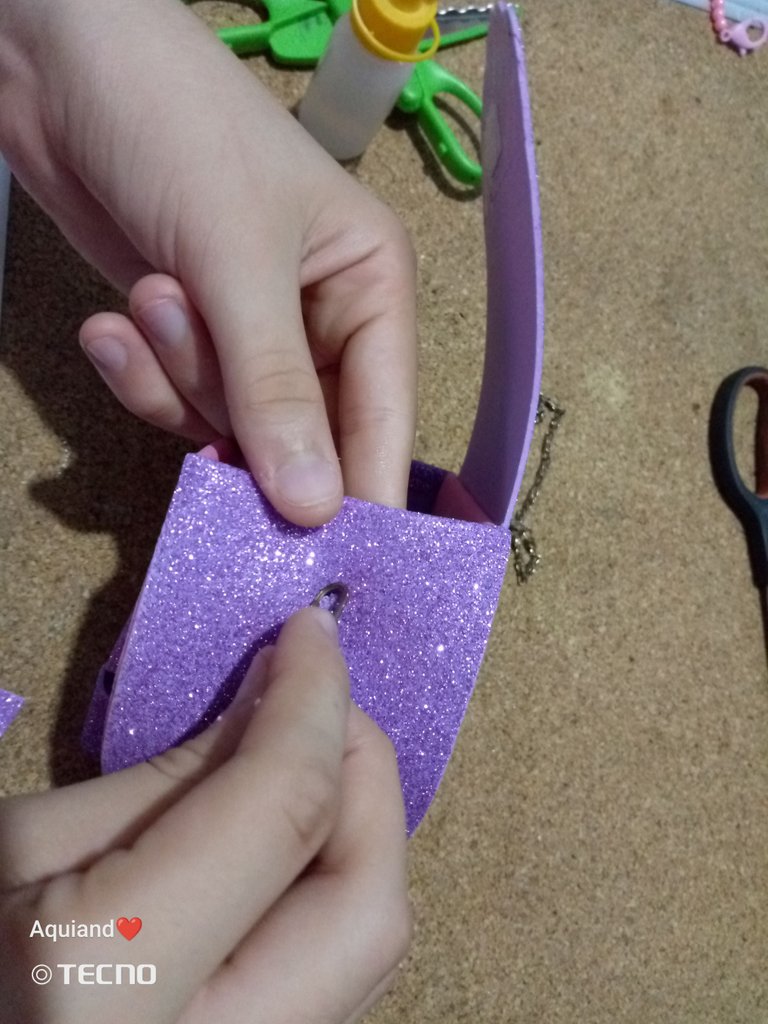
Nos tiene que quedar así.
It has to look like this.
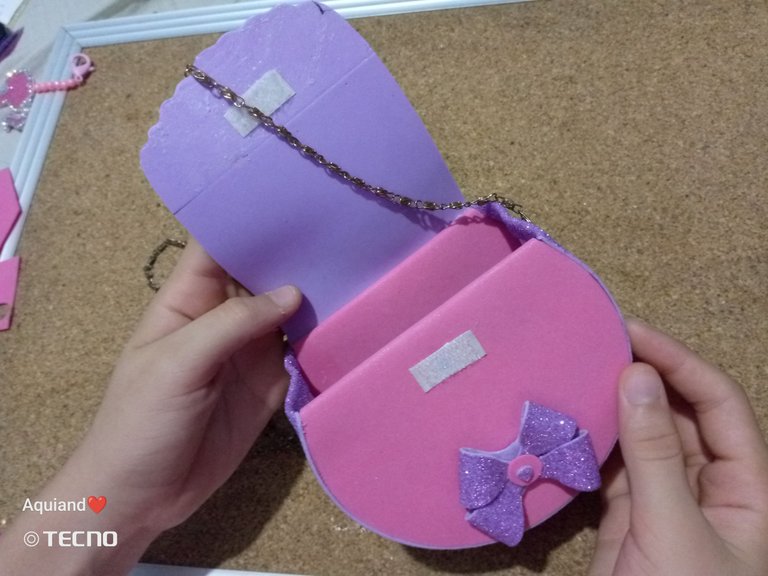
Por último agrego el llavero que hice en una de mis publicaciones anteriores, esto le dará el toque final a la cartera.
Finally I add the keychain that I made in one of my previous publications, this will give the final touch to the wallet.
Y listo, ya podemos lucir una hermosa cartera hecha por ti mismo, quedó muy bonita.
And that's it, we can now show off a beautiful self-made wallet, it turned out very nice.
Espero les haya gustado mucho este tutorial tanto como a mi, disfruté mucho el procedimiento de esta linda cartera para niñas, espero ver también las de ustedes, este bolsito le dará un toque único a tu outfit, está la combinaré con mi look de Barbie ya que tiene colores que representan a ese personaje, espero dejen sus opiniones en los comentarios acerca de la cartera, en mi opinión quedó muy bonita y llamativa; me despido, nos vemos en un próximo post. Gracias por ver y leer.
I hope you liked this tutorial as much as I did, I really enjoyed the procedure of this cute purse for girls, I hope to see yours too, this purse will give a unique touch to your outfit, I will combine it with my Barbie look since it has colors that represent that character, I hope you leave your opinions in the comments about the purse, in my opinion it was very nice and striking; I say goodbye, see you in a future post. Thanks for watching and reading.

- El texto es completamente de mi autoría
- The text is entirely by me
- Traducción realizada con DeepL Traslate
- Translation using DeepL Traslate
- Cámara: Tecno Spark GO 2023
- Camera: Tecno Spark GO 2023
- El texto es completamente de mi autoría
- The text is entirely by me
- Traducción realizada con DeepL Traslate
- Translation using DeepL Traslate
- Cámara: Tecno Spark GO 2023
- Camera: Tecno Spark GO 2023
- Traducción realizada con DeepL Traslate
- Translation using DeepL Traslate
- Cámara: Tecno Spark GO 2023
- Camera: Tecno Spark GO 2023
- Cámara: Tecno Spark GO 2023
- Camera: Tecno Spark GO 2023
Qué belleza esta carterita con materiales reciclados, quedó espectacular. Gracias por mostrar muy bien todo el proceso de elaboración. El resultado está genial.
Nada que agradecer, lo hago con mucho cariño 🫶🏻
Es una super idea @aquiandvaleria , pocos materiales y un modelo único!
Congratulations @aquiandvaleria! You have completed the following achievement on the Hive blockchain And have been rewarded with New badge(s)
Your next target is to reach 2000 upvotes.
You can view your badges on your board and compare yourself to others in the Ranking
If you no longer want to receive notifications, reply to this comment with the word
STOPCheck out our last posts:
quedó bien cuchi, está muy linda, me encanta 😍
Me da mucha alegría que te haya gustado ☺️
¡Felicitaciones!
Estás participando para optar a la mención especial que se efectuará el domingo 30 de julio del 2023 a las 8:00 pm (hora de Venezuela), gracias a la cual el autor del artículo seleccionado recibirá la cantidad de 1 HIVE transferida a su cuenta.
¡También has recibido 1 ENTROKEN! El token del PROYECTO ENTROPÍA impulsado por la plataforma Steem-Engine.
1. Invierte en el PROYECTO ENTROPÍA y recibe ganancias semanalmente. Entra aquí para más información.
2. Contáctanos en Discord: https://discord.gg/hkCjFeb
3. Suscríbete a nuestra COMUNIDADEntra aquí para más información sobre nuestro trail. y apoya al trail de @Entropia y así podrás ganar recompensas de curación de forma automática.
4. Visita nuestro canal de Youtube.
Atentamente
El equipo de curación del PROYECTO ENTROPÍA