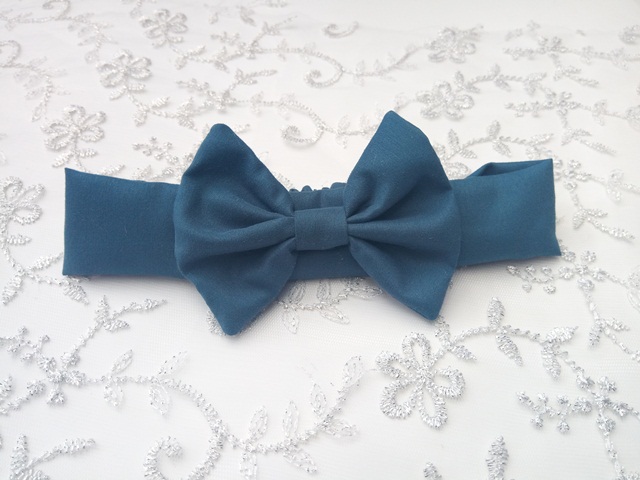
Holaa amigos🤗 , espero que se encuentren muy bien y sanitos , en estos días he estado algo ocupada practicando el arte de la costura😄, espero pronto poder compartir todo lo que estoy aprendiendo . El día de hoy les quiero enseñar la elaboración de una bandana , les confieso que le tengo mucho cariño a estos accesorios de cabello porque fueron parte de mi primer emprendimiento y me hace muy feliz poder compartir cómo se elaboran diferentes modelos, en esta oportunidad vamos a elaborar una bandana para bebes de 1 a 2 años, ¡Comencemos!
Hello friends🤗, I hope you are very well and healthy, these days I have been somewhat busy practicing the art of sewing😄, I hope soon to be able to share everything I am learning . Today I want to show you how to make a bandana, I confess that I am very fond of these hair accessories because they were part of my first venture and it makes me very happy to be able to share how different models are made, this time we are going to make a bandana for babies from 1 to 2 years, let's start!
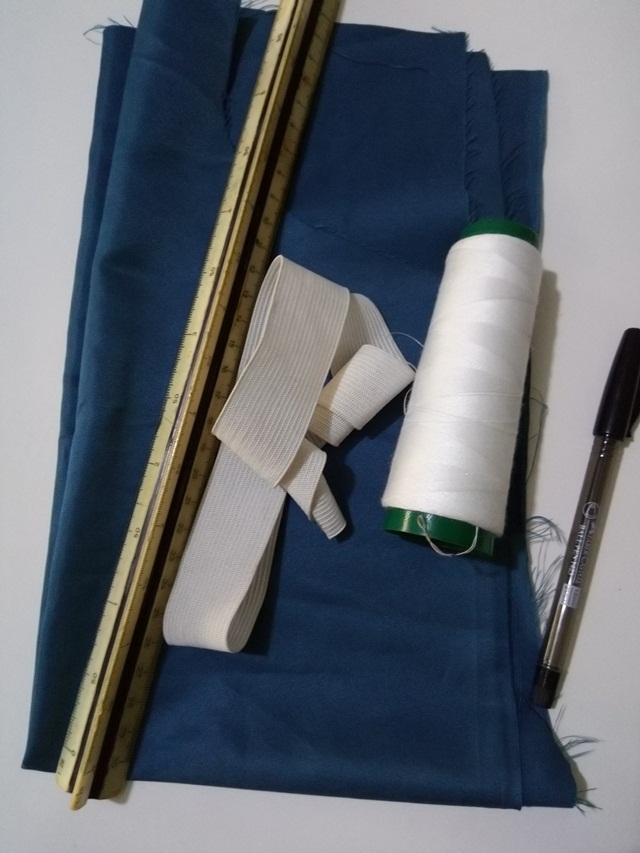
Materiales
- Tela
- Hilo
- Aguja y alfileres
- Regla
- Elástica
- Lapicero
- Cloth
- Thread
- Needle and pins
- Ruler
- elastic
- Pencil
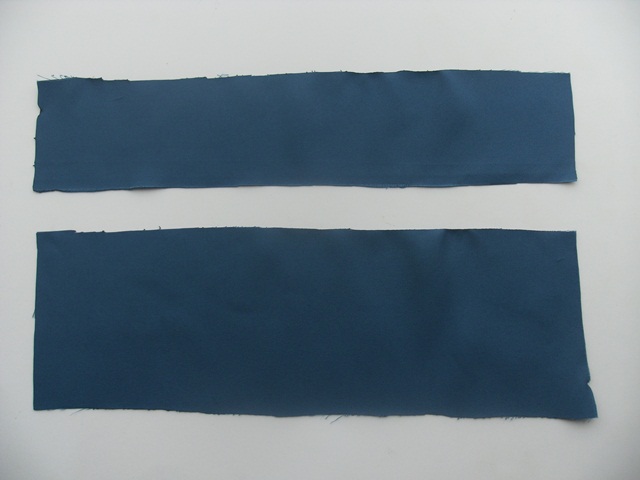
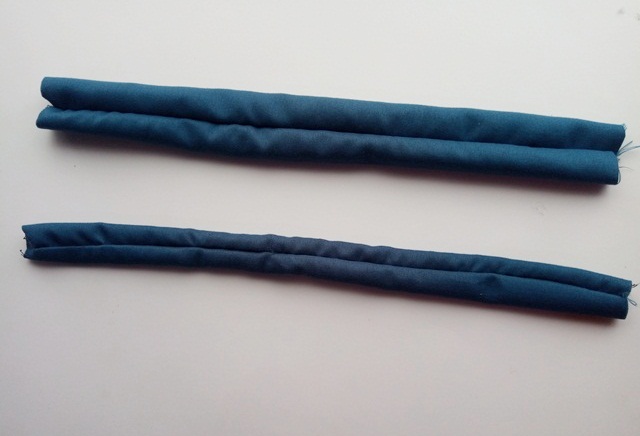
1. El primer paso será cortar dos piezas de tela: una que mida 20cm x 6cm y otra de 22cm x 10cm. Seguidamente doblamos hacia la mitad y procedemos a coser el borde respetando el espacio de costura, o también tenemos la opción de utilizar pegamento para telas. Luego vamos a voltear ambas y quedarán así como se muestra en la segunda imagen:
1. The first step will be to cut two pieces of fabric: one measuring 20cm x 6cm and the other measuring 22cm x 10cm. Then we fold in half and proceed to sew the edge respecting the seam space, or we also have the option of using fabric glue. Then we are going to flip both and they will be as shown in the second image:
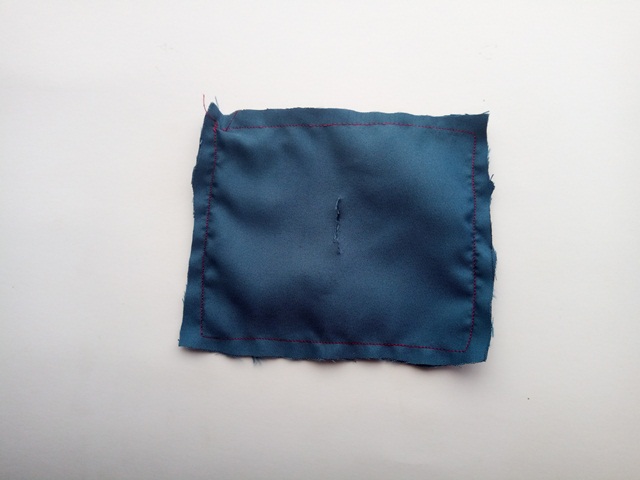
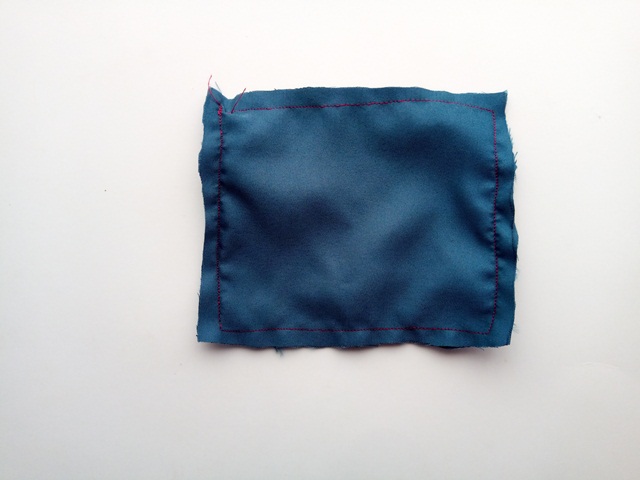
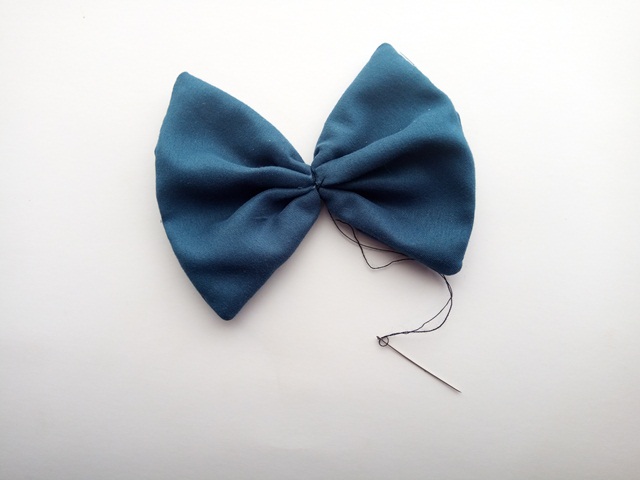
2. Ahora vamos a confeccionar el lacito, debemos marcar y cortar sobre la tela un rectángulo que en este caso mide 11 x 10 centímetros , seguidamente vamos a coserlo por todos sus lados sin dejar aberturas porque luego la abertura se la haremos en el centro del rectángulo y por allí es que vamos a voltear la pieza. Luego de voltear la pieza vamos a coser el centro para darle forma al lacito
2. Now we are going to make the bow, we must mark and cut a rectangle on the fabric that in this case measures 11 x 10 centimeters, then we are going to sew it on all its sides without leaving openings because then we will make the opening in the center of the rectangle and That's where we're going to flip the piece. After turning the piece we are going to sew the center to shape the bow
3. De las tiras de tela que cosimos en el paso 1 vamos a tomar la mas fina para introducirle la elástica, en este caso la elástica tiene una medida de 15cm de largo x 2cm de ancho. Es necesario utilizar una pinza o cualquier herramienta que tengamos en casa para que introducir la elástica lo más rápido posible luego le colocamos alfileres en ambos extemos y cosemos esos extremos
3. From the strips of fabric that we sewed in step 1 we are going to take the thinnest to insert the elastic, in this case the elastic has a measure of 15cm long x 2cm wide. It is necessary to use a clamp or any tool that we have at home so that we can insert the elastic as quickly as possible, then we place pins on both ends and sew those ends
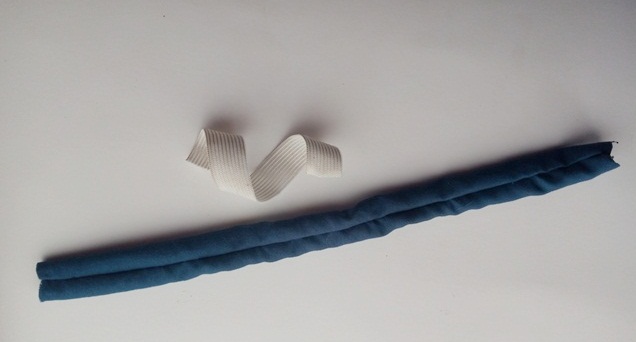
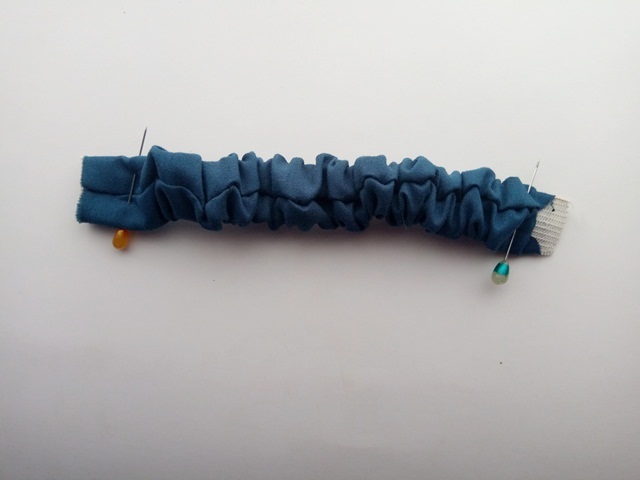
4.Ahora vamos a unir ambas tiras de tela. Lo que haremos será colocar y coser la tira de elástica que hicimos en el paso anterior sobre la tira de tela más ancha, en este paso es importante que la tira de tela elástica quede con la línea de costura visible así como se muestra en la imagen:
4.Now we are going to join both strips of fabric. What we will do is place and sew the elastic strip that we made in the previous step on the widest strip of fabric, in this step it is important that the strip of elastic fabric remains with the seam line visible as shown in the image :
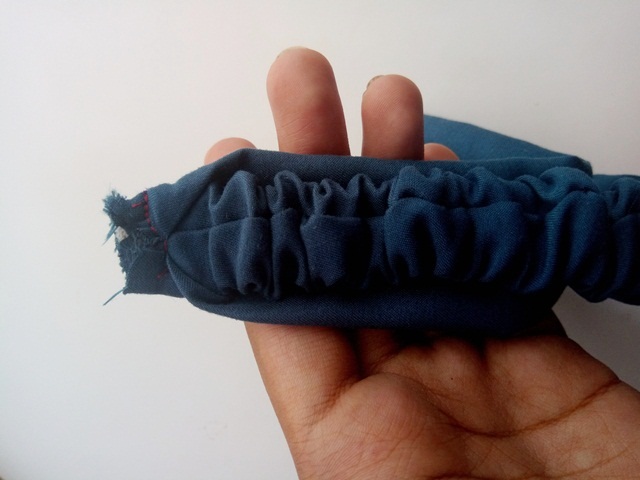
En pocas palabras la tira más ancha será la que abrace en ambos extremos a la tira elástica para que están queden unidas mediante la costura, luego de coser acomodamos la bandana y quedará como en la segunda imagen:
In a few words, the widest strip will be the one that embraces the elastic strip at both ends so that they are joined by sewing, after sewing we adjust the bandana and it will look like in the second image:
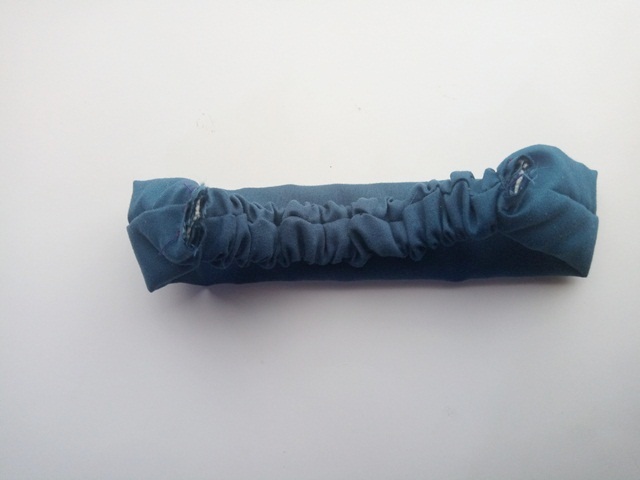

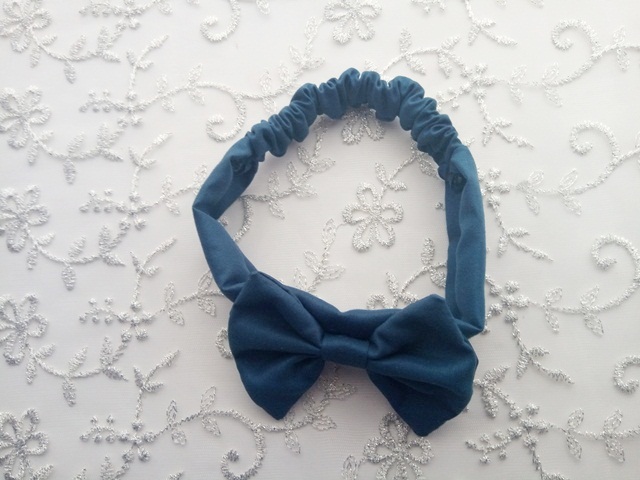
To finish, we put the bow on it and in this case, as it is for a 1-year-old baby, I will not be putting pearls or other decorations on the fabric, and that way our bandage would be ready.
Espero que les haya gustado amigos, gracias por visitar mi publicación💖, las bandanas para bebes son un excelente regalo y también un bonito emprendimiento, a las mamis les encanta tener a sus niñas coquetas y también es importante evitar utilizar telas sintéticas cuando elaboramos accesorios para bebes. Hasta la próxima oportunidad
I hope you liked it friends, thanks for visiting my publication💖, baby bandanas are an excellent gift and also a nice undertaking, mommies love having their girls flirtatious and it is also important to avoid using synthetic fabrics when we make accessories for babies . Until the next opportunity
Las imágenes fueron tomadas por mi persona @beidacarolina para ser publicadas exclusivamente en hive. Para editar las fotos utilice PhotoScape y para traducir el texto utilice Traductor de Google
The images were taken by my person @beidacarolina to be published exclusively on hive. To edit the photos use PhotoScape and to translate the text use Google Translate
Congratulations @beidacarolina! You have completed the following achievement on the Hive blockchain and have been rewarded with new badge(s):
Your next target is to reach 30 posts.
You can view your badges on your board and compare yourself to others in the Ranking
If you no longer want to receive notifications, reply to this comment with the word
STOPTo support your work, I also upvoted your post!
Check out the last post from @hivebuzz:
Support the HiveBuzz project. Vote for our proposal!
Thank you🤗
Apóyenos también y vote por nuestro testigo.
Recibirá una insignia adicional y un voto más fuerte de nuestra parte cuando le notifiquemos.
Hola beidacarolina, me encanto la bandana aunque no tengo bebes pequeños, pero si tengo sobrinos y les caería muy bien un regalito así, gracias por compartir
¡Gracias amiga!, que bueno que te haya gustado, siii es una buena idea para obsequiar a las pequeñas de la casa, incluso he visto madres que coleccionan las bandanas de sus bebes por colores, gracias por tu visita🤗
Thank you for sharing this amazing post on HIVE!
non-profit curation initiative!Your content got selected by our fellow curator @rezoanulvibes & you just received a little thank you via an upvote from our
You will be featured in one of our recurring curation compilations and on our pinterest boards! Both are aiming to offer you a stage to widen your audience within and outside of the DIY scene of hive.
Join the official DIYHub community on HIVE and show us more of your amazing work and feel free to connect with us and other DIYers via our discord server: https://discord.gg/mY5uCfQ !
If you want to support our goal to motivate other DIY/art/music/homesteading/... creators just delegate to us and earn 100% of your curation rewards!
Stay creative & hive on!
thanks for the invitation friends😊
Hi beidacarolina,
Join the Curie Discord community to learn more.
Thanks friends 😊
Your content has been voted as a part of Encouragement program. Keep up the good work!
Use Ecency daily to boost your growth on platform!
Support Ecency
Vote for new Proposal
Delegate HP and earn more
Thanks 🤗