Hi friends!!!
Hola Amigos!!!
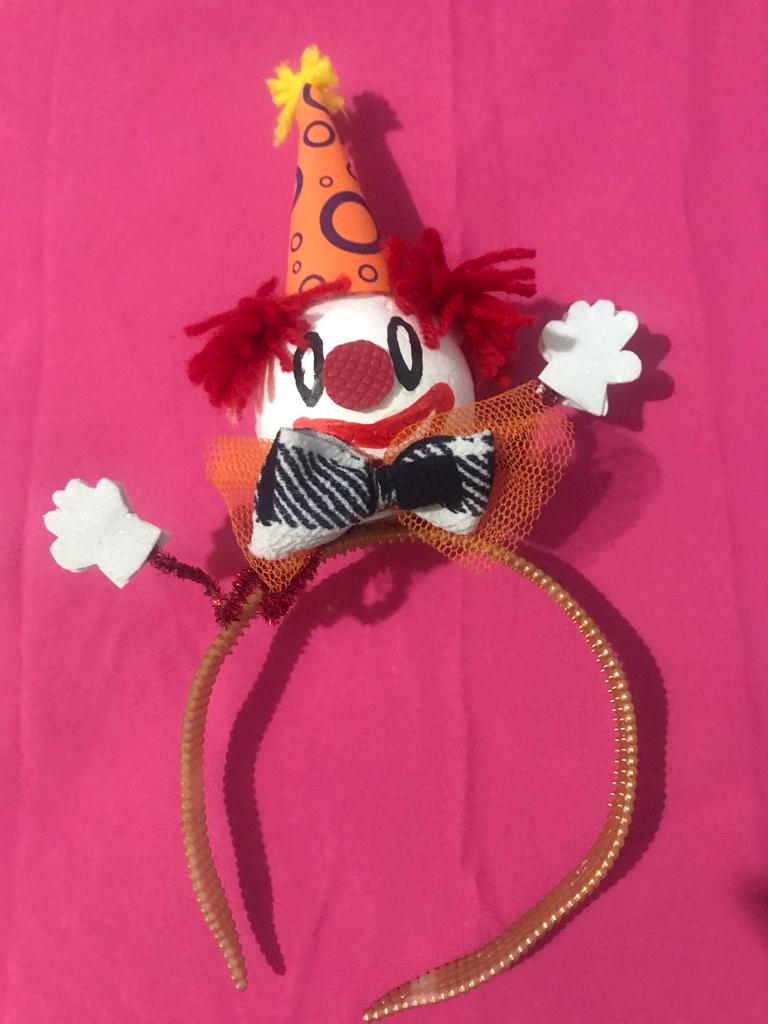
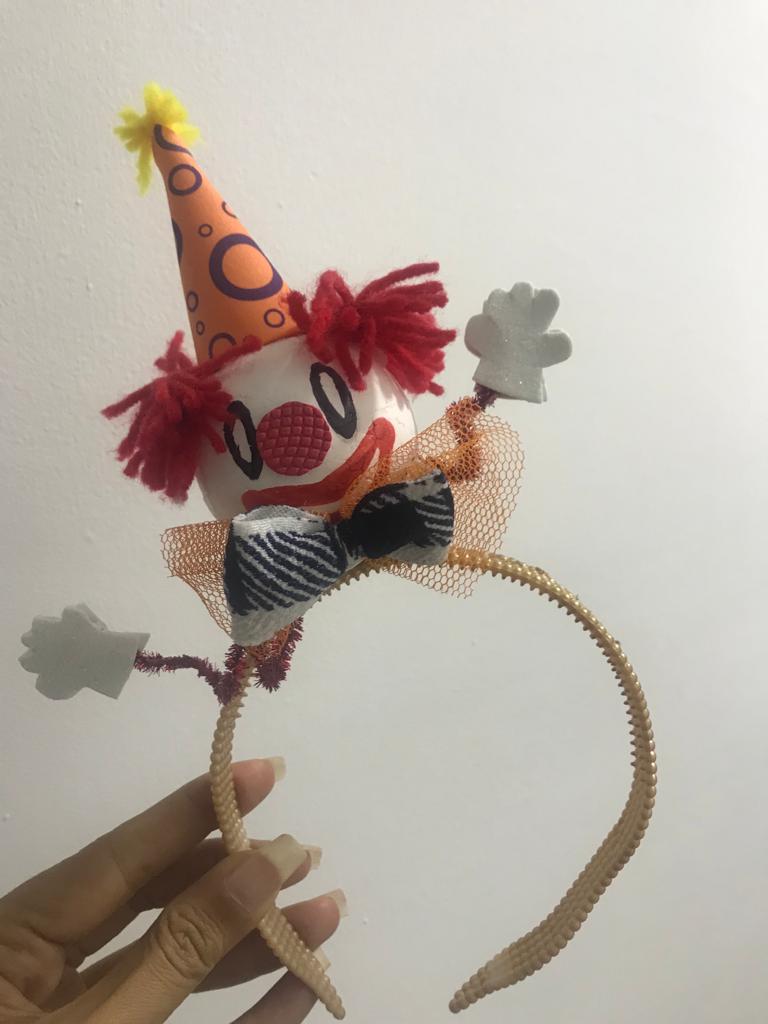
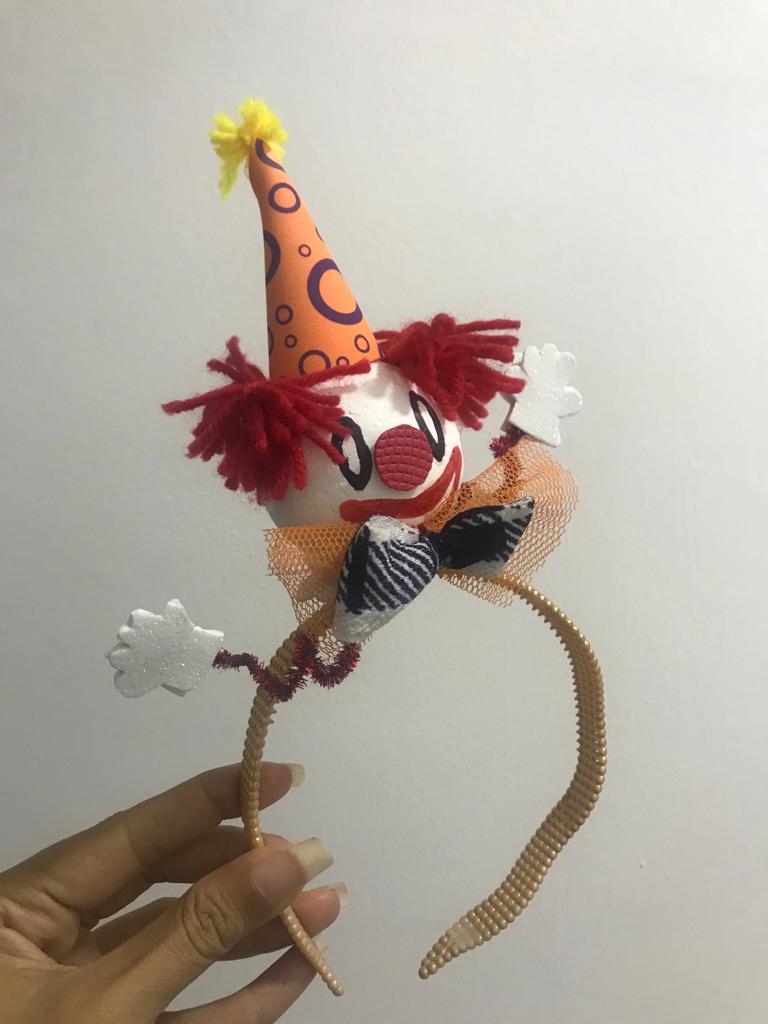
Have a good day everyone; Today I am going to show you how simply by following this tutorial you will be able to make a beautiful and original headband with a funny little clown at home to celebrate the carnival.
Buen día tengan todos; el día de hoy les voy a mostrar como sencillamente siguiendo este tutorial podrán hacer en casa un hermoso y original cintillo con divertido payasito para celebrar el carnaval.
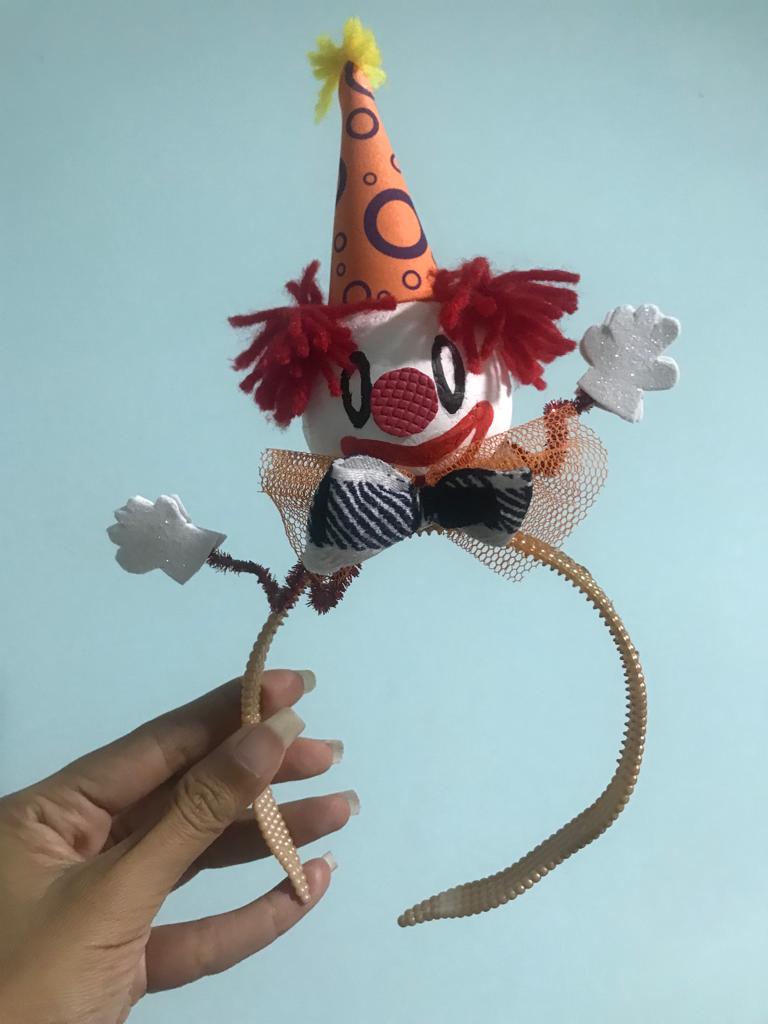
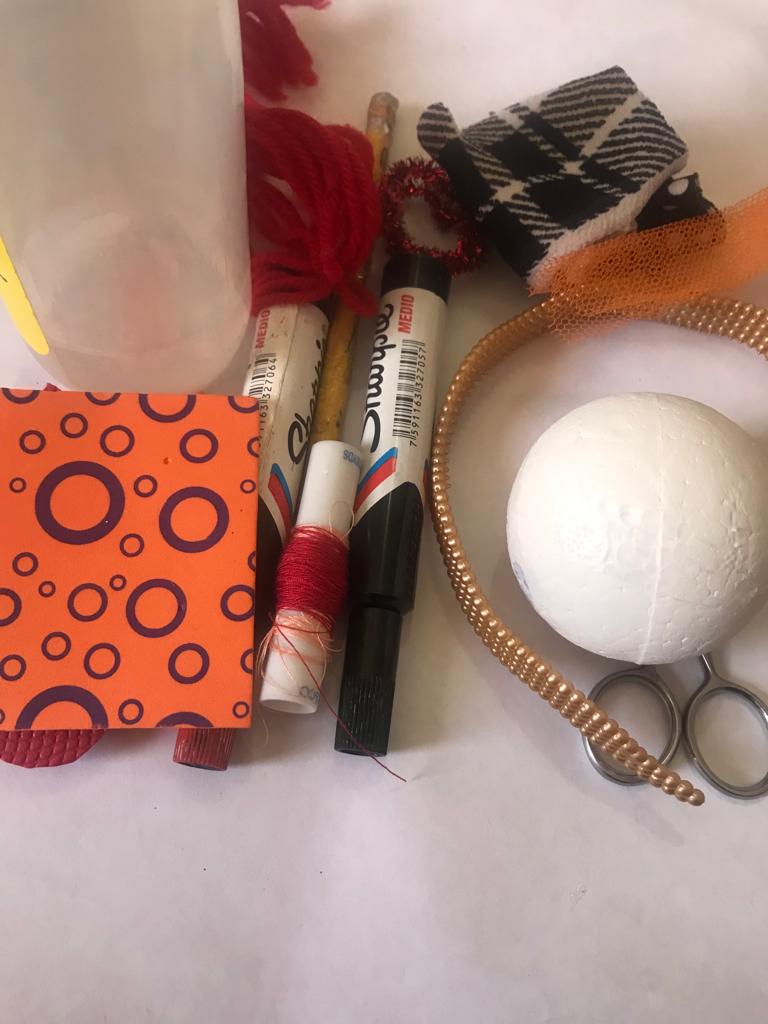
You will need the following materials:
Necesitarán los siguientes materiales:
• Headband in the color of your choice.
• Anime sphere (medium).
•White paint.
•Black and red thick tip markers.
•Brush.
•Red and yellow stamen.
•Eye foamy pieces; patterned and white
•Shilling of the desired color.
•Glue.
•Scissor.
•Fabric scraps and tull (of the desired color).
•Pencil.
•Cintillo del color de su preferencia.
•Esfera de anime ( mediana).
•Pintura blanca.
•Marcadores punta gruesa negro y rojo.
•Pincel.
•Estambre rojo y amarillo.
•Retazos de foamy ojo; estampado y blanco .
•Chelín del color deseado.
•Pegamento.
•Tijera.
•Retazos de tela y tull (del color deseado).
•Lápiz.
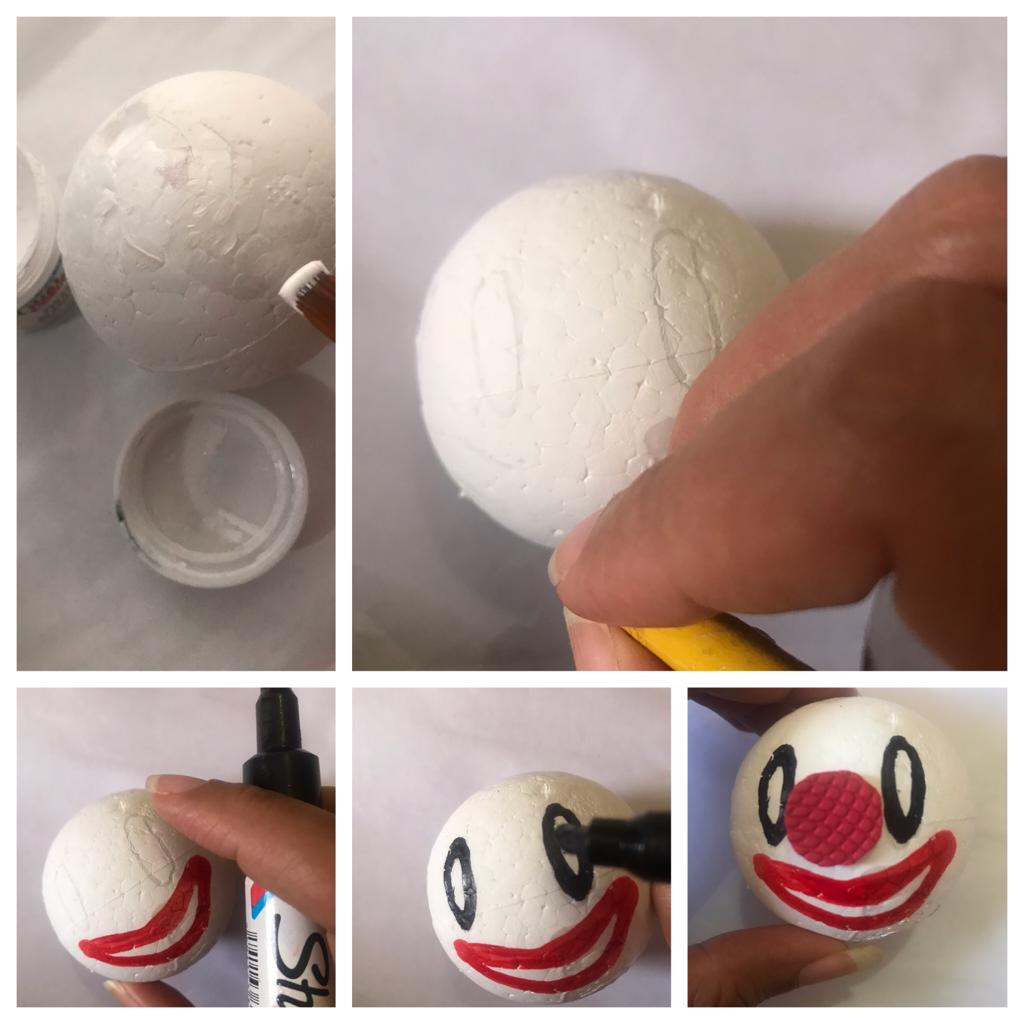
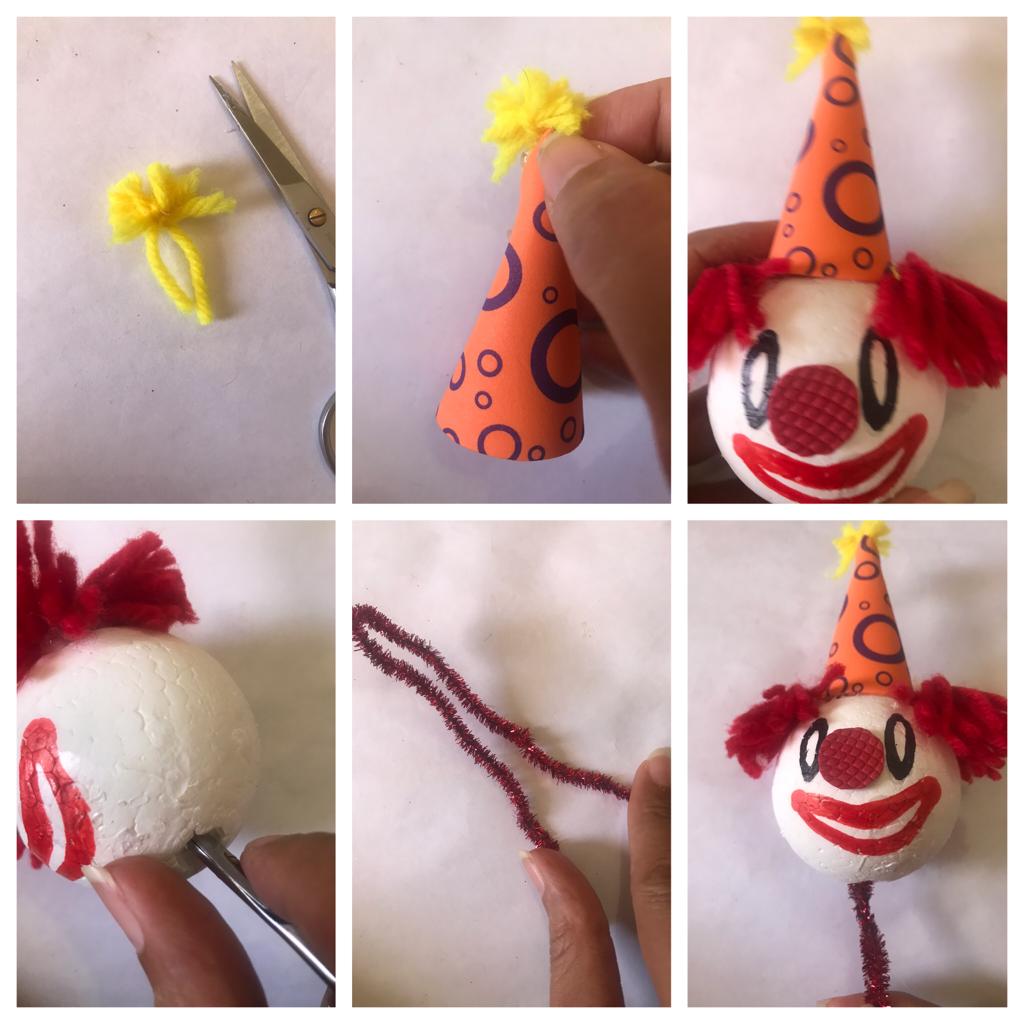
He started by painting the sphere white (let it dry). Later, with the pencil, he marked the eyes and mouth of the clown to continue giving color with the markers; In the red foam, cut a small red circle for his nose and fixed it to the clown's face.
Inició pintando la esfera de blanco ( dejó secar). Posteriormente con el lápiz marcó ojos y boca del payaso para continuar dando color con los marcadores; en el foamy rojo recortó un pequeño círculo rojo para su nariz y fijo a la cara del payasito.
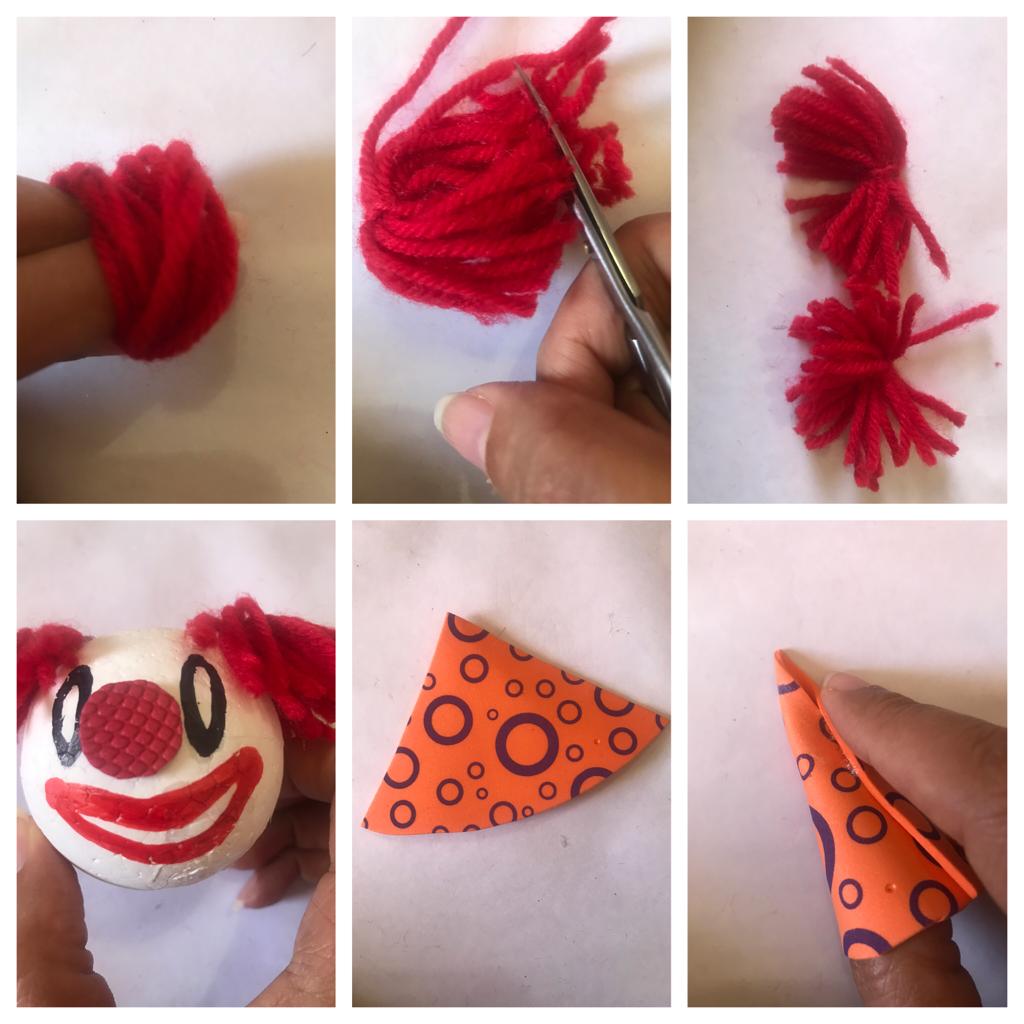
He continued to wind the red thread between his fingers; I pass a thread between the roll, knotted and I shape a small pompom. Then I follow the same procedure to make another pompom. He glued these to each side of the clown's face. In the printed foamy, cut a small triangle (as seen in the figure) fixed vertically to shape the clown's hat.
Continuó enrollando entre los dedos el hilo rojo; paso una hebra entre el rollo, anudó y doy forma a un pequeño pompón. Luego sigo el mismo procedimiento para realizar otro pompón. Pegó estos a cada lado de la cara del payaso. En el foamy estampado cortó un pequeño triángulo ( tal como se observa en la figura) fijo verticalmente para dar forma al gorro del payaso.
With the yellow thread, she made a small pompom that she glued to the upper end of the hat; and be fixed to the head of the clown. Then with the scissors I open a small hole in the lower end of the anime sphere; He folded the shilling in half and fixed the center of the shilling inside the hole leaving the ends on each side to form the arms of the clown, (as shown in the figure).
Con el hilo amarillo realizó un pequeño pompón que pegó al extremo superior del sombrero; y esté lo fijo a la cabeza del payaso. Luego con la tijera abro un pequeño orificio en el extremo inferior de la esfera de anime ; dobló el chelín a la mitad y fijo el centro del chelín dentro del orificio dejando los extremos a cada lado para dar forma a los brazos del payaso,( tal como se observa en la figura).
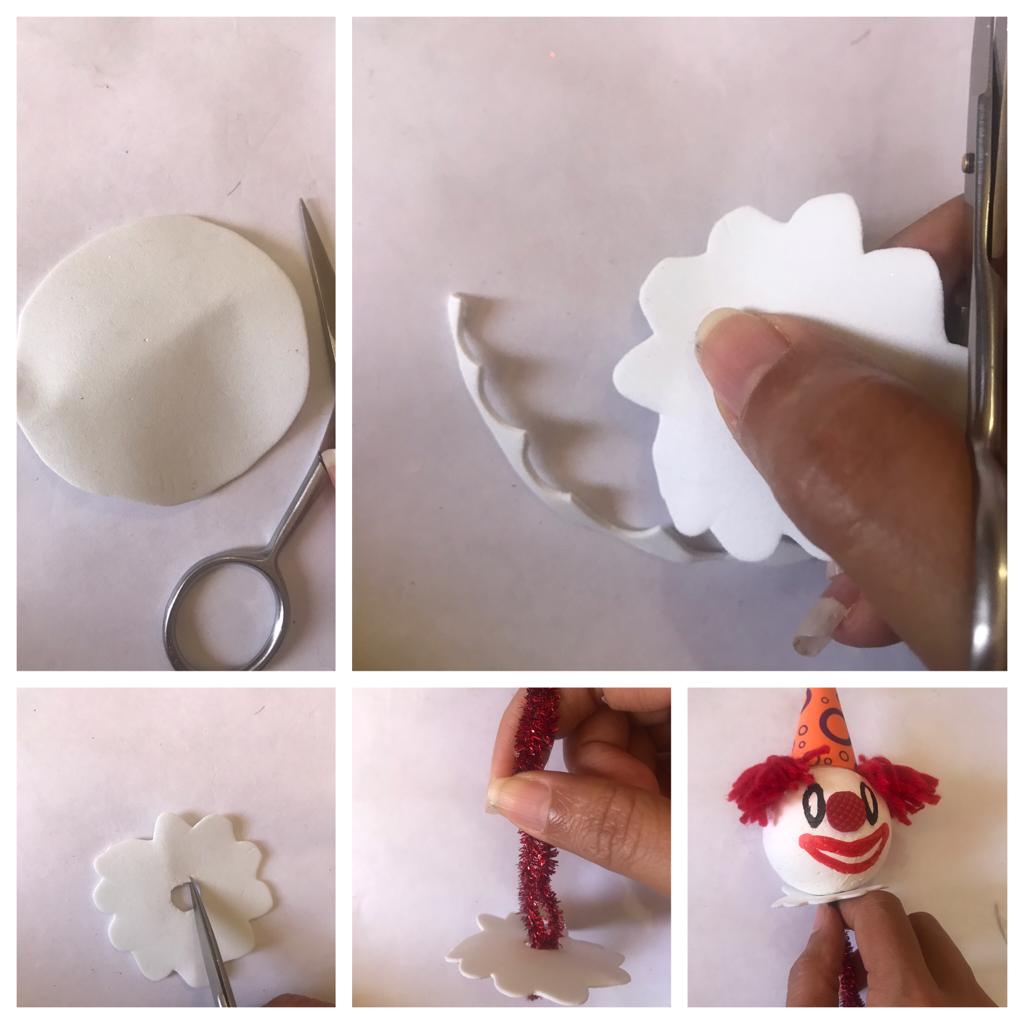
Continue cutting a circle of 11 centimeters in diameter in the white foam, then I shape the edge of the circle (as seen in the figure). In the center of this, open a small circle with the scissors and pass through the ends of the shilling to fix it to the base of the clown's head.
Continuó cortando un círculo de de 11 centímetros de diámetro en el foamy blanco, luego doy forma a él borde del círculo ( tal como se observa en la figura). En el centro de este abrir con la tijera un pequeño círculo y paso por el los extremos del chelín para fijar esté a la base de la cabeza del payaso.
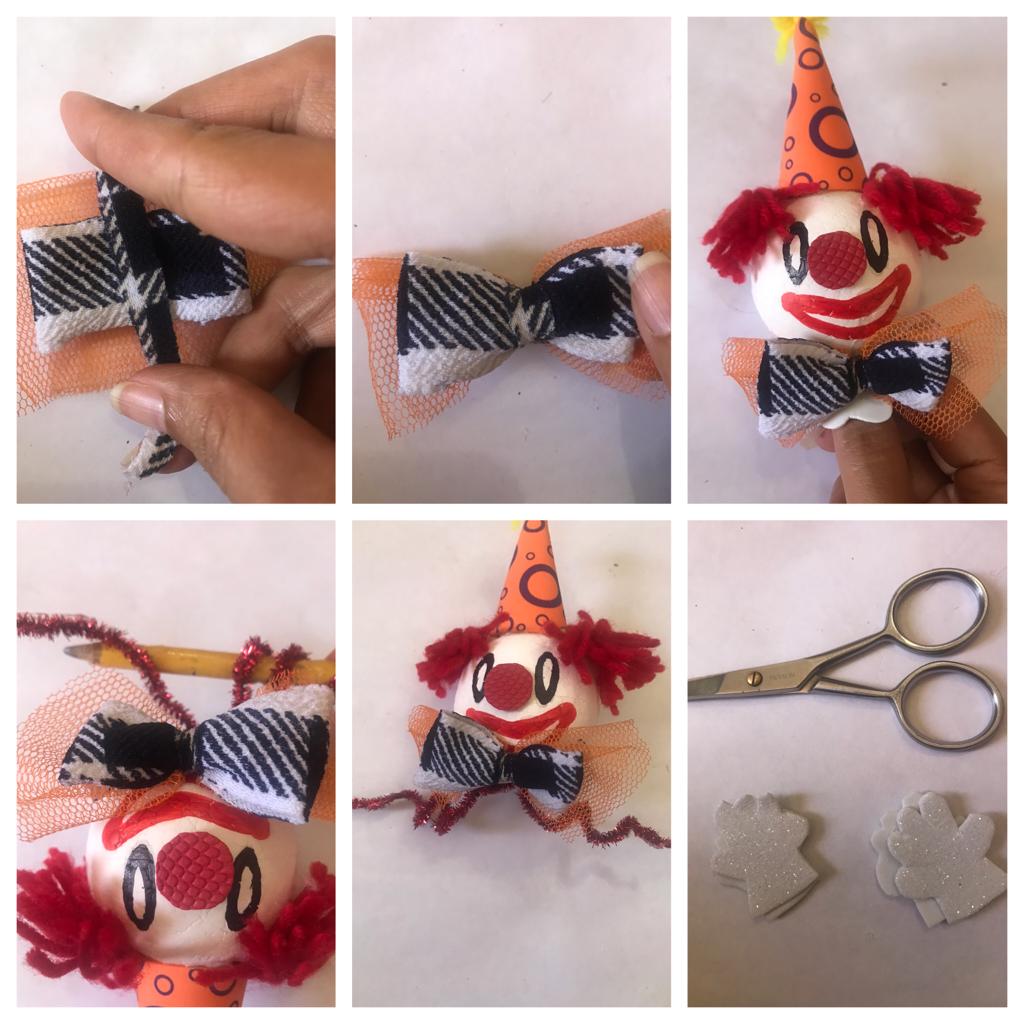
I cut two rectangles, one of fabric and the other of tulle, and in the center I tied a ribbon at the back to form a bow; fixed to the front under the clown's head, with the pencil I shape springs on each side of the shilling (as seen in the figure). He marked and cut out 2 pairs of hands in the white foam.
Corto dos rectángulos uno de tela y otro de tull y en el centro anudó una cinta a la parte posterior para formar un lazo; fijo a la parte delantera debajo de la cabeza del payaso, con el lápiz doy forma de resortes a cada lado del chelín ( tal como se observa en la figura). Marcó y recortó en el foamy blanco 2 pares de manos.
Finally I attach the foamy hands on each side to the ends of the shilling spirals. Glued the base of the clown to one side of the headband (as shown in the figure).
Finalmente fijo las manos de foamy a cada lado en los extremos de los espirales de chelín. Pegó la base del payaso a un costado del cintillo ( tal como se observa en la figura).
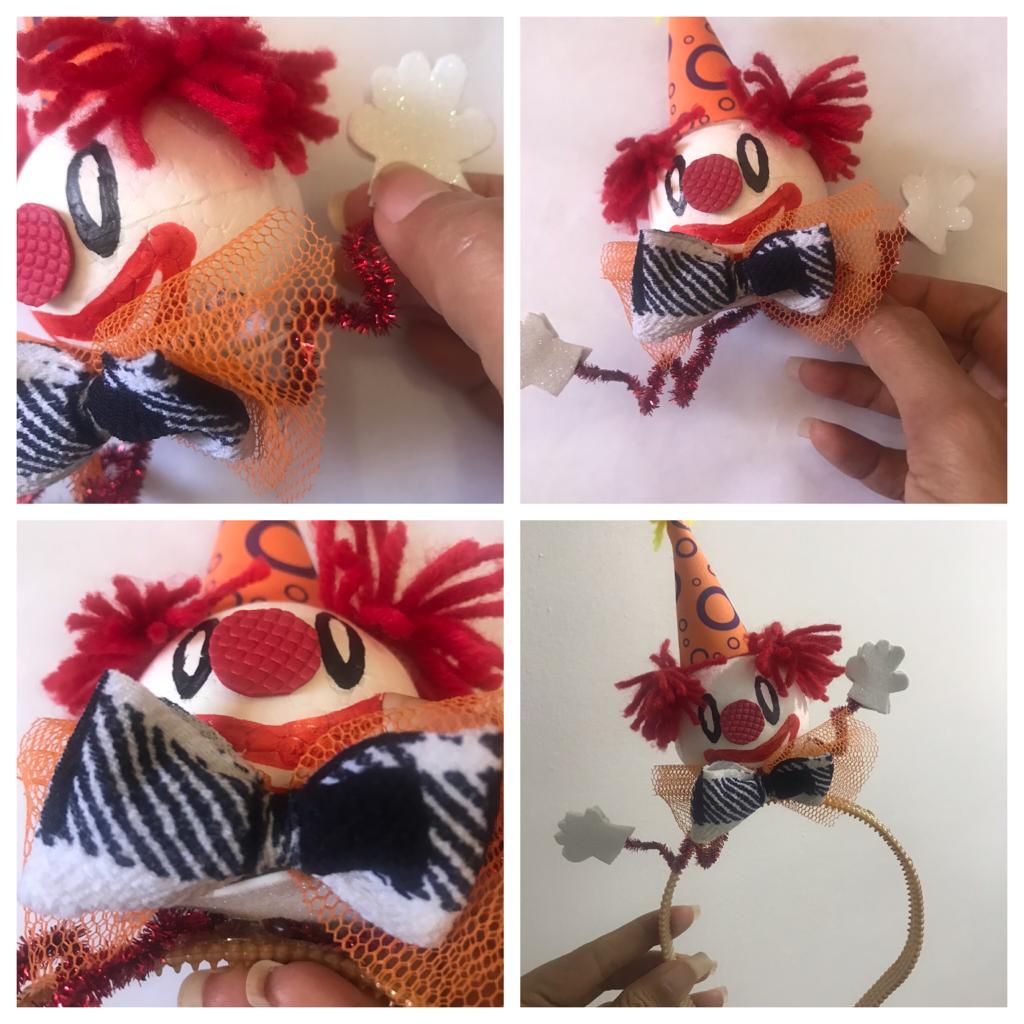
This beautiful and original headband of a funny little clown; It is an excellent option for the approaching carnival days; You can do it yourself at home with simple and inexpensive materials.
Este hermoso y original cintillo de divertido payasito ; es una excelente opción para los días de carnavales que se aproximan; lo podrás hacer tu mismo en casa con sencillos y económicos materiales.
Until a next opportunity.
Hasta una próxima oportunidad.
The photographs in this article are my own and the grids were made using the incollage application; the translation of the article using the Google translator.
Las fotografías de este artículo son de mi autoría y las cuadrículas fueron realizadas utilizando la aplicación incollage; la traducción del artículo usando el traductor de Google.
Thank you for sharing this post on HIVE!
Your content got selected by our fellow curator priyanarc & you just received a little thank you upvote from us for your great work! Your post will be featured in one of our recurring compilations which are aiming to offer you a stage to widen your audience within the DIY scene of Hive. Stay creative & HIVE ON!
Please vote for our hive witness <3
Thank you very much friends for your support