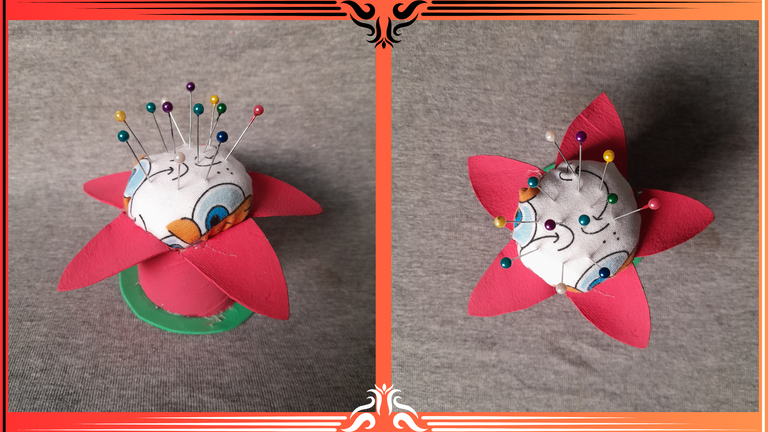
Greetings my friends of Hive welcome to my blog, today I am pleased to be with you again showing you a nice creativity, this work I did to give it to my mom, as she likes sewing I had the pins in a container, then I decided to make a pincushion with a nice flower design, it is very simple to do. Let's see the step by step.
Español:
Materiales:
- 1 tubo de cartón del papel higiénico.
- 1 pequeño retazo de tela.
- Foami verde.
- Algodón.
- Pintura al frío roja.
- Silicon .
- Pincel.
- Tijera.
- Lápiz.
English:
Materials:
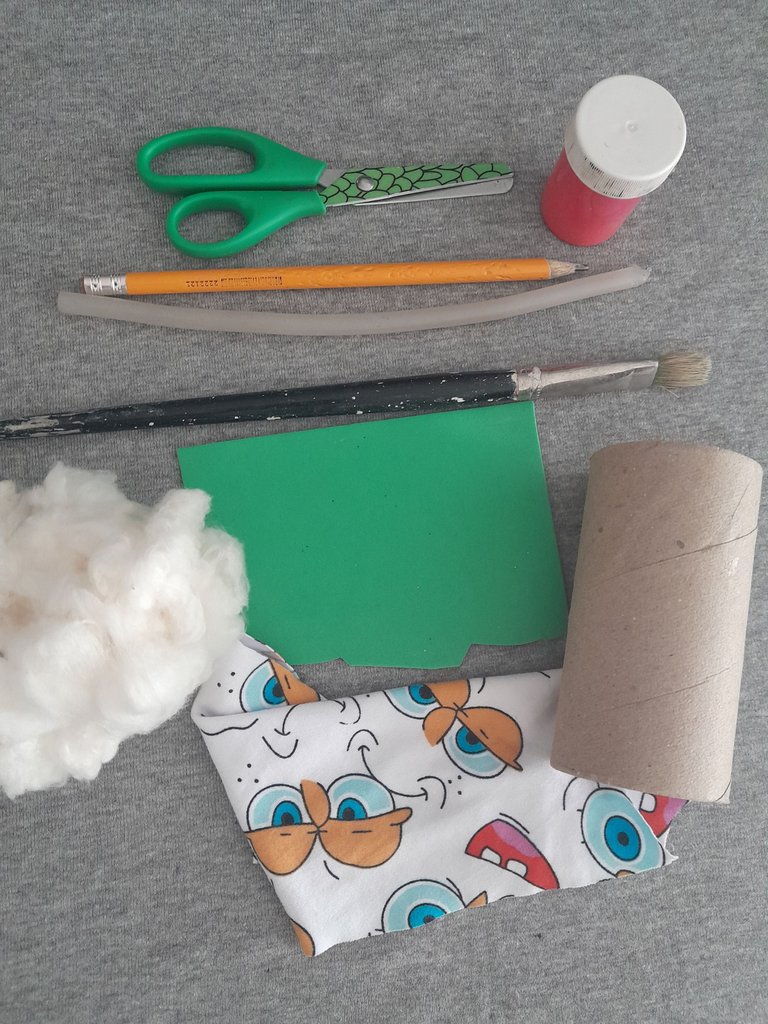
- 1 cardboard toilet paper tube.
- 1 small piece of cloth.
- Green Foami.
- Cotton.
- Red cold paint.
- Silicon .
- Paintbrush.
- Scissors.
- Pencil.

Español:
Paso 1:
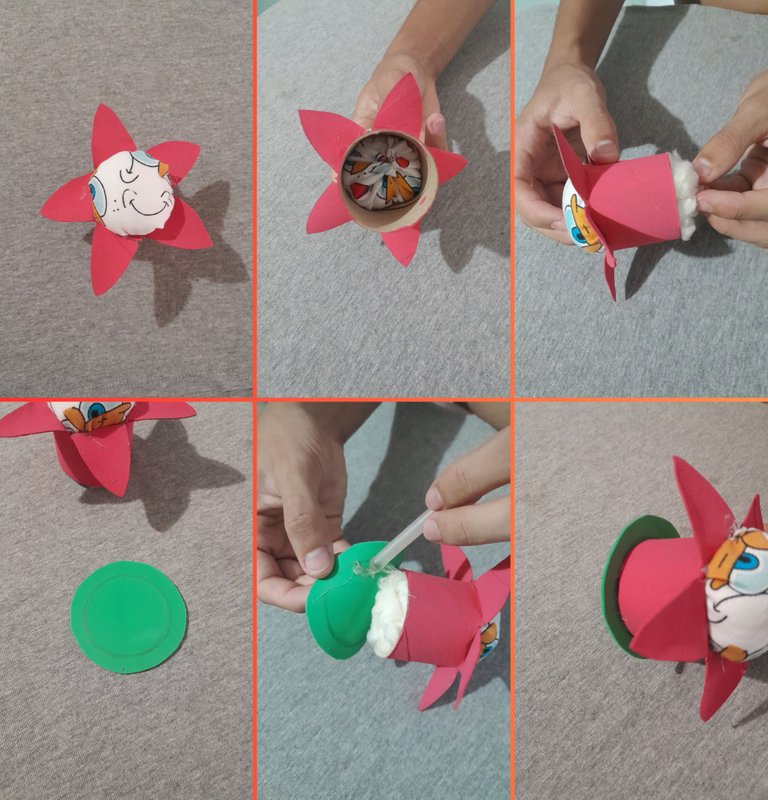
- Comienzo marcando con el lápiz, 2 lineas al rededor del tubo de cartón, primera linea a 1 cm y la otra a 4 cm de la primera linea, luego recorto por la marca de la primera linea, después dibujo 5 pétalos desde la marca de la linea hacia arriba y recortamos formando los pétalos, ahora con ayuda de los dedos doblamos los pétalos hacia abajo formando una flor y procedemos a colorear con la pintura al frió, por ambos lados de los pétalos y la parte de abajo.
English:
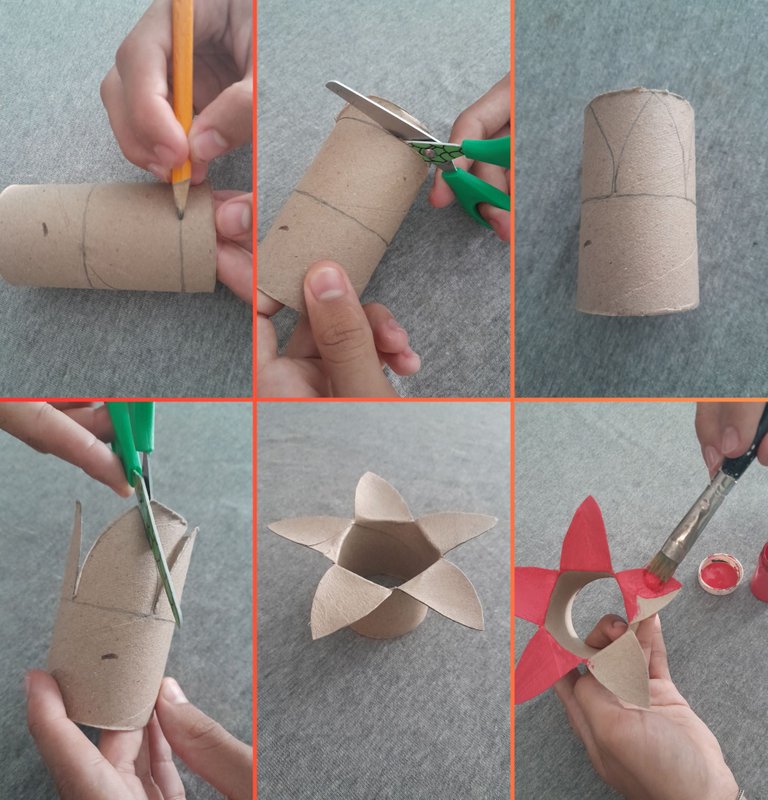
Step 1:
- I start marking with the pencil, 2 lines around the cardboard tube, first line at 1 cm and the other at 4 cm from the first line, then I cut by the mark of the first line, then I draw 5 petals from the mark of the line upwards and we cut forming the petals, now with the help of the fingers we fold the petals downwards forming a flower and we proceed to color with the cold paint, on both sides of the petals and the bottom.

Español:
Paso 2:
- Mientra seca la pintura de nuestra flor, con la ayuda de una tapa dibujamos un circulo de 10 cm de diámetro por el lado al revés de la tela, lo recortamos y lo rellenamos con algodón, para luego pegarlo con silicon caliente uniendo todo el borde del circulo, quedando una pelota rellena de algodón.
English:
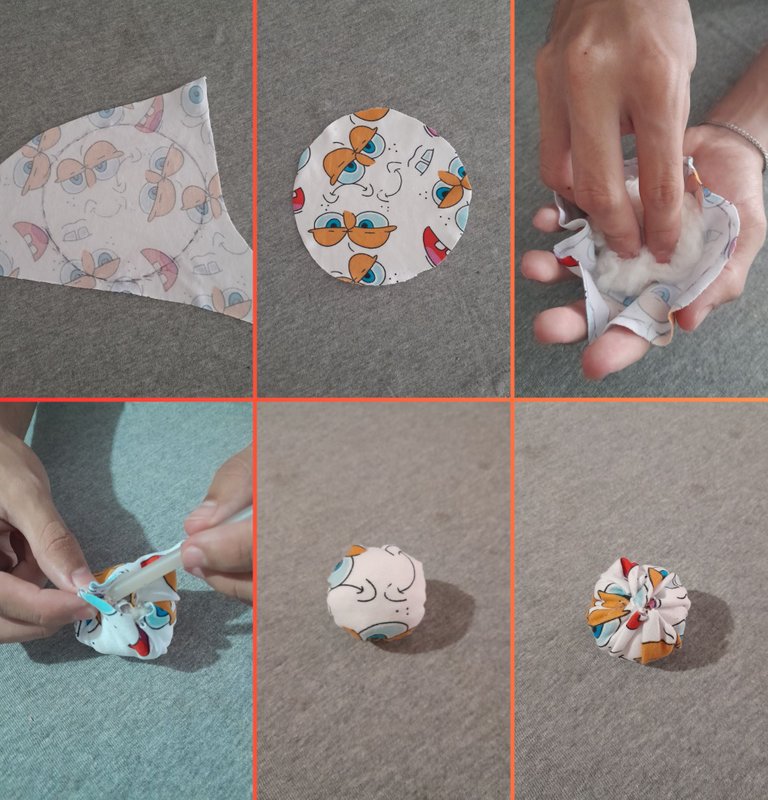
Step 2:
- While the painting of our flower dries, with the help of a lid we draw a circle of 10 cm in diameter on the reverse side of the fabric, we cut it out and fill it with cotton, and then glue it with hot silicone joining the entire edge of the circle, leaving a ball filled with cotton.

Español:
Paso 3:
- Ahora introducimos la pelota en la parte superior de la flor, pegando con silicon caliente por el borde de la pelota, luego introducimos por abajo mas algodón rellenando todo el espacio vacío, después procedo a dibujar un circulo en el foami verde del tamaño de la base de la flor y recorto a 1 cm de la marca; Terminando nuestro alfiletero pegando con silicon caliente el foami verde a la flor.
English:
Step 3:
- Now we introduce the ball at the top of the flower, gluing with hot silicone on the edge of the ball, then we introduce more cotton at the bottom filling all the empty space, then proceed to draw a circle in the green foami the size of the base of the flower and cut to 1 cm of the mark; Finishing our pincushion sticking with hot silicone green foami to the flower.

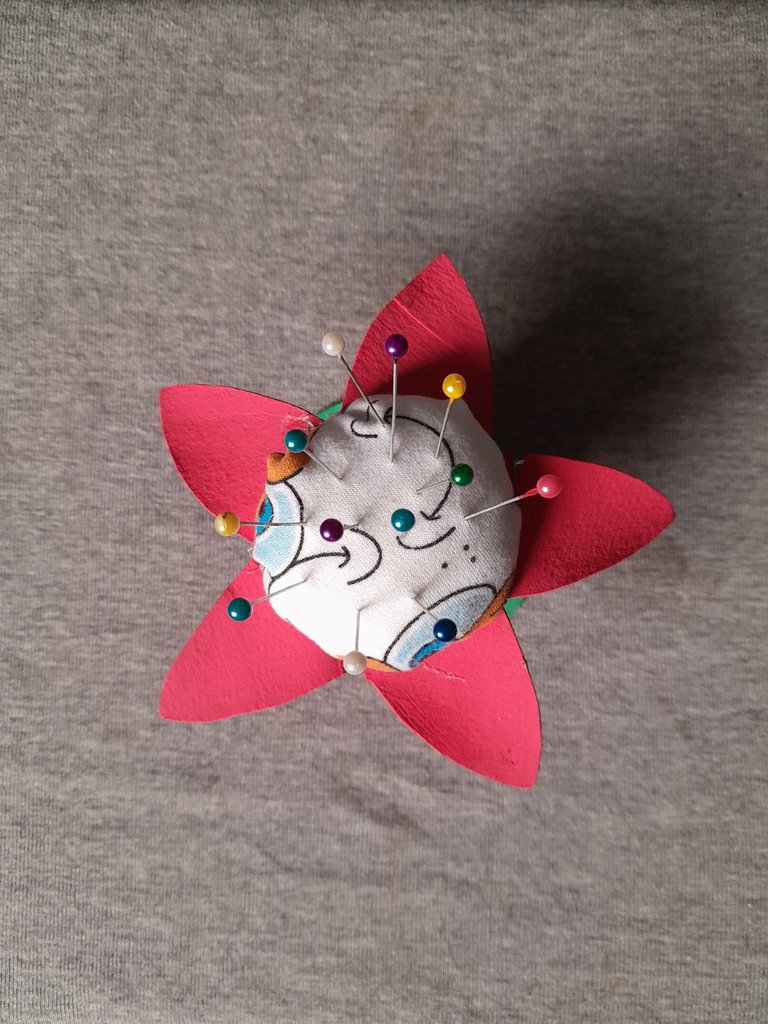
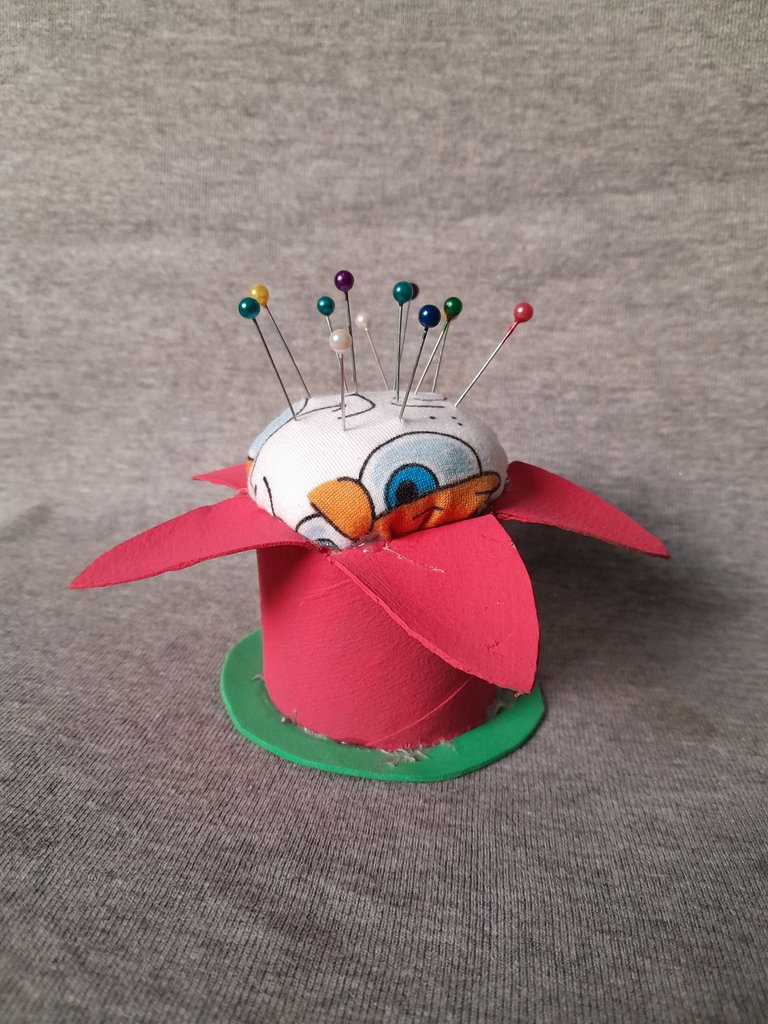
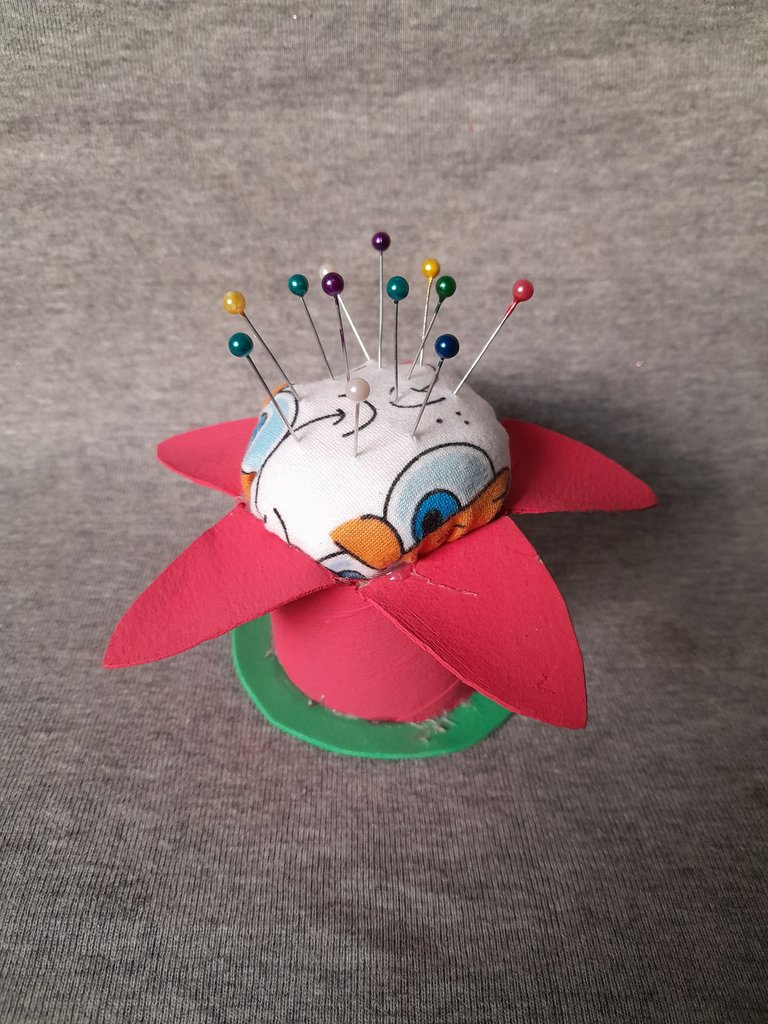
Aquí esta mi resultado final.
Here is my final result.

Todas las fotos son de mi autoria y editadas con Canva.
Traductor: DeepL Traslate.
All photos are my own and edited with Canva. Translator: DeepL Traslate.
Traductor: DeepL Traslate.
All photos are my own and edited with Canva. Translator: DeepL Traslate.
Congratulations @brahiam15! You received a personal badge!
You can view your badges on your board and compare yourself to others in the Ranking
Check out our last posts:
Support the HiveBuzz project. Vote for our proposal!
Congratulations @brahiam15! You have completed the following achievement on the Hive blockchain And have been rewarded with New badge(s)
Your next target is to reach 100 posts.
You can view your badges on your board and compare yourself to others in the Ranking
If you no longer want to receive notifications, reply to this comment with the word
STOPTo support your work, I also upvoted your post!
Check out our last posts:
Support the HiveBuzz project. Vote for our proposal!
Thank you for your support.
Awesome work @brahiam15! You're well on your way to reaching your Hive goals. Keep buzzing!
BTW, please support our funding proposal and help us bring more fun and badges to Hive. Together we can make Hive a more exciting place!
All you need to do is to click on the "support" button on this page: https://peakd.com/proposals/248.
Thank you!