Hola mis amigos artesanos y creadores, Bienvenidos a mi Blog/Hello my friends craftsmen and creators, Welcome to my Blog
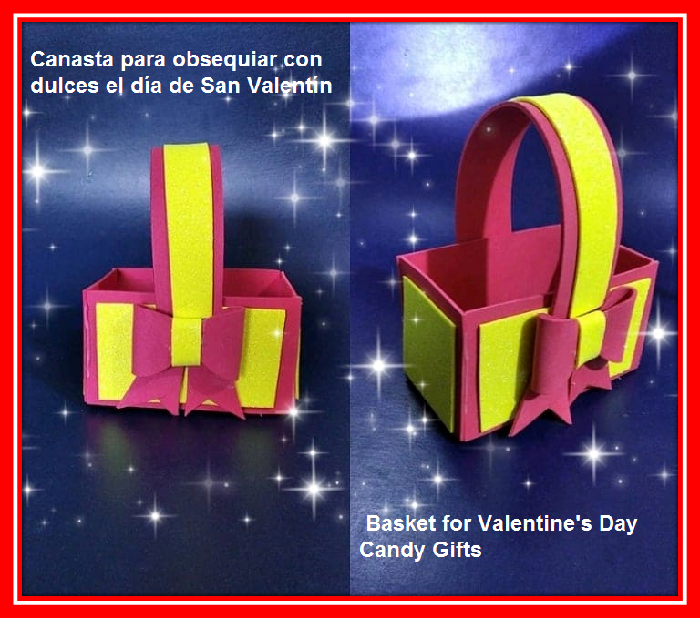
Un saludo cordial a todos los miembros de esta prestigiosa comunidad. El día de hoy continuo en la onda del día del Amor y la Amistad así que realice una linda Canasta de foami ideal para colocar dulces para obsequiar en ese día tan especial. A continuación, les muestro como lo hice
A cordial greeting to all the members of this prestigious community. Today I am continuing with the Love and Friendship Day so I made a nice foami basket ideal for placing sweets to give as a gift on that special day. Next, I show you how I made it
Materiales necesarios para mi proyecto/Materials needed for my project
Foami rojo, foami amarillo escarchado, pistola de silicón, silicón líquido, tijera, trozo de cartón
Red foami, yellow frosted foami, silicone gun, liquid silicone, scissors, piece of cardboard, etc.
Paso a Paso/Step by Step
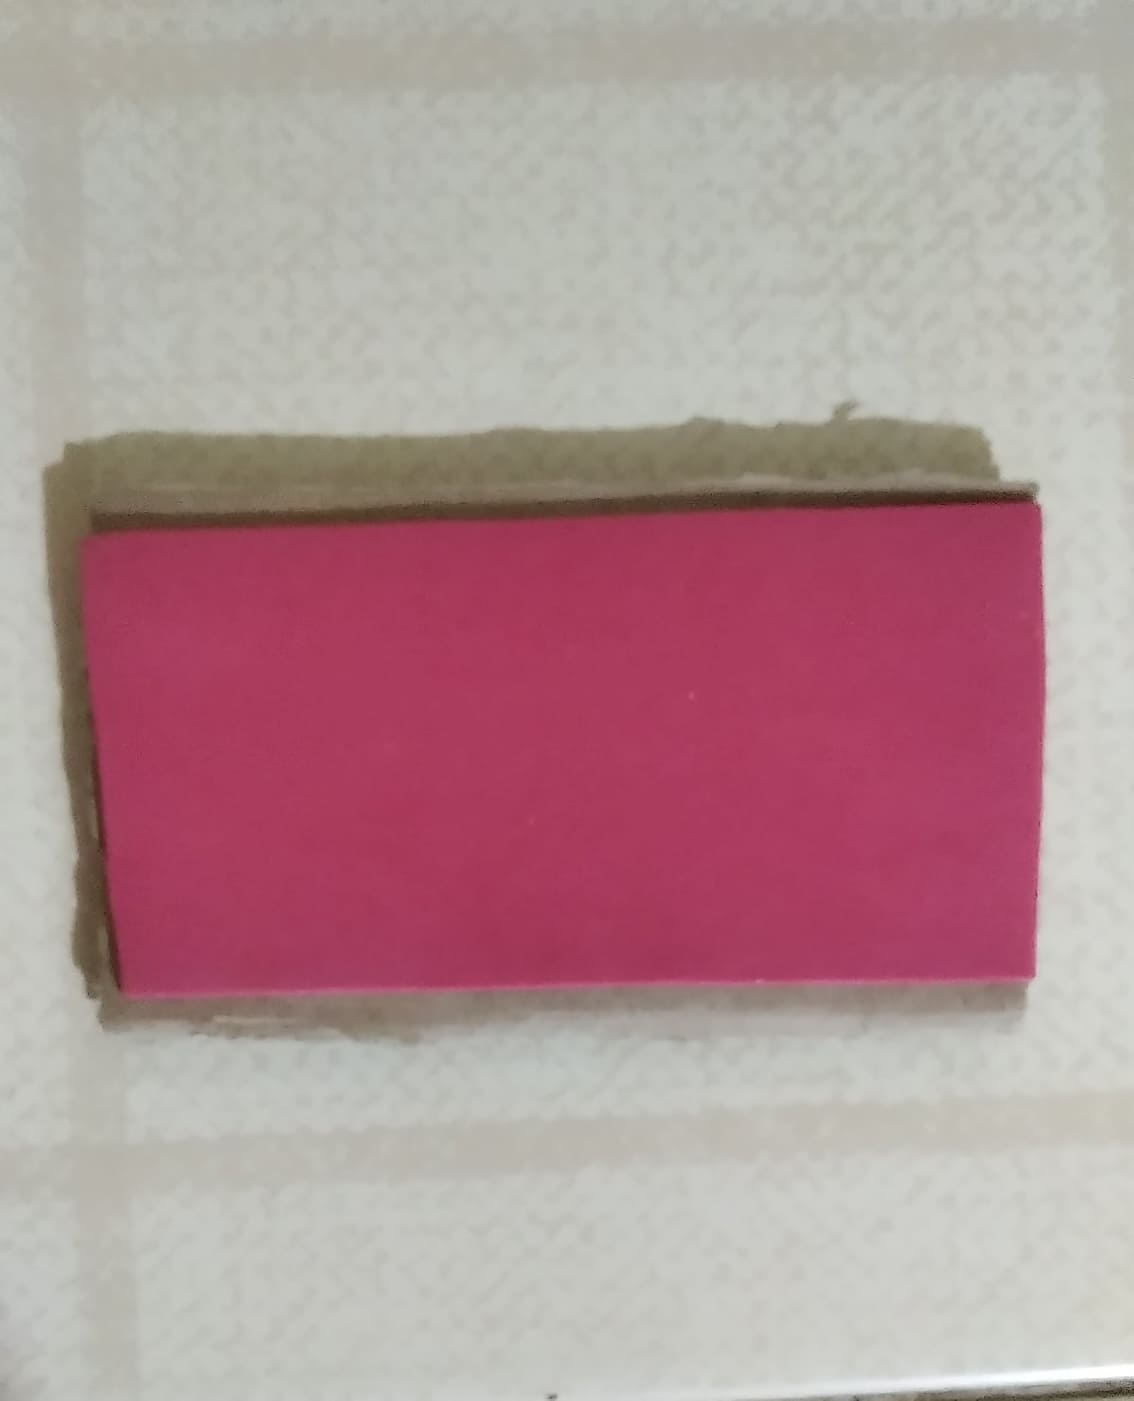
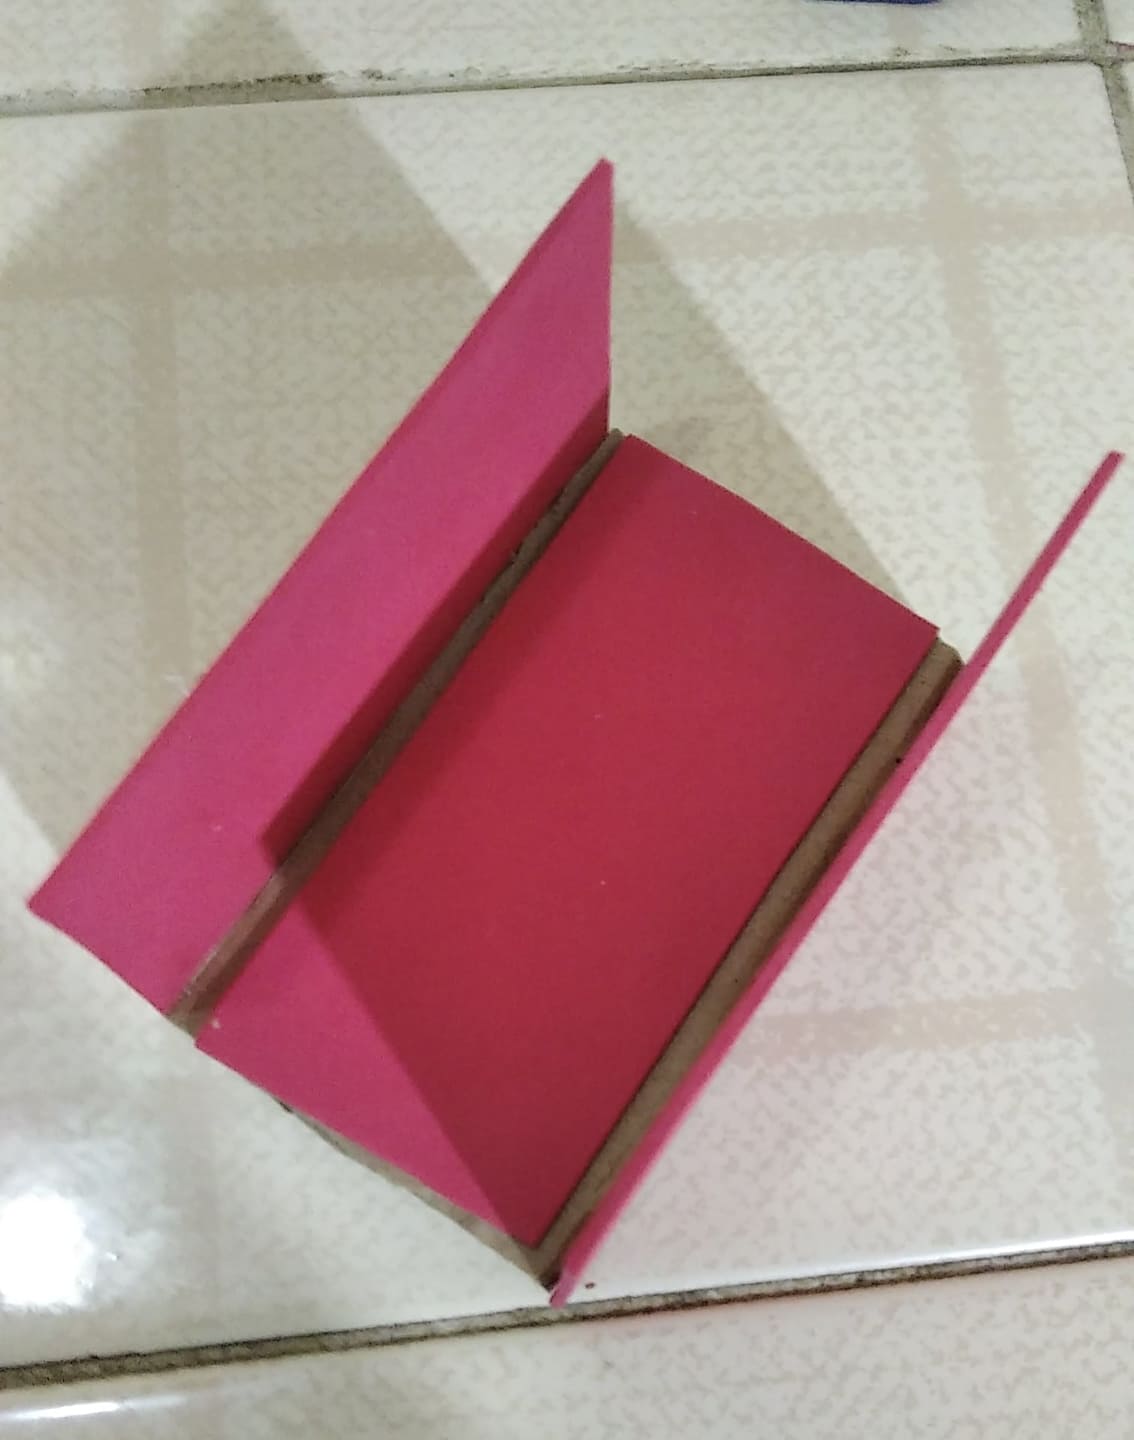
El primer paso es recortar en foami de color rojo dos rectángulos de 11cm x 6cm, dos cuadrados de 6cm, una tira larga de 22cm x 3cm.Recortamos también un rectángulo en cartón tomando las mismas medidas del rectángulo anterior
The first step is to cut in red foami two rectangles of 11cm x 6cm, two squares of 6cm, a long strip of 22cm x 3cm and a rectangle in cardboard with the same dimensions of the previous rectangle.

Pegar el rectángulo de foami al rectángulo de cartón
Glue the foami rectangle to the cardboard rectangle.
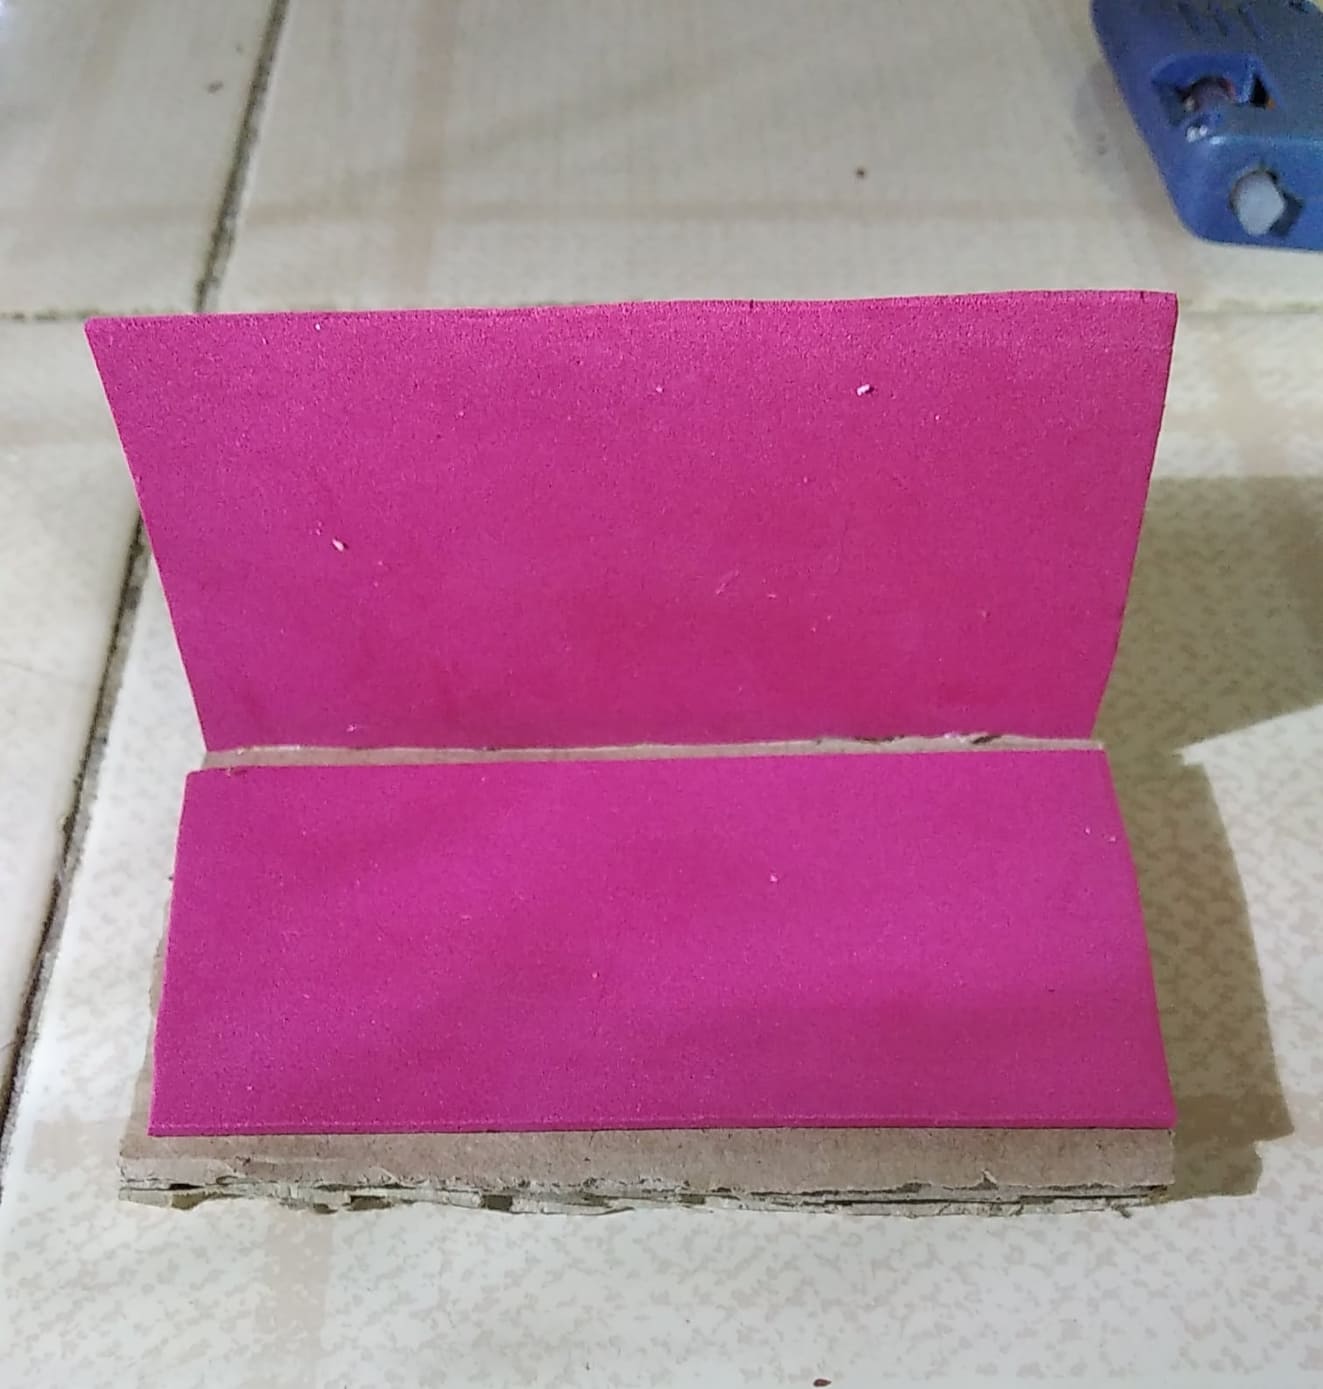
Luego se pega cada rectángulo a los lados del cartón
Each rectangle is then glued to the sides of the cardboard.
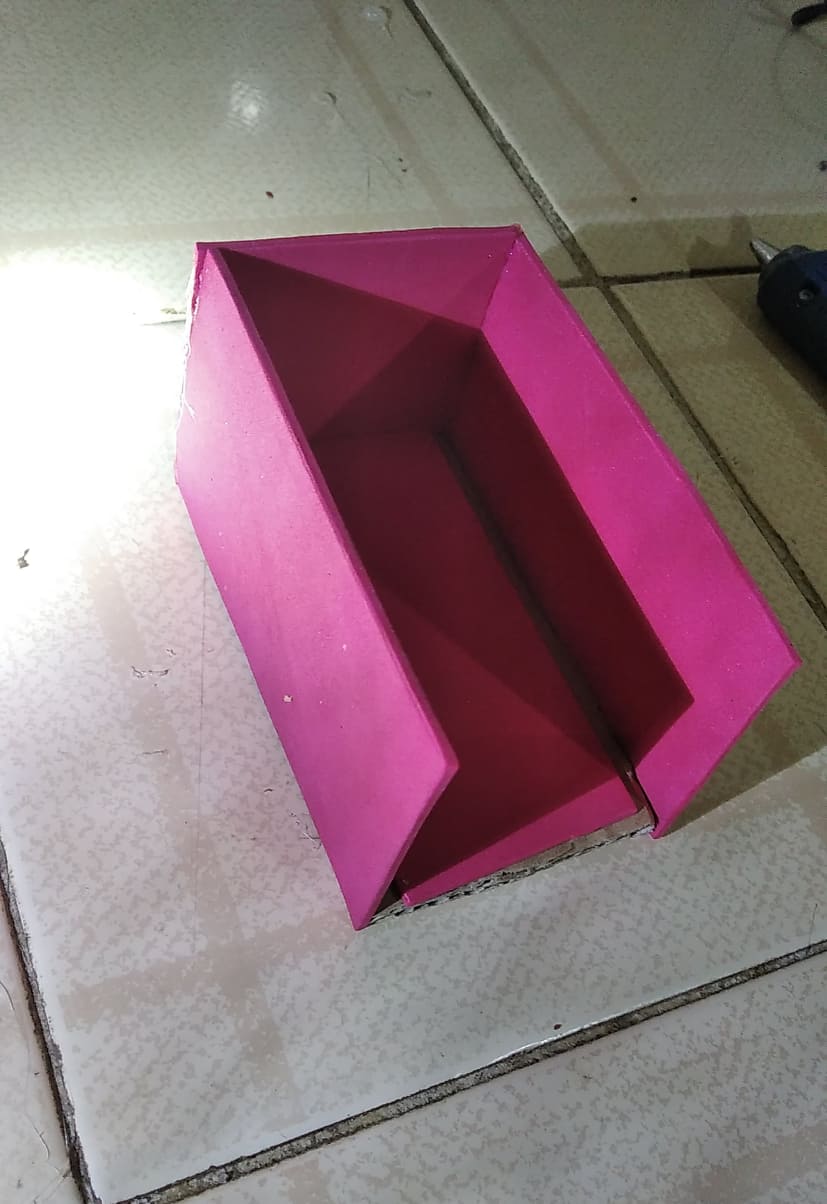
Ahora es el turno de pegar los cuadrados en el lugar que corresponde
Now it's time to glue the squares in the right place
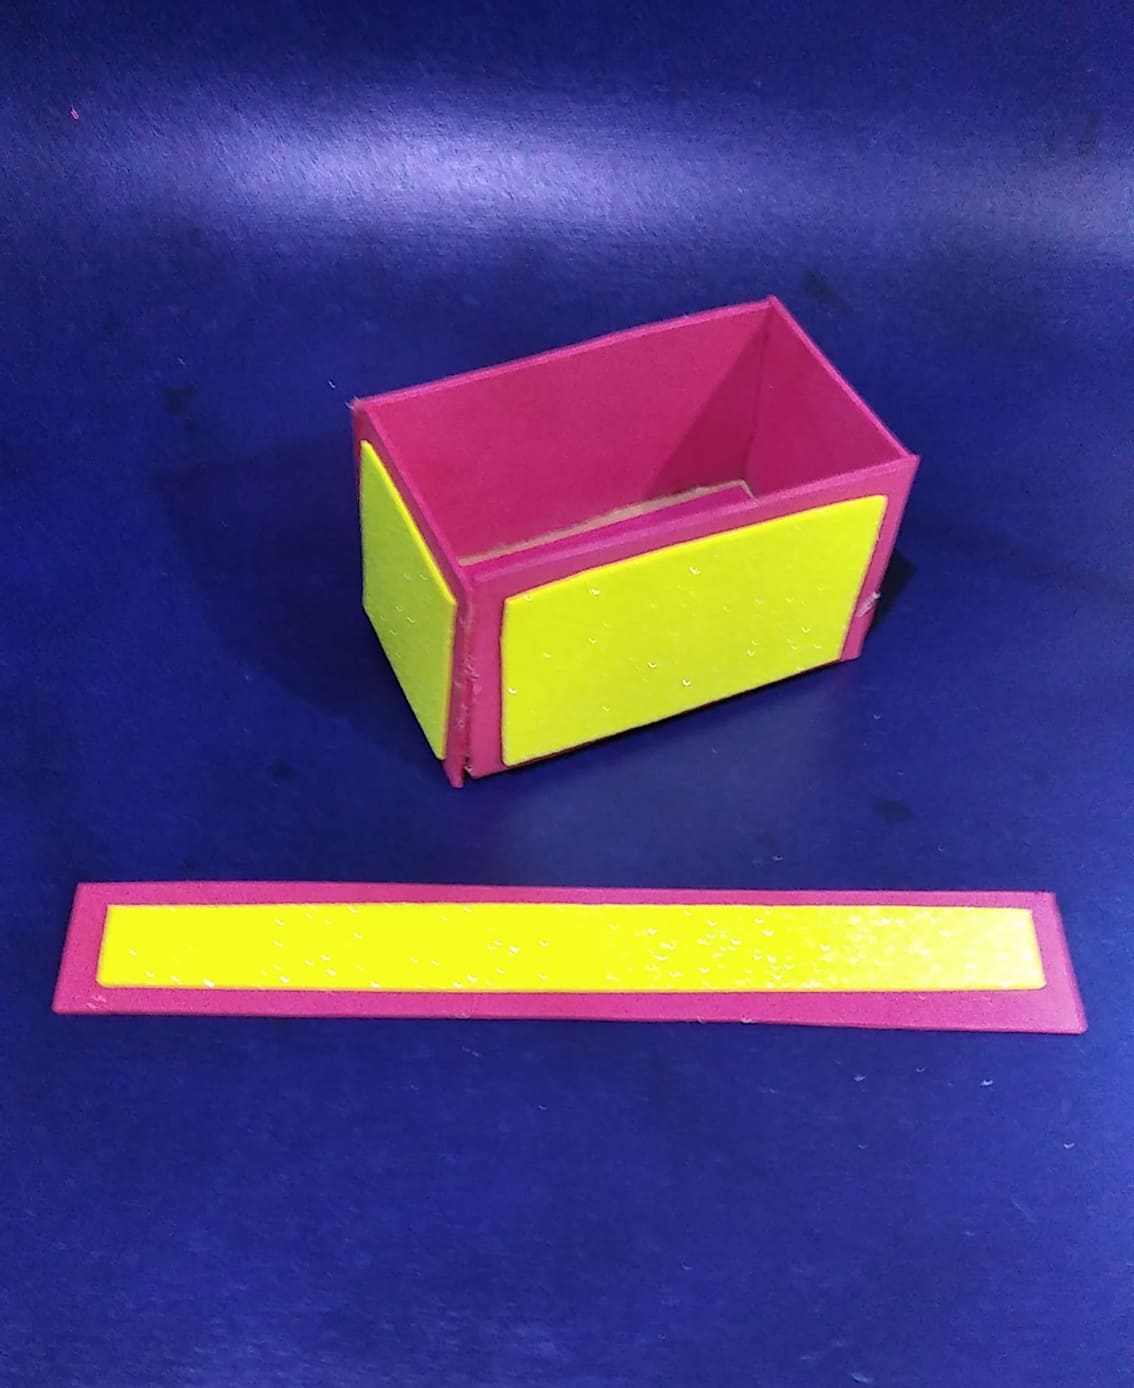
Para darle mayor vistosidad y colorido a mi canasta decidí recortar dos rectángulos de 9cm x 5cm ,dos cuadrados de 5cm y una tira de 2cm x 20cm, las cuales pegué en la canasta como se observa en la imagen
To make my basket more colorful and colorful I decided to cut out two rectangles of 9cm x 5cm, two squares of 5cm and a strip of 2cm x 20cm, which I glued on the basket as shown in the image.
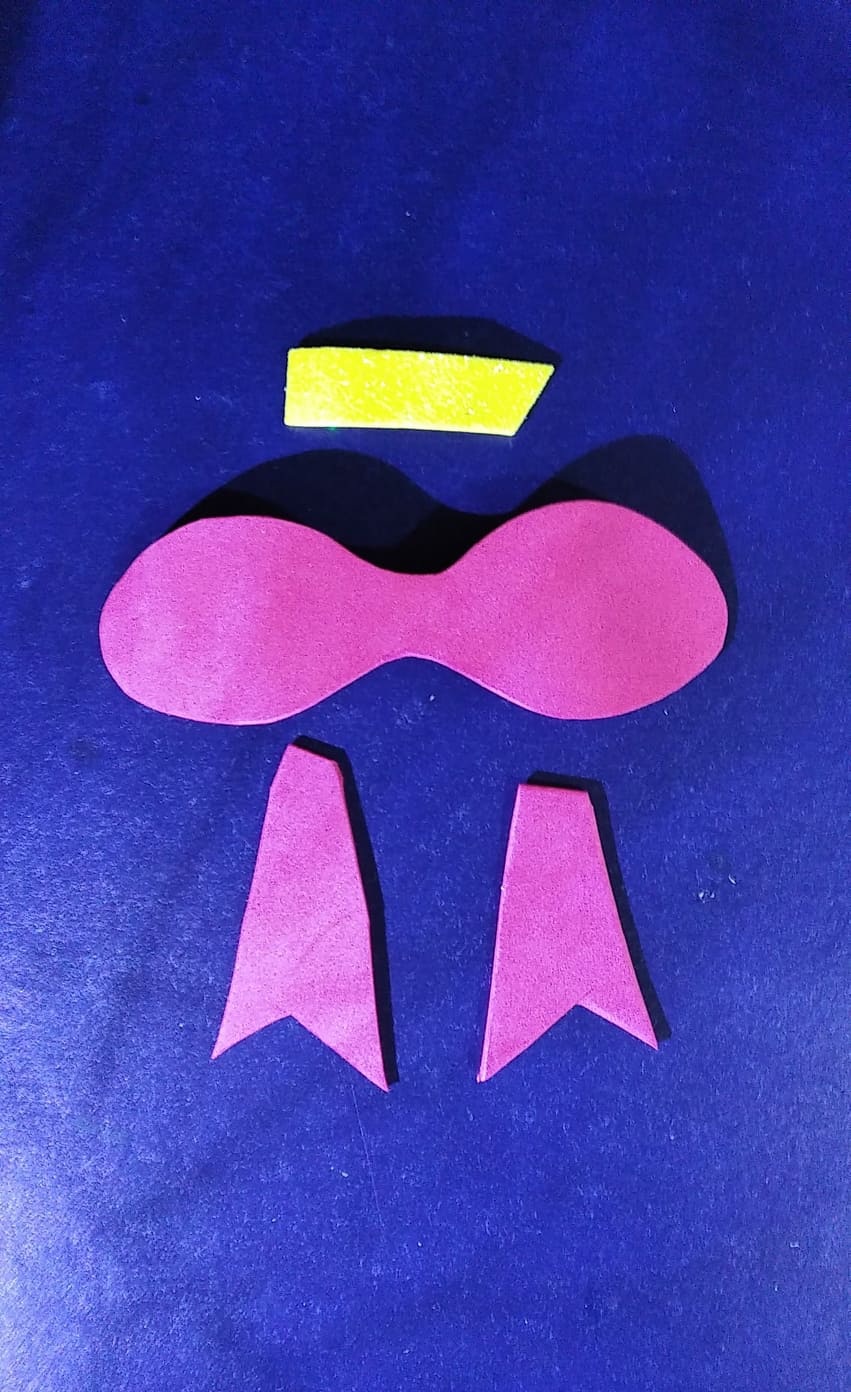
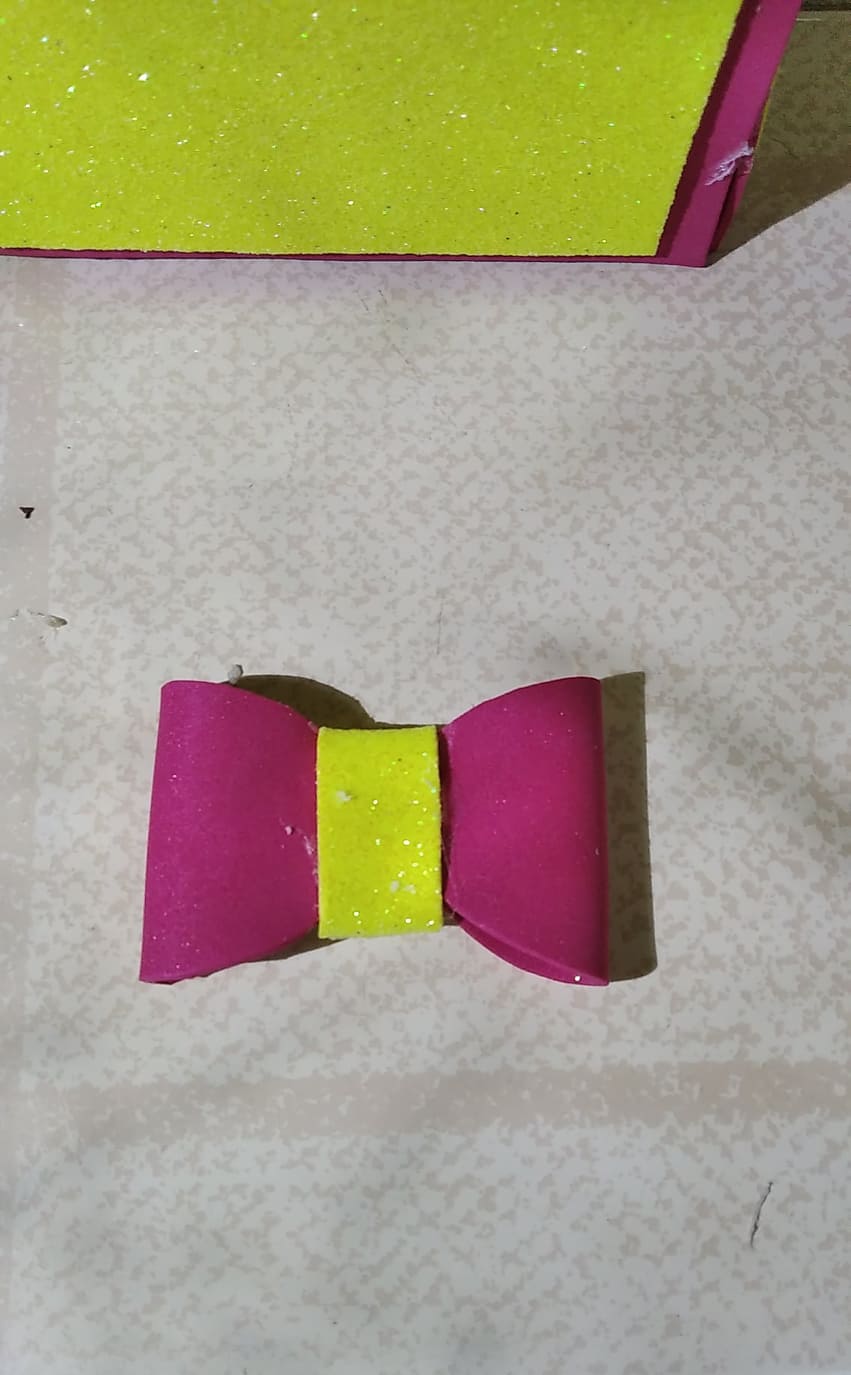
Para realizar el lazo recorte sus formas en foami rojo y una tira de foami amarillo escarchado
To make the bow, cut out its shapes in red foami and a strip of frosted yellow foami.
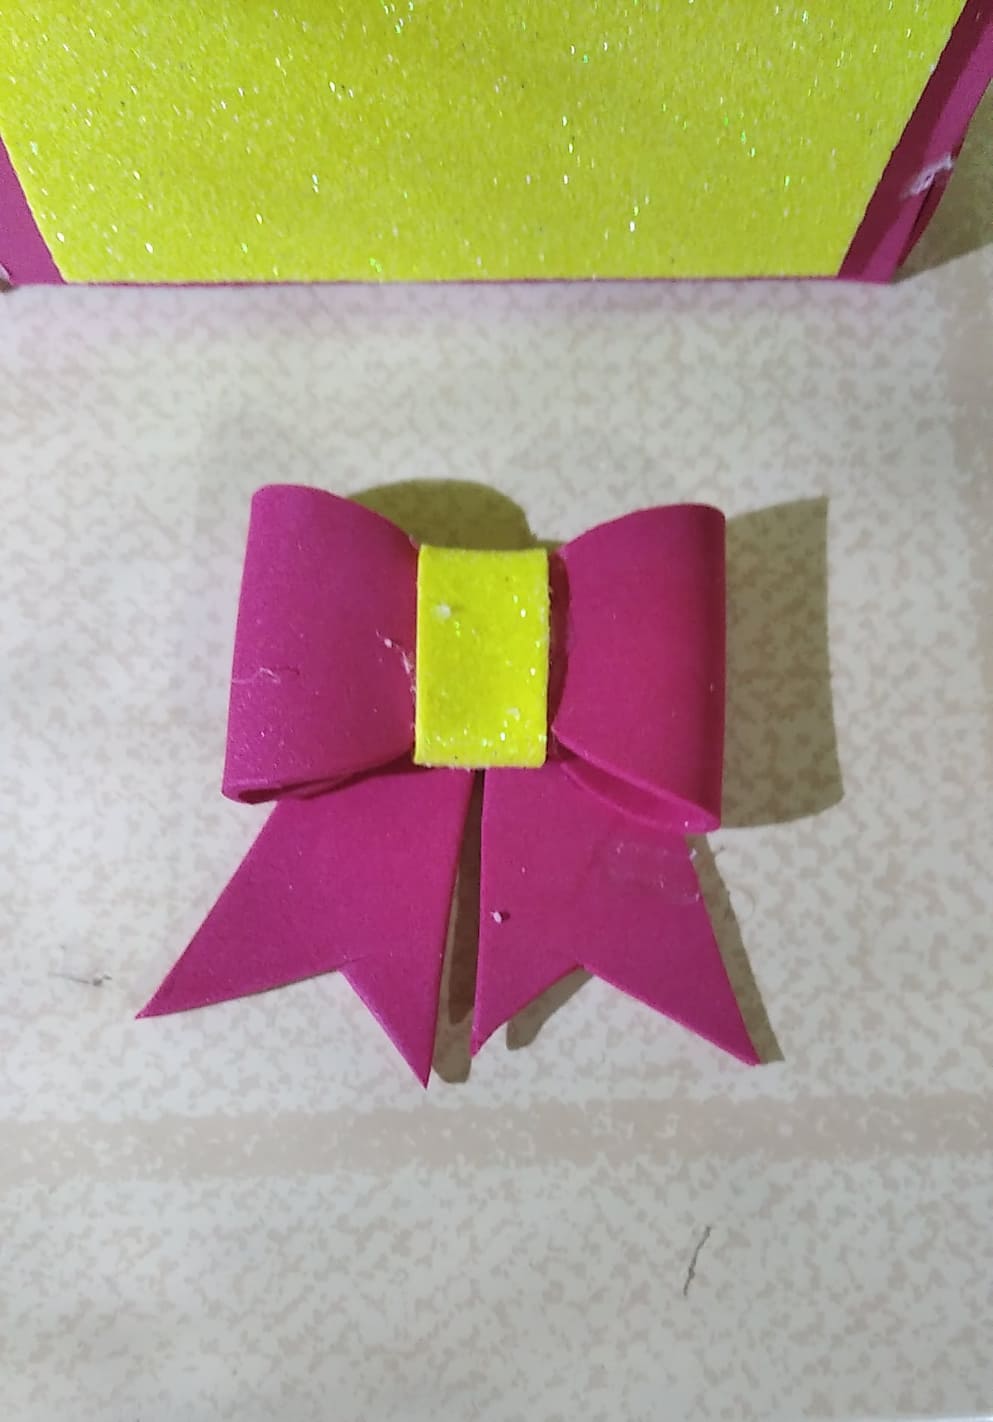
Unimos los extremos y colocamos en el centro la tira amarilla, luego se pega en la parte trasera los dos lazos
Join the ends and place the yellow strip in the center, then glue the two ribbons at the back.
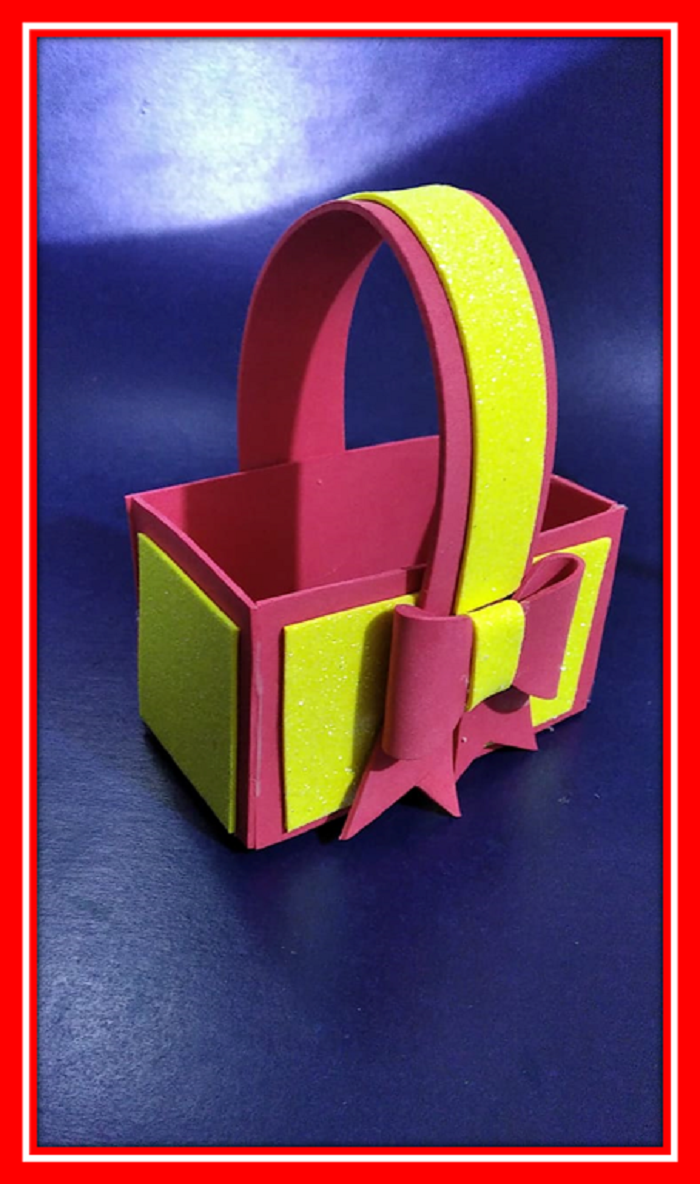
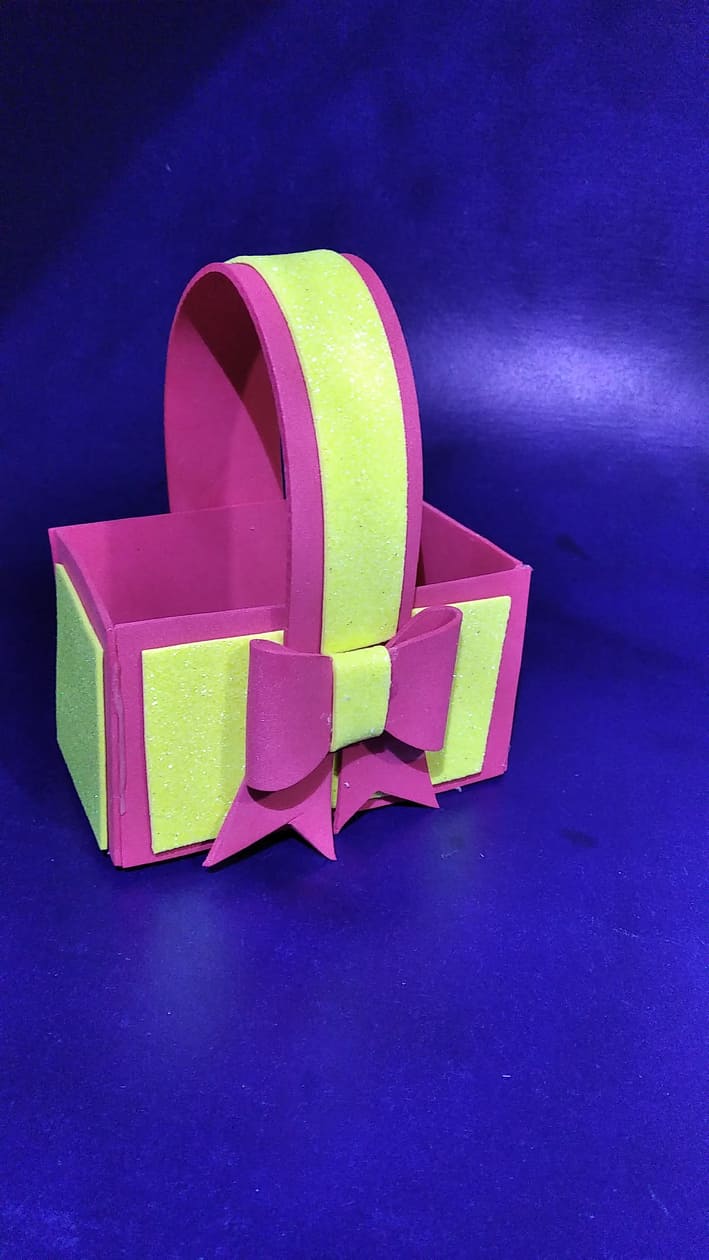
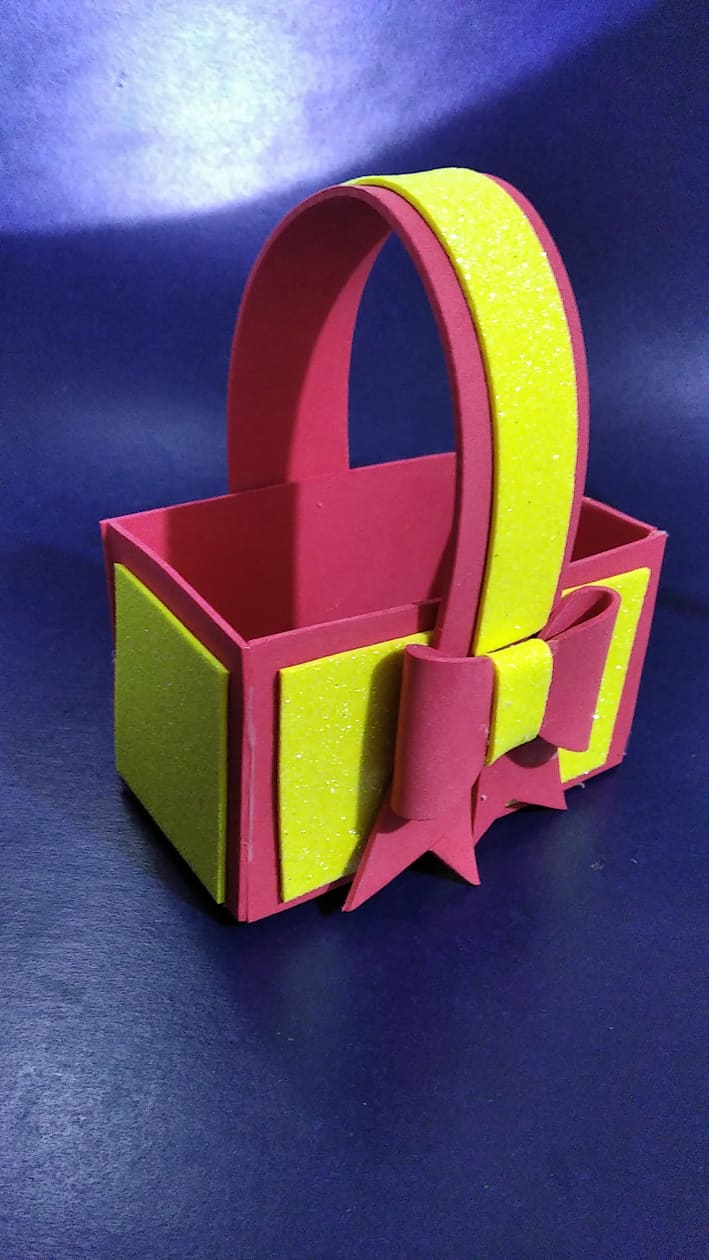
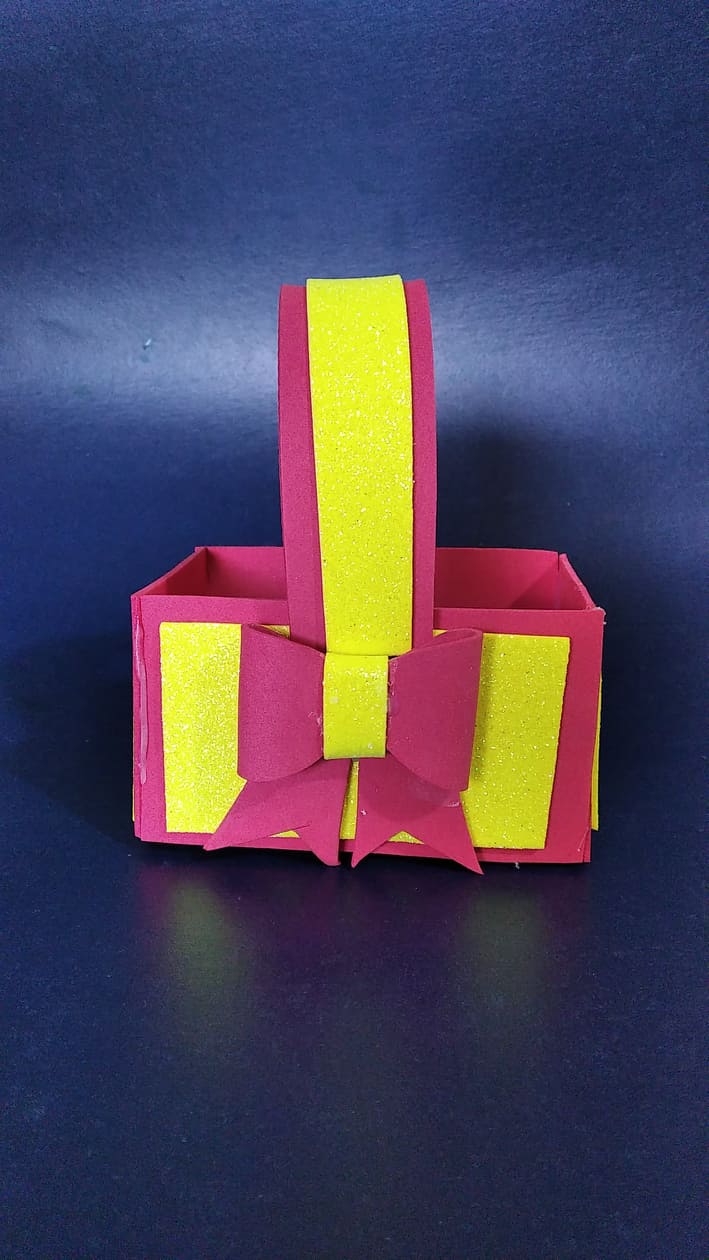
Casi finalizando pegamos la tira que va a sostener la canasta después se pega el lazo y de esta forma quedo mi linda Canasta para dulces la cual usare para compartir con mis amigos. Gracias por leerme espero lo pongan en práctica es muy hermosa y fácil de hacer
Almost finished we glued the strip that will hold the basket then glue the ribbon and this way I got my nice basket for candy which I will use to share with my friends. Thanks for reading I hope you put it into practice it is very beautiful and easy to make.
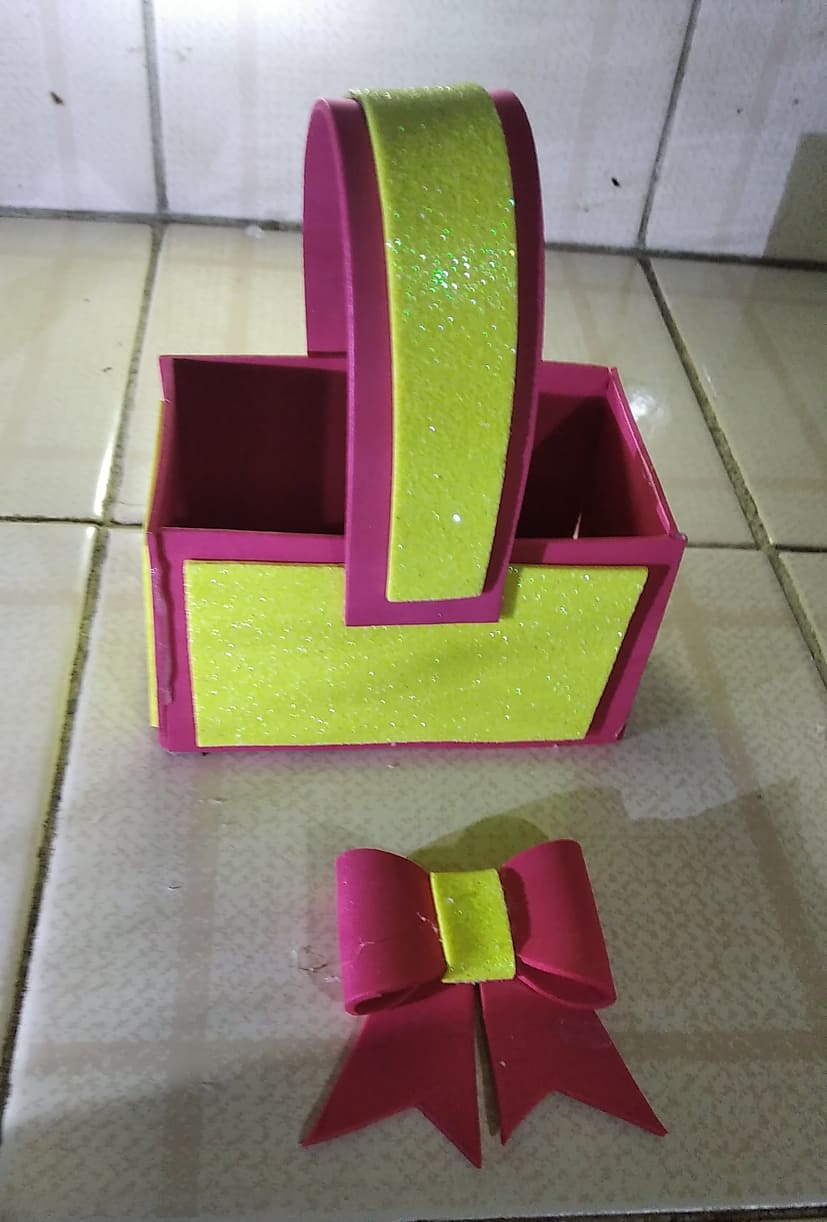
RESULTADO FINAL DE MI PROYECTO/FINAL RESULT OF MY PROJECT

Las fotos son de mi autoría y fueron tomadas con mi celular Redmi7
_ Traducido con www.DeepL.com/Translator (versión gratuita)
Edite las fotos con PowerPoint
The photos are my own and were taken with my Redmi7 cell phone_
Translated with www.DeepL.com/Translator (free version)
Edit the photos with PowerPoint
Lovely creation, This is so awesome, you've done a great job.
Thank you friend for your comment, greetings
You're welcome.
Guao amiga muy lindo de verdad, me diste una gran idea. Gracias por compartir