How are you dear community! How have you been? I hope you have a happy day.
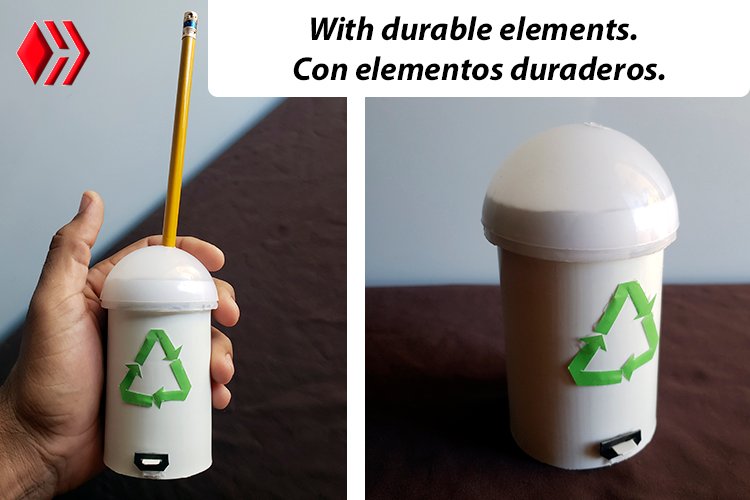
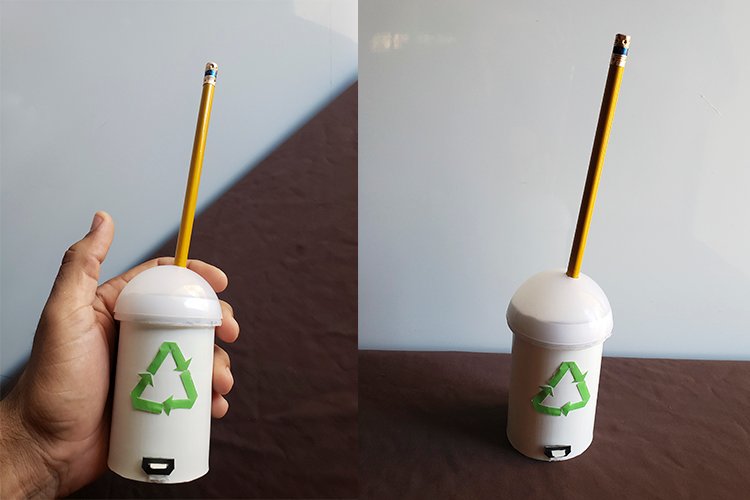
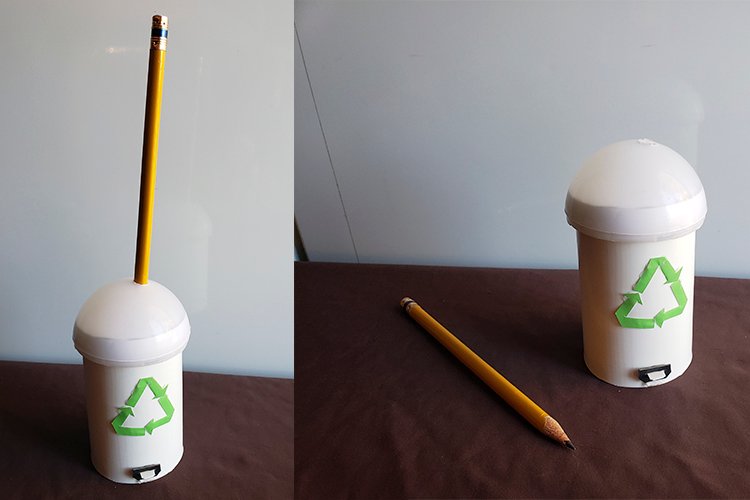
I bring you in this opportunity how we can create a container for an iron pencil sharpener.
This complement is very useful when working with your pencils and colors, very practical and the best thing is that we can customize it as we want.
For the preparation of this container use 1 small can of peas, a small mayonnaise lid, a saving light bulb lid, black and white flexible plastic.
I had needed this accessory for my containerless pencil sharpener for a long time, and it has been very useful and comfortable when it comes to sharpening keeping your workspace clean without the dirt of graphite and shavings.
I hope you like my step by step let's get started!
Materials:
• Iron pencil sharpener without deposit.
• 1 can of peas; We use the container that we have on hand, in my case I only had this can that I wrapped with a white flexible plastic to give it the trash can finish.
• 1 plastic lid; It has to fit with the container, in this lid we will adapt the pencil sharpener with tank glue or silicone.
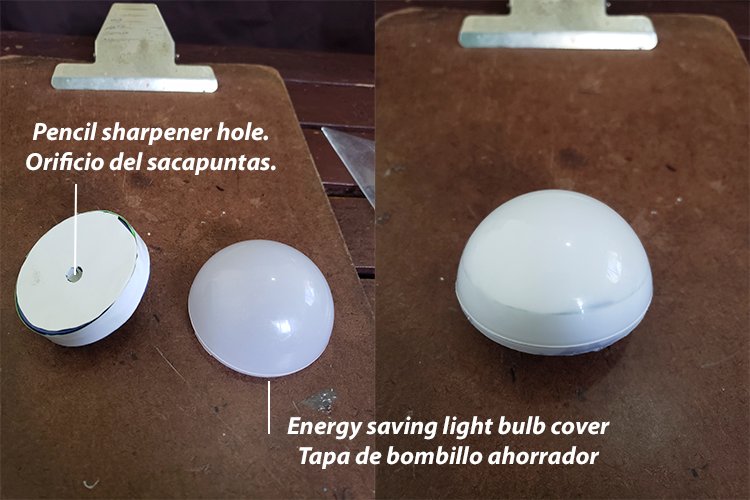
• 1 saving light bulb cover; this gives it the characteristic shape of a small trash can.
• Black and white flexible plastic; We can get this in food or cleaning containers, it is easy to cut and model.
Tools:
• Pencil, eraser, square and notebook.
• Scissor.
• Silicone.
• Razor.
• Compass.
¡Qué tal querida comunidad!, ¿cómo han estado? Espero tengan un feliz día.
Les traigo en esta oportunidad como podemos crear un contenedor para un sacapuntas de hierro.
Este complemento es de gran utilidad a la hora de trabajar con tus lápices y colores muy práctico y lo mejor es que podemos personalizarlo como queramos.
Para la elaboración de este contenedor utilice una lata pequeña de guisantes, una tapa de mayonesa pequeña, una tapa de bombillo ahorrador, plástico flexible blanco y negro.
Tenía tiempo que necesitaba este complemento para mi sacapuntas sin contenedor, y me ha resultado de gran utilidad y comodidad a la hora de sacar puntas manteniendo tu espacio de trabajo limpio sin la suciedad del grafito y virutas.
¡Espero les guste mi paso a paso comencemos!
Materiales:
• Sacapuntas de hierro sin deposito.
• 1 lata de guisantes; utilizamos el contenedor que tengamos a mano, en mi caso solo tenía esta lata que envolví con un plástico flexible blanco para darle el acabado de papelera.
• 1 tapa plástica; tiene encajar con el recipiente, en esta tapa le adaptaremos el sacapuntas con pega tanque o silicón.
• 1 tapa de bombillo ahorrador; éste le da la forma característica de una papelera pequeña.
• Plástico flexible blanco y negro; esta la podemos conseguir en los recipientes de comida o de limpieza, es fácil de cortar y modelar.
Herramientas:
• Lápiz, borrador, escuadra y libreta.
• Tijera.
• Silicón.
• Navaja.
• Compas.

Step 1
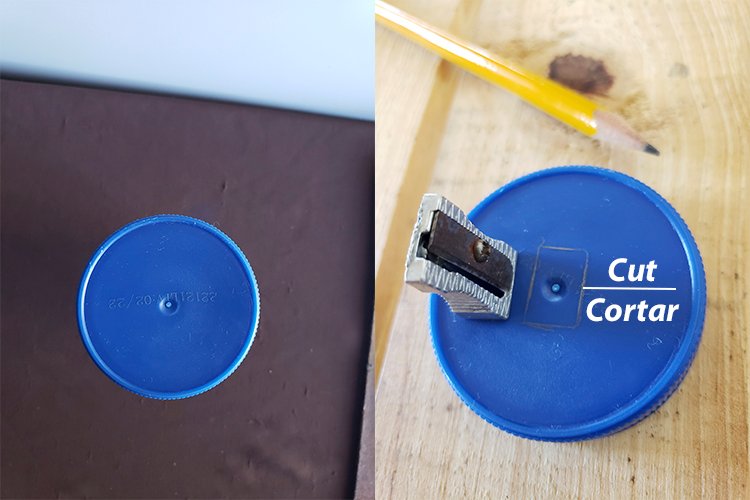
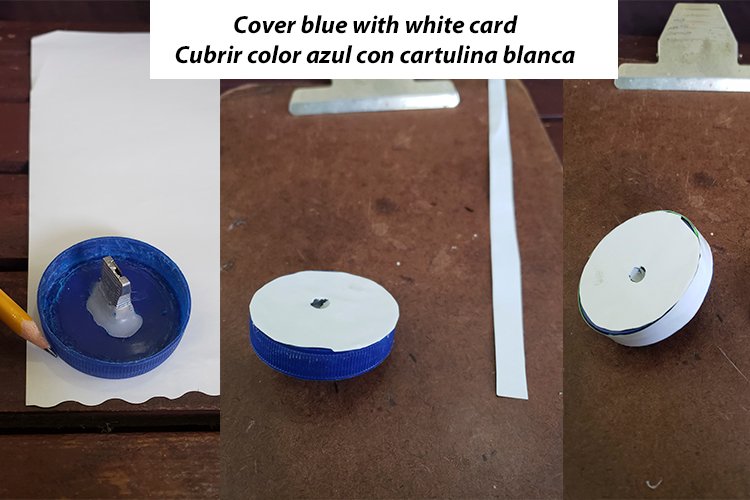
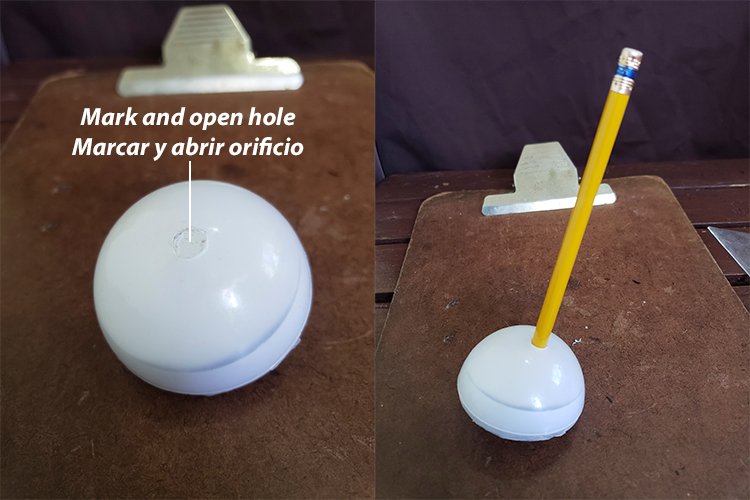
• We place the pencil sharpener on the surface of the lid and mark with a pencil.
• It is important to make the box marked with a fine point to give more precision to the cut, and to fit very tightly.
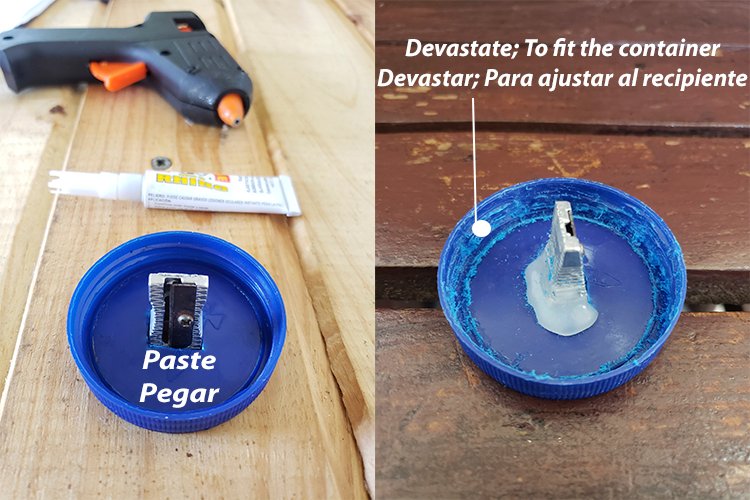
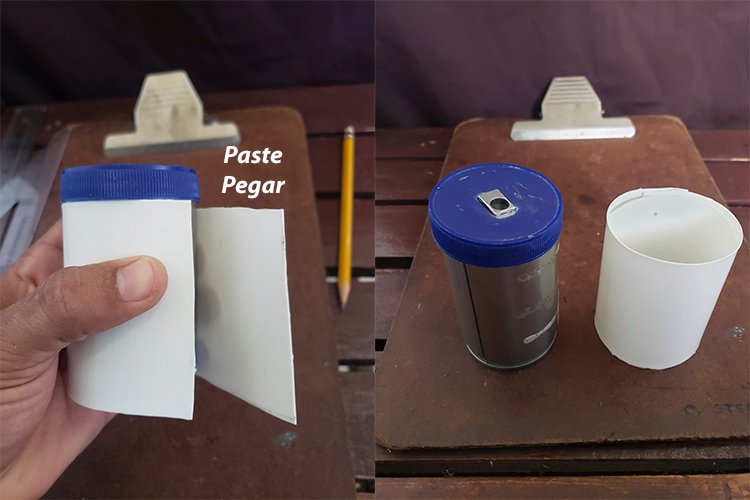
• We preferably stick with; paste tank or paste everything.
Paso 1
• Colocamos el sacapuntas en la superficie de la tapa y marcamos con un lápiz.
• Es importante hacer el recuadro marcado con una punta fina para darle mayor precisión al corte, y que entre muy ajustado.
• Pegamos preferiblemente con; pega tanque o pega todo.

PStep 2
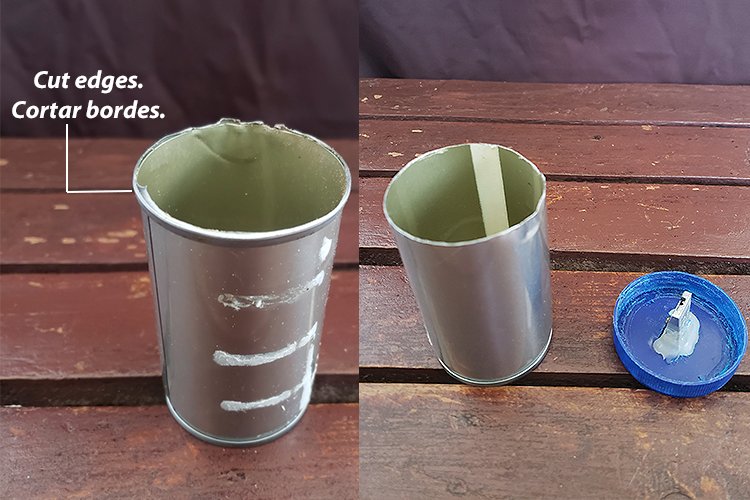
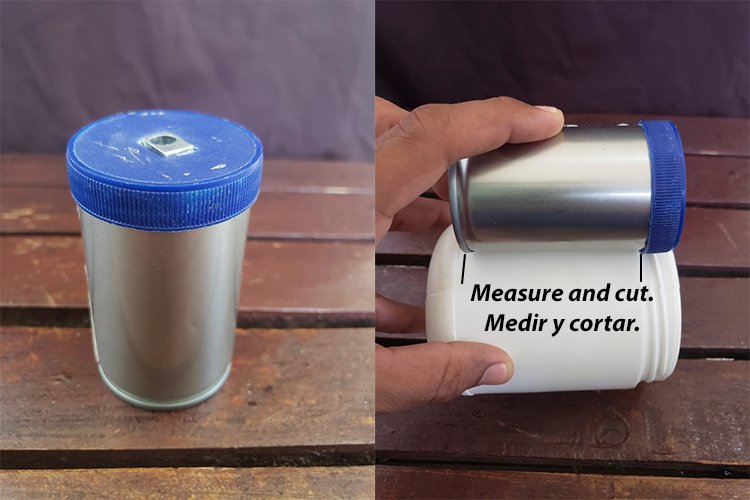
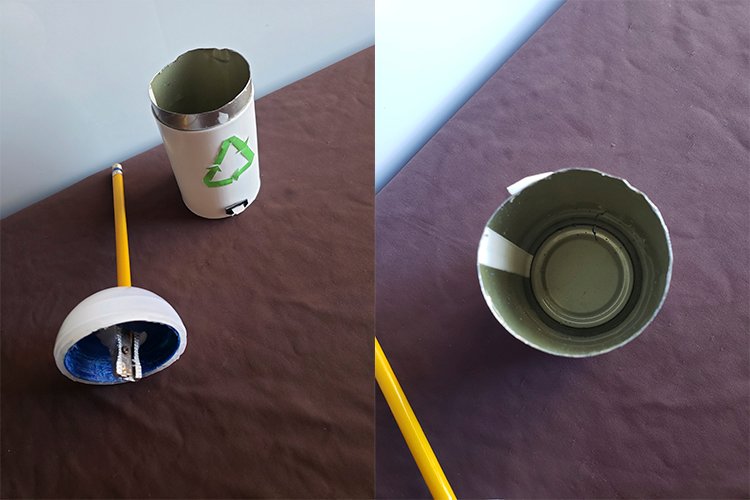
• Cut the edges of the can to fit the plastic lid.
• Then sand to remove the edge.
Paso 2
• Corté los bordes de la lata para hacer lograr que pudiera encajar la tapa plástica.
• Seguidamente lijar para eliminar el filo.
Step 3
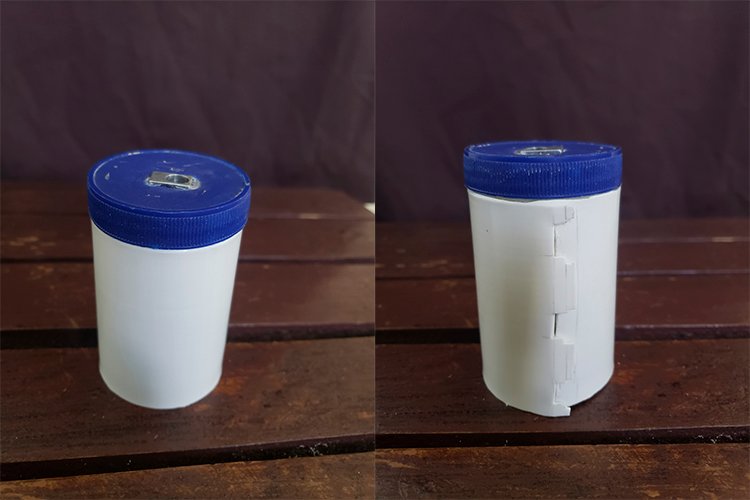
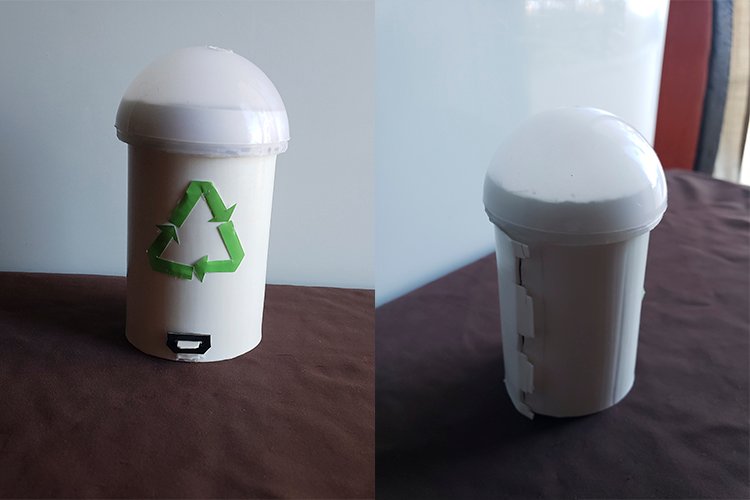
• We measure and cut the white plastic to give it the plastic finish of a trash can.
• Use white card stock to change the color of the blue cap, to highlight the white with the circular cap of the energy saving light bulb.
Paso 3
• Medimos y cortamos el plástico blanco para darle el acabado plástico de una papelera.
• Utilice cartulina blanca para cambiar el color de la tapa azul, para resaltar el blanco con la tapa circular del bombillo ahorrador.
Step 4
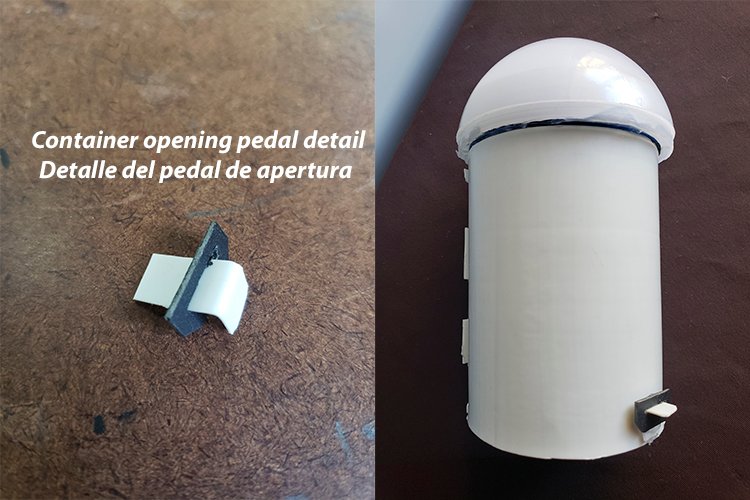
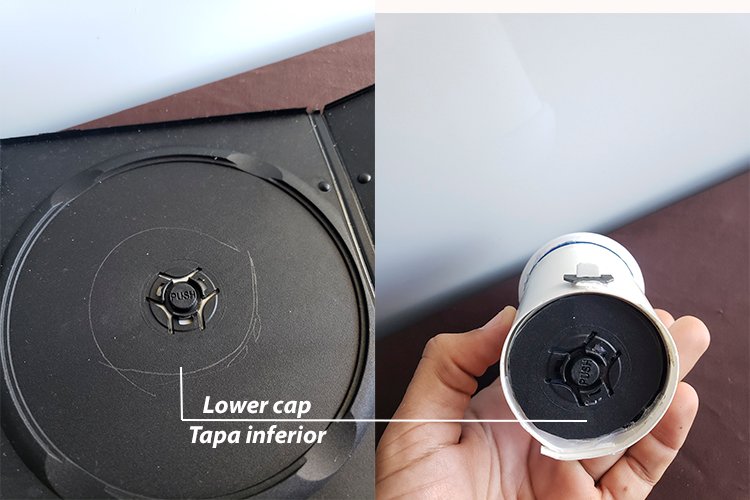
• Use flexible black and white plastic with the details of the trash can open pedal and the bottom cover.
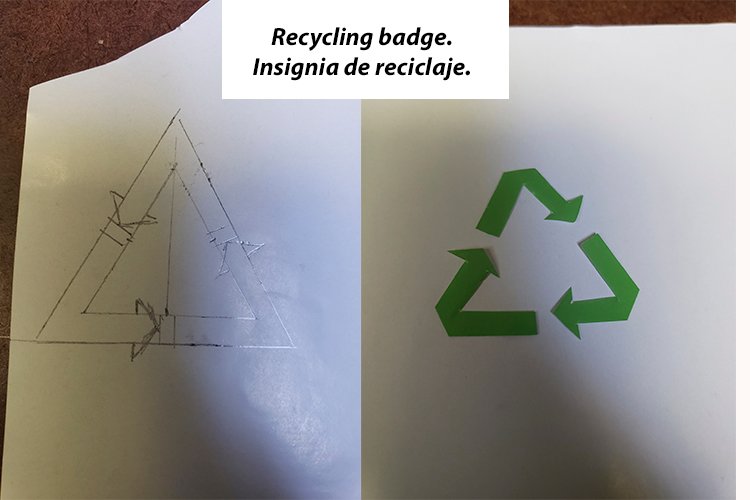
• For the green glossy paper recycling logo.
Paso 4
• Con los detalles del pedal de apertura de la papelera y la tapa inferior utilice plástico negro y blanco flexibles.
• Para el logo del reciclaje papel lustrillo verde.
Thankful for your time to browse my post, I hope the idea has been useful to you, always pleased to contribute, Greetings!
¡Agradecido por su tiempo de ojear mi post, espero le haya sido útil la idea, siempre complacido de aportar, Saludos!
Resource // Recursos
Teléfono Samsung A10
Edition // Edición
Photoshop S6
Translator // Traductor;
https://translate.google.com/?hl=es&sl=auto&tl=en&op=translate

Hola muy lindo trabajo me gusto mucho
Hola @Katiuscarub, me alegra que te haya gustado 👍
Congratulations @carlossteele! You have completed the following achievement on the Hive blockchain and have been rewarded with new badge(s):
Your next target is to reach 1250 upvotes.
You can view your badges on your board and compare yourself to others in the Ranking
If you no longer want to receive notifications, reply to this comment with the word
STOPTo support your work, I also upvoted your post!
Check out the last post from @hivebuzz:
Support the HiveBuzz project. Vote for our proposal!