Hola, amigos de Hive. Espero estén bien, muy bien. Cómo ya saben, ya vienen los días de regalar cosas a nuestros seres queridos, por ende un lindo detalle debe tener su buen envoltorio 🎁 así que hoy les traigo 5 ideas de bolsitas navideñas para hacer en casa y en familia🎅🏼🎄☃️
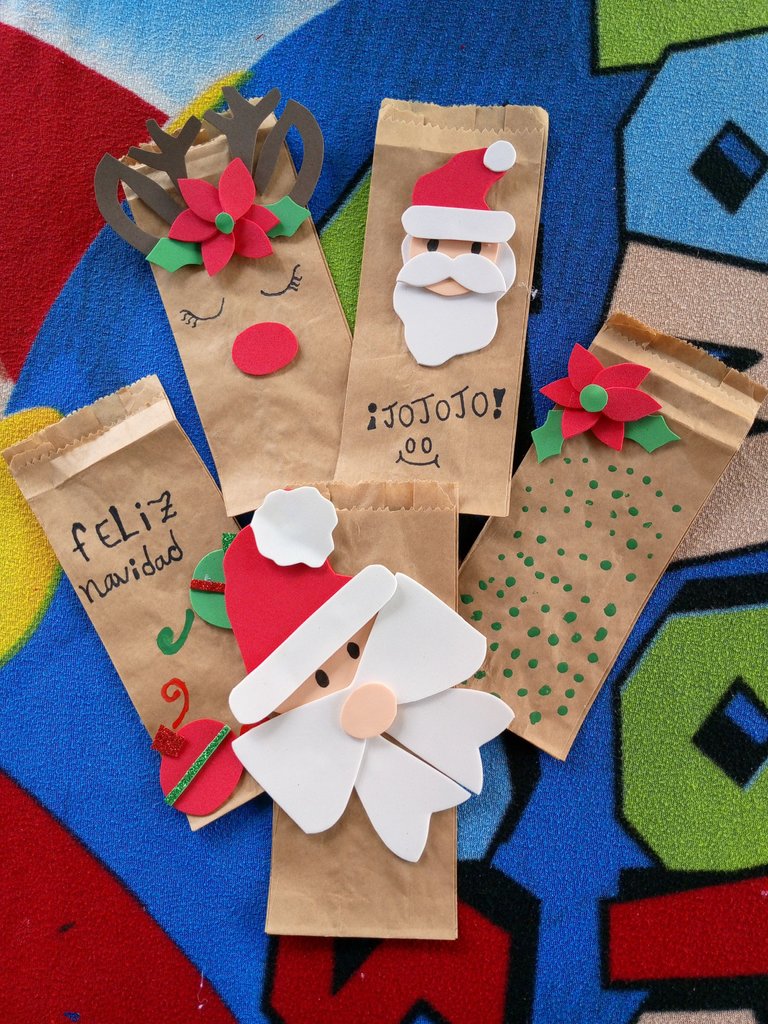
Estás bolsas navideñas la verdad están bastante sencillas pero bonitas, son las ideales para guardar unos bonitos regalos de pequeño tamaño o para llenarles de dulces variados.
Estás bolsas las elaboré con ayuda de mi mamá para regalar cosas a nuestros familiares 🗿👍, es una actividad que realizamos todos los años en familia. Mi mamá siempre disfruta de la navidad, por eso siempre prepara pequeños presentes a sus familiares y amistades cercanas. Ella dice que es una manera de agradecer por estar presentes en su año. Pero en vez de comprar las bolsas navideñas como habitualmente lo hacíamos, decidimos comprar las bolsas de papel craft y hacerlas completamente personalizadas 🎅🏼 para de esa forma hacerlas a nuestro gusto 😼
Pues bueno, sin más nada que decir. Empecemos con el tutorial.
Primero debemos contar con los siguientes materiales los cuales no son tantos.
Foami rojo
Foami verde
Foami marrón
Foami color piel
Foami blanco
Un marcador color negro
Pintura color verde
Pintura color rojo
Bolsas de papel craft
Tijera
Barra de silicon

Bueno, éstos serían nuestros materiales que debemos utilizar. Ahora sí, empecemos con la primera bolsita🎅🏼
Nuestra primera bolsa navideña será un reno de navidad.
Para esto necesitaremos cortar unas 2 orejitas color marrón, 1 naríz de color rojo, unos 6 pétalos color rojo, unos cachitos color marrón y unas hojitas🌿
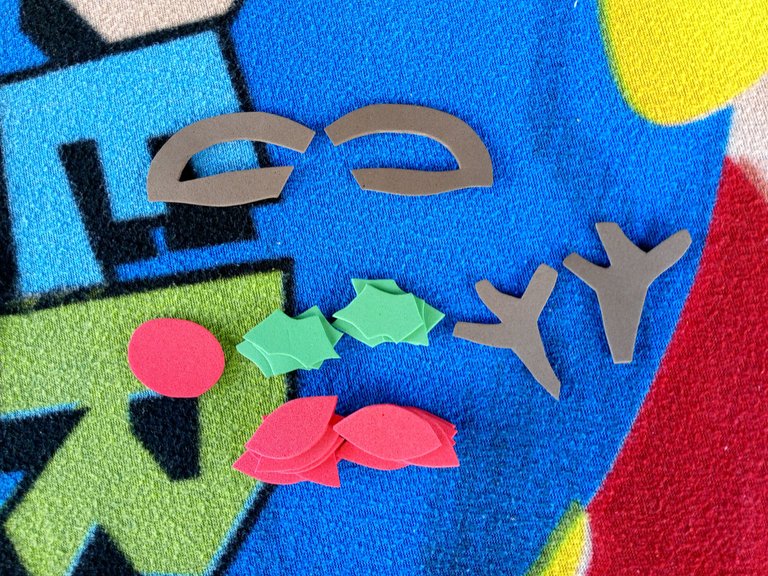
Luego haremos un doblez a la bolsa que es para dejar espacio de sellado, luego colocaremos cada parte en donde va, las orejas van en las esquinas superiores de la bolsa y los pétalos juntos con las hojas también en la parte superior (no en las esquinas) estos pétalos se usarán para realizar un flor.
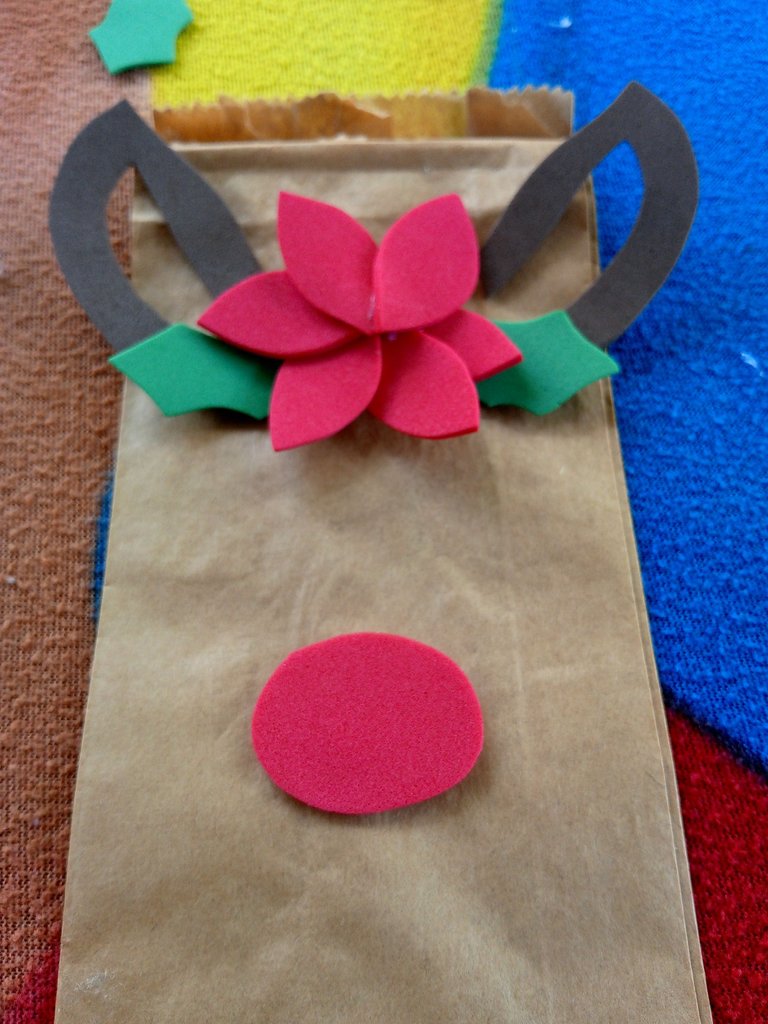
Ahora le colocaremos unos ojos dibujados ya sean con marcador, pintura de color negro o foami negro.

Resultado:
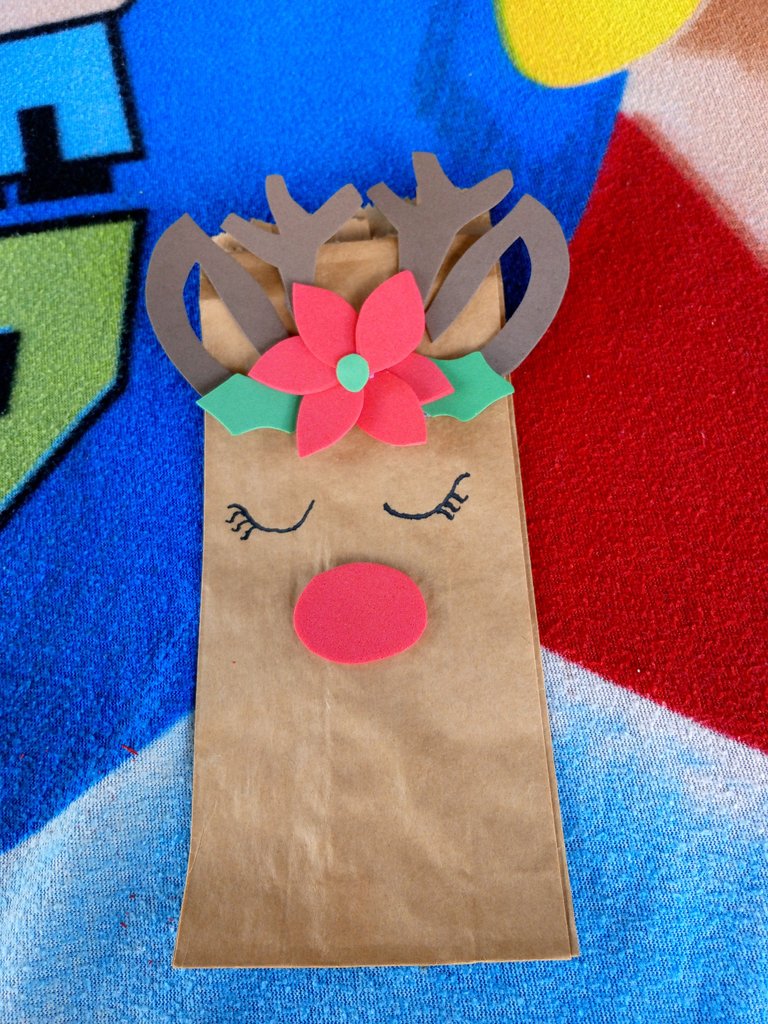
Y listo, terminamos con nuestra primera bolsita 😼 ¿Qué tal te quedó? ¡Ahora sigamos con la segunda bolsita de navidad!
Pará está segunda bolsa haremos unos 6 pétalos nuevamente, 2 hojitas y un círculo color verde. También ocuparemos pintura color verde.
Este diseño es bastante sencillo, a mí no me pareció el más bonito, sin embargo, seguro que a la persona que se lo regales le ¡encantará!
Primero. Haremos una flor como la que se realizó anteriormente, luego pintaremos puntitos de color verde por toda la bolsa 😼🟢
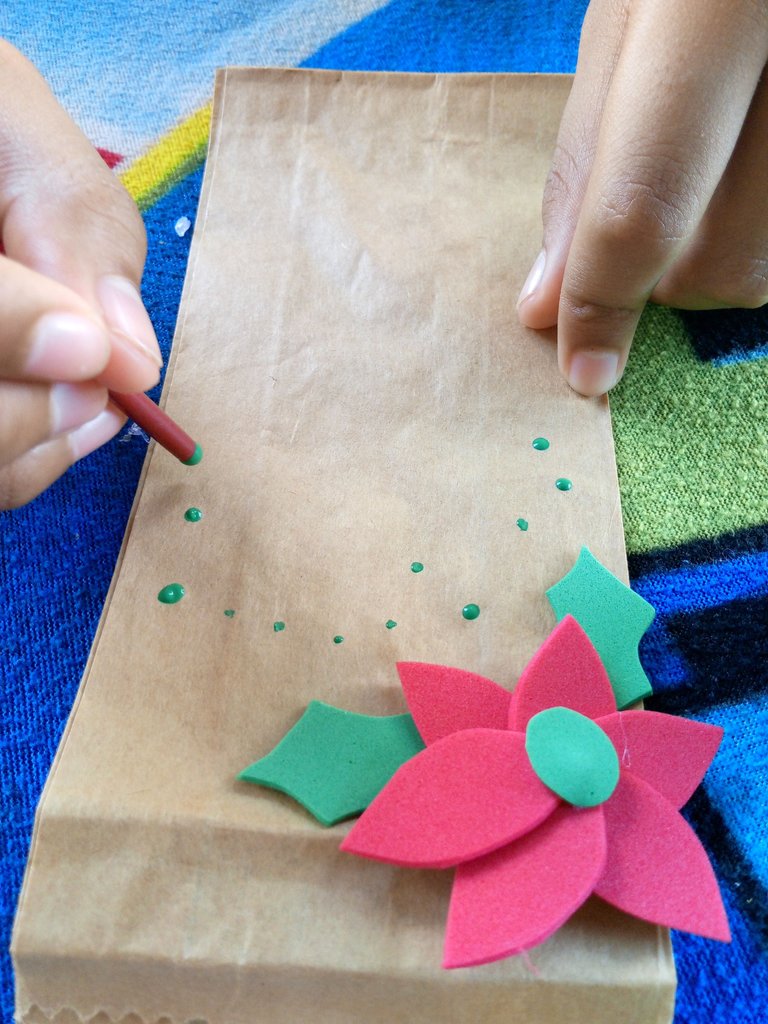
Resultado:

Ahora pasemos con la tercera bolsa 👍
Para hacer esta bolsa, primero debemos hacer dos círculos un poco grandes de color verde y otra de color rojo. Ahora haremos un cuadrito verde y otro de color rojo, para luego pegarlos en la parte superior del círculo antes hecho, luego de eso haremos una tira de color verde y una roja seguido de esto. La verde se la pegaremos en medio del círculo rojo y la roja se la pegaremos en el círculo verde

Ahora lo juntaremos todo con la bolsa y pintaremos con pintura verde y roja unas rayas un poco curvadas. Luego escribiremos “Feliz Navidad"
Resultado:

Ahora pasemos con el cuarto diseño de bolsita😺
Para hacer esta otra bolsa necesitaremos foami blanco para hacer la barba, el bigote y una tira color blanco. Luego haremos un gorro de navidad color rojo y tomaremos el foami color piel y haremos su cara.

Ahora juntaremos todo y le haremos unos ojos ya sea con pintura, marcador o foami color negro.
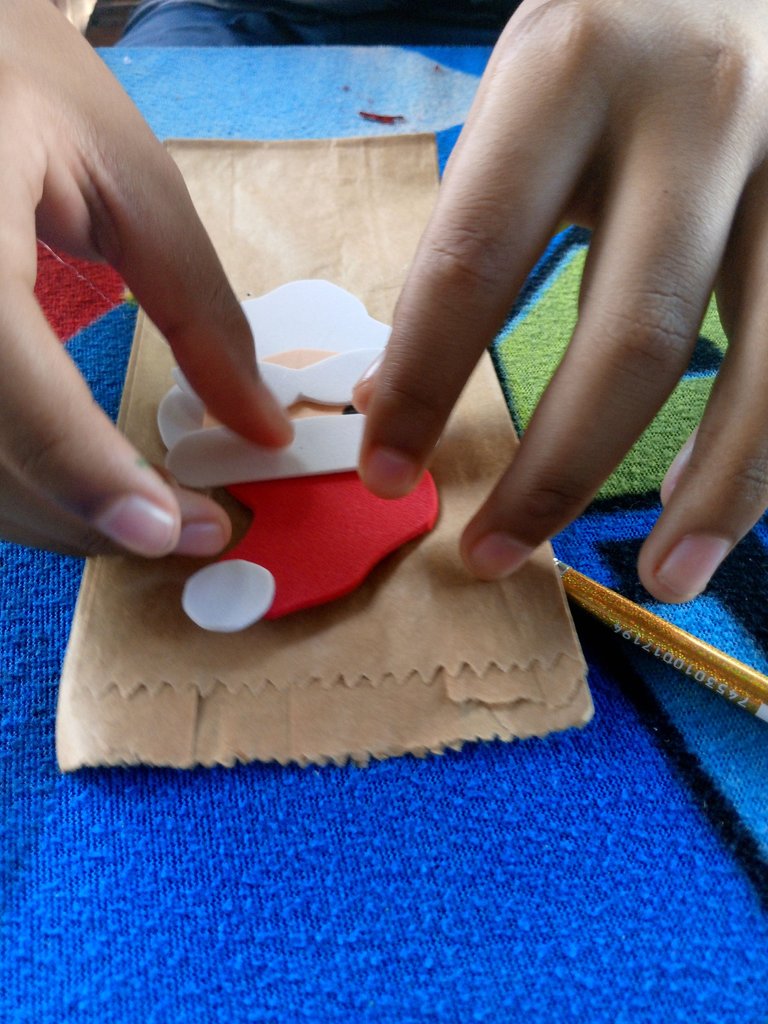
Ya juntado todo. Pegaremos con una barra de silicona y escribiremos dentro de signos de exclamaciones ¡Jo Jo Jo! Juntó con una carita felíz al final θ‿θ
Resultado:
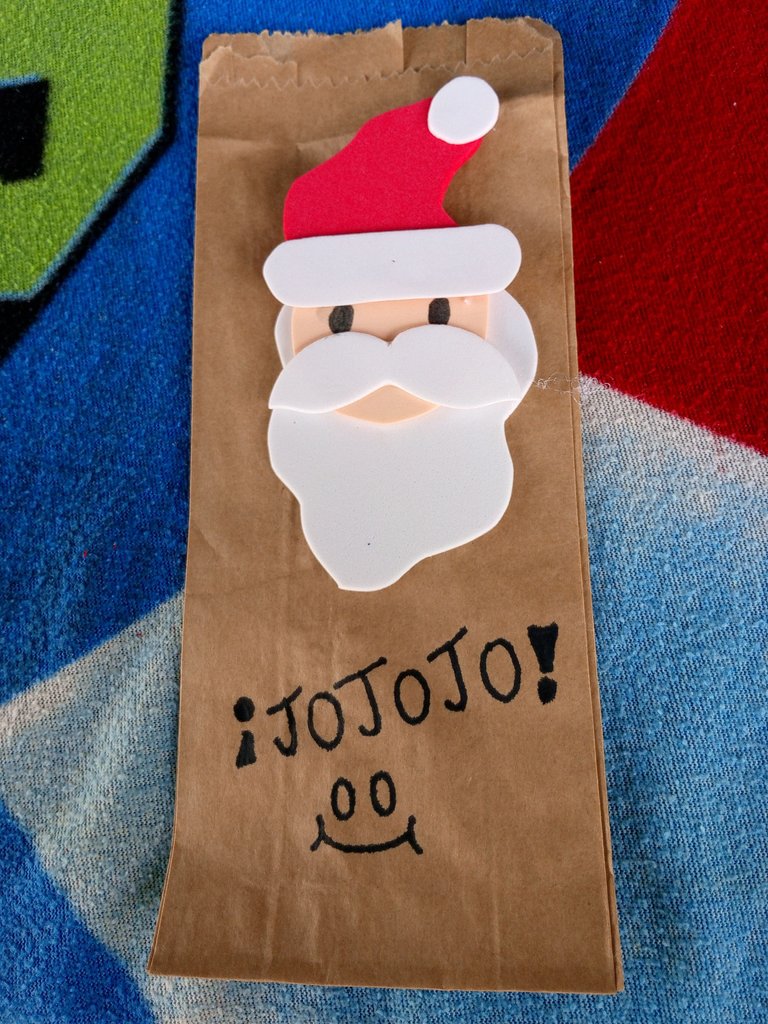
Ahora sigamos con la próxima bolsita:
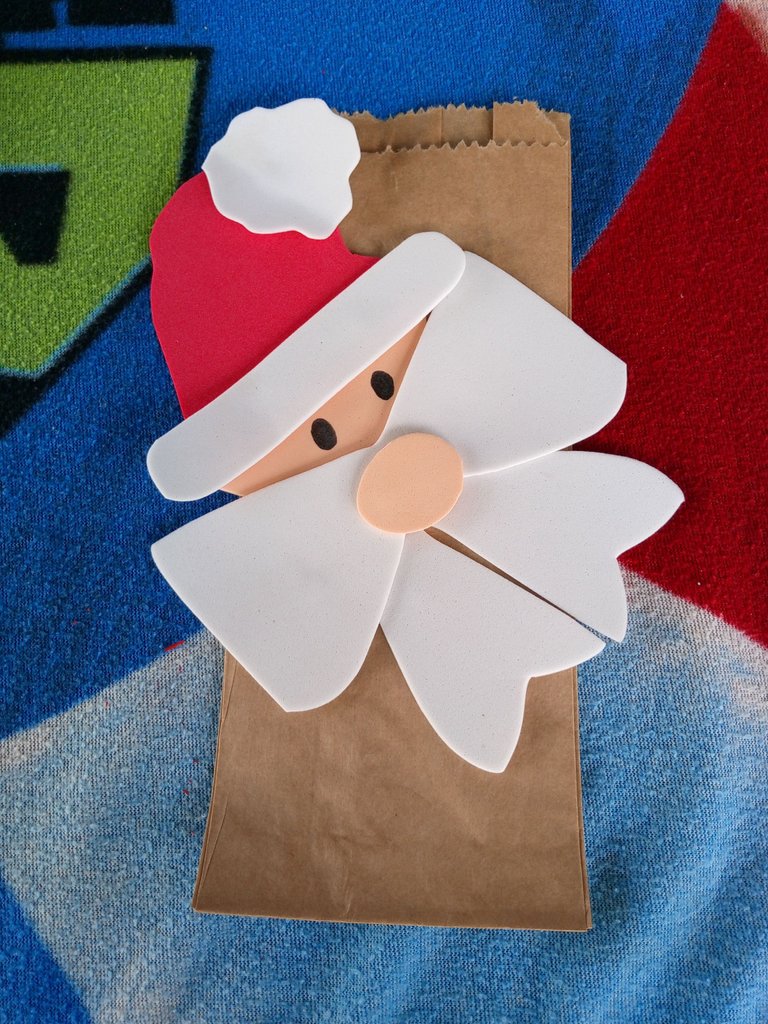
Empezamos cortando unos bigotes con forma de moño al igual que su barba, luego haremos su cara y haremos su gorro junto con el círculo blanco que tiene el gorro y haremos una nariz de foami color piel.

Luego juntaremos todo con una barra de silicona (nuevamente) y haremos unos ojos de color negro ya sean con foami o con pintura.
Resultado:
Pues bueno, ya he llegado hasta el final. ¿Recuerdan el Grinch que les dije que realizaría? Pues bueno, estoy manos a la obra preparándolo, no lo he mostrado en una publicación aún es porque es una manualidad bastante bien elaborada, por ello me estoy tomando mi tiempo para prepararlo para ustedes. Les prometo que en cuanto esté listo se los traeré. Empecé a realizar el Grinch de forma más difícil debido a que elegí otro aún más encantador y bonito para la decoración de nuestras casas.
Bueno. Muchas gracias a todos por leer, si llegaste hasta aquí, te doy las gracias por haber leído mi post. Me despido y feliz navidad a todos jojojo 🎅🏼🎄☃️
English Versión:
Hello Hive friends. I hope you are well, very well. As you already know, the days of giving things to our loved ones are coming, therefore a nice detail must have a good packaging 🎁 so today I bring you 5 ideas for Christmas bags to make at home and with your family🎅🏼🎄☃️

These Christmas bags are actually quite simple but pretty, they are ideal for storing nice small gifts or for filling them with various sweets.
I made these bags with the help of my mother to give things to our relatives 🗿👍, it is an activity that we do every year as a family. My mom always enjoys Christmas, that's why she always prepares small presents for her family and close friends. She says it's a way to thank them for being present in her year. But instead of buying the Christmas bags as we usually did, we decided to buy the craft paper bags and make them completely personalized 🎅🏼 so that we could make them to our liking 😼
Well, nothing more to say. Let's start with the tutorial.
First we must have the following materials which are not that many.
Red foam
Green foam
Brown foam
Skin-colored foam
White foam
A black marker
Green paint
Red paint
Craft paper bags
Scissors
silicone bar

Well, these would be our materials that we must use. Now, let's start with the first bag🎅🏼
Our first Christmas bag will be a Christmas reindeer.
For this we will need to cut about 2 brown ears, 1 red nose, about 6 red petals, some brown pieces and some leaves🌿

Then we will fold the bag to leave sealing space, then we will place each part where it goes, the ears go in the upper corners of the bag and the petals together with the leaves also in the upper part (not in the corners ) these petals will be used to make a flower.

Now we will add some eyes drawn either with marker, black paint or black foam.

Result:

And that's it, we finished with our first bag 😼 How did it turn out for you? Now let's continue with the second Christmas bag!
For this second bag we will make about 6 petals again, 2 leaves and a green circle. We will also use green paint.
This design is quite simple, I didn't think it was the prettiest, however, I'm sure the person you give it to will love it!
First. We will make a flower like the one made previously, then we will paint green dots all over the bag 😼🟢

Result:

Now let's move on to the third bag 👍
To make this bag, first we must make two slightly large circles in green and another in red. Now we will make a green and a red square, and then glue them on top of the circle made before, after that we will make a green and a red strip followed by this. We will stick the green one in the middle of the red circle and we will stick the red one in the green circle

Now we will put everything together with the bag and paint some slightly curved stripes with green and red paint. Then we will write "Merry Christmas"
Result:

Now let's move on to the fourth bag design😺
To make this other bag we will need white foam to make the beard, the mustache and a white strip. Then we will make a red Christmas hat and we will take the skin-colored foam and make its face.

Now we will put everything together and make eyes with either paint, marker or black foam.

Everything has already been put together. We will glue with a silicone bar and write inside exclamation marks: Ho Ho Ho! It came together with a happy face at the end θ‿θ
Result:

Now let's continue with the next bag:
We start by cutting some bun-shaped mustaches like his beard, then we will make his face and make his hat along with the white circle that the hat has and we will make a skin-colored foam nose.

Then we will put everything together with a silicone bar (again) and make black eyes either with foam or paint.
Result:

Well, I've already reached the end. Remember the Grinch I told you I would make? Well, I'm getting to work preparing it, I haven't shown it in a publication yet, it's because it's a fairly well-made craft, that's why I'm taking my time to prepare it for you. I promise you that as soon as it's ready I'll bring it to you. I began to make the Grinch in a more difficult way because I chose another one that was even more charming and beautiful for the decoration of our houses.
Well. Thank you all very much for reading, if you made it this far, I thank you for reading my post. I say goodbye and Merry Christmas to everyone jojojo 🎅🏼🎄☃️
Estas bonitas y tienen un toque único, la verdad es que están muy bien hechas. Excelente trabajo.
Gracias, la verdad están bastante bonitas y muy personalizables😼
Me encanta tu propuesta para decorar las bolsas para Navidad 🎄
Se ven lindas, divertidas y acordes a la temporada. Muchas gracias por compartir tu creación ☺️
De nada, es un placer compartir lo que sé con los demás 😺
Están hermosas, una excelente idea para las bolsas navideñas de este año 👍
Si, bastante🎅🏼
Congratulations @carlpia! You have completed the following achievement on the Hive blockchain And have been rewarded with New badge(s)
Your next target is to reach 900 upvotes.
You can view your badges on your board and compare yourself to others in the Ranking
If you no longer want to receive notifications, reply to this comment with the word
STOPCheck out our last posts:
Unas bolsitas muy bien decoradas para dar esos lindos regalos en navidad. Me encantan.
!discovery 30
Gracias🫂
This post was shared and voted inside the discord by the curators team of discovery-it
Join our Community and follow our Curation Trail
Discovery-it is also a Witness, vote for us here
Delegate to us for passive income. Check our 80% fee-back Program
Gracias 🫂
Excelente