
English
Hiii, friends of the HiveDiy community, how are you today? I hope you're doing great!
I've already shared with you a couple of tutorials for making bows, and maybe this post would have been about that, if it wasn't for the fact that, among my sewing stuff, I saw an elastic ribbon.
So I thought: you know what I could make with an elastic ribbon? A headband, but this is not just any headband, but one that I had never seen before, only in drawings: a ruffled headband.
Yes, this is another post about sewing, because I really like it. So let's grab our fabric, thread, needle, and here we go!
Materials
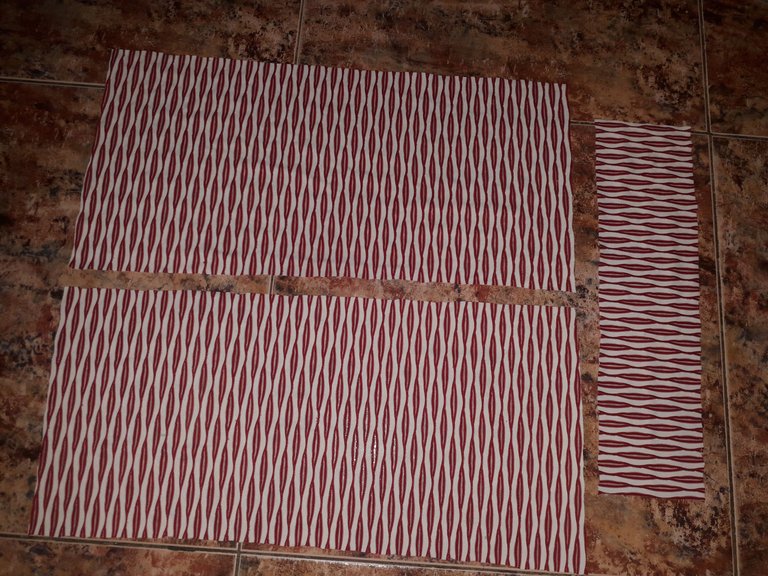
- 2 rectangles of the fabric of your choice 47 x 20 cm.
- 1 rectangle of the fabric of your choice 35 x 8 cm.
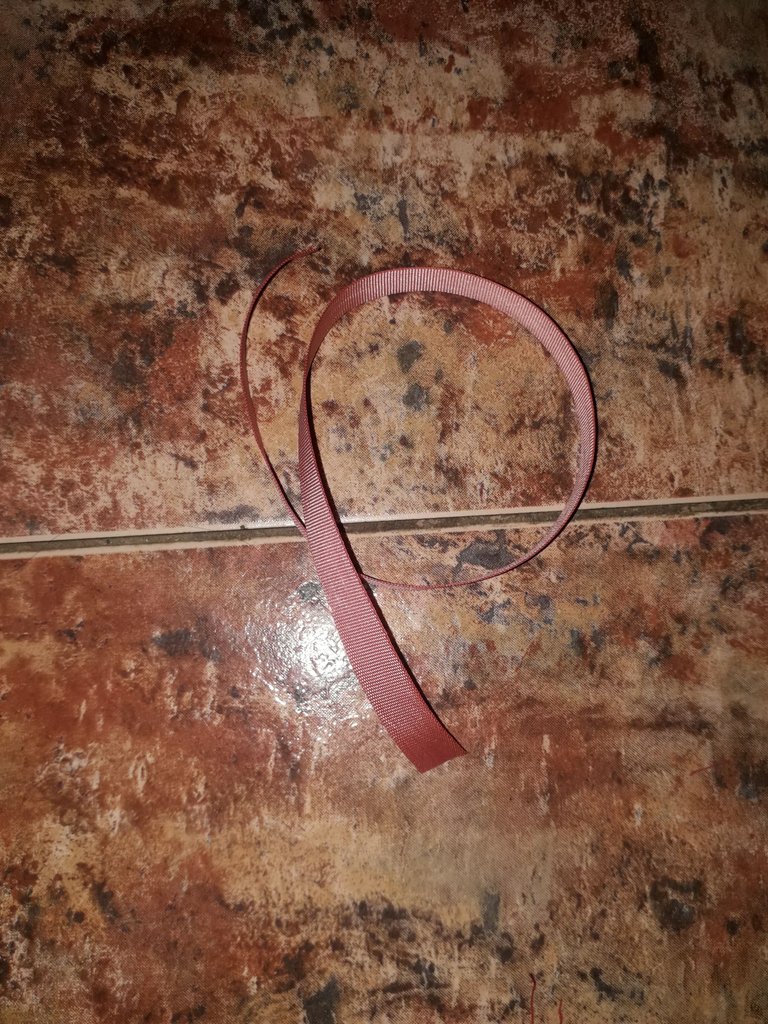
- 1 ribbon of 40 x 3 cm.
- 1 elastic ribbon of 18 cm.
- Thread of the color of your choice.
- Needle.
- Pins to hold the fabric (if you don't have them, you can use needles).
- 1 safety pin hook.
 |  |
|---|
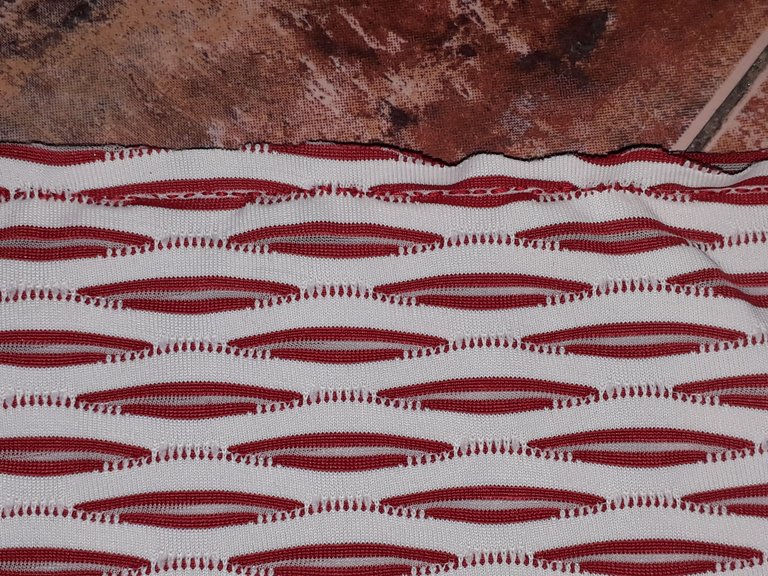
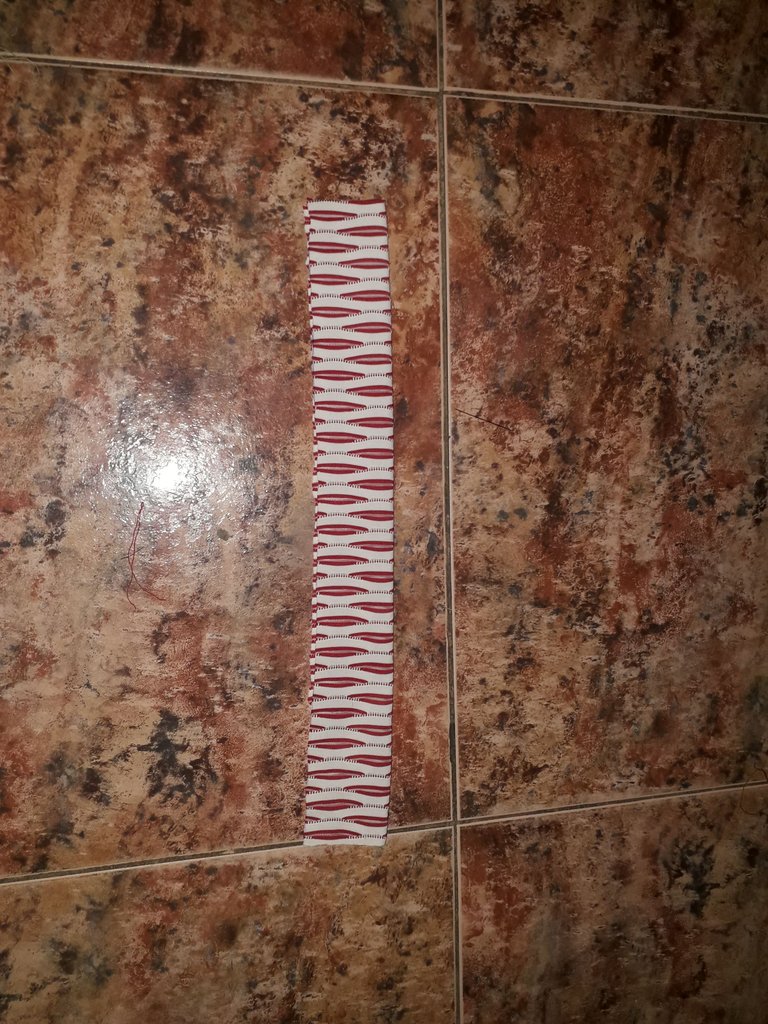
First I want to show you this cute fabric, I love its patterns, it reminds me of mints. I really like this fabric because it is “sliding”, but you can use absolutely any fabric you want, the only thing I would change is the finish of the headband, obviously. If you use “stiffer” fabrics the finish will look stiffer. Even so, I think this is a positive point of the headbands, and of this one in general, that it doesn't matter what fabric you use.
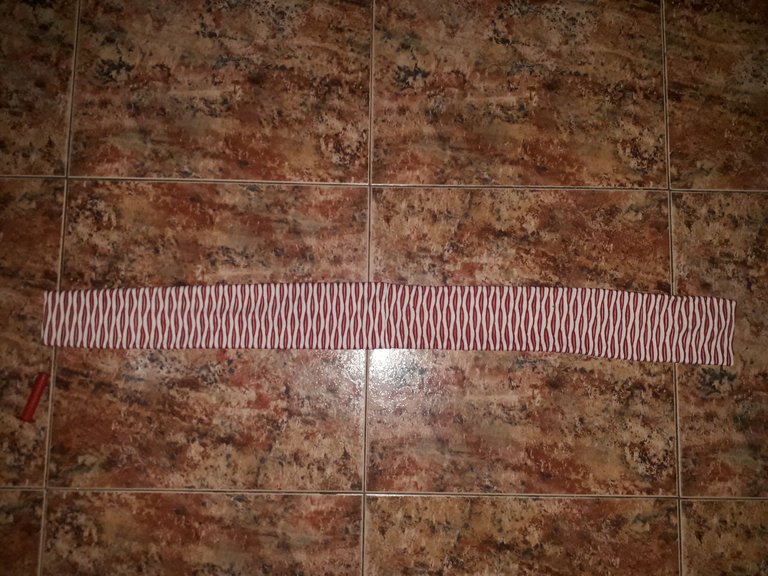
These are the little pieces of fabric we are going to use, it looks huge.
 |  |
|---|
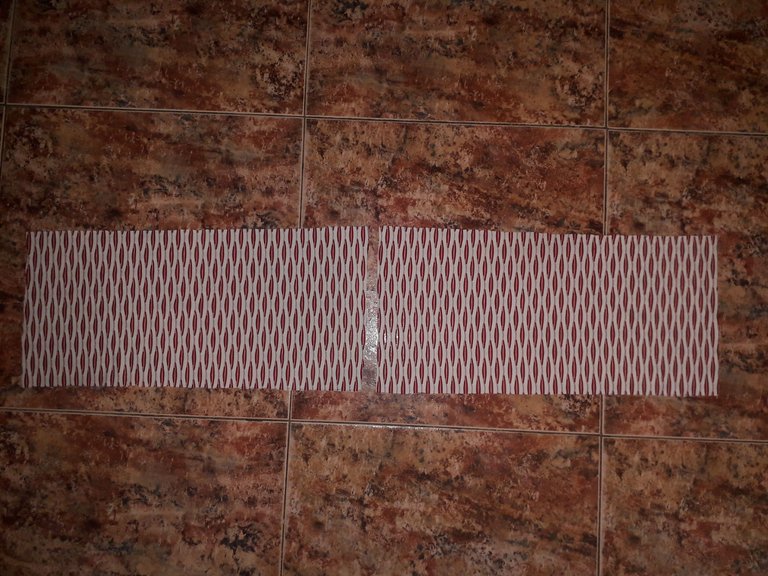
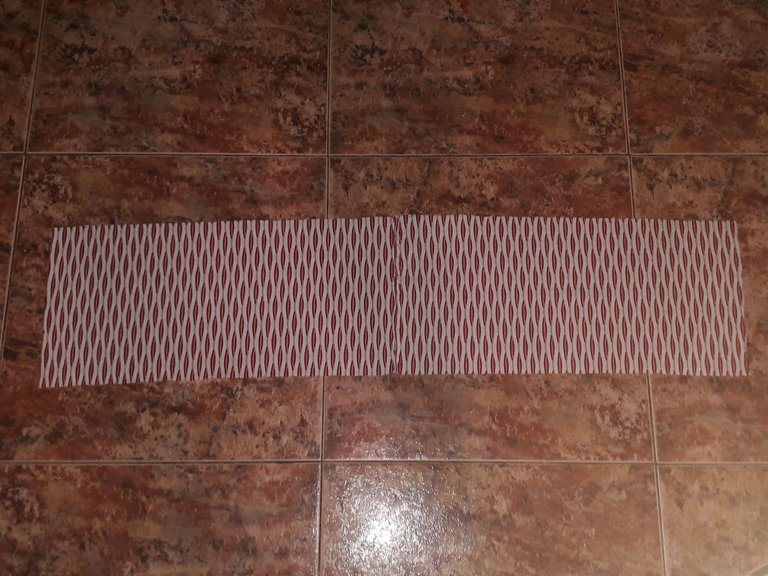
The first step is to take the two rectangles of fabric and join them in this way, so that we have a fairly long (or wide) piece of fabric. That is to say, by joining the two, we will have a piece of fabric that will measure 94 x 20 cm approximately.
Well, I was making this little striped seam, very carefully so that it would be straight. Remember to make the seam with both sides of the fabric upside down, so that when we turn it over, the seam will be facing inwards.
 |  |
|---|
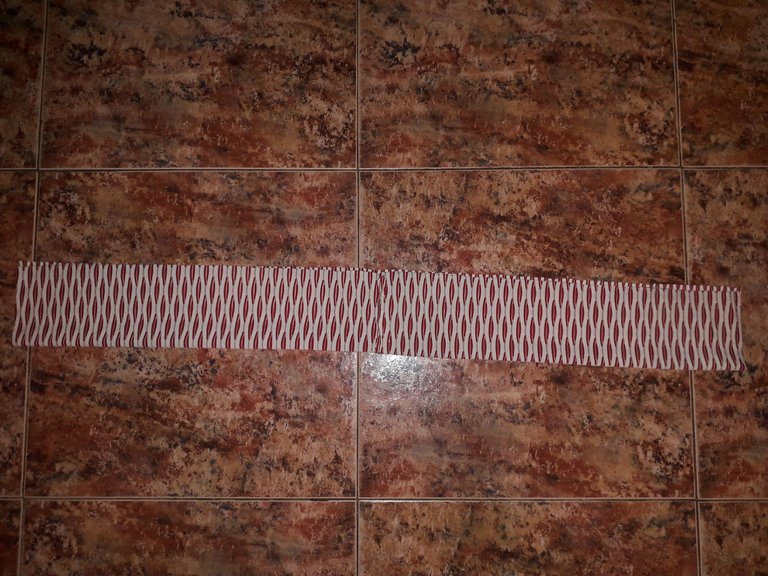
Once the fabric is tied, we are going to fold it in half, so that we have a measure of 94 x 10 cm approximately. And now we are going to put needles or pins along the fabric, so that it does not move when sewing.
 |  |
|---|
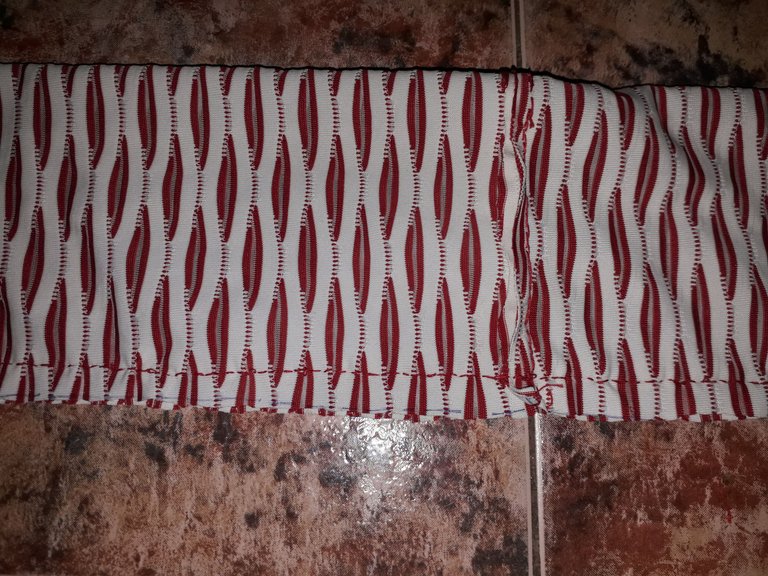
Carefully sew the fabric along the entire length, in this horizontal way. I sewed this little “stripes” seam, leaving 1 cm of distance from the edge, hehe. I'm sorry for not being very knowledgeable about sewing terms, I just do what I think is best and that's it; speaking of “best I think”, I sewed this twice so that it would be well fixed. Remember, I hand sew all that stuff.
After that, I flipped the fabric over, so that the seam would be on the inside. And that was it.
 |  Edited in Canva Edited in Canva |
|---|
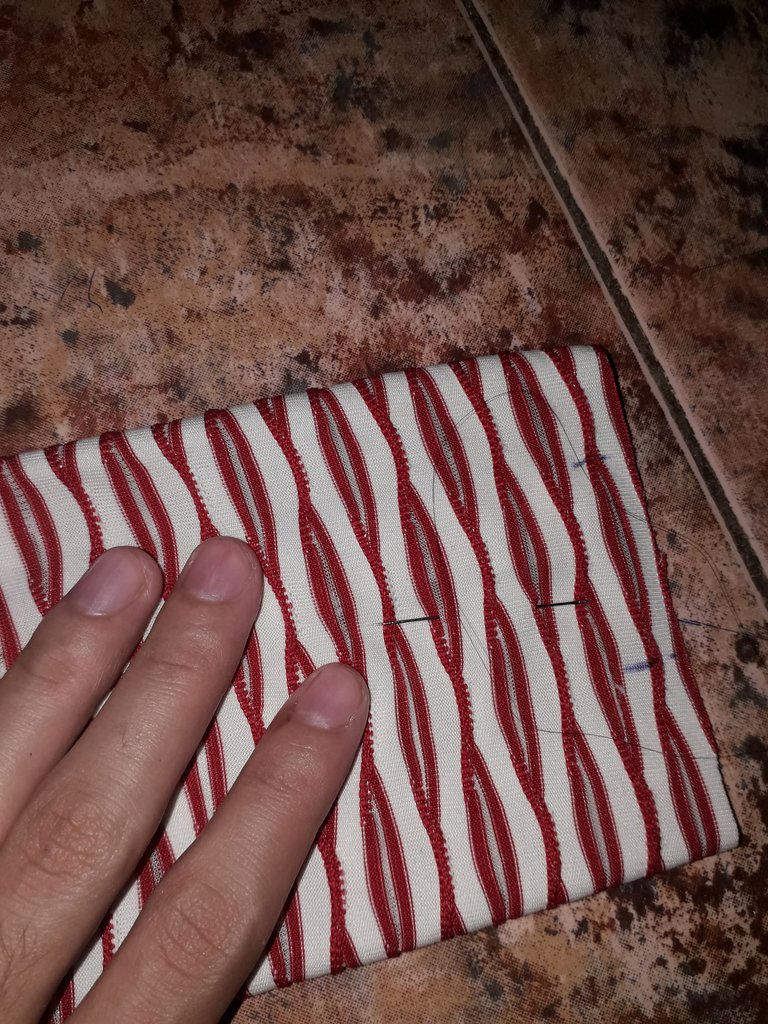
Now, we are going to leave the seam of the fabric in the center of the back of the fabric, if am I making myself clear? A very big problem I had with this, is that the fabric does not “grab” iron; that is, no matter how much I iron it, it does not fix, because it is too “slippery”.
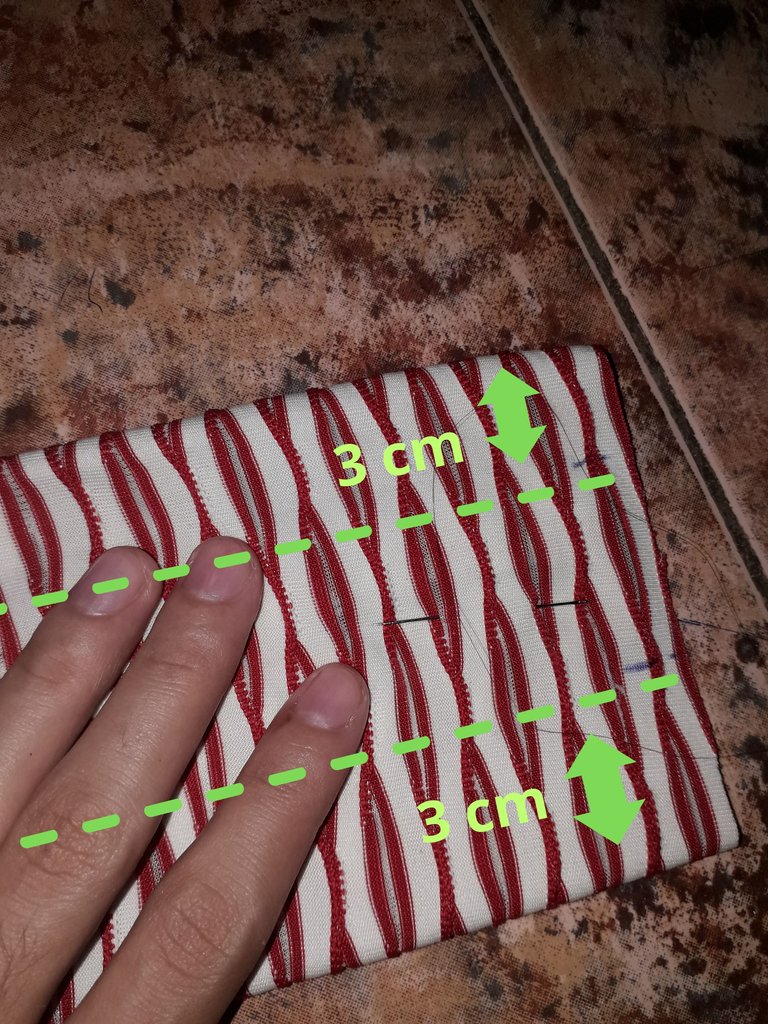
So, what I did was to take needles to fix the fabric, so that it doesn't move while I sew it. We are going to make two seams that run along the 94 cm of fabric. Each seam should be 3 cm apart from each edge. In the image on the right I leave an example.
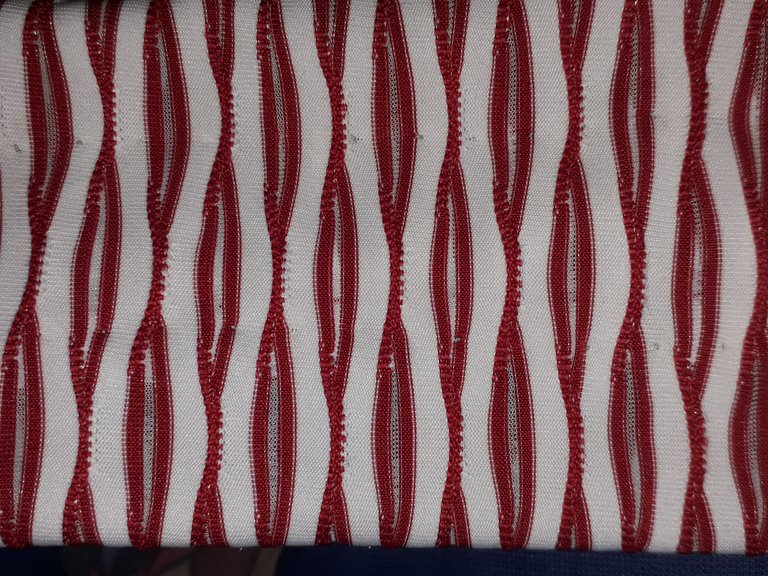
I made a stitch seam, or rather here it looks like an invisible seam, hahaha. The important thing is that the seam was not so visible, remember that this is the top of our headband, so make sure that it is a nice seam. At this point I was trying very hard to get the seam straight, and it took me a long time because it was a long way to go, but I did it.
So as not to confuse you with the explanation, I'm going to call this 94 x 10 cm piece of fabric piece 1.
 |  |
|---|
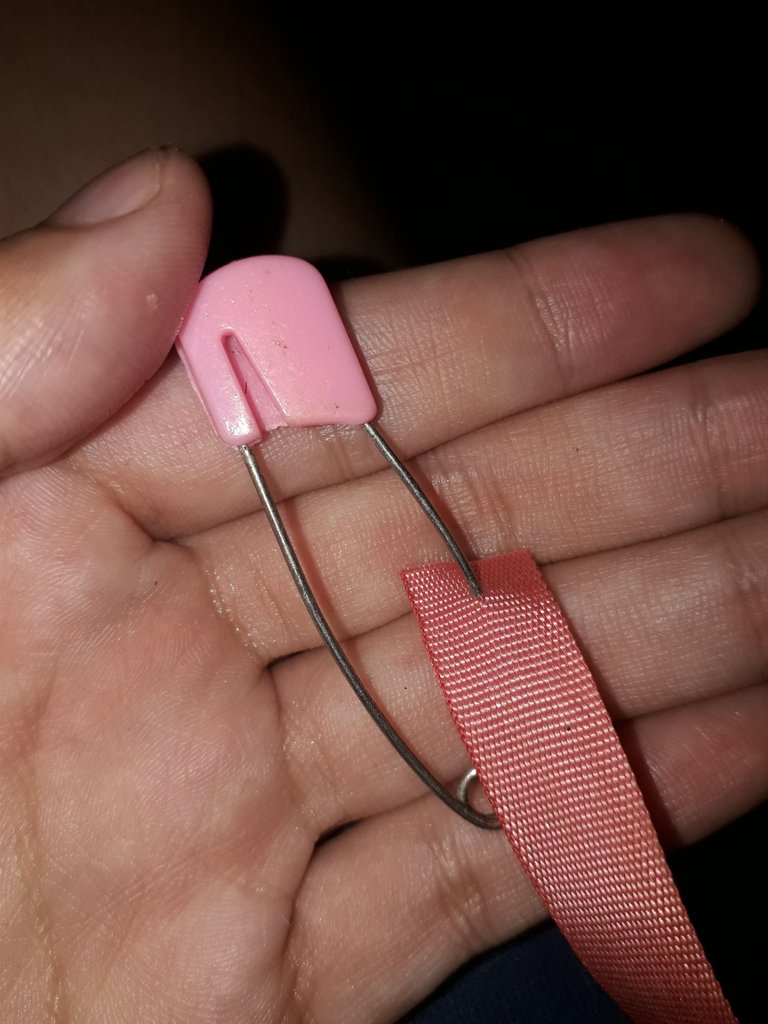
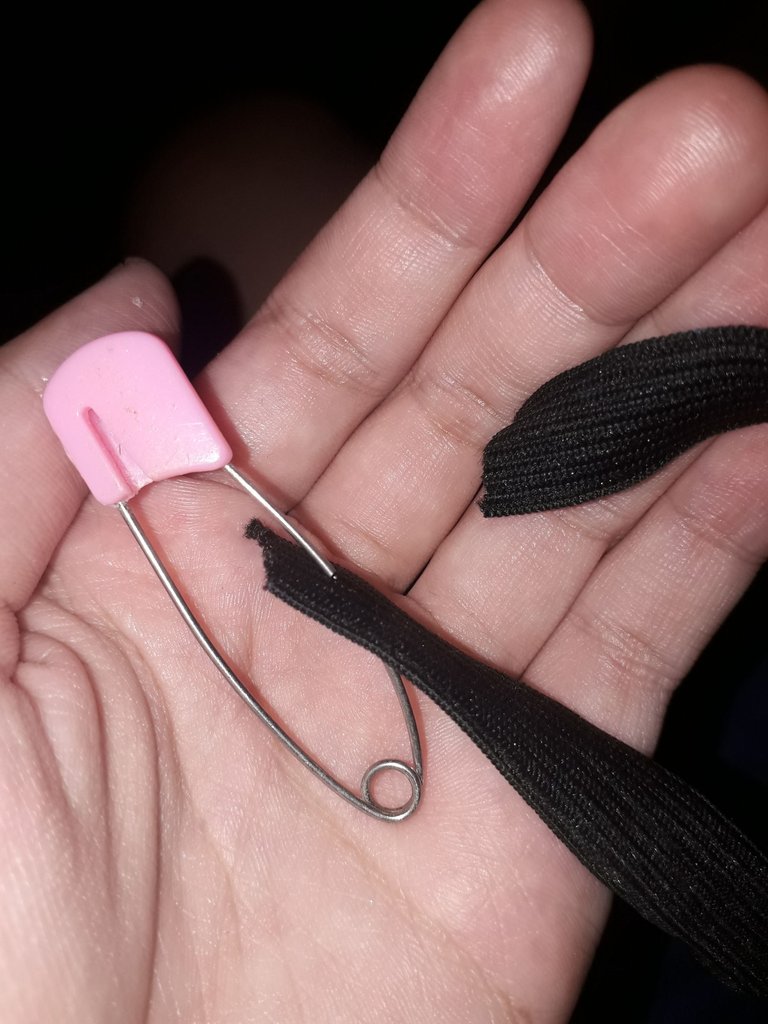
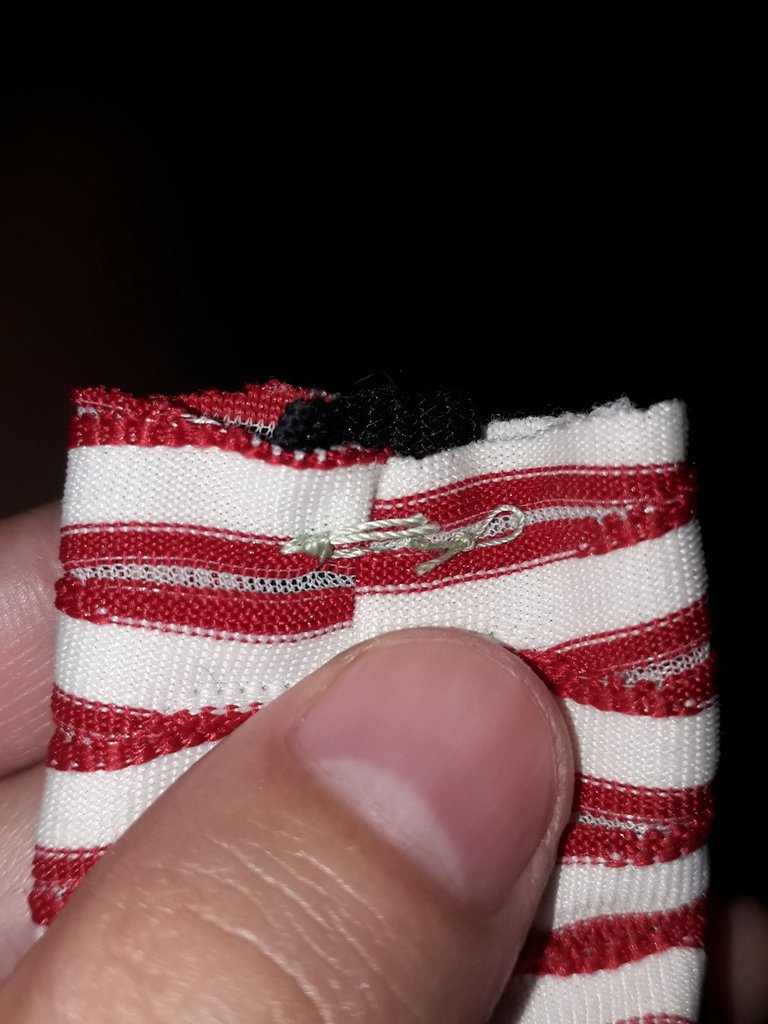
Now we take the 20 cm ribbon and we are going to put a safety pin on one of the ends. After that, we are going to put it through the central opening of the piece of fabric 1. The safety pin hook works for us to have a tool that is easy to handle and drag. It's important that we secure the remaining end of the ribbon together with the end of the fabric piece 1, with a needle, to keep them flush against each other so that it doesn't come loose as we drag the safety pin.
Then, we are going to drag the whole hook until it comes out of the other end of the fabric piece 1, after that we pull the hook out.
 |  |
|---|
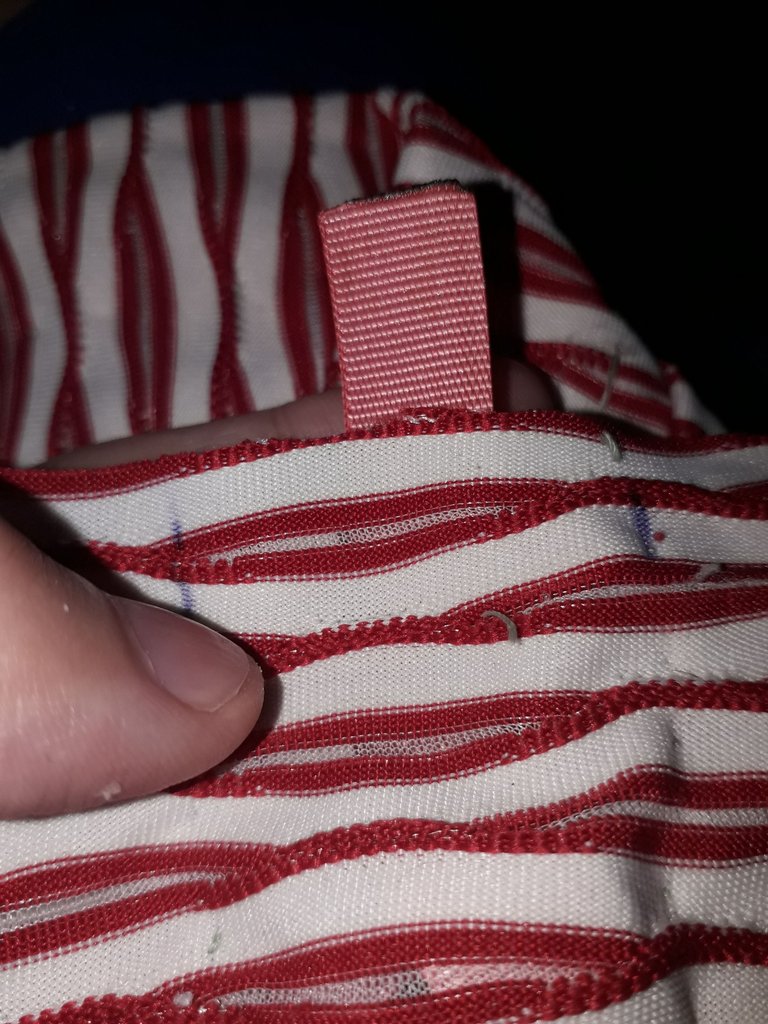
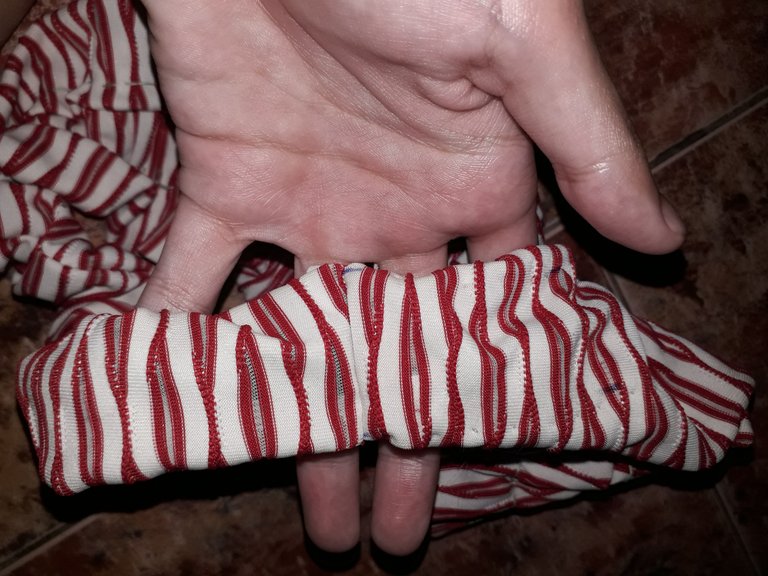
Now, we're going to put the end of the ribbon and the end of the fabric piece 1 flush with flush. And then we're going to make a seam right at the end to finally secure it. Finally, we sew the other end as well and finally remove the pin or needle that we used to hold everything in place.
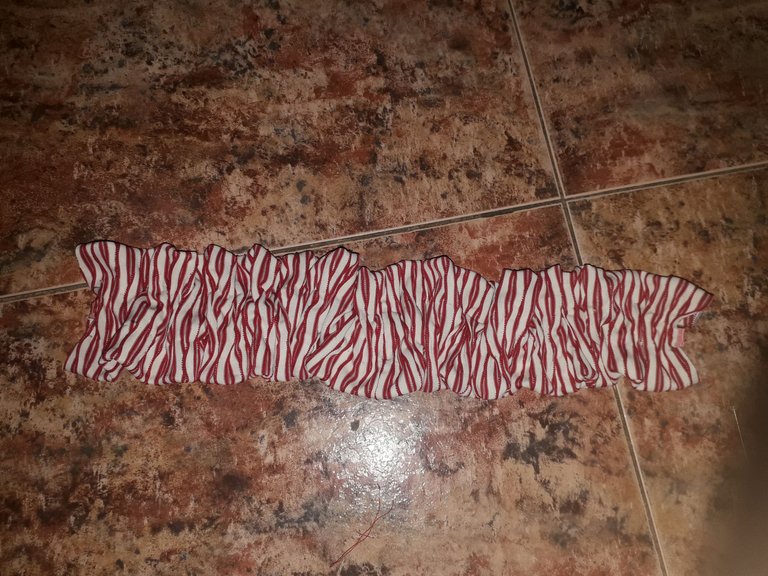
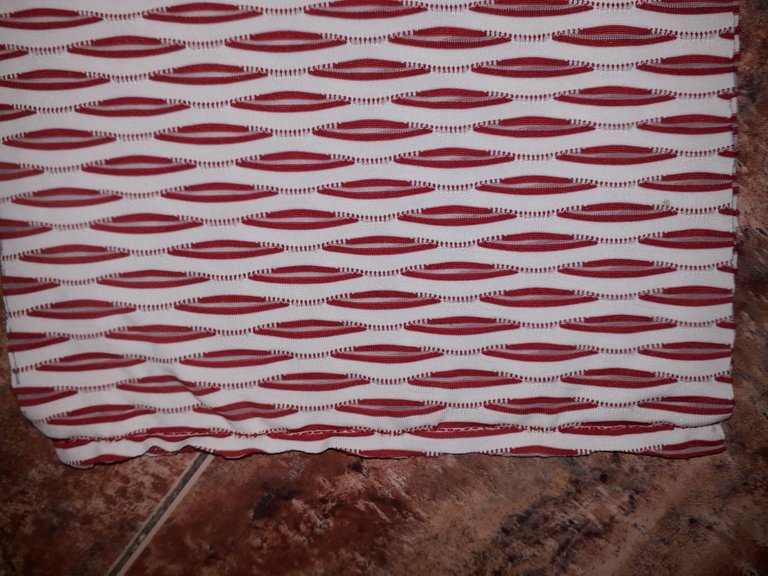
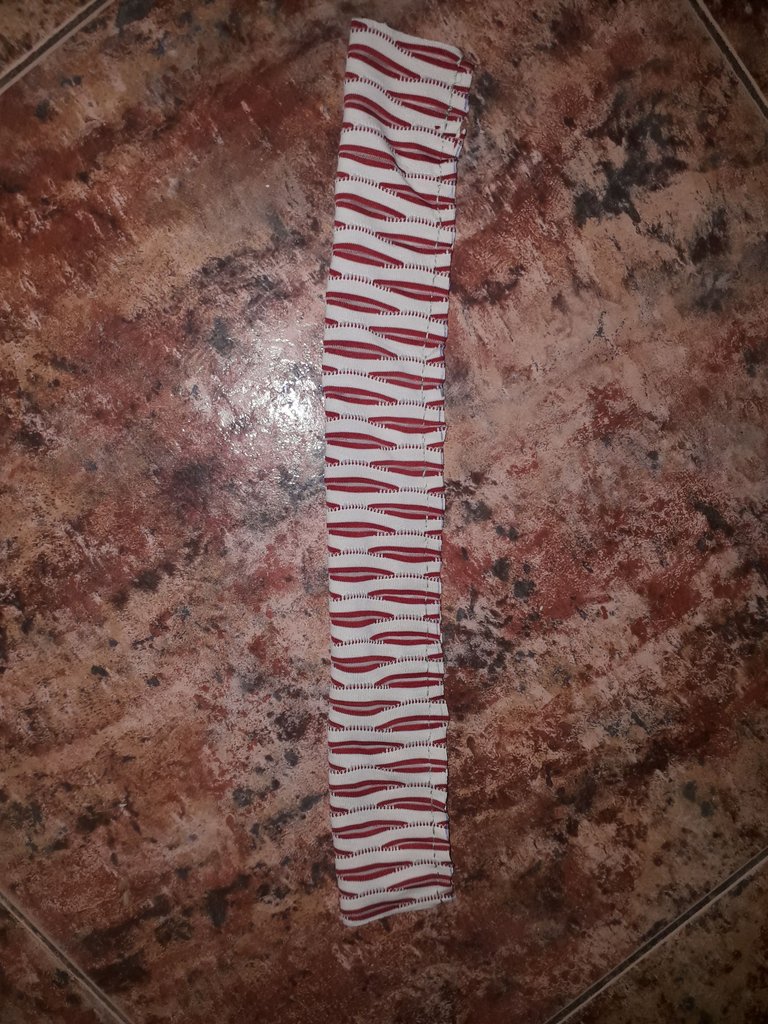
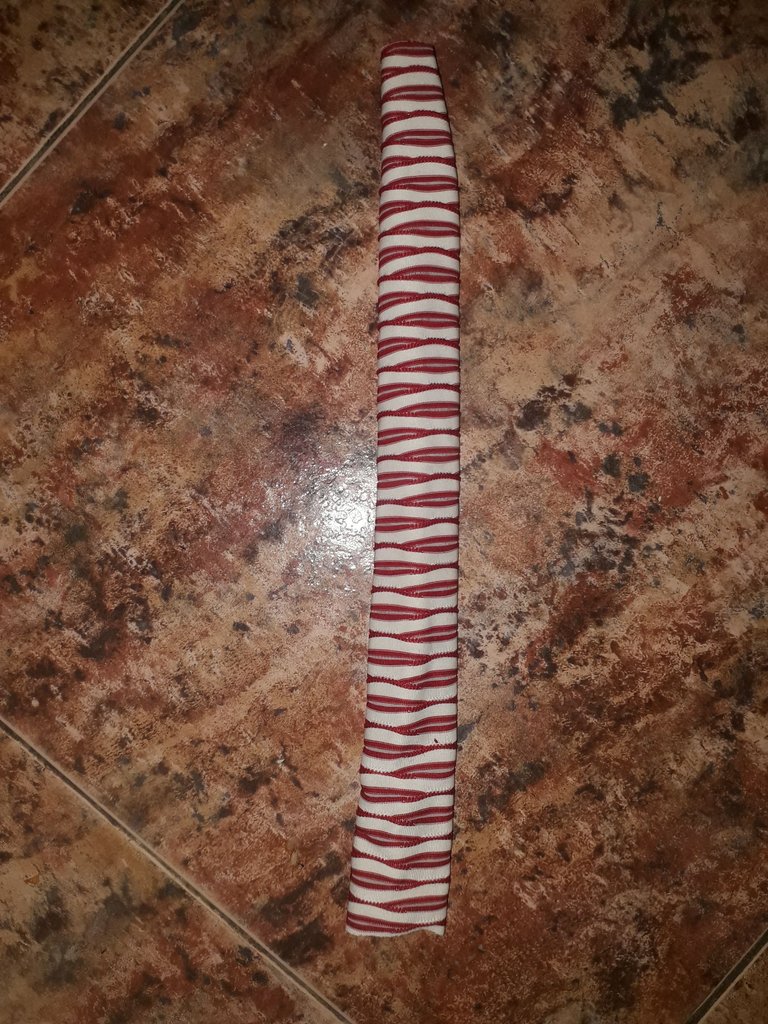
This is how it would finally look: ruffled. It looks quite nice, with this finish it gives the impression that the fabric was printed with straight lines, and not with small stripes.
Now let's move on to the back of the headband, the base. I'll call this other fabric piece 2, to avoid confusion.
 |  |
|---|
With fabric piece 2, we are going to repeat one of the first steps. We are going to turn the fabric inside out and fold it in half, so that we are left with a rectangle of 35 x 4 cm. After this, we are going to make a seam that goes along the 35 cm. Once sewn, we will flip the fabric piece 2.
 |  |
|---|
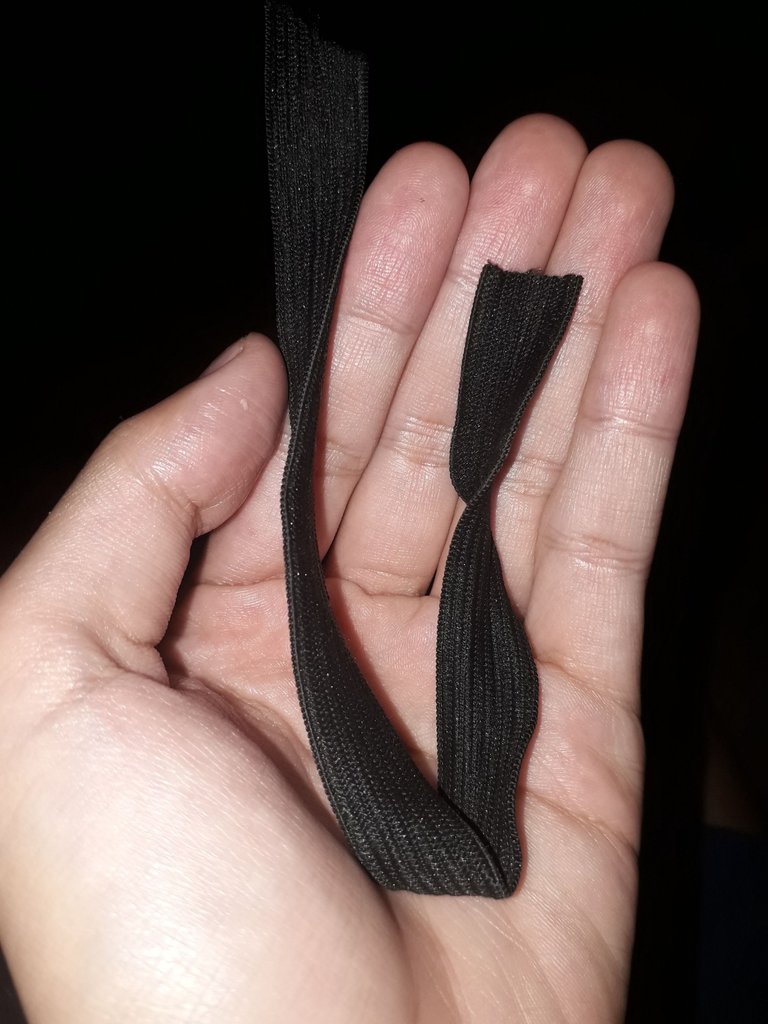
Now, we're going to take the elastic band and repeat the process of the previous band: we're going to take the safety pin, and we're going to hook it to one end of the elastic band.
Then, we are going to put it through the opening of the piece of fabric 2. You know, we are going to take the remaining end of the elastic ribbon, and we are going to put it flush with the end of the piece of fabric 2, and we put a needle or pin to fix it.
We drag the safety pin along the entire length of fabric piece 2, and when it comes out the other end, we pull the little hook out.
We put the ends of the piece of fabric 2 and the elastic band flush with each other, and then sew to fix it in place. Then we repeat this process with the other end.

 |  |
|---|
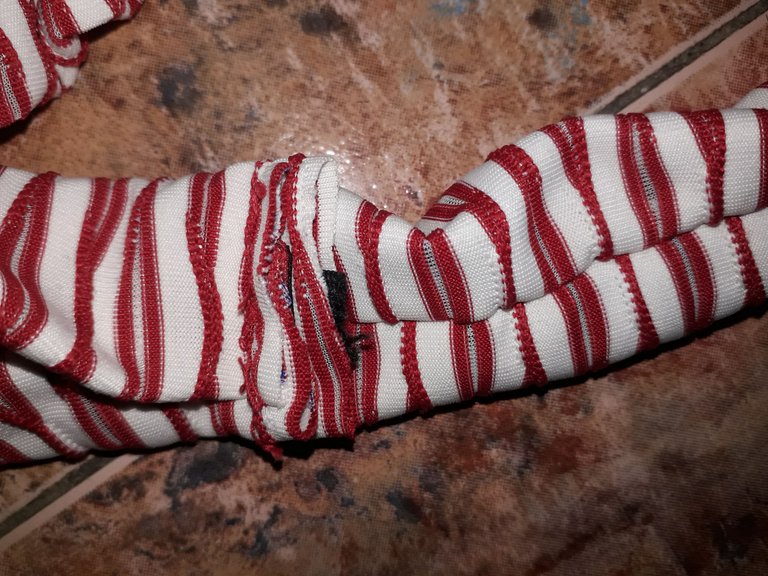
Now we're going to take fabric piece 1 and fabric piece 2, and we're going to put one behind the other, and we're going to take fabric piece 1 and we're going to wrap the end like this, so that it's the same length as the end of fabric piece 2, so that we can sew them together. I don't know how to explain this step clearly. But basically the two fabrics will be with the top side against each other, if I understand?
The important thing is that we are going to sew the two ends together. In the pictures above you can see how the fabric piece 1 is going to be wrapped, and how both pieces are going to look tied together from the back and from the front.
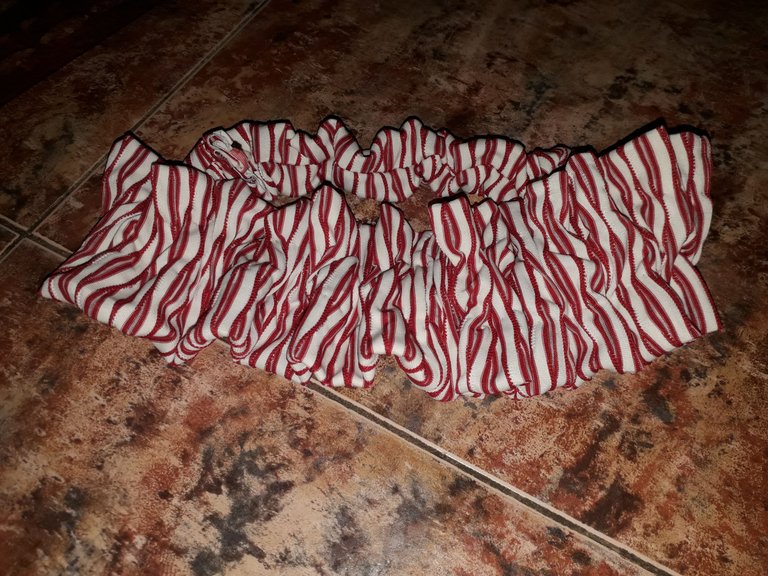
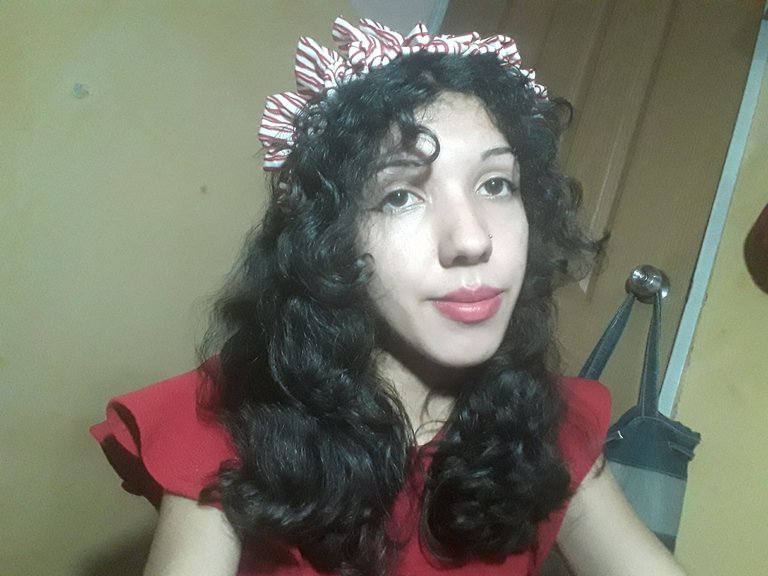
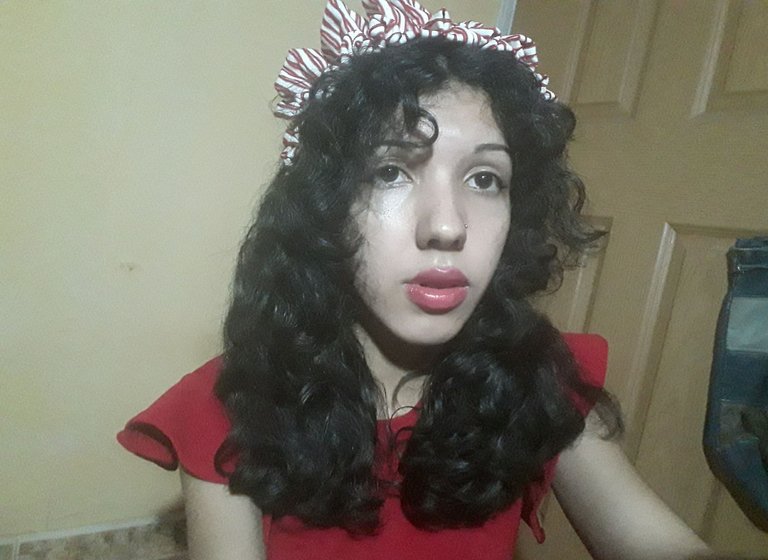
And that would be it. Look how coquette is, isn't it?
This is one of my favorite accessories, because it makes my hair stand out in a special way. What I don't like is that it doesn't go with anything that I know of, I'll have to go through my closet carefully to find the cutest combinations and look radiant with this.
But I would like to know if you girls liked it, and even more, if you would try it. Are you a fan of headbands?
Without anything else to add, take care, drink water, and don't forget to smile. I love you, see you in the next post, bye!
Español
Holiii, amigos de la comunidad de HiveDiy, ¿cómo se encuentran el día de hoy?, ¡espero que muy bien!
Ya les he compartido un par de tutoriales para hacer lacitos, y quizá este post se hubiera tratado de eso, si no fuera porque, entre mis cosas de costura, vi una cinta elástica.
Entonces pensé: ¿saben qué cosa podría hacer con una cinta elástica? Un cintillo, pero este no es cualquier cintillo, sino uno que no había visto antes, solo en dibujos: un cintillo fruncidito.
Sí, este es otro post sobre costura, porque me gusta mucho. Así que vamos a tomar nuestra tela, hilo, aguja, ¡y vamos allá!
Materiales
- 2 rectángulos de la tela que quieras de 47 x 20 cm.
- 1 rectángulo de la tela que quieras de 35 x 8 cm.
- 1 cinta de 40 x 3 cm.
- 1 cinta elástica de 18 cm.
- Hilo del color que quieras.
- Aguja.
- Alfileres para sostener la tela (si no tienes, puedes usar agujas).
- 1 gancho imperdible.
| |
|---|
Primero quiero enseñarles esta linda tela, me encantan sus patrones, me recuerda a los caramelos de menta. Esta tela me gusta mucho porque es “corrediza”, pero ustedes pueden usar absolutamente cualquier tela que quieran, lo único que cambiaria es el acabado del cintillo, obviamente. Si usas telas más “duras” el acabado se verá más rígido. Aun así, creo que este es un punto positivo de los cintillos, y de este en general, que no importa que tela uses.
Estas son las piecitas de tela que vamos a usar, se ve enorme.
| |
|---|
El primer paso es tomar los dos rectángulos de tela y los uniremos de esta manera, para que quede una tela bastante larga (o ancha). Es decir, al empatarlas las dos, tendremos una pieza de tela que medirá 94 x 20 cm aproximadamente.
Bueno, fui haciendo esta pequeña costura de rayitas, muy cuidadosa para que me quede recta. Recuerden hacer la costura con ambas caras de la tela estando al revés, de manera que cuando la volteemos, la costura quede hacia dentro.
| |
|---|
Una vez empatada la tela, la vamos a doblar a la mitad, de manera que nos quede una medida de 94 x 10 cm aproximadamente. Y ahora vamos a ir poniendo agujas o alfileres a lo largo de la tela, para que no se mueva al momento de coser.
| |
|---|
Con cuidadito vamos cosiendo la tela a todo lo largo, de esta forma horizontal. Yo cosí haciendo esta pequeña costura de “rayitas”, dejando 1 cm de distancia de la orilla, jiji. Lo siento por no ser muy conocedora de los términos de costura, yo solo hago lo que mejor me parece y ya; hablando de “mejor me parece”, le di dos pasadas de costura a esto para que quedara bien fijado. Recuerden que ando cosiendo a mano todo eso.
Después de esto, volteé la tela, de manera que la costura quedara por dentro. Y ya estaría.
| Editada en Canva |
|---|
Ahora, vamos a dejar la costura de la tela en el centro de la parte trasera de la tela, ¿sí me explico? Un problema muy grande que tuve con esto, es que la tela no “agarra” plancha; es decir, por más que la plancho, no se fija, porque es demasiado “corrediza”.
Entonces, lo que hice fue tomar agujas para fijar la tela, de manera que no se mueva mientras la coso. Vamos a hacer dos costuras que recorran los 94 cm de tela. Cada costura debe tener una separación de 3 cm de cada borde. En la imagen de la derecha les dejo un ejemplo.
Hice una costura de punto, o más bien aquí luce como una costura invisible, jajaja. Lo importante es que la costura no fuera tan visible, recuerden que esta es la parte de arriba de nuestro cintillo, así que procuren que quede una costura linda. En este momento me estuve esforzando mucho para que quedara la costura recta, y me tomó mucho tiempo porque era bastante camino por recorrer, pero lo logré.
Para no confundirlos con la explicación, a esta pieza de tela de 94 x 10 cm le voy a llamar pieza de tela 1.
| |
|---|
Ahora tomamos la cinta de 20 cm y le vamos a poner un ganchito imperdible en uno de los extremos. Luego de eso, lo vamos a meter por la abertura central de la pieza de tela 1. El gancho imperdible nos funciona para poder tener una herramienta fácil de manejar y arrastrar. Es importante que aseguremos el extremo restante de la cinta junto con el extremo de la pieza de tela 1, con una aguja, para mantenerlos ras con ras y que no se suelte mientras arrastramos el gancho imperdible.
Entonces, vamos a arrastrar todo el gancho hasta que salga por el otro extremo de la pieza de tela 1, después de esto sacamos el gancho.
| |
|---|
Ahora, vamos a poner el extremo de la cinta y el extremo de la pieza de tela 1 al ras con ras. Y luego vamos a hacer una costura justo en el extremo para fijarlo finalmente. Por último, cosemos también el otro extremo y retiramos por fin el alfiler o aguja que usamos para mantener todo en su sitio.
Ya así nos quedaría por fin: fruncido. Se ve bastante bonito, con este acabado da la impresión de que la tela tenía estampado de líneas rectas, y no de pequeñas rayitas.
Ahora vamos a pasar con la parte trasera del cintillo, la base. A esta otra tela le llamaré pieza de tela 2, para evitar confusiones.
| |
|---|
Con la pieza de tela 2, vamos a repetir uno de los primeros pasos. Vamos a poner la tela al revés y la doblaremos a la mitad, de manera que nos quede un rectángulo de 35 x 4 cm. Después de esto, vamos a hacer una costura que vaya a lo largo de los 35 cm. Una vez cosido, vamos a voltear la pieza de tela 2.
| |
|---|
Ahora, vamos a tomar la cinta elástica y repetiremos el proceso de la cinta anterior: tomamos el ganchito imperdible, y lo enganchamos a uno de los extremos de la cinta elástica.
Luego, lo vamos a meter por la abertura de la pieza de tela 2. Ya saben, vamos a tomar el extremo restante de la cinta elástica, y la vamos a poner al ras con el extremo de la pieza de tela 2, y le ponemos una aguja o alfiler para fijarla.
Arrastramos el gancho imperdible por todo lo largo de la pieza de tela 2, y cuando salga por el otro extremo, sacamos el ganchito.
Ponemos los extremos de la pieza de tela 2 y de la cinta elástica al ras con ras, y luego cosemos para fijarlo en su sitio. Luego repetimos este proceso con el otro extremo.
| |
|---|
Ahora vamos a tomar la pieza de tela 1 y la pieza de tela 2, y vamos a poner uno detrás de otra, y vamos a tomar la pieza de tela 1 y vamos a envolver el extremo de esta manera, para que quede de la misma longitud que el extremo de la pieza de tela 2, y así poder coserlas juntas. Este paso no sé explicarlo con claridad. Pero básicamente las dos telas quedarán con la cara superior una contra otra, ¿si me explico?
Lo importante es que vamos a coser los dos extremos juntos. En las fotos de arriba se ve como van a envolver la pieza de tela 1, y como se van a ver ambas piezas empatadas desde la parte trasera y desde la parte delantera.
Y ya estaría. Miren qué acabado tan coquette, ¿a que sí?
Este es uno de mis accesorios favoritos, porque hace resaltar mi cabello de una forma especial. Lo que no me gusta es que no me combina con nada, que yo sepa, tendré que revisar cuidadosamente mi armario para encontrar las combinaciones más lindas y lucir radiante con esto.
Pero quisiera saber si a ustedes les gustó, y más aún, si lo intentarían. ¿Son fans de los cintillos?
Sin nada más que añadir, cuídense, tomen agua, y no se olviden de sonreír. ¡Se les quiere, nos vemos en el próximo post, chau!
Credits | Créditos
- English translation DeepL (sorry for any mistakes, I don't know much English)
- Traducción al inglés DeepL (lo siento por cualquier error, no sé mucho inglés.)
- Cover, dividers, and banners made in Canva
- Portada, separadores y banners hechos en Canva
- Photos used in the post were taken by me, using a Samsung Galaxy J6
- Las fotos usadas en el post fueron tomadas por mí, usando un Samsung Galaxy J6
Posted Using INLEO
La verdad no soy fan de los cintillos, pero ¡a ti se te ve muy bien! ¡Todo se te ve muy bien! 😊 ¡Muchos saludos! !PIZZA !BBH !HUESO !DIY
Muchas gracias! Que bonito 🩷✨ y gracias por el apoyo, my friend
Está muy cute ! Muy a tu estilo anime kawaii 🩷🎀
Muchas gracias, bonita! 🩷✨ Jijiji
Bellísimo te quedó, pero no hiciste hace un tiempo una falda roja? Pienso que te quedaría bien con el cintillo. 🥰🫰🏻
Gracias Sarangcita 🩷✨. Es verdad, ahora solo me falta una blusa jijiji
@celely, one of your Hive friends wishes you a Happy Valentine's day and asked us to give you a new badge!
To find out who wanted you to receive this special gift, click here!
You can view your badges on your board and compare yourself to others in the Ranking
Check out our last posts:
You can query your personal balance by
@cpol just sent you a DIY token as a little appreciation for your post dear @celely! Feel free to multiply it by sending someone else !DIY in a comment :) You can do that x times a day depending on your balance so:!DIYSTATSTe quedo bien el cintillo fruncidito, ya tienes otro accesorio para el cabello, saludos y bendiciones.
Muchas gracias 🩷✨. Así es, otro más para la colección 🤭
$PIZZA slices delivered:
(9/15) @cpol tipped @celely