
English

Hiii, friends of the HiveDiy community, how are you this time? I hope you're very well!
Today I bring you something a little bit different. You see, I had a lot of old magazines in my house, and I didn't know what to do with them, I thought I would just throw them away.
However, I saw an image of everlasting roses made with BOOK LEAVES, how evil! It made me very sad, because I love books, and I would like to have many on a shelf, but unfortunately my economy does not allow me to do so (for the moment).
Well, it occurred to me to follow this formula with a really recyclable material such as magazines. Although for many it may not look as aesthetic as doing it with a more conventional material, the truth is that my idea was to recycle and use the materials I had at hand, to also demonstrate once again that from something simple you can make things a little cute.
So, combining my love for flowers, and using recyclable materials, today you will join me to make paper roses, here we go!

Materials

- Magazine (one is enough).
- White glue.
- Bamboo skewers (note: it was very difficult for me to find the name of these in English, I hope it is correct now.).
 |  |  |  |
|---|
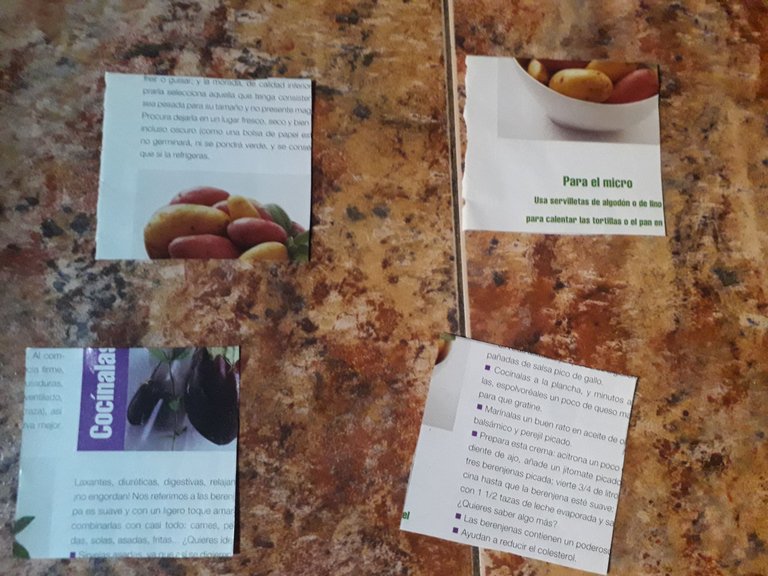
We measured five 8x8 cm squares and cut them out, I needed only two sheets of the magazine for this.
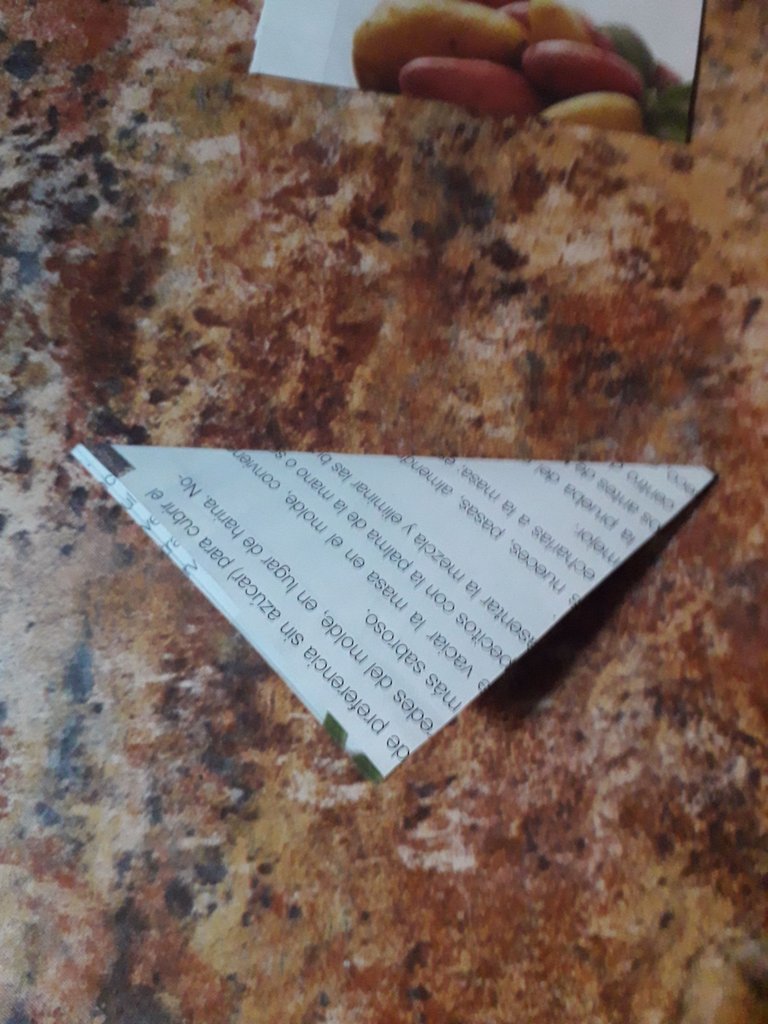
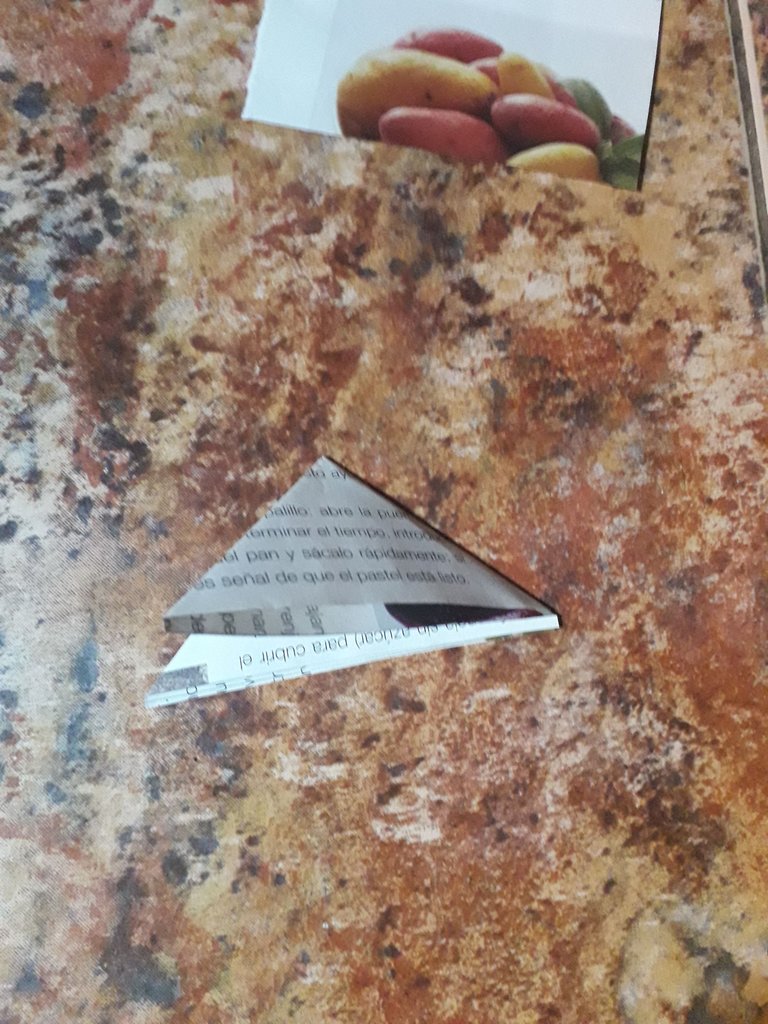
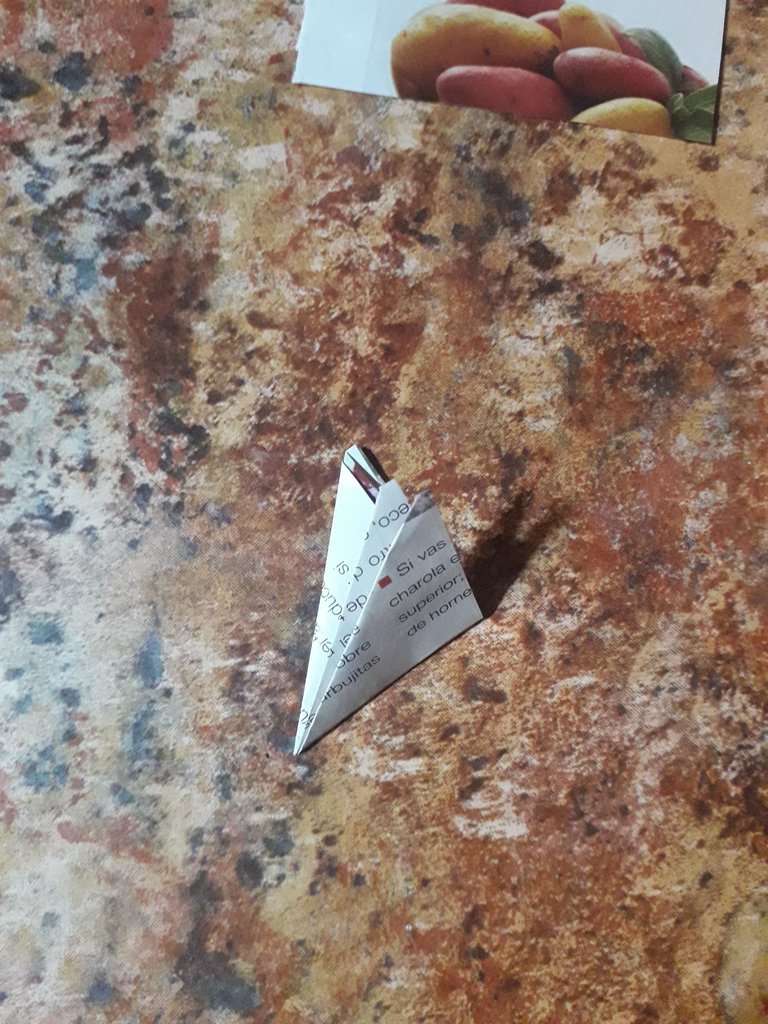
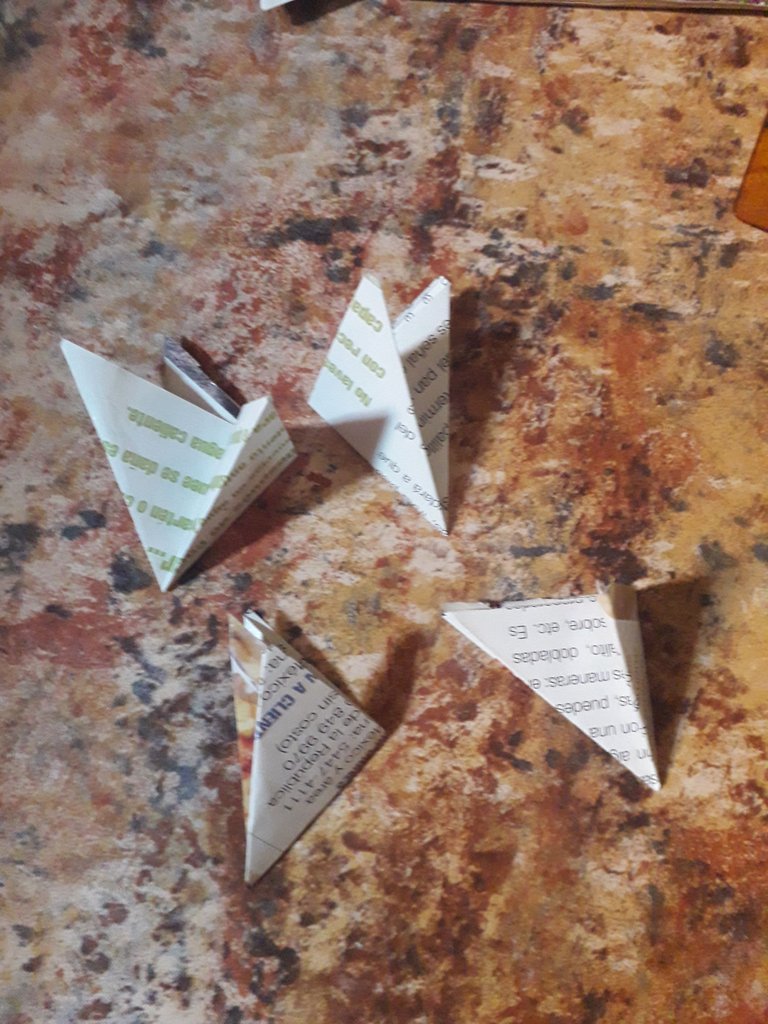
Then, we fold as shown in the pictures: first we make a triangle by measuring tip to tip, taking the top tip and bringing it to the bottom tip.
Then, we fold tip to tip again, taking the tip on the right and joining it with the one on the left.
Finally, we repeat the above until we are left with a shape like the one in the last image.
 |  |
|---|
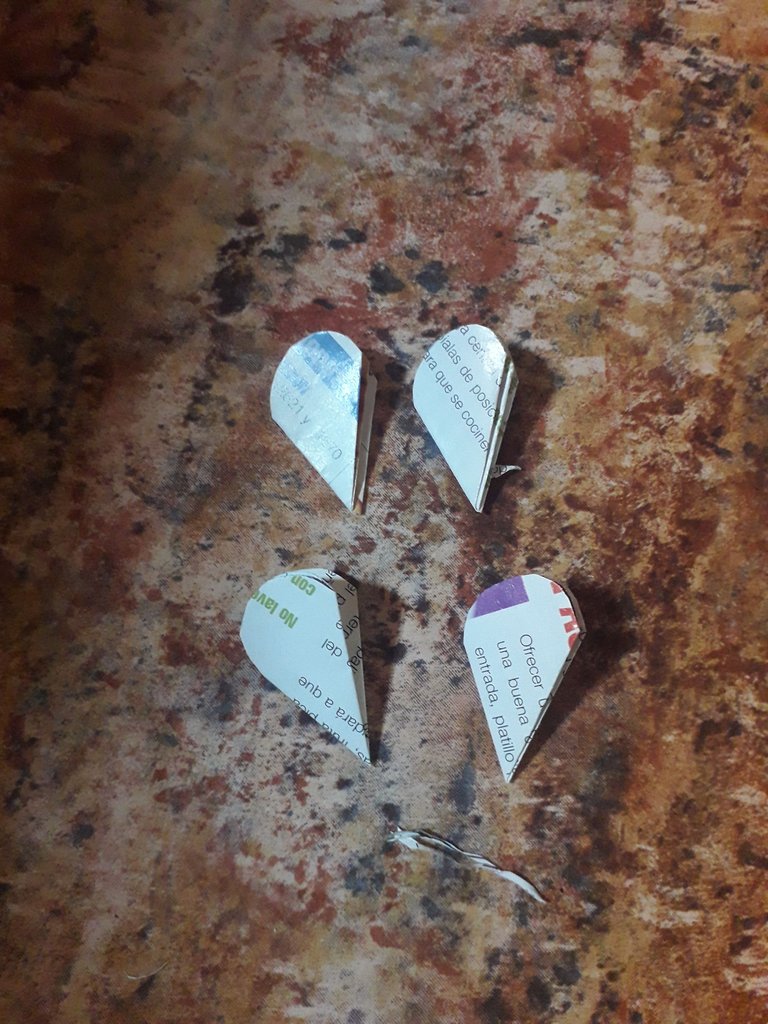
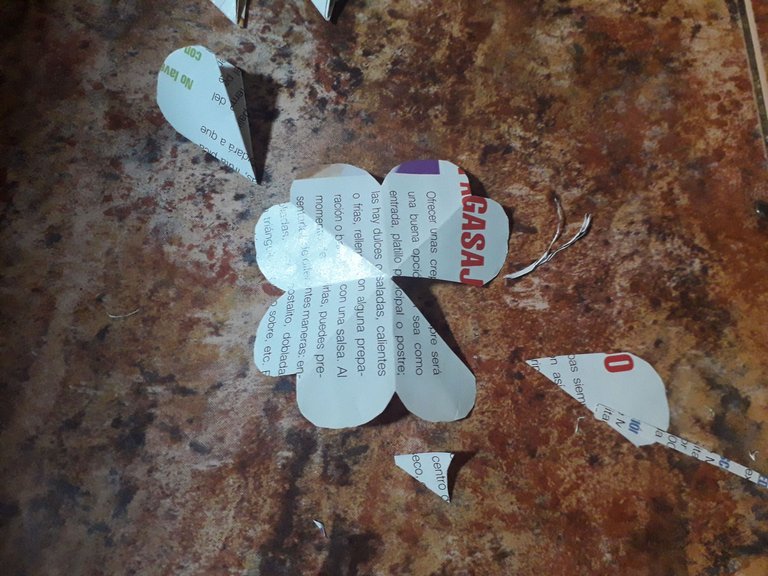
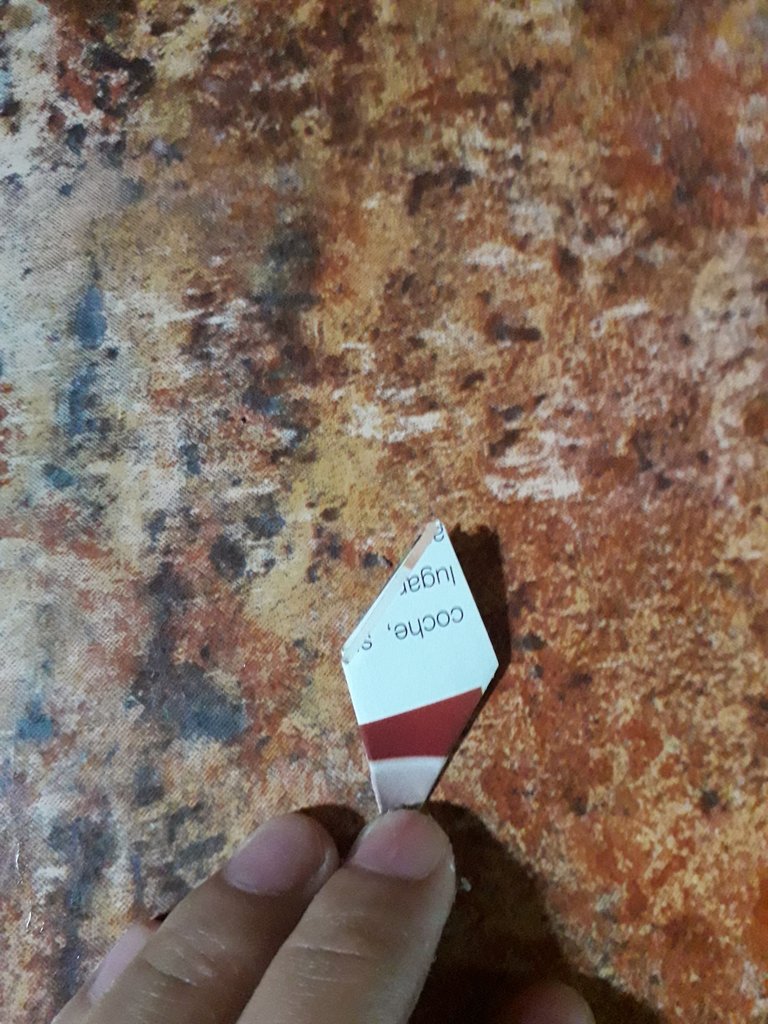
Once we have all five squares of paper folded (in the image there are four because I forgot to photograph the fifth one, but there must be five), we mark an arc with a pencil and cut it, as shown in the second image. I hope I am explaining myself well.
 |  |
|---|
 |  |
|---|
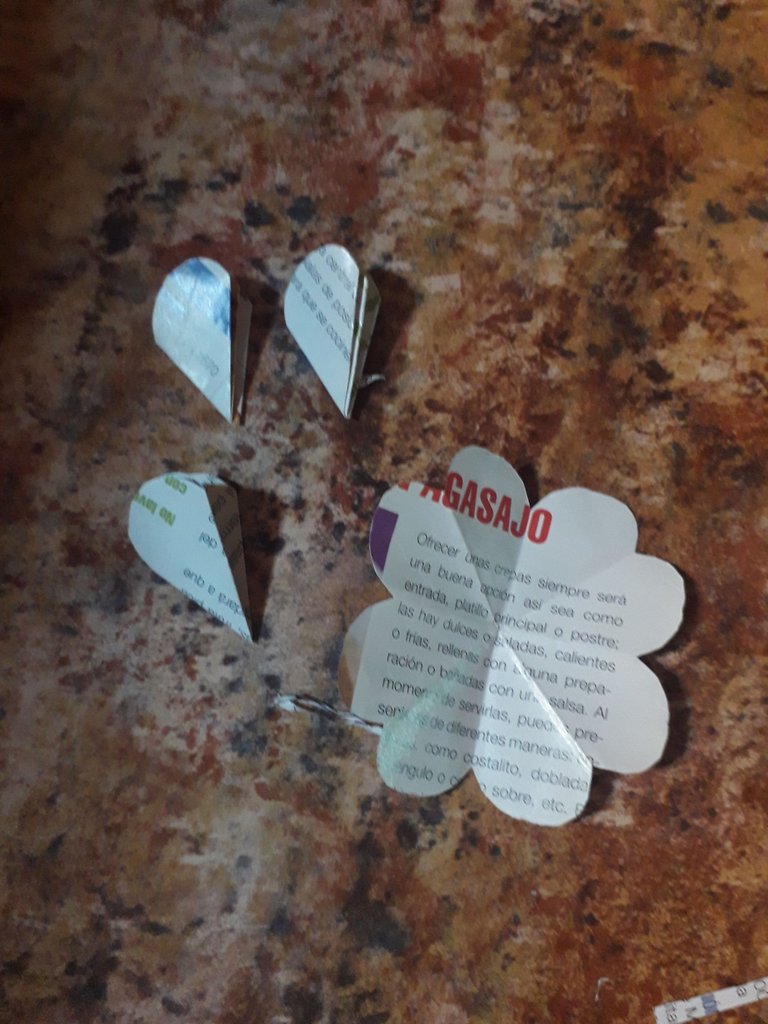
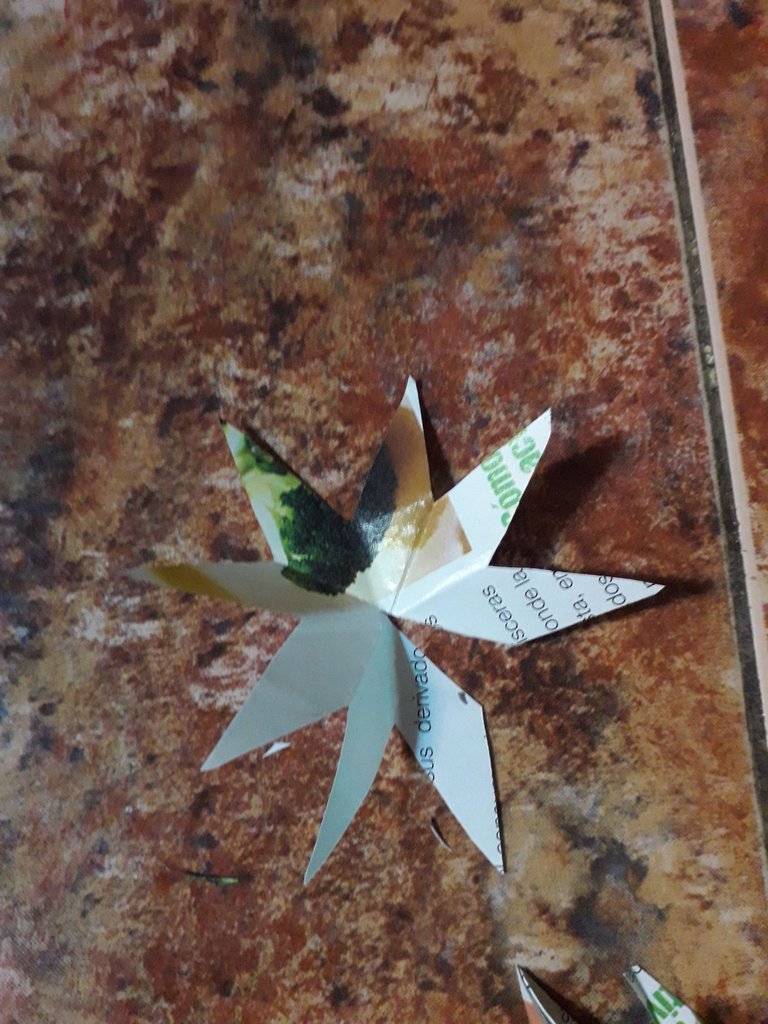
When we open the paper, it has to look like a flower, if you managed to get it like that, then we got it right, yay!
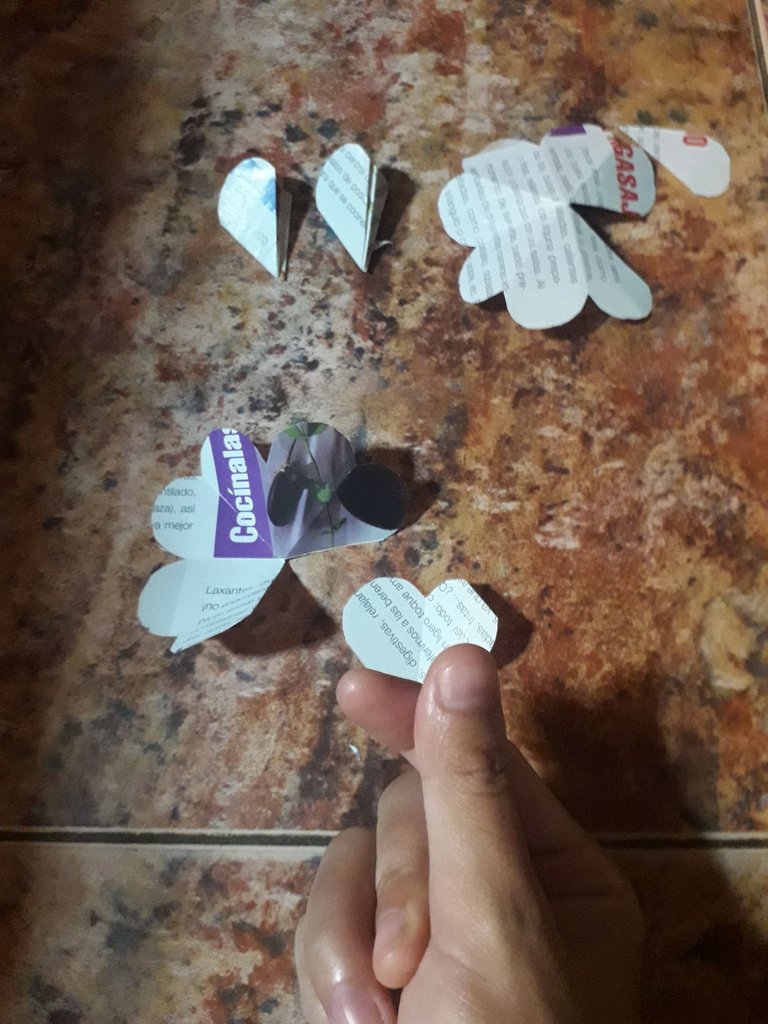
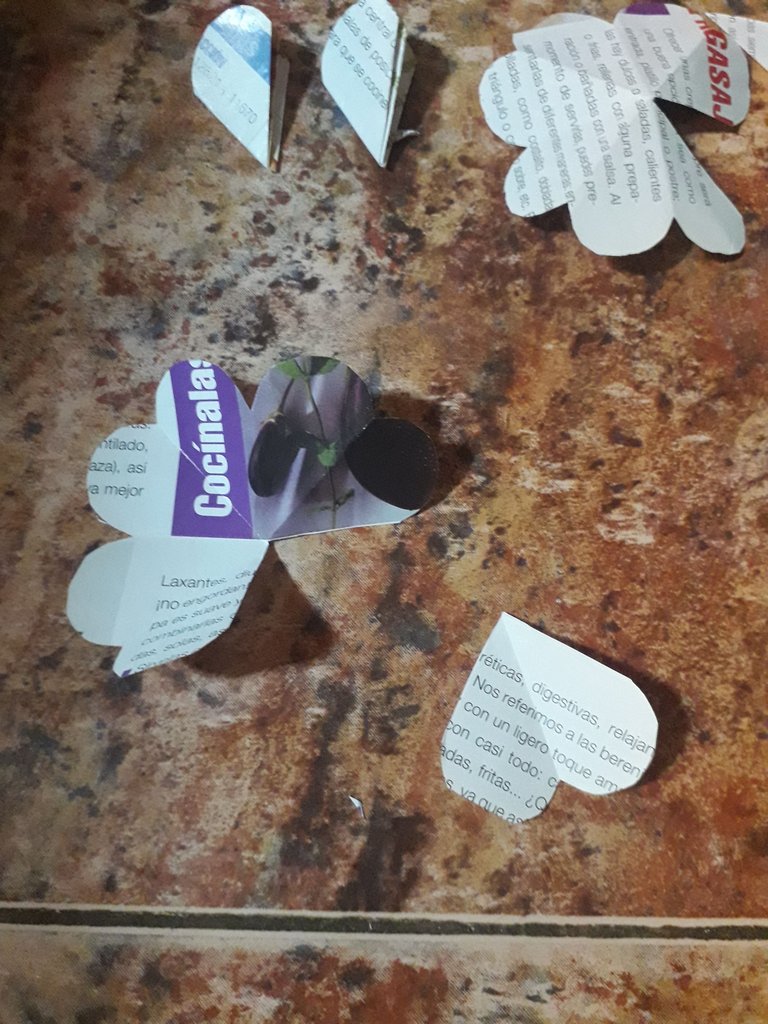
Now, we will start cutting some petals of the flowers, in a specific order, following the marks left by the folds on the paper.
For the first flower, we cut a single petal.
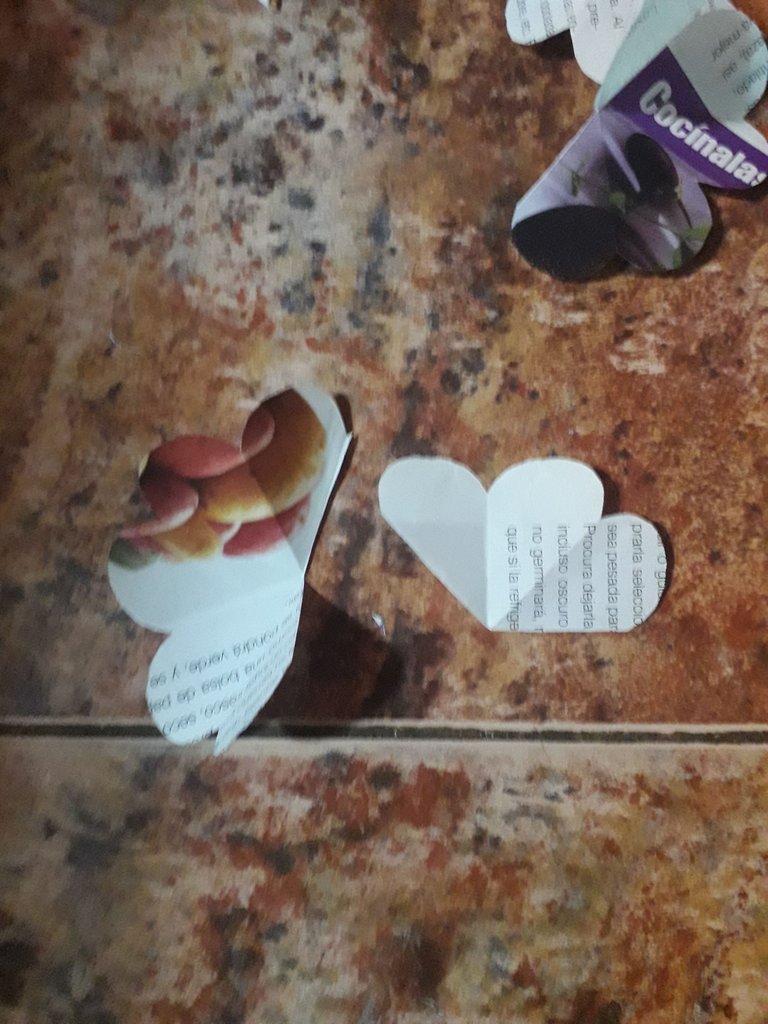
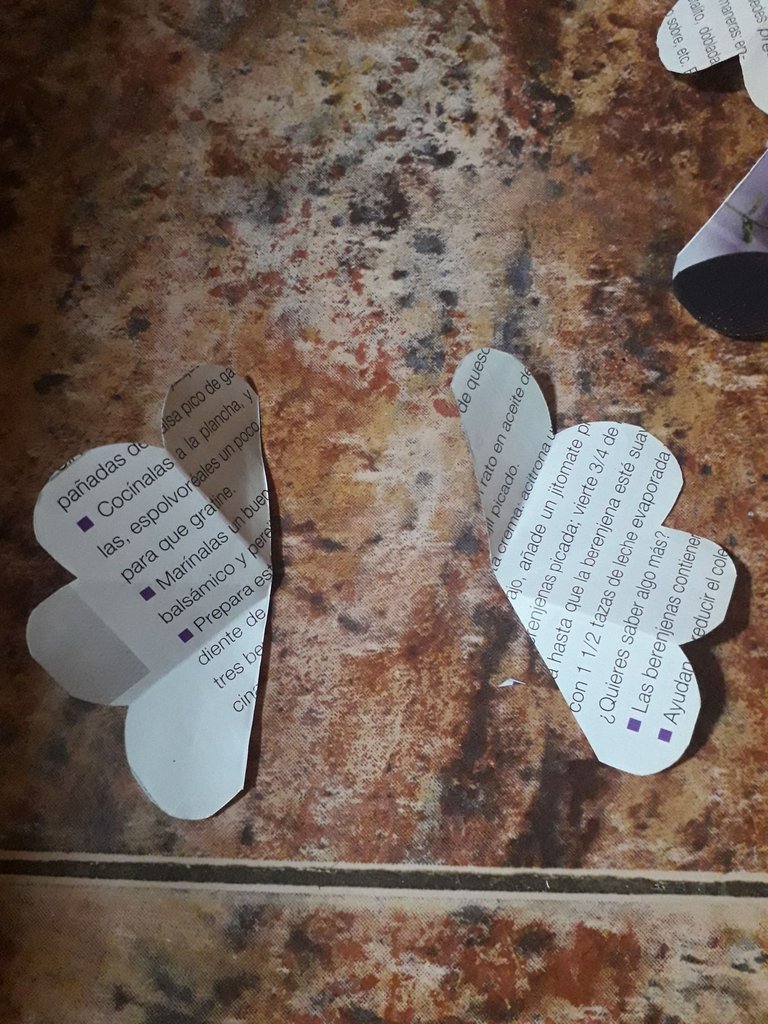
For the second flower, we cut two petals together, as seen in the two images below, it looks like a heart. ❤️
 |  |
|---|
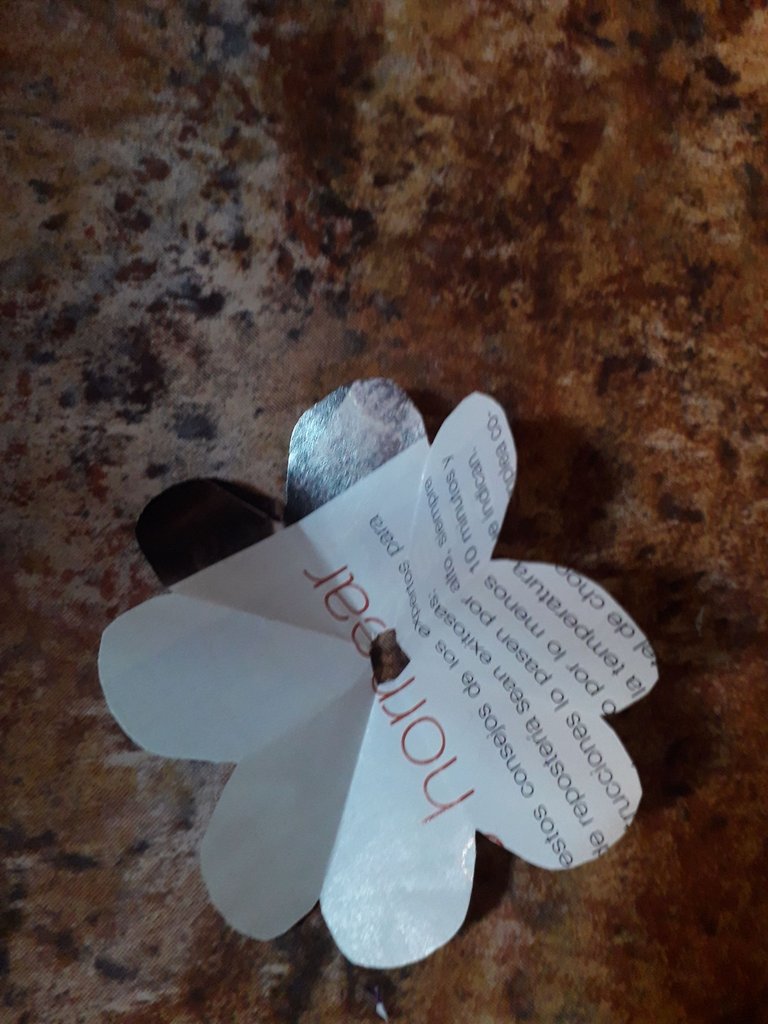
On the third flower, we cut three petals together.
On the fourth flower, we cut four petals together, which divides it in half.
To the fifth flower, we do not cut any petals, but we will make a small hole in the center. This hole can be made by refolding the flower again, and remove the tip of the triangle by just cutting it a few millimeters. When you open the flower again, it will have this little hole in the center.
Now we have all the steps to make the flower, now we need the most important thing: the stem.
 |  |
|---|
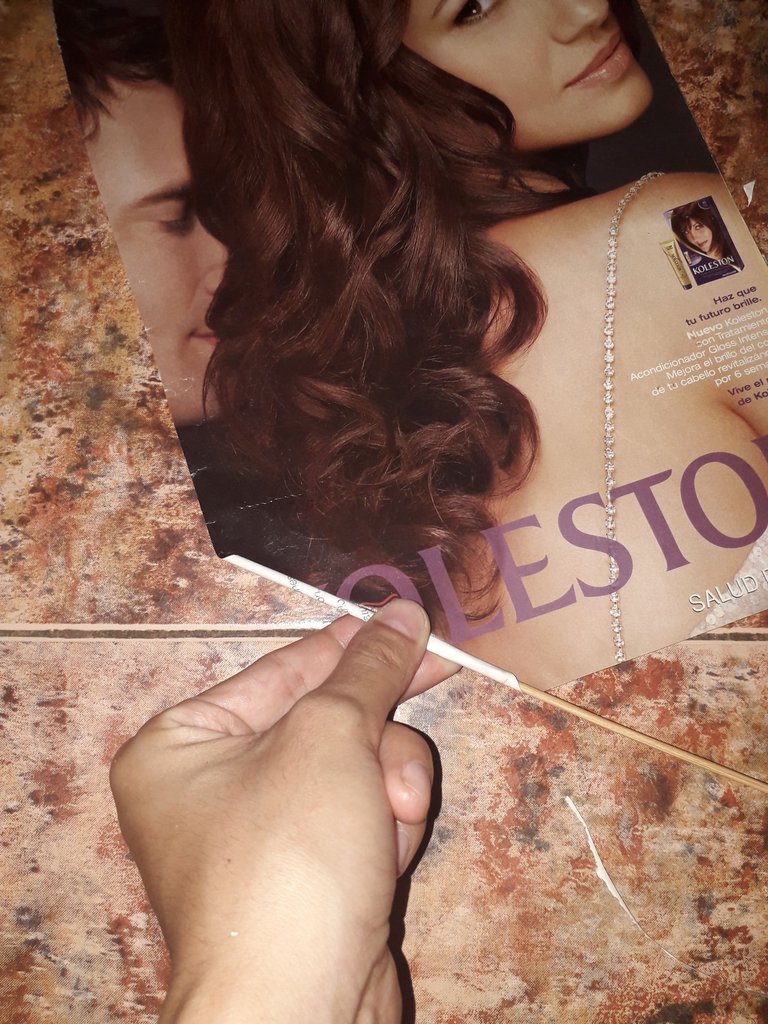
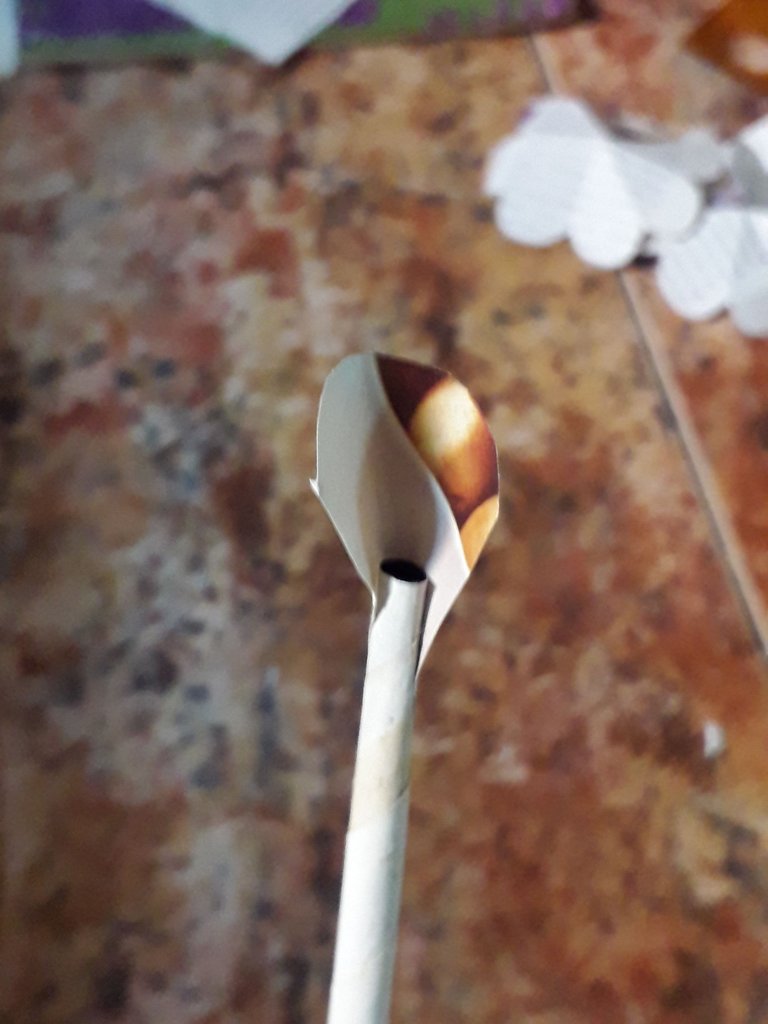
To make the stem, we will use a bamboo skewer to make something called a “canute”, at least that's what my high school arts and crafts teacher used to call it.
Well, to make a canute we take a sheet of paper, preferably longer than wide, and from the tip we start to roll this sheet giving many turns to the stick.
I put white glue in the lower left corner of the sheet, which is where I start to roll diagonally. Then, halfway through, I reapply a little white glue and continue rolling up to the top right corner, where I reapply a little glue and seal the entire cylinder by twisting and running my fingers around it.
I feel it's a little difficult to explain and I don't make myself clear, but the important thing to remember is that you are going to roll the paper around and around, where your starting point is the lower left corner and your end point is the upper right corner.
I cut this canute in half, because I was planning to make more roses. The length of the canute depends on the size of the sheet of paper, you decide if you want a longer or shorter stem. I made five of these, for five roses.
It is important that you tighten the paper a little so that it is well secured, but not too much because then you will not be able to remove the bamboo skewer inside, which is the final step. Once I squeezed it so tight that I couldn't get the bamboo skewer out and had to throw it all away.
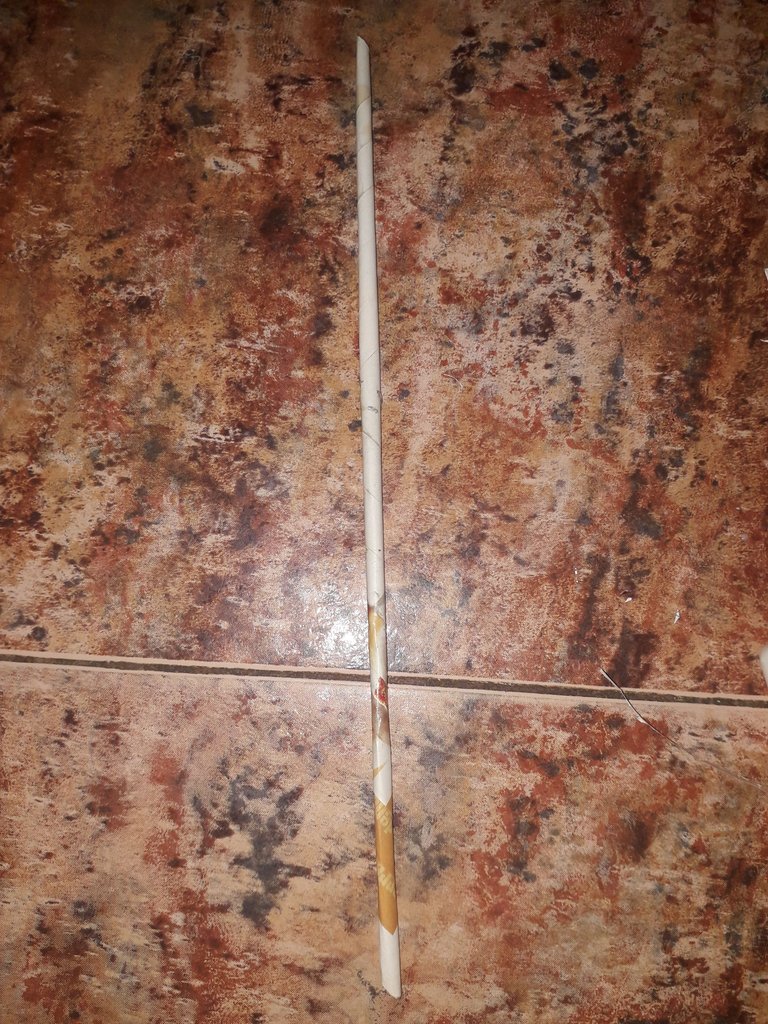
If we manage to do all the steps correctly, the result should look like a paper stick, just like in the second picture.
 |  |
|---|
Here comes the part that I consider a mix between easy and cumbersome: making the rose.
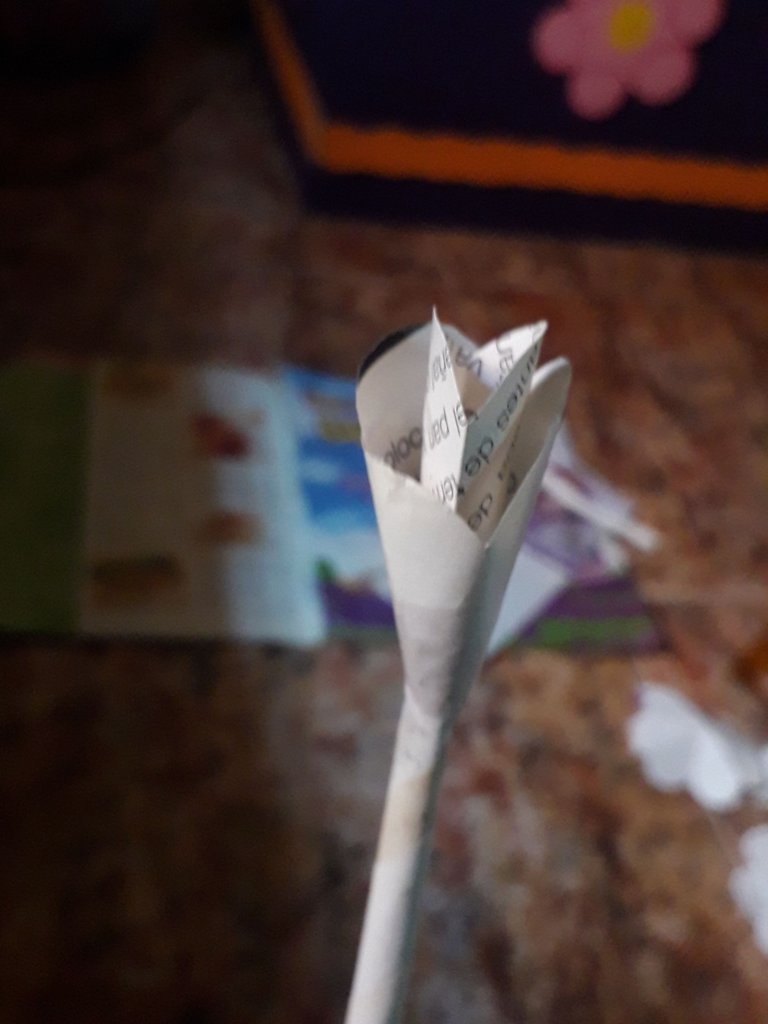
We start by taking the first petal, the one that was on its own, and put a little glue on the bottom end, and glue it like this, wrapped a little bit over the end of the canute.
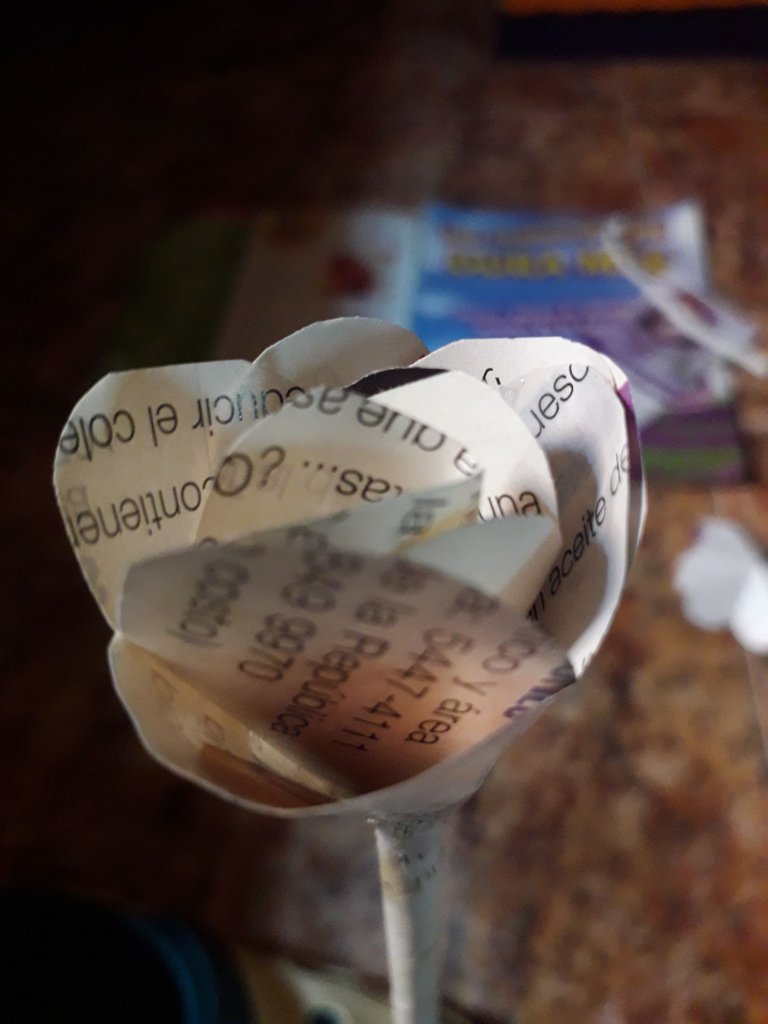
Then, we take the second set of petals, the ones that are two together (heart-shaped), and wrap them around this first petal. I do it this way: I wrap around the previous set of petals, and close by gluing the petals at the ends together, if I understand?
For example, this heart-shaped petal, I glue each end together, put glue on both and close them by putting one on top of the other.
Another thing I take into account is that I always try to put the locks of each petal in the opposite way to the previous one, they have to be at opposite ends so that the rose is balanced. This is the way I glue them, it is the method that I developed on my own and that makes them more secure.
I really hope you understand how I glue each section of petals, the important thing is to keep one thing in mind: each section wraps around the previous one and is glued at each end that comes together when wrapped. This is the simplest way I can make myself understood, I hope I succeed.
 |  |  |
|---|
Okay, following the procedure described above, we are going to glue the three petal section together.
Then we are going to glue the four petals together, and then the other four petals together that we had left. And so we continue in numerical order: we glue the five-petal section, then the six-petal section, then the seven-petal section, until we get to the one with only one hole in the middle.
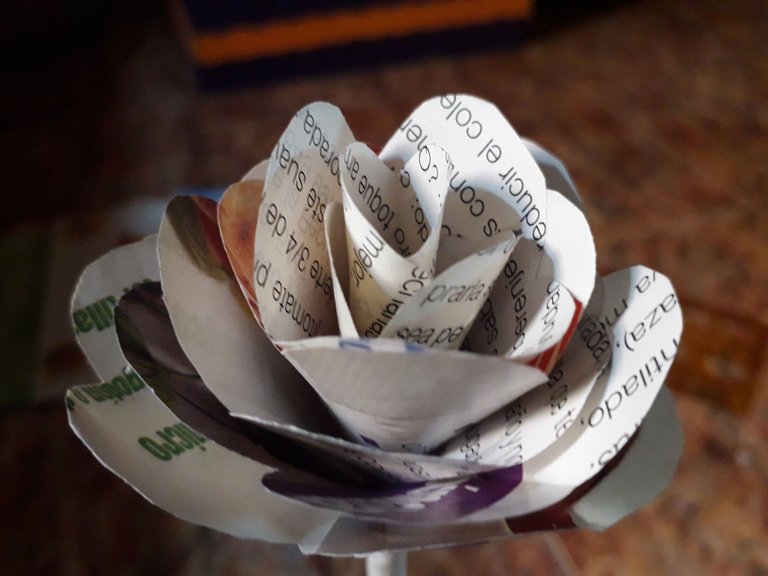
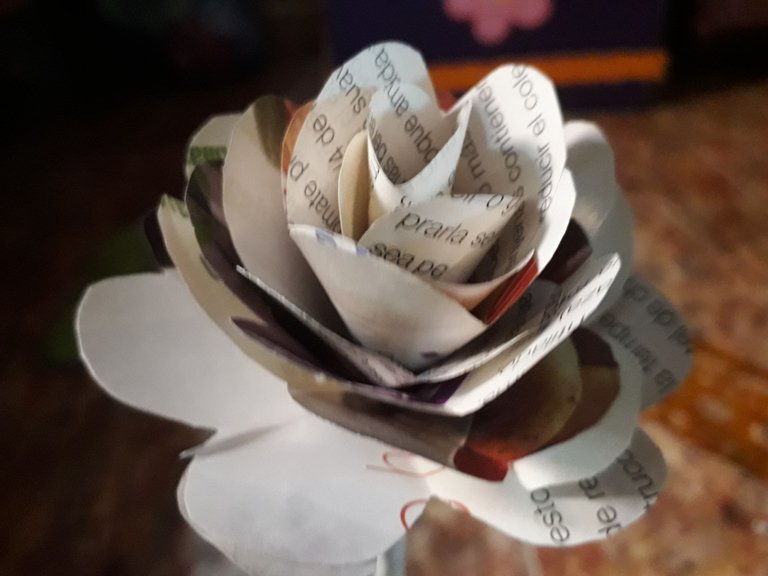
To this last section, I put glue in the center. I also put glue at the base of the flower and finally joined the last section of petals with the rest of the rose. It looks like the third image.
 |  |
|---|
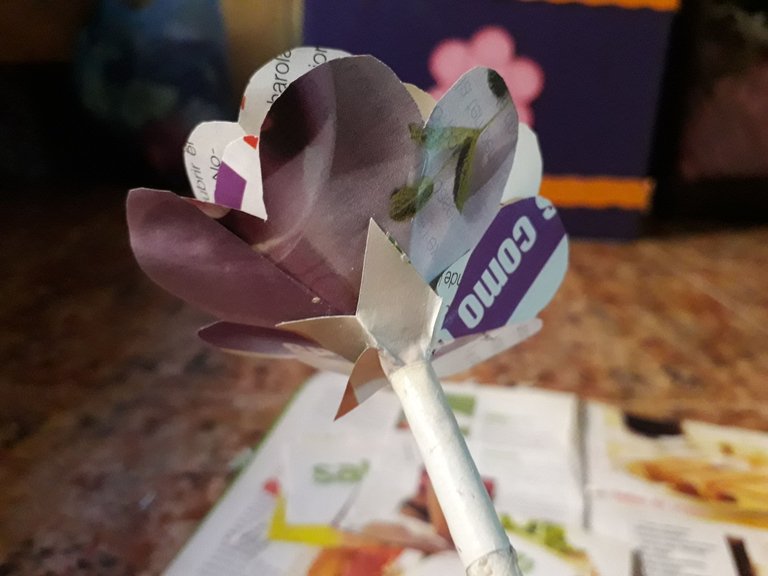
This next thing I would say is optional, but I took some approx. 4x4 cm squares of paper and folded them the same way I did the folds for the flowers at the beginning, but, instead of cutting a bow, I cut these very sharp little spikes.
When I opened up this section of little spikes, I cut them in half and glued each one to the base of the rose, basically wrapping around the stem. These spikes are actually the little leaves at the base of our rose.
This other thing is optional, but I cut almond-shaped sheets of paper like the leaves of the roses, and glued them to the middle of the stem. To some I put two leaves, to others I put only one, the truth is all this is optional and it is up to each one's taste, but I consider that they are prettier with leaves, because it is more similar to a bouquet.
Now, in the following image I will show you the result...
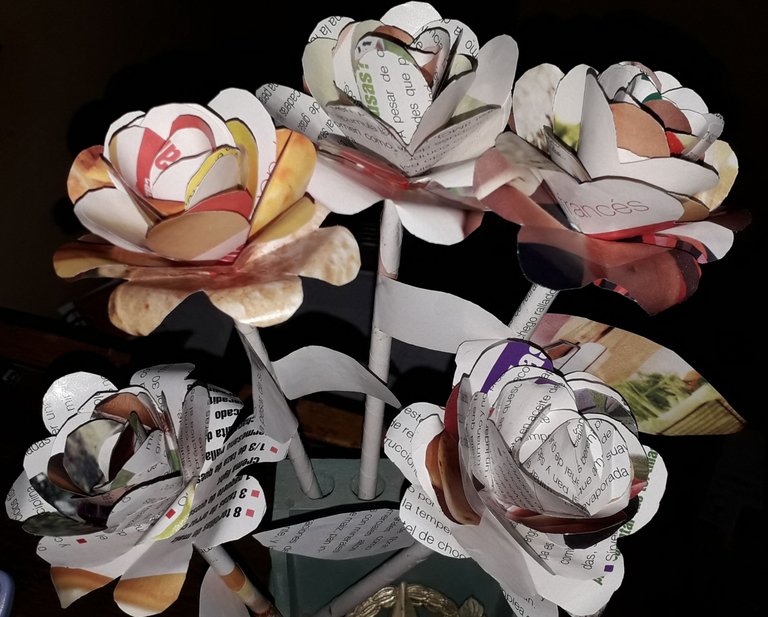
And that's it, what do you think?
Oh well, these pictures can't be appreciated so well, I guess, do they?

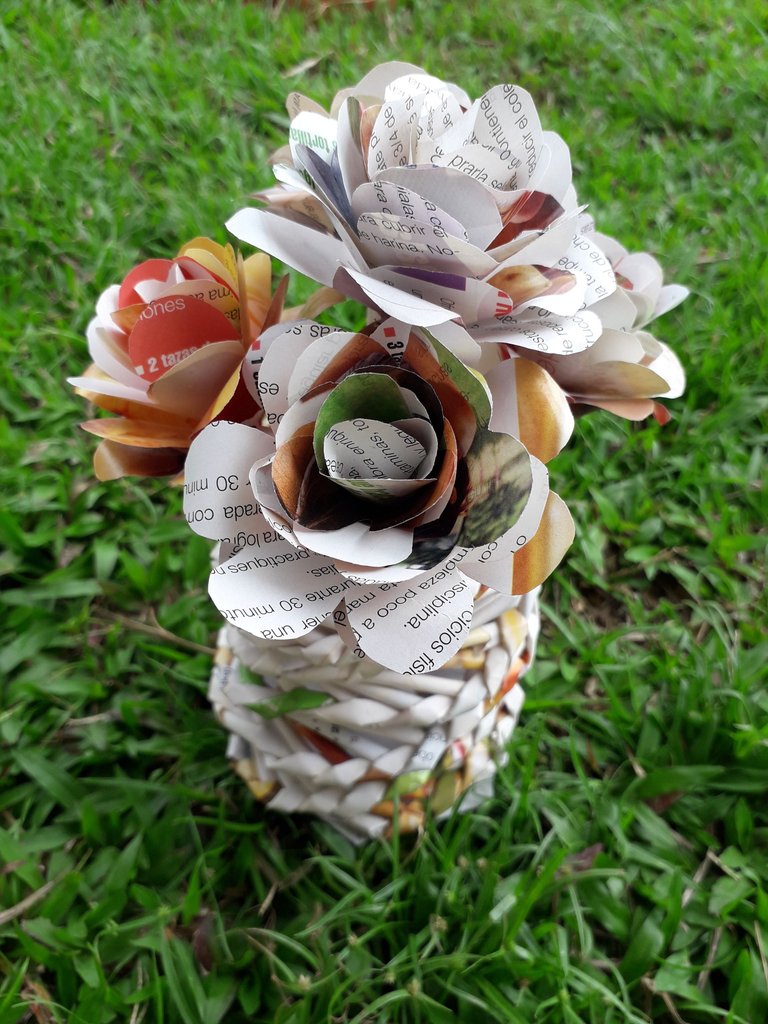 | 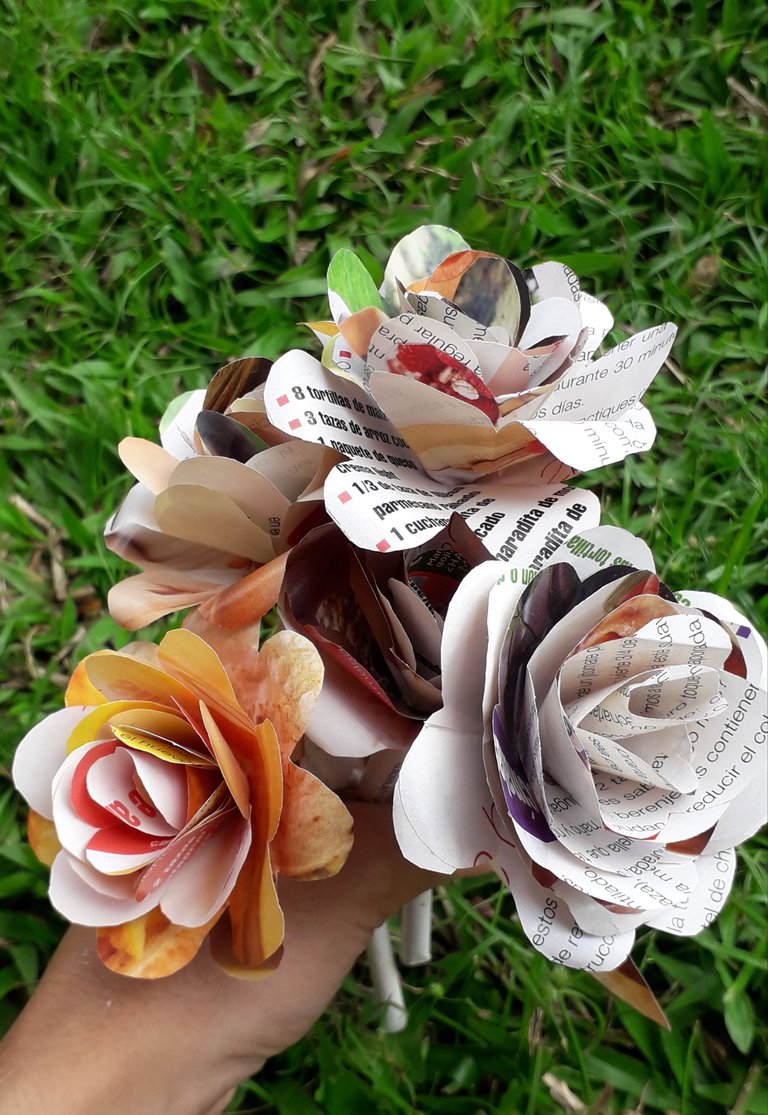 |
|---|
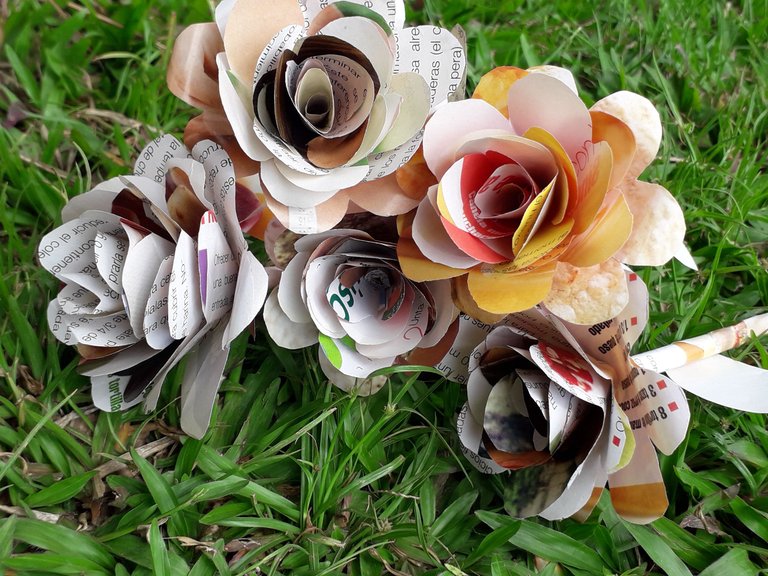

With a little bit of nature everything is more beautiful! Also, I wanted to show you the woven vase I made for you, although it could mostly be used as a pencil holder. In the next post I will bring you tutorial on how to make it, I will try to write it next week!
In the end, I have not been able to fulfill my dream of having real roses, but my love led me to make something nice, and now I have it next to its vase adorning my desk, until the day comes when I fulfill my dream of having a beautiful rose bush.

Without anything else to add, take care, drink water, and don't forget to smile, I love you, see you in the next post, bye!



Español

Holiii, amigos de la comunidad de HiveDiy, ¿cómo se encuentran en esta ocasión?, ¡espero que muy bien!
Hoy les traigo algo un poquito diferente. Verán, tenía muchas revistas viejas en mi casa, y no sabía qué hacer con ellas, pensé en botarlas a la basura y ya.
Sin embargo, vi una imagen de rosas eternas hechas con HOJAS DE LIBROS, ¡qué maldad! Me puso muy triste, porque a mí me encantan los libros, y quisiera tener muchos en una estantería, pero lamentablemente mi economía no me lo permite (de momento).
Pues bien, se me ocurrió seguir esta fórmula con un material realmente reciclable como lo son las revistas. Aunque para muchos no luzca tan estético como hacerlo con un material más convencional, lo cierto es que mi idea fue reciclar y usar los materiales que tenía a la mano, para también demostrar nuevamente que de algo simple se pueden hacer cosas un poco lindas.
Así que, juntando mi amor por las flores y usando materiales reciclables, hoy me acompañarán a hacer rosas de papel, vamos allá!

Materiales

- Revista (con una basta).
- Pega blanca.
- Palito de altura.
 |  |  |  |
|---|
Medimos cinco cuadrados de 8x8 cm y los cortamos, yo necesité solo dos hojas de la revista para esto.
Luego, doblamos como se ve en las imágenes: primero hacemos un triángulo midiendo punta con punta, tomando la punta de arriba y llevándola a la punta de abajo.
Después, doblamos punta con punta nuevamente, tomando la punta de la derecha y la unimos con la de la izquierda.
Por último, repetimos lo anterior hasta que nos quede una forma con la de la última imagen.
 |  |
|---|
Una vez que tenemos todos los cinco cuadraditos de papel doblados (en la imagen aparecen cuatro porque olvidé fotografiar el quinto, pero tienen que ser cinco), marcamos un arco con lápiz y lo cortamos, así como se ve en la segunda imagen. Espero que me esté explicando bien.
 |  |
|---|
 |  |
|---|
Cuando abramos el papel, tiene que lucir así como una flor, si lograste que quedara así, entonces logramos hacerlo bien, ¡yeiii!
Ahora, comenzaremos a cortar algunos pétalos de las flores, en un orden especifico, guiándonos por las marcas que dejaron los dobleces en el papel.
A la primera flor, le cortamos un solo pétalo.
A la segunda flor, le cortamos dos pétalos juntos, tal como se ve en las dos imágenes de abajo, parece un corazón. ❤️
 |  |
|---|

A la tercera flor, le cortamos tres pétalos juntos.
A la cuarta flor, le cortamos cuatro pétalos juntos, lo cual la divide a la mitad.
A la quinta flor no le cortamos ningún pétalo, pero sí le haremos un pequeño agujero en el centro. Este agujero pueden hacerlo redoblando la flor nuevamente, y quitan la punta del triángulo apenas cortándola unos milímetros. Cuando abran nuevamente la flor, tendrá este huequito en el centro.
Ya tenemos todos los pasos para hacer la flor, ahora nos falta lo más importante: el tallo.
 |  |
|---|
Para hacer el tallo, nos ayudaremos de un palito de altura para hacer algo llamado “canuto”, al menos así le decía mi profesora de manualidades en el liceo.
Pues bien, para hacer un canuto tomamos una hoja de papel, preferiblemente que sea más larga que ancha, y desde la punta comenzamos a enrollar esta hoja dando muchas vueltas al palito de altura.
Yo pongo pega blanca en la esquina inferior izquierda de la hoja, que es desde donde empiezo a enrollar de manera diagonal. Luego, a mitad de recorrido, vuelvo a aplicar un poquito de pega blanca y sigo enrollando hasta la esquina superior derecha, donde vuelvo a aplicar un poco de pega y sello todo el cilindro dándole vueltas y pasando mis dedos.
Siento que es un poco difícil de explicar y no me doy a entender, pero lo importante es que recuerden que van a enrollar el papel dando vueltas, donde su punto de partida es la esquina inferior izquierda y su punto de llegada es la esquina superior derecha.
Este palito lo corté a la mitad, porque tenía pensado hacer más rosas. La longitud del canuto depende del tamaño de la hoja de papel, ahí deciden ustedes si quieren un tallo más largo o más corto. Yo hice cinco de estos, para cinco rosas.
Es importante que aprieten un poco el papel para que quede bien asegurado, pero no demasiado porque luego no podrán sacar el palito de altura de adentro, que es el paso final. Una vez lo apreté tanto que no pude sacar el palito y tuve que tirarlo todo a la basura.
Si logramos hacer todos los pasos correctamente, el resultado debe verse como un palillo de papel, tal como en la segunda imagen.
 |  |
|---|
Aquí viene la parte que yo considero una mezcla entre fácil y engorrosa: hacer la rosa. (ok, esto ha sido una rima).
Comenzamos tomando el primer pétalo, el que estaba solito, y le ponemos un poco de pegamento en el extremo inferior, y lo pegamos así, envuelto un poco sobre el extremo del canuto.
Luego, tomamos el segundo conjunto de pétalos, los que son dos juntos (con forma de corazón), y los envolvemos alrededor de este primer pétalo. Yo lo hago de la siguiente forma: envuelvo alrededor del conjunto de pétalos anteriores, y cierro pegando juntos los pétalos de los extremos, ¿si me explico?
Por ejemplo, este pétalo con forma de corazón, lo pegué juntando cada extremo, poniendo pegamento en ambos y cerrándolos poniendo uno sobre otro.
Otra cosa que tomo en cuenta, es que siempre trato de poner las cerraduras de cada pétalo de manera contraria a la anterior, tienen que estar en extremos opuestos para que quede equilibrada la rosa. Así los pego yo, es el método que desarrollé por mi cuenta y que hace que queden más aseguradas.
Realmente espero que se entienda bien la forma en la que pego cada sección de pétalos, lo fundamental es tener una cosa en cuenta: cada sección va envolviendo a la anterior y se pega en cada extremo que se junte al envolverse. Es la manera más simple en la que puedo darme a entender, espero que lo logre.
 |  |  |
|---|
Bien, siguiendo el procedimiento descrito anteriormente, vamos a pegar la sección de tres pétalos juntos.
Luego vamos a pegar los cuatro pétalos juntos, y después los otros cuatro pétalos juntos que nos quedaban. Y así seguimos en orden numérico: pegamos la sección de cinco pétalos, luego la de seis, luego la de siete, hasta que llegamos a la que solo tiene un hueco en medio.
A esta última sección, le puse pegamento en el centro. También, puse pegamento en la base de la flor y junté, por fin, la última sección de pétalos con el resto de la rosa. Quedando como en la tercera imagen.
 |  |
|---|

Esto que viene diría que es opcional, pero tomé unos cuadrados de papel de aprox. 4x4 cm y los doblé de la misma manera que hice los dobleces para las flores al principio, pero, en lugar de cortar un arco, corté estos piquitos muy afilados.
Cuando abrí esta sección de piquitos, los corté a la mitad y pegué cada uno a la base de la rosa, envolviendo el tallo, básicamente. Estos piquitos son en realidad las hojitas de la base de nuestra rosa.
Esta otra cosa es opcional, pero yo corté hojas de papel en forma almendrada como las hojas de las rosas, y las pegué a mitad del tallo. A algunas les puse dos hojas, a otras les puse una sola, la verdad todo esto es opcional y queda al gusto de cada quien, pero yo considero que quedan más lindas con hojitas, pues se asemeja más a un ramo.
Ahora sí, en la siguiente imagen les mostraré el resultado…

¡Y ya estaría!, ¿qué les parece?
Oh, bueno, estas fotos no le hacen mucha justicia, creo yo, ¿verdad?

 |  |
|---|


¡Con un poco de naturaleza todo es más bonito! Además, quería mostrarles el jarrón tejido que les hice, aunque más que todo podría usarse como un portalápiz. En el siguiente post les traeré tutorial de como hacerlo, ¡intentaré escribirlo la semana que viene!
Al final, no he podido cumplir mi sueño de tener rosas reales, pero mi amor me llevó a hacer algo lindo, y ahora lo tengo junto a su jarrón adornando mi escritorio, hasta que llegue el día en el que cumpla mi sueño de tener un hermoso rosal.

Sin nada más que añadir, cuídense, tomen agua, y no se olviden de sonreír. ¡Se les quiere, nos vemos en el próximo post, chau!



Credits | Créditos
- English translation DeepL (sorry for any mistakes, I don't know much English)
- Traducción al inglés DeepL (lo siento por cualquier error, no sé mucho inglés.)
- Cover, dividers, and banners made in Canva
- Portada, separadores y banners hechos en Canva
- Photos used in the post were taken by me, using a Samsung Galaxy J6
- Las fotos usadas en el post fueron tomadas por mí, usando un Samsung Galaxy J6
Posted Using INLEO
Preciosas amiga. Bendiciones 😘.
Quedan hermosas esas flores y dependiendo de las hojas que tengamos para hacerlas, serán más o menos coloridas, ajustándose a lo que queramos.
Te felicito @celely
¡Muchas gracias! 💙
Sí, de hecho, por eso usé revistas, porque son varios colores diferentes mezclados, y sentí que eso le daría un toque único, pero incluso con tela pueden hacerse unas parecidas. ☺️
Una hermosa forma de reciclar y aprovechar esas revistas que ya ibas a desechar, te quedaron muy bien.😍
Muchas gracias, me alegra que te haya gustado. 💖
Está genial está idea 💡 ,ideal para reciclar las revistas viejitas, (yo todavía tengo un montón) y hacer algo decorativos ,espero que lueguito si tengas tu rosal real también
Graciaaaas, me alegro de que te haya gustado! Ciertamente, las posibilidades de lo que se puede hacer con revistas, es muy extensa, así que puedes intentar, no se pierde nada (aprendes en el proceso, jijiji). Y muchas gracias, yo también espero que pronto la tenga.
Lindo día, bella. 💙✨
¡Amé el resultado! Se ven preciosas y tienen un toque único. Aparte explicas muy bien cómo hacerlas. Me encantó tu post ✨
!DIY
¡Muchas gracias! Me alegro de que te haya gustadooo. 💖 Intento explicar lo mejor posible, es bueno saber que me haya dado a entender correctamente jijiji.
Definitivamente se entendió ✨.
Por cierto, si no es molestia ¿podrías decirme que código usas para vincular la parte en español al principio? Para que se pueda acceder fácilmente a la otra parte del post sin tener que bajar tanto
Claro, solo que no sé como hacer para que se vea como código, ya que al escribirlo aquí, lo maqueta automáticamente, no tengo muchos conocimientos en esto jajaja.
Intentaré adjuntando una imagen donde esté escrito, puede ser. Igual es bastante sencillo.
Espero que así sea de ayuda jiji. 🤭
Tranquila, yo tampoco sé mucho de esto. Pero con la imagen se entiende perfecto, ¡muchísimas gracias! 💖✨
Transformaste algo tan simple como una revista en una obra de arte además tu paso a paso es tan claro que hasta yo que soy mala en manualidades podría intentarlo. Saludos!
Owwww, gracias, gracias. ✨
Que bueno que si me expliqué bien jsjsj. Espero que sí te animes a intentarlo, si te gusta, claro; no se trata de ser bueno o malo en algo, sino de disfrutar y aprender. Lindo día para ti. ☺️💙
te quedó genial
Graciaaaas. 💙
pero que hermosura y explicado con mucho detalle, te felicito niña guapa.. Dios te bendiga siempre
Ay, muchas gracias. 🥹✨ Amén, igualmente para usted!
Quedan bellas las rosas, si le colocas pintura más bellas quedan... Saludos, bendiciones y éxitos.
¡Gracias! 💙✨ Había pensado en ello, pero no tenía pintura, jiji. Lindo día y muchas gracias por los buenos deseos, que se le multipliquen. 🌻
La estructura de tu publicación es hermosa, muy buen paso a paso y las flores me encantaron, se ven espectaculares y lindas para decorar espacios vintage. No tengo revistas, pero creo que podemos usar impresiones recicladas <3 Gracias por compartir tus proyectos de calidad con nosotros.
¡Muchas gracias por tus lindas palabras! 🌻
Me alegra muchísimo que te haya gustado mi publicación y manualidad, y también me siento halagada por tus observaciones. Es bonito saber que sirva de inspiración para decorar, sobre todo porque me gustan mucho las vibras de lo vintage. ¡Gracias a ti, por tu apoyo! 🥹✨
¡Me encantaron estas rosas! De hecho me diste una idea, voy a pensarla con detenimiento... !PIZZA !BBH !HUESO
!HUESO
Congratulations @celely! You have completed the following achievement on the Hive blockchain And have been rewarded with New badge(s)
Your next target is to reach 900 comments.
You can view your badges on your board and compare yourself to others in the Ranking
If you no longer want to receive notifications, reply to this comment with the word
STOPThis is so creative and detailed. Thanks for sharing your creativity with us, well done.
Thank you very much for your nice comment and support! 💙
You can query your personal balance by
@mandysmoon just sent you a DIY token as a little appreciation for your post dear @celely! Feel free to multiply it by sending someone else !DIY in a comment :) You can do that x times a day depending on your balance so:!DIYSTATSThanks, I will do so. ✨
Quedan bellas las rosas, si le colocas pintura más bellas quedan... Saludos, bendiciones y éxitos..
Te quedaron hermosa las flores, le diste otra utilidad a la revista, me gusto como quedo el resultado.
!HUESO
!BHRT
Hola.. Disculpa el abuso, Puedes apoyar con un voto a mi esposo @albertocoachbl en este concurso?? Te dejo el link del post 🙏
Gracias de antemano 🥰🥰
https://peakd.com/hive-140169/@lordbutterfly/help-us-decide-the-winner-of-vibes-week-27-community-poll
$PIZZA slices delivered:
(7/15) @cpol tipped @celely