Español:
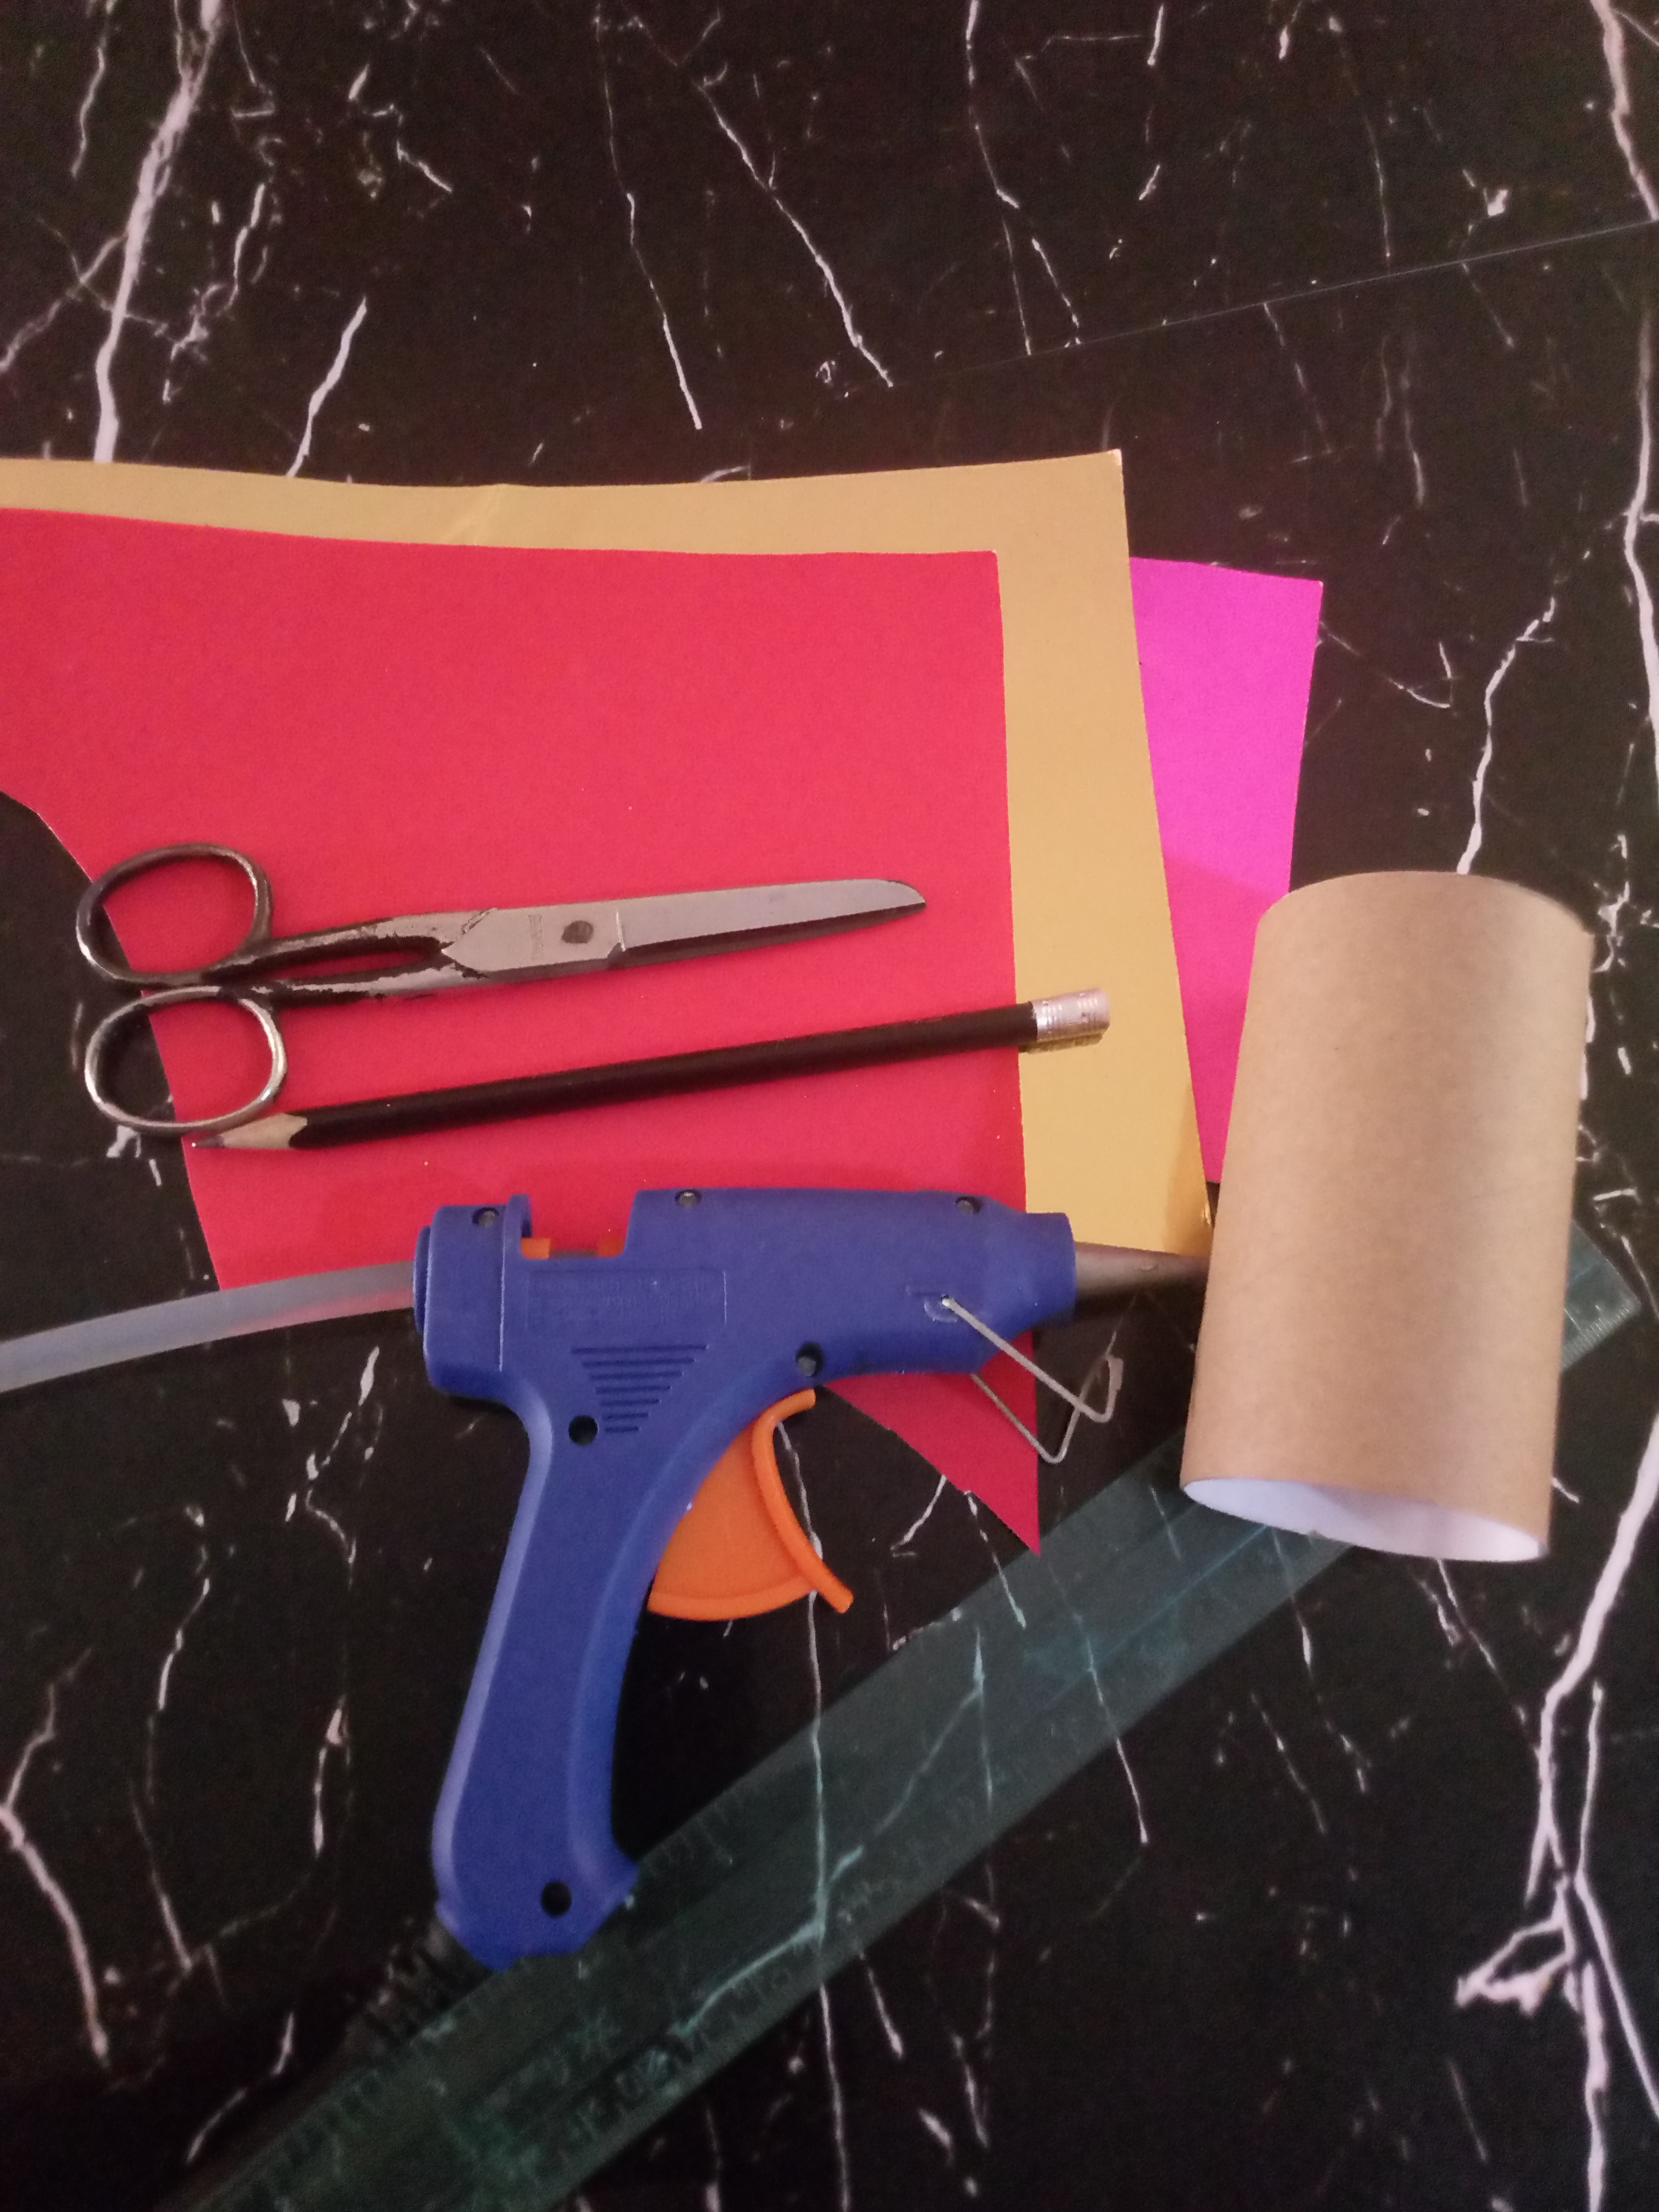
Materiales:
- 1 tubo de cartón del papel higiénico.
- Cartulina (color de tu preferencia).
- Silicon.
- Lápiz.
- Tijera.
- Regla.
English:
Materials:
- 1 cardboard toilet paper tube.
- Cardboard (color of your choice).
- Silicon.
- Pencil.
- Scissors.
- Ruler.
.png)
Español:
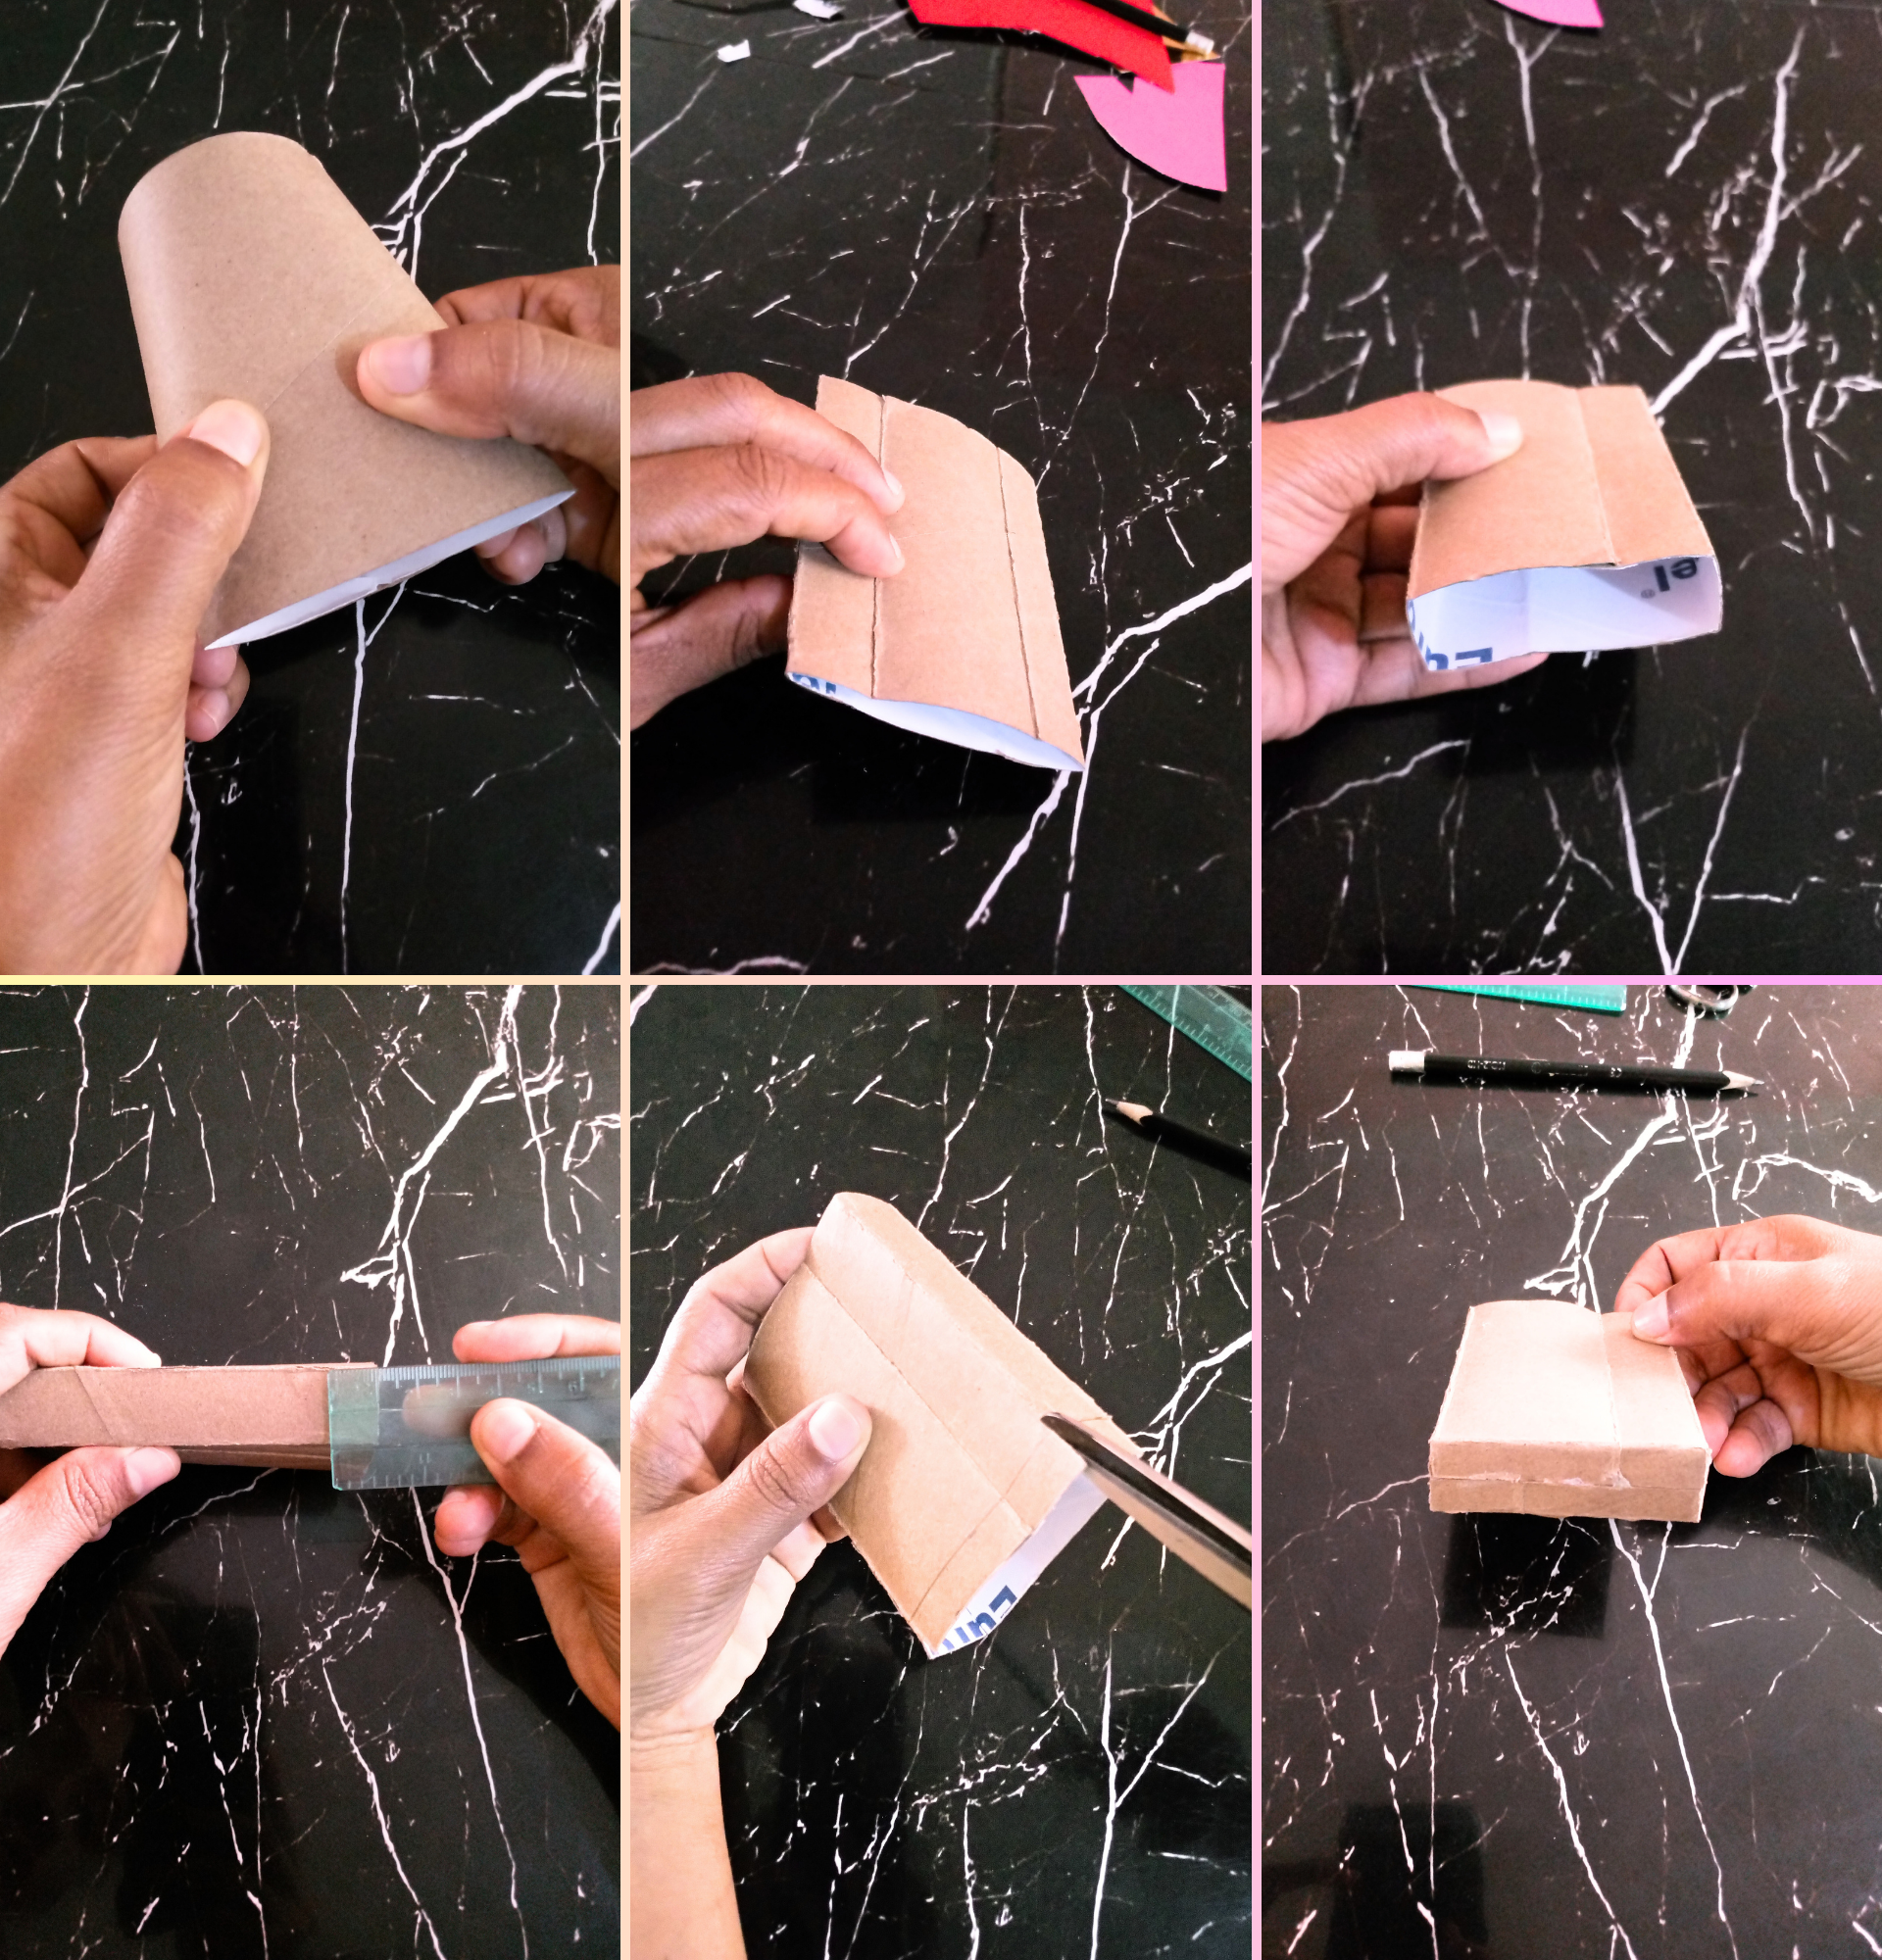
Paso 1:
- Doblamos el tubo de cartón en dos, luego realizamos otro dobles a la distancia de 2 cm de donde hicimos el primer dobles, quedando así como una cajita en forma rectangular.
- Seguidamente, marcamos una linea a la distancia de 1 cm de altura del fondo de nuestra bolsita, cortamos con la tijera las 4 puntas, la doblamos hacia dentro y procedemos a pegar con silicon caliente.
English:
Step 1:
- We fold the cardboard tube in two, then we make another double at a distance of 2 cm from where we made the first double, leaving a rectangular shaped box.
- Next, we mark a line at a distance of 1 cm in height from the bottom of our bag, cut with scissors the 4 ends, fold it inwards and proceed to glue with hot silicone.

Español:
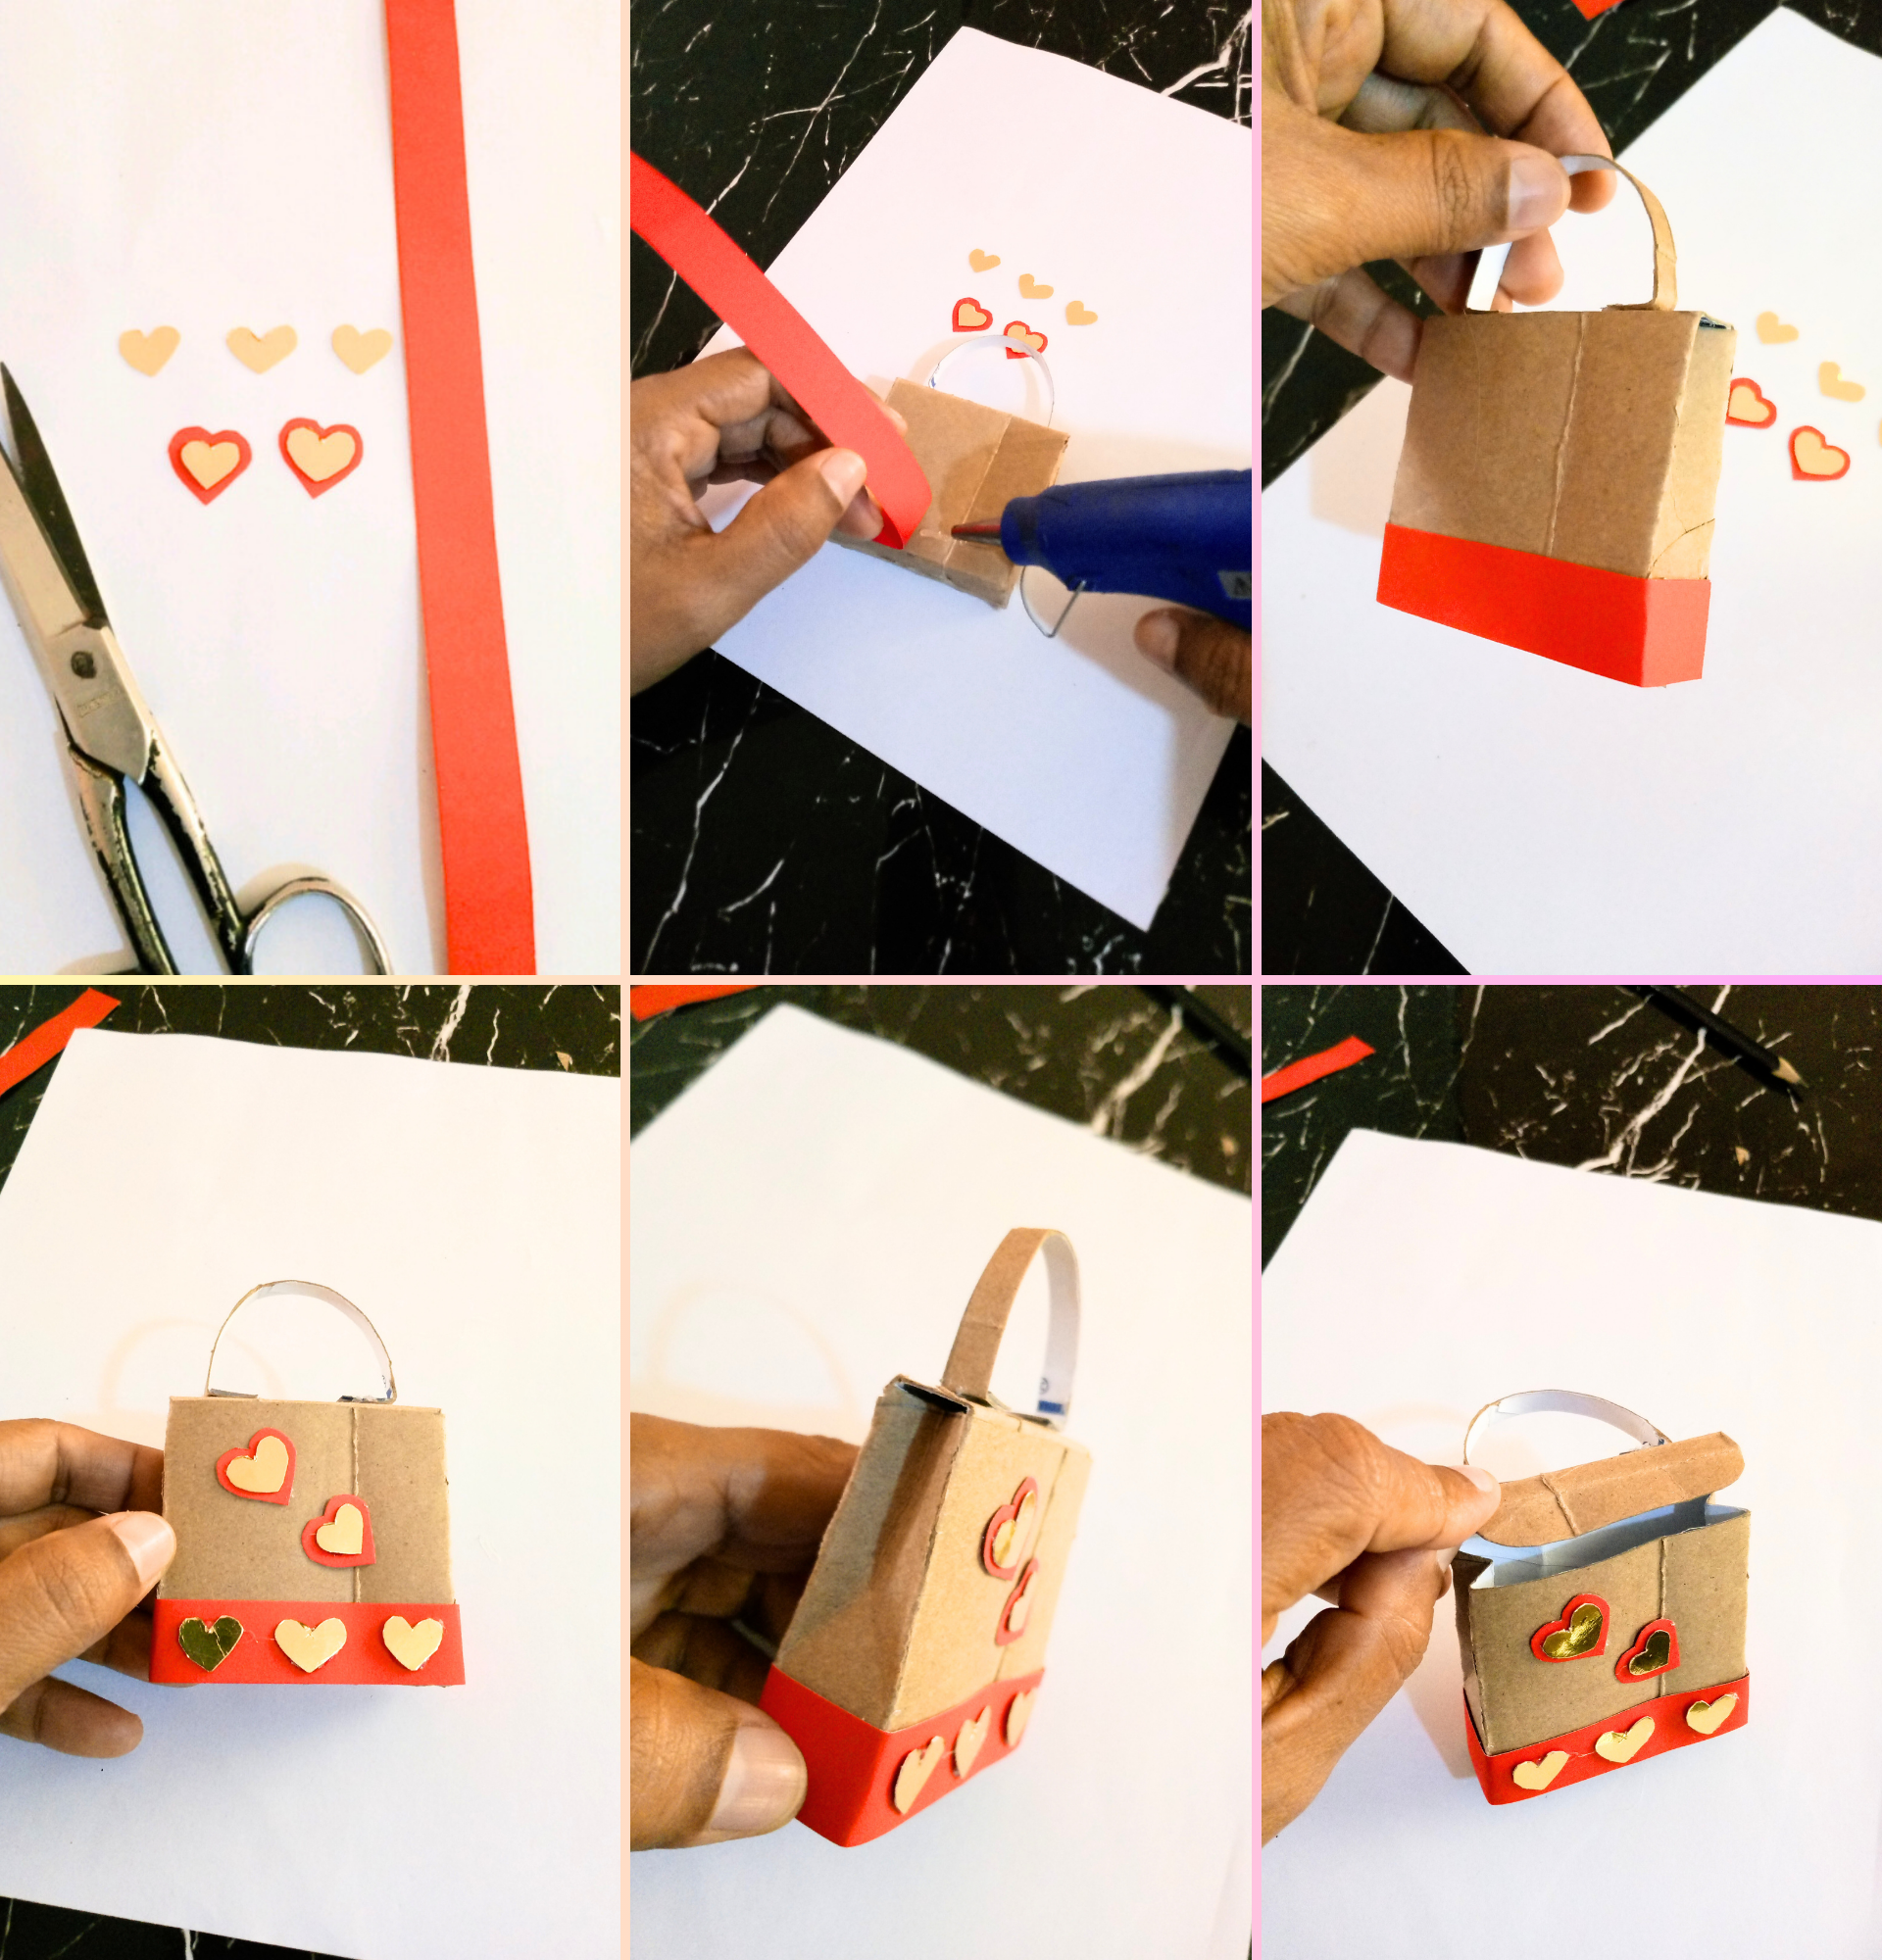
Paso 2:
- Ahora nos vamos con la parte de arriba de la bolsita, cortamos por todo el borde de la bolsita dejando un solo lado sin cortar a 4 cm de altura, a ese mismo lado le recortamos las dos puntas semi circular, luego con la ayuda de los dedos hacemos un pequeño dobles en ambos lados hacia dentro de la bolsita.
- Después hacemos otro dobles a la tapa, así quedaría cerrada la bolsita .
- Luego con el mismo pedacito de cartón que nos quedo recortamos una tirita y la pegamos a la parte de arriba en forma de asa.
English:
Step 2:
- Now we go to the top of the bag, we cut all around the edge of the bag leaving only one side uncut to 4 cm in height, on that same side we cut the two semi-circular tips, then with the help of the fingers we make a small double on both sides into the bag.
- Then we make another double to the lid, this way the bag will be closed.
- Then with the same piece of cardboard we cut out a strip and glue it to the top in the form of a handle.
Español:
Paso 3:
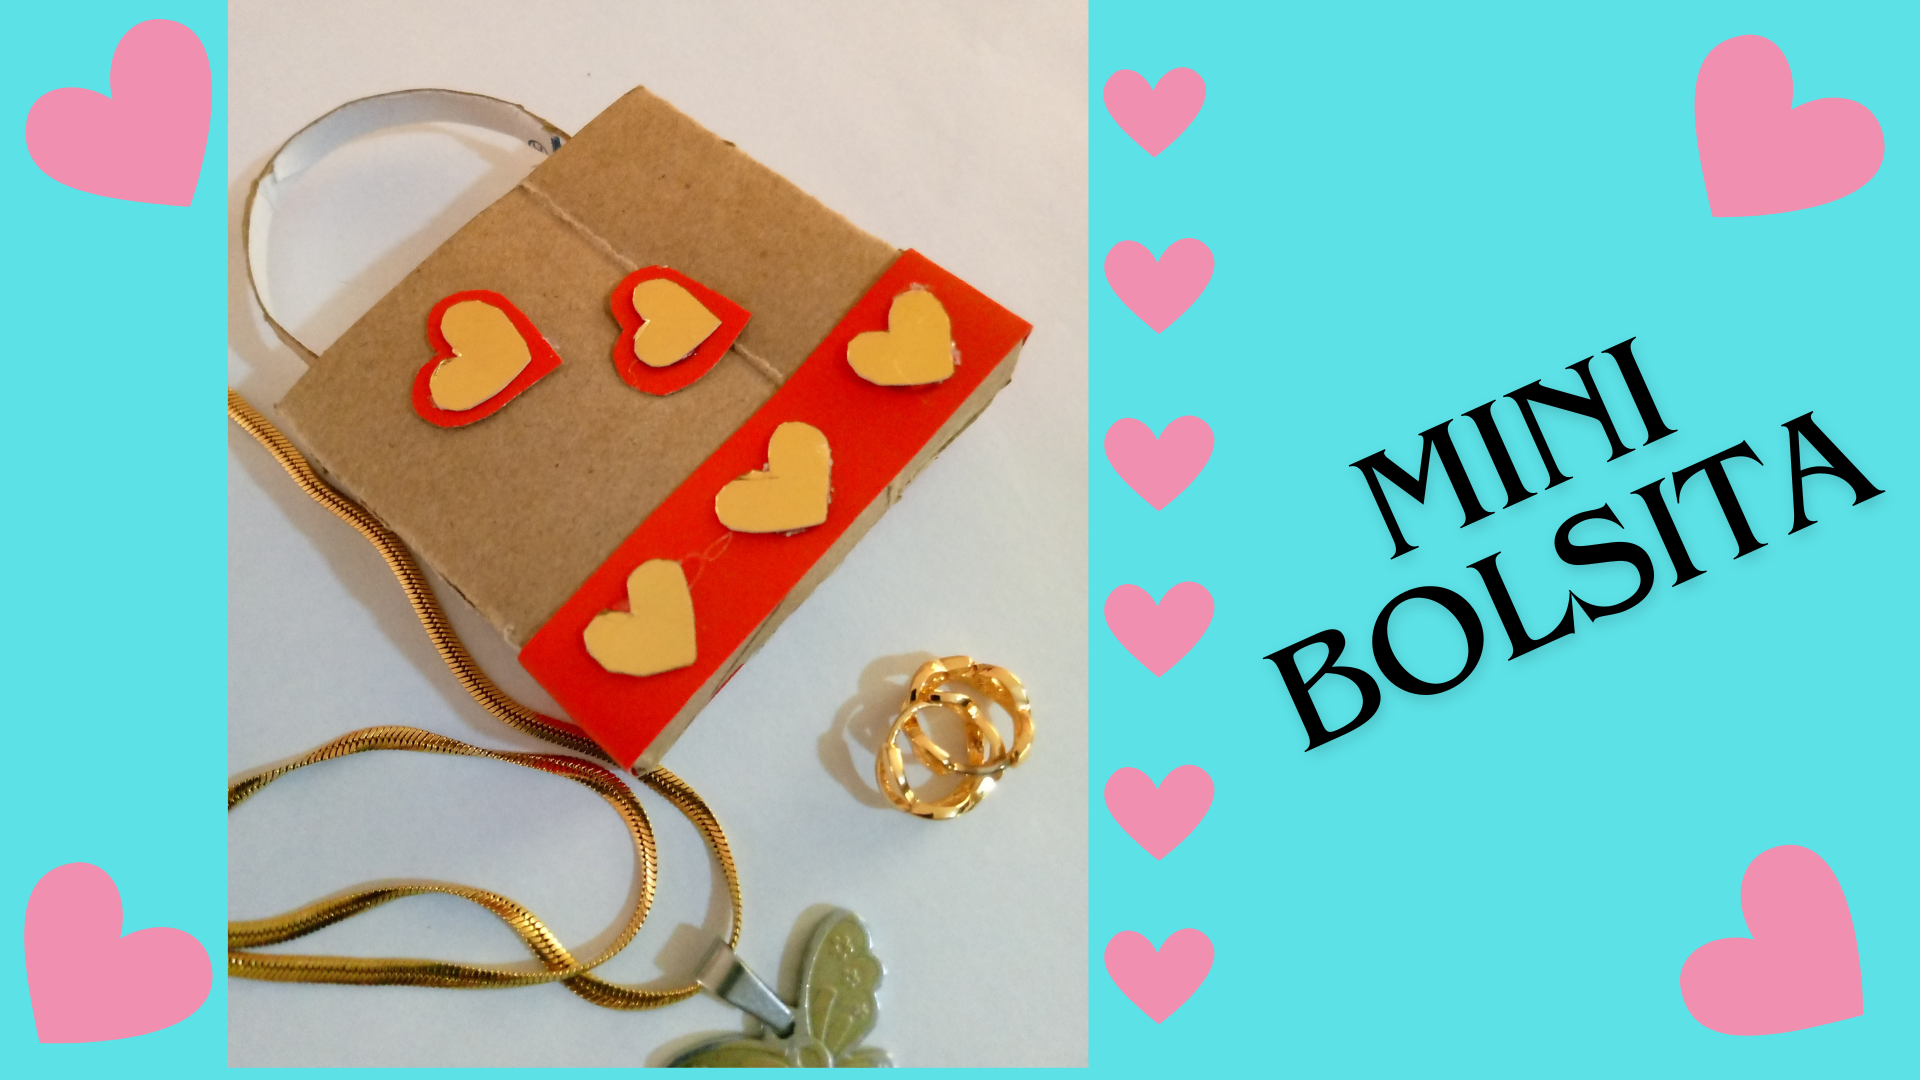
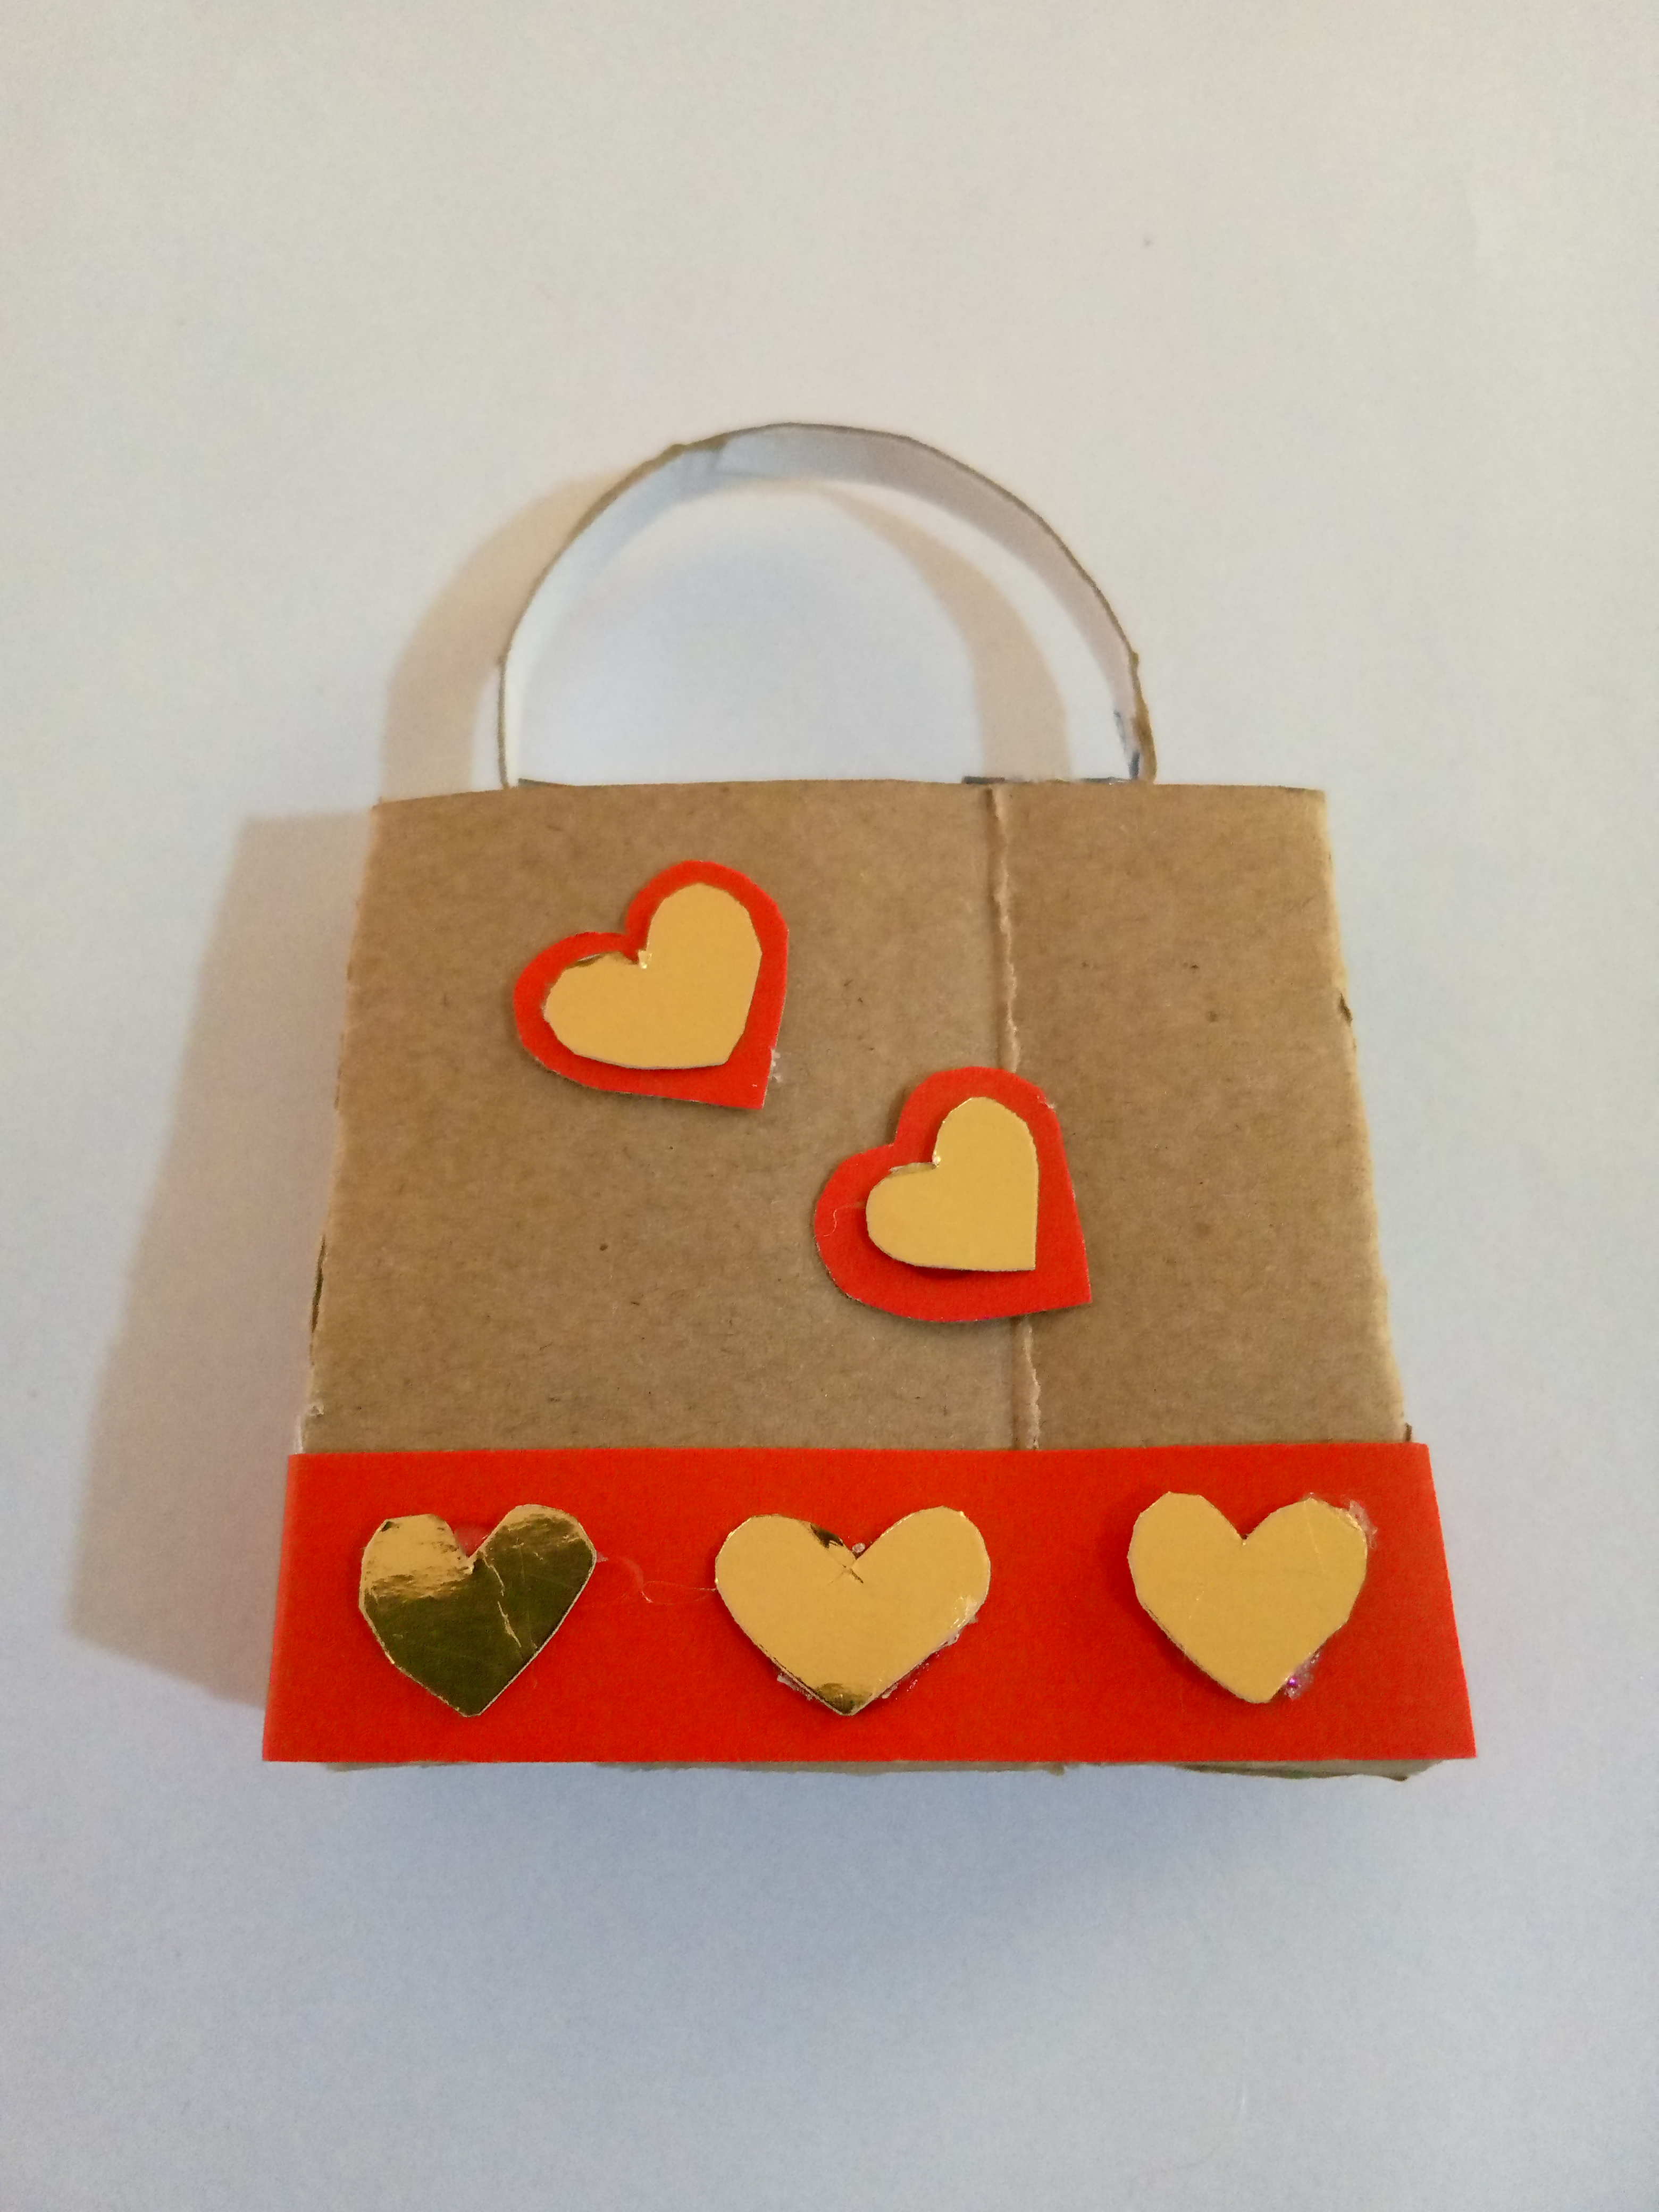
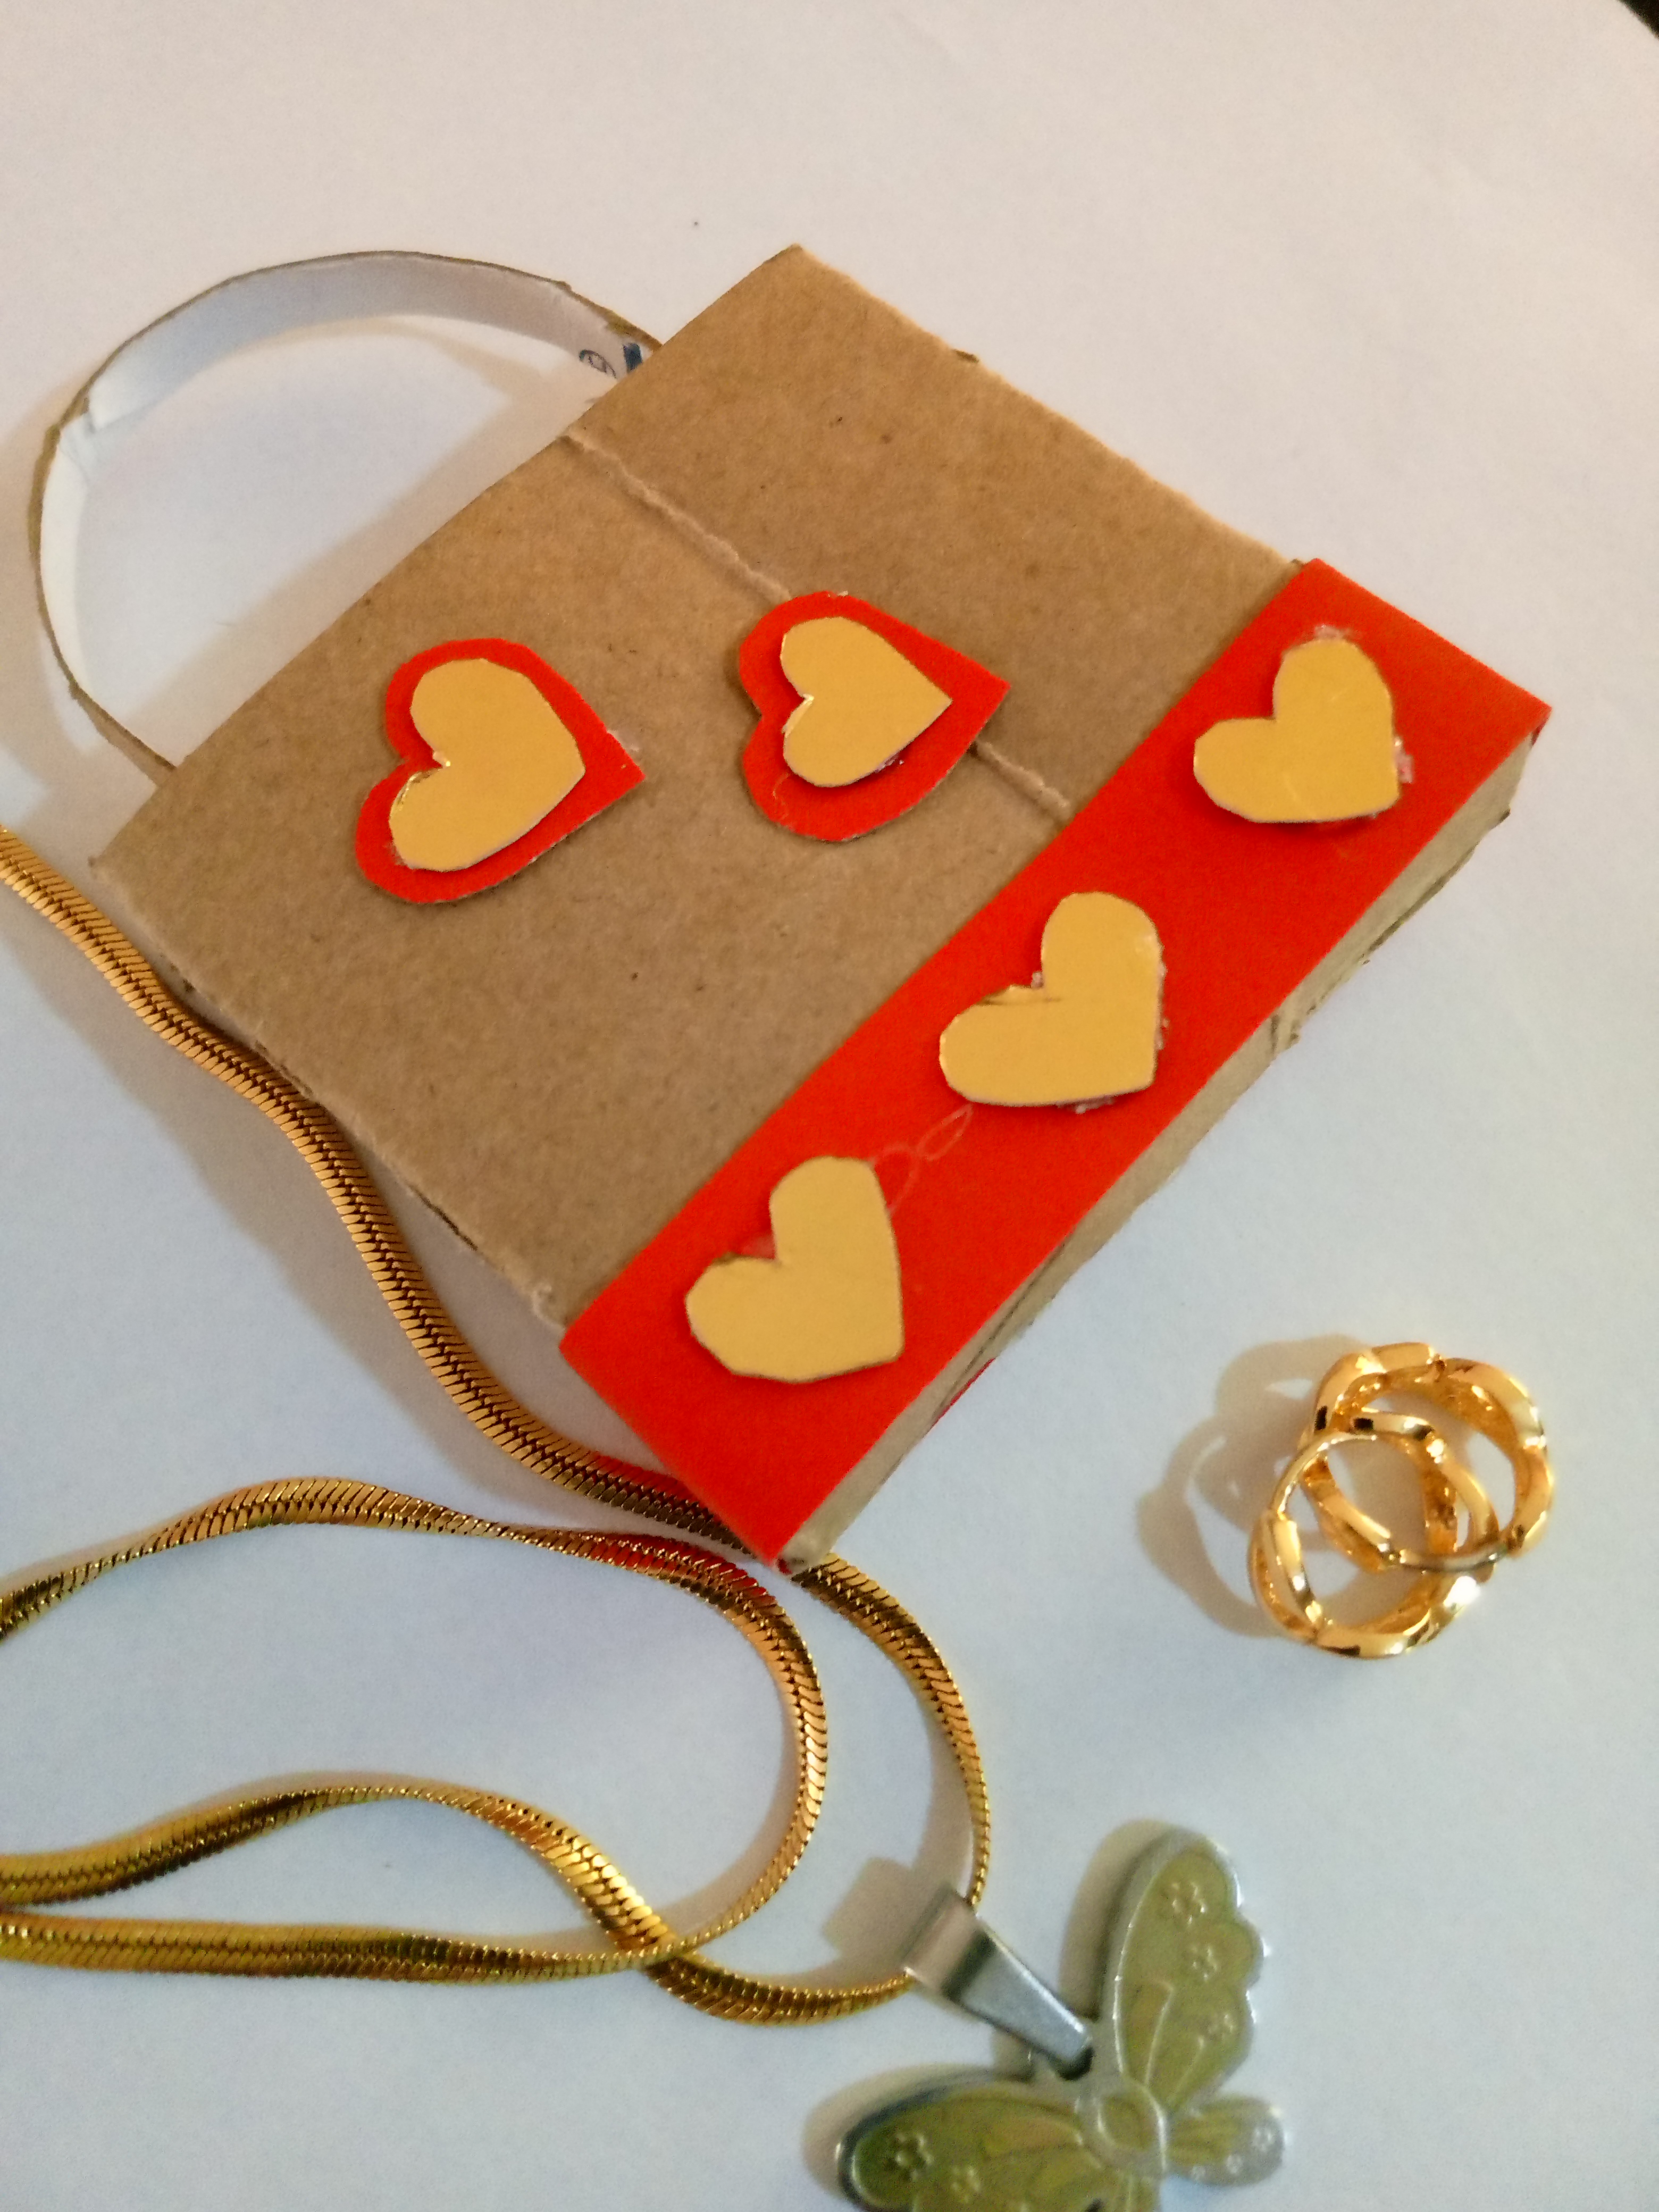
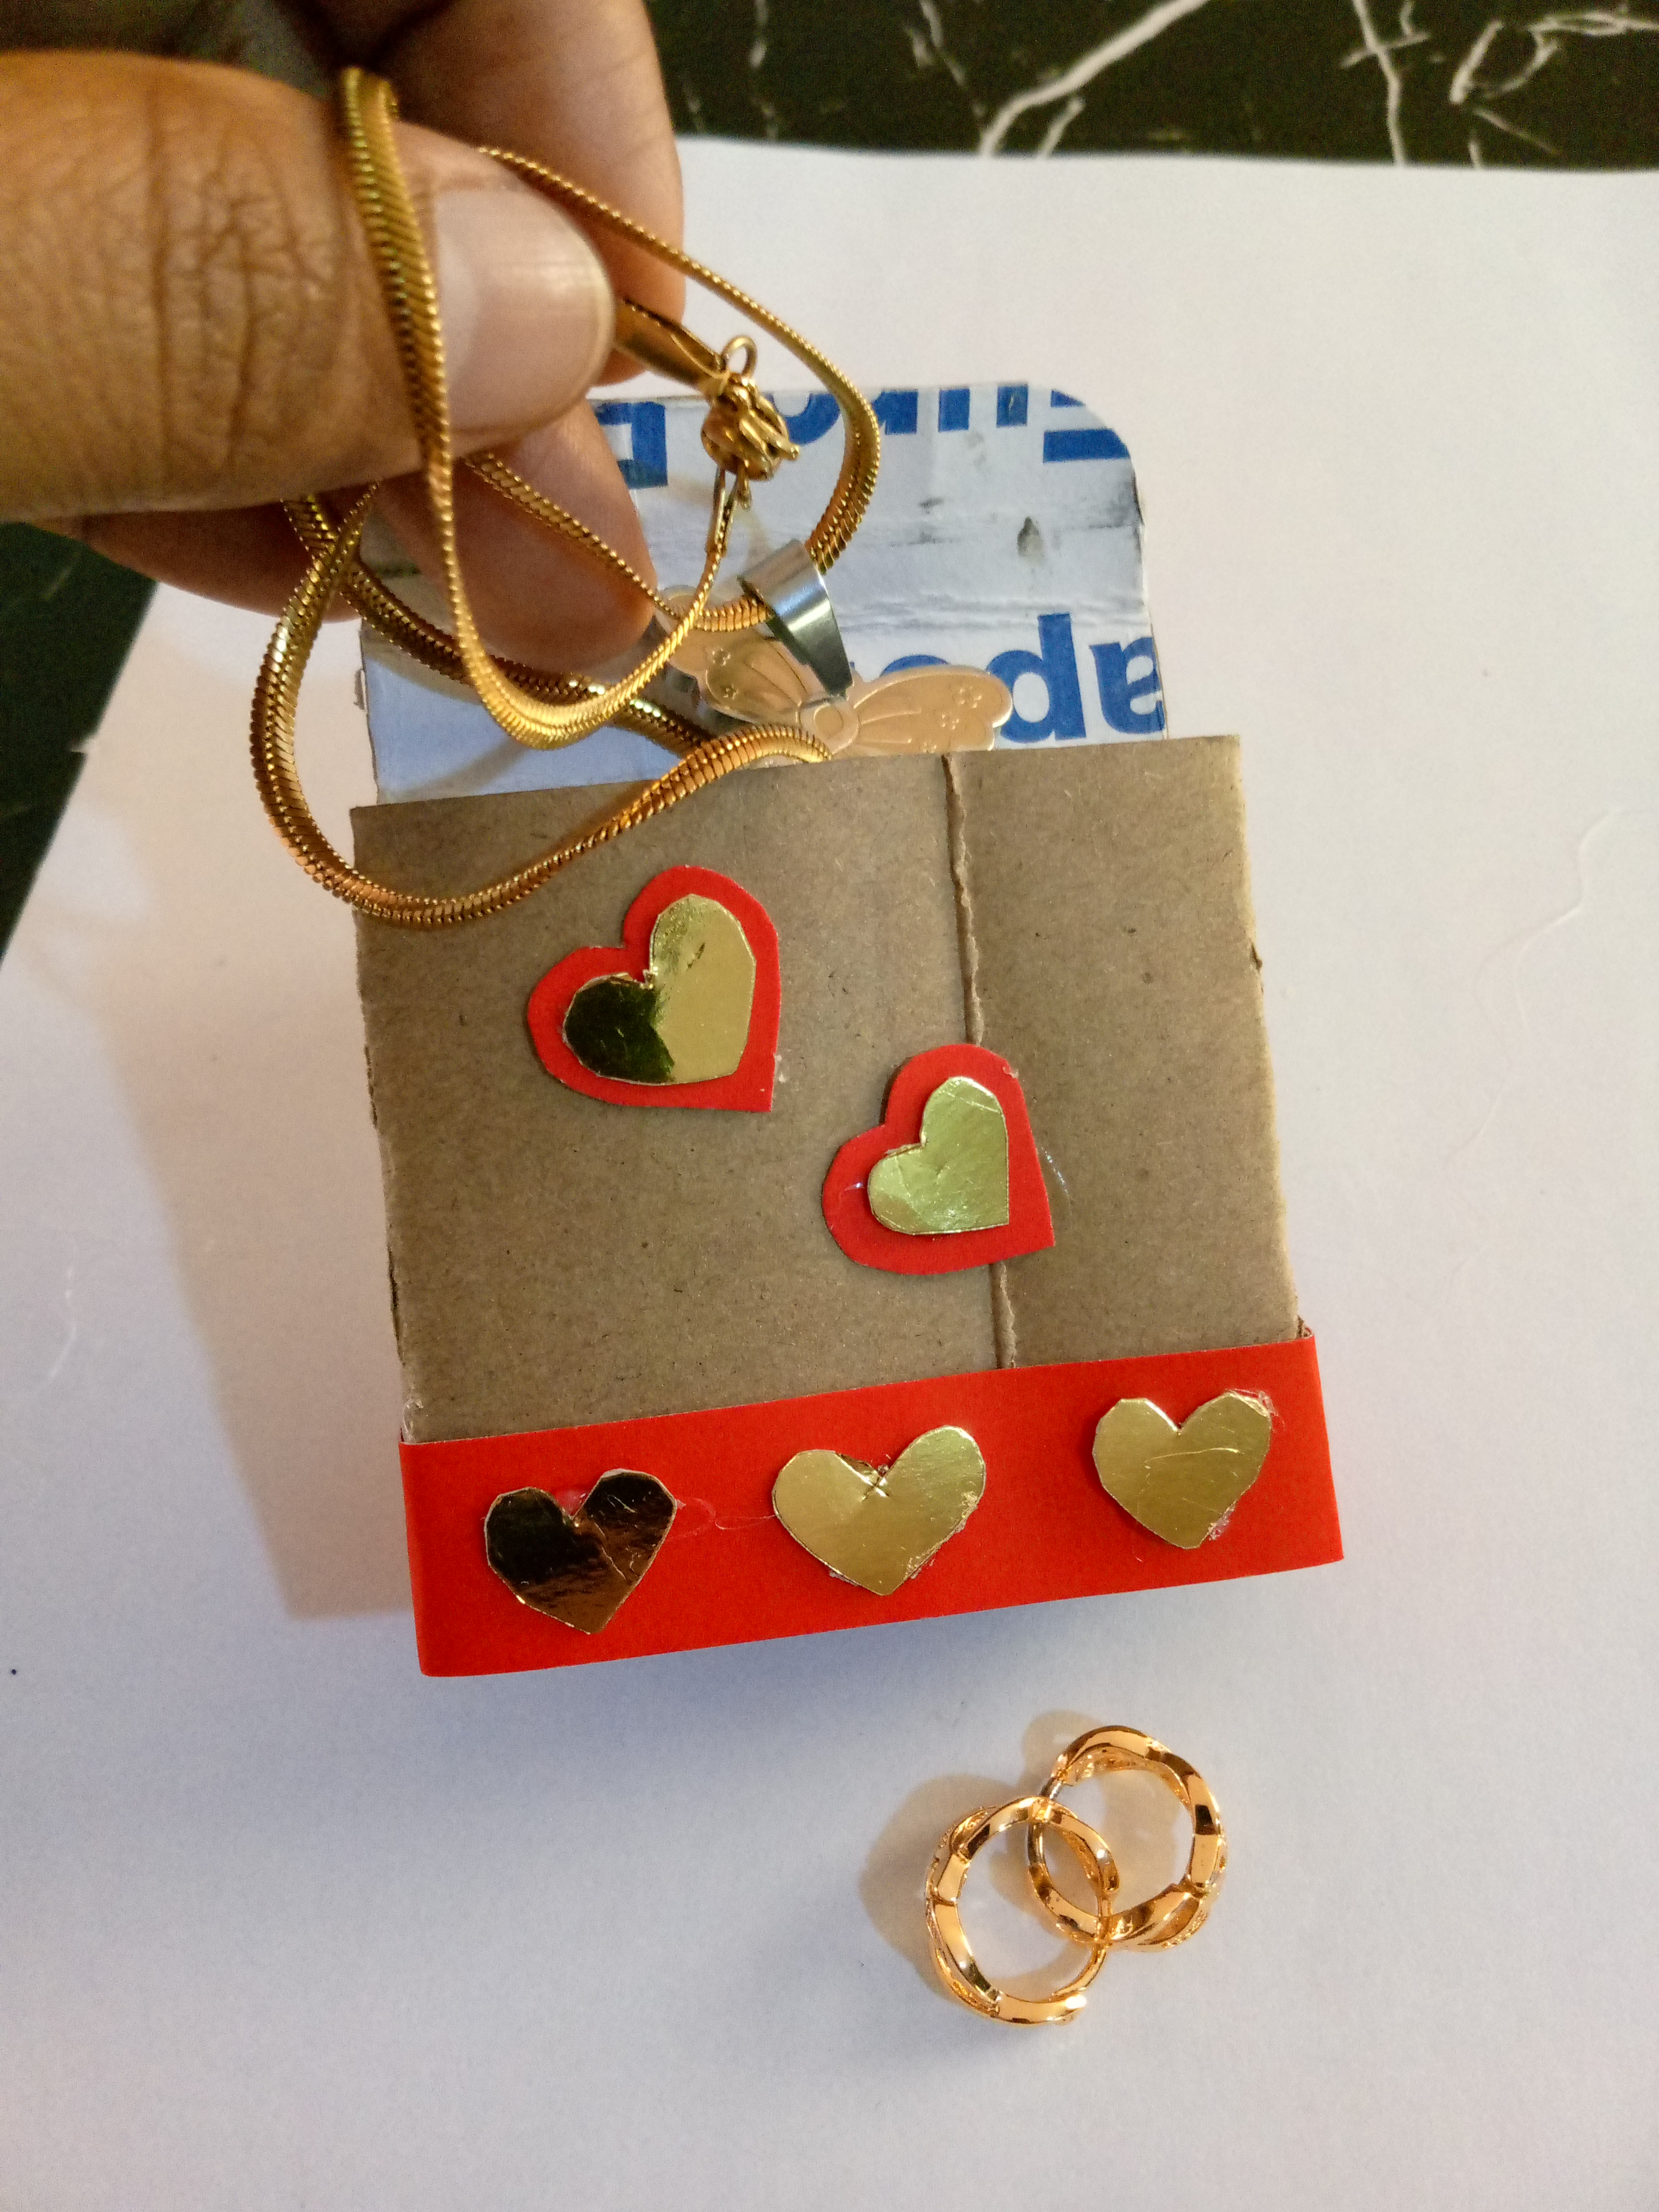
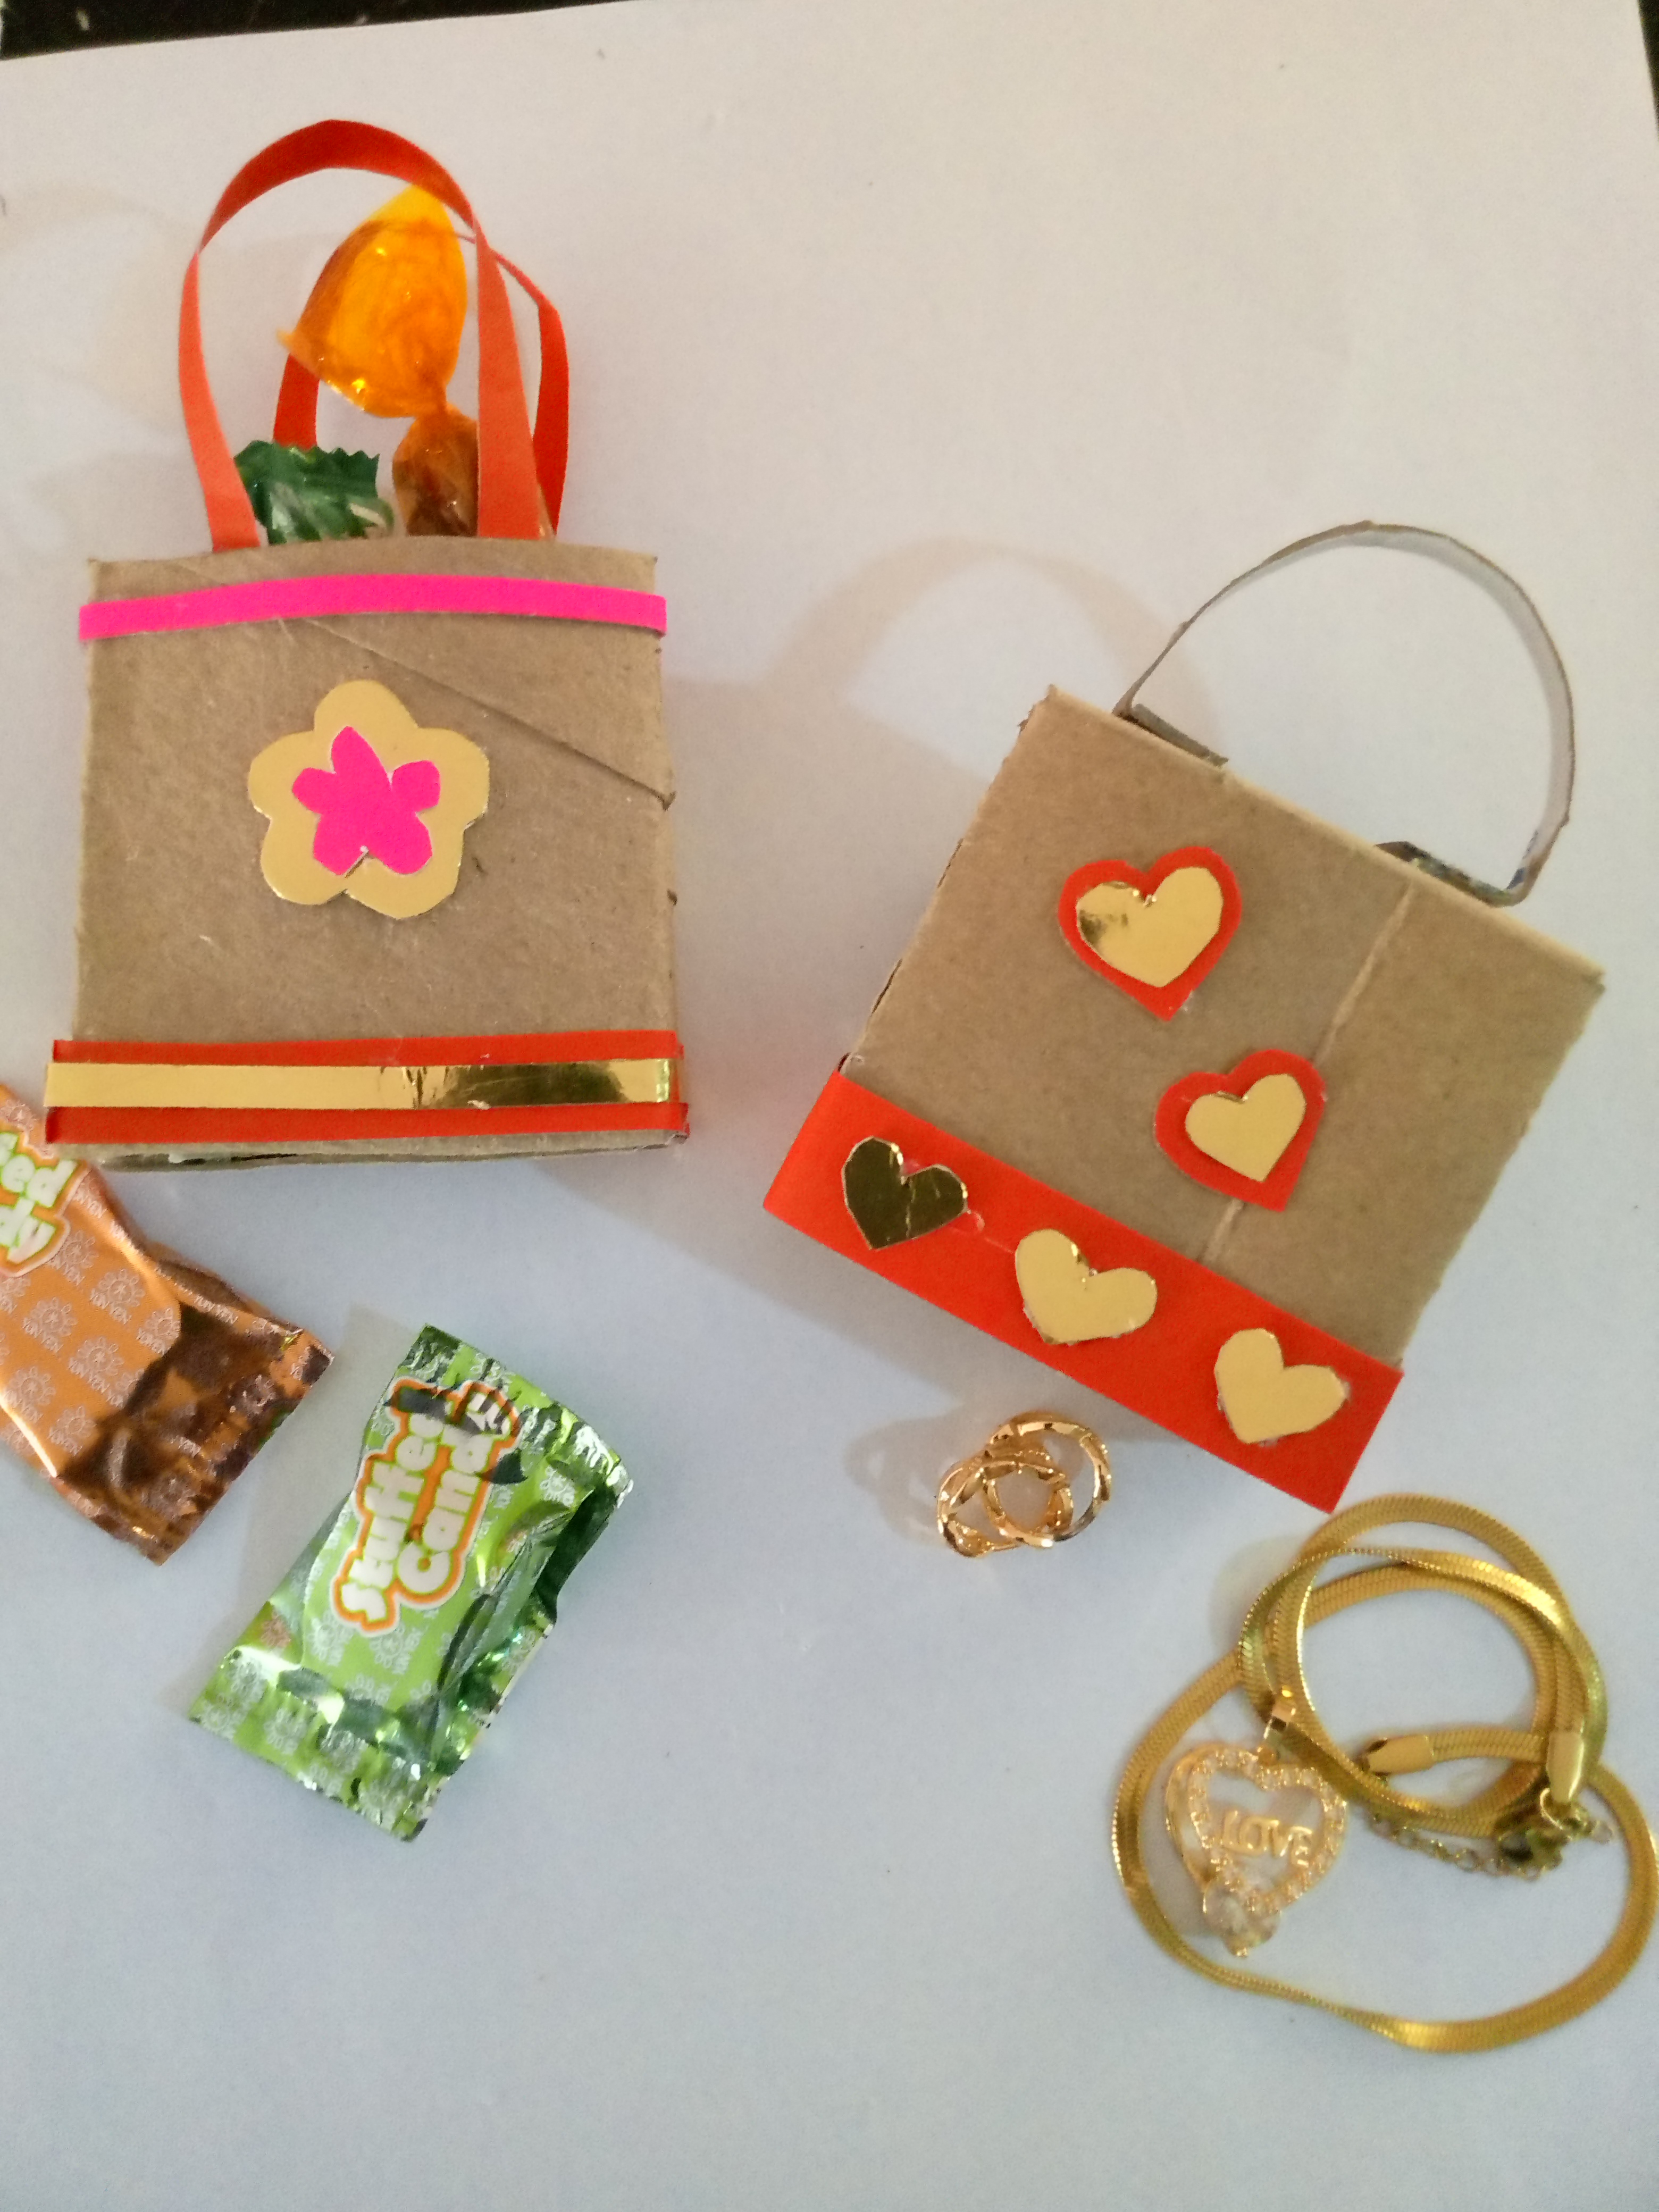
- En este último paso hacemos los detallitos para decorar la bolsita, cortamos una tira de cartulina de color en este caso roja de 2 de ancho. Dibujamos y recortamos unos corazones y procedemos a pegarlos así como los muestro en las fotos.
De esta manera tendremos unas lindas bolsitas de obsequios, del mismo modo hice una igual pero con diferentes asa, la cual se las muestro en el resultado final.
English:
Step 3:
- In this last step we make the little details to decorate the bag, we cut a strip of colored cardboard in this case red 2 wide. We draw and cut out some hearts and proceed to glue them as shown in the pictures.
In this way we will have a nice gift bags, in the same way I did the same but with a different handle, which I show you in the final result.
Espero les haya gustado mi resultado final hasta luego
I hope you liked my final result.
Que lindaaa, me parece una idea económica y creativa, la usaría para obsequiar unos aretes 😊
Cierto amiga es muy económico ya que se hace con poco material, saludos y bendiciones.
Amazing job friend, thanks for sharing your beautiful cardboard bag with us and for also walking us through the whole creation process. Well done friend.