
Hola, comunidad de HiveDIY, soy Cristhenos. Nuevamente les deseo un feliz inicio de semana lleno de nuevas experiencias. En el día de hoy seguimos aprendiendo a dibujar paisajes con diferentes puntos de fuga y en esta ocasión les traigo este dibujo que presenta dos puntos de fuga, ya que en mi anterior post estuve hablando de cómo empezar un dibujo con un solo punto de fuga; aquí será la misma lógica. De igual manera, estaré dando algunos consejos durante el proceso para poder desarrollar un dibujo a dos puntos de fuga de la mejor manera posible. Sin más distracciones, los dejo con el resto del post.
Hello, HiveDIY community, I'm Cristhenos. Once again I wish you a happy beginning of the week full of new experiences. Today we continue learning how to draw landscapes with different vanishing points and this time I bring you this drawing that presents two vanishing points, since in my previous post I was talking about how to start a drawing with a single vanishing point; here it will be the same logic. Likewise, I will be giving some tips during the process to be able to develop a drawing with two vanishing points in the best possible way. Without further distractions, I leave you with the rest of the post.
Materiales/Materiales
Los materiales que necesitaremos para dibujo son
1 hoja blanca común, lápiz H o 2H, lapicero, cinta negra
The materials we will need for drawing are
1 plain white sheet of paper, H or 2H pencil, pencil, black tape
Este tipo de dibujos no es muy demandante en cuanto a materiales; esto puede variar dependiendo del estilo del artista. En mi caso, me gusta bastante utilizar el achurado con un poco de garabato para crear un dibujo que se parezca a lo que estoy dibujando y transmita esa sensación que quiero expresar, pero ustedes pueden utilizar la técnica que mejor les parezca.
This type of drawing is not very demanding in terms of materials; this may vary depending on the artist's style. In my case, I quite like to use the flattening with a bit of doodling to create a drawing that looks like what I am drawing and transmits the feeling I want to express, but you can use the technique that best suits you.
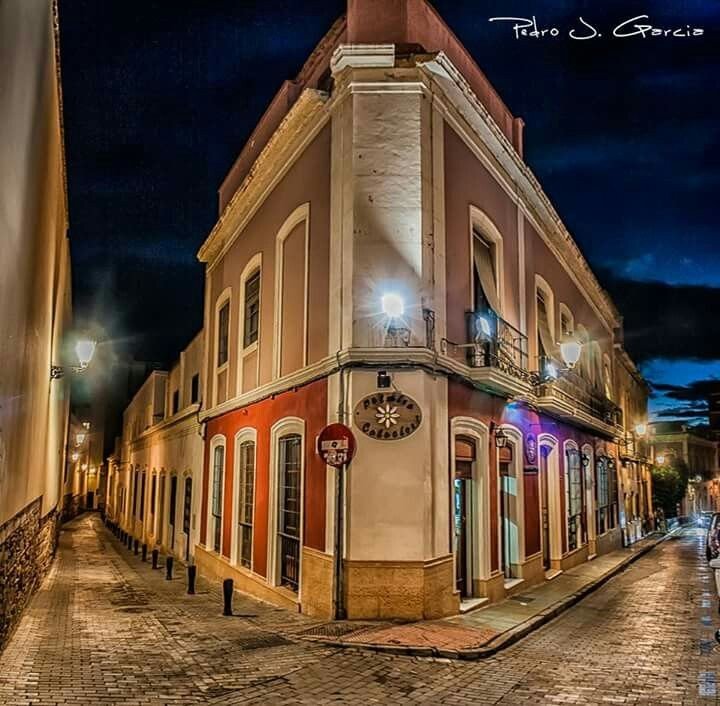
Para el siguiente dibujo utilizaré esta imagen de la plataforma Pinterest como referencia:
For the following drawing I will use this image from the Pinterest platform as a reference:
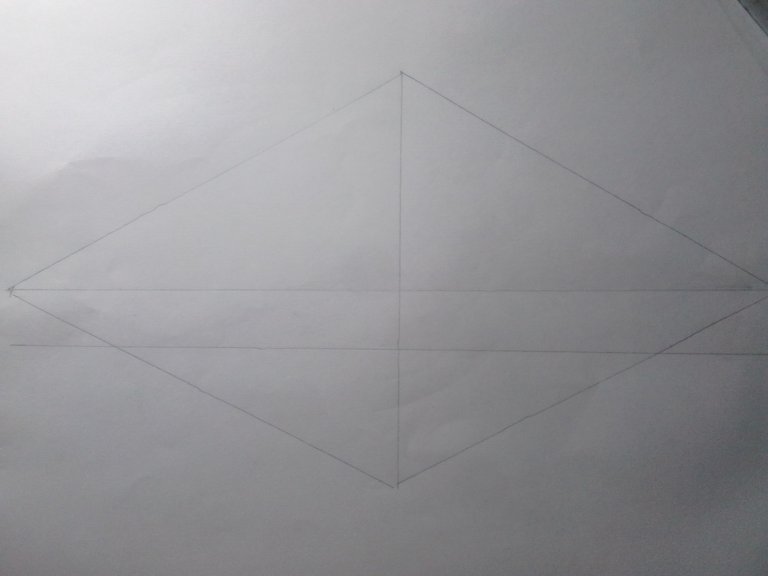
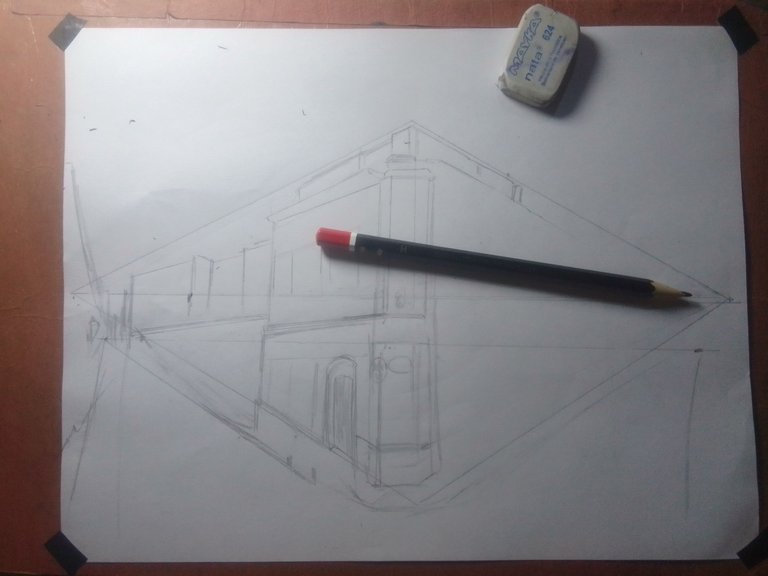
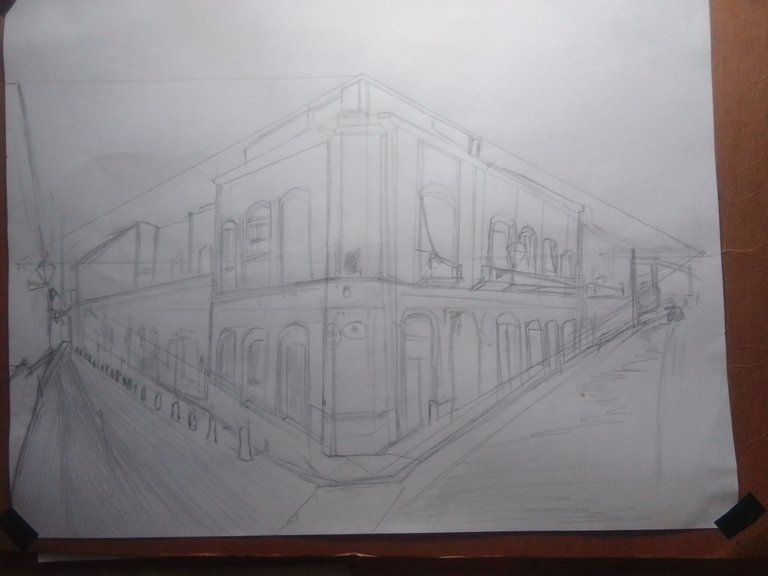
Lo primero que haremos será crear nuestro bosquejo inicial para tener una base sólida; esto lo vamos a lograr primero con una línea de horizonte, la cual nos servirá como guía para determinar la distancia del dibujo.
The first thing we will do will be to create our initial sketch to have a solid base; we will do this first with a horizon line, which will serve as a guide to determine the distance of the drawing.
Lo siguiente será trazar las líneas paralelas para determinar la estructura y esta nos servirá como guía para determinar el tamaño de las casas conforme se vayan acercando a los puntos de fuga.
The next step is to draw parallel lines to determine the structure and this will serve as a guide to determine the size of the houses as they approach the vanishing points.
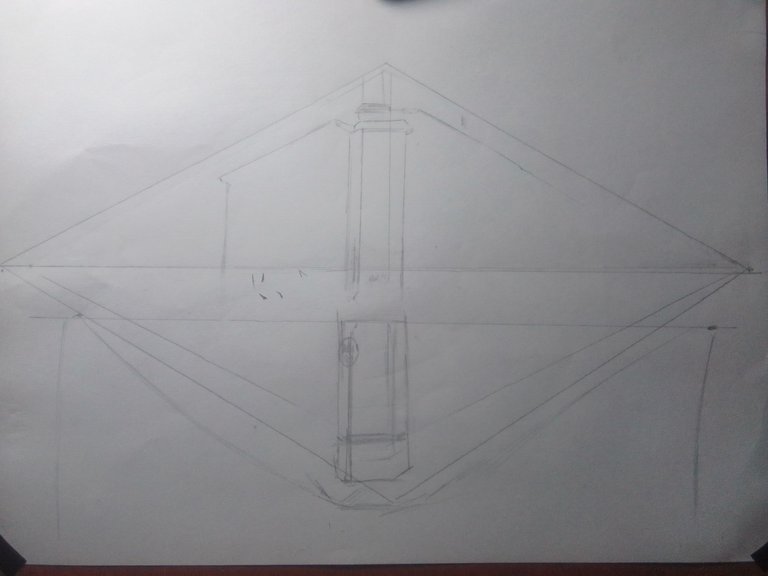
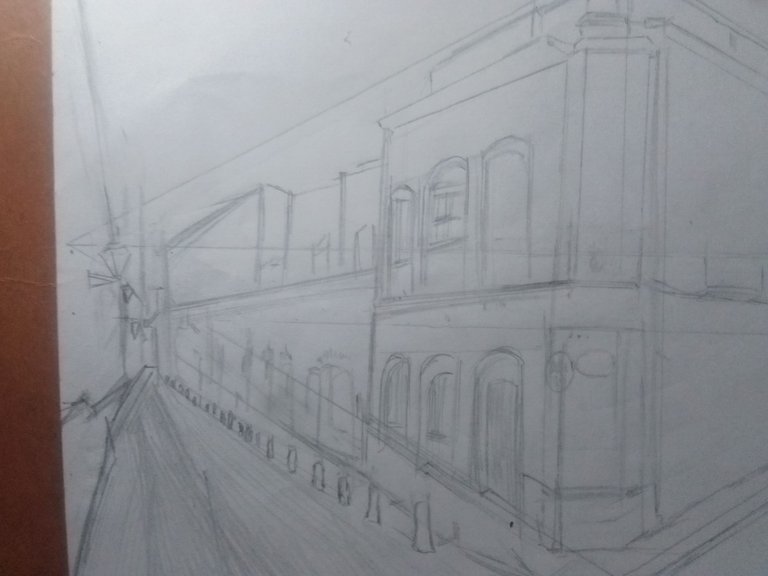
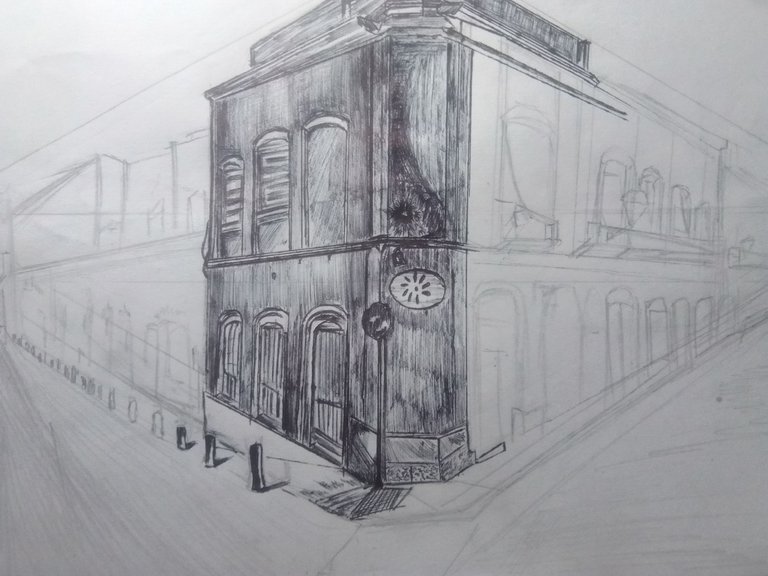
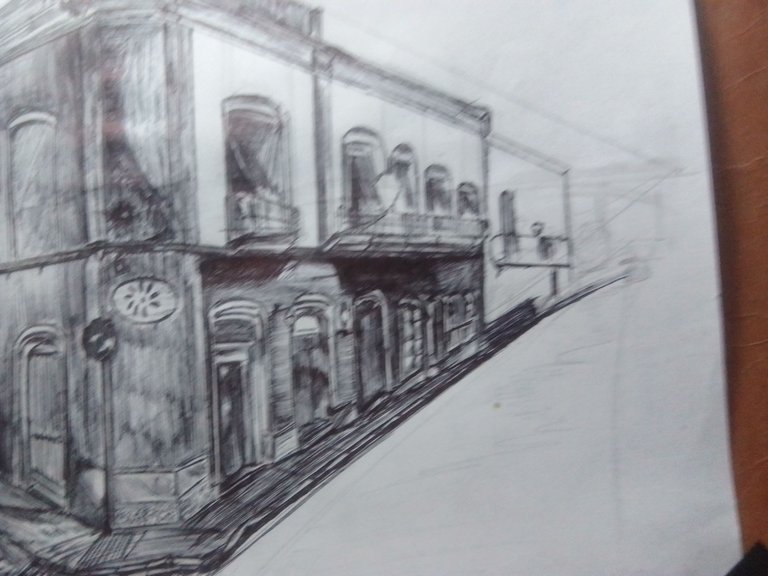
Una vez tengamos todo esto listo, pasamos a dibujar el bosquejo y creo que, para empezar de buena manera, empezamos por el centro de la imagen y desde este punto de partida vamos desarrollando el resto del dibujo por partes.
Once we have all this ready, we move on to draw the sketch and I think that, to start in a good way, we start with the center of the image and from this starting point we develop the rest of the drawing in parts.
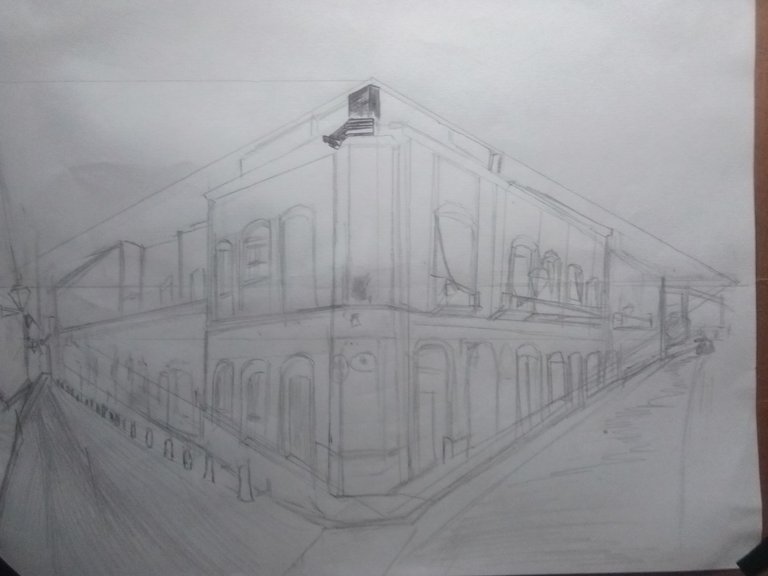
Una vez termine con la parte del medio, pase a la parte izquierda donde traté de simular todas las estructuras de manera simple para de esta manera tener una idea de lo que quiero hacer.
Once I am done with the middle part, move to the left part where I try to simulate all the structures in a simple way to get an idea of what I want to do.
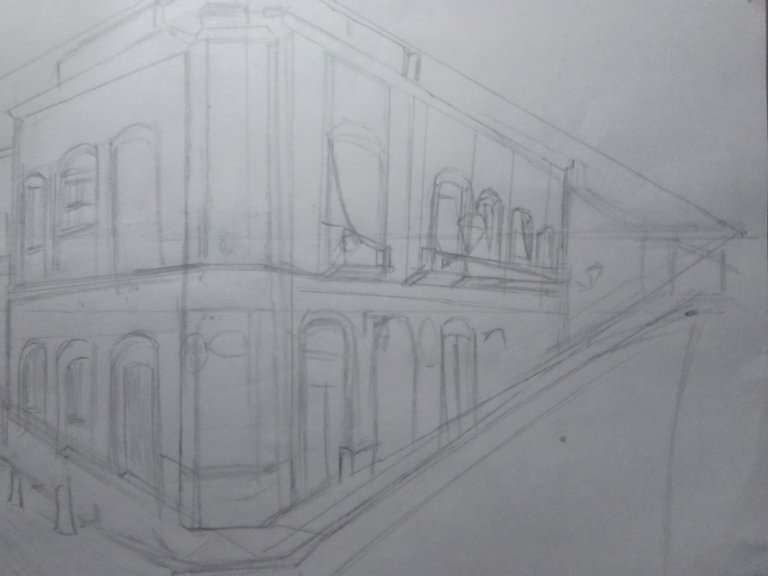
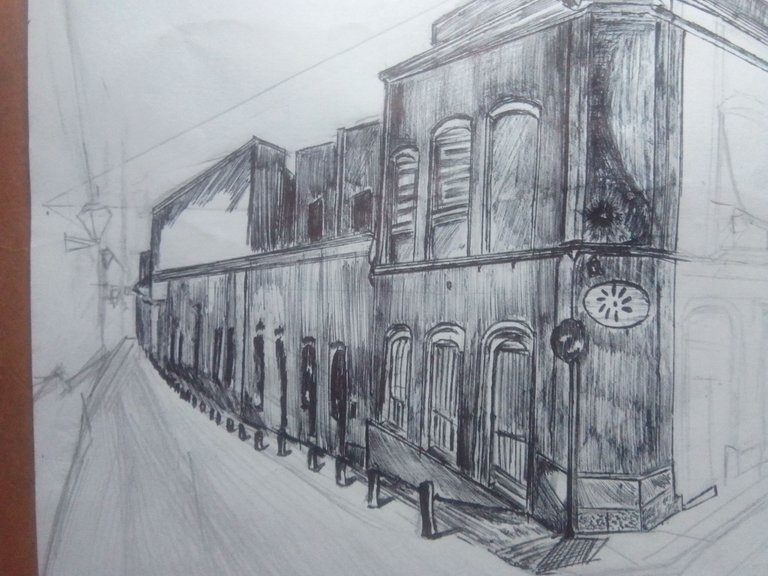
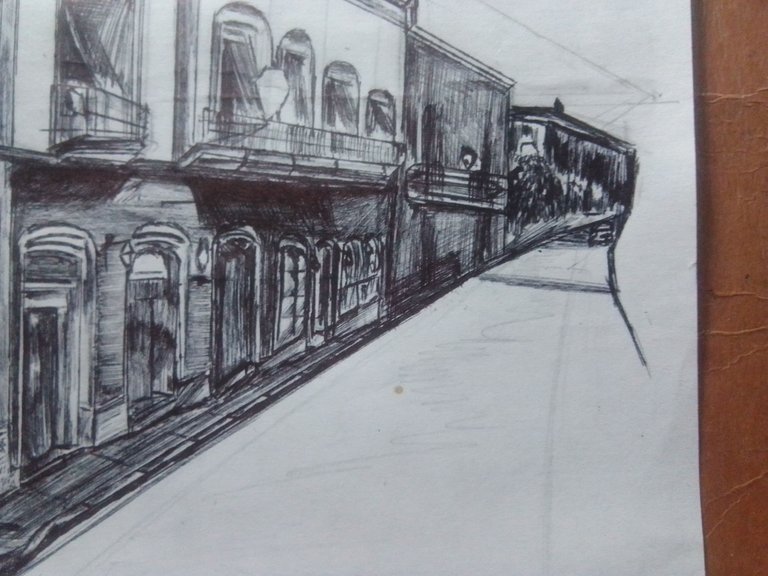
Lo mismo es para la parte derecha; solo busco simplificar lo más posible la imagen, ya que presenta muchos detalles pequeños que no son muy visibles a simple vista.
The same is for the right side; I just want to simplify the image as much as possible, since it presents many small details that are not very visible to the naked eye.

Durante todo este proceso tuve algunos errores, como el calcular mal el tamaño de la línea de horizonte al determinar el tamaño de algunas áreas en la imagen, etc. La mejor forma de describir lo ocurrido es tomarlo como error de principiante; por eso es bueno practicar siempre que podamos, y de estos errores los podemos utilizar como aprendizajes para no cometerlos la próxima vez.
During all this process I had some mistakes, such as miscalculating the size of the horizon line when determining the size of some areas in the image, etc. The best way to describe what happened is to take it as a beginner's mistake; that's why it is good to practice whenever we can, and from these mistakes we can use them as lessons to not make them next time.
Una vez tengamos todo el bosquejo, pasamos al coloreado, para el cual utilizaremos el lapicero y bastante paciencia; de la misma que empezamos a dibujar vamos a colorear con el lapicero.
Once we have all the sketch, we move on to coloring, for which we will use the pencil and a lot of patience; in the same way that we started to draw, we will color with the pencil.
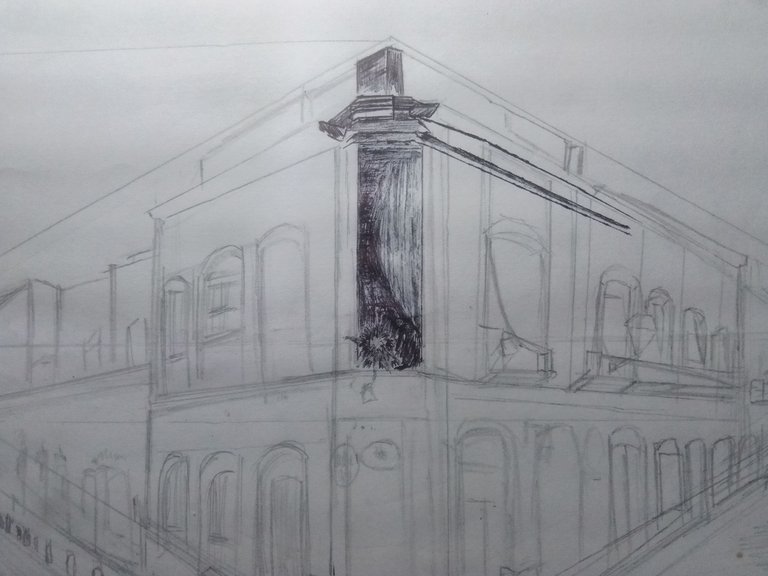
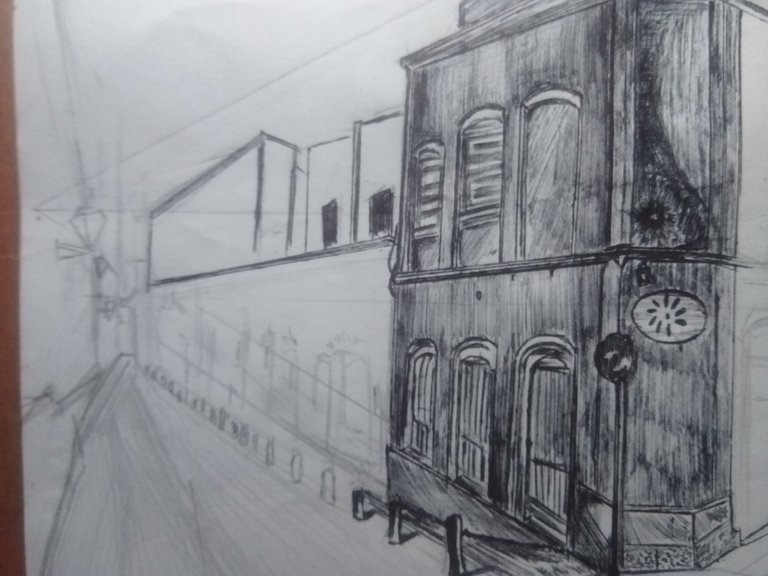
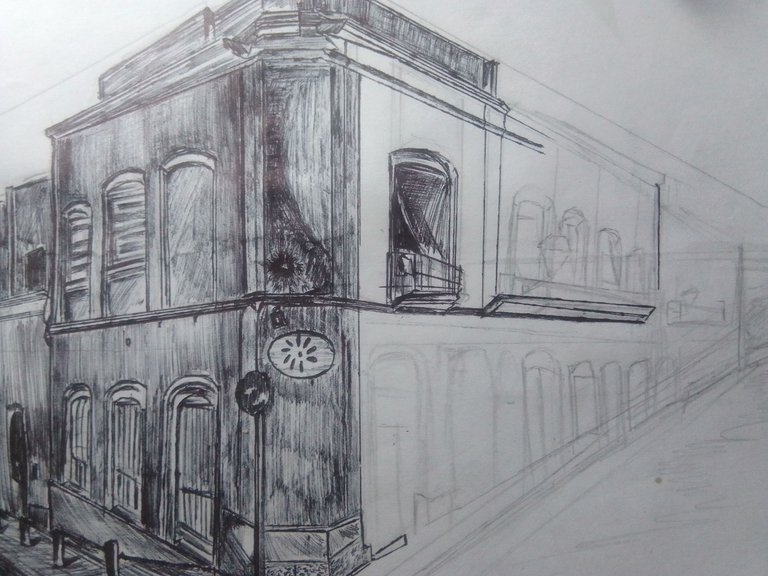
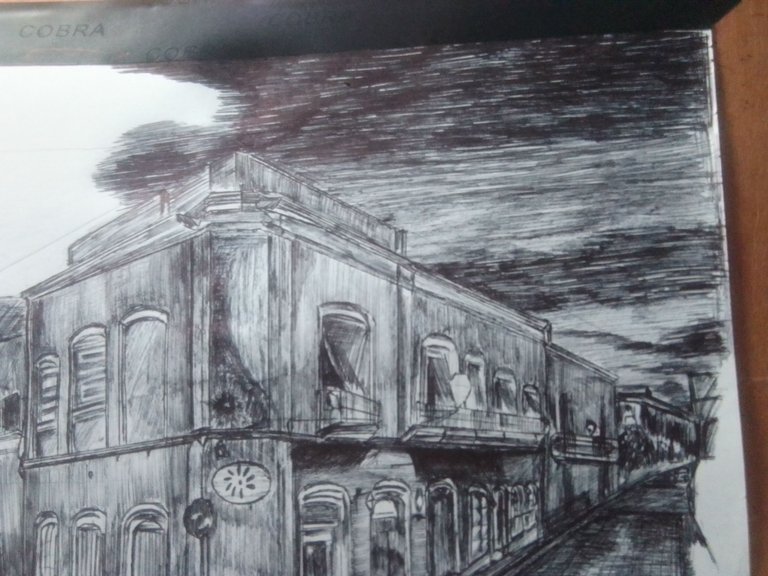
Para lograr esa textura, utilicé una técnica parecida al achurado, creando líneas muy finas en los lugares con menos iluminación y líneas más oscuras en zonas con más presencia de sombra.
To achieve this texture, I used a technique similar to flattening, creating very fine lines in places with less light and darker lines in areas with more shadow.
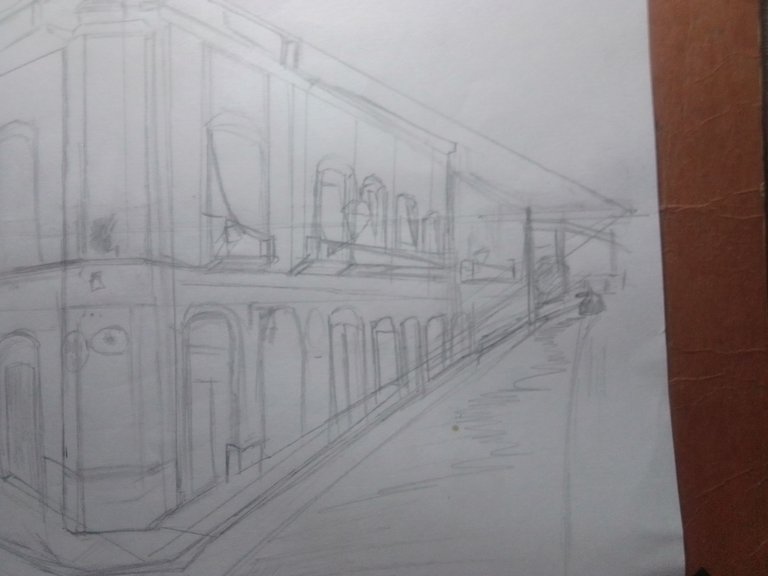
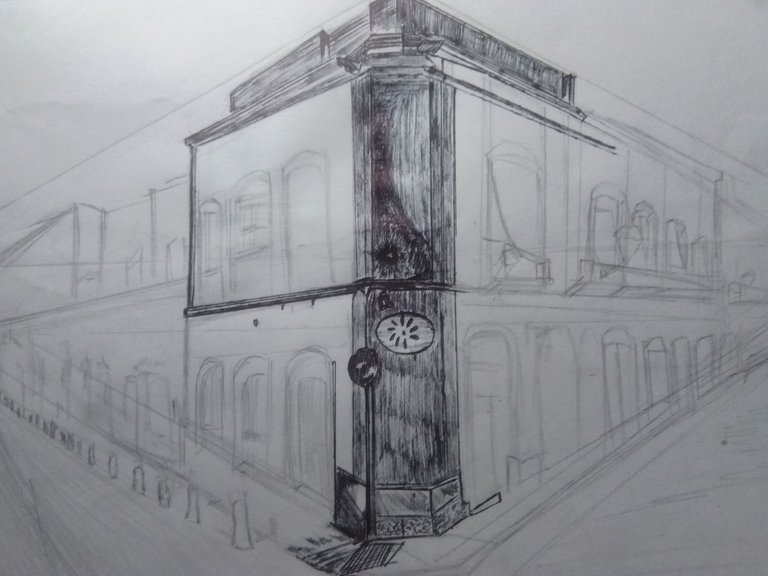
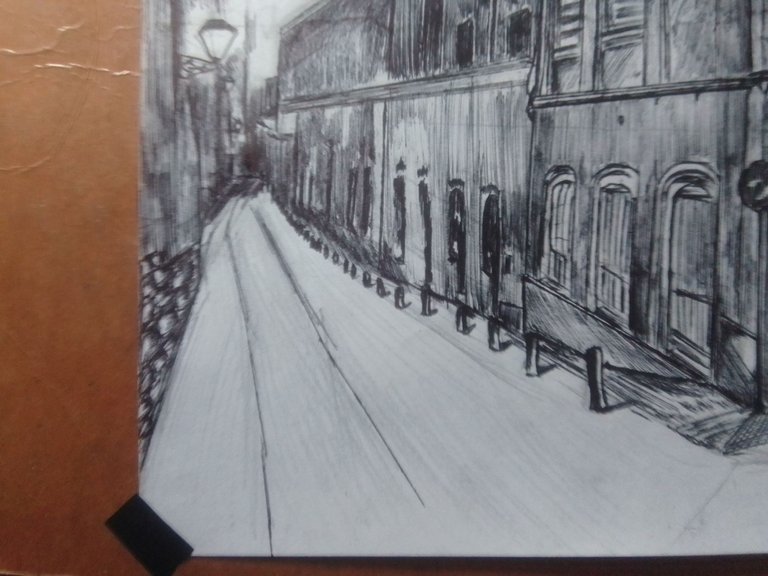
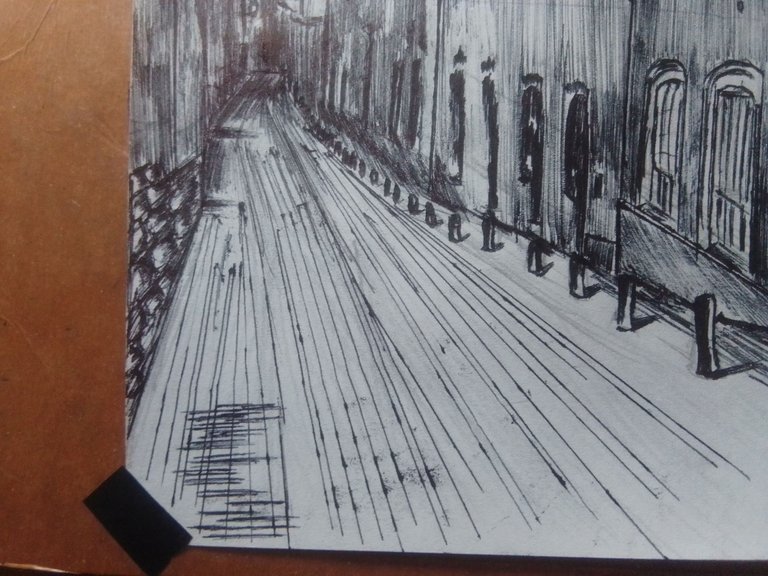
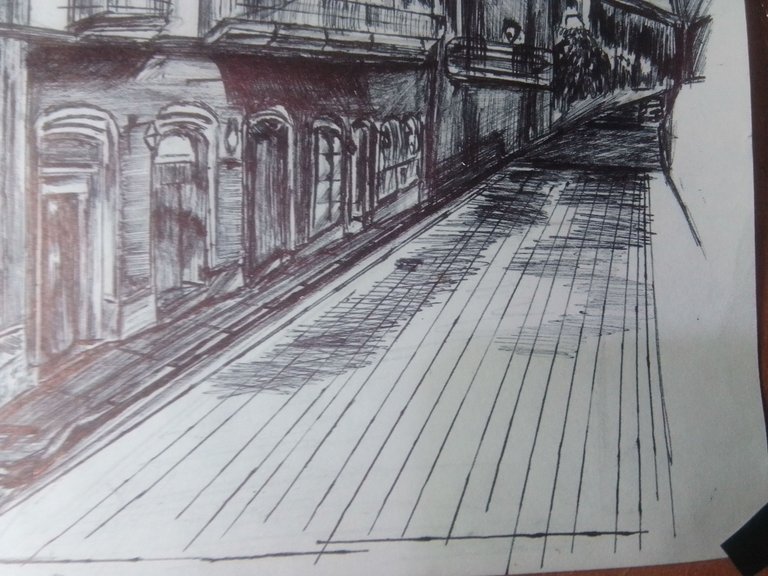
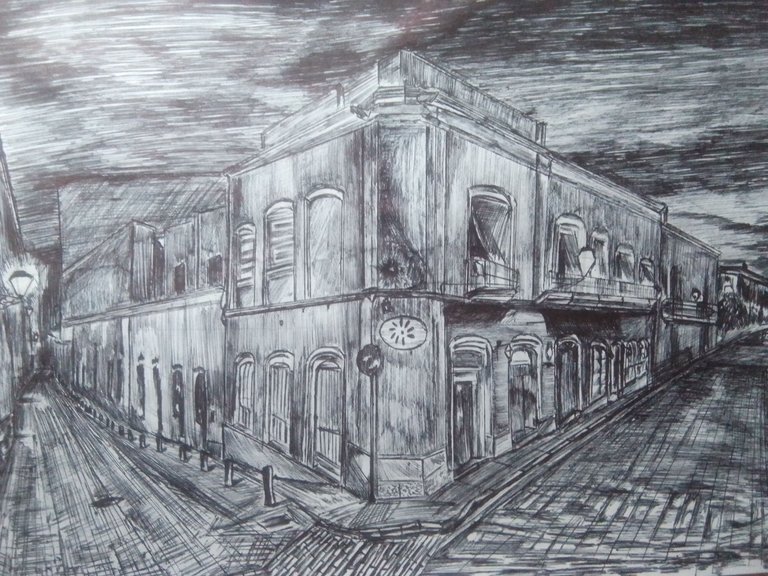
Una vez termine con las estructuras de la parte izquierda, pasamos a la calle, ya que, al ser una calle formada por ladrillos, eran demasiados detalles, así que decidí simplificar en simples líneas y agregar líneas en direcciones contrarias para esa sensación que es distinta al resto de la superficie de las demás estructuras. Ustedes pueden experimentar de manera distinta con este tipo de dibujos; esa es una de las mejores partes del dibujo, que no existe una regla escrita que defina cómo debe ser interpretado. Cada quien puede poseer un estilo único o bien desarrollar uno ya existente y esto para mí es lo que hace el arte tan dinámico para todas las personas.
Once I finished with the structures on the left side, we moved on to the street, since, being a street made up of bricks, there were too many details, so I decided to simplify them into simple lines and add lines in opposite directions for that feeling that is different from the rest of the surface of the other structures. You can experiment differently with this type of drawing; that's one of the best parts of drawing, there is no written rule that defines how it should be interpreted. Everyone can have a unique style or develop an existing one, and that to me is what makes art so dynamic for everyone.

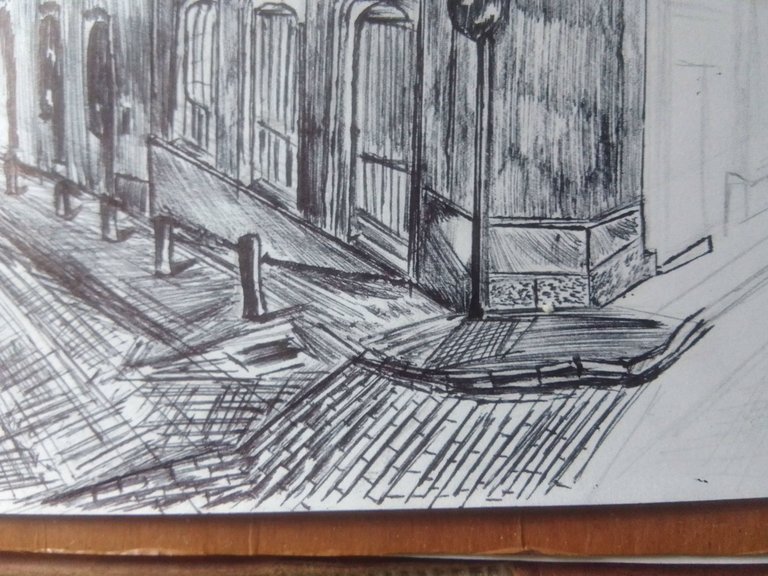
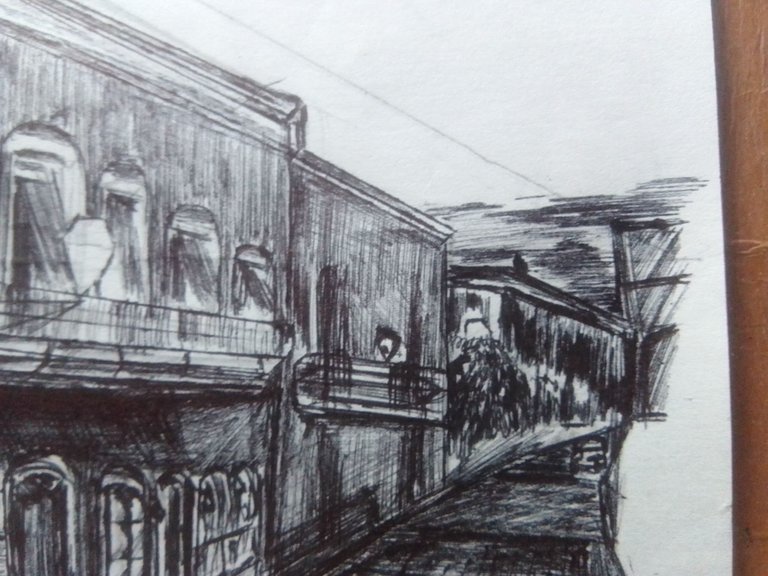
Para la parte derecha encontramos muchas cosas complejas, como miradores en la parte de arriba y muchas puertas en la parte de abajo, pero nada complejo, aunque esta parte presenta mucho más detalles que la parte anterior. Seguiremos con la misma lógica, tratando de simplificar todo de manera que sea simple, pero no perderemos la idea de objeto que estamos dibujando.
For the right part we find many complex things, like bay windows at the top and many doors at the bottom, but nothing complex, although this part presents much more details than the previous part. We will continue with the same logic, trying to simplify everything so that it is simple, but we will not lose the idea of the object we are drawing.
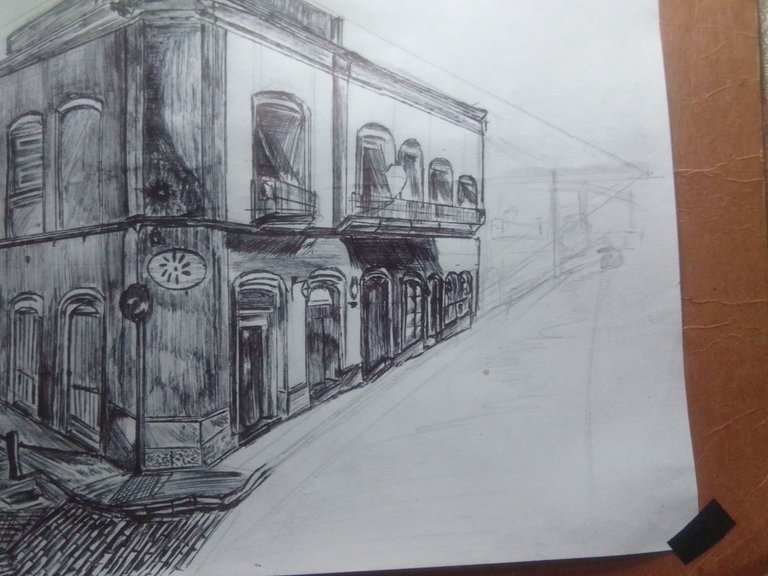
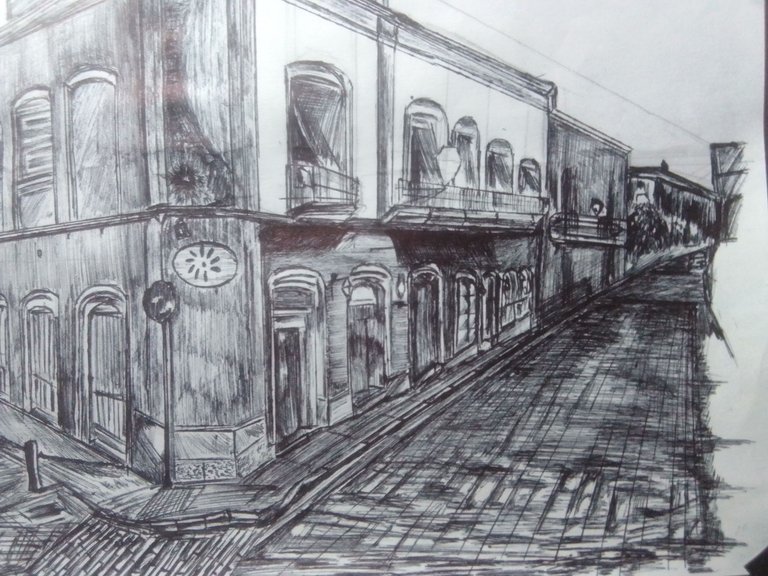
Ya con básicamente todo el panorama listo, pasamos a mi parte favorita, las nubes. Aquí traté de corregir un error que cometí en mi post anterior, el cual fue que no presté mucha atención a las nubes y terminé perdiendo lo que quería transmitir y que al final no quedó tan mal; se notaba bastante que no eran unas nubes muy naturales, falla que arreglé en este dibujo respetando las zonas con más luz y sombra y, obviamente, con mucha más paciencia. Y recuerdan la cinta negra, bueno, esta la utilizaremos para crear un pequeño marco para las nubes.
With basically the whole picture ready, let's move on to my favorite part, the clouds. Here I tried to correct a mistake I made in my previous post, which was that I didn't pay much attention to the clouds and I ended up losing what I wanted to convey and in the end it didn't look so bad; it was quite noticeable that they were not very natural clouds, a flaw that I fixed in this drawing respecting the areas with more light and shadow and, obviously, with much more patience. And remember the black tape, well, we will use this one to create a small frame for the clouds.
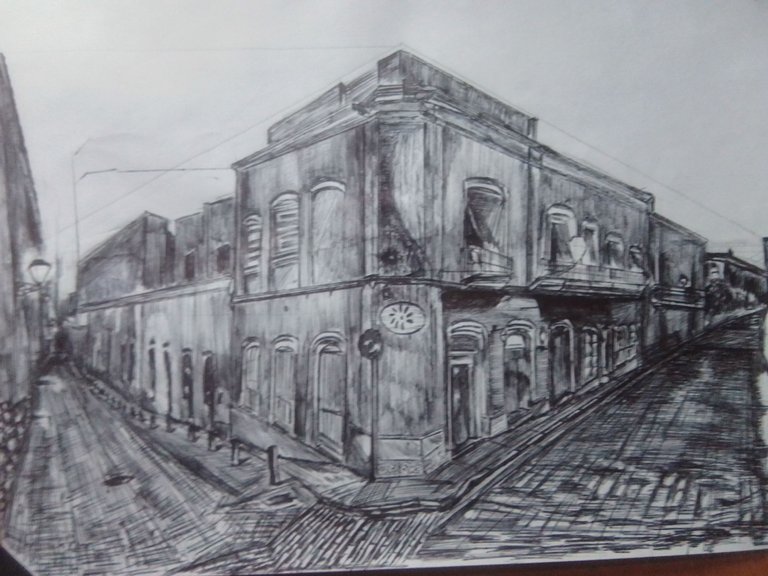
Esto fue todo por el día de hoy. Espero le haya gustado mucho mi post y que le haya servido mucho. Recuerden que estos son trabajos en los que tardo casi 4 días, así que no se molesten si no les sale a la primera; sigan practicando. Sin más nada que aportar, me despido.
That was all for today. I hope you liked my post and that it has helped you a lot. Remember that these are works in which I take almost 4 days, so don't get upset if you don't get it right the first time; keep practicing. With nothing more to contribute, I say goodbye.
todas las fotos fueron tomadas con mi telefono Yezz art 2 pro/all photos were taken with my Yezz art 2 pro phone.
Las fotos editadas en este post fueron gracias a la aplicación para móviles InShot./ The photos edited in this post were thanks to the mobile application InShot.
| Muchas gracias por leer mi publicación! | Thank you very much for reading my post! |
|---|
| Redes Sociales | Social Network |

This is absolutely an outstanding work of art,this is amazing and the way your made the drawing is exceptionally good and talented. Well done and great artwork 👍
Thank you very much 🫂
Your most welcome e
Congratulations @cristhenos! You have completed the following achievement on the Hive blockchain And have been rewarded with New badge(s)
Your next target is to reach 40 posts.
You can view your badges on your board and compare yourself to others in the Ranking
If you no longer want to receive notifications, reply to this comment with the word
STOPWow! This is a complete work of art, everything in your drawing is amazing. You nailed it friend, well done and thanks for sharing.
Un hermoso trabajo. Te felicito.
Un dibujo de mucha exigencia técnica que logras muy bien. La perspectiva, en concreto los "puntos de fuga", y si son dos más, requiere un trabajo denodado que has sabido afrontar. Saludos, @cristhenos.
your drawing skills are amazing bro👍
Hola corazón! Tienes una tecnica increible. Debes poner siempre el enlace de la referencia, al menso al final del post. Tenlo en cuenta para tus siguientes publicaciones
Gracias por el consejo
Pero qué gran trabajo! hiciste ver el proceso tan sencillo y me encantó el resultado final con tantos detalles hechos, sobre todo en la calle y en el edificio. Bien hecho!
Me alegra que te haya gustado mi trabajo.