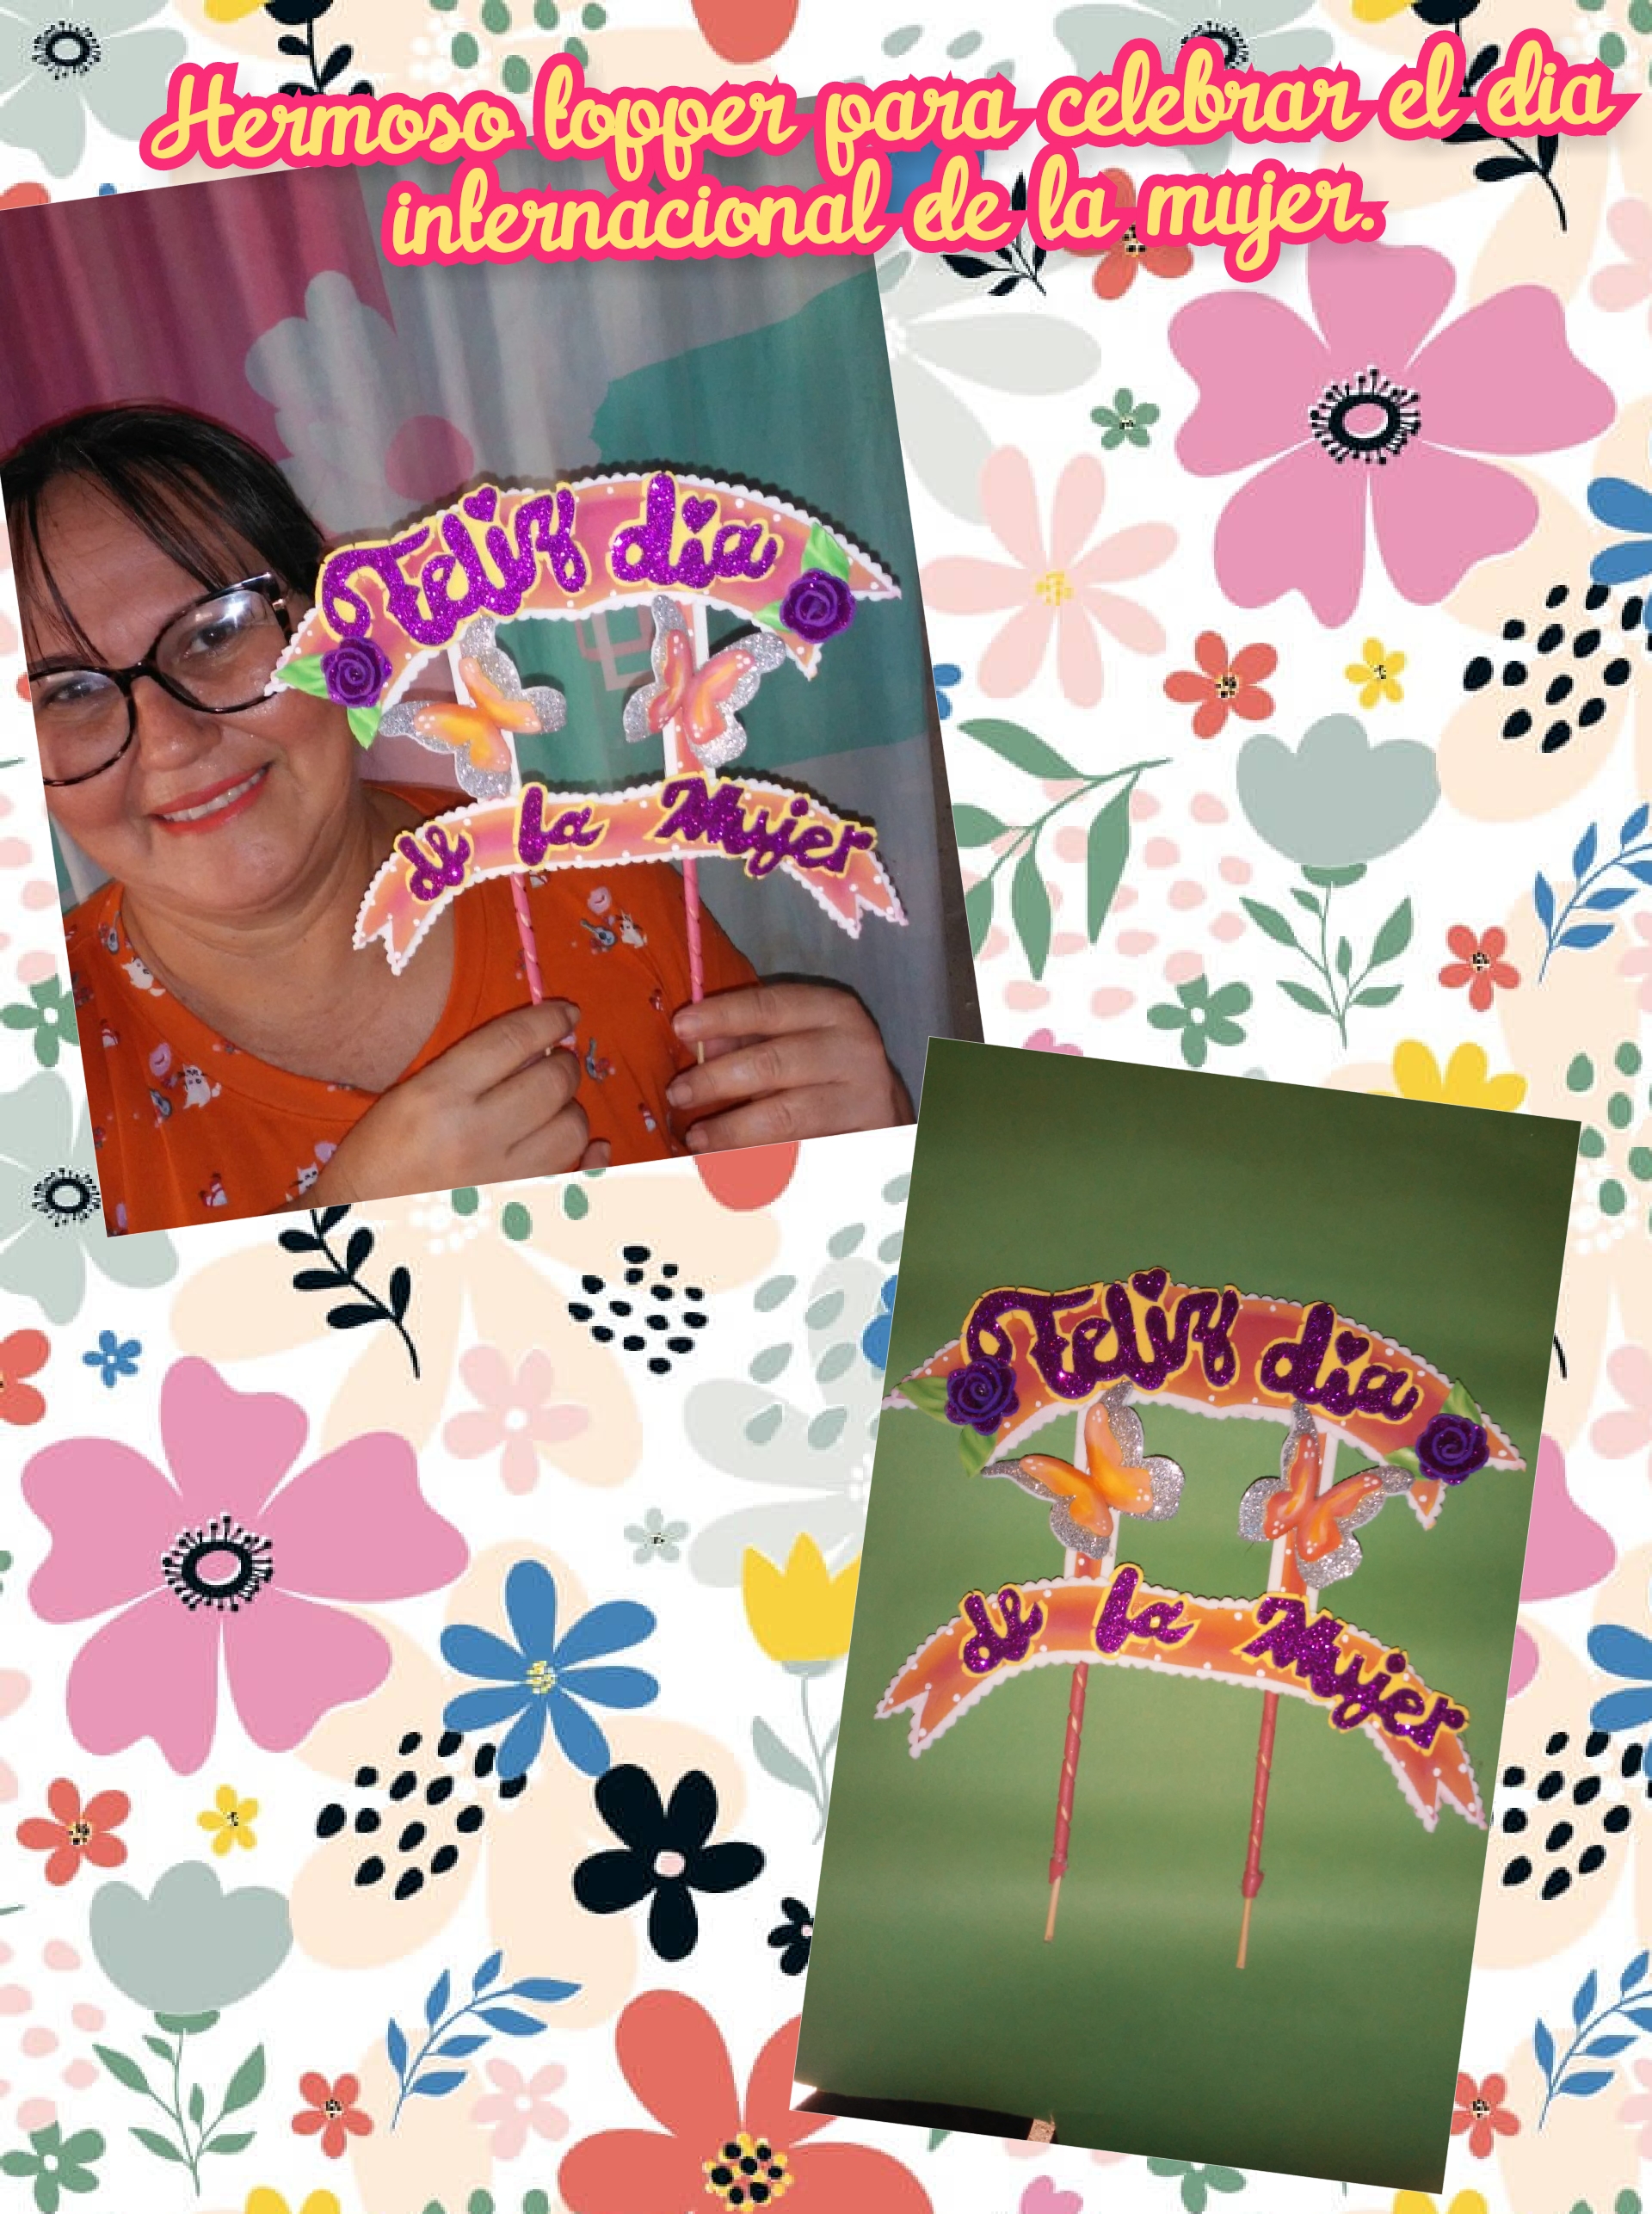
Hola, muy buenos mis amigos creativ@s de esta hermosa y apreciada comunidad Hivediy, espero hayan pasado un feliz fin de semana, y espero se encuentren muy bien que es lo mas importante, reciban de mi parte un fuerte abrazo. El dia de hoy les traigo otro nuevo y divertidisimo tutorial, donde aprenderemos a realizar un hermoso topper para celebrar el dia internacional de la mujer, mujeres guerreras que damos el todo por el todo para cumplir lo que nos proponemos, para seguir adelante, este hermoso topper nos va a dar ese toque creativo y especial a nuestros pasteles, arreglos y todo lo que querramos decorar, y lo mejor de todo es que esta hecho con materiales, super economicos y muy facil de conseguir, asi que manos a la obra y ya les voy a mostrar el paso a paso, les aseguro que se van a divertir tanto como yo.
Hello very good my creative friends of this beautiful and appreciated Hivediy community, I hope you had a happy weekend, and I hope you are very well, which is the most important thing, receive a big hug from me. Today I bring you another new and hilarious tutorial, where we will learn how to make a beautiful topper to celebrate International Women's Day, warrior women who give everything to fulfill what we set out to do, to move forward, this beautiful topper is going to give that creative and special touch to our cakes, arrangements and everything we want to decorate, and the best of all is that it is made with materials, super cheap and very easy to get, so get to work and that's it I'm going to teach the step by step, I assure you that you are going to have as much fun as me.
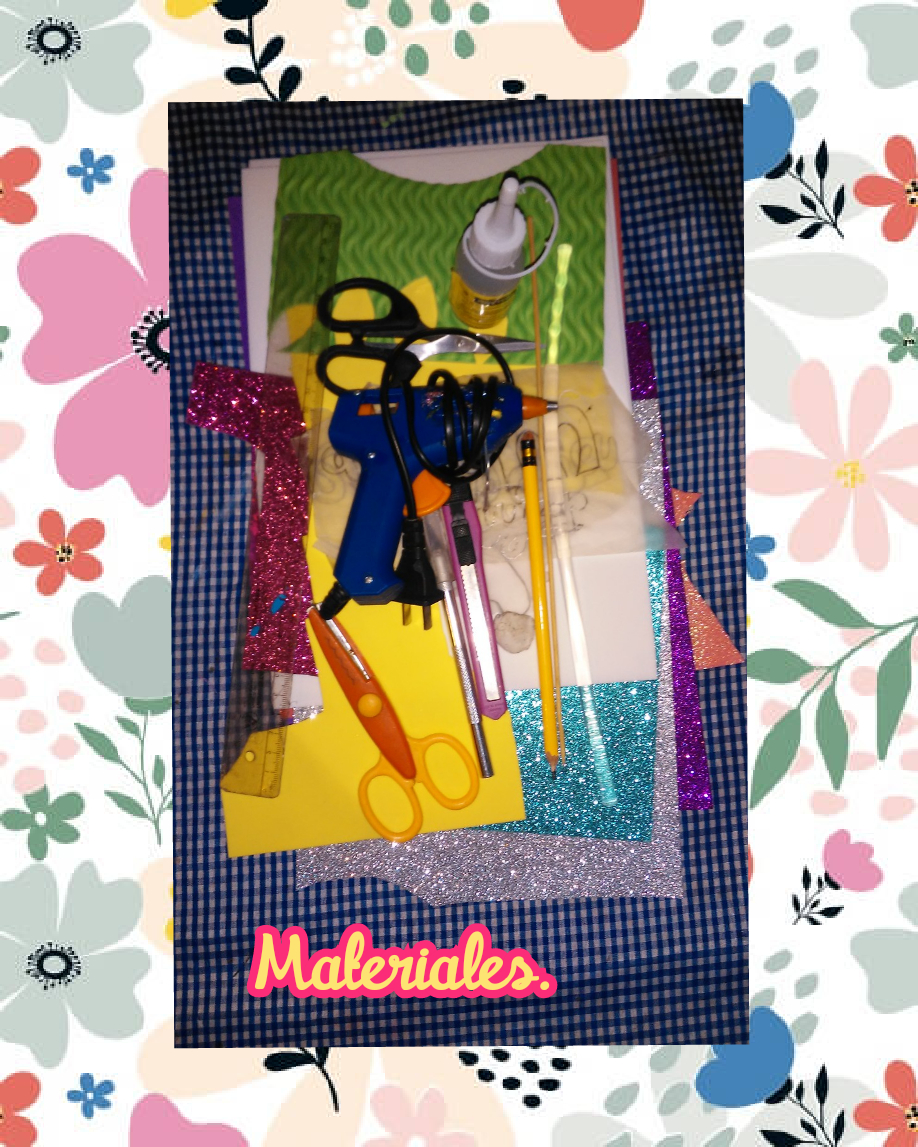
Para hacer este hermoso topper, vamos a necesitar estos materiales y herramientas:
Materiales:
*Foamis de diferentes colores y texturas.
*Silicon liquido.
*Patreones.
*Pinturas al frio.
*Palillos de altura.
*Barra de silicon.
*Herramientas:
*Tijeras.
*Cutter.
*Lapiz.
*Regla.
*Pistola de silicon.
To make this beautiful topper we are going to need these materials and tools:
Materials:
*Foams of different colors and textures.
*Liquid silicone.
*Patrons.
*Cold paints.
*Height sticks.
*Silicone bar.
*Tools:
*Pair of scissors.
*Cutter.
*Pencil.
*Ruler.
*Glue gun.
We start with the step by step.

Step 1. To start making this beautiful topper, the first thing we are going to do is mark the first two pieces to form the topper on foami with a soft texture, pink, then with the help of scissors we cut the pieces by the entire edge, as seen in the images
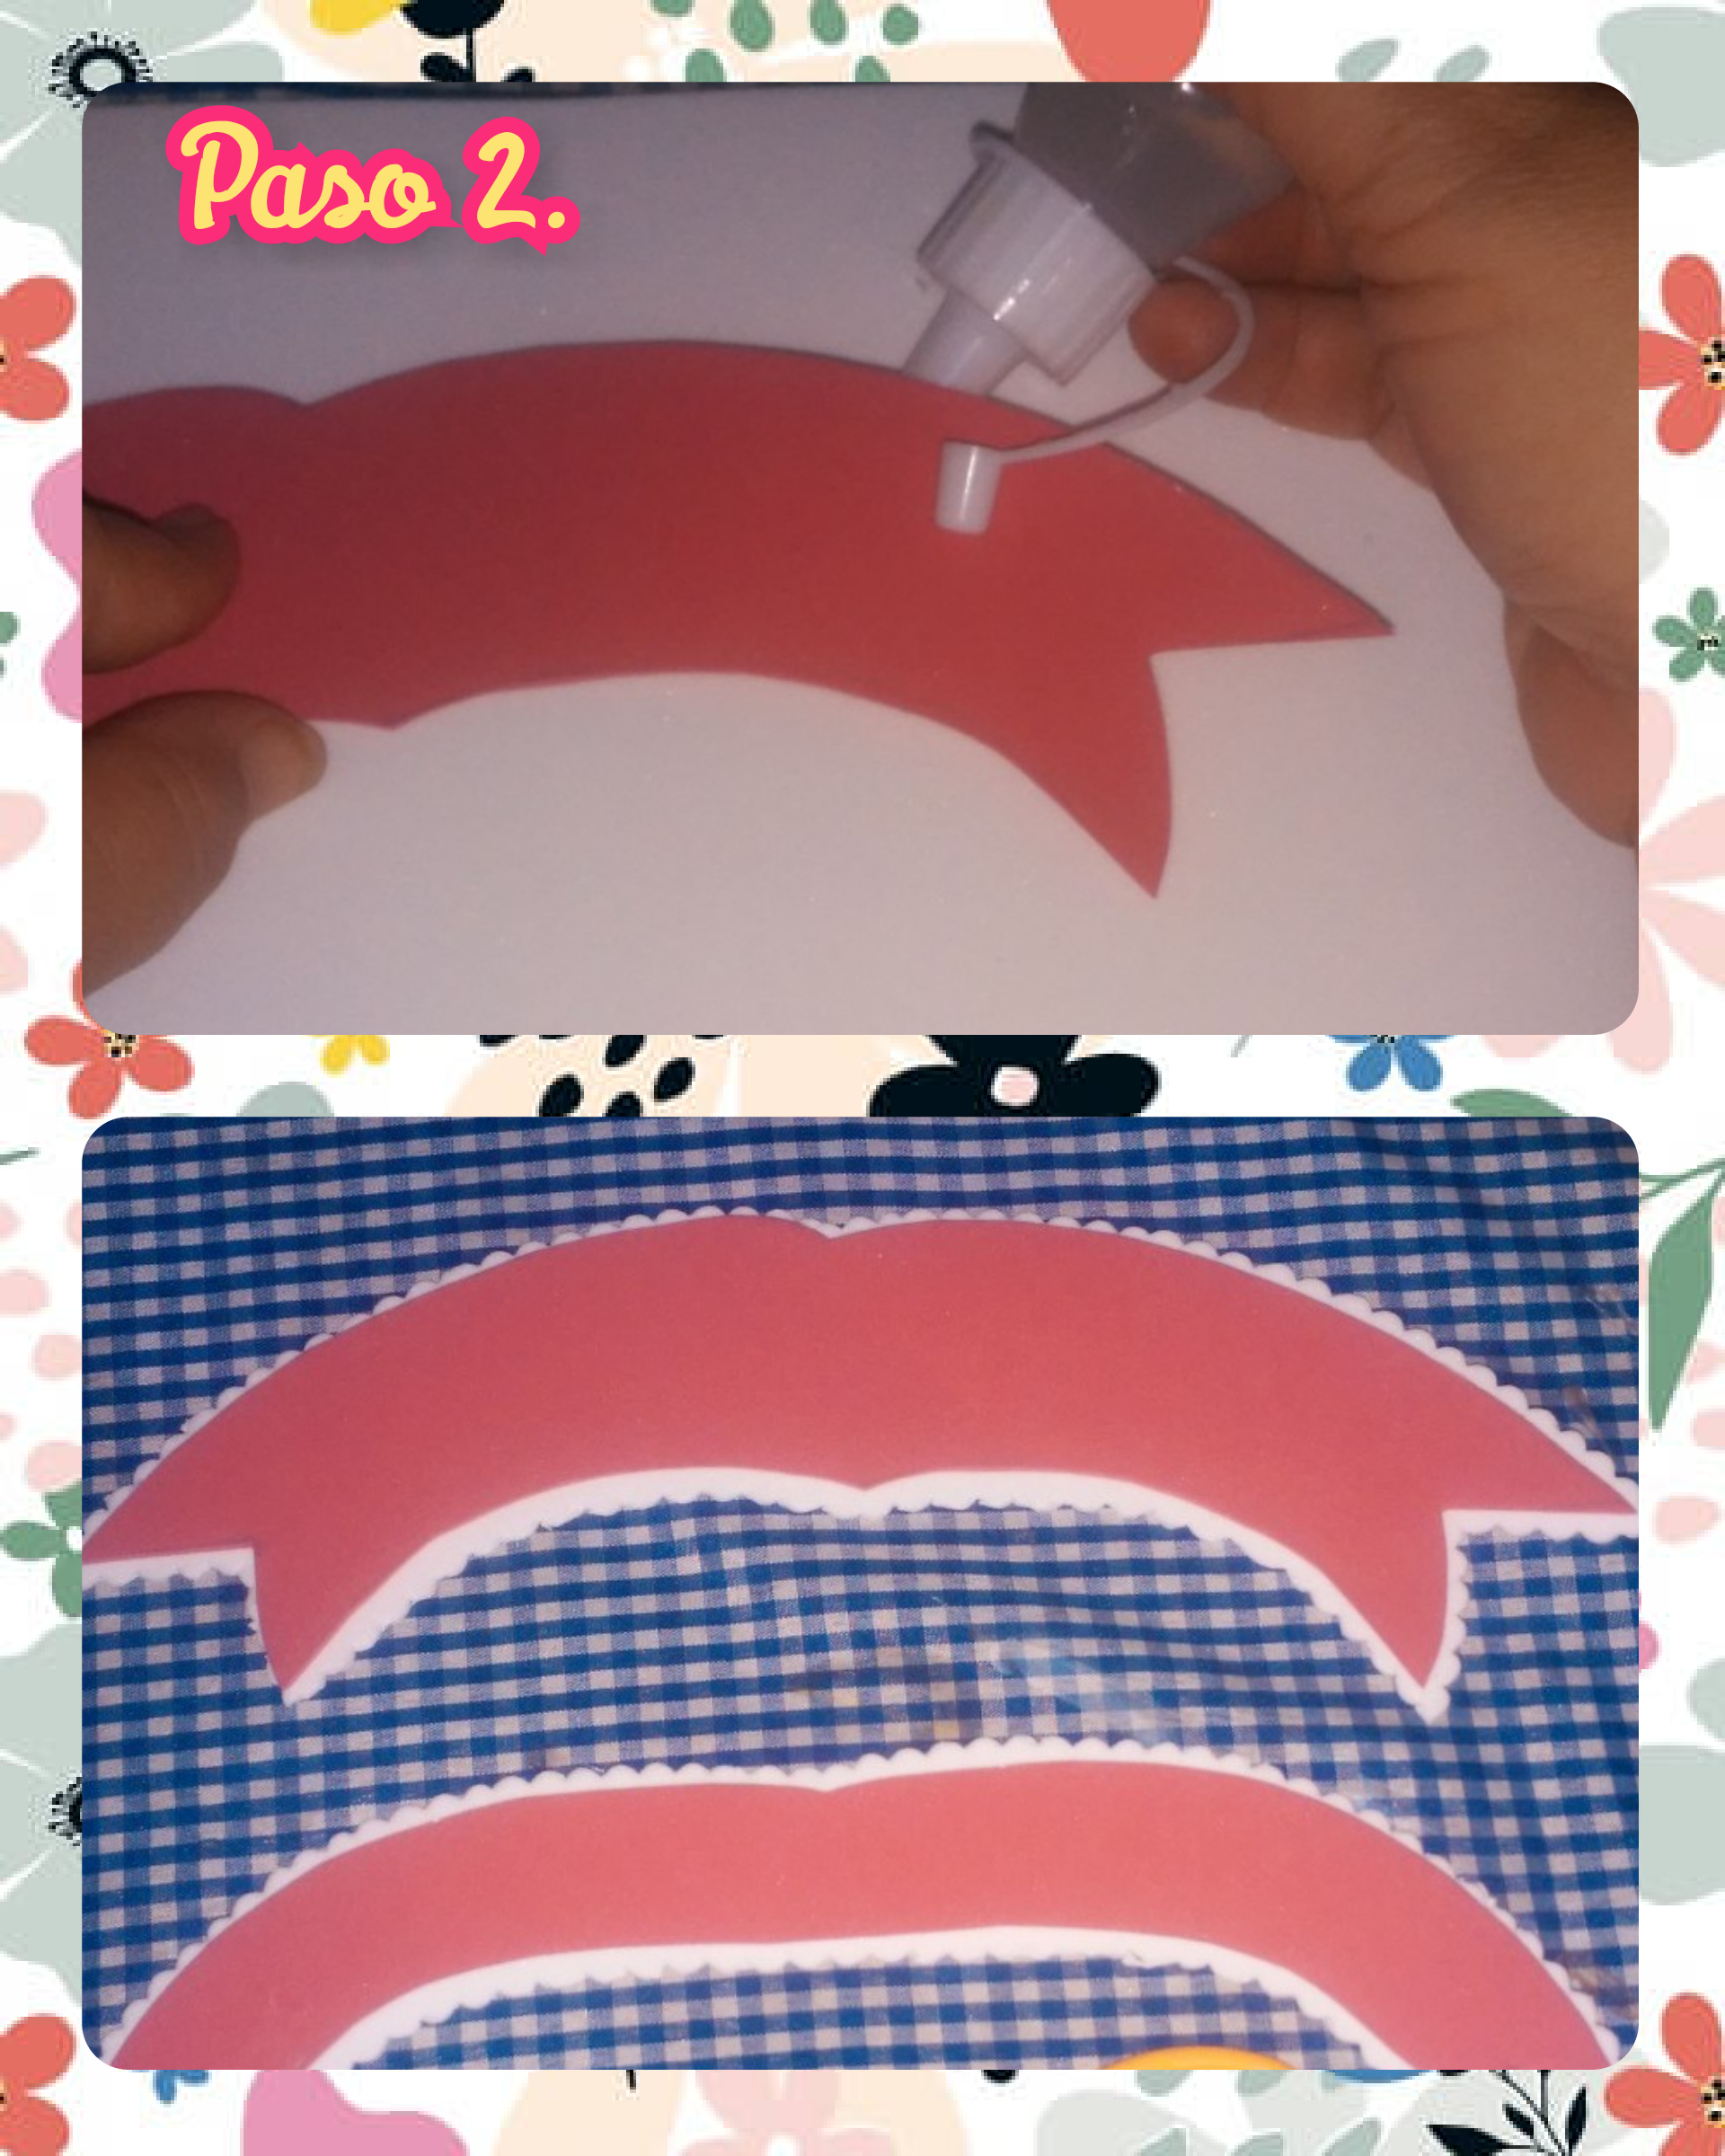
Step 2. Once the 2 pieces have been cut, we now proceed to glue them with cold silicone on a foami with a soft texture, white in color and with the help of scissors we cut it along the edge leaving half a centimeter of distance, which is as a relief, see the images.
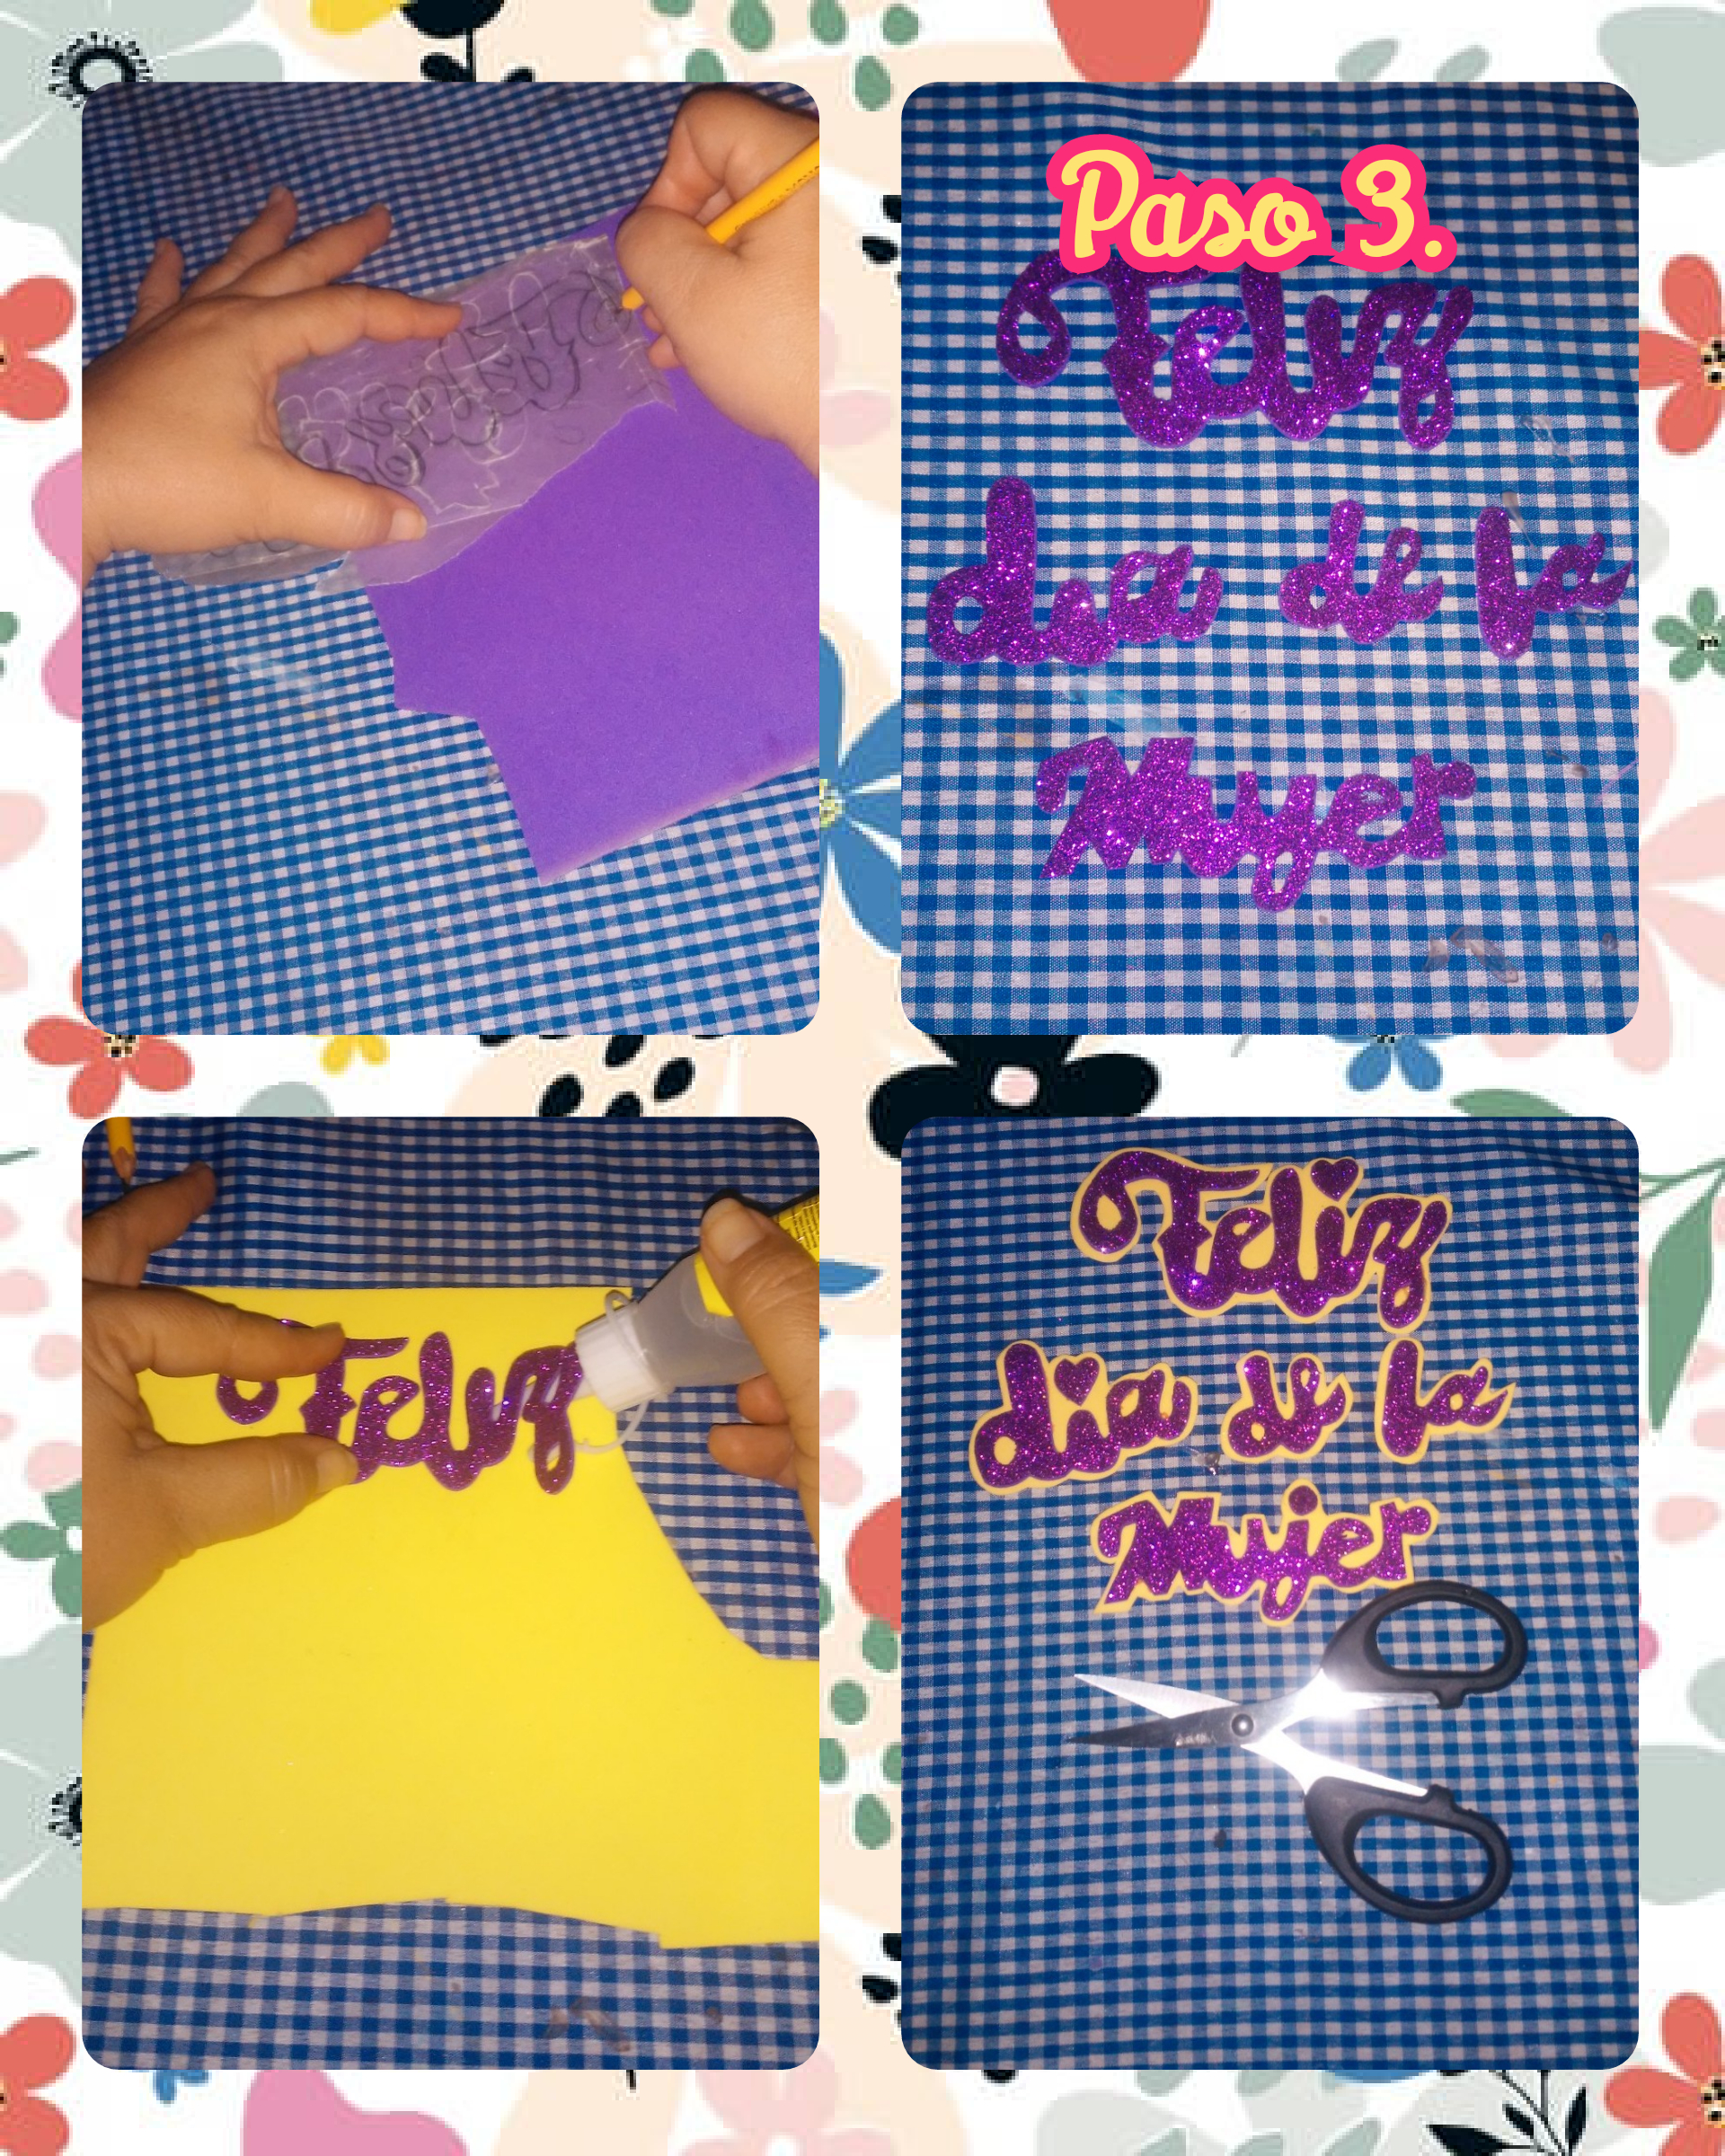
dejando medio centimetro de distancia como relieve.
Step 3. Now in this step, with a parchment paper pattern, on a purple diamond foami we mark the phrase that says "HAPPY WOMEN'S DAY" then we cut it out and then we stick it on another foami with a smooth texture , yellow and we proceed to cut them, leaving half a centimeter of distance as relief.
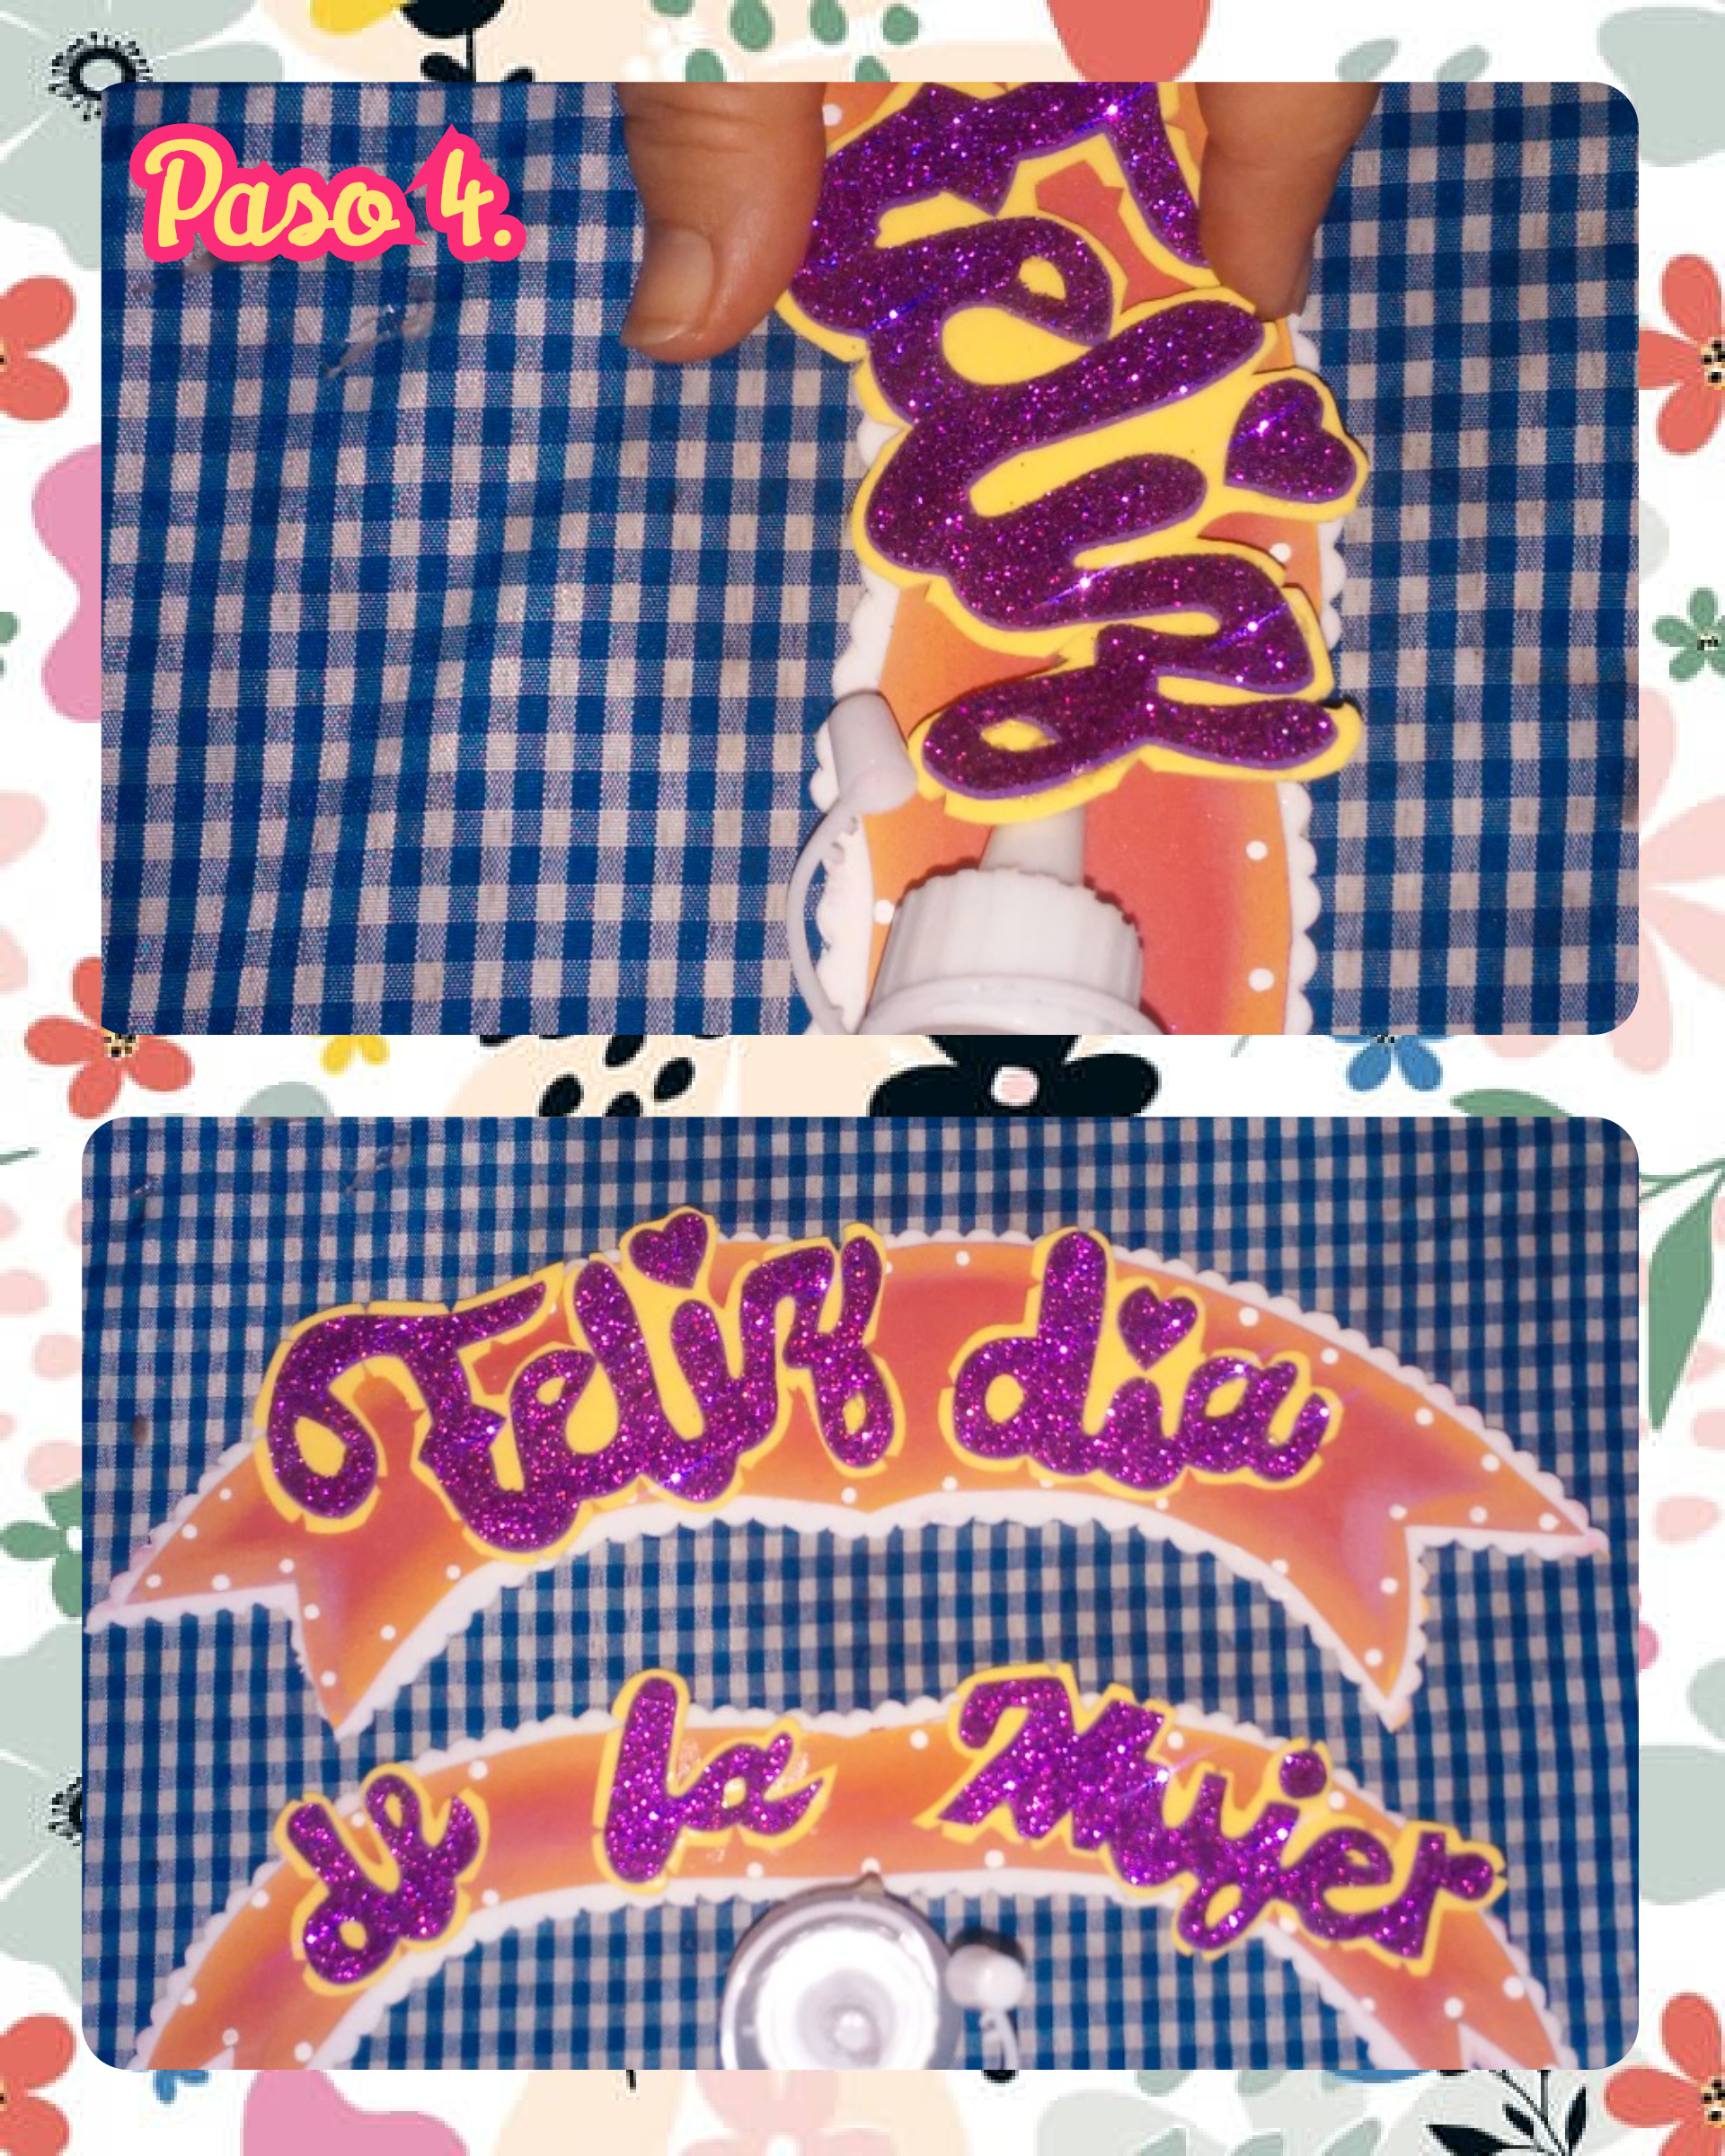
center> Step 4. Now in this step, we are going to glue the letters with cold silicone, to the 2 pieces already cut out previously.
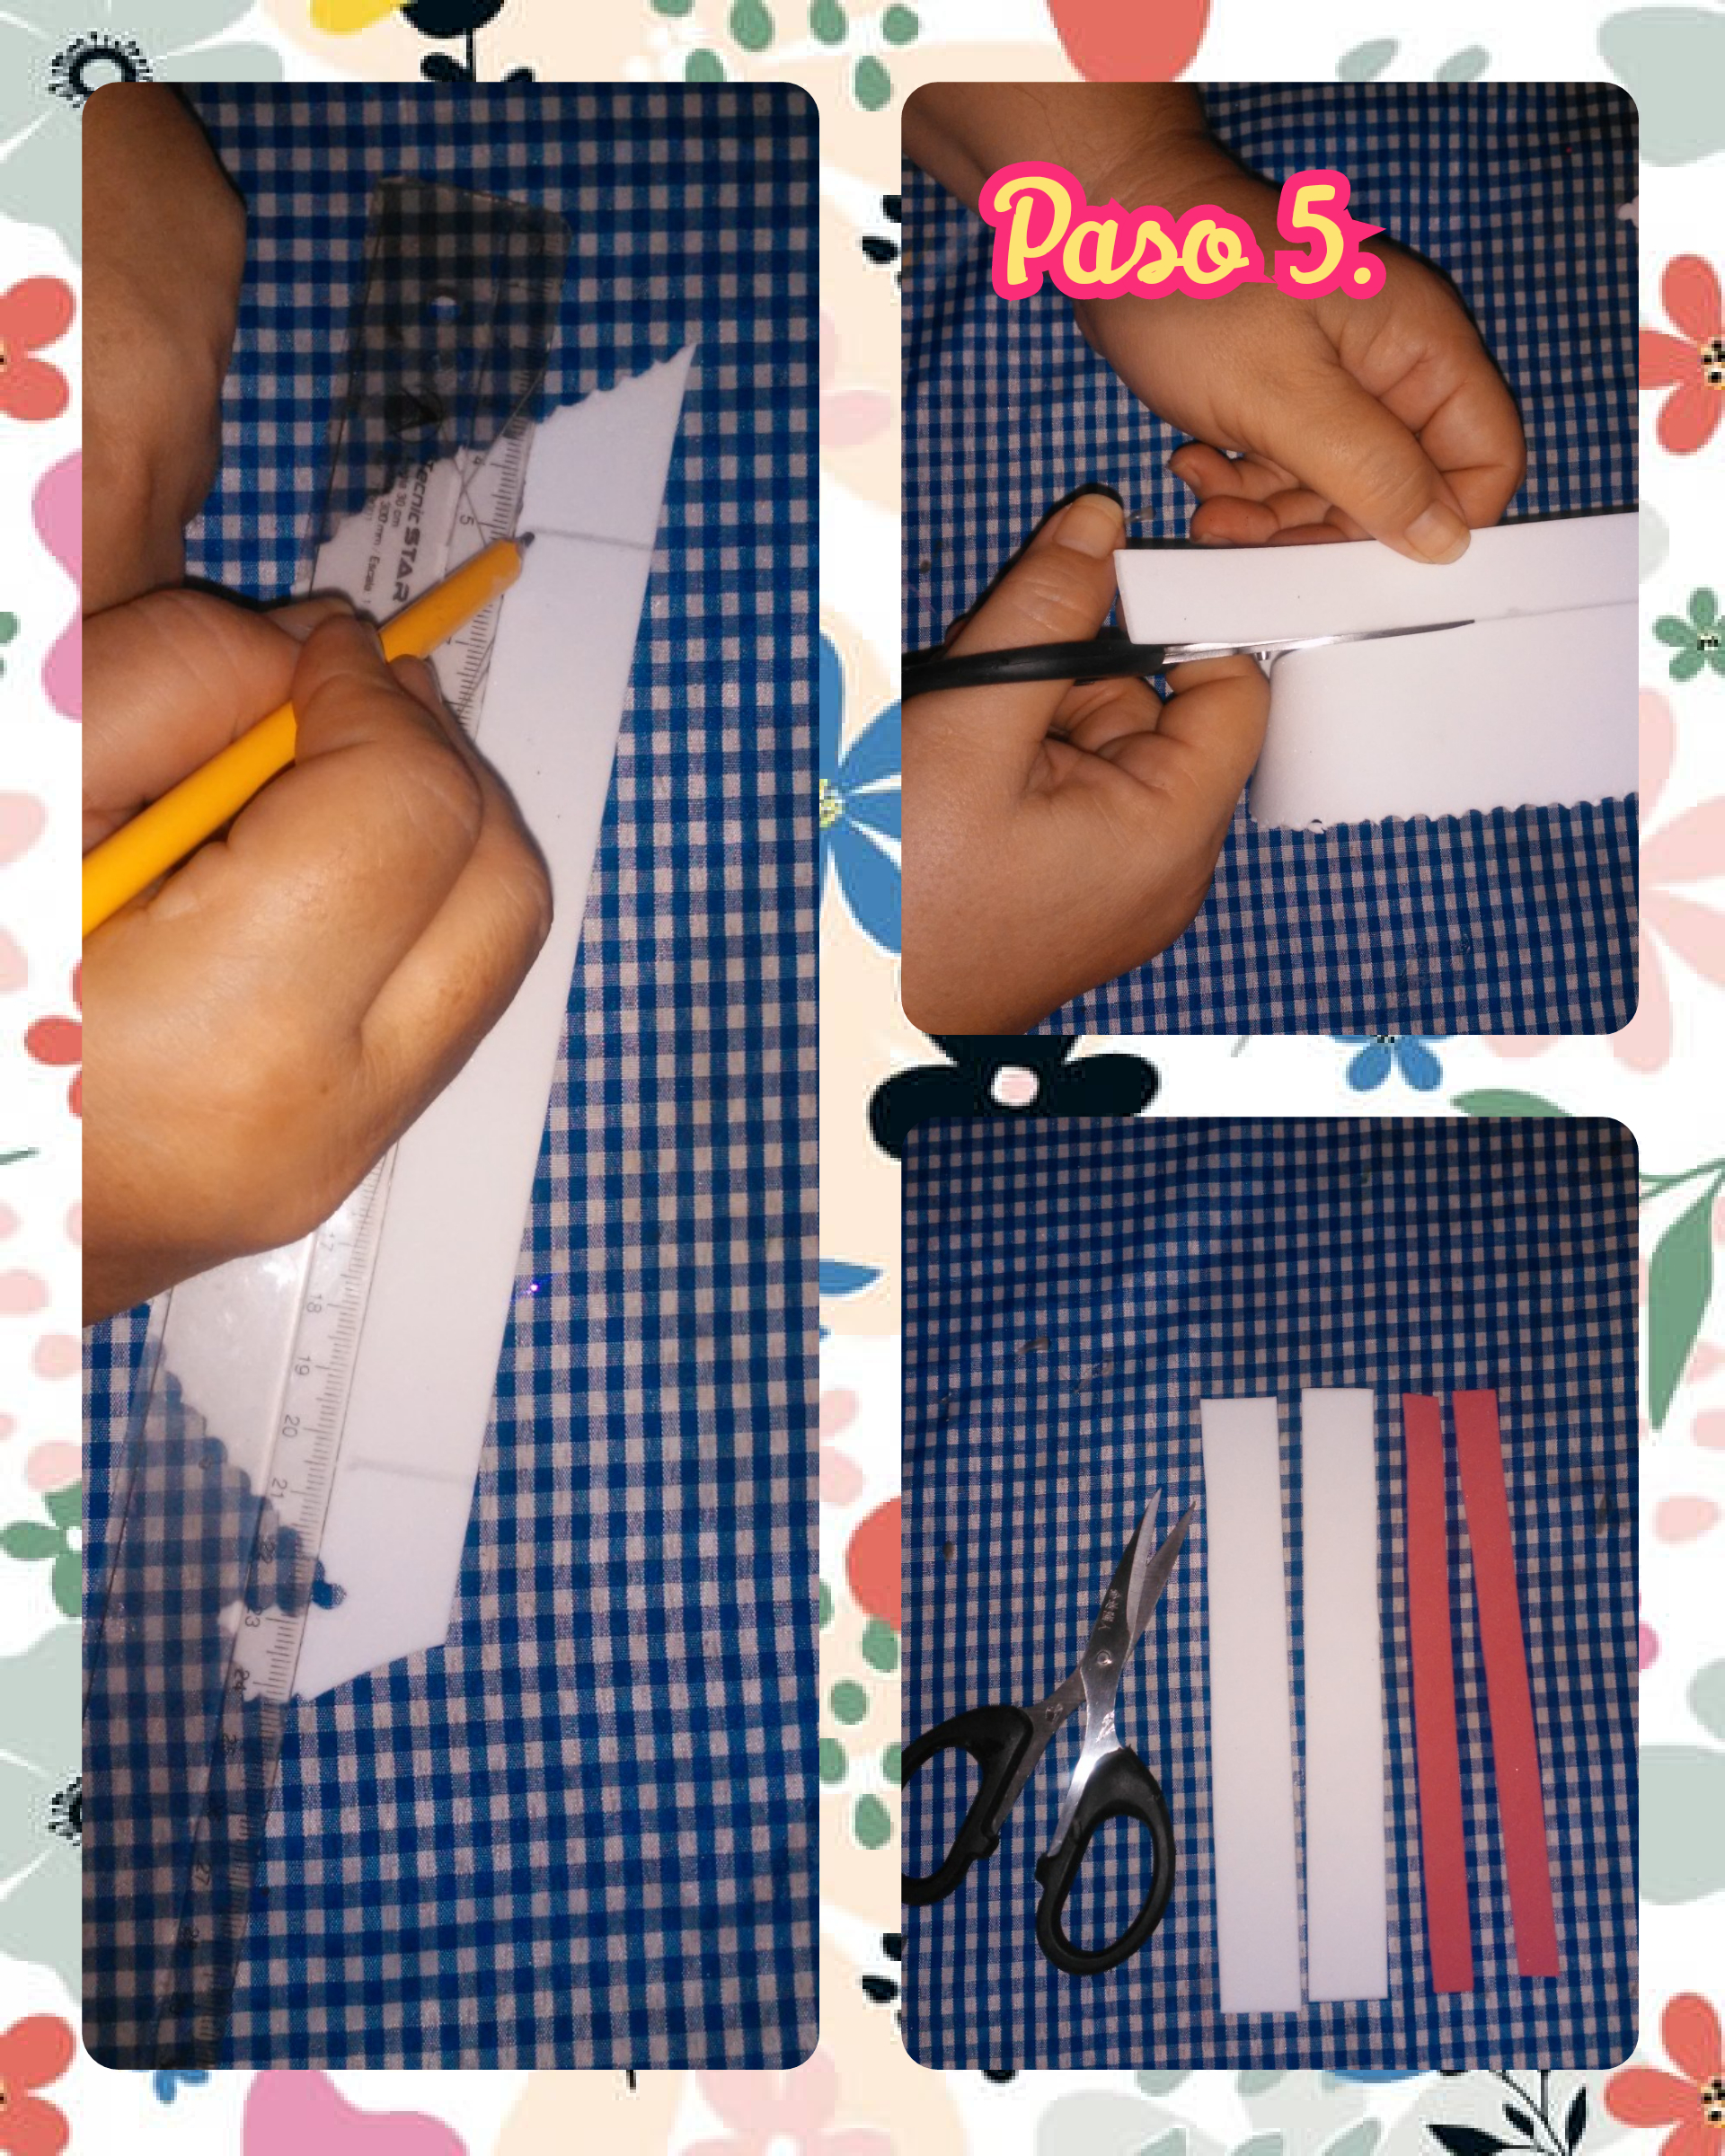
Step 5. We take some foamis with a soft texture, white and pink, and mark strips of 2cm and 1cm wide, then cut them.
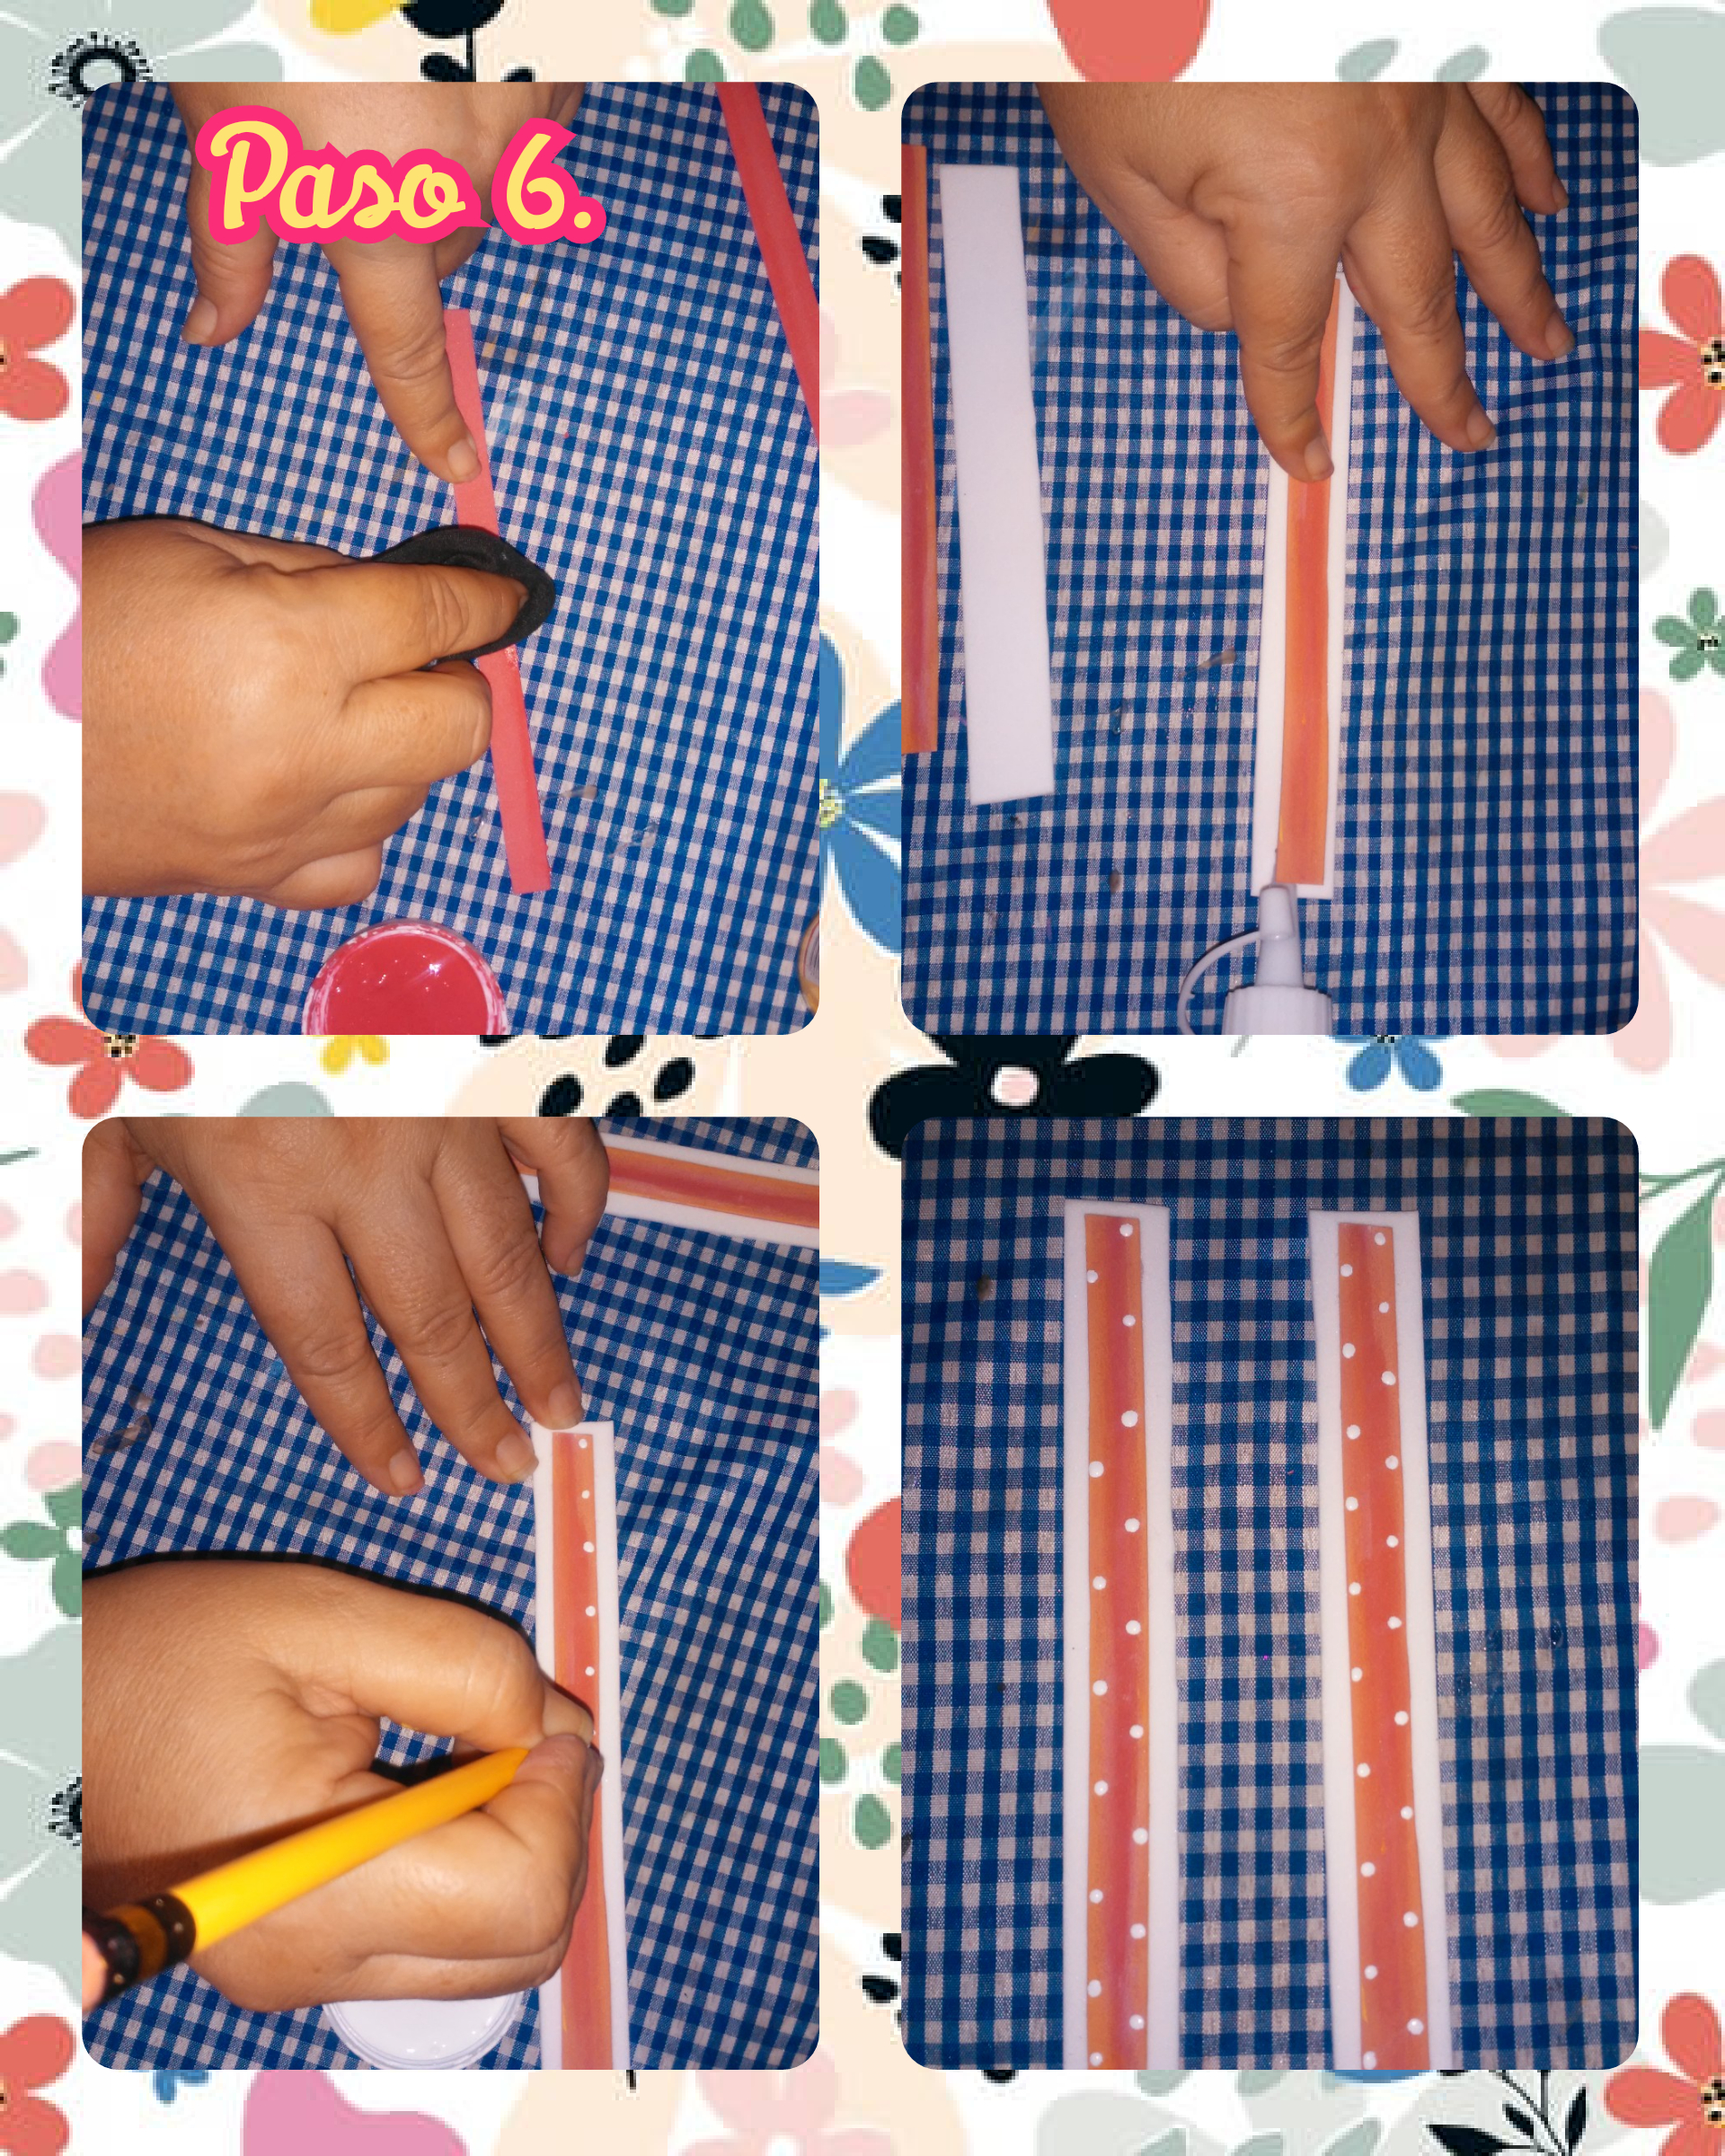
Step 6. In this step with paint and a piece of fabric that you don't use, we do this technique which is to blur the pieces, we dip the piece of fabric in the paint and then we rub it on the edge of the piece, leaving a shading, we paste it in the center of the white strip and with a height stick and paint we put white dots on the edges to lighten the piece.
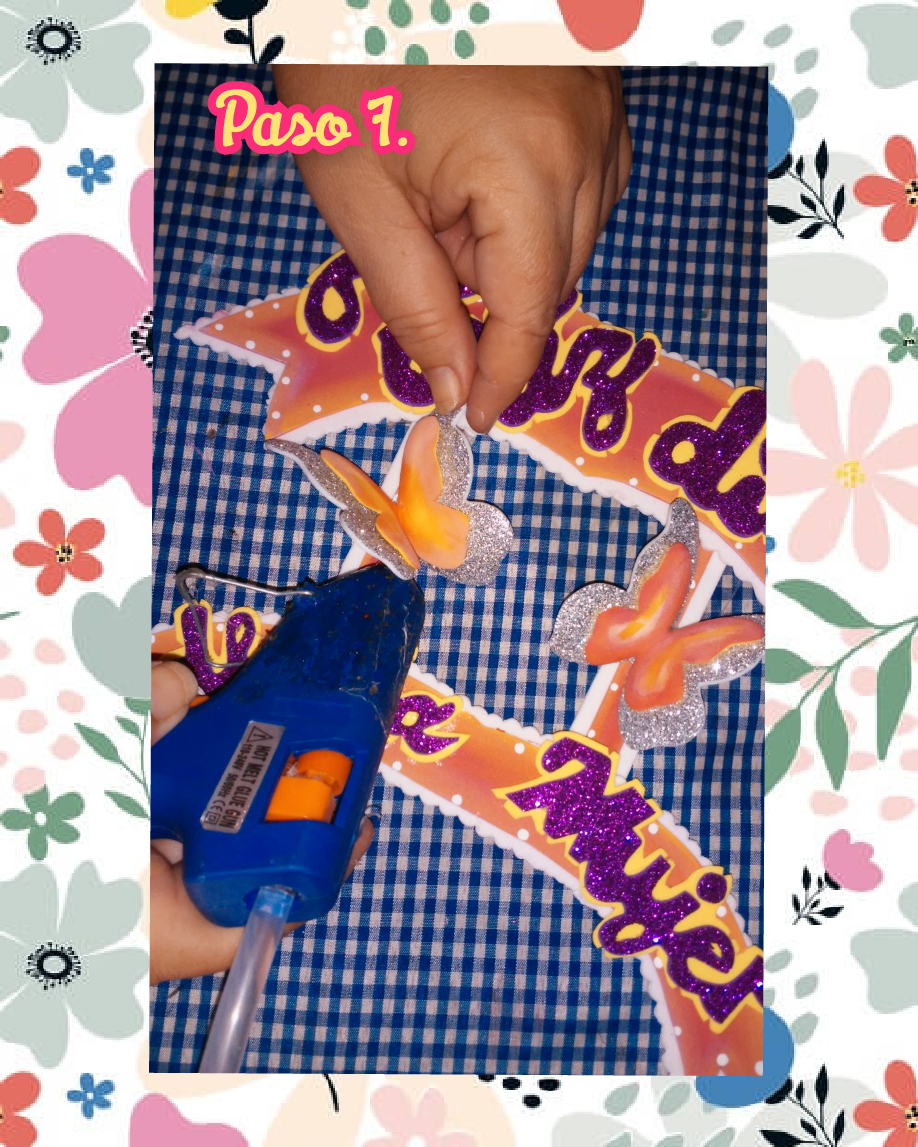
Step 7. In this step we are going to decorate this beautiful topper, with some butterflies on the sides so that it is beautiful and very elegant.

step 8. In this step we are going to make some small roses, we take a diamond foami, purple color and we mark it in the shape of a wavy spiral, we cut and roll the spiral from the outside inwards forming the roses and with wavy texture foami , cut out some green leaves, they are very pretty.
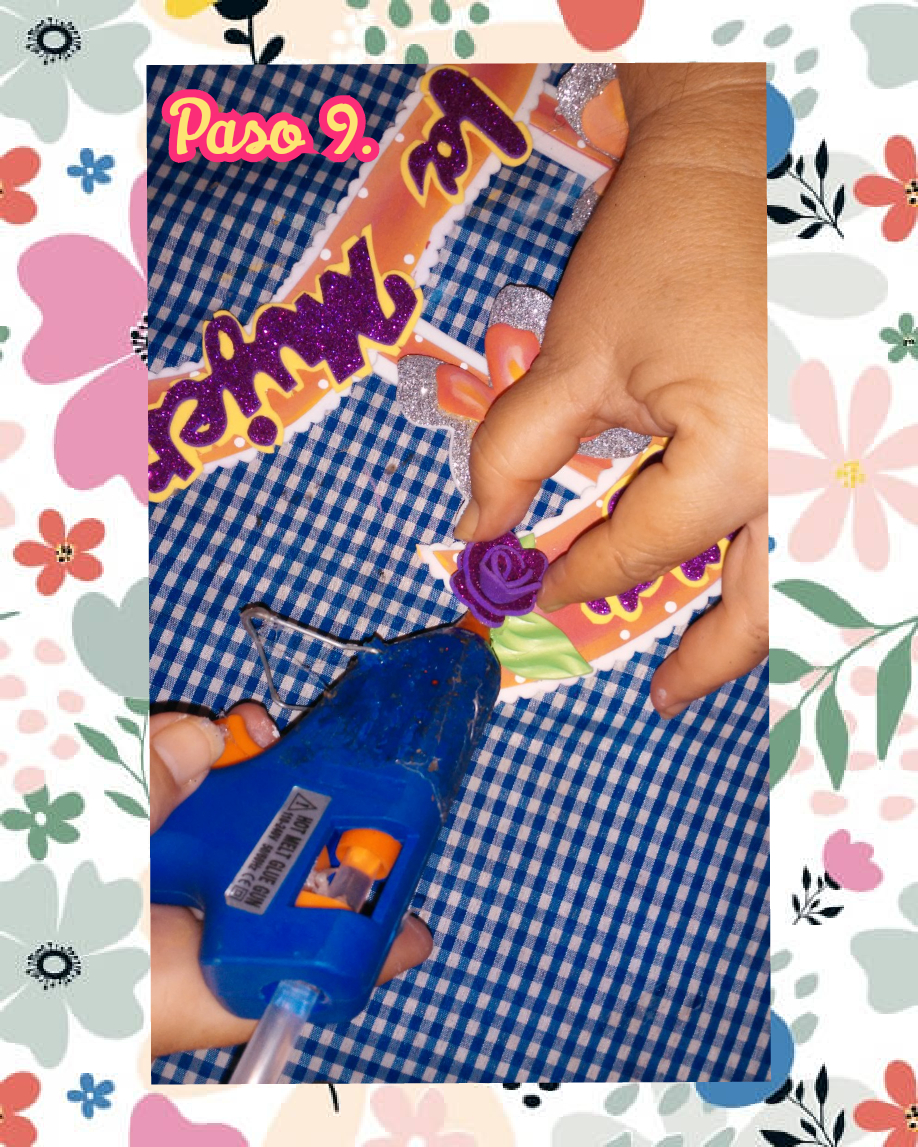
Step 9. In this step, with the help of a glue gun, we proceed to glue the roses to the topper, from the top to the sides, as seen in the images.
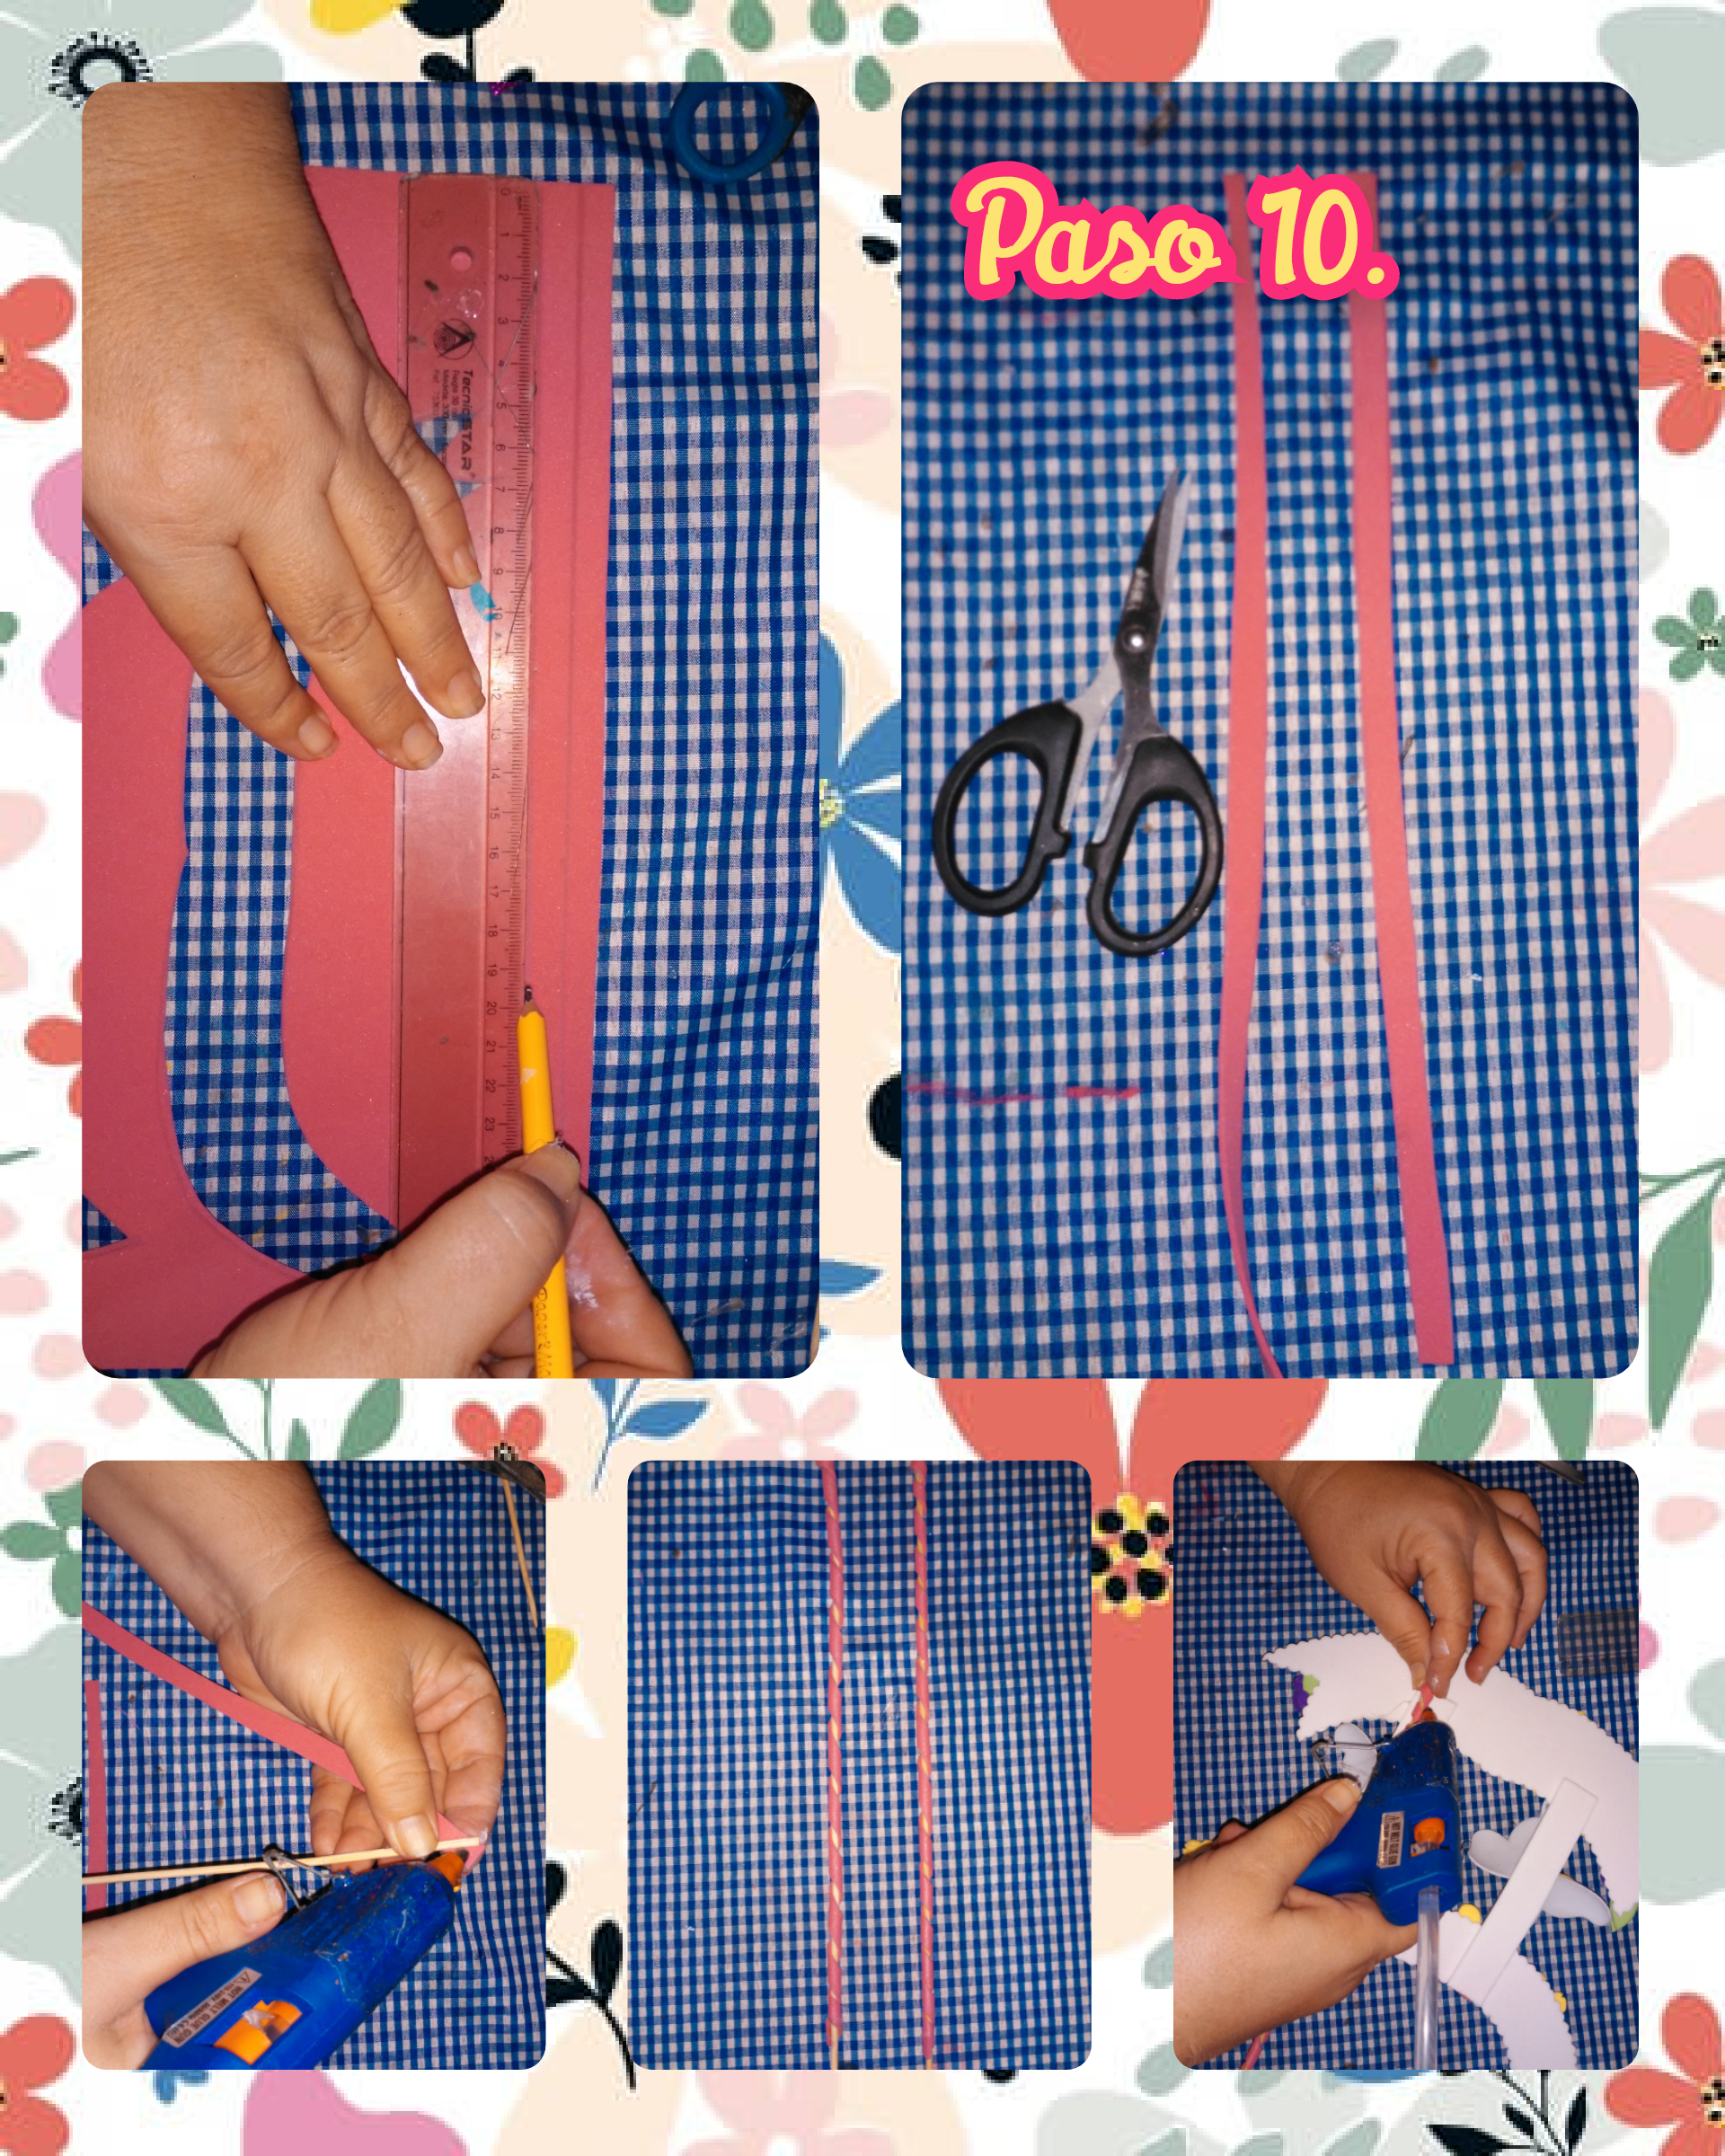
In a foami with a soft texture, pink, we mark strips of half a centimeter, we cut it and take some height sticks, we stick it on the tip and roll it up and to finish on the back of the topper we stick it with hot silicone, to be able to hold it.
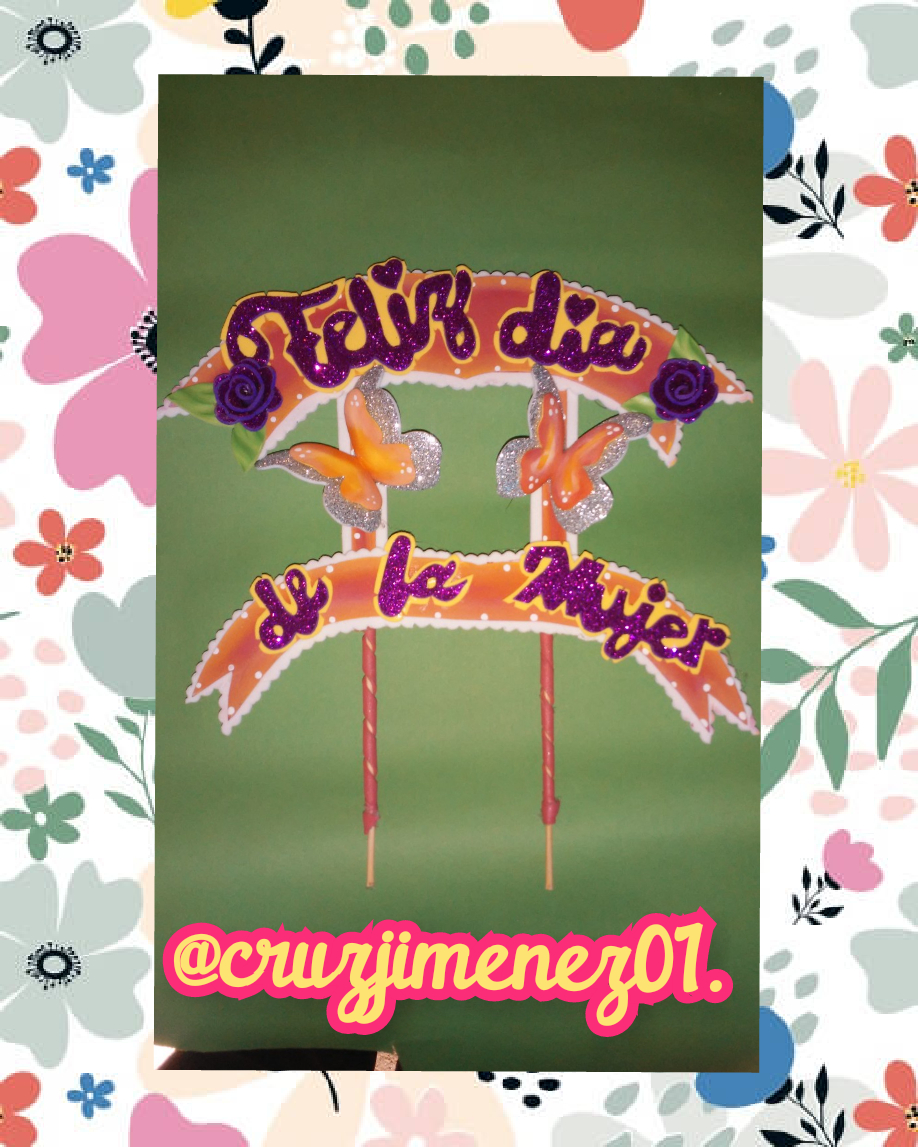
We have reached the end of all the steps, and the result is a beautiful topper to celebrate International Women's Day, which is celebrated tomorrow, thanks for watching until the end, I hope you liked it. See you soon. Have a nice day, God bless you.
Las fotos son de mi propiedad, y editadas con la aplicacion Collage Maker.
Photos are owned by me and edited with Collage Maker app.