Español // Spanish
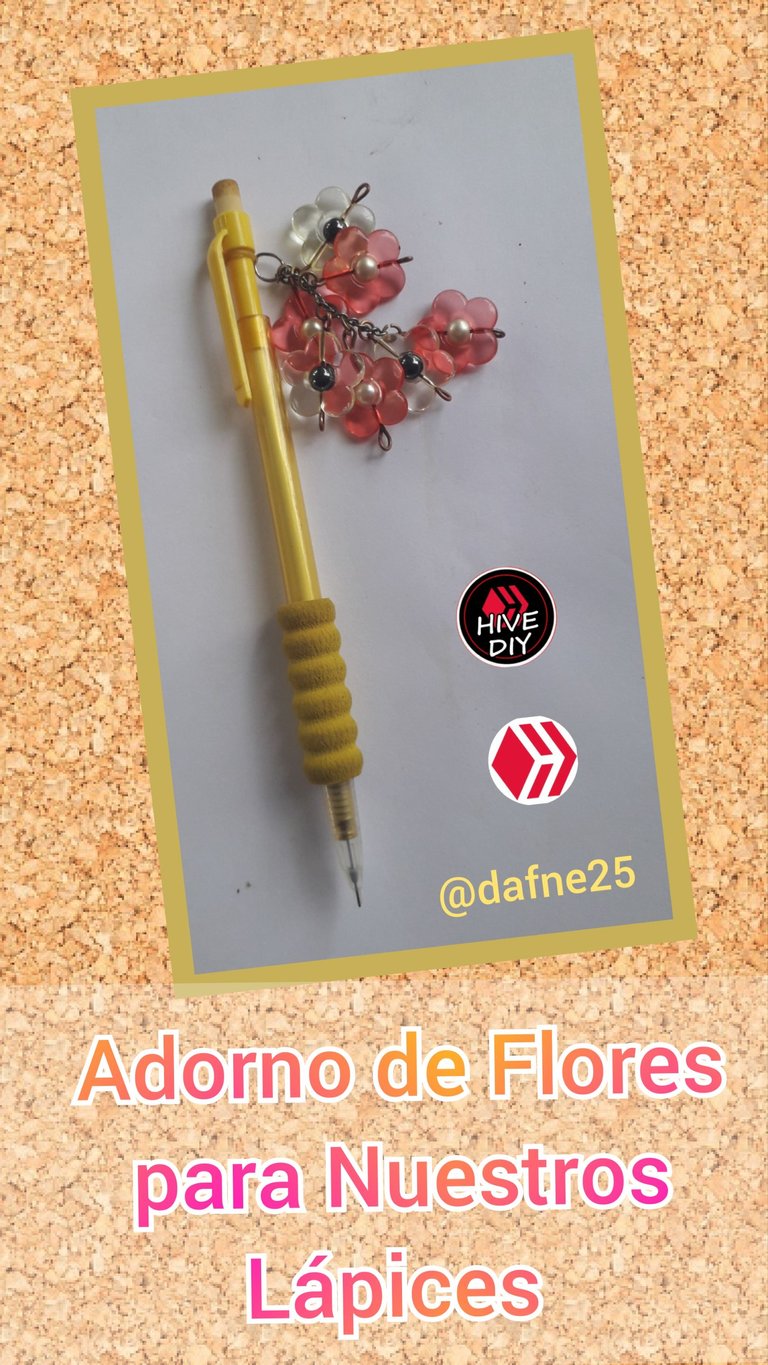
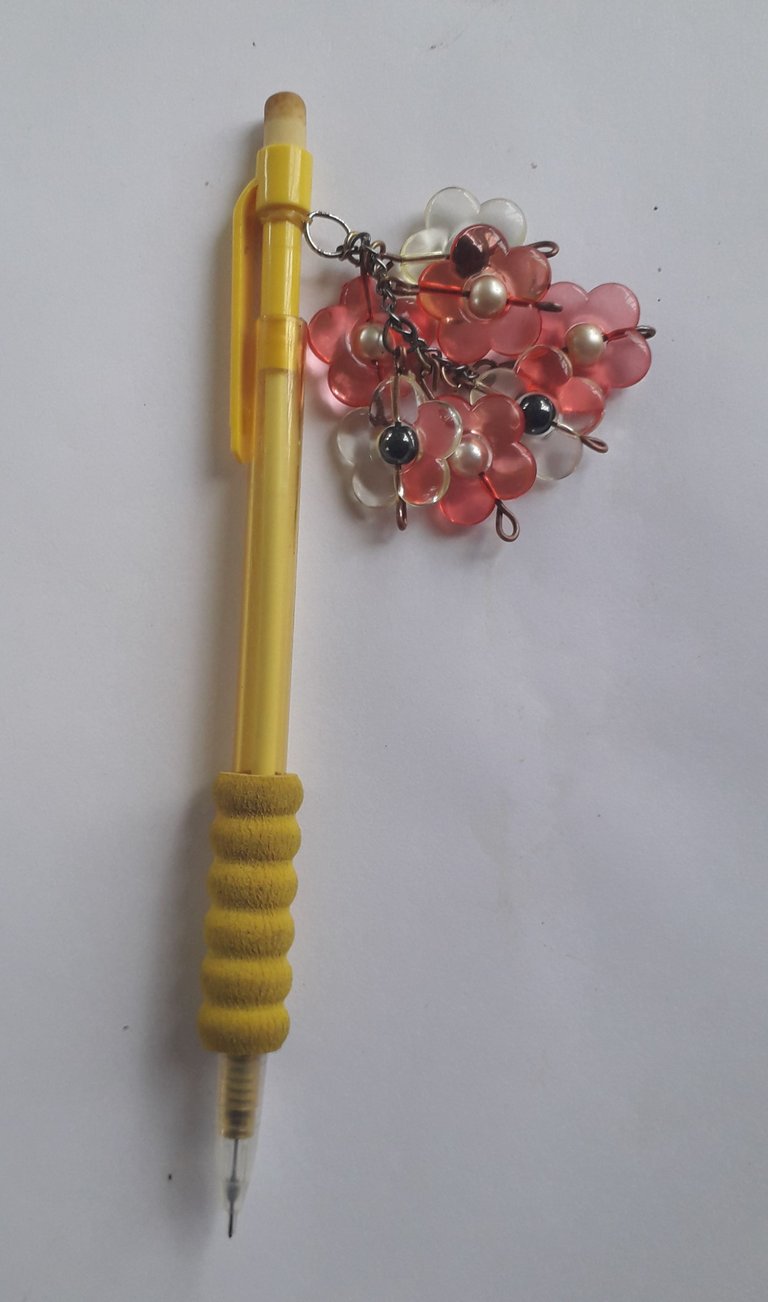
Buenos días queridos amigos de Hive y Hive Diy, cómo están?, espero que se encuentren bien y que hayan teniendo un excelente día. En esta hermosa tarde les quisiera compartir un adorno para los lápices, no sé si les ha pasado pero hay veces que los lápices se confunden así que un adorno de estos es lo mejor para diferenciarlos, lo más cómodo es buscar materiales que no sean pesados para que al usar los lápices es muy incomodo tener un adorno de lápices pesado al escribir. Yo ya lo empecé a usar en el lápiz que siempre uso y que tengo en la cartera para trabajar. Lo que más me gusta de este adorno es que las flores tienen en el centro perlas, tanto blancas como negras, lo que realmente me encanta. Espero que les guste y que lo disfruten tanto como yo, ahora empezaré a decirles cómo lo hice:
Los Materiales que vamos a necesité fueron:
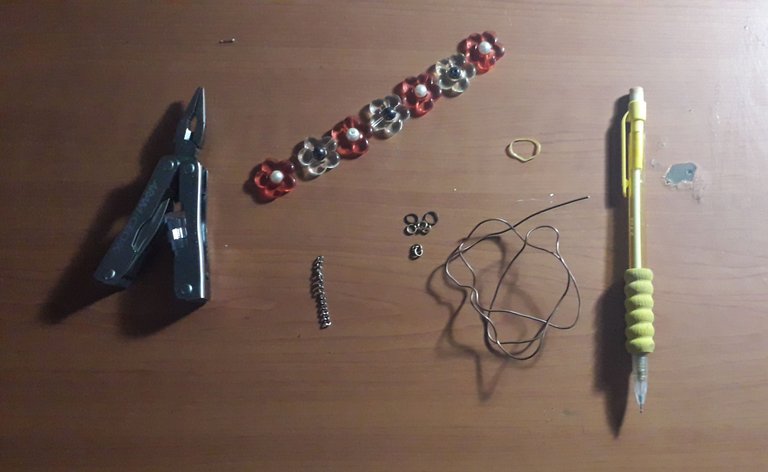
3 Perlas negras de tamaño pequeño
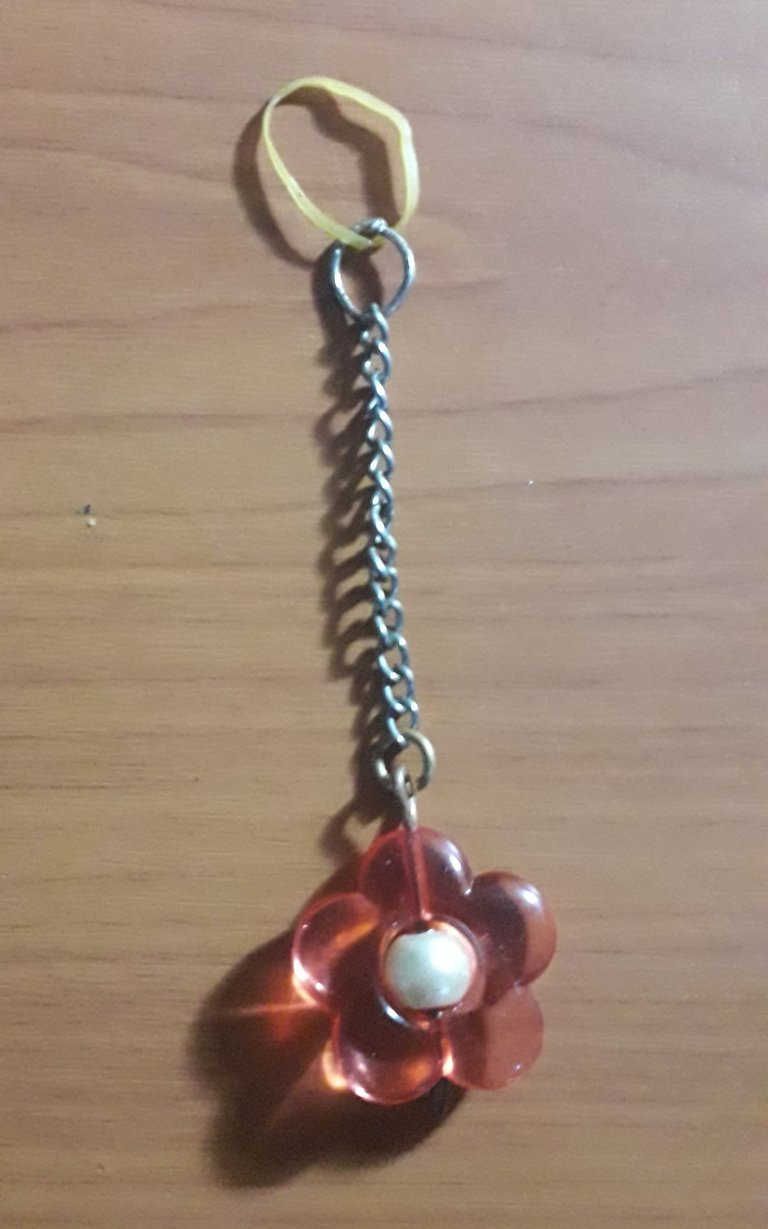
4 Flores de cristal con orificio en el centro de color rojo
3 Flores de cristal con orificio en el centro de color amarillo
Alambre de cobre
8 Argollas
Trozo de cadena de 6cm con 14 eslabones.
1 liga pequeña de cabello
Pinza
Procedimiento
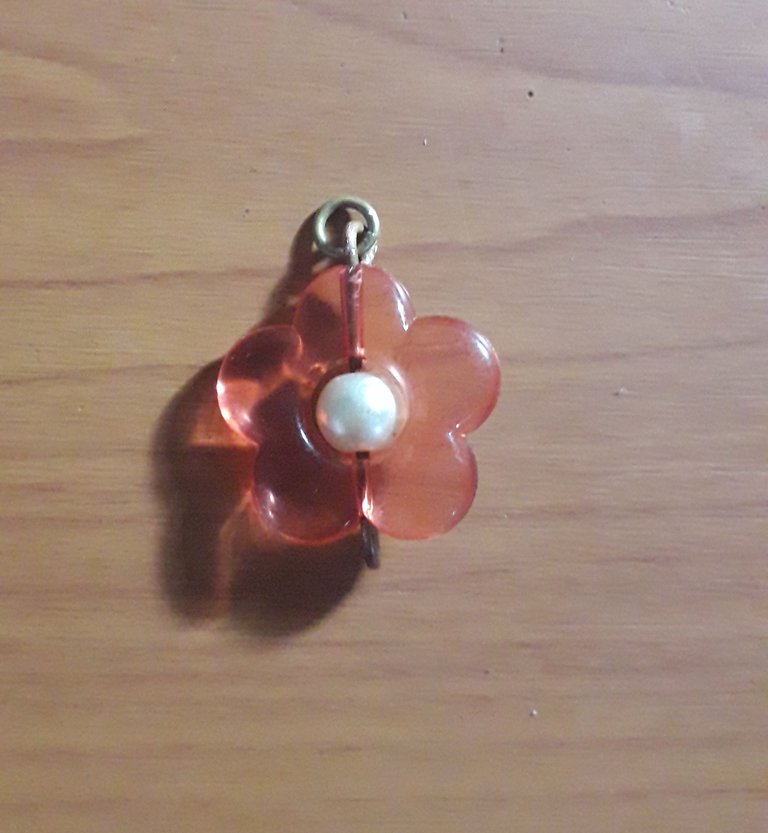
Para empezar vamos a cortar 6cm de alambre de cobre, en un extremo del alambre hacemos un aro, enderezando bien el alambre con ayuda de la pinza de joyería y agregamos el orificio inferior de una de las flores rojas, en el centro añadimos una perla blanca y el otro extremo de la flor. Al terminar hacemos un aro en la parte superior con la pinza y le colocamos una de las argollas en ese mismo aro superior.
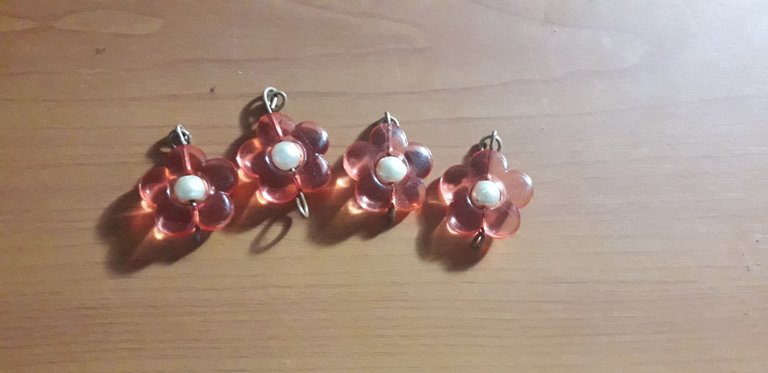
Hacemos el procedimiento anterior 3 veces más con las otras flores rojas y sus respectivas perlas blancas.
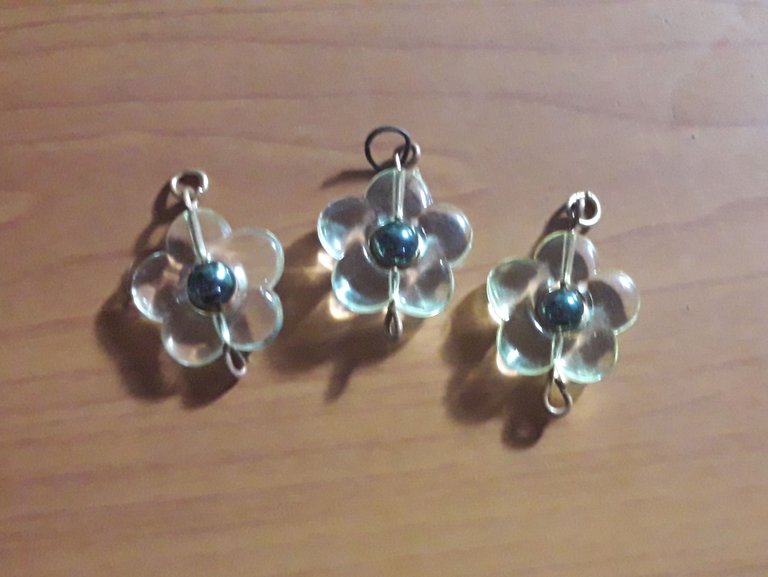
Volvemos a repetir el paso 1, pero esta vez lo hacemos con las flores amarillas y en el centro usamos las perlas negras. Recuerden que el alambre debe estar bien recto para que la flor y la perla entren sin ningún problema y les sea más fácil.

Ahora vamos a insertar en uno de los extremos de la cadena la última de las argollas y en ella vamos a insertar la liga pequeña de cabello, es con esto que vamos a sujetar nuestro adorno al lápiz.
Insertamos en el extremo opuesto a la argolla una de las argollas con una flor roja.
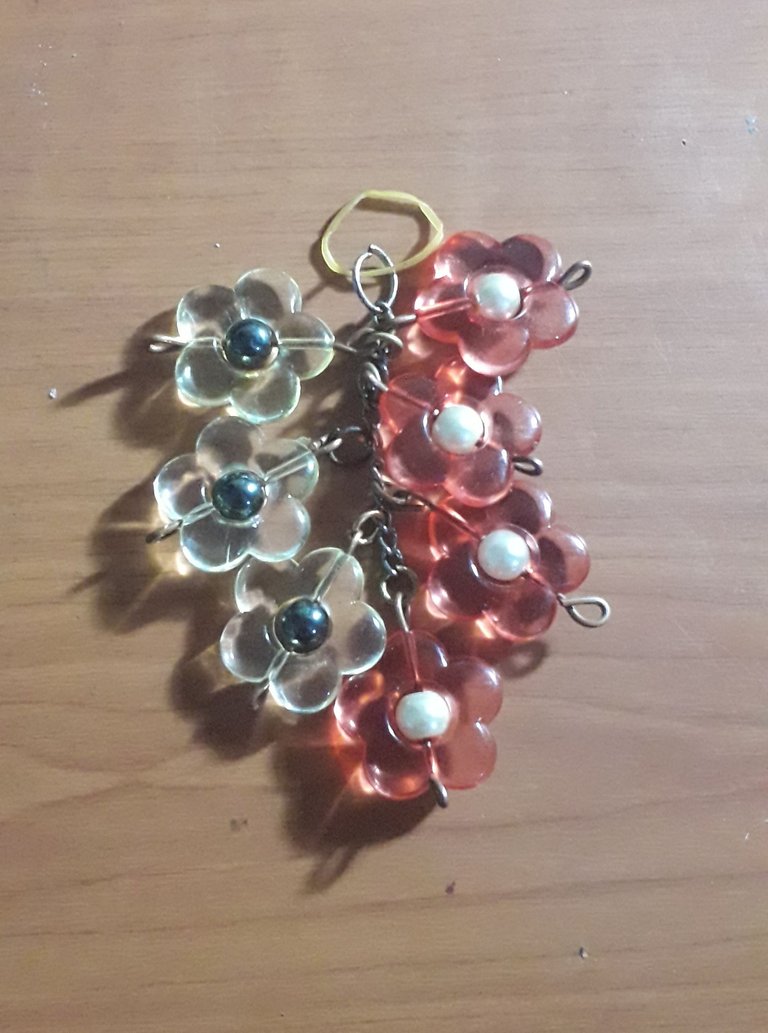
Ahora insertamos dos eslabones más arriba de la flor la argolla de una flor amarilla, dos eslabones más arriba la argolla de una flor roja, seguimos así hasta completar las flores.
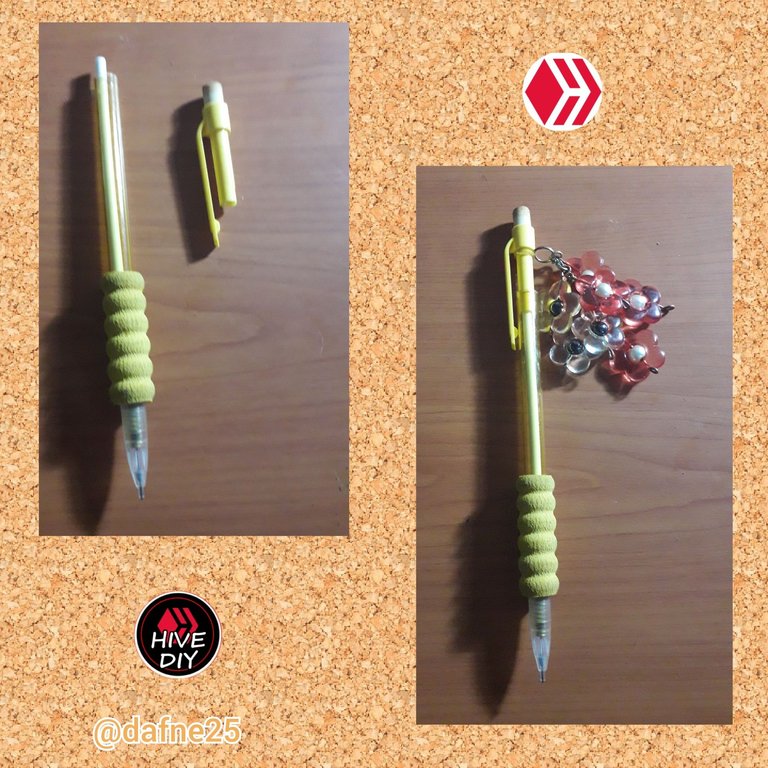
Por último vamos a desarmar el lápiz y ajustamos la liga del adorno donde pueda sujetarse bien y no caerse. Y listo, tenemos un nuevo y original adorno para los lápices.
Hasta la próxima 👋
Créditos
Traductor: App DeepL
Editor de fotos usado: editor de fotos Polish.
Inglés // English
Good morning dear friends of Hive and Hive Diy, how are you, I hope you are well and that you are having a great day. In this beautiful afternoon I would like to share an ornament for pencils, I do not know if it has happened to you but there are times that pencils are confused so an ornament of these is the best to differentiate them, the most comfortable thing is to look for materials that are not heavy so that when using pencils is very uncomfortable to have a heavy pencil ornament when writing. I have already started to use it on the pencil that I always use and that I have in my wallet to work. What I like most about this ornament is that the flowers have pearls in the center, both black and white, which I really love. I hope you like it and enjoy it as much as I do, now I will start telling you how I made it:
The Materials we are going to need were:
3 small black pearls
4 Crystal flowers with hole in the center of red color
3 Crystal flowers with hole in the center in yellow color
Copper wire
8 rings
Piece of chain of 6cm with 14 links.
1 small hair tie
Tweezers
To start we are going to cut 6cm of copper wire, at one end of the wire we make a hoop, straightening the wire well with the help of the jewelry pliers and add the bottom hole of one of the red flowers, in the center we add a white pearl and the other end of the flower. At the end we make a ring in the upper part with the pliers and we place one of the rings in the same upper ring.
We do the above procedure 3 more times with the other red flowers and their respective white pearls.
We repeat step 1 again, but this time we do it with the yellow flowers and in the center we use the black pearls. Remember that the wire must be straight so that the flower and the pearl fit without any problem and it will be easier for you.
Now we are going to insert in one of the ends of the chain the last of the rings and in it we are going to insert the small hair garter, it is with this that we are going to attach our ornament to the pencil.
We insert at the opposite end of the ring one of the rings with a red flower.
Now we insert two links above the flower the ring of a yellow flower, two links above the ring of a red flower, we continue in this way until we complete the flowers.
Finally we are going to disassemble the pencil and adjust the garter of the ornament where it can hold well and not fall off. And ready, we have a new and original ornament for pencils.
Until next time 👋
Credits
Translator: App DeepL
Photo editor used: Polish photo editor
Congratulations @dafne25! You have completed the following achievement on the Hive blockchain And have been rewarded with New badge(s)
Your next target is to reach 4250 upvotes.
Your next target is to reach 800 upvotes.
You can view your badges on your board and compare yourself to others in the Ranking
If you no longer want to receive notifications, reply to this comment with the word
STOPTo support your work, I also upvoted your post!
Check out our last posts:
Te quedó muy bonita al decoración. Saludos.
Que trabajo tan bonito me gusta mucho