Hello, friends especially diy ers!
Last weekend i finally could finish a cute adorable bunny birthday card for my best friend. Although her birthday is still far away i already want to spend my time to make a bunny birthday card for her, because she loves bunny so much. Now without anymore prologue, let just begin!
Project Time: approximately 5 hours
Difficulty: easy
Materials & things needed:
- drawing paper
- pencil
- 0.5 drawing pen
- eraser
- scissors
- ruler
- zig zag scissors
- medium blue cardboard
- green paper, soft pink paper, pearl green paper and soft purple paper
- glue stick
- soft pink and medium pink color pencil
- double sided tape with the sponge in it (so it would give 3D effect)
- glitter glue in silver and gold
How to make it:
1ST
First i measured the drawing paper 15 cm width, cut it off then i cut a bit of the untidy part, so the length became 29 cm. After that, i drew the bunny body with two hands on its' left and right.
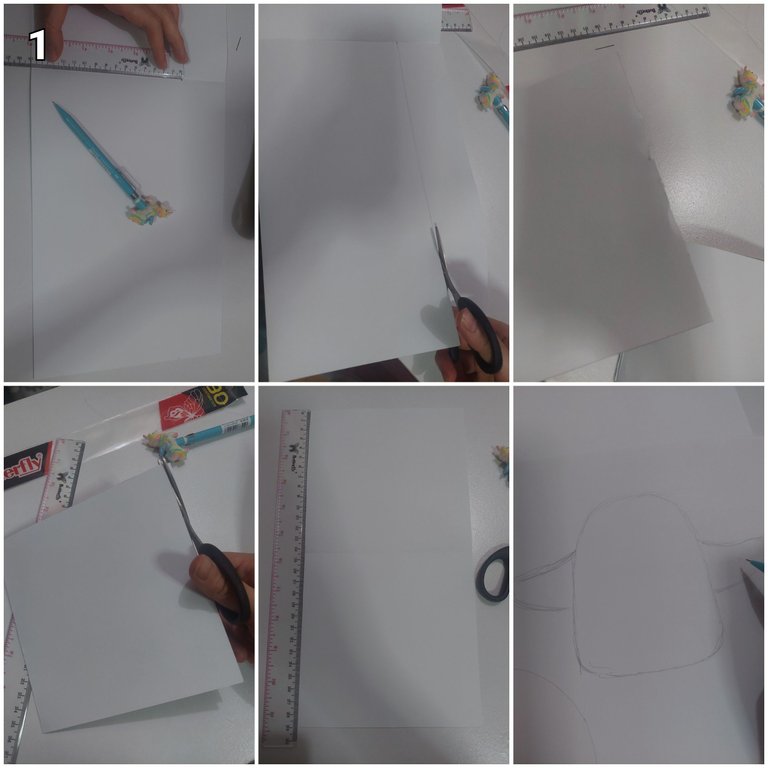
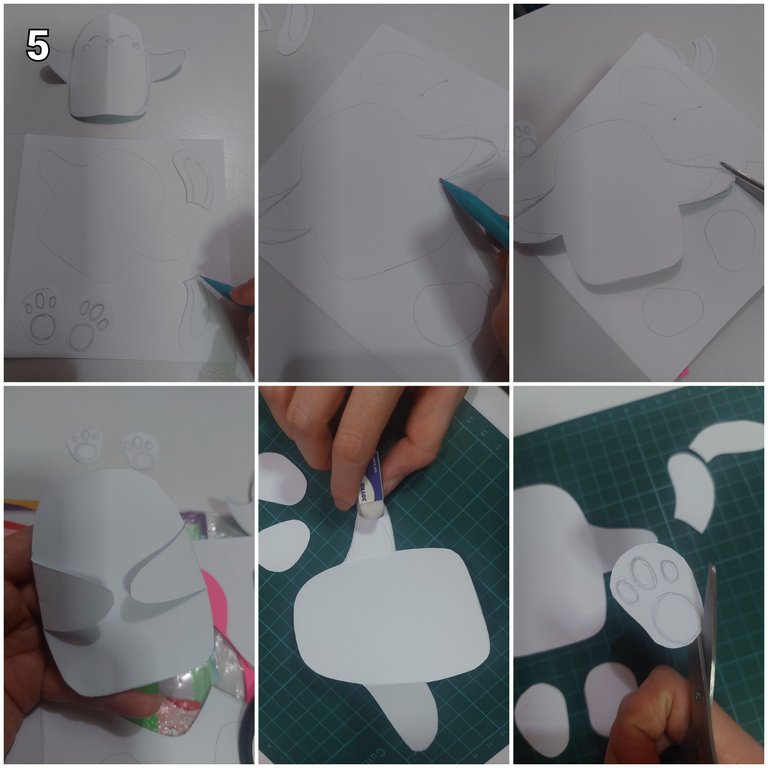
2ND
Then i also drew the ears, face, and two feet. I cut them off. These would all be the pattern. To make sure the body was symettric i folded the paper with bunny drawing in the middle before cutting it.
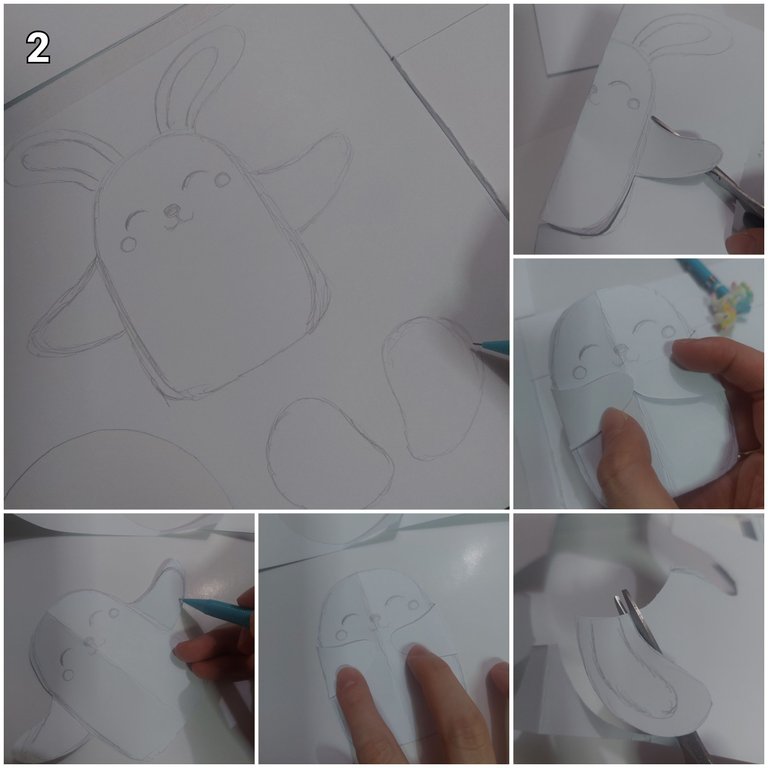
3TH
I drew the small parts of one foot inside. Then i cut both feet. After that i cut the grass with the zig zag scissors.
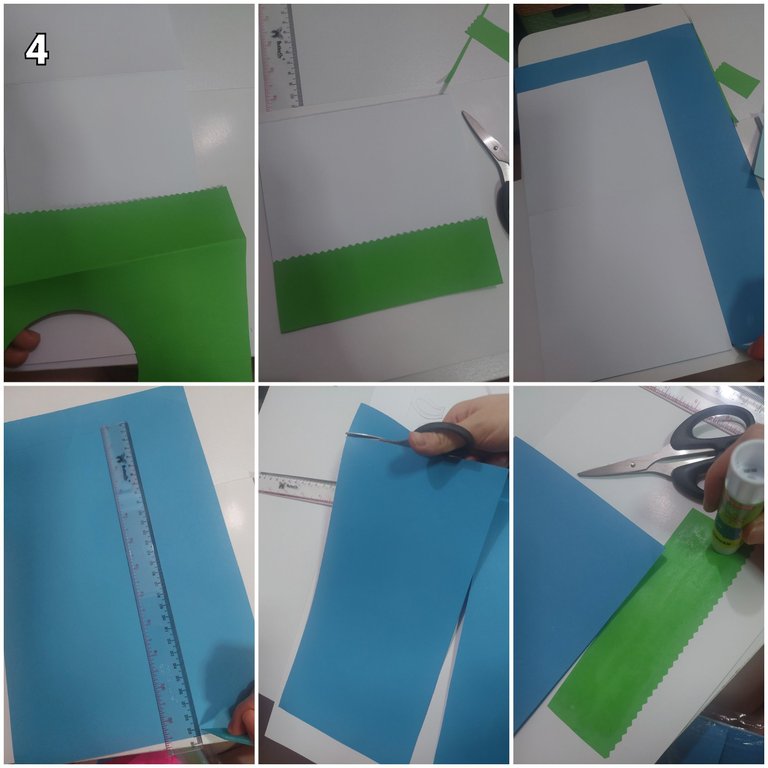
4TH
After i tried it on the white card i suddenly changed my mind. The drawing paper would look pale if i used it as the card, so then i measured the same size of it, 15 cm x 29 cm, on blue cardboard then cut it off and folded it in the middle. After that, i glued the green grass on bottom part of it.
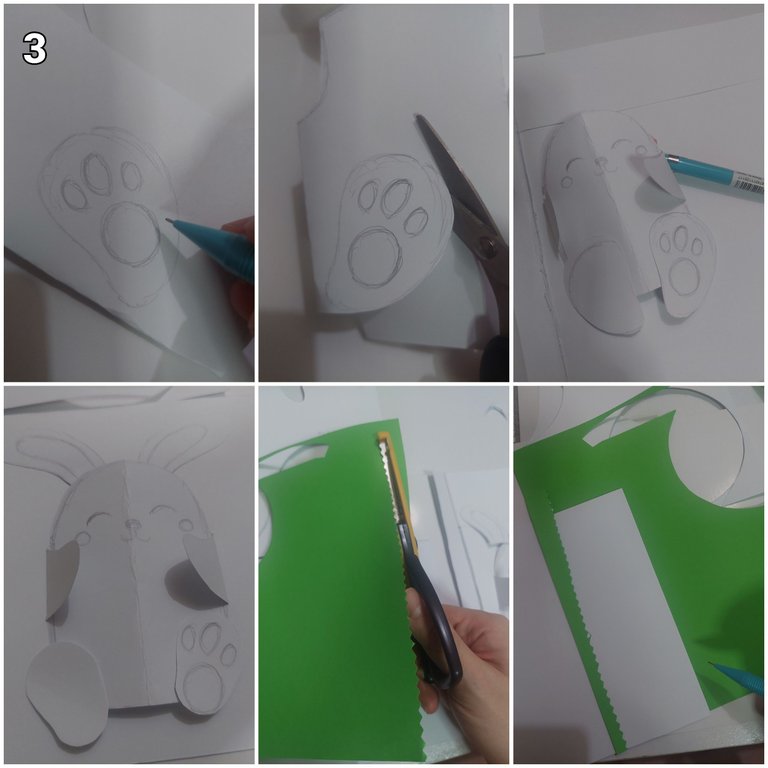
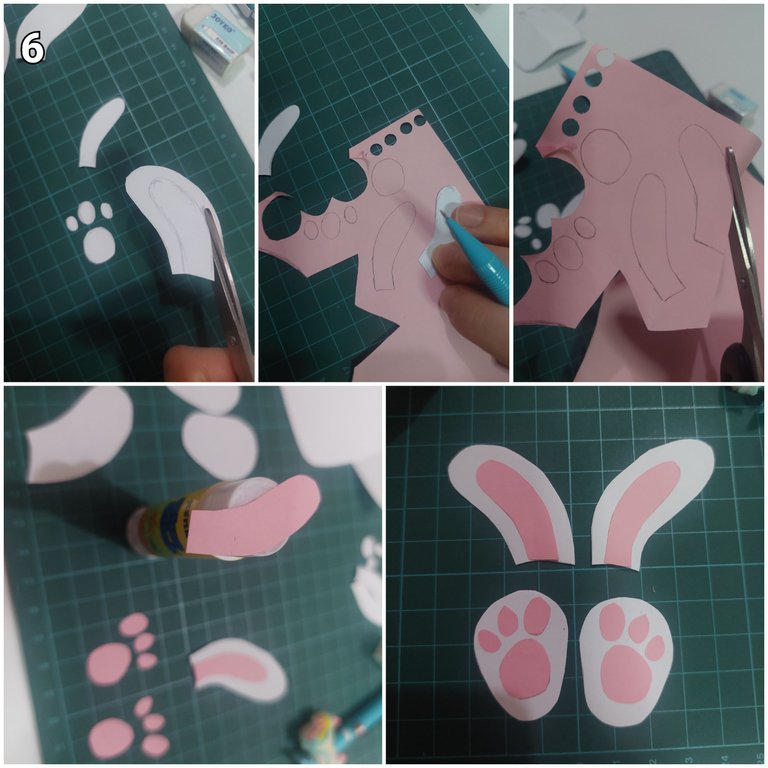
5TH
Then, i transferred the pattern on a piece of drawing paper. Edited the hands cause i want it a bit lower. Then i cut them off and erased the pencil drawing in it. After that i cut the pattern, inside of the feet small parts.
6TH
Next i also cut inside the ear areas of the pattern. I transferred what i cut, on a piece of soft pink paper. Cut them off then glued them in ears and feet, just like in the picture.
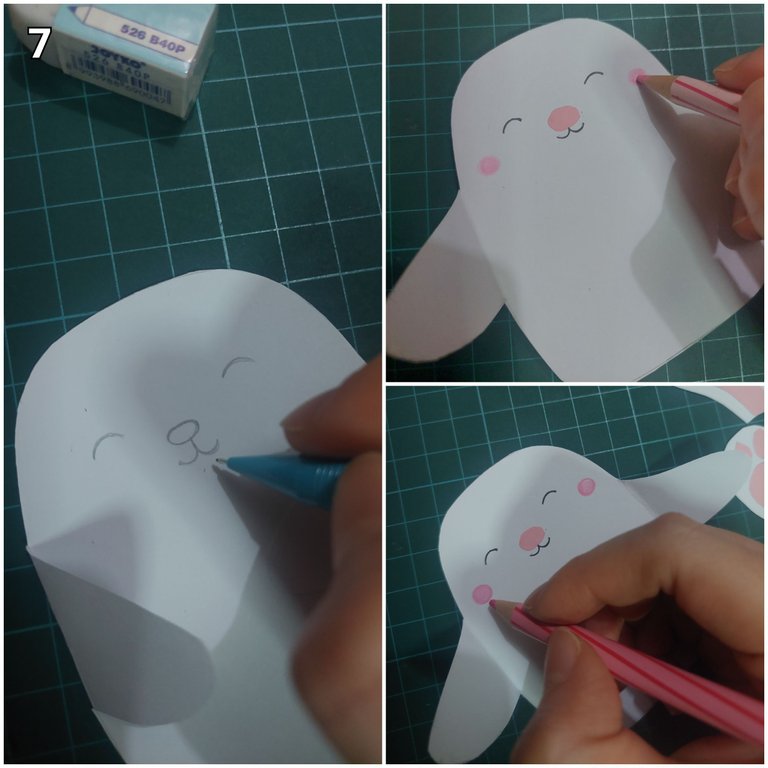
7TH
For the face, i drew it with pencil then bolded it wiht the drawing pen. For the nose, i glued soft pink little oval and for the cheeks, i drew two circles with pink color pencils: soft pink first then medium pink around.
8TH
Next i drew the cupcake in pearl green and soft purple just like below. Cut them off. I cut my double tape then pasted it on the bunny, just like on the picture.
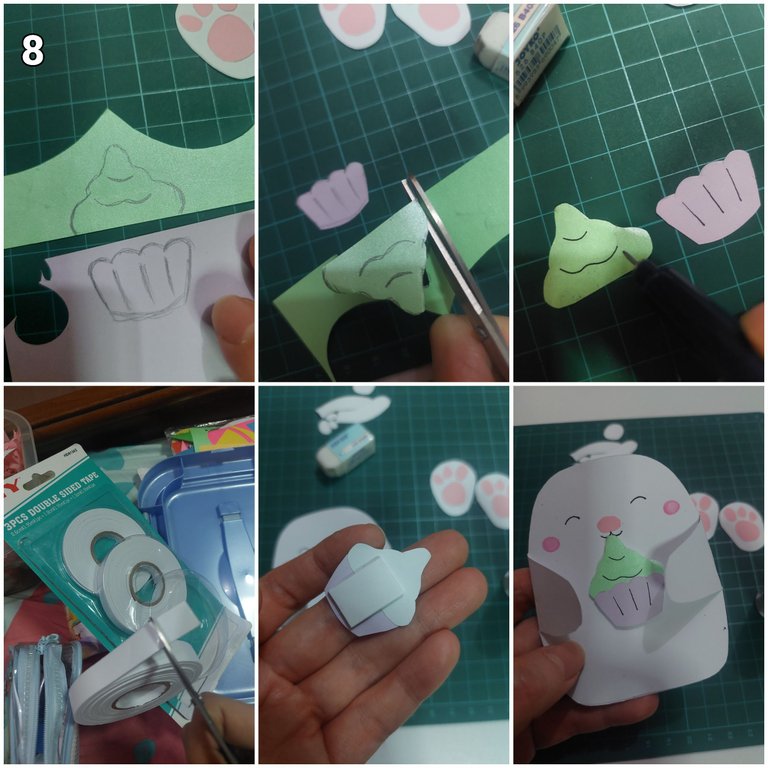
9TH
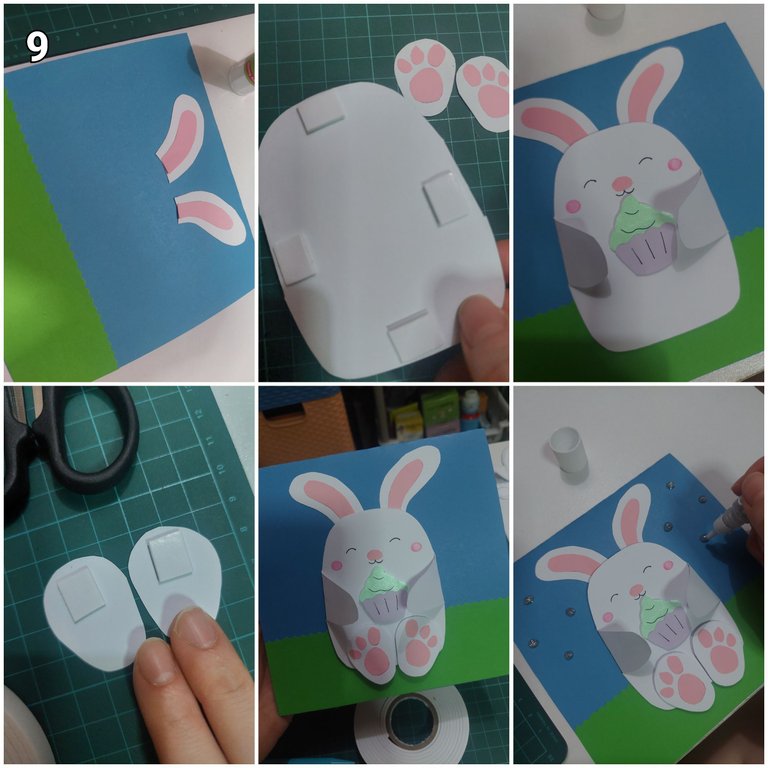
First, i glued the bunny's ears on the blue cardboard, then for the head and body, i put the double tape behind. Pasted it on the cardboard. Next two feet. Last, i put on the glitter on it too.
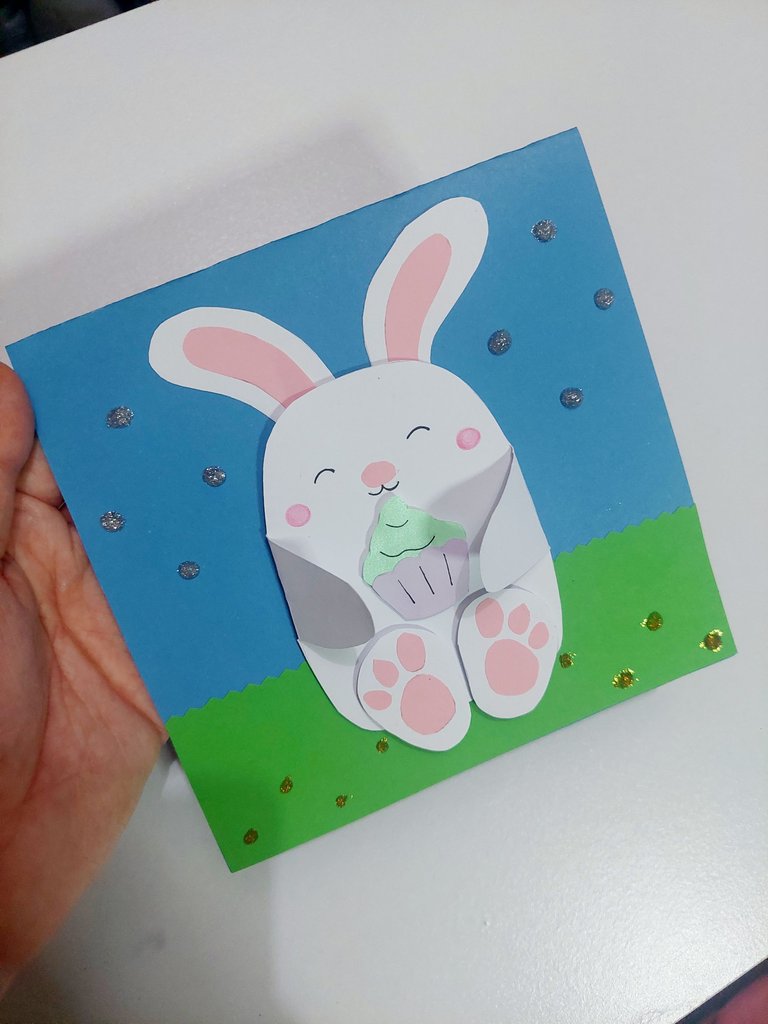
The Result
Voila here is the 3D bunny birthday card i made..
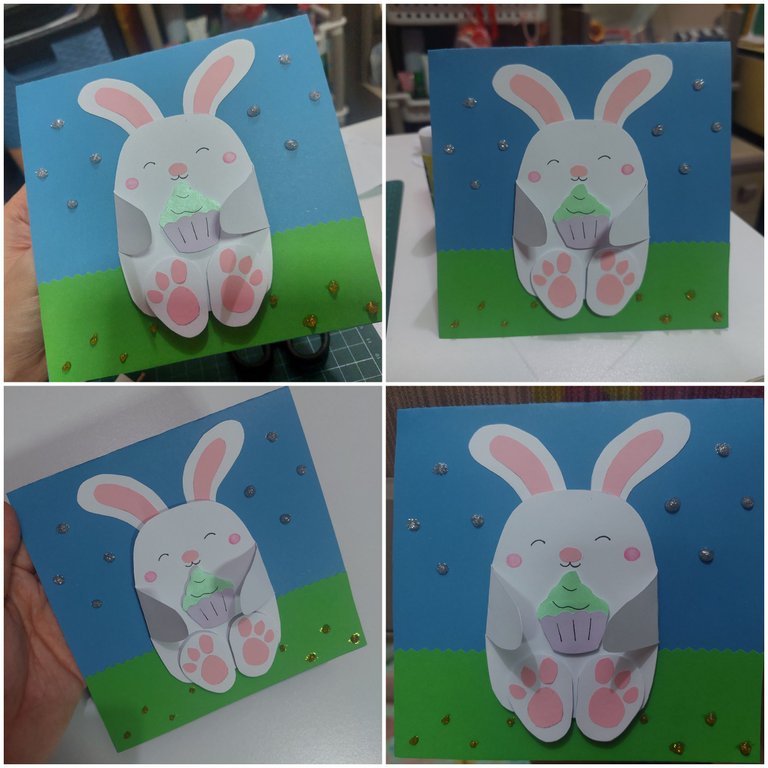
Isn't it cute?
Thanks for having my article, hope you enjoy it and stay tune for more CRAFT things from me!
All the pictures were taken with samsung A52 5G.
A bit about the author
She works in a bank but she interests in CRAFT (CRaft, Art, Food and Travel). To pursue her art passion she does the cross stitch, embroidery, handsewing, crafts, crochet and also draws. Find hers in https://www.redbubble.com/people/de-creartique/shop?asc=u and https://decreartique.threadless.com/designs . Also find her cute collectibles pixel cat pictures here https://opensea.io/collection/pixelcryptocat .
The Bunny card that you made is very beautiful. And bunny looks cute. ❤
Thank you :)
very good
谢谢, 哥