BINVENIDOS/ WELCOME
Hola querida comunidad de Hive espero se encuentren muy bien! Para mí es un gusto saludarlos y poder compartir una vez mas un poco con ustedes.
Hoy quiero compartirles el proceso paso a paso para la elaboración de una cartuchera, un proyecto muy sencillo pero también versátil, que pueden decorar y personalizar como mas les guste! Por eso este trabajo es tan especial, les dará la oportunidad de trabajar sobre una base que pueden modificar tanto como deseen, variado combinaciones de materiales, colores y texturas.
Acompáñame a realizar este hermoso trabajo imaginando todas las posibles confinaciones
Hello dear Hive community, I hope you are very well! For me it is a pleasure to greet you and to be able to share a little with you once again.
Today I want to share with you the step-by-step process for making a pencil case, a very simple but also versatile project that you can decorate and customize as you like! That is why this work is so special, it will give them the opportunity to work on a base that they can modify as much as they wish, varied combinations of materials, colors and textures.
Join me to carry out this beautiful work by imagining all the possible confinements.

Materiales
👝De 20cm por el ancho de la tela, de alguna tela de su preferencia.
👝20cm de alguna tela para el forro (puede ser POP, Tafeta o cualquiera de su agrado, yo utilice tafeta)
👝29 cm de cierre y 1 Slaider (pueden usar un cierre ya armado, de igual forma les enseñare como pueden armar uno)
🧵Hilo en combinación con la tela
✂️Tijera
🎀Cinta métrica
📍Alfileres
💥Máquina de coser.
🔨Martillo
Materials
👝20cm for the width of the fabric, of any fabric of your choice.
👝20cm of some fabric for the lining (it can be POP, Taffeta or whatever you like, I use taffeta)
👝29 cm closure and 1 Slaider (you can use a closure already assembled, I will also show you how you can assemble one)
Thread in combination with the fabric
✂️Scissor
🎀Metric tape
📍Pins
💥Sewing machine.
🔨Hammer
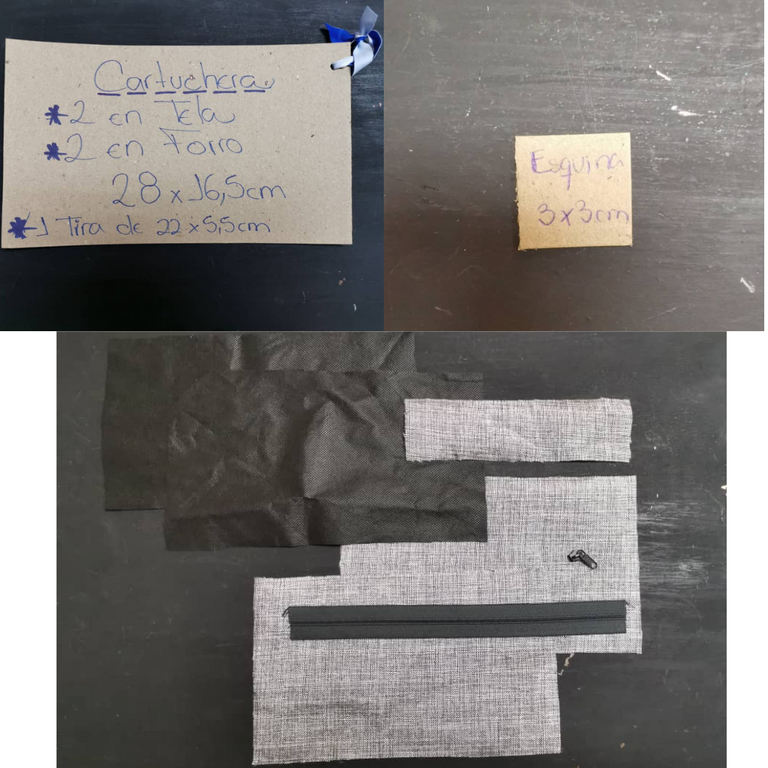

Paso a paso
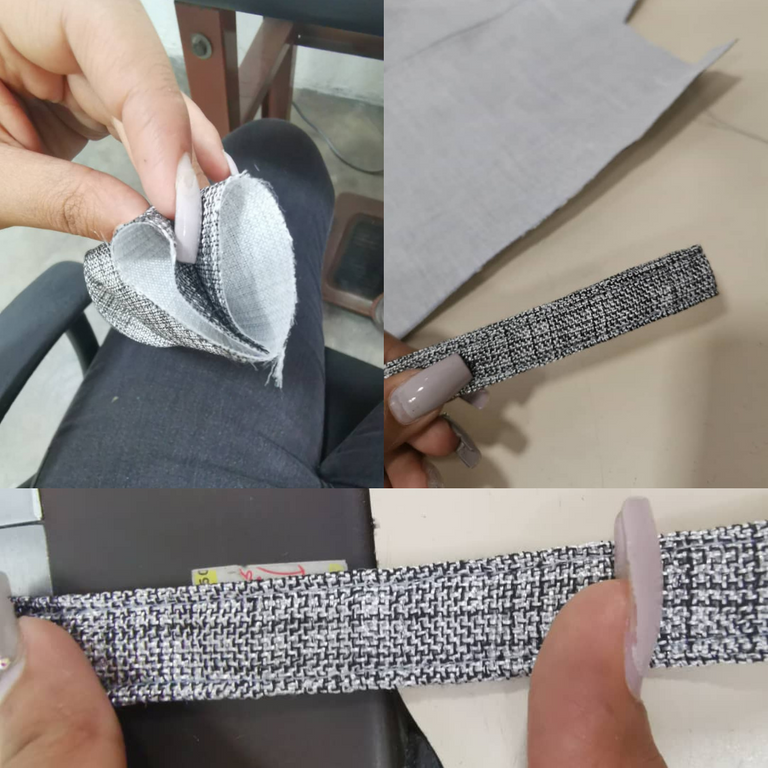
comenzamos con el l asa, juntando los dos extremos al medio como se observa en la imagen, volviendo a enfrentar. Haciendo una costura primero para unir los lados al borde del orillo, Luego repitiendo en el lado contrario.
Step by Step
We start with the handle, joining the two ends in the middle as shown in the picture, facing again. Making a seam first to join the sides to the selvedge edge, then repeating on the opposite side.
Continuemos enfrentando el derecho del forro con trasero de cierre, y a su vez derecho de cierre con derecho de la tela, puedes fijar con alfileres para que te resulte un poco mas facil. Teniéndolo de esta forma pasamos una costura lo mas cerca del cierre que podamos, volteamos y y pasamos una costura de repise, los mas a la orilla que podamos.
Let's continue facing the right side of the lining with the back of the zip, and in turn the right side of the zip with the right side of the fabric, you can fix it with pins to make it a bit easier. Having it this way we pass a seam as close to the zip as we can, we turn and pass a seam of repise, as close to the edge as we can.
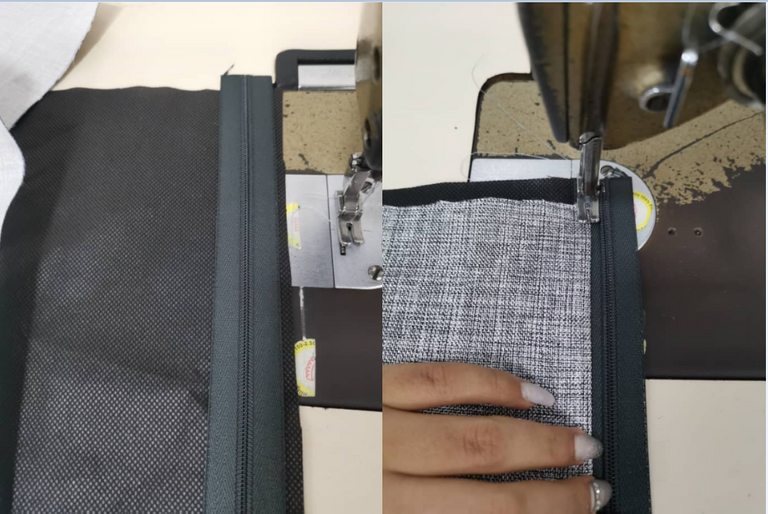
Luego repetimos la misma operación del lado contrario del cierre.
Then we repeat the same operation on the opposite side of the closure.
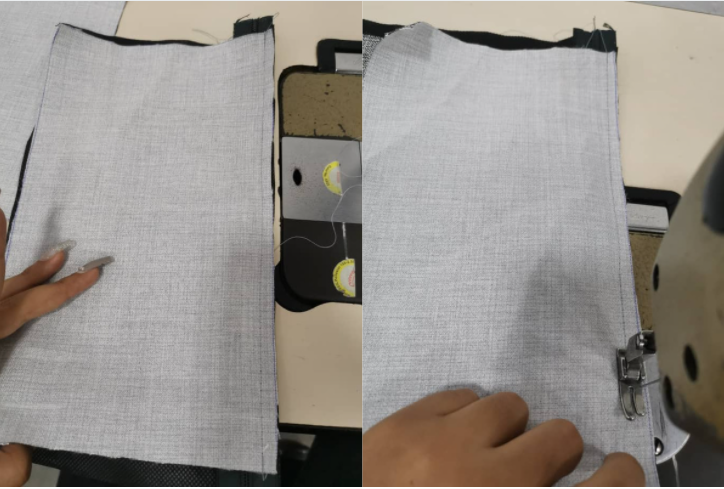
Habiendo repisado ambos lados del cierre, procedemos a introducir el slaider. No lo hice antes porque me pareció mas cómodo hacerlo de esta manera, y en este caso el procedimiento nos lo permite. si es un cierre que ya viene armado no podríamos hacerlo de esta forma, tendríamos que coser y al encontrar el cierre levantar el pie de maquina, pasar el cierre y bajarla nuevamente para continuar cosiendo. En uno de mis post anteriores explico a detalle el armado del cierre desde cero. 😊
Having smoothed both sides of the zip, we proceed to insert the slaider. I didn't do it before because I thought it was more comfortable to do it this way, and in this case the procedure allows us to do it. If it's a zip that comes already assembled we couldn't do it this way, we would have to sew and when we find the zip we would have to lift the machine foot, pass the zip and lower it again to continue sewing. In one of my previous posts I explain in detail the assembly of the zip from scratch. 😊
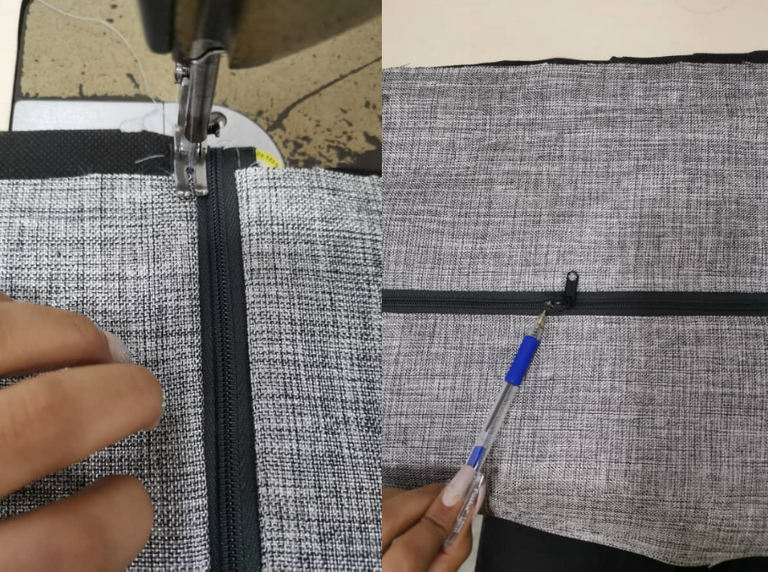
Luego fijamos la tela del forro con una costura a todo el orillo de las piezas, esto nos ayudara mas adelante a que no se nos mueva nada y podamos trabajar de una mejor manera. Doblamos enfrentado los dos extremos de la base para fijarlos con una costura de unos 0,5cm al al borde de la tela o pie de maquina.
Then we fix the lining fabric with a seam around the edge of the pieces, this will help us later on so that nothing moves and we can work in a better way. Fold the two ends of the base facing each other to fix them with a seam of about 0.5cm to the edge of the fabric or machine foot.
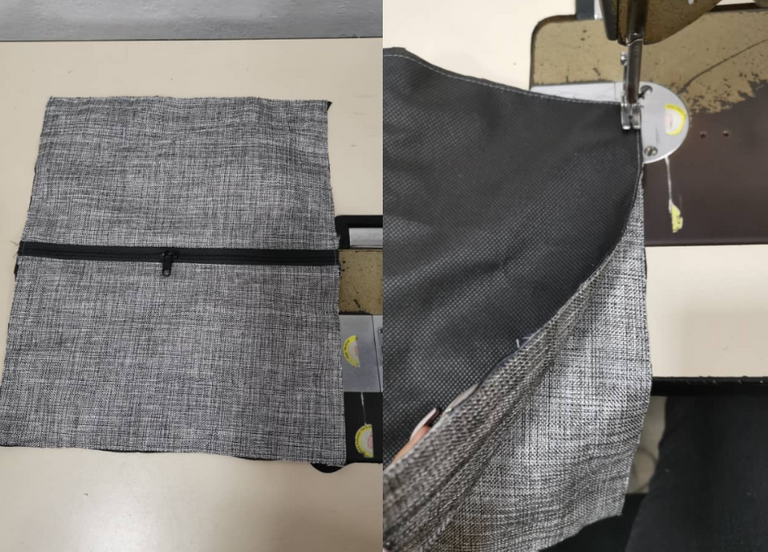
Habiendo fijado la parte inferior, procedemos a sesgar para que no se vean los cortes de la tela y nos quede un poco mas prolija nuestra cartuchera, como lo hacemos, con una tira de nuestro forro de aproximadamente unos 3cm de ancho por el largo necesario, dolamos como en las imágenes y pasamos una costura a pie de maquina. yo lo hice con el hilo gris para que ustedes puedan observarlo mejor, pero ideal fuera sido con negro, o color de la tela.
Having fixed the lower part, we proceed to bias binding so that the cuts in the fabric are not visible and our pencil case is a little neater, how we do it, with a strip of our lining of approximately 3cm wide by the necessary length, we sew as in the images and we sew a machine foot seam. I did it with grey thread so that you can see it better, but ideally it would be with black, or the colour of the fabric.
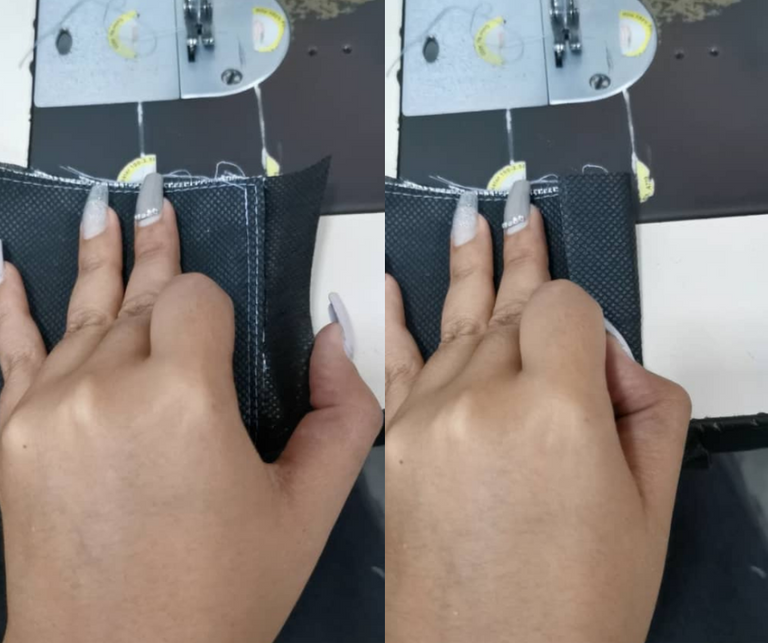
Luego de haber sesgado procedemos a juntar de la forma que vemos en la imagen nuestra cartuchera. Enfrentando el cierre justo con la unión inferior de nuestra cartuchera. Teniéndolo de esta forma procedemos a introducir para fijar la tirita que habíamos hecho anteriormente que nos servirá para agarrar nuestra cartuchera. dolamos la tirita al medio como se ve en la foto la introducimos a la cartuchera. Podemos fijarla con un alfiler para que no se nos mueva. Procedemos a pasar la costura aproximadamente a 1cm del borde, teniendo especial cuidado al pasar la tira ya que el grosor de la tira puede dificultarnos un poco el paso de la aguja. Pero con cuidado y ayudando un poco nuestra maquina de forma manual pasara perfectamente.
After having slanted, we proceed to put together our pencil case as shown in the picture. Facing the zip just with the lower joint of our pencil case. Having it in this form we proceed to introduce to fix the bandage that we had done previously that will serve us to hold our pencil case. We put the bandage in the middle as you can see in the picture and we introduce it to the pencil case. We can fix it with a pin so that it doesn't move. We proceed to pass the seam approximately 1cm from the edge, taking special care when passing the strip as the thickness of the strip can make it a little difficult to pass the needle. But with care and a little help from our manual machine, it will pass perfectly.
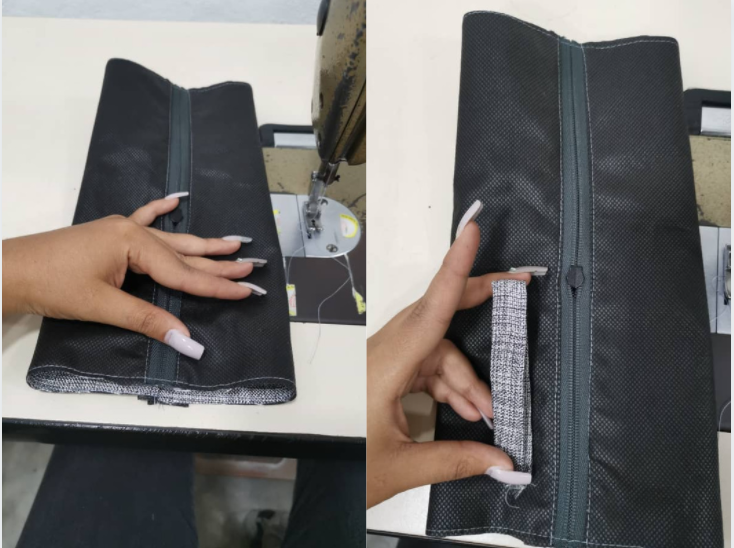
Habiendo cerrado los laterales procedemos a marcar en los extremos de la cartuchera el cuadradito que les había dejado inicialmente. marcamos los cuadraditos, cortamos y abrimos enfrentándolo. pasamos una costura a pie de maquina en las cuatro esquinas de nuestra cartuchera.
Having closed the sides, we proceed to mark on the ends of the pencil case the little square that we had left initially. we mark the little squares, cut and open them facing each other. we sew a machine seam on the four corners of our pencil case.
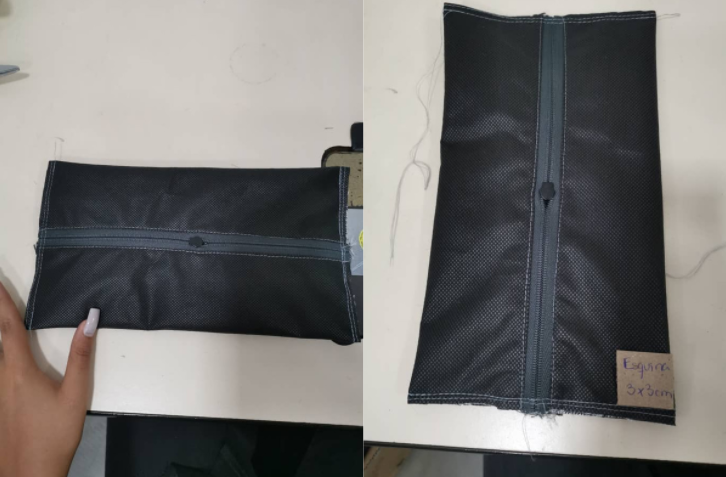
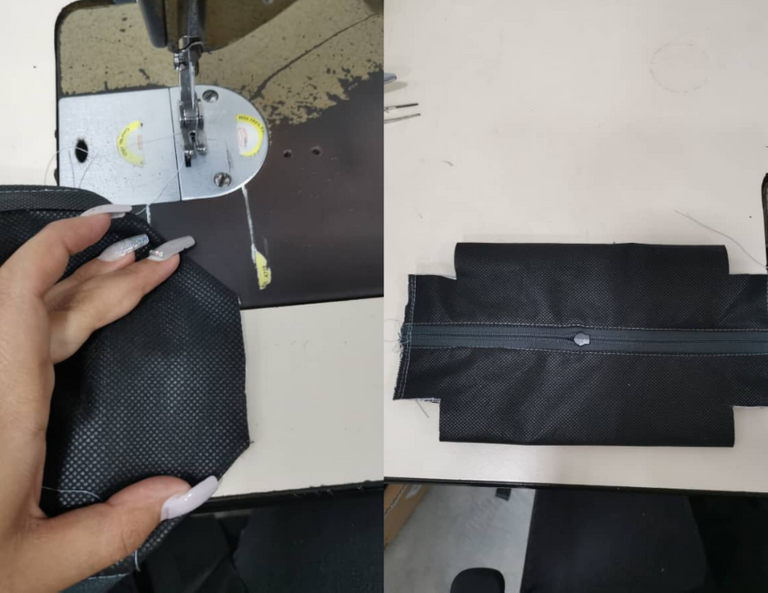
Procedemos a sesgar nuestras cuatro esquinas, y podemos abrir y voltear nuestra cartuchera.
We proceed to slant our four corners, and we can open and flip our pencil case.
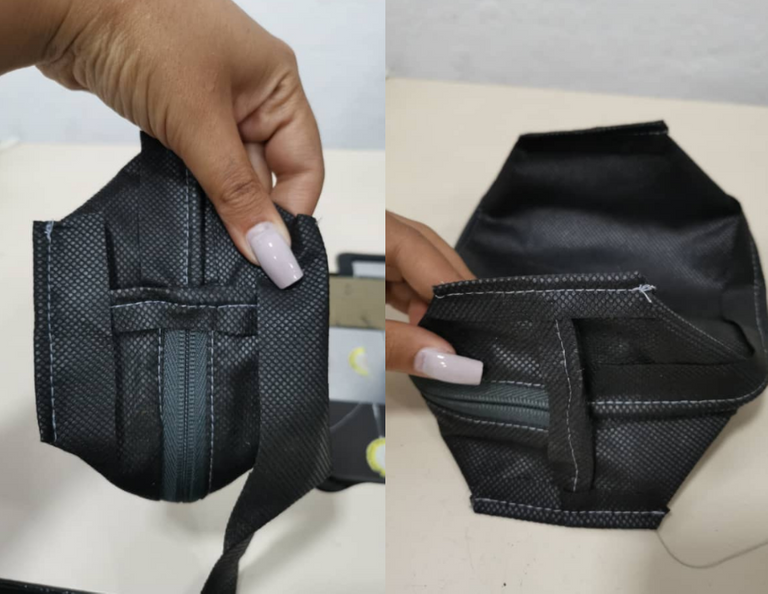
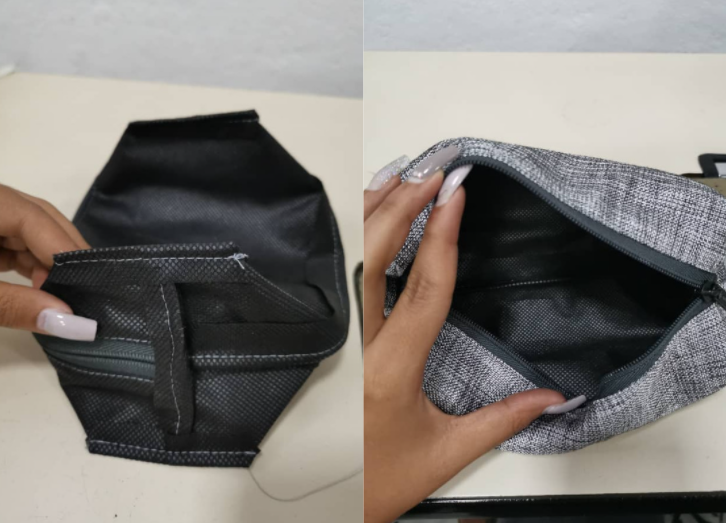
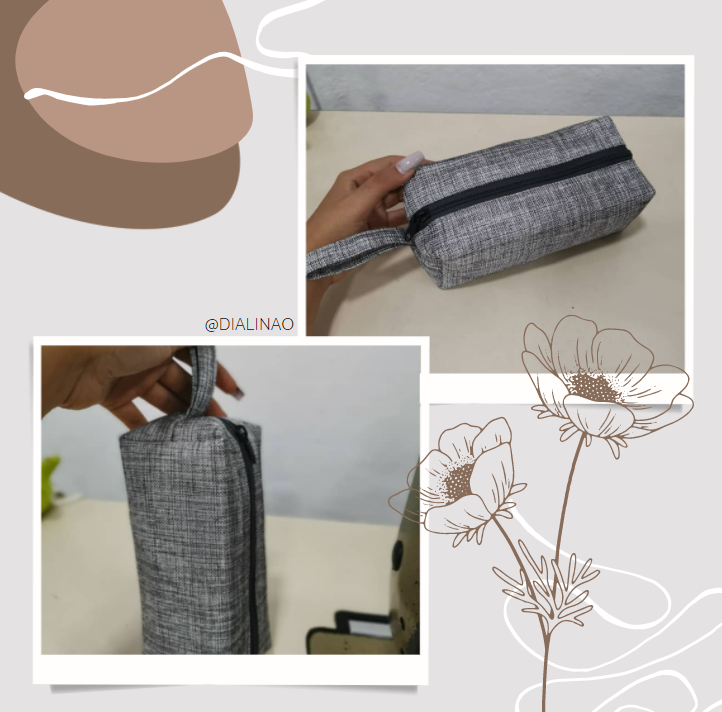
De esta forma nuestra cartuchera esta lista. 😍 De verdad hay un sinfín de combinaciones que podemos lograr, para tener nuestras cartucheras hermosas y practica.
This way our pencil case is ready. 😍 There really are endless combinations that we can achieve, to make our pencil cases beautiful and practical.

¡¡Gracias por haber llegado hasta aquí !! ¡Espero que este trabajo les entusiasme tanto como a mí me entusiasma compartirlo con ustedes! Si te animas a hacerlo, espero que compartas fotos de tu trabajo, y si tienes alguna duda, consúltame estaré dichosa de guiarte, nos vemos en una próxima publicación.🥰
Thank you for having come this far!! I hope this work excites you as much as I am excited about my sharing with you! If you dare to do it, I hope you share photos of your work, see you in a next post.

Congratulations @dialinao! You have completed the following achievement on the Hive blockchain and have been rewarded with new badge(s):
Your next target is to reach 600 upvotes.
You can view your badges on your board and compare yourself to others in the Ranking
If you no longer want to receive notifications, reply to this comment with the word
STOPCheck out the last post from @hivebuzz: