Greetings, beautiful community of crafters.
Women's Day is just around the corner, as we say in my country, and I couldn't let such an important date pass without dedicating a craft to it. That is why this time I will share with you my experience creating a cotillion specially dedicated to the coming March 8. In the title I didn't put “cotillion” because in English it refers to a masked ball, so maybe during the tutorial I will refer to the craft as “cotillion” or as “decoration”. I hope this does not cause confusion.
I must admit that I had no idea what a cotillion was, since at first the publication was going to be something like a candy box or party elements. But my wife showed me some pictures and it turns out that there are cotillions in this shape. And yes, this craft has the peculiarity that inside it you can keep all kinds of things with a small size, leaving a glimpse of what is inside, but serving as a wrapper at the same time.
Saludos, bella comunidad de artesanos.
El Día de la Mujer está a la vuelta de la esquina, como decimos en mi país, y yo no podía dejar pasar tan importante fecha sin dedicarle alguna manualidad. Es por ello que en esta ocasión les compartiré mi experiencia creando un cotillón dedicado especialmente al venidero 8 de marzo. En el título no puse "cotillón" ya que en inglés se refiere a un baile de máscaras, así que quizás durante el tutorial me refiera a la manualidad como "cotillón" o como "decoración". Espero que esto no cause confusión.
Debo admitir que no tenía idea de qué era un cotillón, ya que al principio la publicación iba a ser algo así como un estuche para caramelos o elementos de fiesta. Pero mi esposa me mostró algunas imágenes y resulta que hay cotillones con esta forma. Y es que sí, esta manualidad tiene la peculiaridad de que dentro de ella podrán guardar todo tipo de cosas con un tamaño pequeño, dejando entrever lo que lleva dentro, pero sirviendo a la vez como envoltorio.
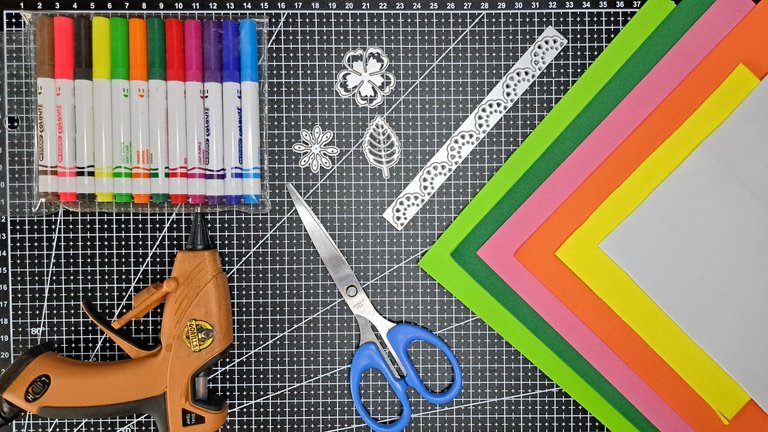
Materials // Materiales
| English | Español |
| ✔️ Green, light green, pink and orange plain fomi | ✔️ Fomi liso verde, verde claro, rosado y naranja |
| ✔️ Gold and silver frosted fomi | ✔️ Fomi escarchado dorado y plateado |
| ✔️ Metal cutting dies with flower, leaf and embroidery shapes | ✔️ Troqueles metálicos de corte con forma de flor, hoja y bordado |
| ✔️ Permanent markers | ✔️ Marcadores permanentes |
| ✔️ Scissors | ✔️ Tijeras |
| ✔️ Hot silicone | ✔️ Silicona caliente |
Step by step // Paso a paso
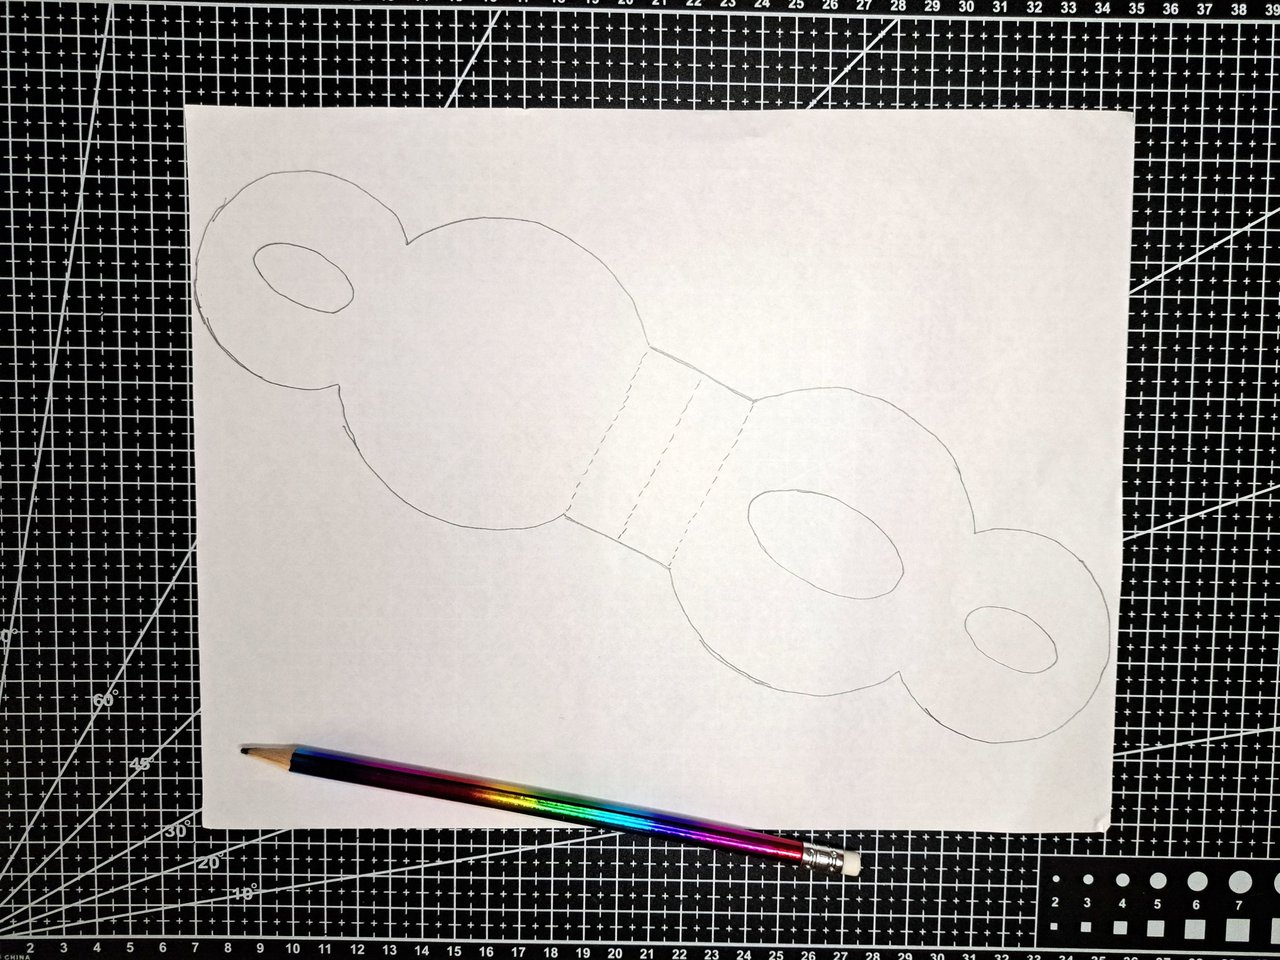
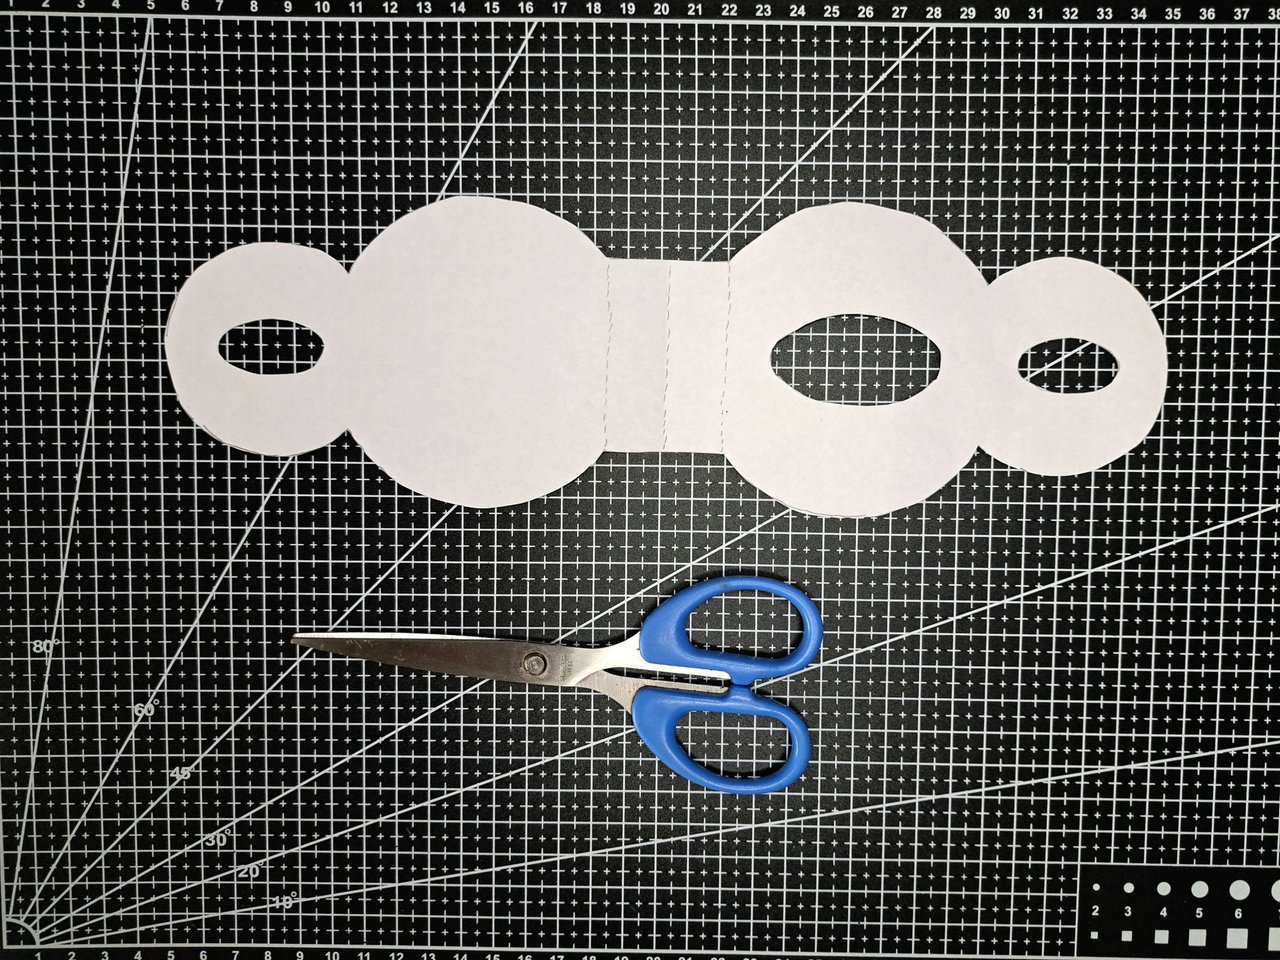
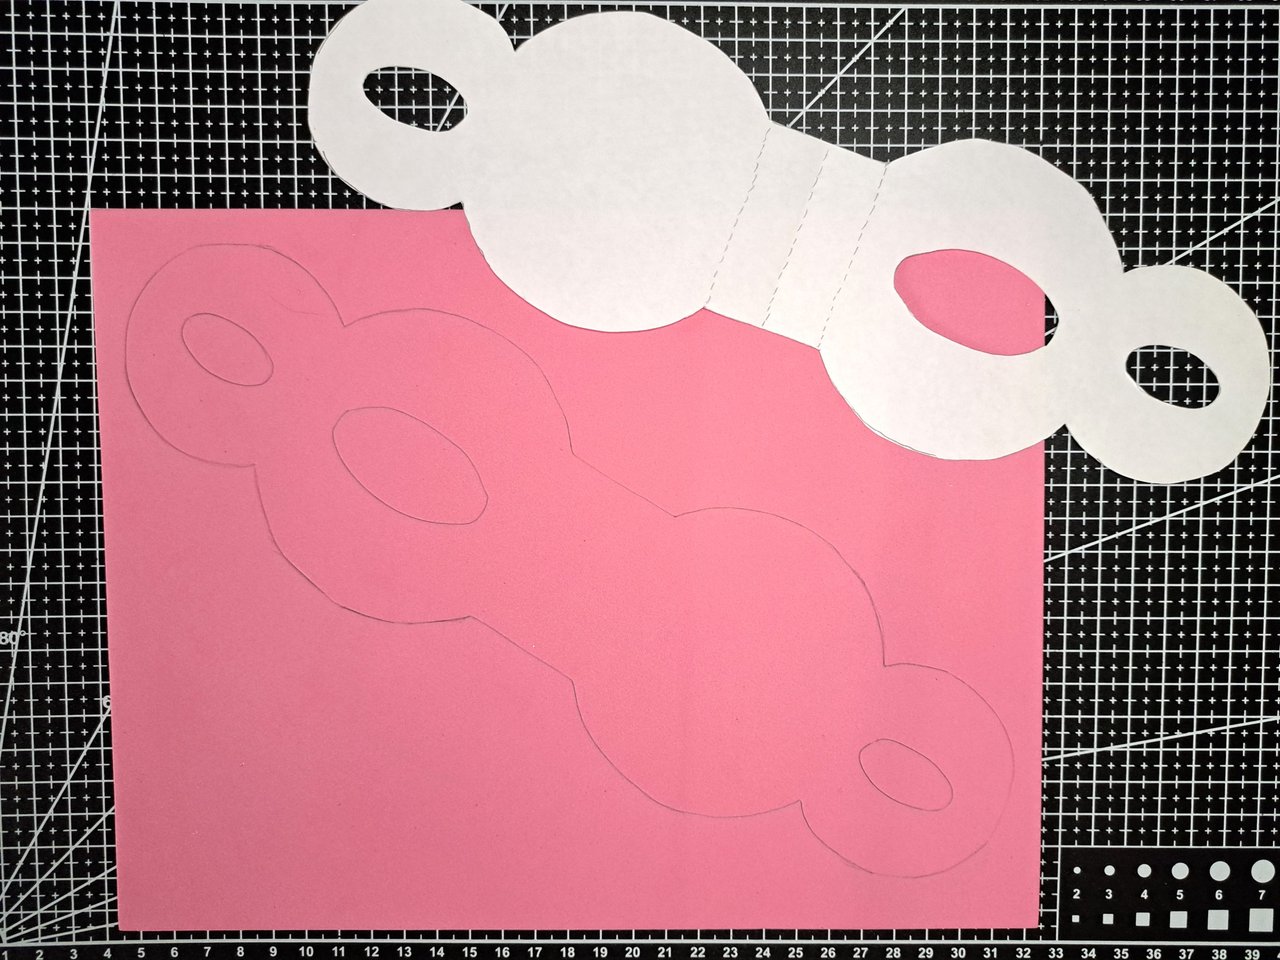
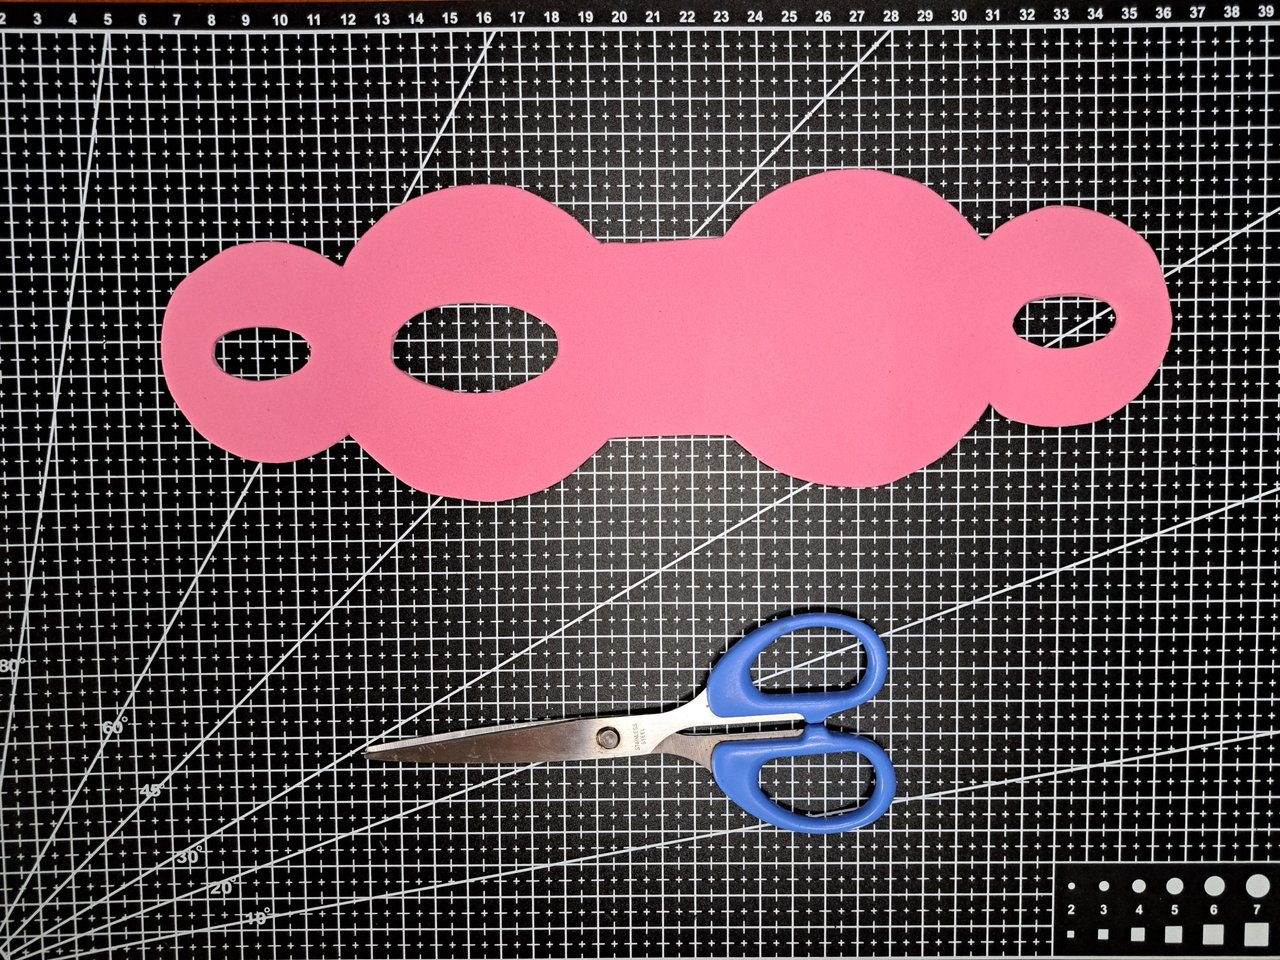
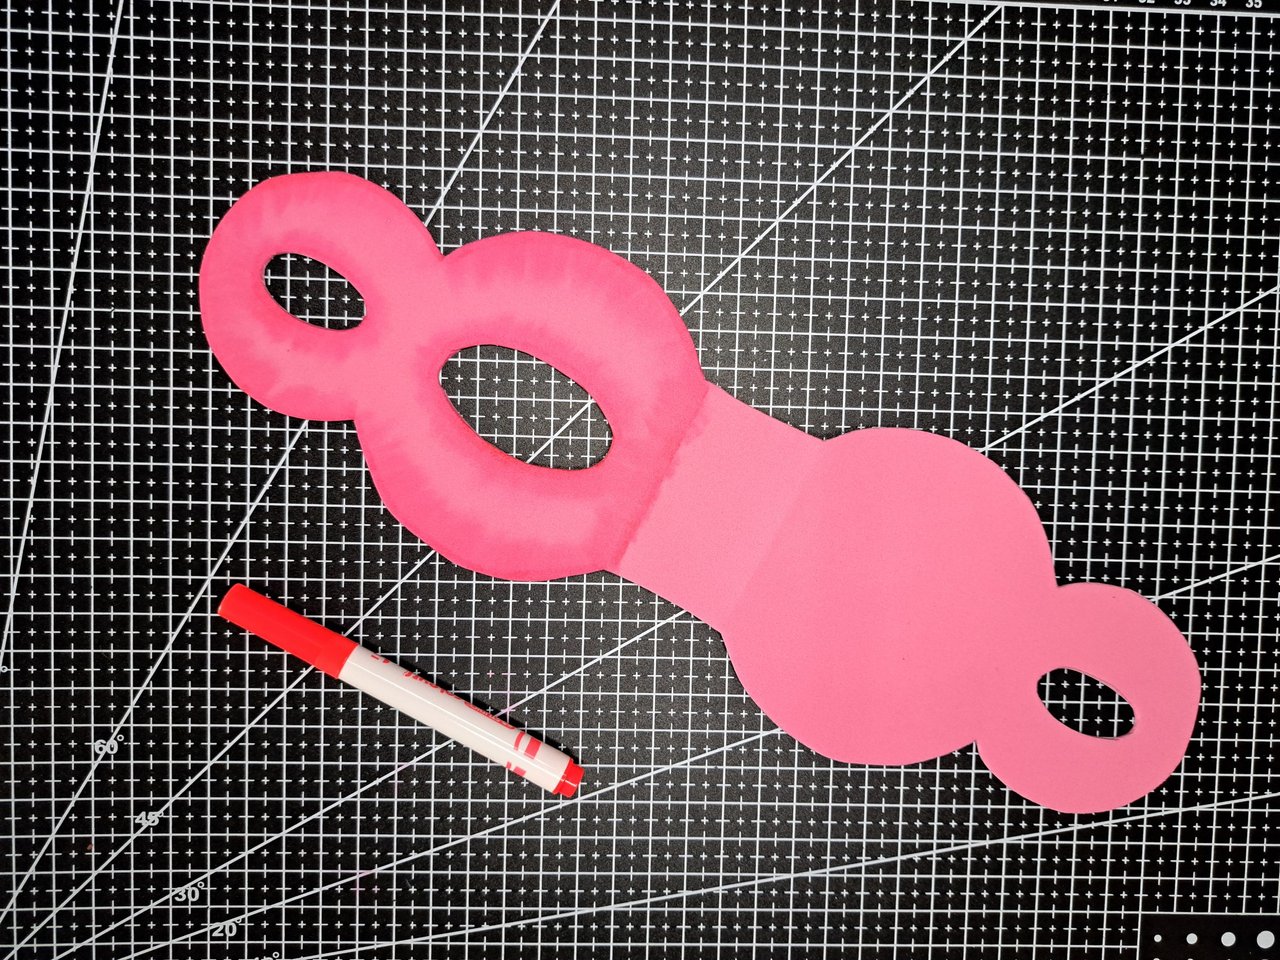
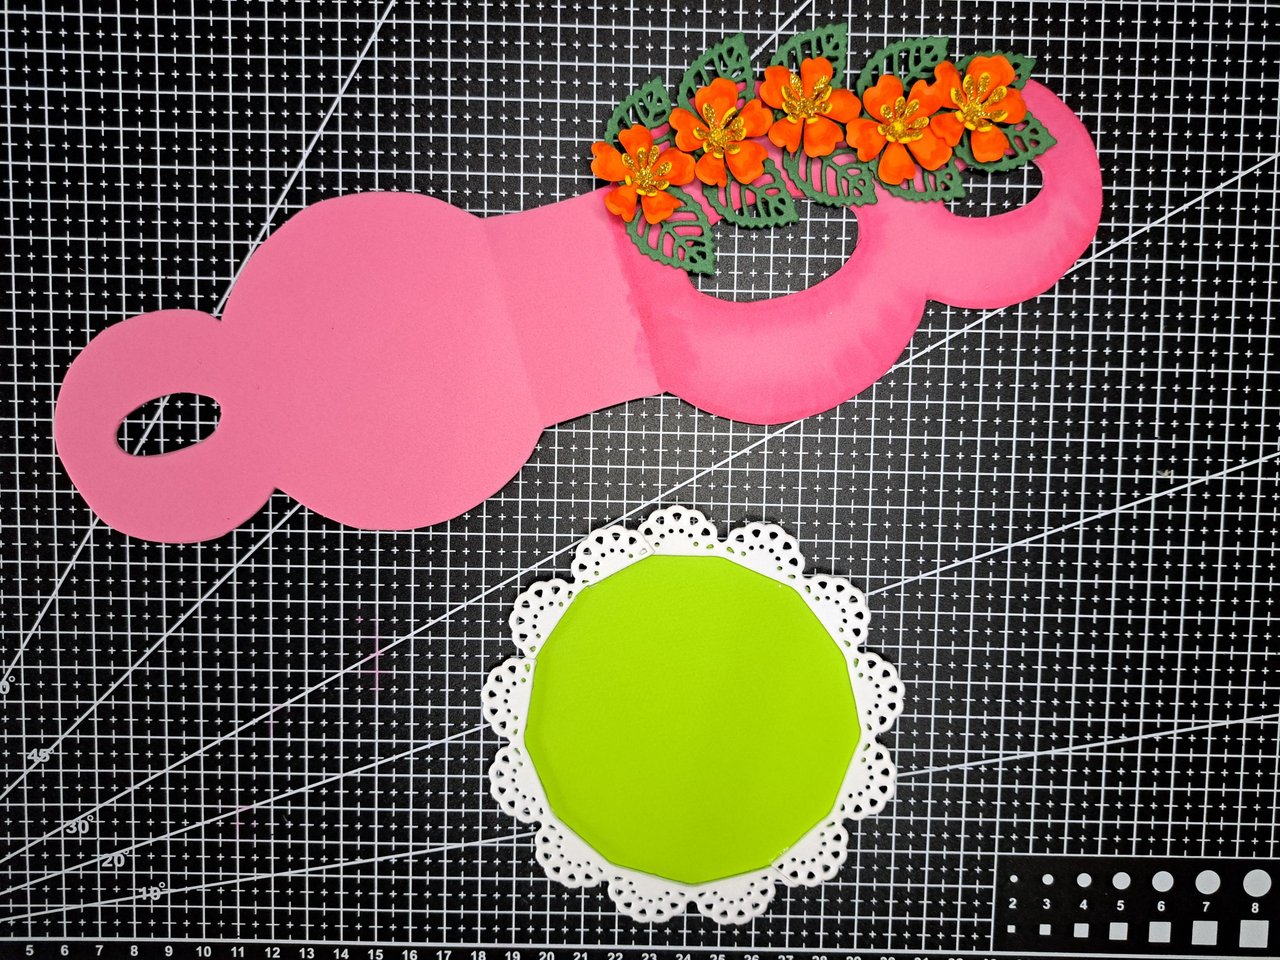
1️⃣ I will start by creating the base structure of the cotillion. To do this, I will draw the shape of two large 8's joined together by two rectangular segments. The approximate size of the template is that of an A4 sheet, so you can use the first image as a mold. After I have the template, I mark its outline on a pink fomi sheet and cut it out.
Comenzaré creando la estructura base del cotillón. Para ello, dibujaré la forma de dos 8 grandes unidos entre sí por dos segmentos rectangulares. El tamaño aproximado de la plantilla es el de una hoja A4, así que pueden utilizar la primera imagen como molde. Luego de tener la plantilla, marco su contorno en una lámina de fomi rosado y la recorto.
 |  |
 |  |
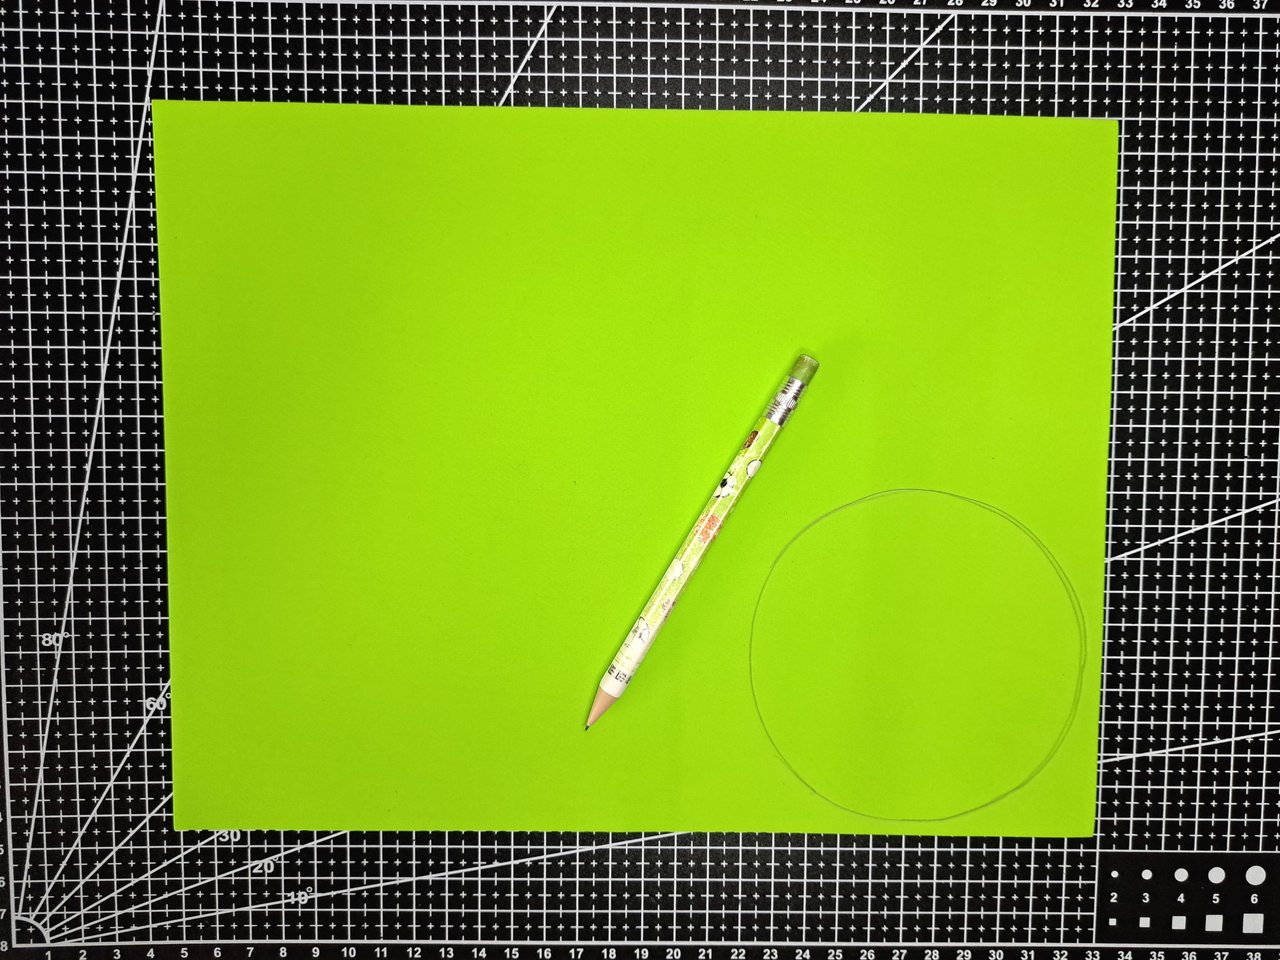
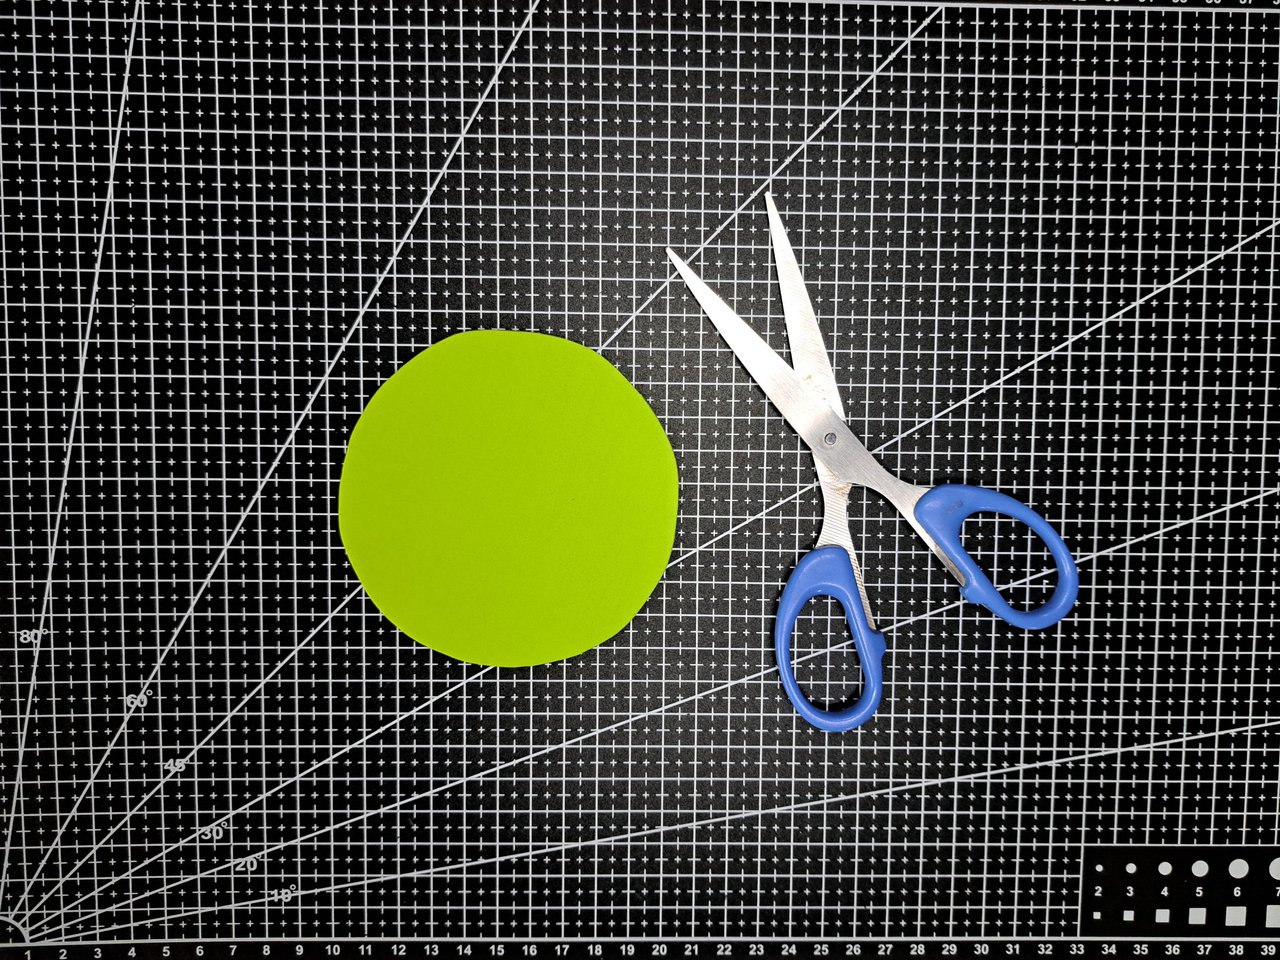
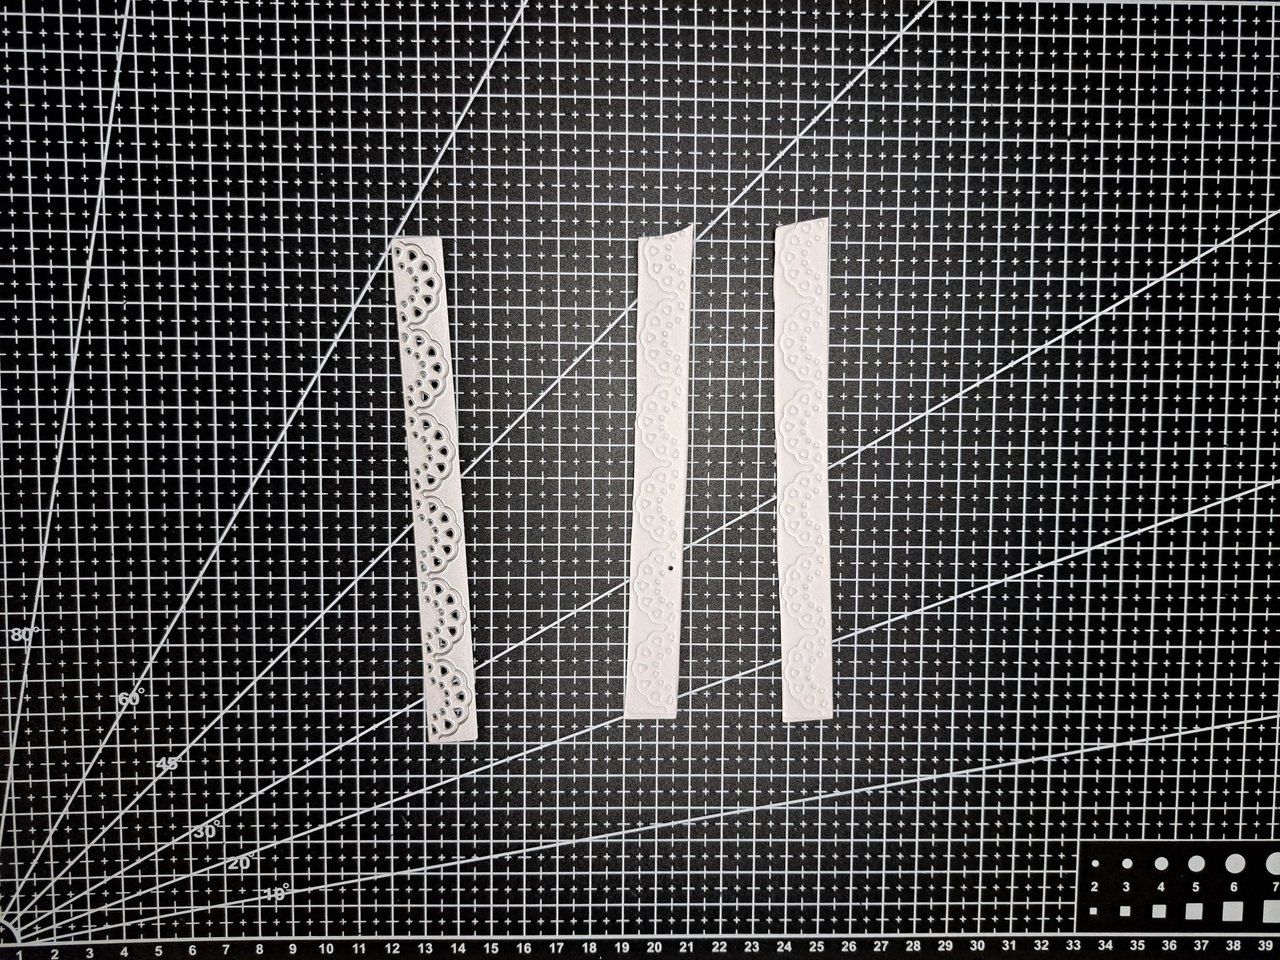
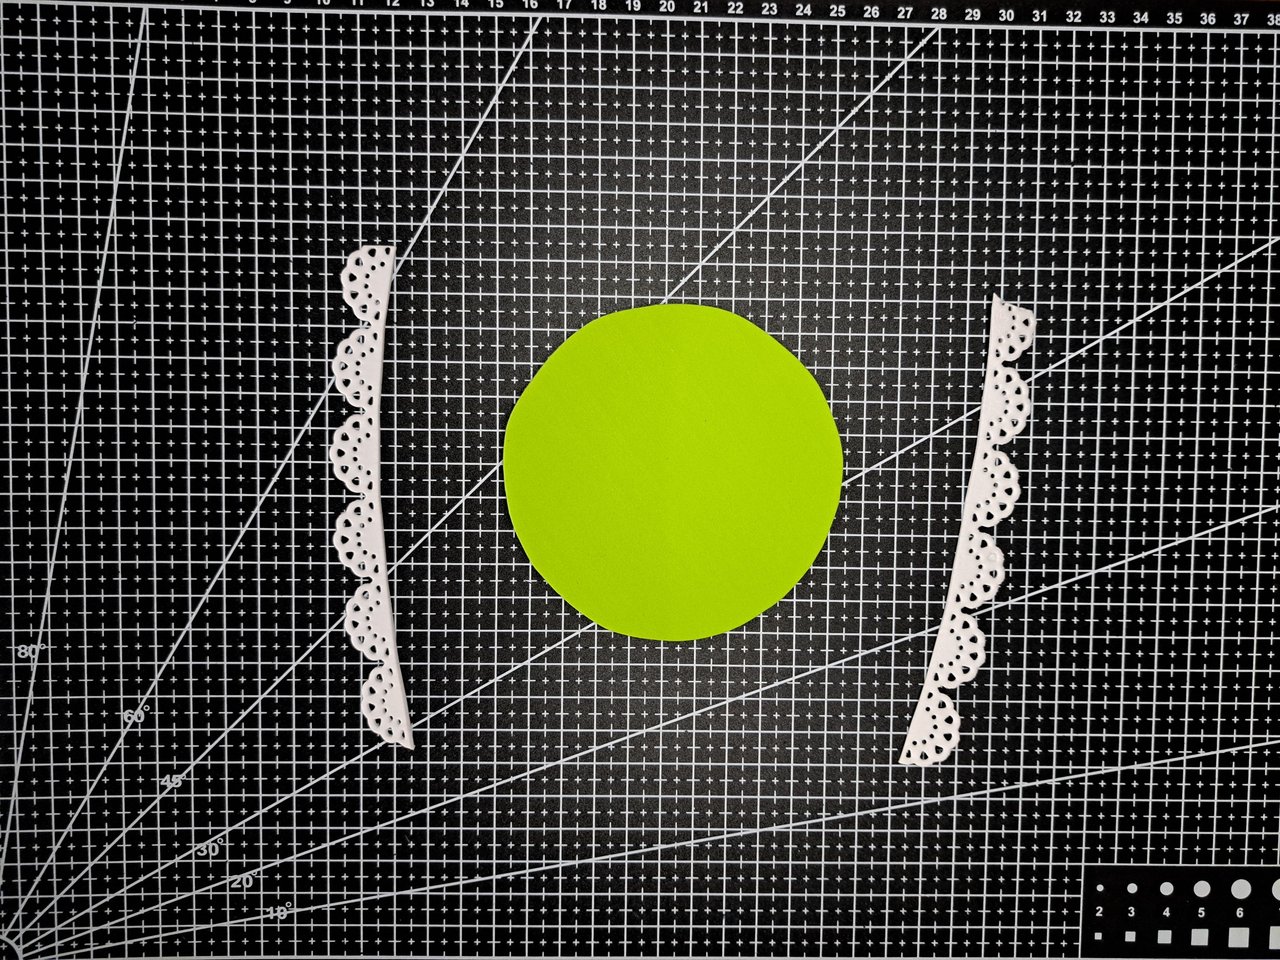
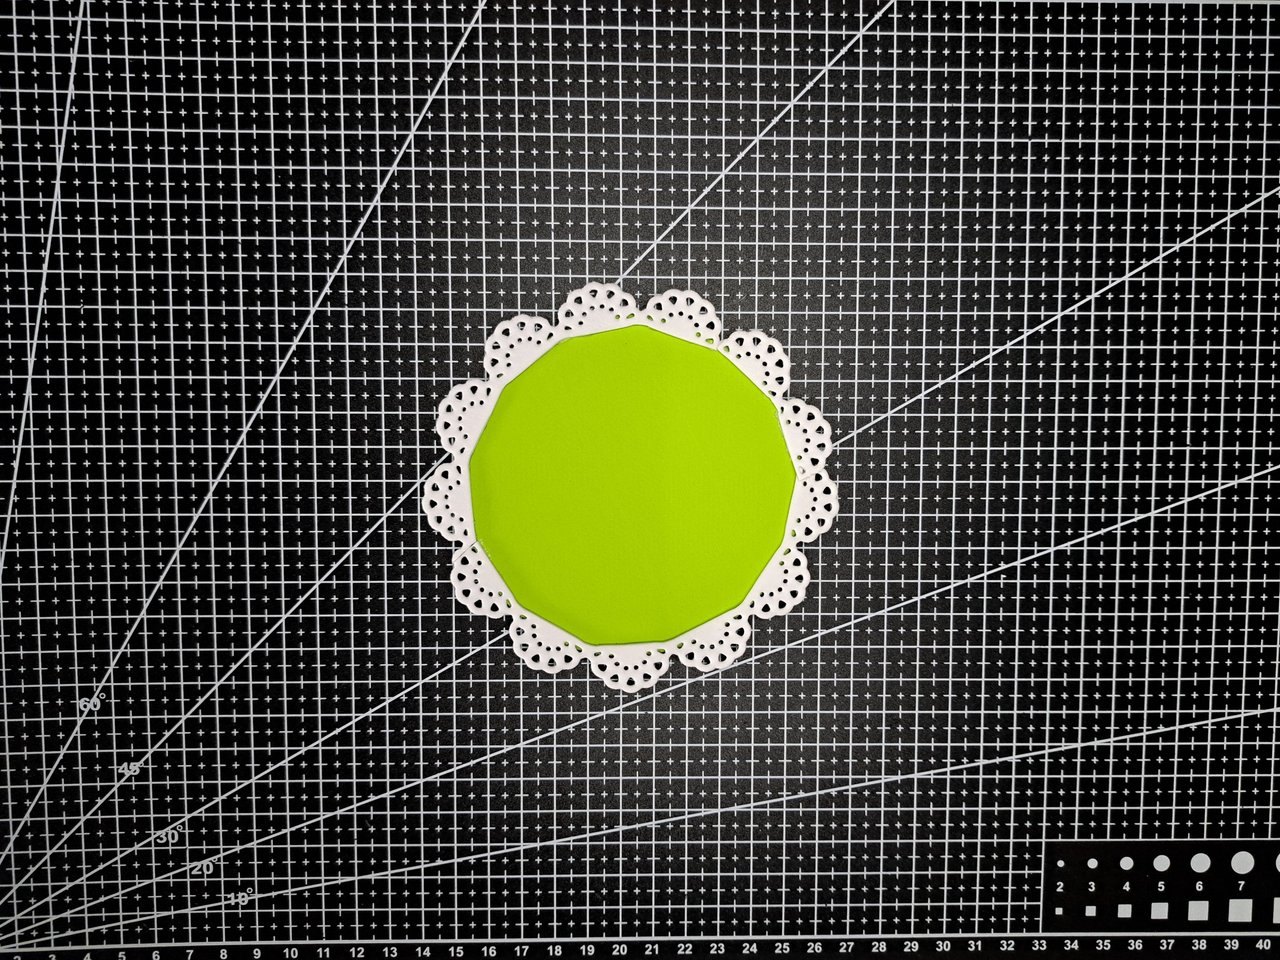
2️⃣ For the base I will use a fomi circle with a yellowish green color. I mark the base and cut it out with scissors and then cover the entire edge of the circle with white lace that I made with the help of a metal cutting die. When choosing the edge of the base, keep in mind that the design must bend without resistance to avoid ripples.
Para la base utilizaré un círculo de fomi con un color verde amarillento. Marco la base y la recorto con unas tijeras para luego cubrir todo el borde del círculo con unos encajes blancos que hice con la ayuda de un troquel metálico de corte. A la hora de escoger el borde de la base, hay que tener en cuenta que el diseño debe doblarse sin oponer resistencia para evitar ondulaciones.
 |  |  |
 |  |
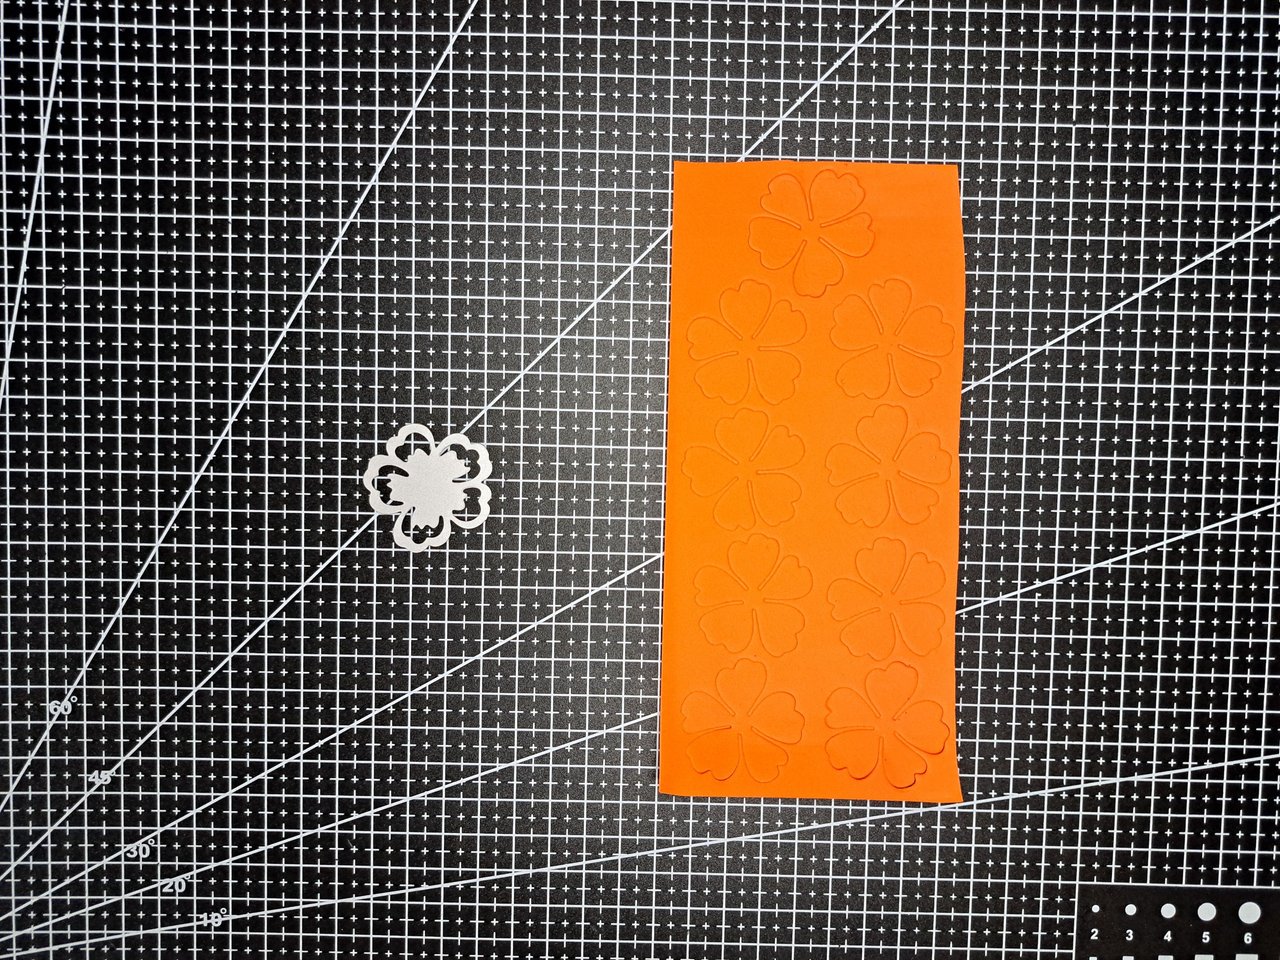
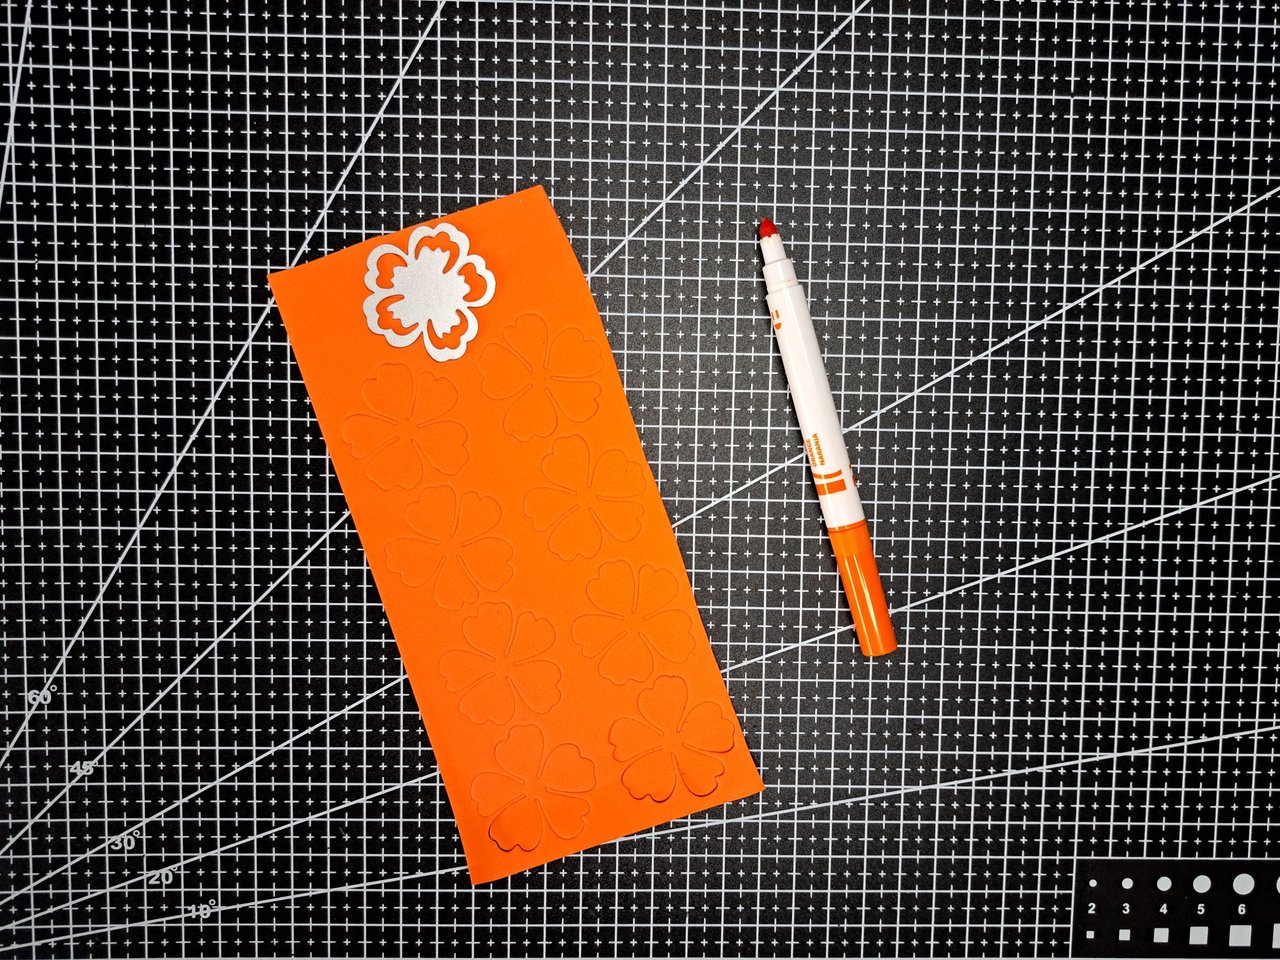
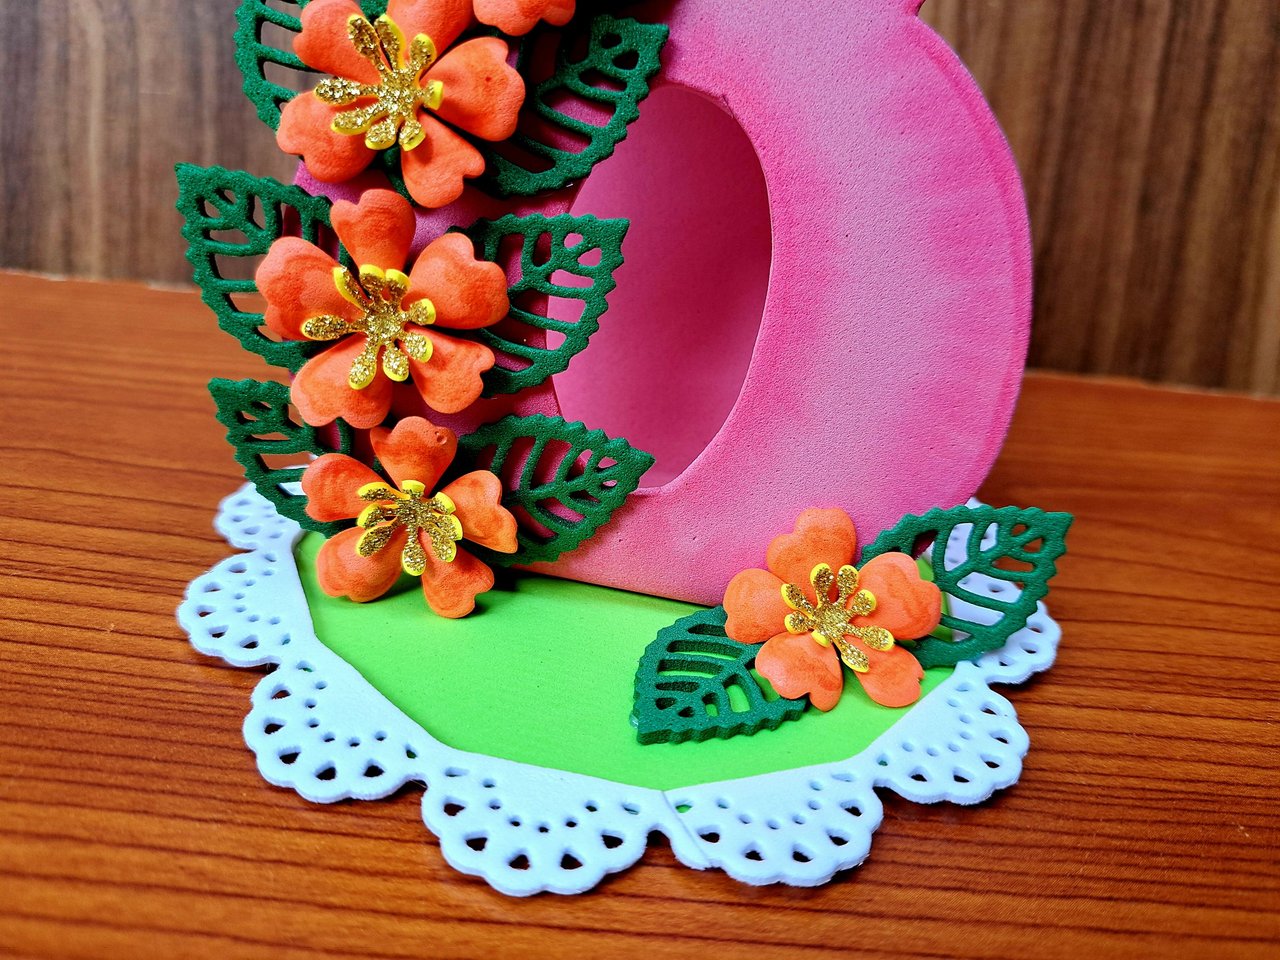
3️⃣ Since I already had the main pieces, I moved on to creating the decorations. I used a metal cutting die in the shape of a flower to cut out 6 flowers. If you notice, the die has some spaces inside so that, once cut out, the flower shape can be used with a marker or paint to give shadows on the petals.
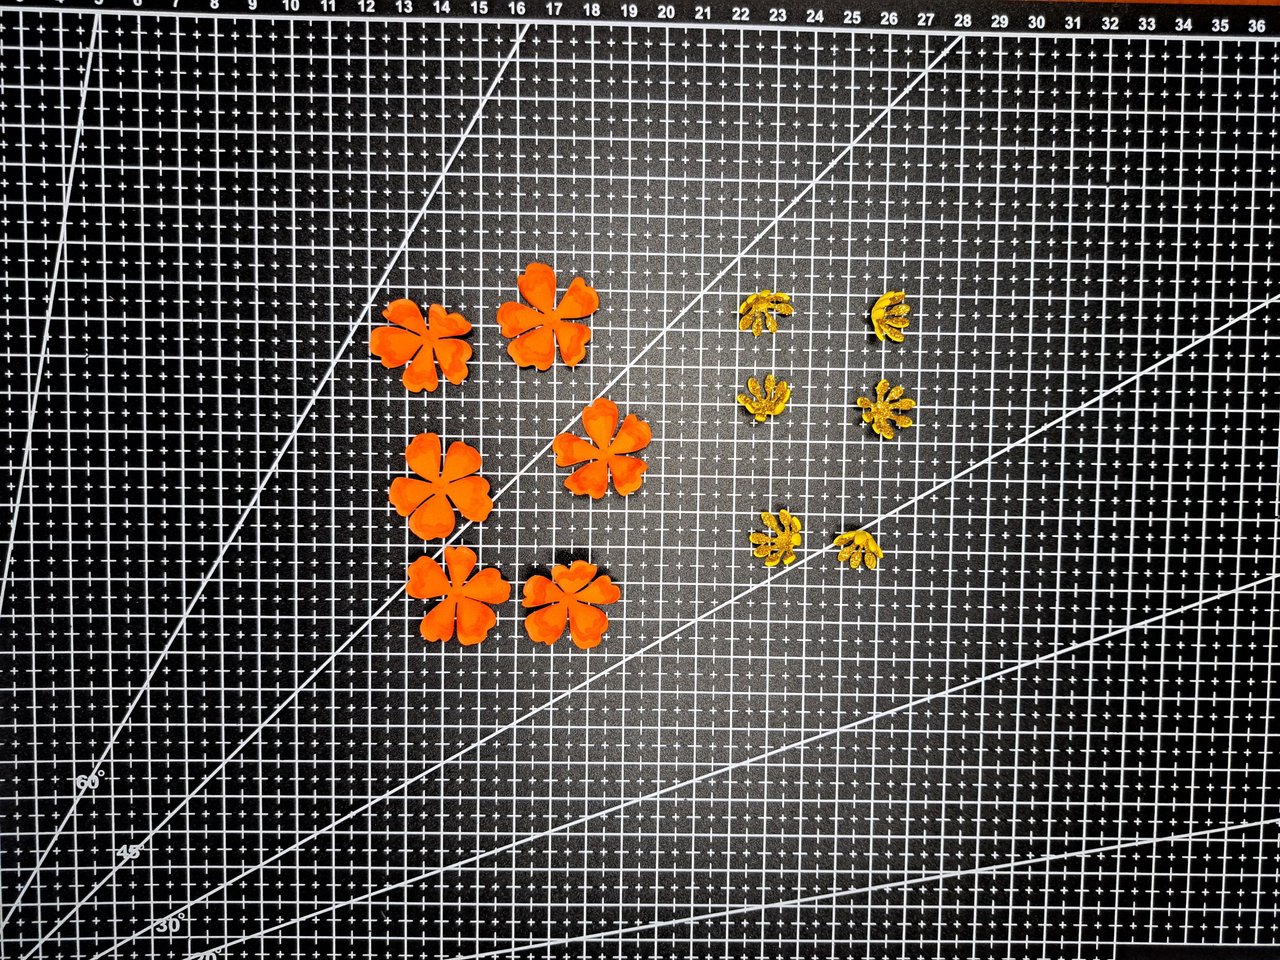
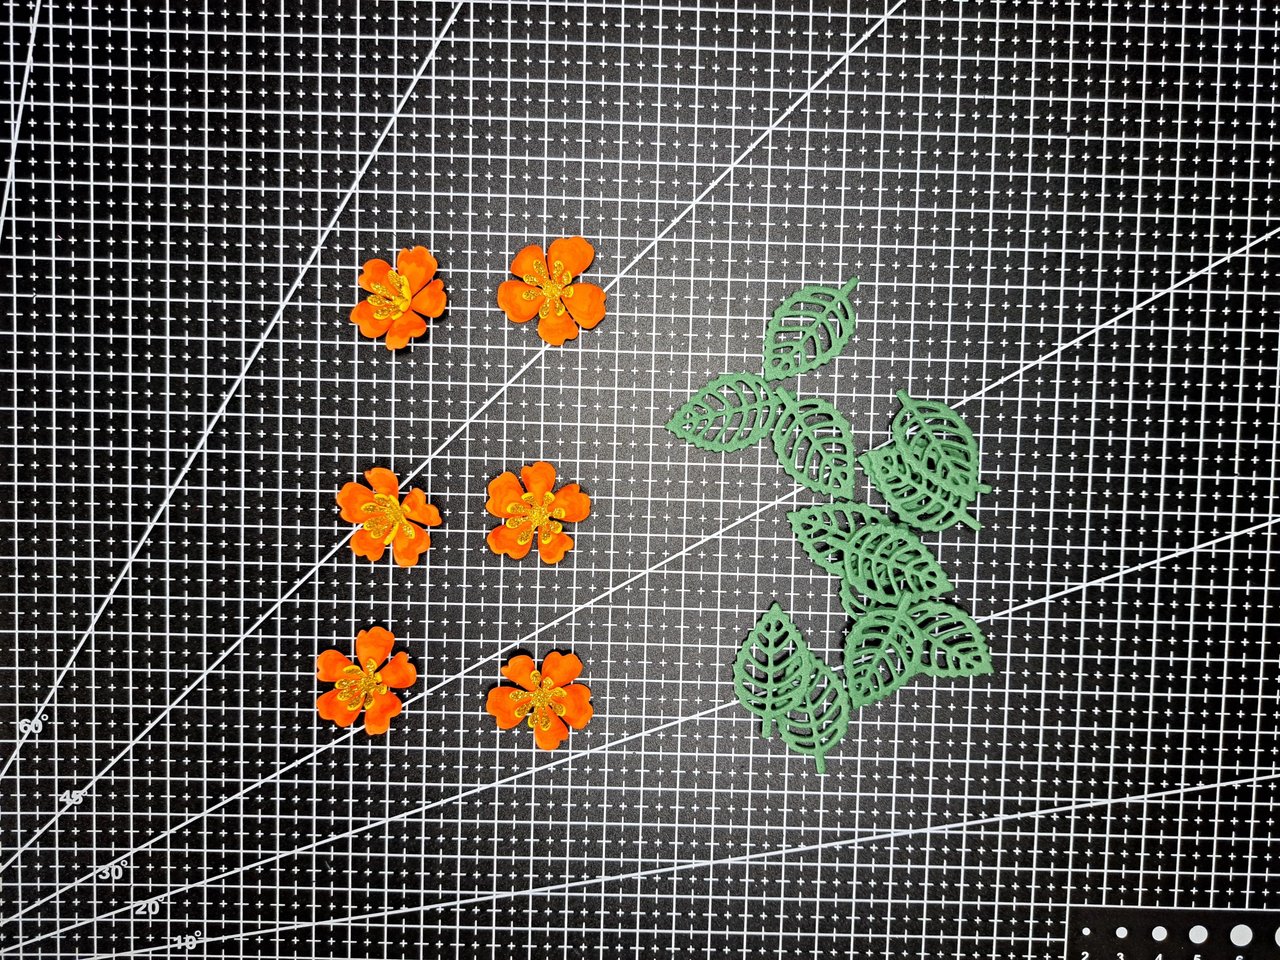
For the pistils and leaves I also used metal cutting dies, but in this case I did not apply shadows to them. What I did do was to subject the golden flowers and pistils to a thermoforming process to give them volume.
Como ya tenía las piezas principales, pasé a crear las decoraciones. Empleé un troquel metálico de corte con forma de flor para recortar 6 flores. Si se fijan, el troquel tiene unos espacios en el interior para que, una vez recortadas, la forma de la flor se pueda utilizar un marcador o pintura para dar sombras en los pétalos.
Para los pistilos y las hojas utilicé también troqueles metálicos de corte, pero en este caso no les apliqué sombra. Lo que sí hice fue someter a las flores y los pistilos dorados a un proceso de termoformado para que obtuviesen volumen.
 |  |  |
 |  |
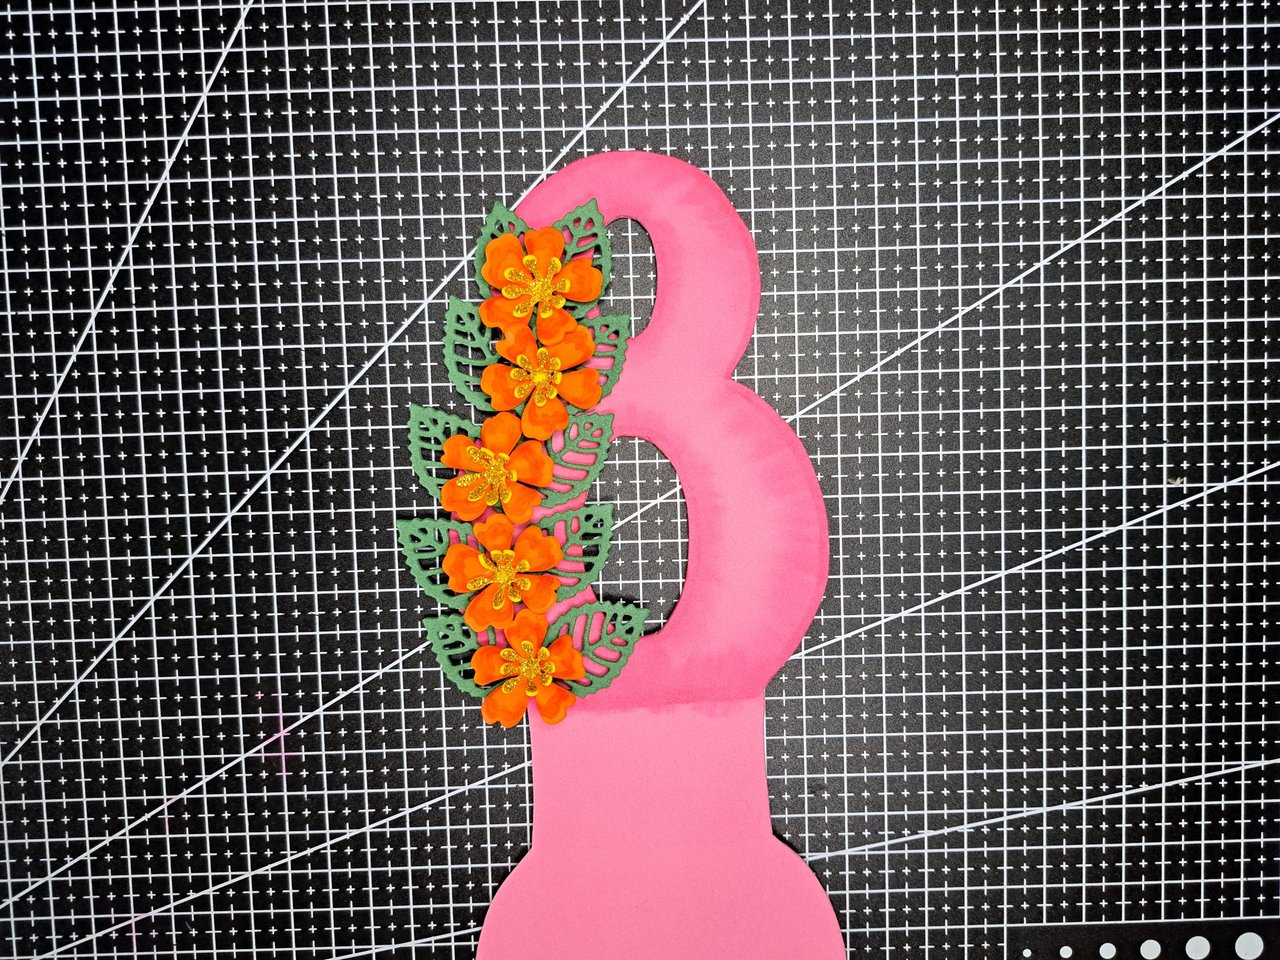
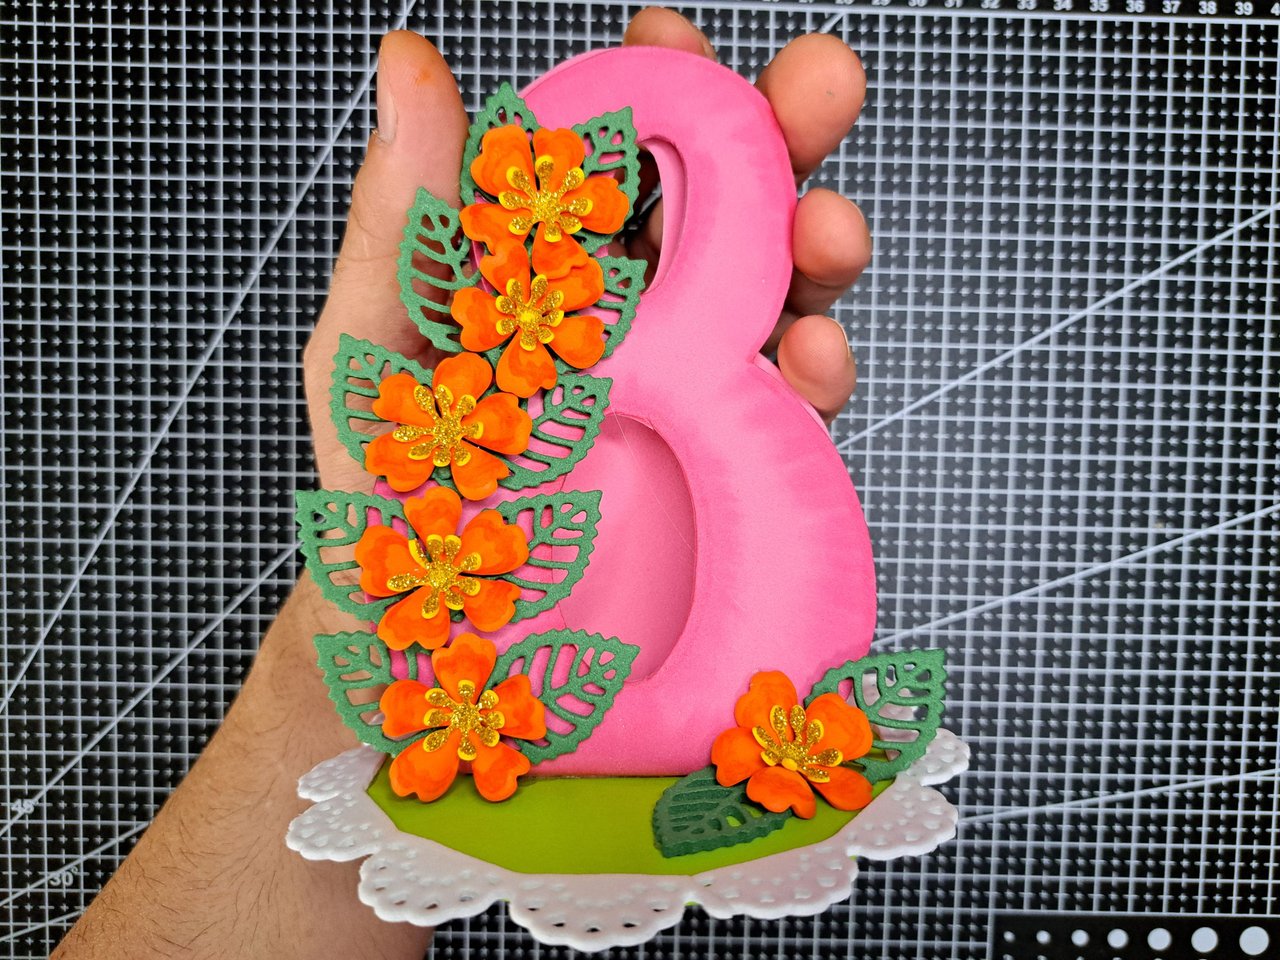
4️⃣ Before gluing the flowers and leaves in place, I use a pink marker and a piece of paper towel to paint all around the edge and blend it with a piece of paper towel. Next, I glue the pink structure on top of the base and then place the leaves and flowers all around the left edge and the leftover ones on the base, but on the opposite side.
Antes de pegar las flores y hojas en su lugar, utilizo un marcador rosado y un pedazo de papel de cocina para pintar todo el borde e ir difuminándolo con un papel de cocina. A continuación, pego la estructura rosada encima de la base y seguidamente coloco las hojas y flores por todo el borde izquierdo y las que me sobran en la base, pero en el lado contrario.
 |  |
 |  |
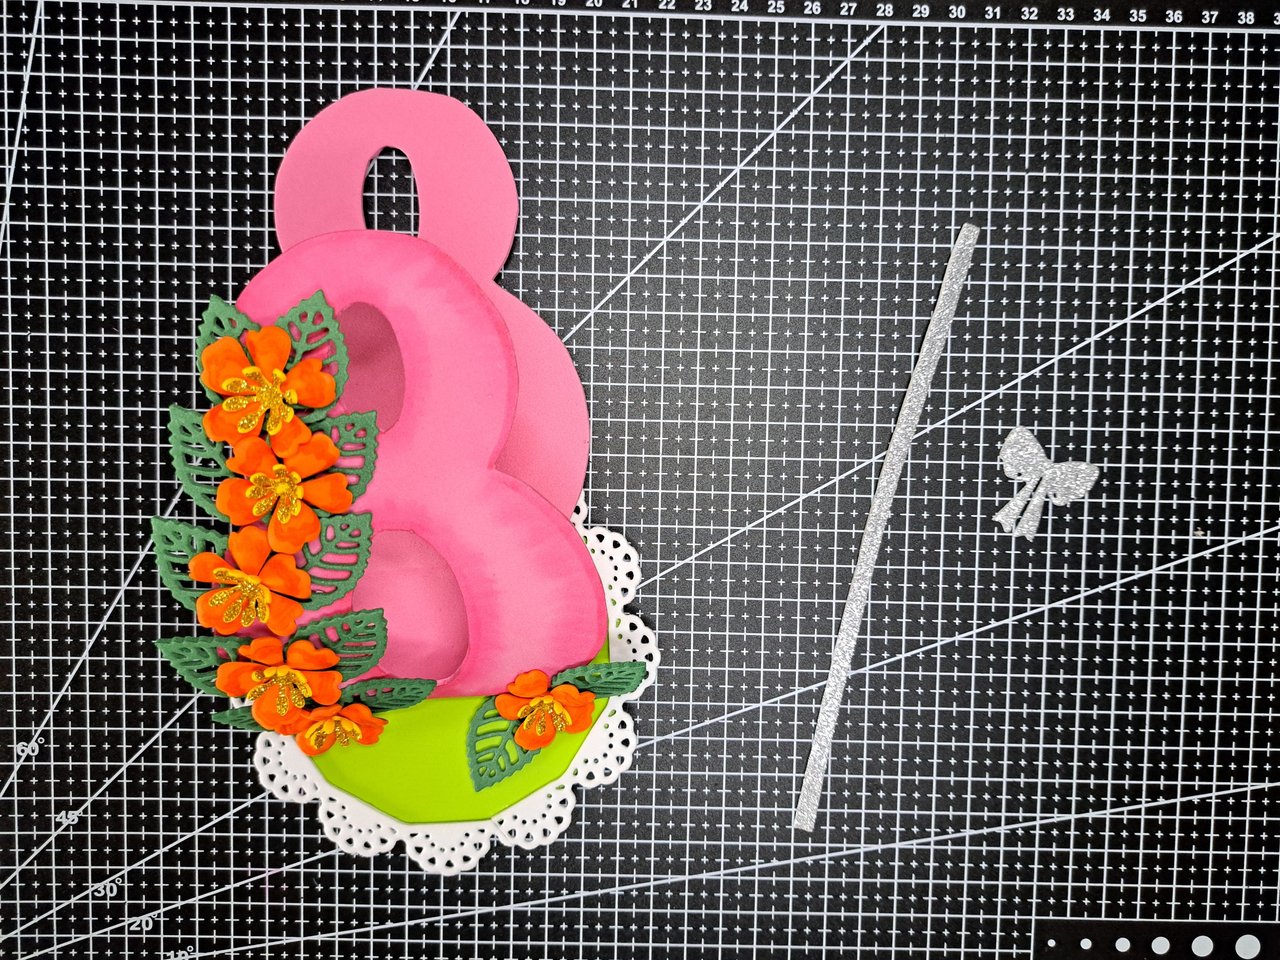
5️⃣ To finish, I will cut out a bow and a shiny silver ribbon to place on top and join the two pieces of the cotillion; this way it will stay closed and straight. If you don't like the ribbon, you can choose to use another type of trim or simply glue the two ends together with silicone.
Para finalizar, recortaré un lazo y una cinta de color plateado brillante para colocarlos en la parte superior y unir las dos piezas del cotillón; de esta manera se mantendrá cerrado y derecho. Si la cinta no les gusta, pueden optar por utilizar otro tipo de adorno o simplemente pegar con silicona las dos puntas.
 |  |
Finished Work // Trabajo Terminado
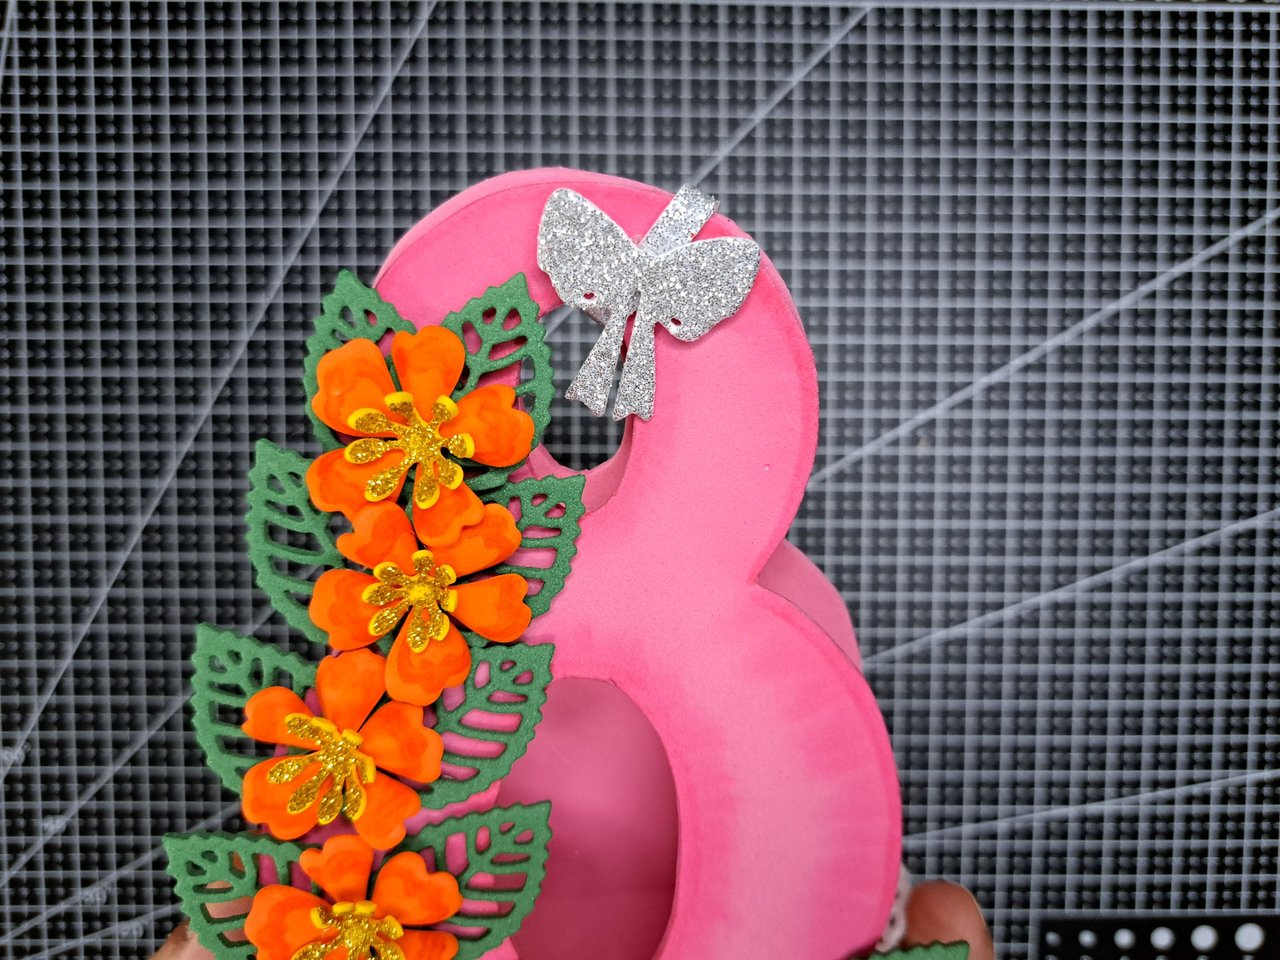
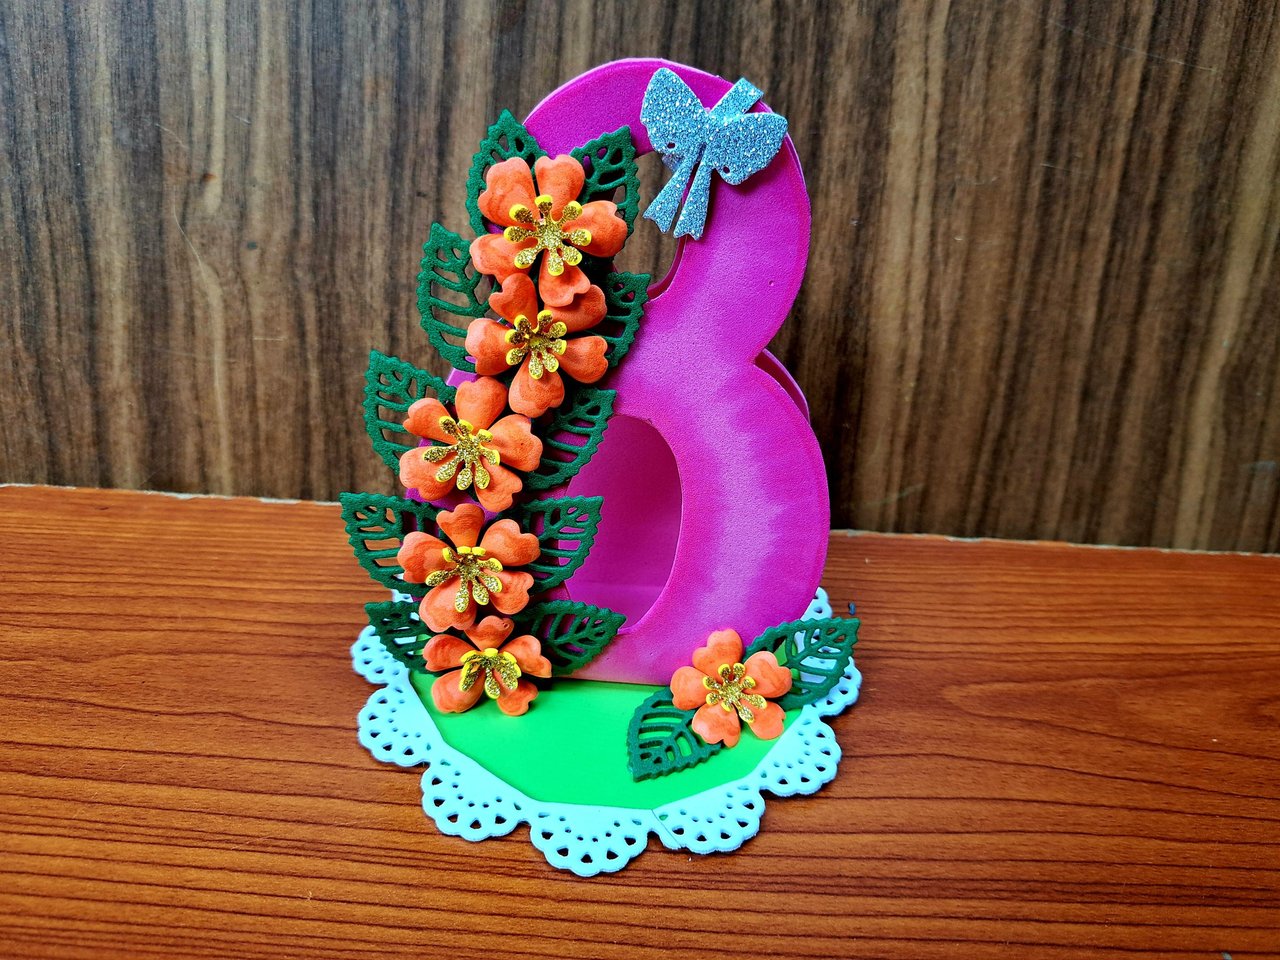
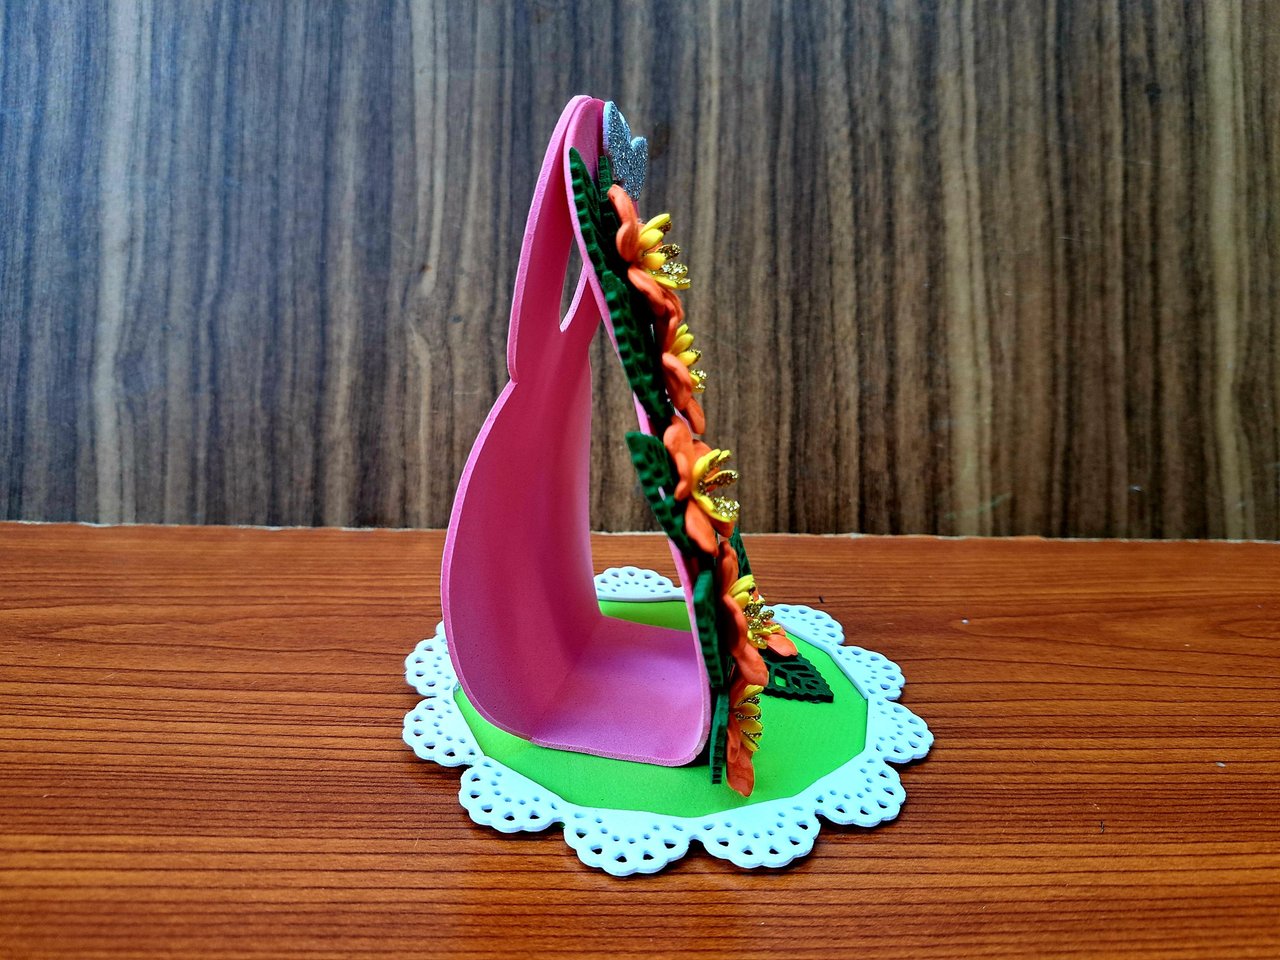
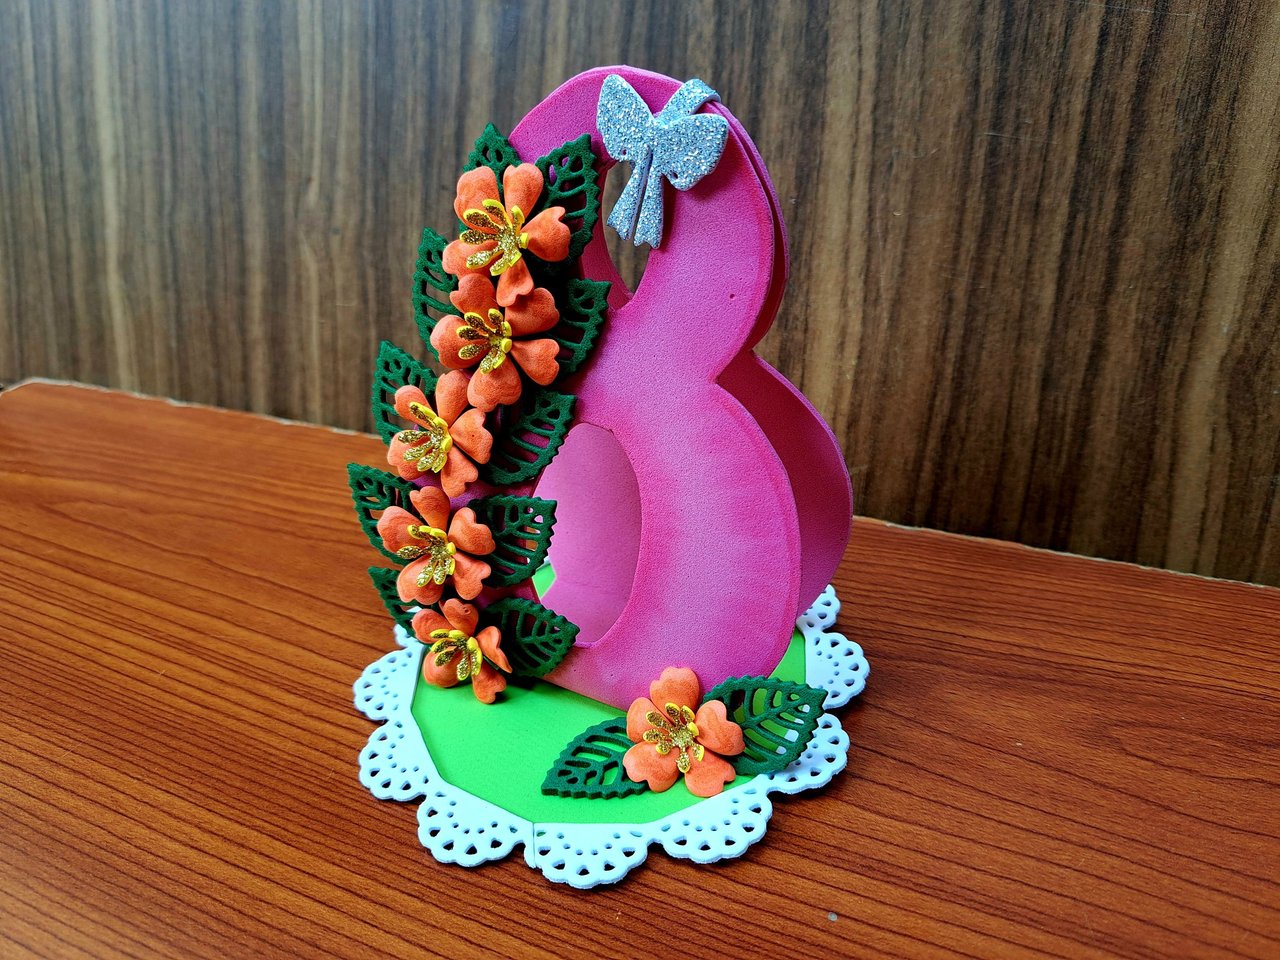
And well, that's all for today. I hope you liked the craft and the step by step. Here are some images from different angles and with a little color editing to make it look more eye-catching.
Y bueno, esto sería todo por hoy. Espero que les haya gustado la manualidad y el paso a paso. A continuación les dejo algunas imágenes desde distintos ángulos y con una pequeña edición de colores para hacer que se vea más llamativo.
 |  |  |
 |  |

Credits and Resources // Créditos y Recursos
Cover page created in Canva
Translated by DeepL
Images captured with my Samsung Galaxy A53
inspiration Source


Posted Using INLEO
Such a lovely and creative way to celebrate Women's Day. Perfect for adding a festive and personalized touch to any Women's Day celebration.
Thank you for your support and for such a nice comment.
This decoration was very beautiful on you. Excellent work.
Thank you friend 🥰
Wow me encanto se ve precioso, super adecuado para este lindo día.💖
Me alegra mucho saber que te gustó. Está especialmente dedicado a todas las mujeres de la comunidad.
Gracias querido @edeyglezsosa,Saludos y felicidades, a tus amadas mujeres, esposa, y madre.🌼🌺🌻