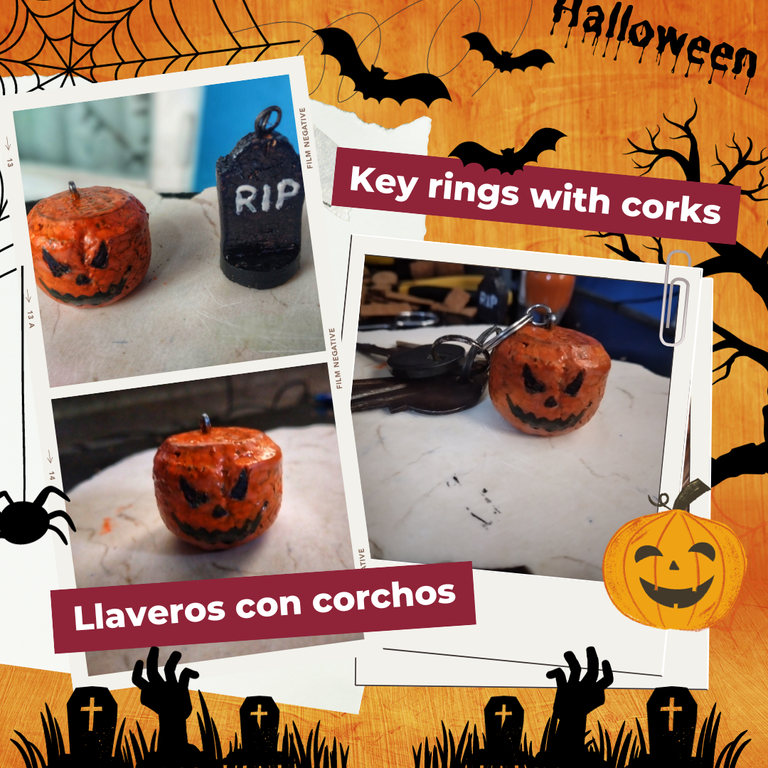
Ya ha pasado más de la mitad del mes de octubre, lo cual significa que es casi hora de la noche en las que las brujas salen de paseo a resucitar a los muertos. Zombis y vampiros deambularán por la noche y atacaran a todo aquel que no posea su amuleto. O bueno, su llavero de Halloween, en este caso 🤣🤣🤣.
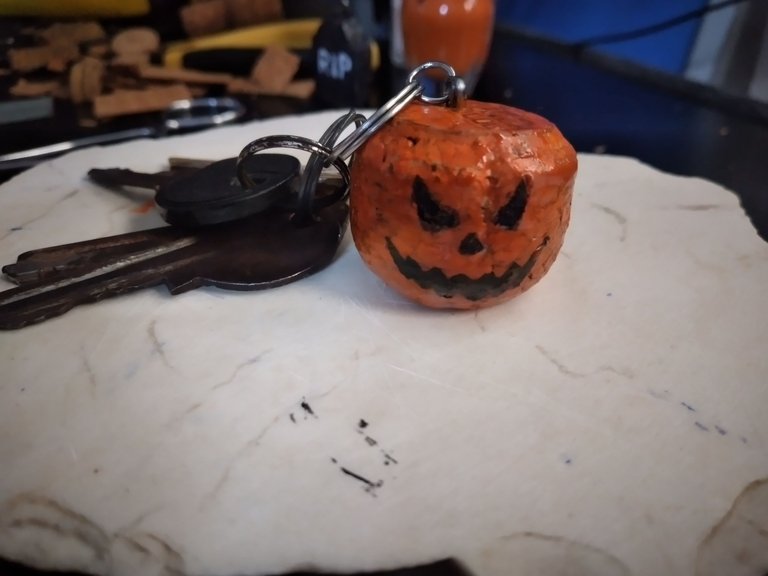
Hoy quiero enseñarles a confeccionar unos sencillos llaveros con temática de Halloween. Uno con forma de lápida y otro con forma de linterna de calabaza. Pueden usarlos para acompañar sus llaves, bolsos o mochilas. Son unos adornos confeccionados con corchos de botellas, lo cual significa que son eco-amigables, no pesan y pueden ser un lindo presente para regalar a un familiar o amigo.
More than half of the month of October has already passed, which means that it is almost time for the witches to go for a walk to resurrect the dead. Zombies and vampires will roam the night and attack anyone who doesn't have their amulet. Or well, their Halloween keychain, in this case 🤣🤣🤣🤣.
Today I want to show you how to make some simple Halloween themed keychains. One in the shape of a tombstone and one in the shape of a pumpkin jack-o-lantern. You can use them to go with your keys, bags or backpacks. They are made with bottle corks, which means they are eco-friendly, weightless and can be a nice present to give to a family member or friend.
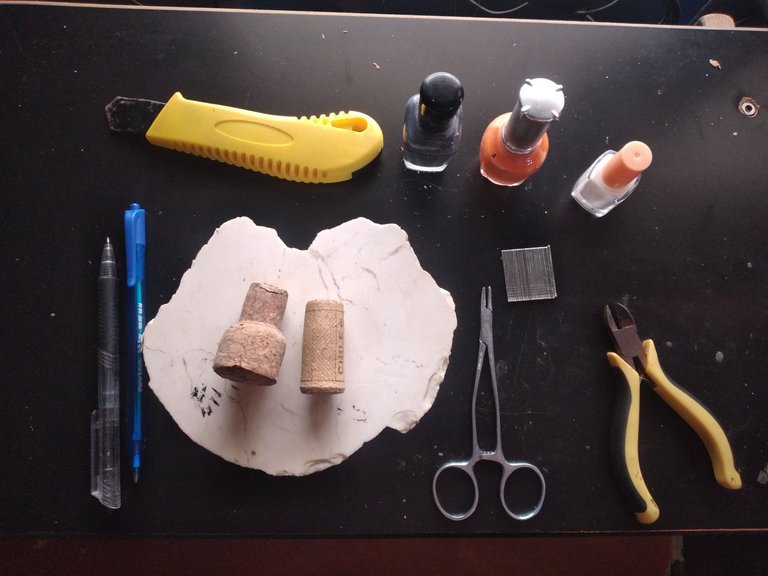
Materiales || Materials
- Dos corchos, uno de botella de vino y otro de sidra.
- Un cúter o cuchilla.
- Dos lapiceras o marcadores.
- Una pinza de puntas finas.
- Una pinza de corte.
- Algún tipo de alambre duro, pero flexible (Usé clavos finos de martilladora eléctrica)
- Barniz, Pintura de aceite o pintura acrílica. (Use esmalte de uñas porque no tenía color naranja 😅)
- Two corks, one from a wine bottle and one from a cider bottle.
- A box cutter or blade.
- Two pens or markers.
- One fine-tipped tweezers.
- Cutting pliers.
- Some kind of hard, but flexible wire (I used fine nails from an electric hammer).
- Varnish, Oil paint or acrylic paint (I used nail polish because I didn't have orange 😅).
Paso a Paso || Step by step
Antes de comenzar a marcar o cortar los corchos, trata de tener en mente el diseño que quieres usar, o elabora una plantilla.
Before you start marking or cutting the corks, try to have in mind the design you want to use, or make a template.
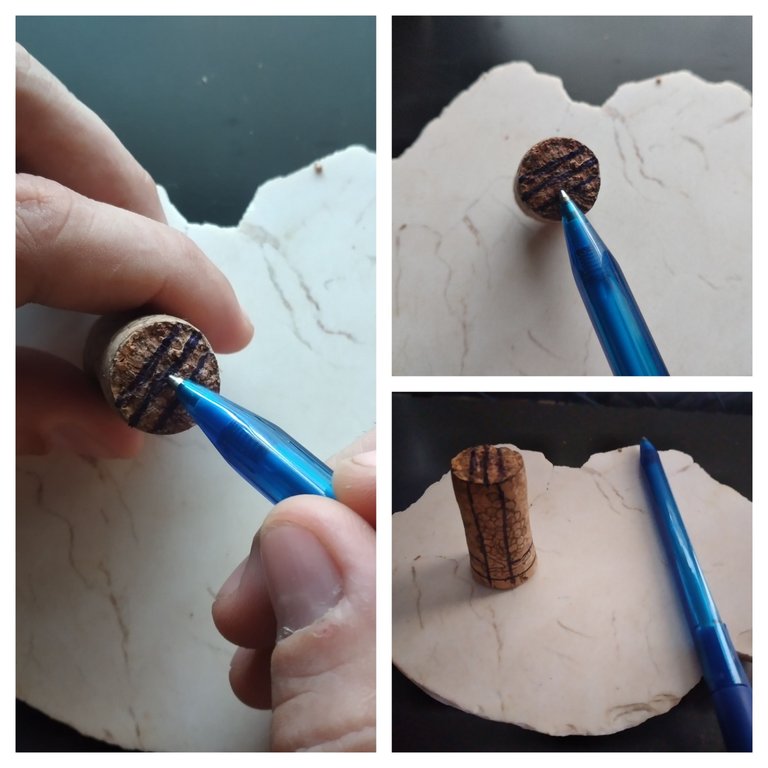
Paso #1 || Step #1
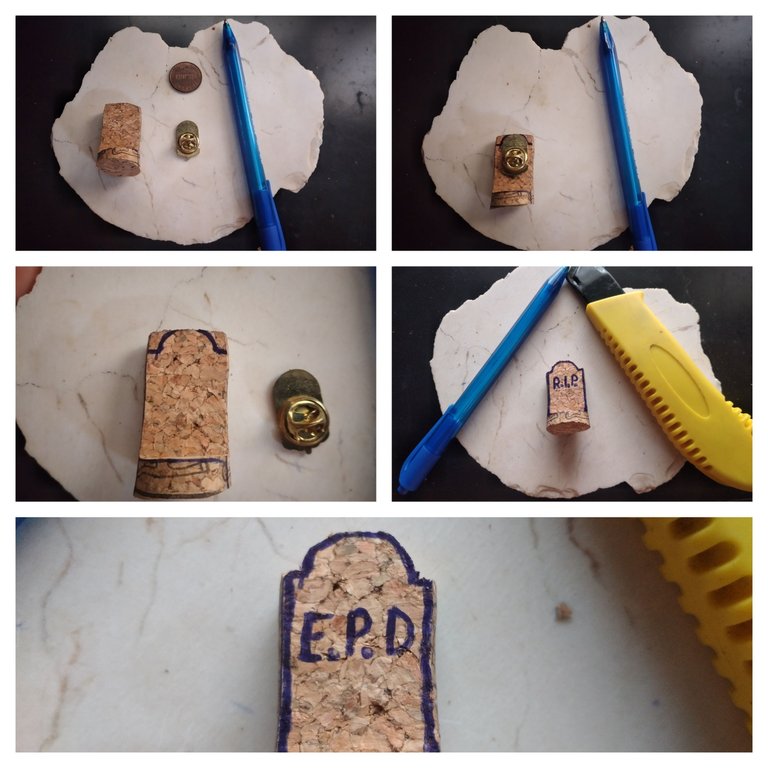
Para la lápida marca en el corcho de vino las líneas por donde vas a cortar, trata de medir para que queden ambos lados iguales.
For the tombstone, mark on the wine cork the lines where you are going to cut, try to measure so that both sides are equal.
Paso #2 || Step #2
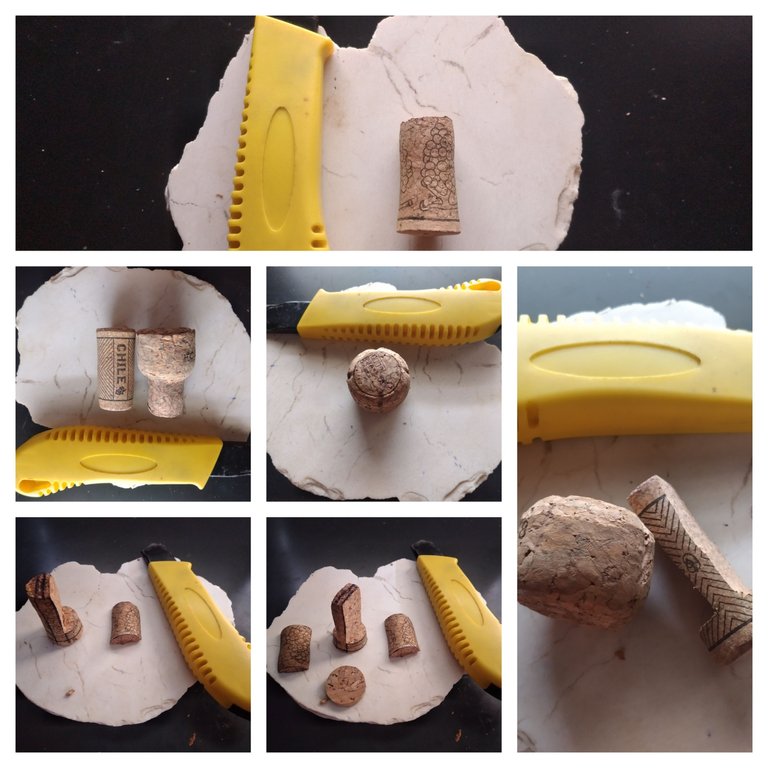
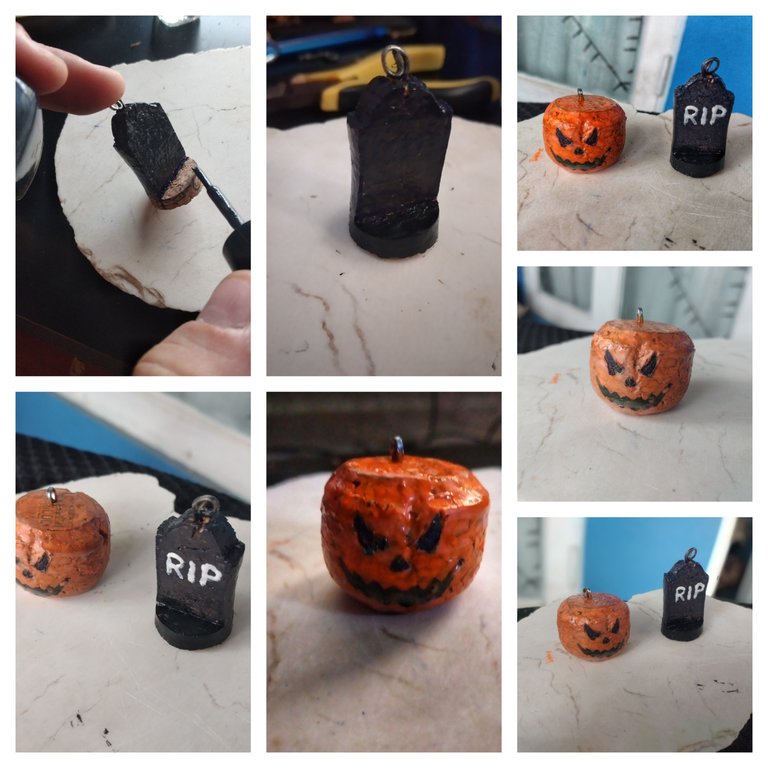
Una vez marcado por donde recortar, corta el corcho de vino por ambas caras, pero sí llegar a la base. También recorta el corcho de sidra por la parte fina y a la parte ancha intenta darle una forma redondeada.
Once you have marked where to cut, cut the wine cork on both sides, but do not reach the base. Also cut the cider cork on the thin side and try to give a rounded shape to the wide side.
Paso #3 || Step #3
Con la ayuda de una moneda dibuja un semicírculo en el aparte superior del corcho de vino y recórtalo con el cúter.
With the help of a coin draw a semicircle on the upper side of the wine cork and cut it out with the cutter.
Paso #4 || Step #4
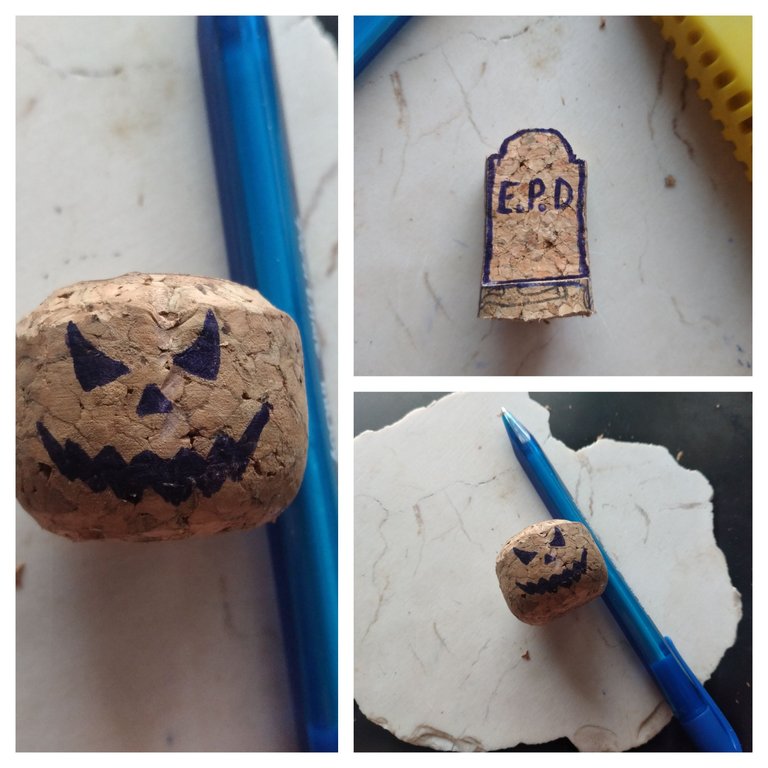
En el corcho de vino dibuja el letrero que tendrá la lápida y en el corcho de sidra dibuja la cara malvada de la linterna de calabaza.
On the wine cork draw the sign that the tombstone will have and on the cider cork draw the evil face of the pumpkin lantern.
Paso #5 || Step #5
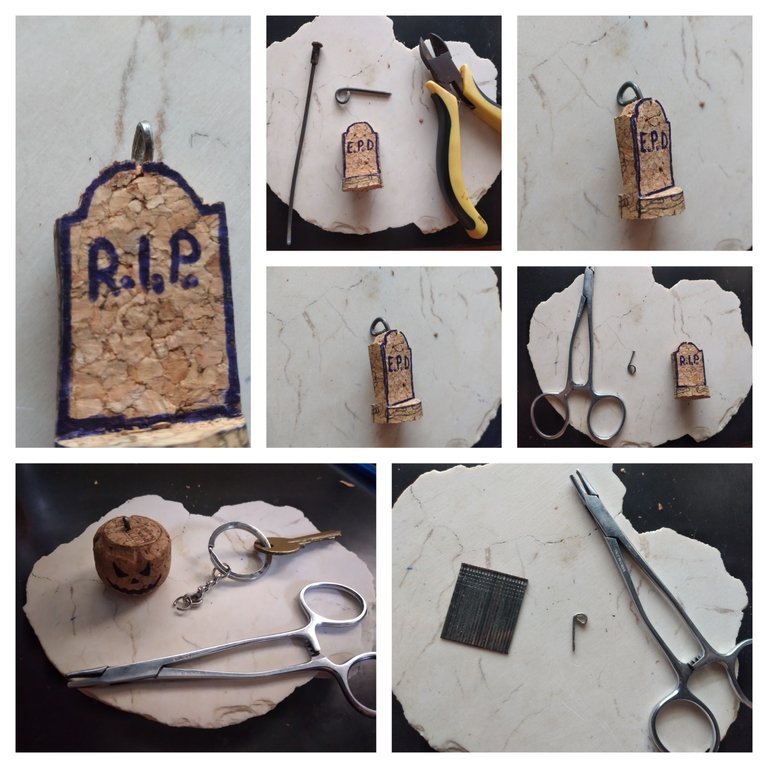
Usando las pinzas, tanto la de corte como la de electricidad, enrolla la punta de un alambre formando la letra P. En mi caso utilice un clavo fino de una martilladora eléctrica, pero pueden usar lo que quieran. Una vez que tengas listo el enganche insértalo en la parte superior de cada corcho.
Using the pliers, both cutting and electrical, roll the tip of a wire forming the letter P. In my case I used a thin nail from an electric hammer, but you can use whatever you want. Once you have the hitch ready insert it into the top of each cork.
Paso #6 || Step #6
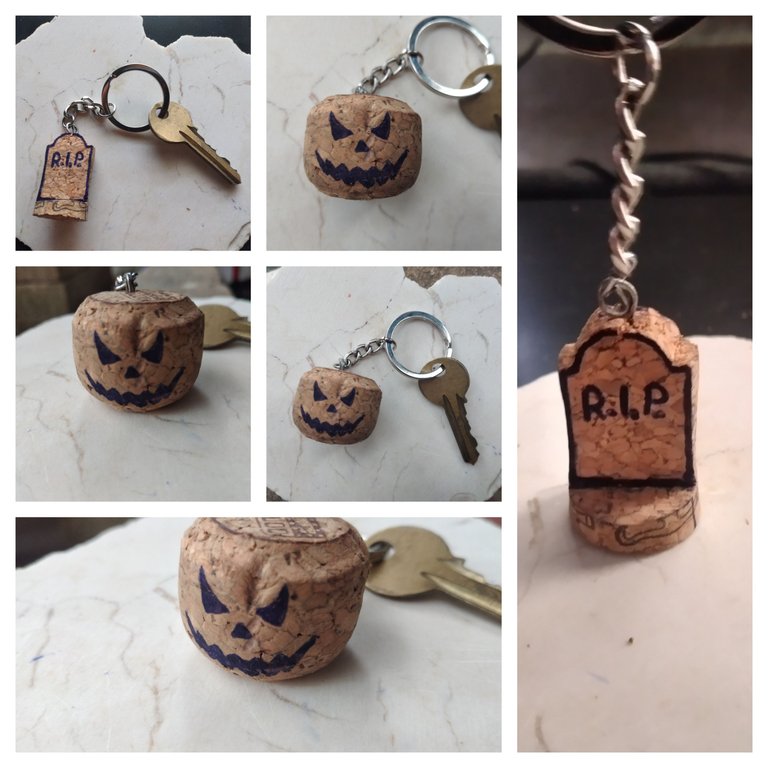
Llegados a este punto el camino se divide en dos. En primer lugar, los que cuenten con pinturas de colores vivos y marcadores pasaran a decorar los llaveros y lo que no, podrán dejar así los llaveros dándole un toque aún más rústico. En mi caso en un principio pensé en parar aquí porque no tenía pintura naranja, pero apareció un poco de esmalte para uñas y utilicé eso mismo. Entonces en este paso 6 les dejo como quedaría si no utilizarán pintura.
At this point the path is divided in two. First, those who have brightly colored paints and markers can decorate the key chains and those who don't, can leave the key chains like this, giving them an even more rustic touch. In my case at first I thought about stopping here because I didn't have orange paint, but some nail polish appeared and I used that. So in this step 6 I leave you how it would look like if you do not use paint.
Paso #7 || Step #7
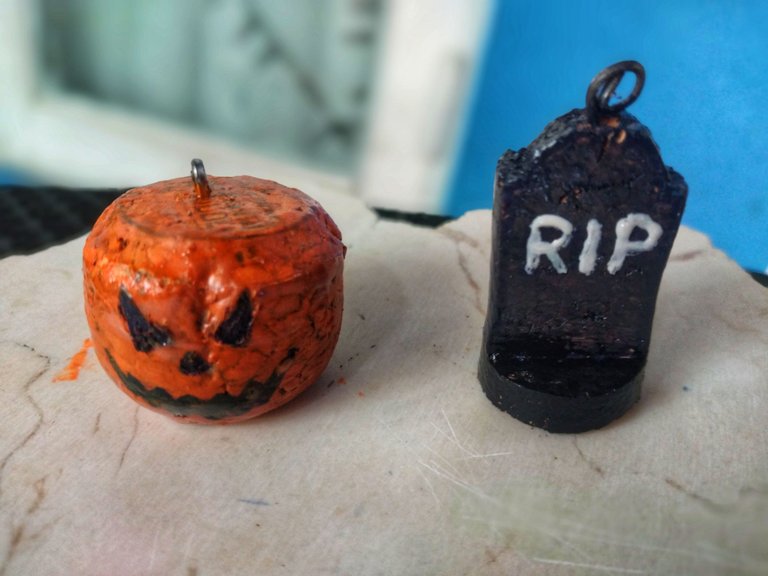
Si eres de los que contaba con los colores adecuados para pintar los llaveros, te felicito. Aquí es donde puedes dar riendas sueltas a tu imaginación, pinta los llaveros, pero no olvides agregarle un rostro terrorífico a la linterna de calabaza y ponerle un epitafio a la lápida.
If you are one of those who had the right colors to paint the key chains, congratulations. Here is where you can let your imagination run wild, paint the key chains, but don't forget to add a scary face to the pumpkin lantern and put an epitaph on the tombstone.
El Final || The End
Hasta aquí el tutorial, espero que haya sido de su agrado. Estoy seguro de que si lo intentan les quedarán muy lindos. No quiero despedirme sin antes decir que: lo que más me gusta del DIY no es solo crear adornos y decoraciones, lo que más me gusta y disfruto es darle una segunda oportunidad a las cosas, a la vez, amplío mi creatividad. Y si a pesar de las limitaciones yo nunca me he detenido, no creo que ustedes lo hagan.
So far this tutorial, I hope you liked it. I am sure that if you try it, they will look very nice. I don't want to say goodbye without saying that: what I like most about DIY is not only creating ornaments and decorations, what I like and enjoy the most is to give things a second chance, at the same time, I expand my creativity. And if despite the limitations I have never stopped, I don't think you will.

Muchas gracias por leer mi post. Si te gustó, por favor deja un comentario y considera seguirme para no perderte mis próximas publicaciones. Me encantaría saber tu opinión y tus ideas sobre el tema que traté en este post. ¡Nos vemos en el próximo!
Thank you very much for reading my post. If you liked it, please leave a comment and consider following me so you don't miss my next posts. I'd love to know your opinion and your thoughts about the topic I discussed in this post, see you in the next one!

Portada realizada en Canva
Fotos tomadas con mi Samsung Galaxy A20S
Translated by DeepL

Gracias por el apoyo 💚
Están increíbles tus llaveros, me gusto bastante, muchas gracias
Me alegra mucho saber que te gustaron. Gracias a ti por comentar.
Hola. Me gustó mucho esta propuesta de llaveros para halloween. Los dos diseños se ven lindos. Me gustan sin colores radiantes. Pero se ven bellos de las dos formas. Bonito resultado.
Si, a mi muchas cosas de las que hago con corcho me gustan más sin colores. Pero la calabaza sin el color no era calabaza 🎃. Gracias por comentar.
Quedaron muy chulos, yo quiero la calabaza 🎃 me encantó
Los dos son tuyos mi amor, tu sabes que yo solo uso la míni-cintamétrica como llavero.
Congratulations @edeyglezsosa! You have completed the following achievement on the Hive blockchain And have been rewarded with New badge(s)
Your next target is to reach 300 comments.
You can view your badges on your board and compare yourself to others in the Ranking
If you no longer want to receive notifications, reply to this comment with the word
STOPTo support your work, I also upvoted your post!
Muy buenos!
El proceso se puede seguir muy bien. Es una gran idea, para que el recuerdo de este Halloween se pueda llevar a todas partes. Y, como son talismanes, supongo, estamos a salvo de las travesuras que nos quieran hacer jajaj
Mucha suerte.
!LUV
@edeyglezsosa, @flquin(3/3) sent LUV. | connect | community | HiveWiki | NFT | <>< daily
! help(no space) to get help on Hive. InfoJaja, si esos talismanes son fáciles de hacer y no ocupan mucho espacio. Es mejor estar protegidos 😉
Santo cielo, yo aun no tengo mi amuleto, me van a atacar los monstruos 😱 ¿te sobro alguno de casualidad? jeje
Te quedaron geniales, la calabza si que da miedo, con ese amuleto ningun monstruo se va a acercar 🎃 me encantaron los dos y genial que estan hechos con corchos, ya le encontre una utilidad a los corchos que ya no usa mi abuelo jeje
Saludos ❤️
Lo mejor de todo fue reciclar lo corchos. Yo poseo una gran cantidad en casa pues en los hoteles los desechan. Se pueden usar otros materiales, pero los monstruos le temen más a los talismanes hechos con materiales reciclados.
Yay! 🤗
Your content has been boosted with Ecency Points, by @claudialesly.
Use Ecency daily to boost your growth on platform!
Support Ecency
Vote for new Proposal
Delegate HP and earn more
Están espectaculares!
Gracias, me alegra que te gustasen.
Muy buena idea, ideal para estas fechas.
@edeyglezsosa
https://inleo.io/threads/view/hive-130560/re-leothreads-31qt3me9m