ENGLISH VERSION (click here!)
Hello community, I hope you are all well, enjoying good moments since Christmas arrived, and it is such a beautiful and special date, full of colors, laughter, joy although also of nostalgia, in my family and particularly Christmas has always been joyful, but since my son was born it is even more so, and it is because he was born on December 1st, so we basically start the month celebrating, which makes me think of all the December gifts, 😅 but that is another topic.
On the occasion of the date, today I bring you a beautiful ornament for my desk that I made although it can decorate any space.
I will show you how I made it 🎄
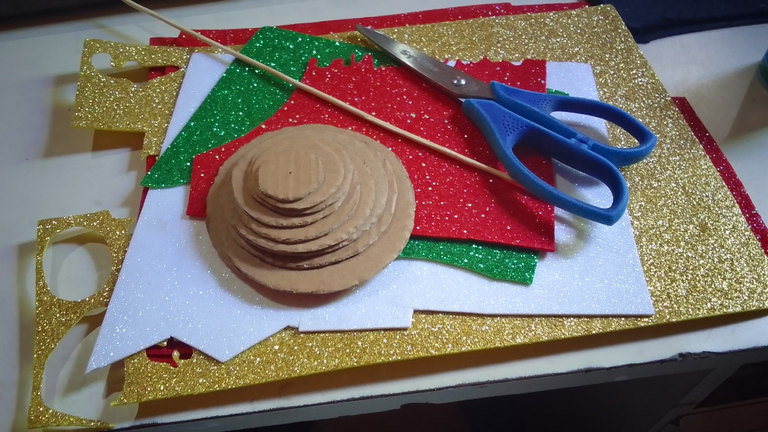
Materials for the ornament 🎄:
✨Foami frosted (Red, gold, white)
✨Silicone glue
✨Cardboard, high stick
✨Scissors, pencil
✨Circular molds
Step by step 🎄
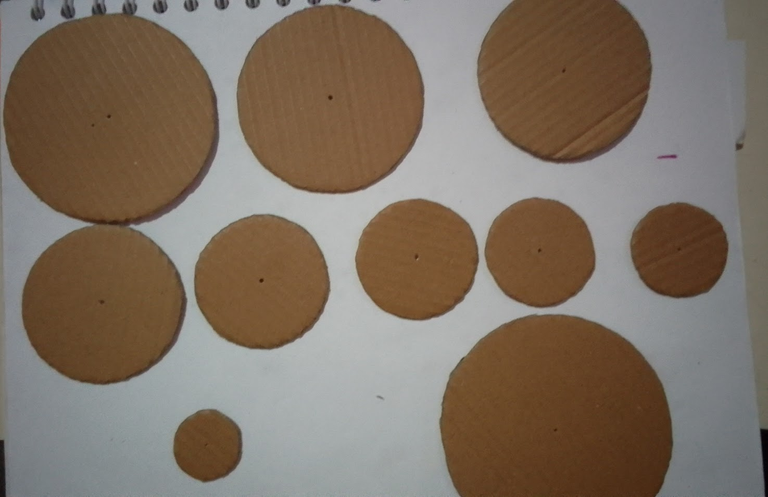
1- On the red foam I drew several circles of different sizes in total 11 cycles, using the cardboard molds these are the circles and from the largest I made two. Then I cut them
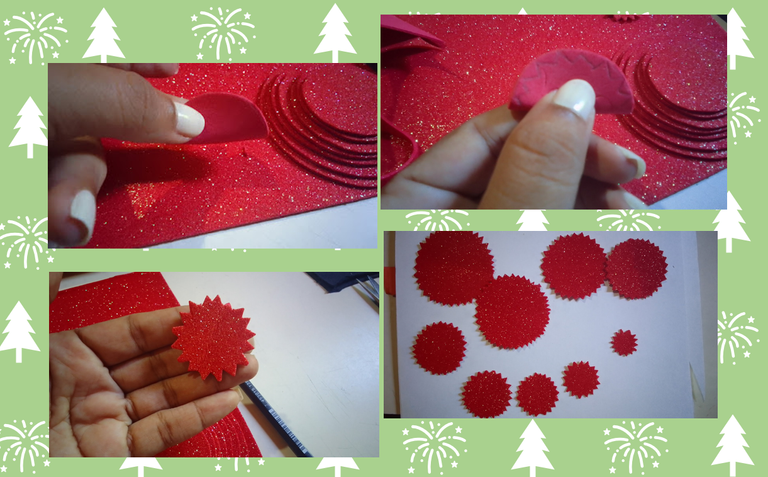
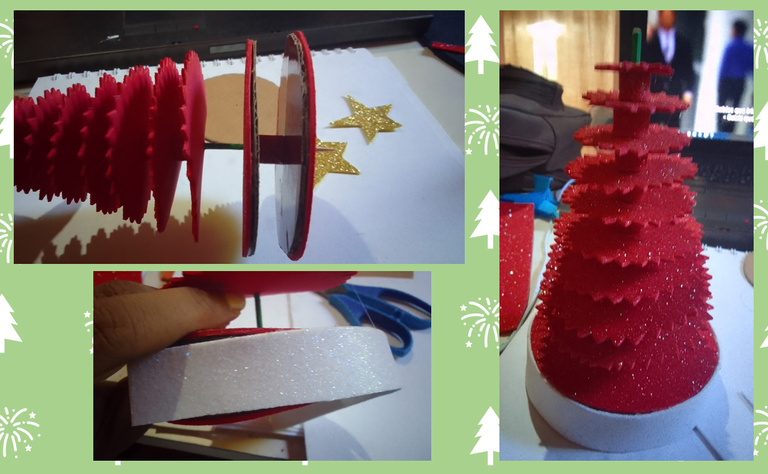
2- After cutting them, I doubled them and drew some zigzags on the edges to then cut them. I repeated the procedure with 9 of the circles and this is how each one looked:
3- Once each circle was ready, we started assembling the tree, yes we will make a tree, and we introduced the smallest circle making a little pressure with the high stick that I had previously painted green, and we rolled it up to a considerable height.
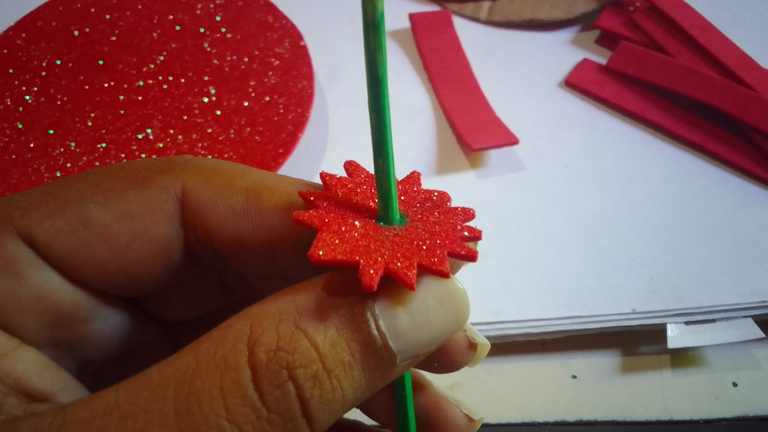
4- Then with a piece of 1cm wide foam I glued it just below the circle that I had just placed and added another of the circles
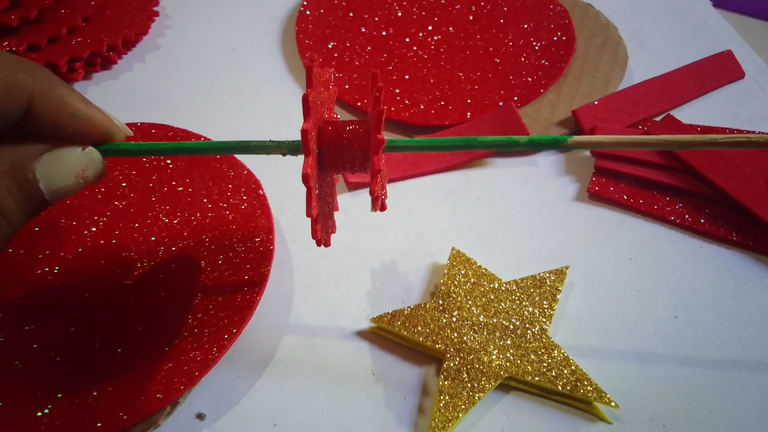
5- I repeated the previous step until all the circles were placed:
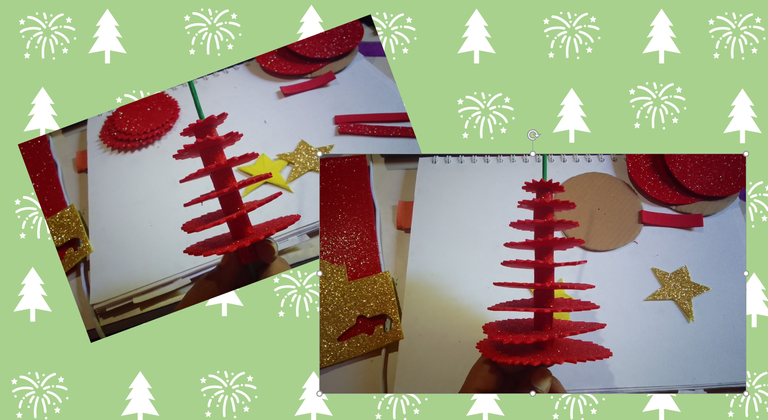
6- For the base, I used a little cardboard and made two large circles and then glued them with the foam circles
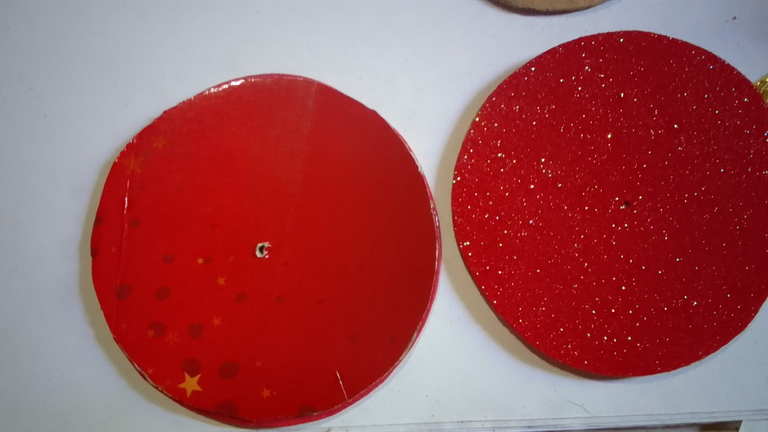
7- Then we placed it on the high stick following the same action of step 4 and 5, then that they stick cut 2 cm wide and 23 long to join those two rings of the base:
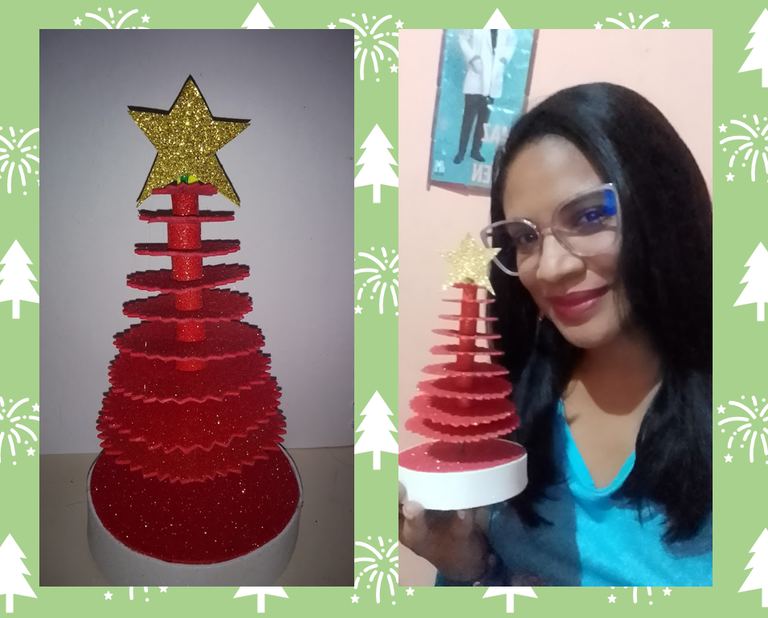
8- As a final step I placed the star and this is how my red tree looks, I would like to make it of various colors, but as I had more red I made it of this color and I loved the result
I hope you liked this tutorial, thank you very much 🎄❤️💕

Saludos comunidad espero se encuentren muy bien, disfrutando de buenos momentos ya que llego la navidad, y es una fecha tan linda y especial, llena de colores, de risas, de alegría aunque también de nostalgia, en mi familia y particularmente la navidad siempre ha sido de alegrías, pero desde que mi hijo nació lo es aun más, y es porque además el nació el 1ro de diciembre así que básicamente comenzamos el mes celebrando, lo que me lleva a pensar en todos los regalos de diciembre, 😅 pero ese es otro tema.
Con motivo de la fecha me trae hoy a compartir con ustedes es un lindo adorno para mi escritorio que realice aunque puede decorar cualquier espacio.
Les mostrare como lo realice 🎄
Materiales para la realización del adorno 🎄:
✨Foami escarchado (Rojo, dorado, blanco)
✨Pega silicona
✨Cartón, Palito de altura
✨Tijera, lápiz
✨Moldes Circulares

Paso a paso 🎄
1- En el foami rojo dibuje varios círculos de diferentes tamaño en total 11 ciclos, utilizando los moldes de cartón estos son los círculos y del mas grande realice dos. Luego los recorte

2- Luego de recortarlos, los doble y dibuje unos zigzag en las orillas para la luego recortarlas. Repetí el procedimiento con 9 de los círculos y así quedaron cada uno:

3- Una vez listo cada circulo comenzamos a armar el arbolito, sii haremos un arbolito, 😅🎄e introducimos el circulo mas pequeño haciendo un poco de presión con el palito de altura que previamente había pintado de verde,y rodamos hasta una altura considerable.

4- Luego con un pedacito de foami de 1cm de ancho pego justo debajo del circulo que acabo de colocar y agrego otro de los círculos

5- Repetí el proceso anterior hasta colocar todos los círculos:

6- Para la base, ocupe un poco de cartón e hice dos círculos grandes y luego los pegue con los círculos de foami

7- Luego lo colocamos en el palito de altura siguiendo la misma acción del paso 4 y 5, luego que se peguen corte 2 cm de ancho y 23 de largo para unir esos dos aros de la base:

8- Como ultimo paso coloque la estrella y así se ve mi árbol rojo, me gustaría hacer de varios colores, pero como tenia mas rojo lo realice de este color y me encanto el resultado 🎄💕

Espero les haya gustado este tutorial, muchas gracias 🎄❤️💕

Recursos/Resources
| Portada y banner/ Cover and banner | canva |
|---|---|
| fotos/ pictures | own photos, realme c11 device |
| Collage | PowerPoint |
| Traductor/ Tranlater | Hive Translator |

Bella idea amiga,me encantó está muy creativa, la pondré en práctica 😊 bendiciones.
Congratulations @edittasc86! You have completed the following achievement on the Hive blockchain And have been rewarded with New badge(s)
Your next target is to reach 1250 replies.
You can view your badges on your board and compare yourself to others in the Ranking
If you no longer want to receive notifications, reply to this comment with the word
STOP!DIY
!discovery 27
This post was shared and voted inside the discord by the curators team of discovery-it
Join our Community and follow our Curation Trail
Discovery-it is also a Witness, vote for us here
Delegate to us for passive income. Check our 80% fee-back Program
It's a beautiful thing to make ones space look nice especially in relation to the festivities. Happy holidays in advance ⛄
You can query your personal balance by
!DIYSTATSQue lindo amiga .. éxitos!
Muy lindo y original!