Hello dear friends, welcome to my blog.
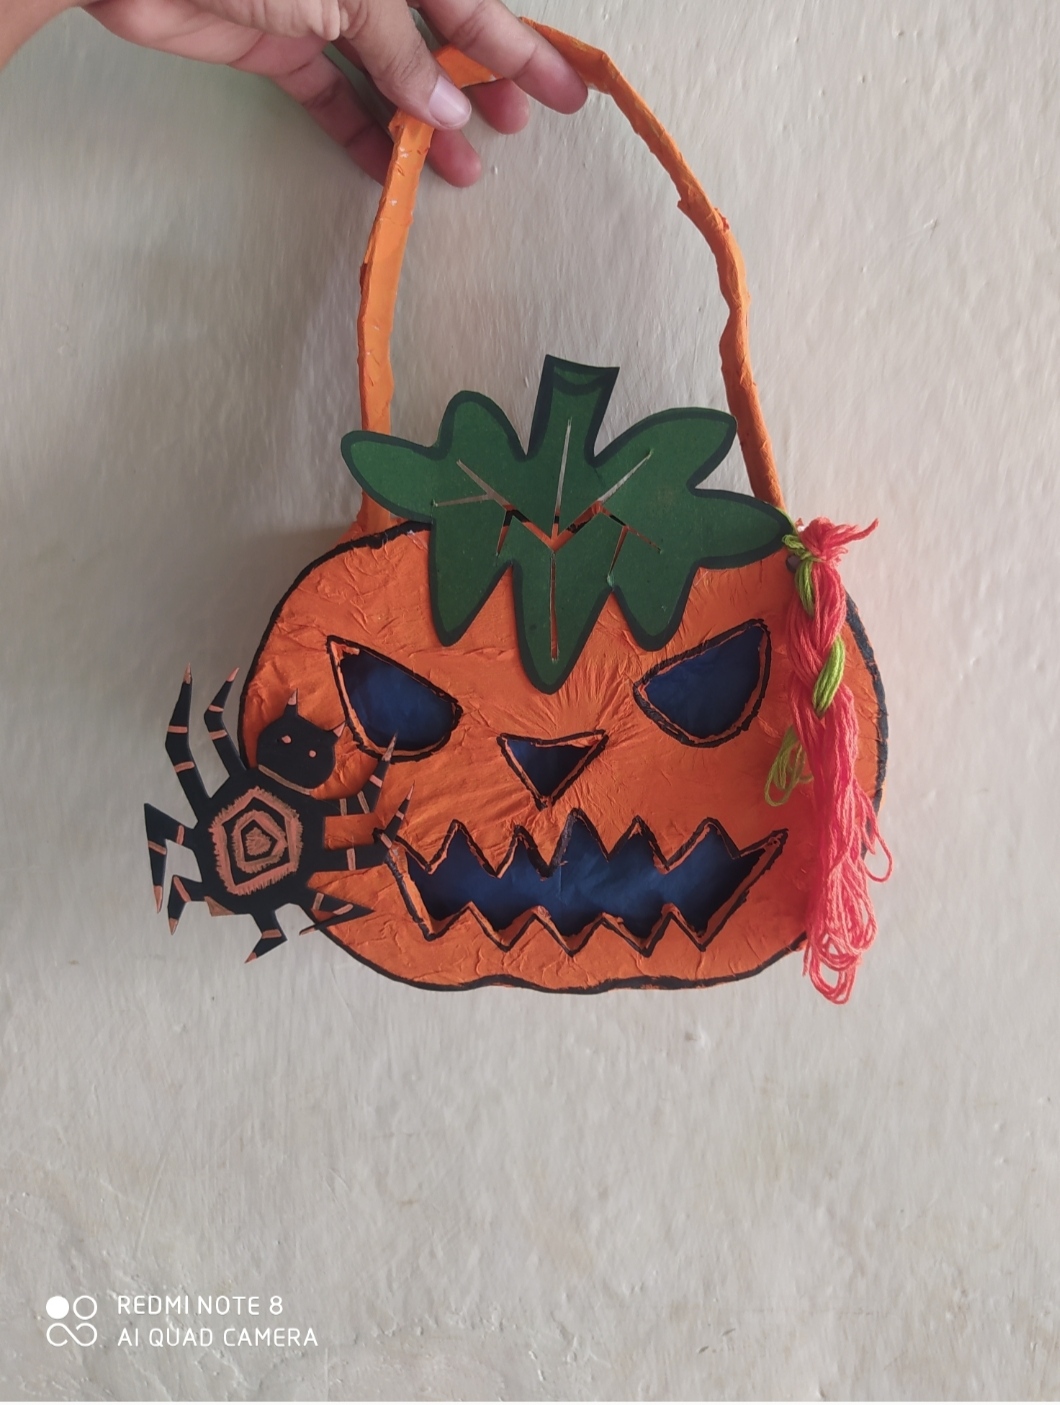
Blessings to everyone in this @hivediy community, on this occasion I am pleased to present this very easy craft to make, a chilling pumpkin-shaped basket 🎃, I had not had the opportunity to share it due to the internet problem that the place where I live presents and my cell phone data doesn't work much for me, it is made very quickly and our children will love it and it can be useful for a costume or to decorate the house at this time, my princess uses it when she goes out to ask candy from the neighbors and she was delighted with her basket. I hope you like it and this tutorial may be useful to you, later I will give you the steps to do it.
Without further ado, greetings and blessings to all!
Hola queridos amigos bienvenidos a mi blog .
Bendiciones a todos en esta comunidad de @hivediy ,en esta oportunidad me complace presentar esta manualidad muy fácil de elaborar ,una escalofriante cesta en forma de calabaza 🎃 ,no había tenido la oportunidad de compartirla por el problema de internet que presenta el lugar donde vivo y los datos de mi celular no me funcionan mucho , se elabora muy rápido y les encantará a nuestros niños y les puede ser útil para un disfraz o para adornar la casa en está epoca, mi princesa la utilizo pasa salir a pedir dulces a los vecinos y estaba encantada con su cesta. Espero les guste y puede serle de utilidad este tutorial, más adelante les dejo los paso para realizarla.
Sin más que agregar saludos y bendiciones a todos!


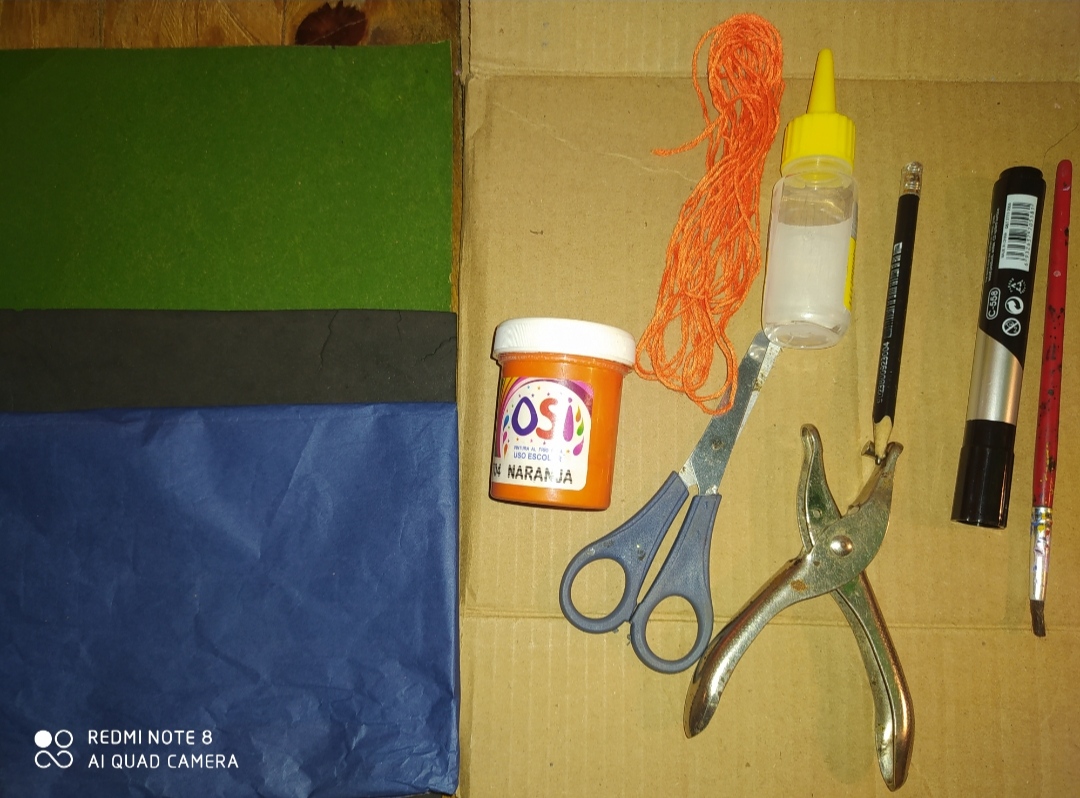
Used materials:
•Cardboard
•Liquid silicone
•Scissors
•Pencil
•Brush
•Orange cold paint
•Open egg
•Black marker
•Orange thread
•Green cardboard
•Black foam
•Gloss paper
•White crepe paper.
Materiales utilizados:
•Carton
•Silicon liquido
•Tijera
•Lapiz
•Pincel
•Pintura al frio naranja
•Abre huevo
•Marcador negro
•Hilo naranja
•Cartulina verde
•Foami negro
•Papel lustrillo
•Papel crepé blanco.
🎃🕸️🕷️How to make it 🎃🕷️🕸️
🎃🕸️🕷️Cómo lo elabore 🎃🕷️🕸️
🕸️1 Step:
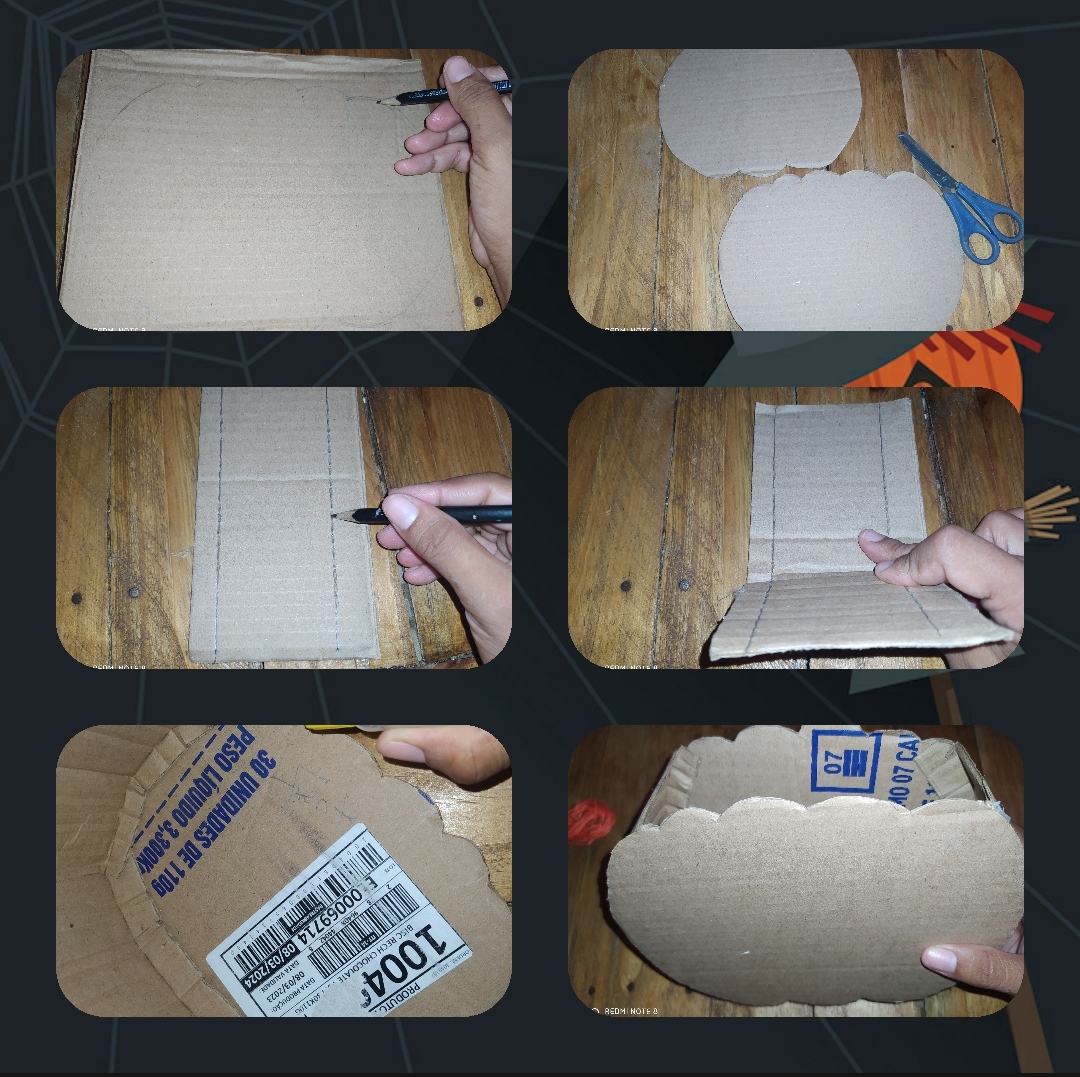
We take the cardboard to mark the shape of our pumpkin, in this case there will be two and we are going to cut it out, then we cut out a thick strip, fold it on the sides and fold it completely, now we glue the strip all around the pumpkin.
🕸️1 Paso :
Agarramos el cartón para marcar la forma de nuestra calabaza ,en este caso seran dos y la vamos a recortar ,luego recortamos una franja gruesa se dobla en los lados y doblarla totalmente ,ahora se pega la franja por todo el alrededor de la calabaza .
🕸️2nd Step:
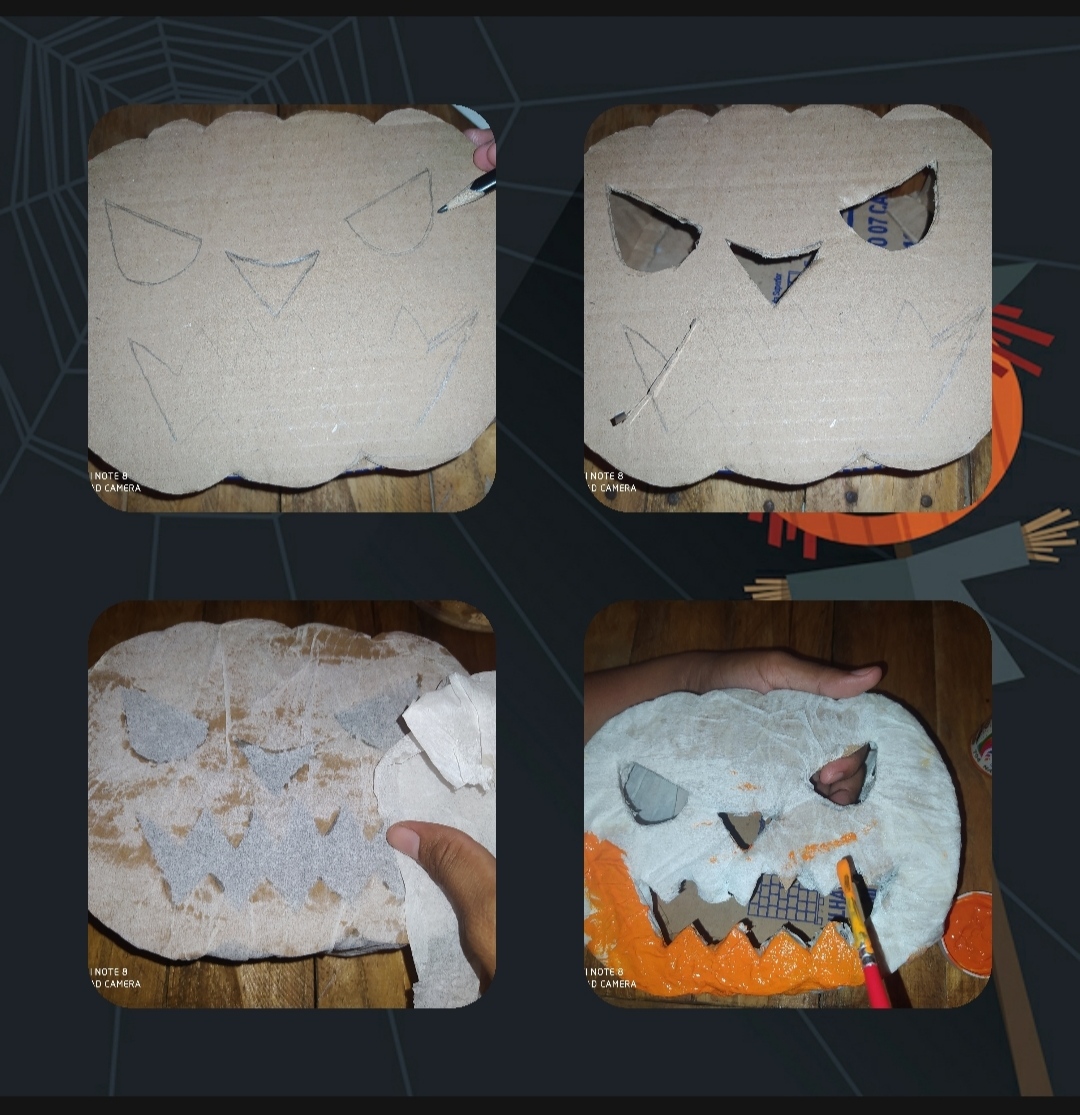
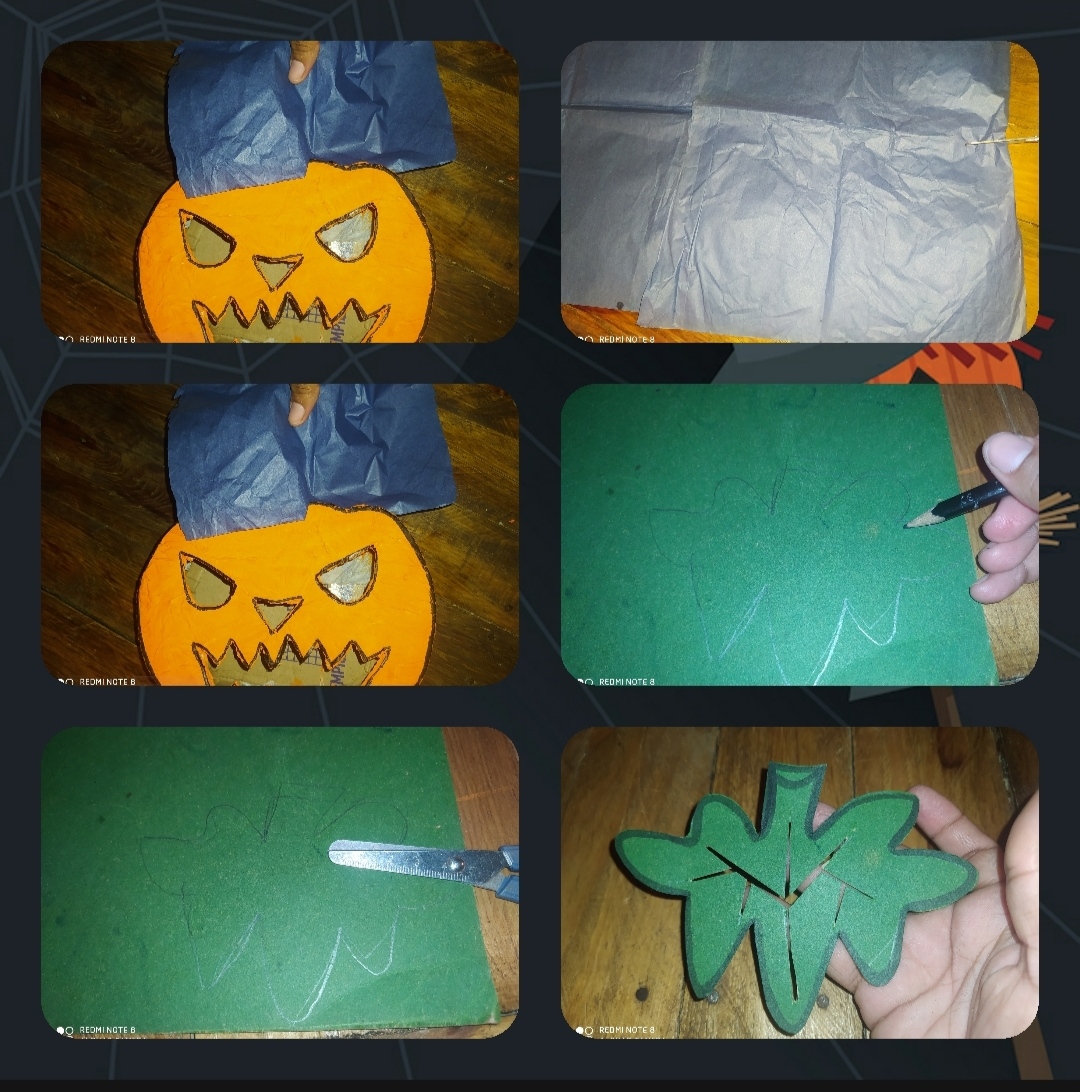
When the pumpkin is ready, we are going to mark the eyes, nose and mouth, cut this out, then we stick the white crepe paper all over the pumpkin 🎃 until it is all covered and then we paint it with the orange cold paint and let it dry..
🕸️2°Paso:
cuando está lista la calabaza, le vamos a marcar los ojos , nariz y boca ,se recorta esto, después pegamos el papel crepe blanco por toda la calabaza 🎃 hasta cubrirla toda y después la pintamos con la pintura al frio naranja y dejamos secar ...
🕸️3rd Step:
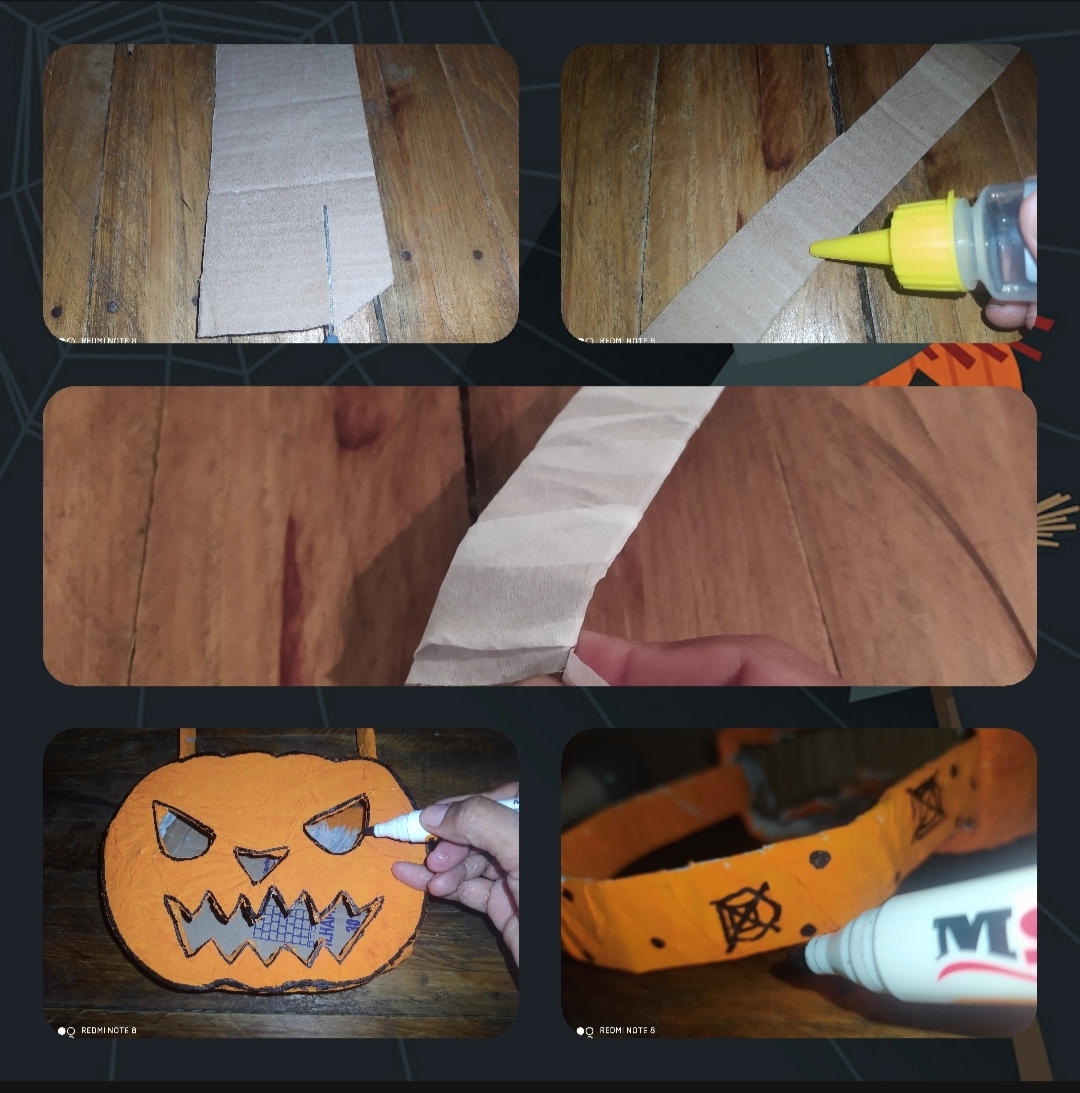
While our pumpkin is drying, we cut out a thin strip, line it with white crepe paper, then paint it orange. Let this dry now. When our pumpkin is dry, we outline the edges of it with the black marker, then glue the strip and make some decorations.
🕸️3°Paso:
Mientras que nuestra calabaza se está secando recortamos una franja delgada ,se forra con el papel crepé blanco , luego se pinta de color naranja se deja secar esto ahora , ya cuando está seca nuestra calabaza delineamos las orillas de esta con el marcador negro ,después se pega la tira y se le hacen unos adornos .
🕸️ 4th step:
In this step, a square of glossy paper is cut out and it will be glued to the inside of this craft, then we mark the part of the pumpkin where the leaf goes, it is cut out and some details are made inside it, this the entire edge is marked.
🕸️ 4° paso:
En este paso se recorta un cuadro de papel lustrillo y se le pegará en la parte de adentro de esta manualidad, luego marcamos la parte de la calabaza dónde va la hoja ,se recorta y se le hacen unos detalles adentro de la misma , a esta se le marca todo el borde .
5th Step:
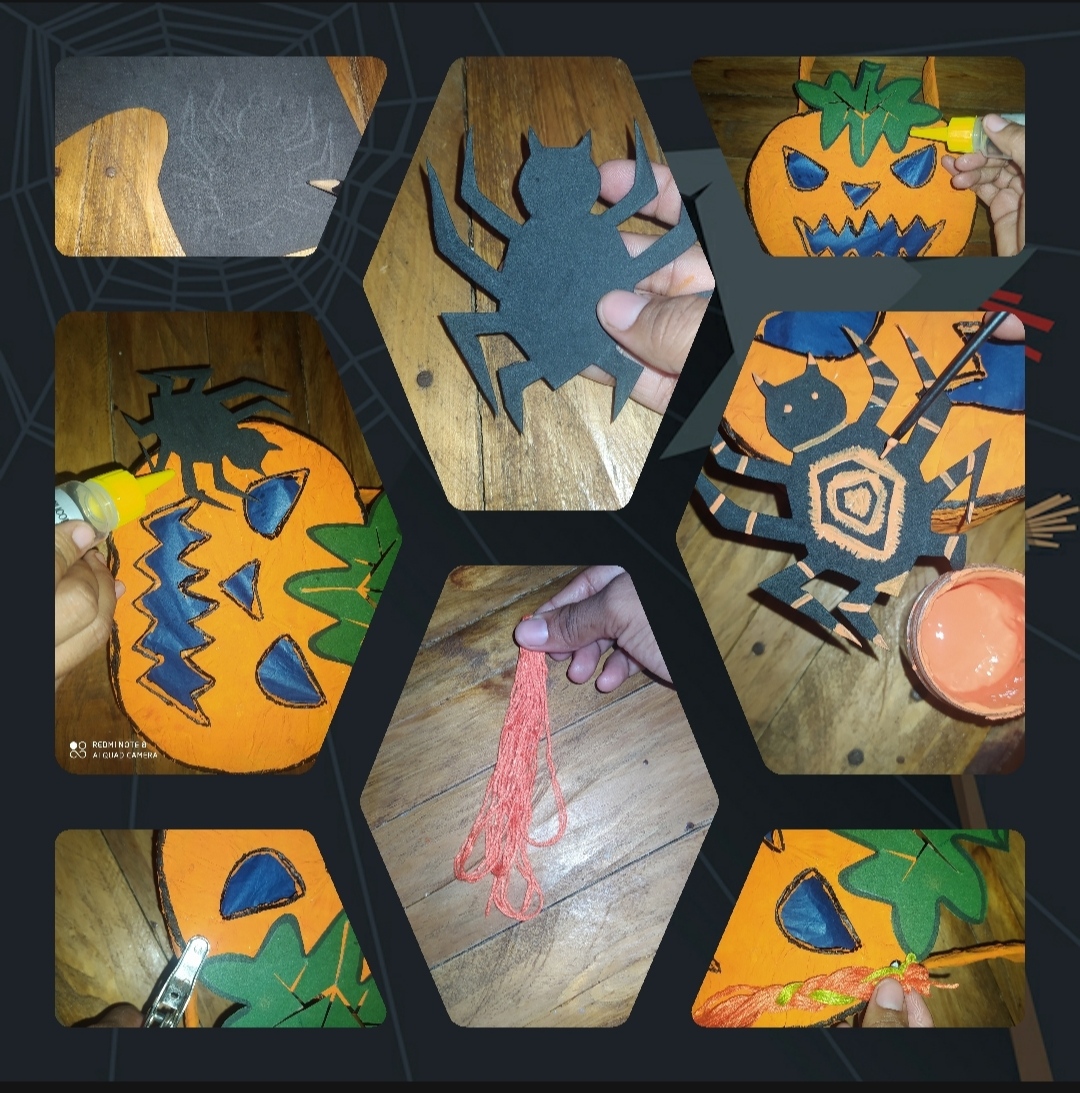
To finish this craft with recycling materials, we glue the part of the leaf, we mark a spider on the black foam, it is cut out and glued to one side of the pumpkin, then with the orange paint we will make some touch-ups, we look for the hole opener A hole is made in one corner, and with the son we make an ornament and it is placed in the other corner of said creativity.
5° Paso :
Para finalizar esta manualidad con materiales de reciclaje , le pegamos la parte de la hoja , marcamos una araña en el foami negro ,se recorta se pega a un lado de la calabaza después con la pintura naranja se le harán unos retoques , buscamos el abre hueco se le hace un hueco en una esquina ,y con el hijo hacemos un adorno y se le pone en la otra esquina de dicha creatividad.
🕷️🎃This way we will have this craft 🎃🕷️I hope you like them.
🕷️🎃De esta manera nos quedará está manualidad 🎃🕷️espero les gusten.
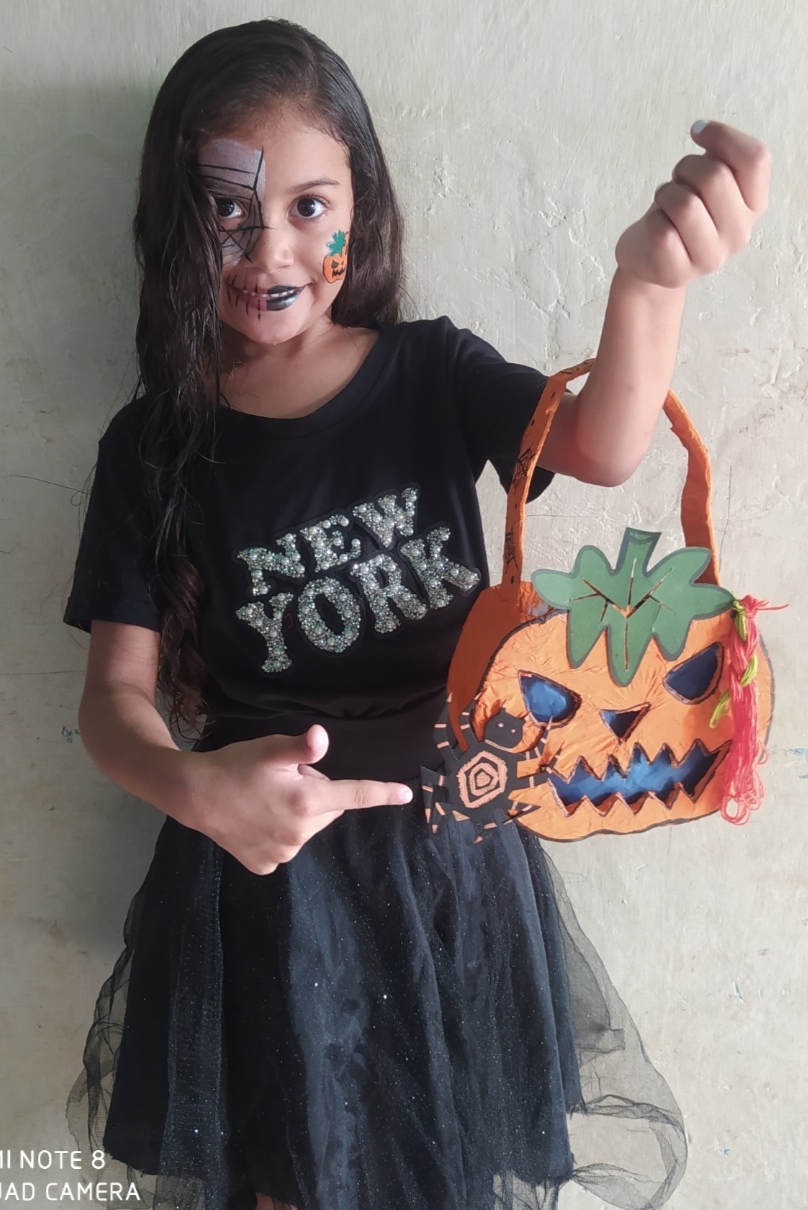
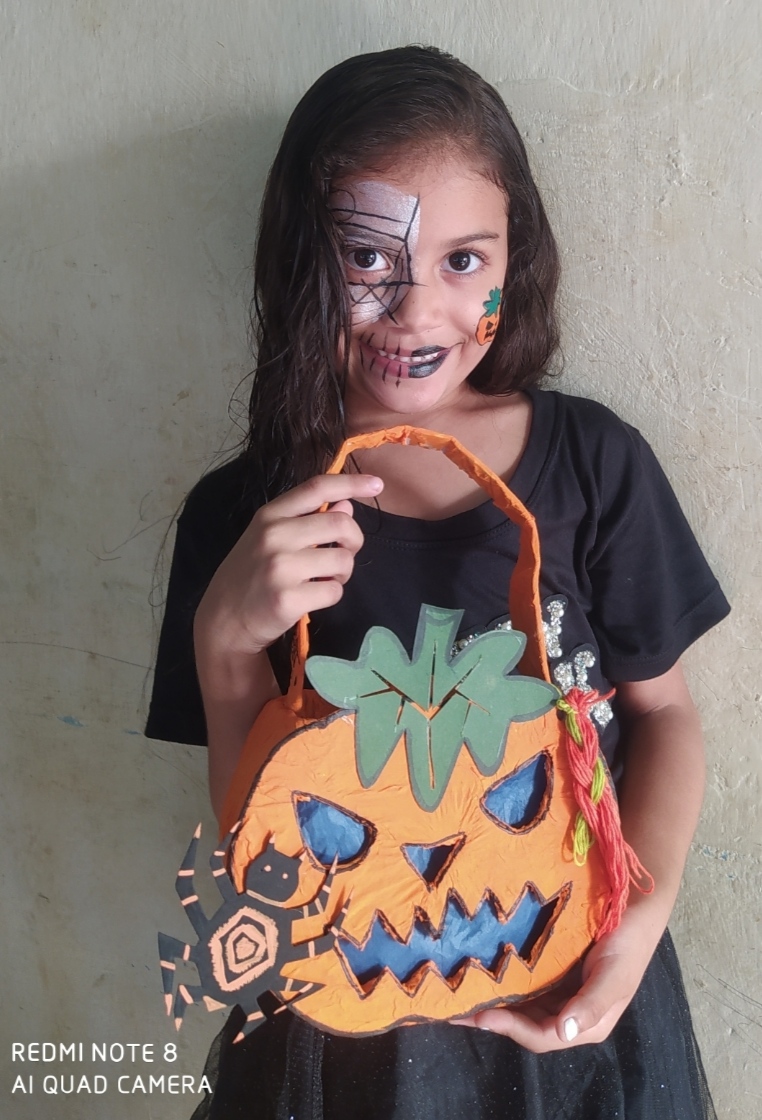

📱The photos are my property, they were taken with my Redmi Note 8 and I used Google Translate.
📱Las fotos son de mi propiedad fueron tomadas con mi Redmi Note 8 y utilice traductor de Google.
Blessings to all, thank you for visiting my blog, I hope this content can be helpful to you.
Bendiciones a todos gracias por visitar mi blog ,espero les pueda hacer de ayuda este contenido.
@egarysv "Tus creaciones son únicas, eres un verdadero talento Hive Diy."
Gracias por el apoyo ..y por tus palabras me alegra que les haya gustado.
Guaooo, estupendo trabajo, me imagino cuántas horas de trabajo. Felicidades
Gracias amigo @emiliocabrera , unas cuantas horas para este trabajo pero los resultados fueron mejor de lo que esperaba! Saludos!!
No deja de sorprenderme tu gran talento en las arte manuales linda calabaza 🎃
Un trabajo precioso y con mucho detalle, además creativo.
Me encantó la araña jaja
Gracias por compartir