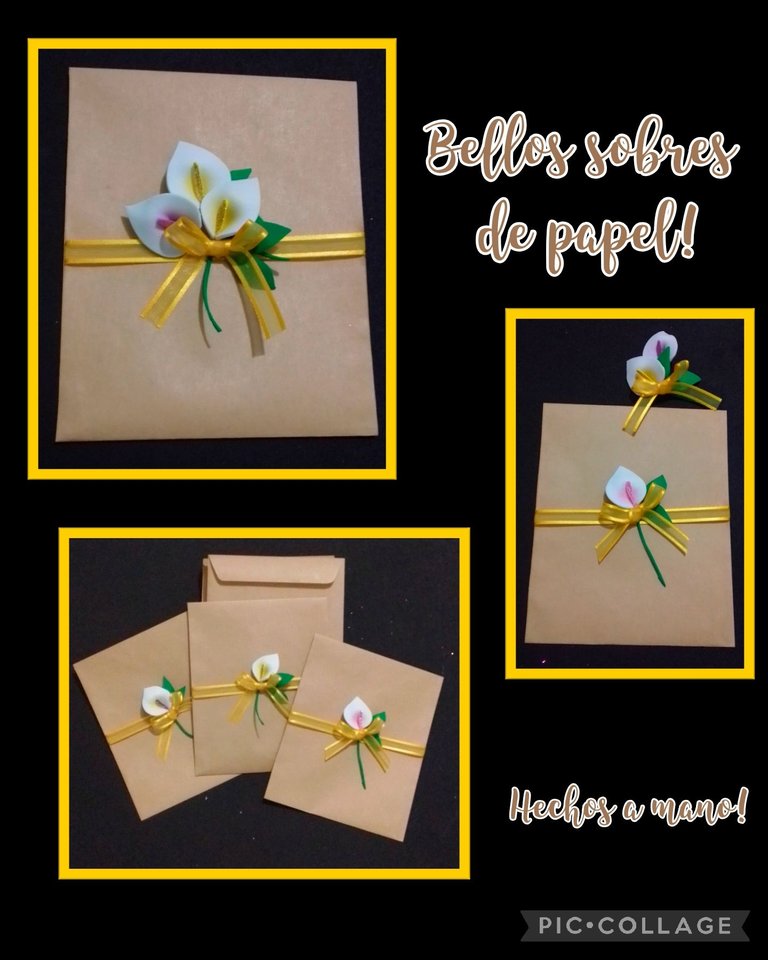
Buenas noches amigos que me visitan, sean todos bienvenidos a mi Blog.
De verdad que gastarás muy poco en materiales.
Así que te invito a que me acompañes y mires como hacerlos.
Para ello vas a necesitar los siguientes materiales:
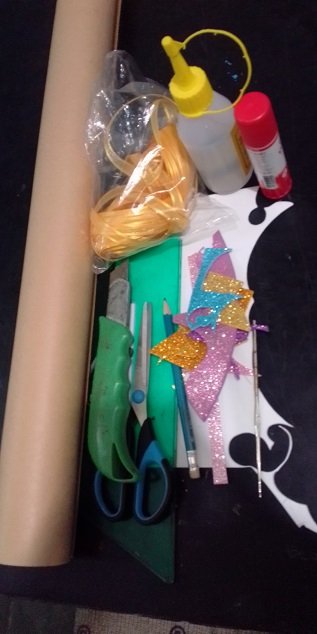
| Papel para envolver | Cinta de tela |
|---|---|
| Retazos de foami mate y escarchado | Silicón líquido |
| Tijera | Tiza de colores |
| Cuchilla | aguja de tejer |
| Pistola de silicón | Plancha eléctrica |
| Lápiz y regla | Molde |
Ahora comencemos:
Paso 1:
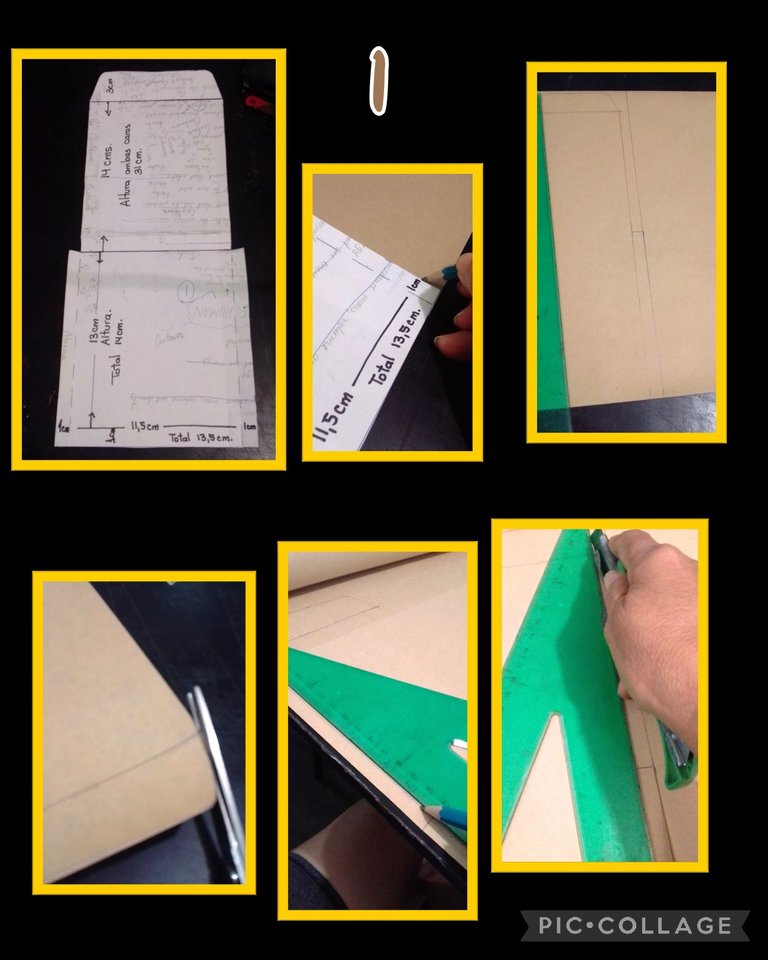
Diseña el molde a la medida deseada.
- Este lo diseñé con las siguientes medidas.
Altura total: 31 cm divididos así:
Tapa ......... 3 cm
Parte superior 14 cm
Parte inferior 14 cm
Ancho total: 13,5 cm divididos así:
Tapa y parte superior 11,5 cm
Parte inferior 1cm pestaña izquierda + 11,5cm centro + 1cm pestaña derecha.
- Traza estas medidas al papel, recorta con el exacto o tijera y da forma redondeada a las esquinas de la tapa.
Paso 2:
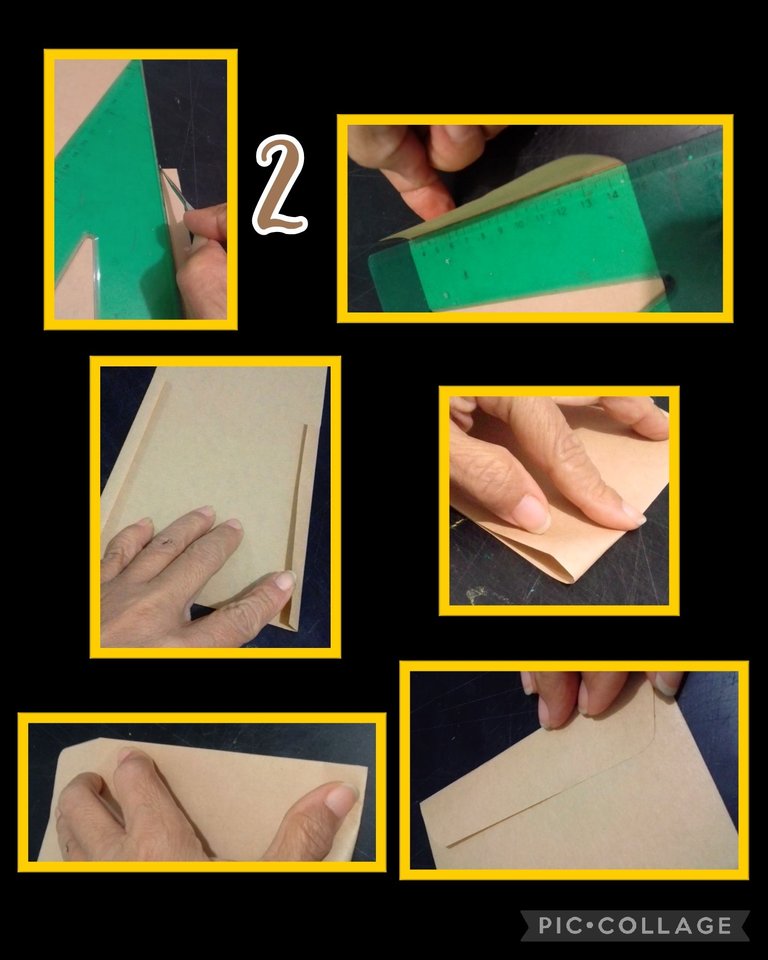
- Después que recortes el sobre, con la ayuda de una aguja de tejer o puede ser un bolígrafo sin tinta, pasa por las líneas de las pestañas, luego coloca la regla en esta misma línea y pasa el dedo para que el doblez quede derecho, retira la regla y dobla completamente la pestaña, (ver foto) y luego dobla por la mitad el sobre y por último dobla la tapa.
Paso 3:
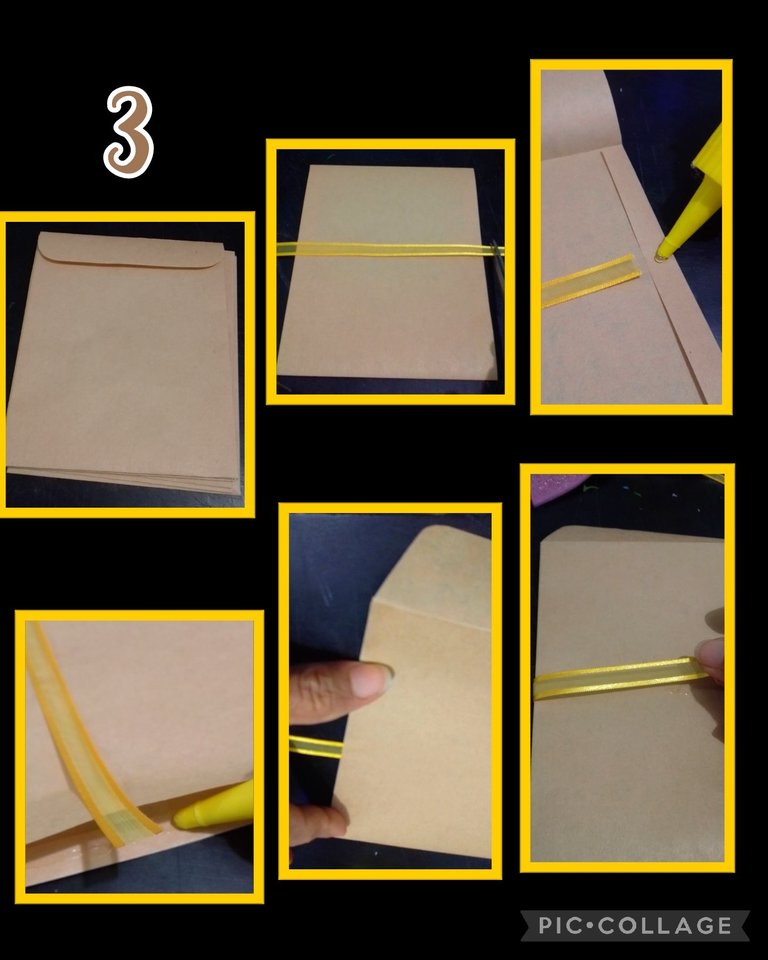
- Ahora después de doblar los sobres, coloca la cinta encima del sobre y recorta pedazos de 13,5cm c/u.
- Aplica silicón en una de las pestañas y pega la cinta insertando un cm justo a la mitad del sobre o donde quieras que quede la cinta y haces presión para que pegue bien.
- Luego hala la cinta hacia el otro y repite el procedimiento para pegar el otro lado.
Paso 4:
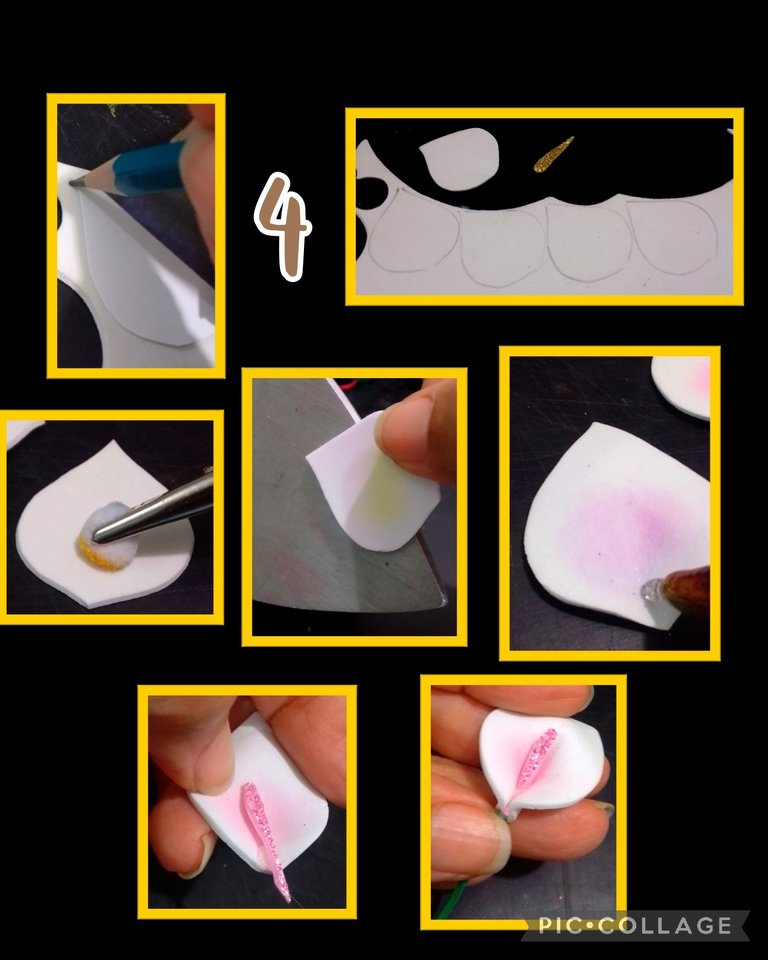
- Ahora dibuja la forma de la cala y marca en el foami blanco, luego con tiza pinta el centro y después calienta la plancha y dale forma a las calas.
- Aplica silicón caliente en la parte baja de la cala y recorta un pistilo en foami escarchado, coloca en el centro y presiona la parte de abajo para cerrar un poco la cala, deja secar y luego pega una tirita de foami verde para hacer el tallo.
Paso 5:

- Marca y recorta las hojas.
- Ahora teniendo las medidas de la cinta recorta las que necesites.
- También recorta las flores, pistilos y tallos para que armes de una vez.
- Luego, coloca un poco de silicón caliente en el centro de la cinta.
Paso 6:
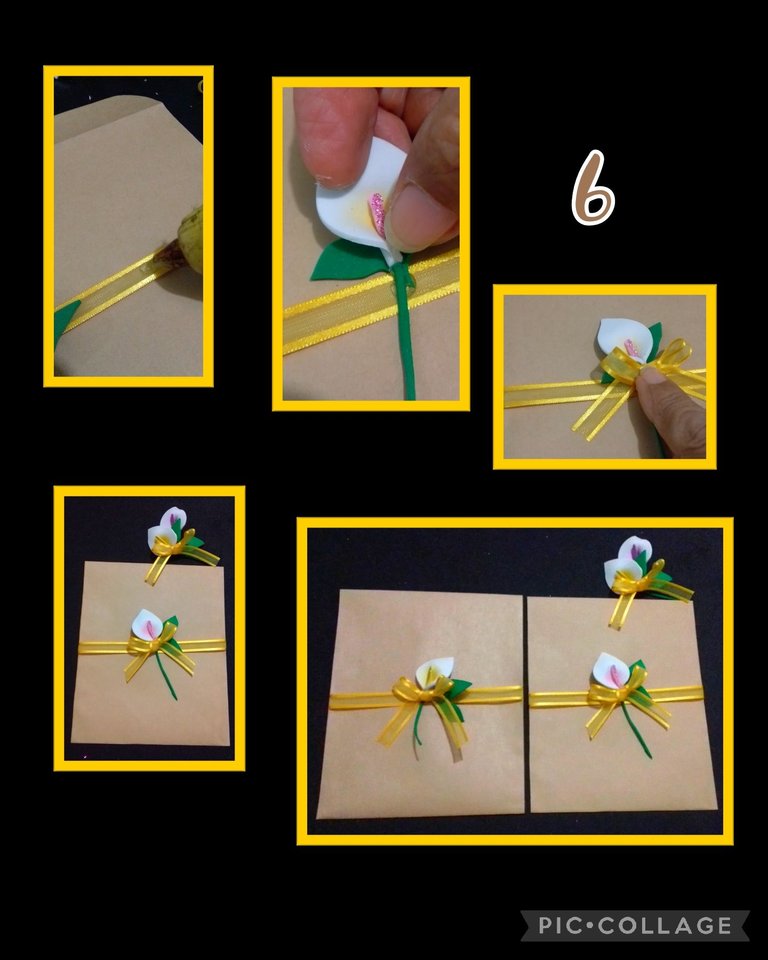
- Pega la cala en el centro y por último arma un lacito y pega sobre el tallo de la cala.
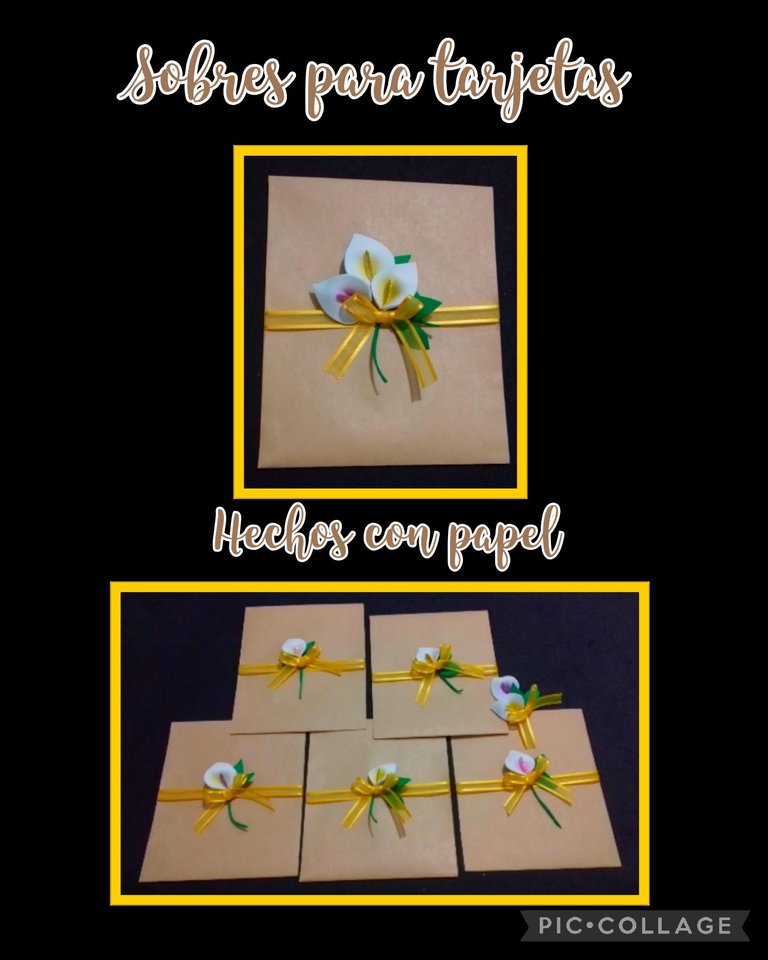
- Y ya quedaron listos estos bellos sobres!
Como siempre puedes decorar a tu gusto!
Mi publicación está traducida por DeepL, editada con etiquetas HTML y las fotos son mías, capturadas con mi Blu G5 y editadas con Pic Collage.
Me despido deseando te sea útil mi tutorial y que hayas aprendido una manera fácil de hacer estos sobres.
Muchas gracias por tu compañía y si te gustó me encantará ver tu comentario.
Saludos y bendiciones.
English:
Good evening friends who visit me, you are all welcome to my Blog.
You will really spend very little on materials.
So I invite you to join me and see how to make them.
For this you will need the following materials:
| Wrapping paper | Cloth ribbon |
|---|---|
| Frosted and frosted foami scraps | Liquid glue |
| Scissors | Colored chalk |
| Knife | Knitting needle |
| Silicone gun | Electric iron |
| pencil and Ruler | mold |
Now let's get started:
Step 1.
Design the mold to the desired size.
- I designed this one with the following measurements.
Total height: 31 cm divided as follows:
Cover ......... 3 cm
Top 14 cm
Bottom 14 cm
Total width: 13.5 cm divided as follows:
Lid and top 11.5 cm
Bottom 1cm left flap + 11.5cm center + 1cm right flap.
- Trace these measurements onto the paper, cut out with the exacto or scissors and round the corners of the lid.
Step 2:
- After you cut out the envelope, with the help of a knitting needle or it can be a pen without ink, pass along the lines of the tabs, then place the ruler on this same line and pass your finger so that the fold is straight, remove the ruler and fold the tab completely, (see photo) and then fold in half the envelope and finally fold the cover.
Step: 3
- Now after folding the envelopes, place the ribbon on top of the envelope and cut out pieces of 13.5cm each.
- Apply silicone on one of the tabs and stick the ribbon by inserting a cm just in the middle of the envelope or where you want the ribbon to be and press it to stick well.
- Then pull the ribbon to the other side and repeat the procedure to stick the other side.
Step 4:
- Now draw the shape of the cove and mark on the white foami, then with chalk paint the center and then heat the iron and shape the coves.
- Apply hot silicone to the bottom of the cove and cut out a pistil in frosted foami, place it in the center and press the bottom to close the cove a little, let it dry and then glue a strip of green foami to make the stem.
Step 5:
- Mark and cut out the leaves.
- Now having the measurements of the ribbon, cut out the ones you need.
- Also cut out the flowers, pistils and stems so that you can assemble them all at once.
- Then, place some hot silicone in the center of the ribbon.
Step 6:
- Glue the calla in the center and finally assemble a bow and glue it on the stem of the calla.
- And now these beautiful envelopes are ready!
As always you can decorate to your liking!
My post is translated by DeepL, edited with HTML tags and the photos are mine, captured with my Blu G5 and edited with Pic Collage.
I say goodbye wishing you to find my tutorial useful and that you have learned an easy way to make these envelopes.
Thank you very much for your company and if you liked it I will love to see your comment.
Greetings and blessings.
Te quedó hermosa felicidades 😘
Muchas gracias amiga.
Saludos.