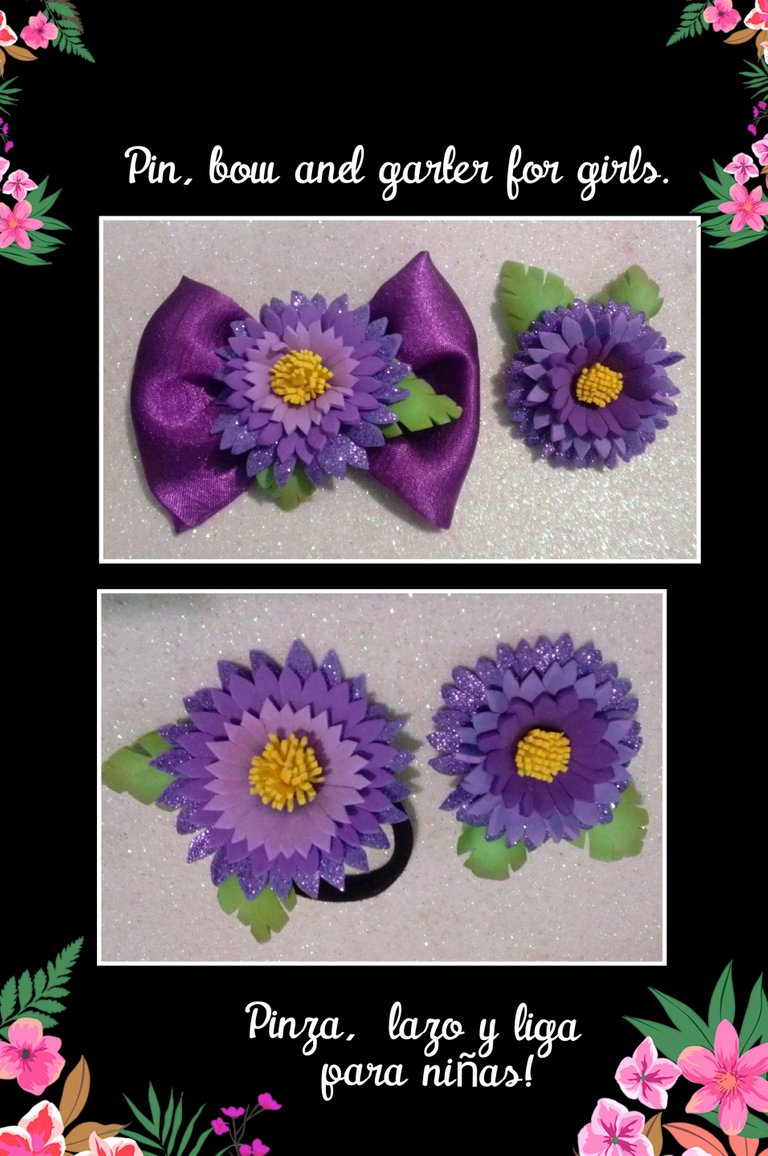
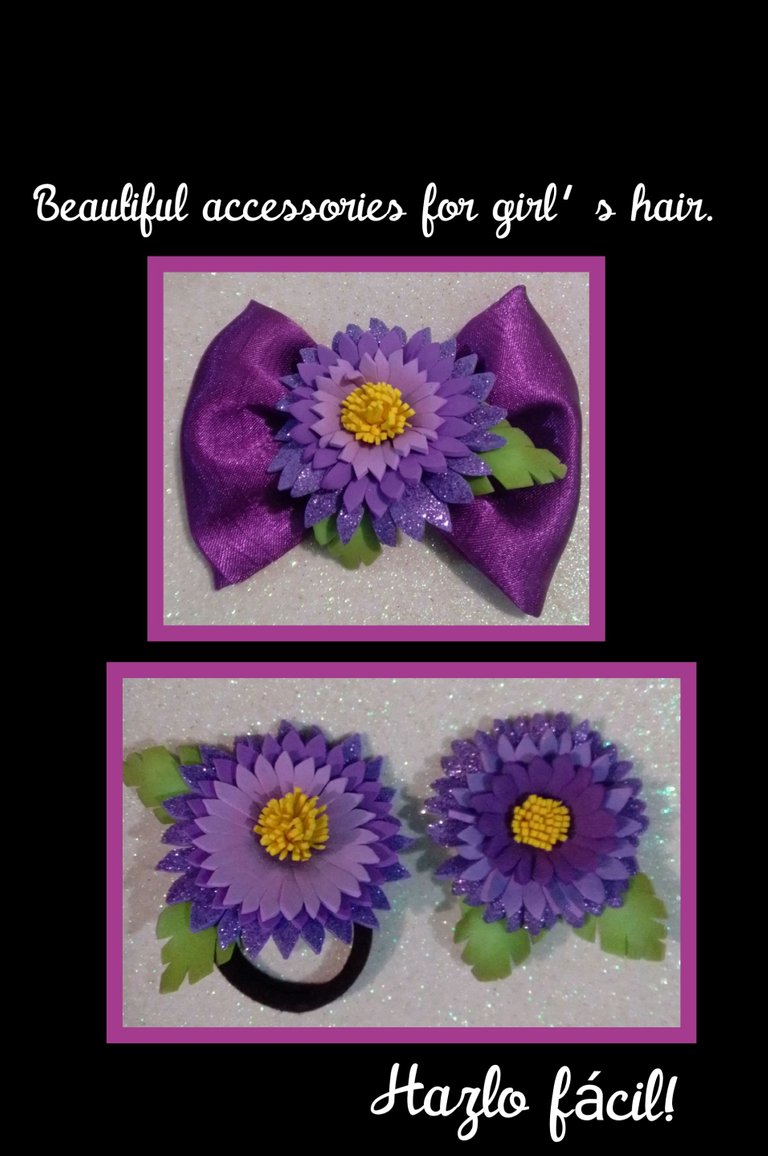
Hola, amigos visitantes y creadores de esta linda comunidad, saludos y bienvenidos sean todos.
Nuevamente por aquí, feliz de compartir este paso a paso con ustedes.
Así que como siempre te invito a que me acompañes en el proceso y veas como se hace.
Necesitas:
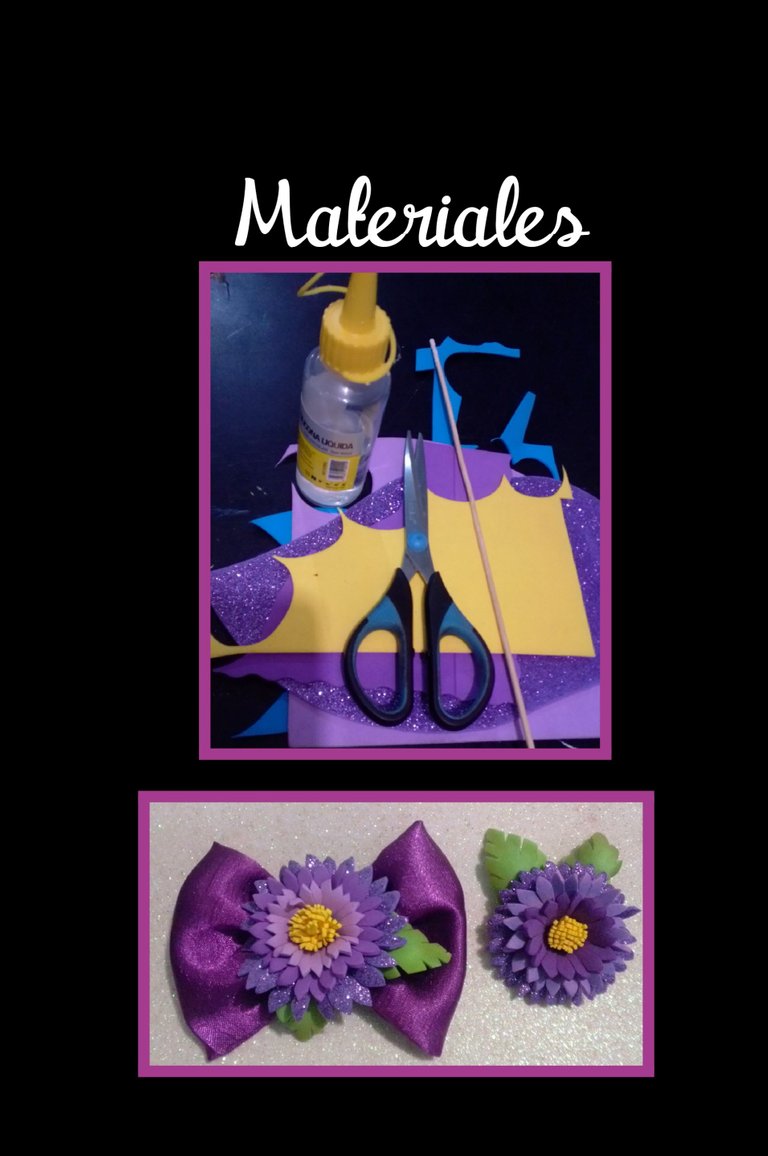
| Foami mate y escarchado | Retazo de tela |
|---|---|
| Tiza opcional | Silicón |
| Tijera | Palito de madera! |
| Aguja, Hilo | Esponja |
| Plancha eléctrica | Acocador |
Paso 1:
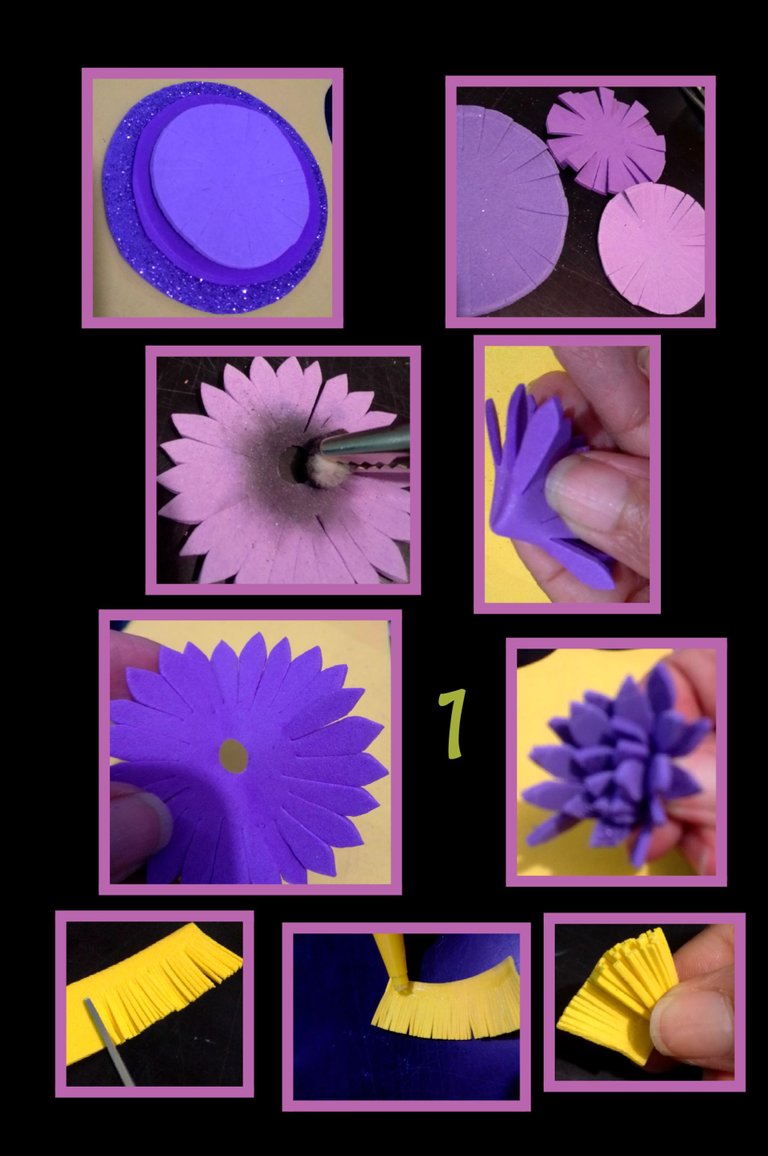
- Lo primero que haremos será recortar 3 círculos de foami de distintos tamaños aumentando 0,5cm a cada uno.
- Luego recorta en cuatro partes (forma de cruz) y luego en cada cuarto haz seis (6) cortes, te saldrán exactamente 24 pétalos, luego si quieres puedes pintar el centro con tiza o pintura al frío.
- Ahora dobla en cuatro el círculo y recorta en el centro para hacer un orificio (ver foto.
- Ahora recorta una tira de foami de 5cm de largo por 1,3cm de altura y corta tiritas de 1mm, aplica silicón en el borde inferior y enrolla para hacer los pistilos.
Paso 2:
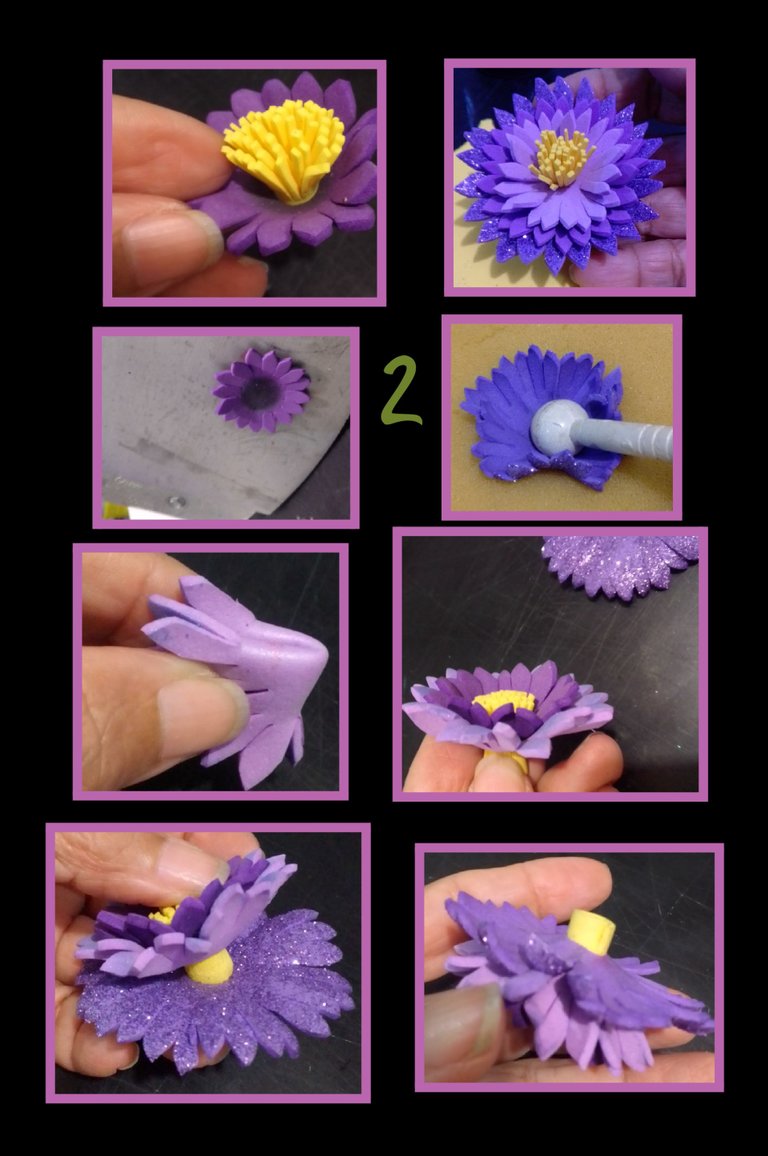
- Inserta los pistilos por los orificios de cada círculo de pétalos aplicando un poco de silicón entre cada círculo, así queda lista esta flor.
- Para hacer el otro modelo, aplica igual tiza en el centro y pon a calentar la plancha, coloca y acoca cada unos de estos círculos, haciendo presión en el centro sobre una esponja.
- Ahora dobla igual a la anterior y recorta el círculo para hacer el orificio e inserta los pistilos.
Paso 3:
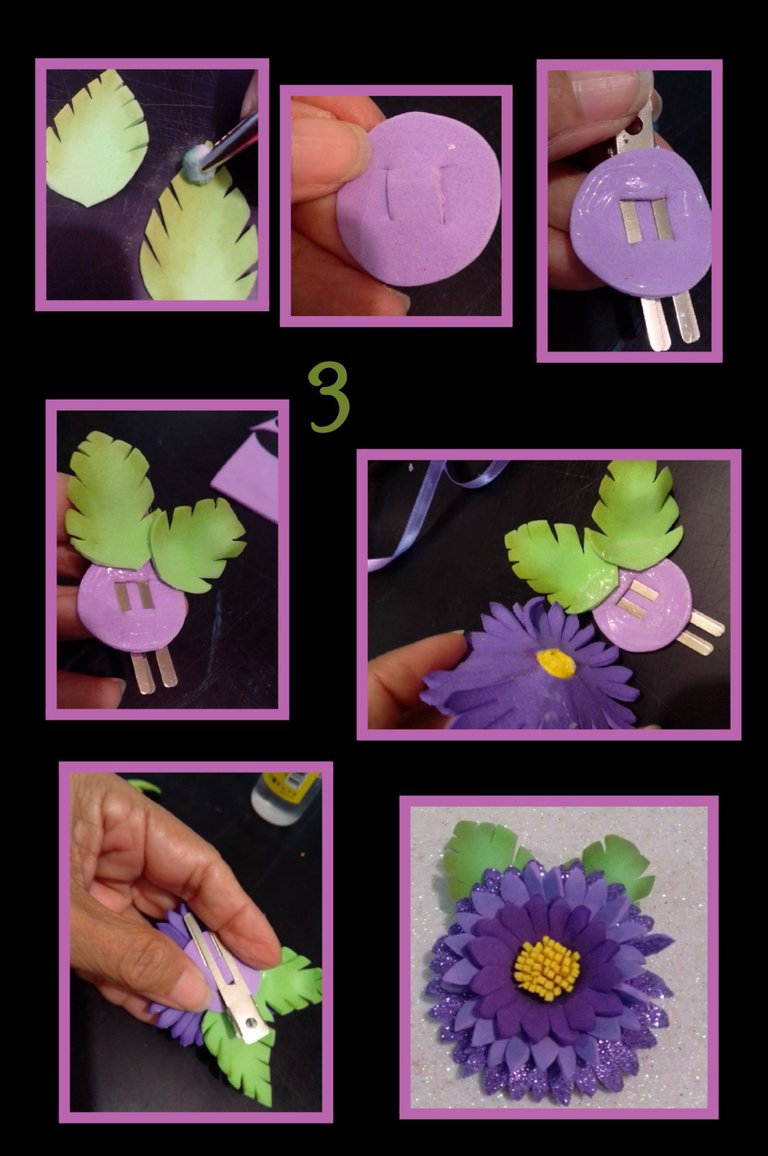
- Ahora recora hojas y colorea con tiza por todo el contorno, aparte recorta un círculo y haz dos ranuras del ancho de la pinza.
- Inserta la pinza y aplica silicon en el círculo y pega las hojas dejando un espacio para pegar la flor, haz presión hasta que pegue bien y así quedará lista.
Paso 4:
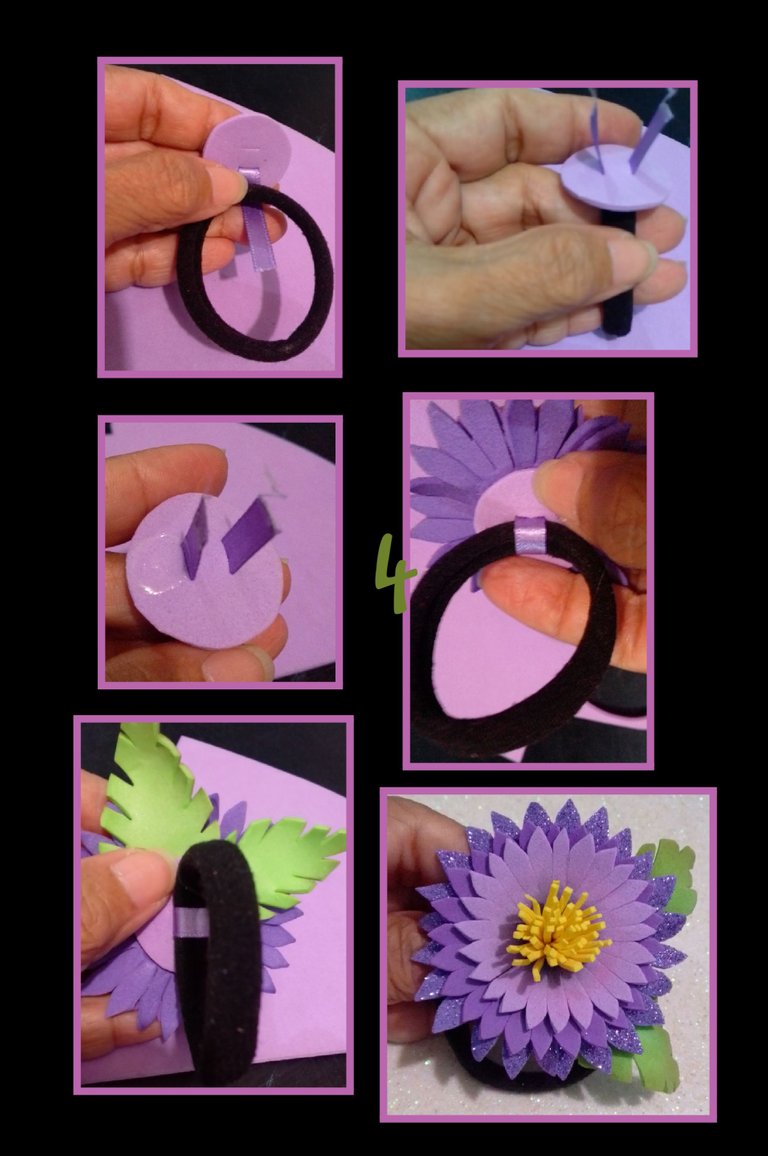
- Ahora, recorta otro círculo y haz las 2 aberturas e inserta un pedacito de cinta, luego la liga o moñera y pasa por el otro orificio hacia arriba, aplica silicón y dobla la cinta, (ver foto), aplica nuevamente silicón, pega las hojas y luego pega a la primera flor que hicimos.
(2do. modelo).
Paso 5:
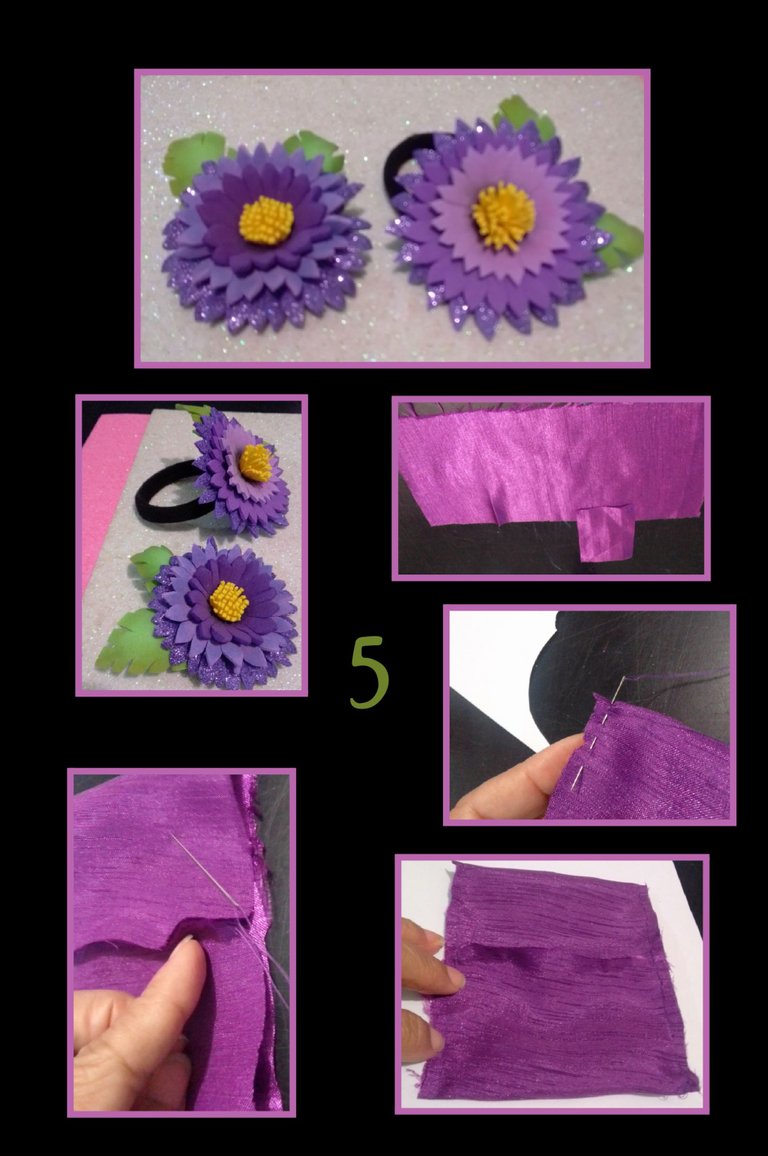
- Después de terminadas la pinza y la moñera, te mostraré como hacer el lazo con un retazo.
- Recorta un rectángulo y una tira de 5x4cms.
- Dobla los extremos hacia el medio del rectángulo y comienza a coser dejando un pedazo sin costura, esto será para voltear la tela.
- Ahora cose los laterales para cerrar el rectángulo y voltea por la abertura del centro.
Paso 6:
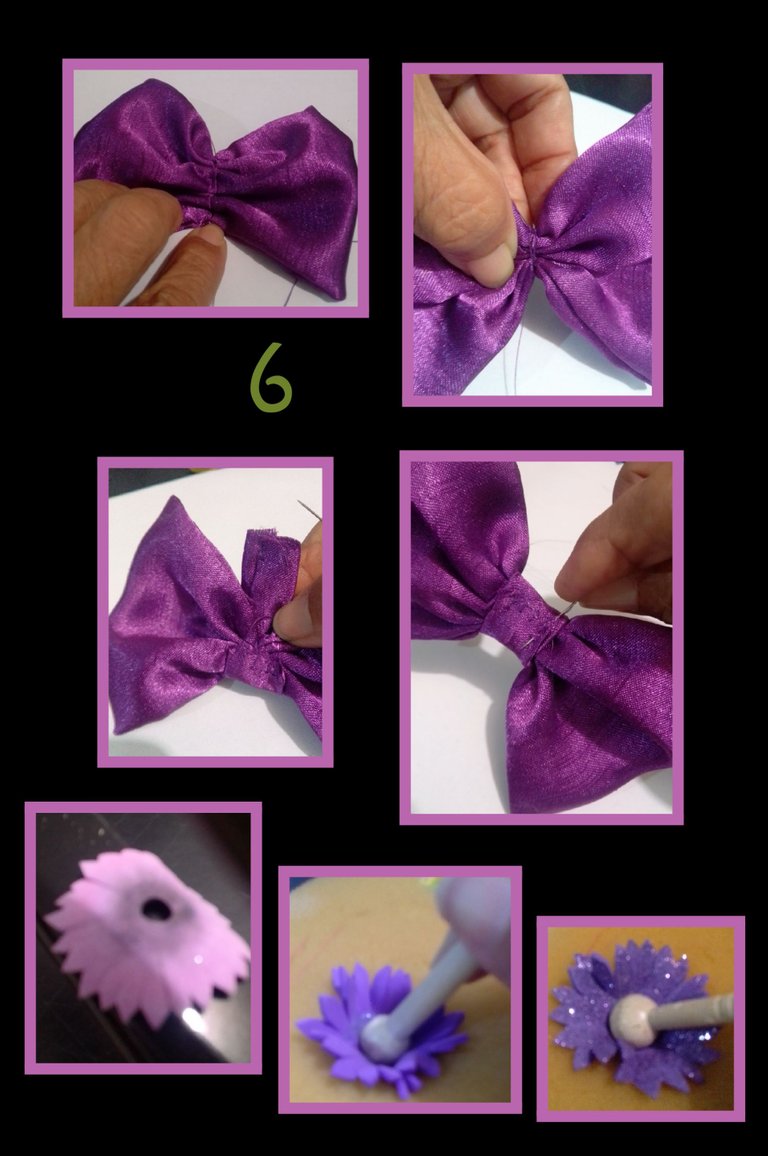
- Luego hilvana en el centro y hala el hilo para arruchar, hecho esto, dá dos o tres vueltas alrededor del centro y anuda.
- Ahora cose la tira del centro para terminar el lazo.
- Para la otra flor, calienta la plancha, coloca a calentar el foami y da forma en el centro con el acocador a los tres círculos.
Paso 7:
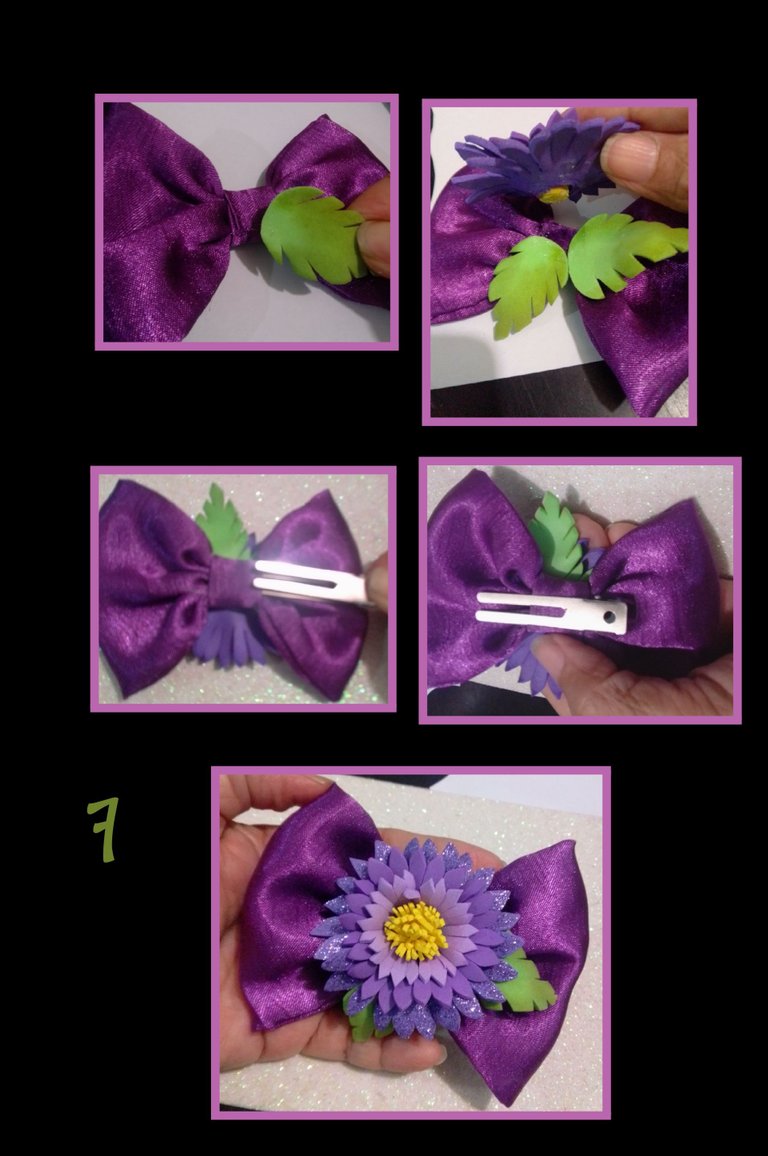
- Aplica silicón en las hojas y pega en el centro del lazo justo donde quedó el empate de la tira.
- Nuevamente aplica silicón sobre las hojas y en la parte baja de la flor y pega la flor haciendo presión.
- Y para terminar, inserta la pinza en la tira por la parte posterior y listo, así que da terminado.
- La pinza se puede remover en el momento que quieras, solo tienes que halar y listo.
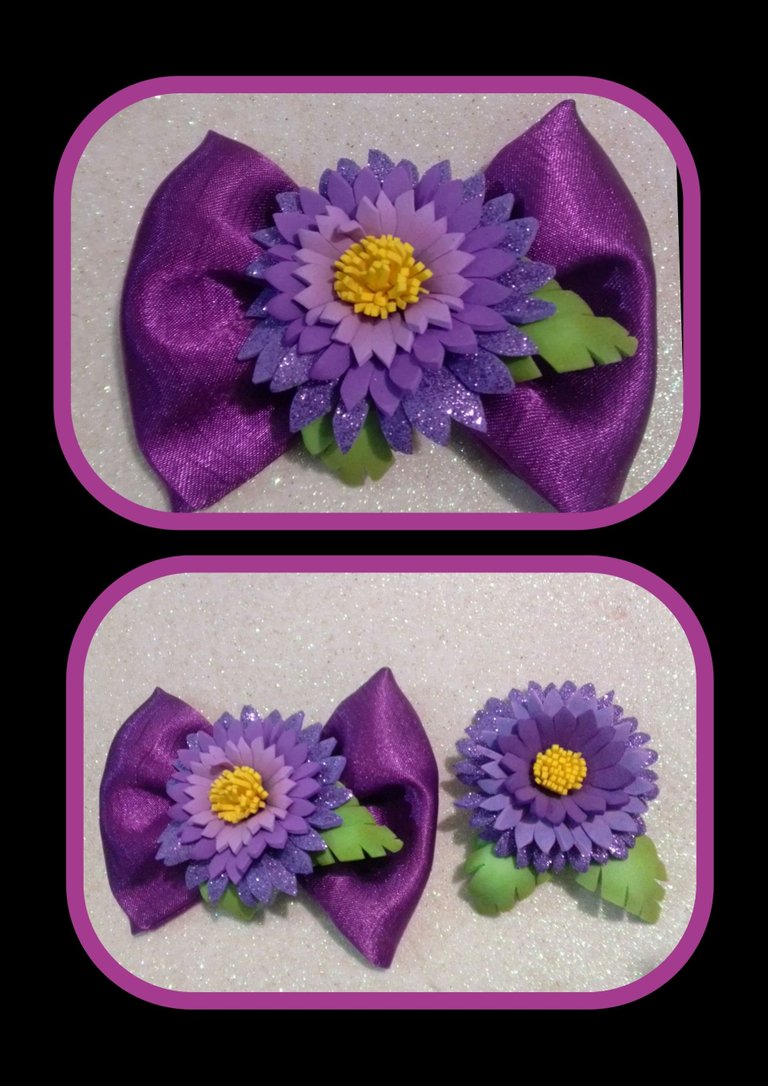

Me despedido esperando sea de tu agrado mi publicación y te sirva de guía para cualquier proyecto que quieras realizar.
English:


Hello, friends visitors and creators of this nice community, greetings and welcome to all of you.
I'm here again, happy to share this step by step with you.
So as always I invite you to join me in the process and see how it's done.
You need:

| Foami matte and frosted | Piece of fabric |
|---|---|
| Optional chalk | Silicone |
| Scissors | Wooden stick! |
| Water, thread | Sponge |
| Electric iron | Acocador |
Step 1:

- The first thing we will do is to cut out 3 circles of foami of different sizes, increasing 0.5cm each.
- Then cut in four parts (cross shape) and then in each quarter make six (6) cuts, you will get exactly 24 petals, then if you want you can paint the center with chalk or cold paint.
- Now fold the circle in four and cut in the center to make a hole (see photo).
- Now cut a strip of foami 5cm long by 1.3cm high and cut 1mm strips, apply silicone on the bottom edge and roll up to make the pistils.
Step 2:

- Insert the pistils through the holes of each circle of petals applying a little silicone between each circle, so this flower is ready.
- To make the other model, apply the same chalk in the center and heat the iron, place and place each of these circles, pressing in the center on a sponge.
- Now fold the same as the previous one and cut out the circle to make the hole and insert the pistils.
Step 3:

- Now cut out leaves and color with chalk all around, then cut out a circle and make two grooves the width of the tweezers.
- Insert the tweezers and apply silicone on the circle and glue the leaves leaving a space to glue the flower, press until it sticks well and it will be ready.
Step 4:

- Now, cut out another circle and make the 2 openings and insert a small piece of ribbon, then the ribbon and go through the other hole upwards, apply silicone and fold the ribbon, (see photo), apply silicone again, glue the leaves and then glue to the first flower we made.
(2nd. model).
Step 5:

- After finishing the clip and the bow, I will show you how to make the bow with a piece of ribbon.
- Cut out a rectangle and a 5x4cms strip.
- Fold the ends to the middle of the rectangle and start sewing leaving a seamless piece, this will be to flip the fabric.
- Now sew the sides together to close the rectangle and flip through the center opening.
Step 6:

- Then baste in the center and pull the yarn through to purl, then make two or three turns around the center and knot.
- Now sew the center strip to finish the loop.
- For the other flower, heat the iron, heat the foami and shape the three circles in the center with the heat press.
Step 7:

- Apply silicone on the leaves and glue in the center of the ribbon just where the tie of the strip was left.
- Again apply silicone on the leaves and on the lower part of the flower and glue the flower by applying pressure.
- And to finish, insert the clip on the back of the strip and that's it, so you are done.
- The clip can be removed whenever you want, just pull and that's it.


I say goodbye hoping you like my publication and serve as a guide for any project you want to do.
Saludos y muchas gracias por el apoyo y comentario.
Se ven hermosos los lazos con estas flores elaboradas con foami. Todo lo que usted hace le queda bello. 🤗
Bendecido día Lelys, muchas gracias por tus palabras.
Usted también hace trabajos bellos.
Dios bendiga sus manos.
Saludos.
Muy creativa se ven estos bellos lazos y sus colores, me encantan como quedaron, feliz dia.
Hola amiga Eylis, que bueno que te gustaron.
Gracias por comentar.
Saludos.
Realmente hermosas!
Hola! saludos.
Muchas gracias y me alegro al saber que te gustaron.