Hola y bienvenidos sean todos los que visitan mi blog.
¿Cómo están?
Para esto vas a necesitar los siguientes materiales y moldes:
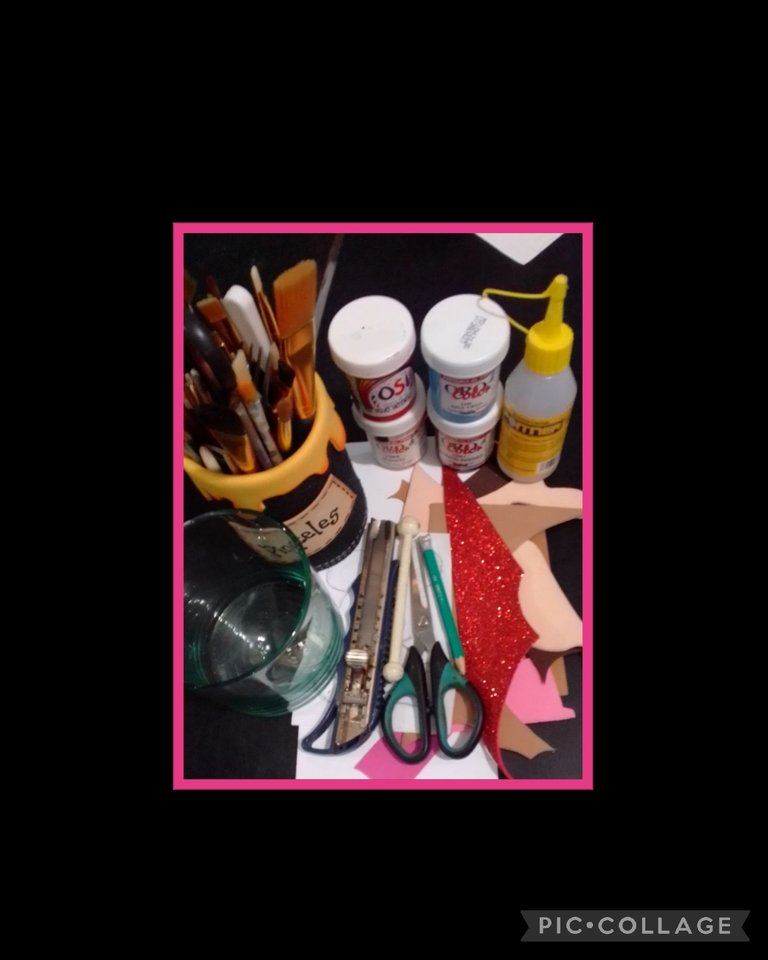
| Cilindro de vidrio | Foami mate y escarchado |
|---|---|
| Cartulinas | Cartón de caja |
| Papel crepé metalizado y nacarado | Tijera |
| Pinturas y pinceles | Lápiz |
| Regla y cinta métrica | Acocador |
| Silicón líquido | plancha eléctrica |
| Dibujos o moldes | palito de madera |
Comencemos:
Paso 1:
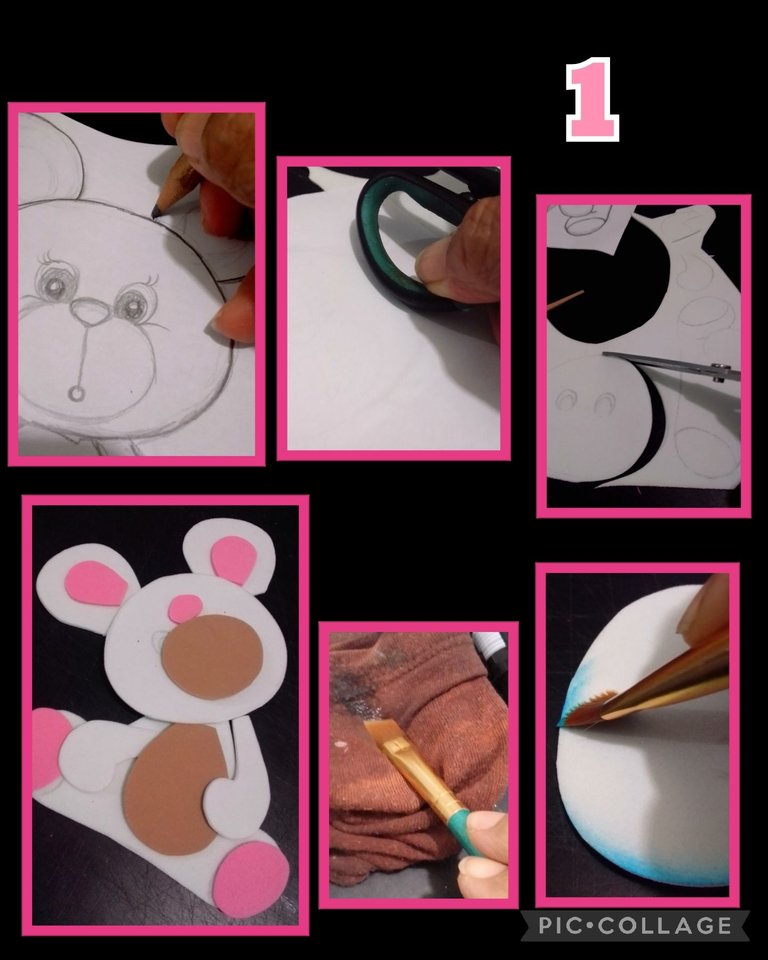
- Remarca el dibujo con lápiz de mina suave o blanda, (esto es para que se fije al foami.) luego frota el papel sobre el foami con la ayuda de la tijera, este paso lo repetirás con cada una de las piezas del foami y con el color correspondiente.
- Recorta las piezas y fíjate que las piezas estén completas.
- Luego moja en agua, un pincel angular y pasa por un pañito para quitar el exceso de agua y moja la punta del pincel en pintura azul y comienza a pasar por todo el borde de las piezas.
Paso 2:

- Sigue pintando todos los bordes, deja secar y rellena los ojos
con un pincel delgado y luego con un pincel liner o marcador punta fina y delinea los ojos, pinta cejas y pestañas. - Luego calienta la plancha a temperatura media y coloca las piezas a las que les darán volumen.
Paso 3:

- Después de termoformar el hocico del osito, delinea por el centro y con la punta del pincel haz un punto rojo para la boca y luego sobre coloca un punto con marrón para bajar el color.
- Aplica silicón y comienza a pegar y armar el osito y con un algodón pasado por tiza, pinta los cacheticos.
Paso 4:
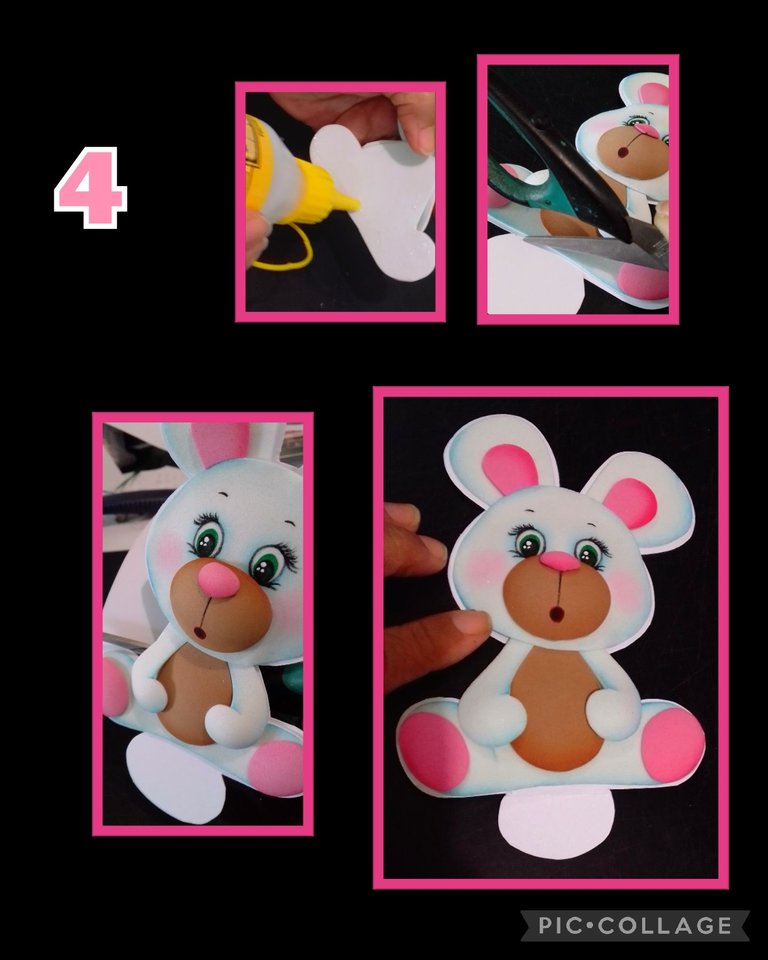
- Ahora aplica silicón en la parte posterior del oso y pega sobre cartulina blanca, recorta y deja en la parte de abajo, un círculo.
¿Te preguntarás para qué?
Este círculo será la base para pegar sobre la tapa.
Paso 5:
Tapa:
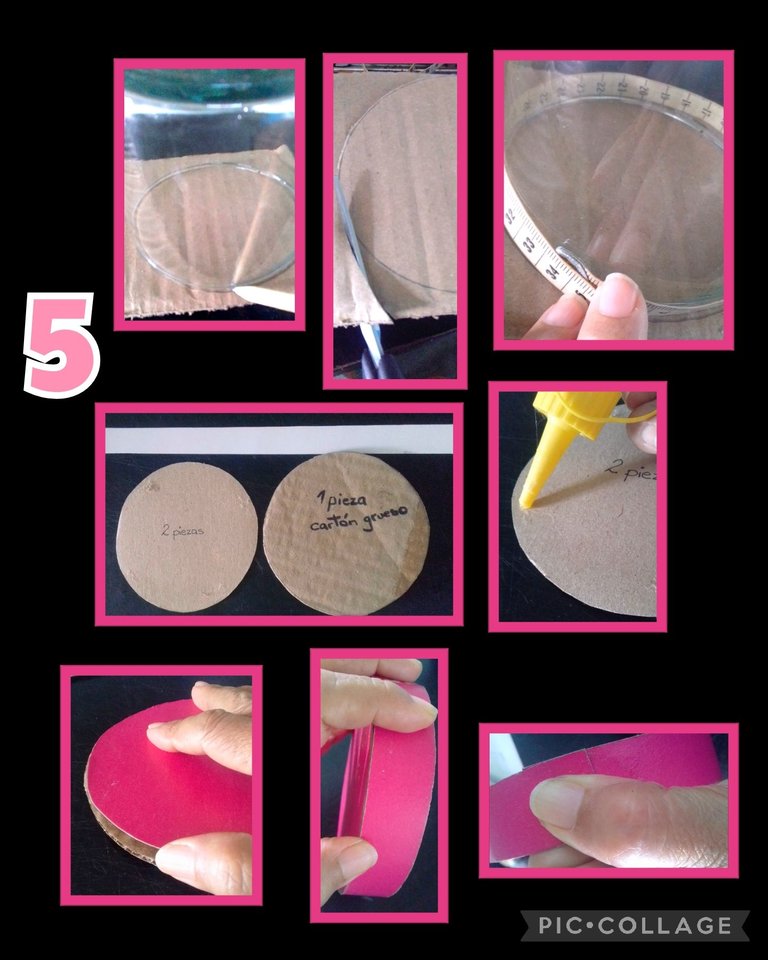
En este paso vas a colocar la boca del cilindro sobre el cartón de la caja y marca por todo el borde (1 pieza) y en cartulina 2 piezas.
Mide el contorno del cilindro para recortar la tira de la tapa.
Ahora aplica silicón y pega un círculo de cartulina al círculo de cartón de caja, luego aplica silicón por todo el borde, pega la tira de cartulina y presiona en las puntas hasta que pegue bien.
Paso 6:
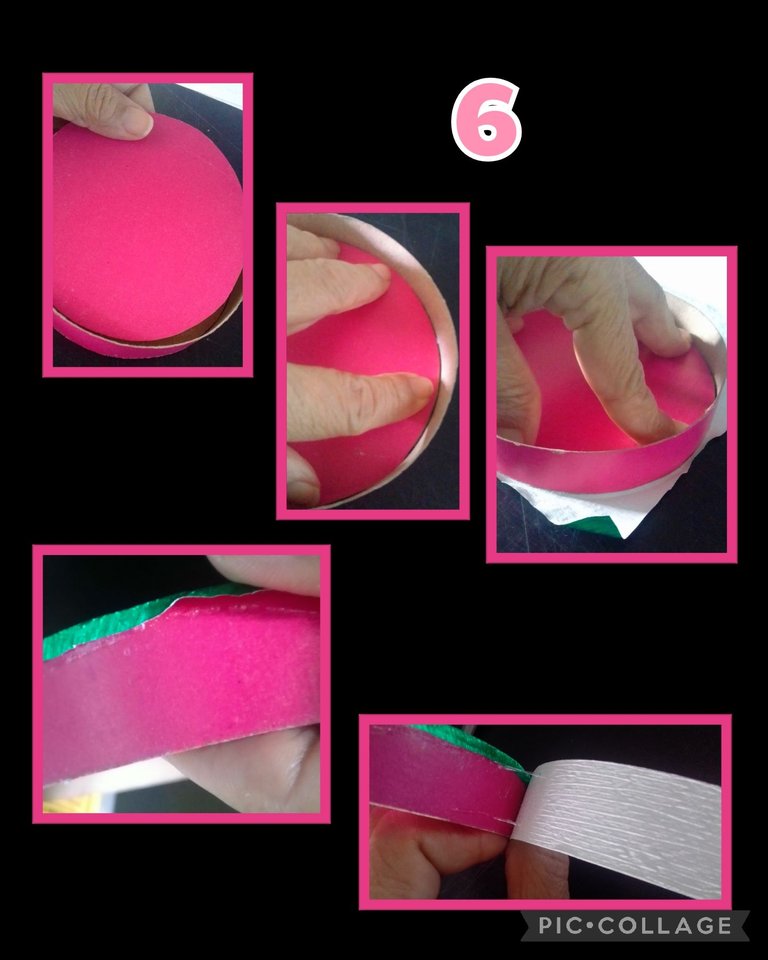
- Al otro círculo de cartulina, aplica silicón y pega en la parte de adentro de la tapa para tapar el cartón y tenga un buen acabado.
- Si utilizas cartulina doble faz puedes dejar sin forrar, pero para darle un toque especial, puedes forrar con papel crepé metalizado, como hice en este caso.
- Aplica silicón a la tapa y pega sobre el papel luego recorta dejando un borde de 3 mm y dobla hacia abajo, después recorta una tira en papel y pega por todo el borde de la tapa.
Paso 7
Medallón:

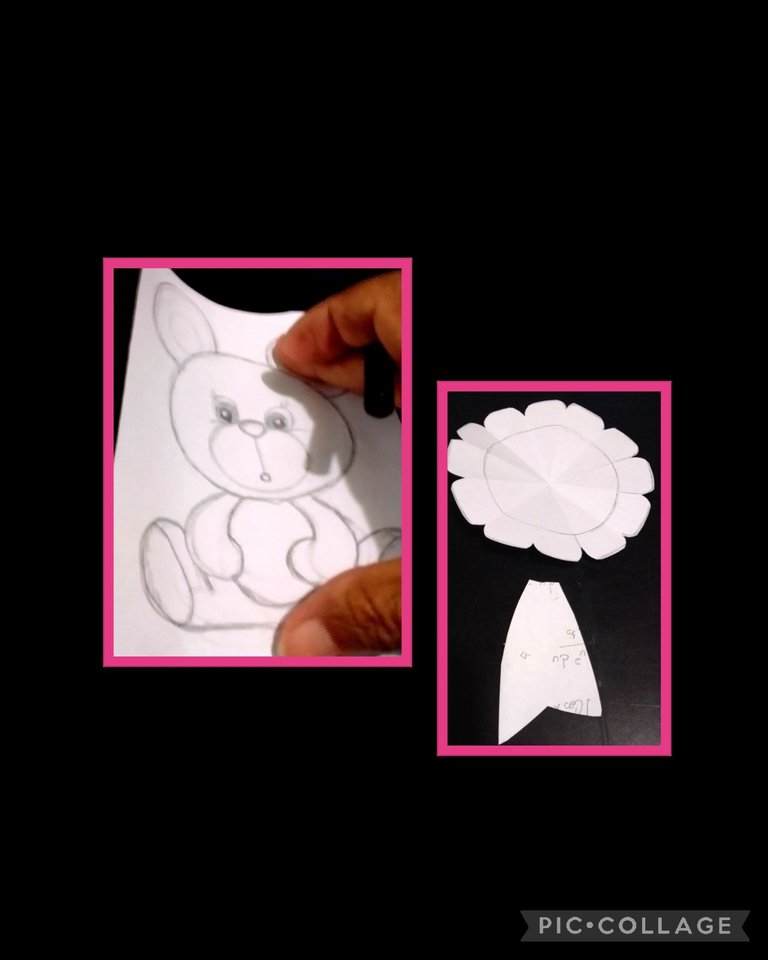
- Haz el molde recortando un círculo del tamaño deseado, dibuja en el centro otro más pequeño y recorta.
- Aparte dobla a la mitad y sigue doblando las veces que quieras para hacer las divisiones y luego recorta redondeando en cada doblez y luego dibuja y recorta los brazos del medallón.
- Ahora marca las piezas del rosetón en la cartulina escarchada dorada y el centro en cartulina o foami blanco.
- Luego dibuja las palabras en papel, remarca y transfiere al foami escarchado rojo, recorta y pega sobre cartulina o foami.
Paso 8:
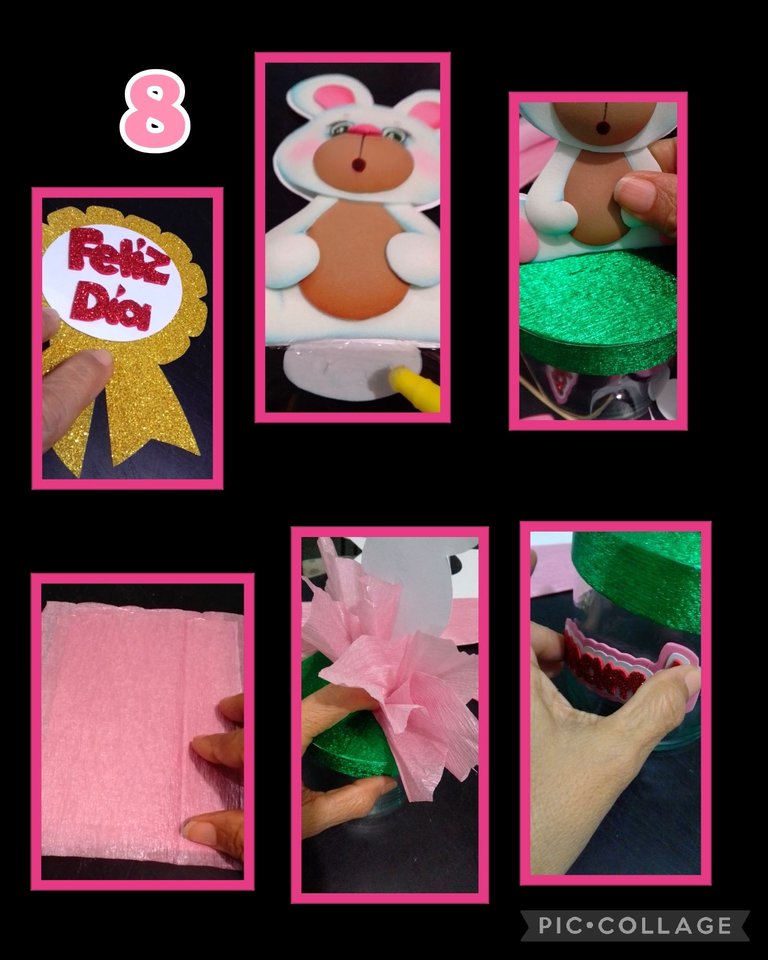
- Arma el medallón y pega las palabras.
- Ahora aplica silicón en la base del osito y pega en el centro de la tapa.
- Recorta cuadros en papel crepé nacarado, aplica silicón en el centro y pega en la parte de atrás para tapar la base del oso y luego pega con silicón líquido la palabra (mamá) en el centro del cilindro, haz presión hasta que pegue bien.
Paso 9:

- Pinta un palito de madera, deja secar y luego pega en la parte posterior del medallón fijando con un círculo de cartulina y deja secar.
- Luego aplica silicón en uno de los brazos y pega el palito al cuerpo del osito y para terminar, recorta corazones en foami escarchado y pega en los pañuelitos de papel y al frente de la tapa.
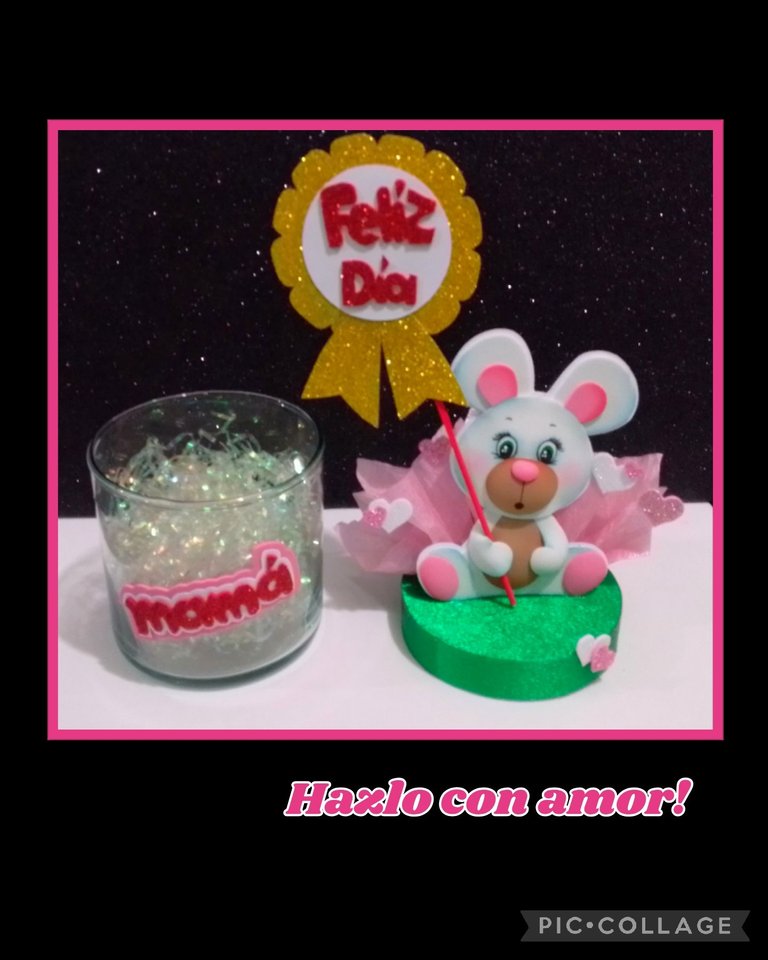
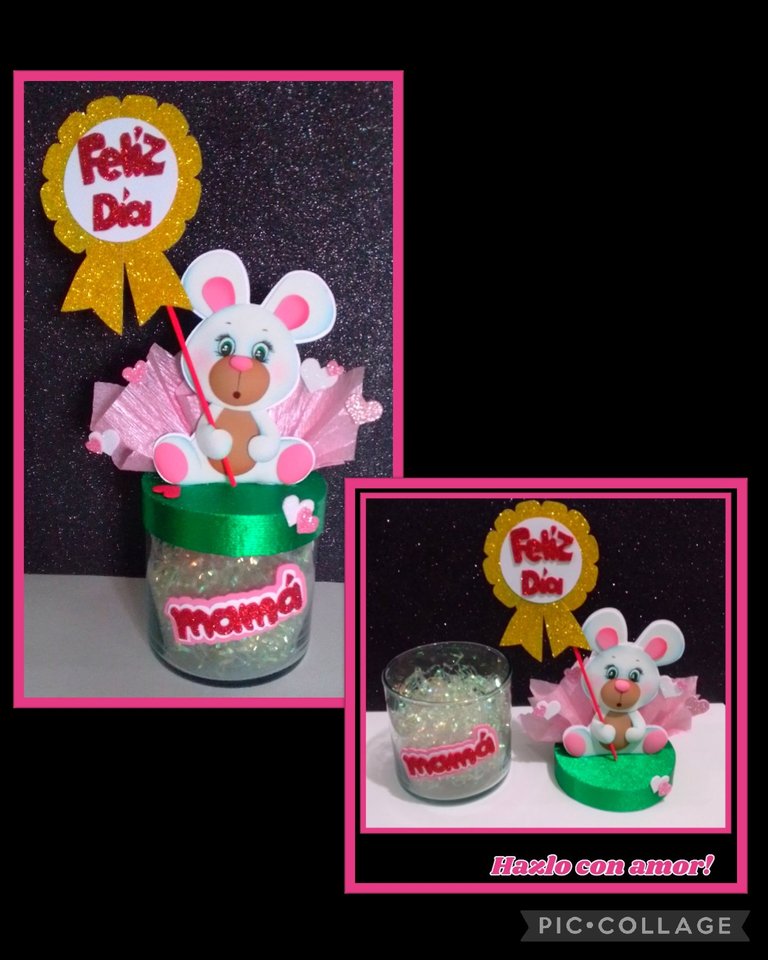
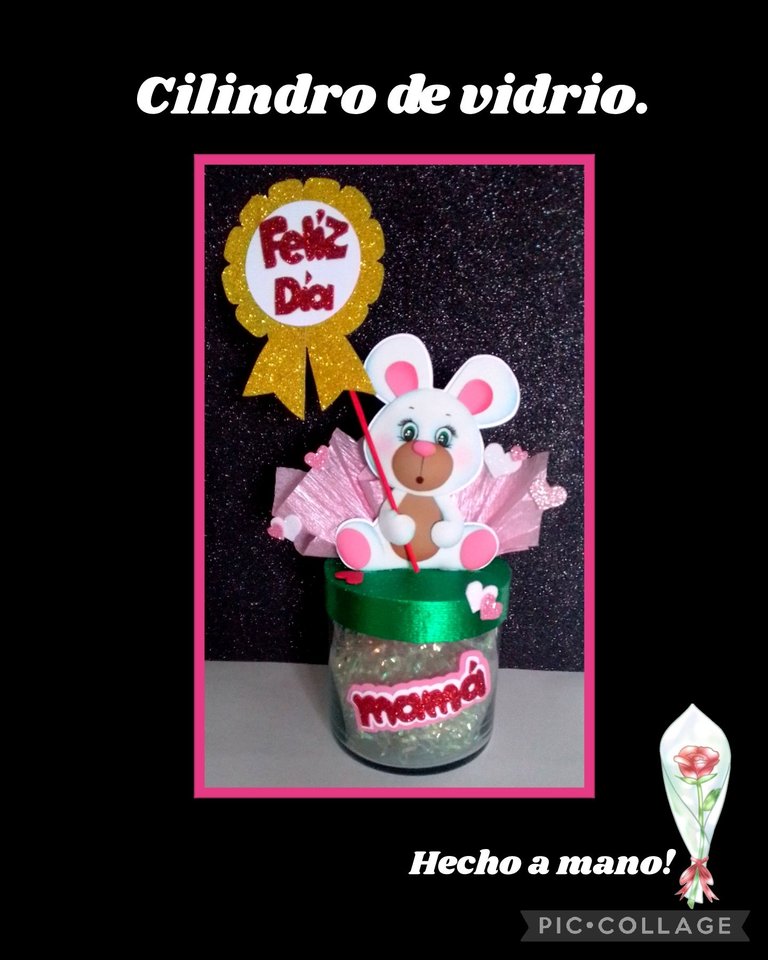
Así quedó decorado este cilindro de vidrio, también lo puedes realizar reciclando un envase plástico y sino puedes hacer sólo el arreglo del osito y de base le puedes colocar un círculo de anime o icopor.
Solo es cuestión de gusto.

Editada con HTML y las fotos son capturadas con mi Blu G5 y editadas con Pic Collage.

Me despido agradeciendo tu compañía, espero me sigas visitando.
Hasta mi próximo tutorial y si deseas, puedes comentar.
Saludos.
Ingles:


Hello and welcome to all who visit my blog.
How are you doing?
For this you will need the following materials and molds:

| Glass cylinder | Frosted and frosted foami |
|---|---|
| Cardboard | Cardboard box |
| Metallized and pearlescent crepe paper | Scissors |
| Paints and paintbrushes | Pencil |
| Ruler and tape measure | Lightening pencil |
| Liquid silicone | electric iron |
| Drawings or molds | Wooden stick |

Let's get started:
Step 1:

- Outline the drawing with a soft pencil (this is to fix it to the foami), then rub the paper over the foami with the help of the scissors, repeat this step with each of the pieces of the foami and with the corresponding color.
- Cut out the pieces and make sure the pieces are complete.
- Then dip an angled brush in water and pass it through a tissue to remove excess water and dip the tip of the brush in blue paint and begin to pass around the edge of the pieces.
Step 2:

- Continue painting all the edges, let it dry and fill in the eyes with a thin brush and then
with a thin brush and then with a liner brush or fine tip marker and outline the eyes, paint eyebrows and eyelashes. - Then heat the iron to medium heat and place the pieces to be volumized.
Step 3:

- After thermoforming the muzzle of the bear, outline the center and with the tip of the brush make a red dot for the mouth and then place a dot with brown to lower the color.
- Apply silicone and begin to glue and assemble the bear and with a cotton swab dipped in chalk, paint the cheeks.
Step 4:

- Now apply silicone on the back of the bear and glue on white cardboard, cut out and leave a circle on the bottom.
You may wonder why?
This circle will be the base to glue on the lid.
Step 5:
- Lid:

- In this step you are going to place the mouth of the cylinder on the cardboard of the box and mark all around the edge (1 piece) and on cardboard 2 pieces.
- Measure the outline of the cylinder to cut out the strip for the lid.
- Now apply silicone and glue a cardboard circle to the cardboard circle, then apply silicone all around the edge, glue the cardboard strip and press on the ends until it sticks well.
Step 6:

- To the other cardboard circle, apply silicone and glue to the inside of the lid to cover the cardboard and give it a good finish.
- If you use double-sided cardboard, you can leave it unlined, but for a special touch, you can line it with metallic crepe paper, as I did in this case.
- Apply silicone to the lid and glue on the paper, then cut leaving a 3 mm border and fold down, then cut a strip of paper and glue all around the edge of the lid.
Step 7:
Medallion:

- Make the mold by cutting out a circle of the desired size, draw a smaller circle in the center and cut out.
- Fold in half and continue folding as many times as you want to make the divisions and then cut out rounding at each fold and then draw and cut out the arms of the medallion.
- Now mark the rosette pieces on the gold frosted cardstock and the center on white cardstock or foami.
- Then draw the words on paper, outline and transfer to red frosted foami, cut out and glue onto cardstock or foami.
Step 8:

- Assemble the medallion and glue the words.
- Now apply silicone to the base of the teddy bear and glue in the center of the lid.
- Cut out squares in pearlescent crepe paper, apply silicone in the center and glue on the back to cover the base of the bear and then glue with liquid silicone the word (mom) in the center of the cylinder, press until it sticks well.
Step 9:

- Paint a wooden stick, let dry and then glue on the back of the medallion fixing with a circle of cardboard and let dry.
- Then apply silicone on one of the arms and glue the stick to the body of the bear and finally, cut out hearts in frosted foami and glue on the tissue paper and the front of the lid.
This is how this glass cylinder was decorated, you can also make it by recycling a plastic container or you can just make the teddy bear arrangement and as a base you can place a circle of anime or styrofoam.
It is only a matter of taste.


Edited with HTML and the photos are captured with my Blu G5 and edited with Pic Collage.

I say goodbye thanking you for your company, I hope you keep visiting me.
Until my next tutorial and if you wish, you can comment.
Greetings.
Te quedo muy hermoso, seguro la afortunada mamá se pondrá muy contenta, suerte con tu publicación, gracias por compartir tu idea.
Hola katiuska, muchas gracias por tu comentario.
Lo hago con mucho cariño.
Saludos.
Ha quedado hermoso 🤩 Bien elaborado. Saluditos Betty
Gracias Kelly por leerme y comentar.
Saludos.🤗
Hermoso. Me encanta el osito. Sería un obsequio ideal para mamá.
Gracias por compartir el paso a paso.
Hola amiga y que bueno saberlo.
Seguro que sí.
A ti por visitarme y comentar.
Saludos.
Hola amiga, tu siempre haciendo cosas tan bellas, es un obsequio muy bonito para las madres y para cualquier ocasión, me encanta la carita del oso, una mirada muy tierna.
Holas amiga, muchas gracias, tu también trabajas muy lindo.
Sí amiga, para las madres está ideal pero eso el lo bueno, se puede usar para cualquier evento.
Saludos y bendiciones.
Que tierno se ve el osito, gran trabajo te felicito amiga, es un lindo detalle para mamá.
Gracias rodnellys por leerme y comentar..
Saludos.