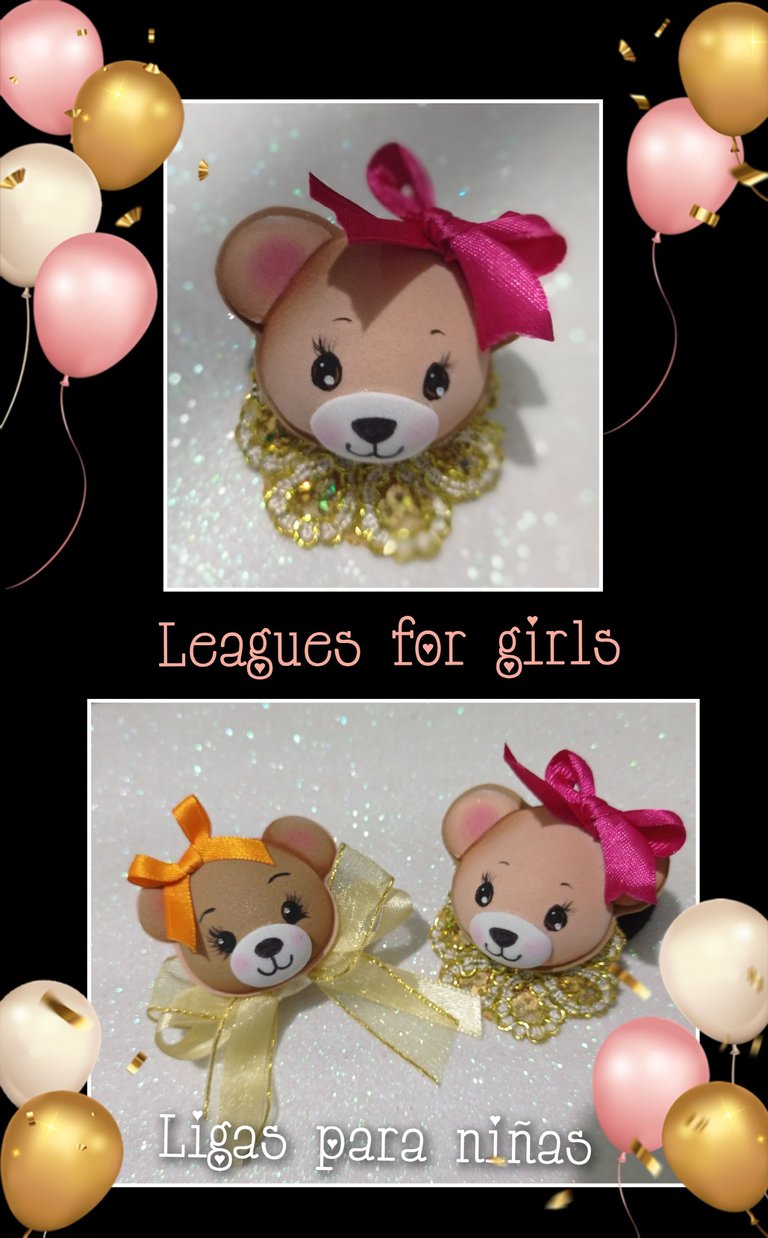
Bueno ahora quiero mostrarles en este tutorial como pueden decorar unas ligas o colas, haciendo unos Ositos con retazos de foami y cinta que sé, le encantarán a las pequeñas de la casa.
Esta es otra manera de decorarlas así que te invito a que me acompañes a ver el procedimiento.
Vas a necesitar:
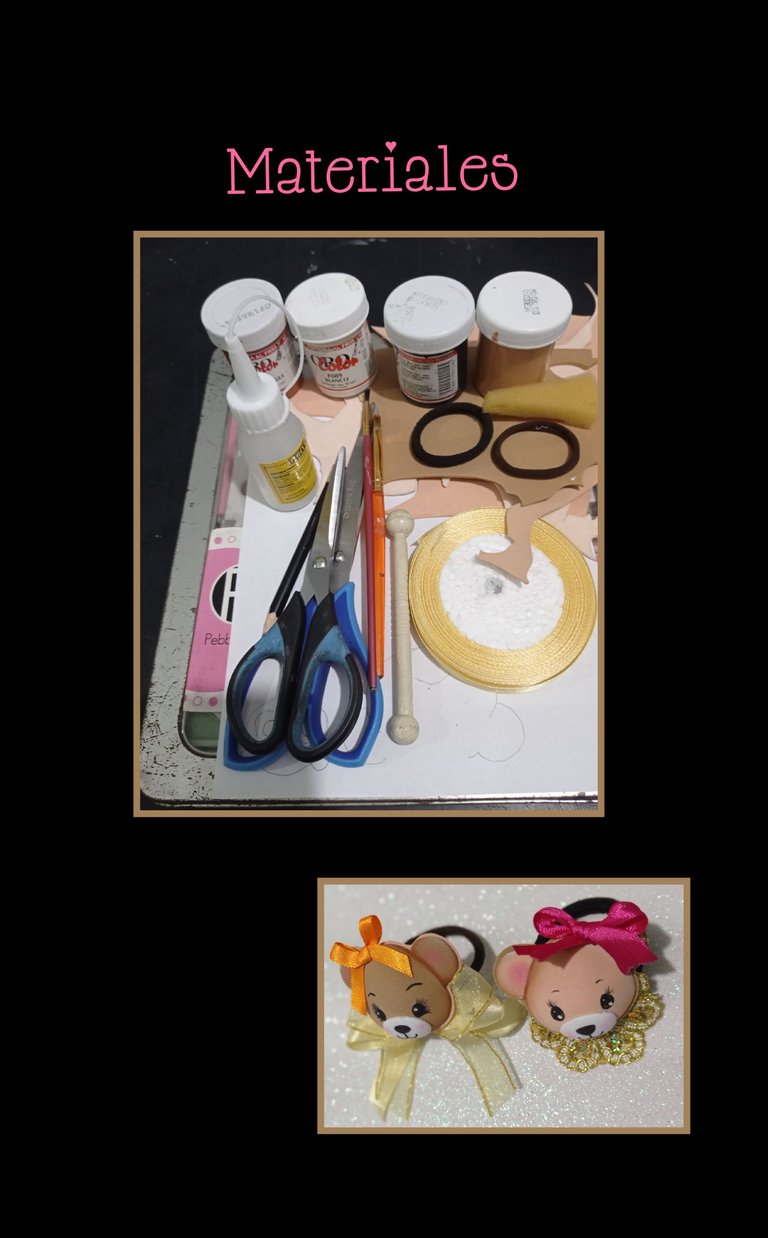
| Ligas o colas | Foami mate retazos |
|---|---|
| Cintas de tela | Pinturas y pinceles |
| Tiza | Tijera |
| Esponja | Acocador |
| Marcador y lápiz | Silicón |
| Dibujo de osito | Palito de madera |
| Plancha eléctrica |
Paso 1:
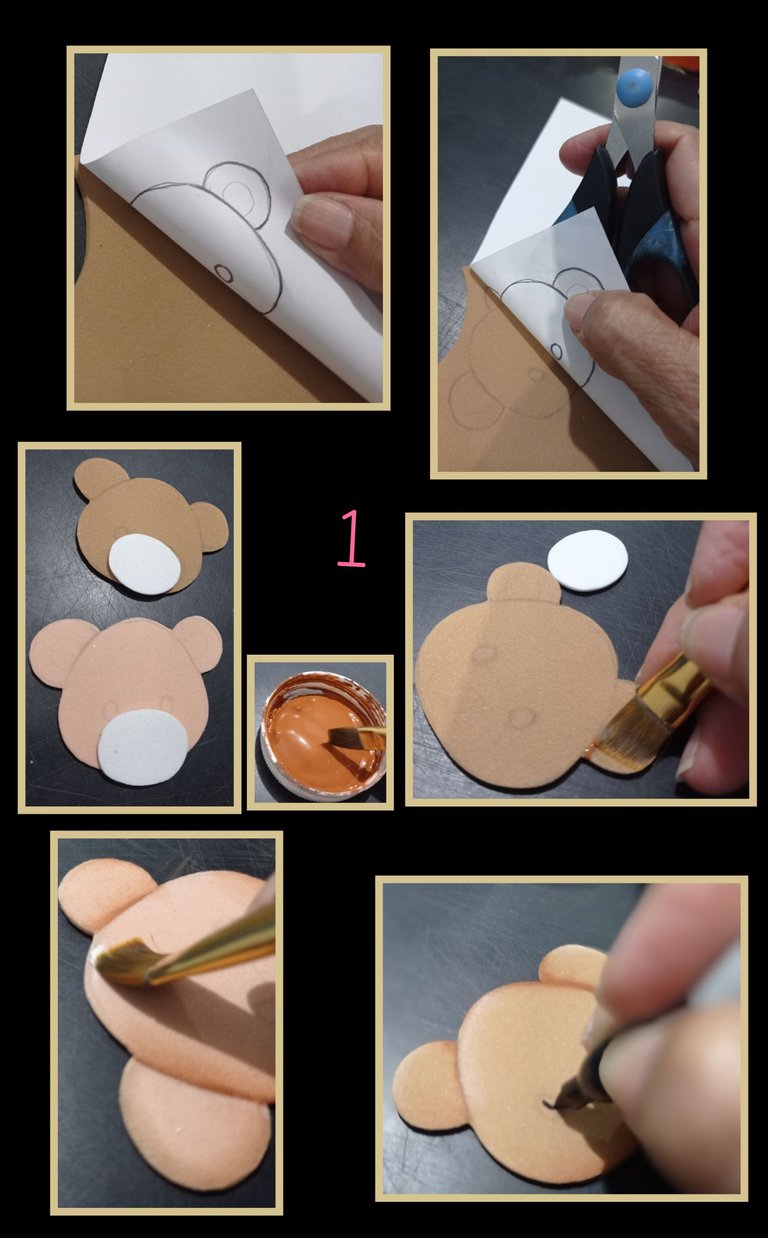
- Remarca el dibujo con lápiz de mina blanda, luego coloca sobre el recorte de foami y con los anillos de la tijera, frota haciendo presión para que se transfiera bien el dibujo y luego sin soltar el papel, levanta de un lado para asegurar que se haya marcado todo el dibujo y recorta por toda la orilla.
- Luego humedece el pincel en agua, retira el exceso pasando por un paño seco y luego moja en pintura la punta del pincel y comienza a pintar por las líneas de las orejas y todo el borde, luego cuando seque, pasa el pincel con un poco de pintura blanca para darle brillo a las caritas y con el marcador o pincel pinta los ojos y con la tiza pinta el centro de las orejas y mejillas.
Paso 2:
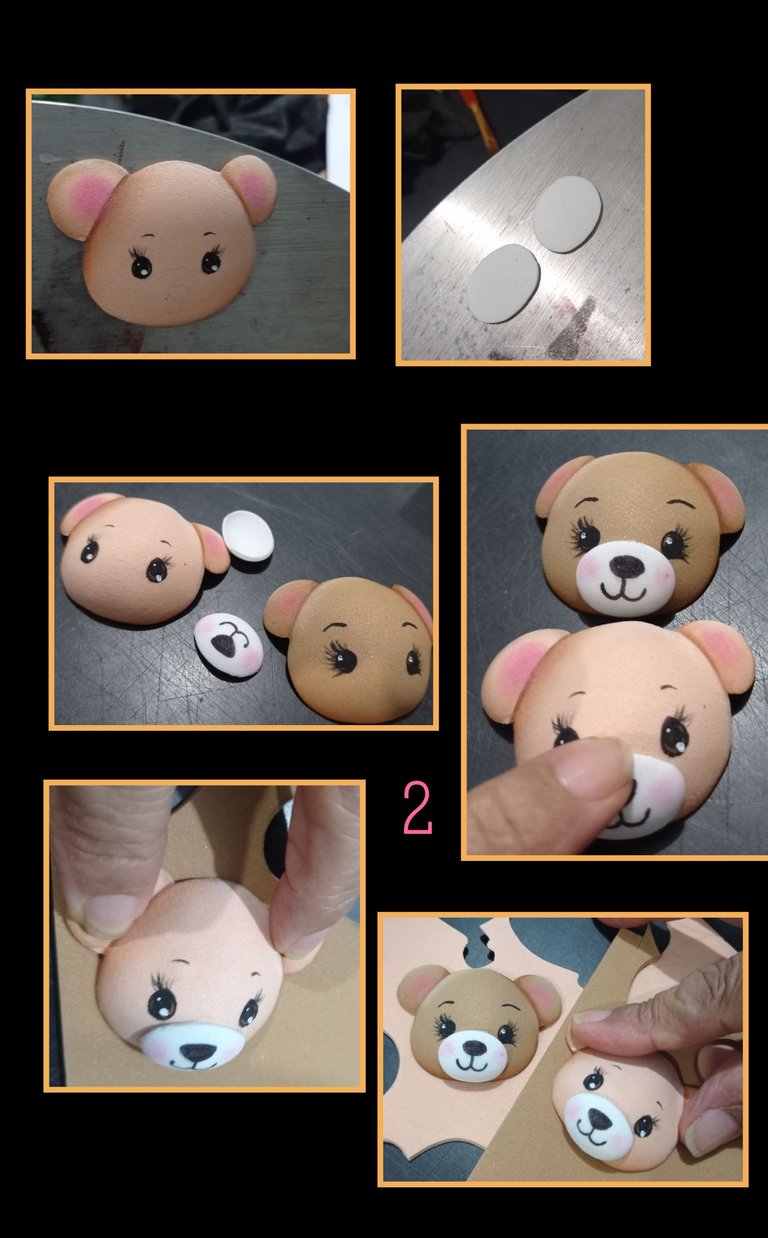
- Ahora calienta la plancha a temperatura media alta y coloca las caritas y hocicos hasta que tomen forma. si no tienes acocador puedes usar una bolita de anime o un objeto redondo.
- Aplica silicón en el hocico y pega haciendo un poco de presión, igual haces en las orejas y todo el contorno de la cabeza y pega sobre un pedazo foami.
Paso 3:
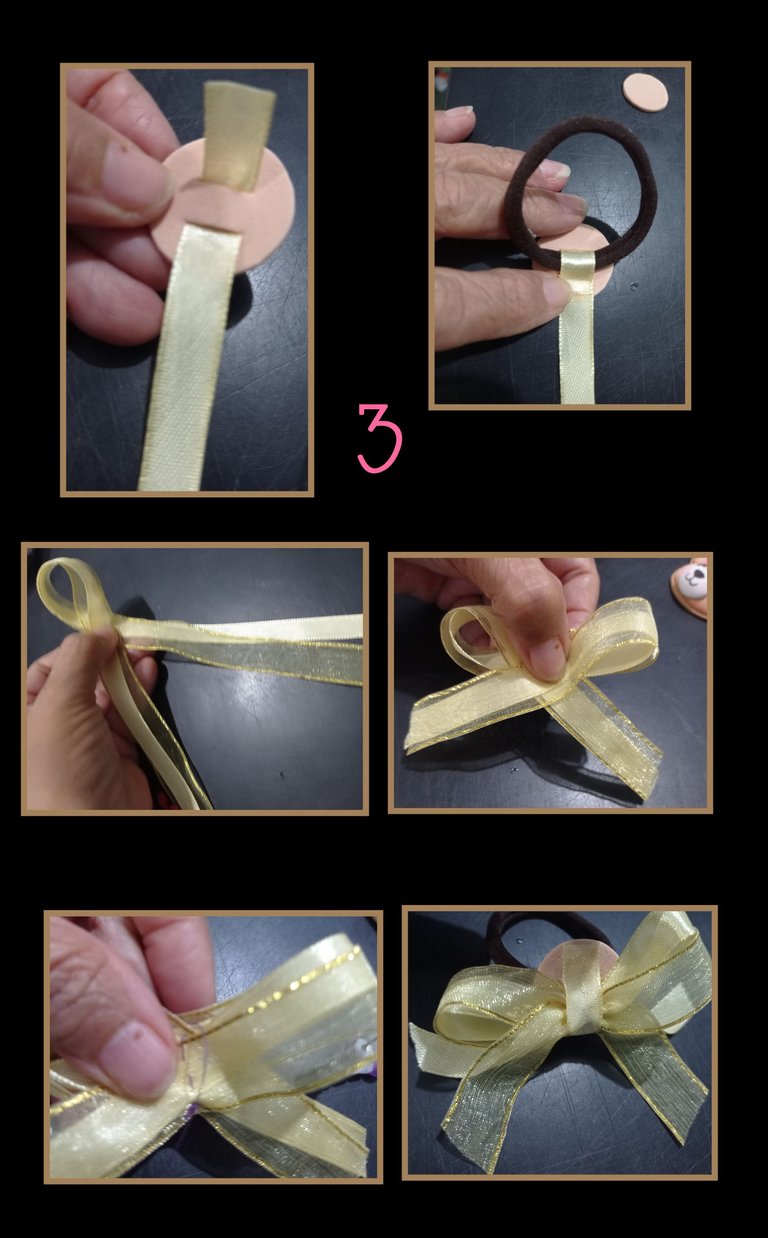
- Recorta un círculo de 2 ó 3cm y haz dos incisiones una sobre la otra e inserta la cinta de tela, luego aplica silicón en la punta corta de la cinta y mete la liga y pega la cinta sujetando la liga.
- Ahora toma un pedazo de cinta y haz una lazada del lado izquierdo y luego otra hacia la derecha y haz unas puntadas en el centro o simplemente haz una lazo como de zapato y pega con la cinta que sujeta la liga, así quedará armado el lacito.
Paso 4:
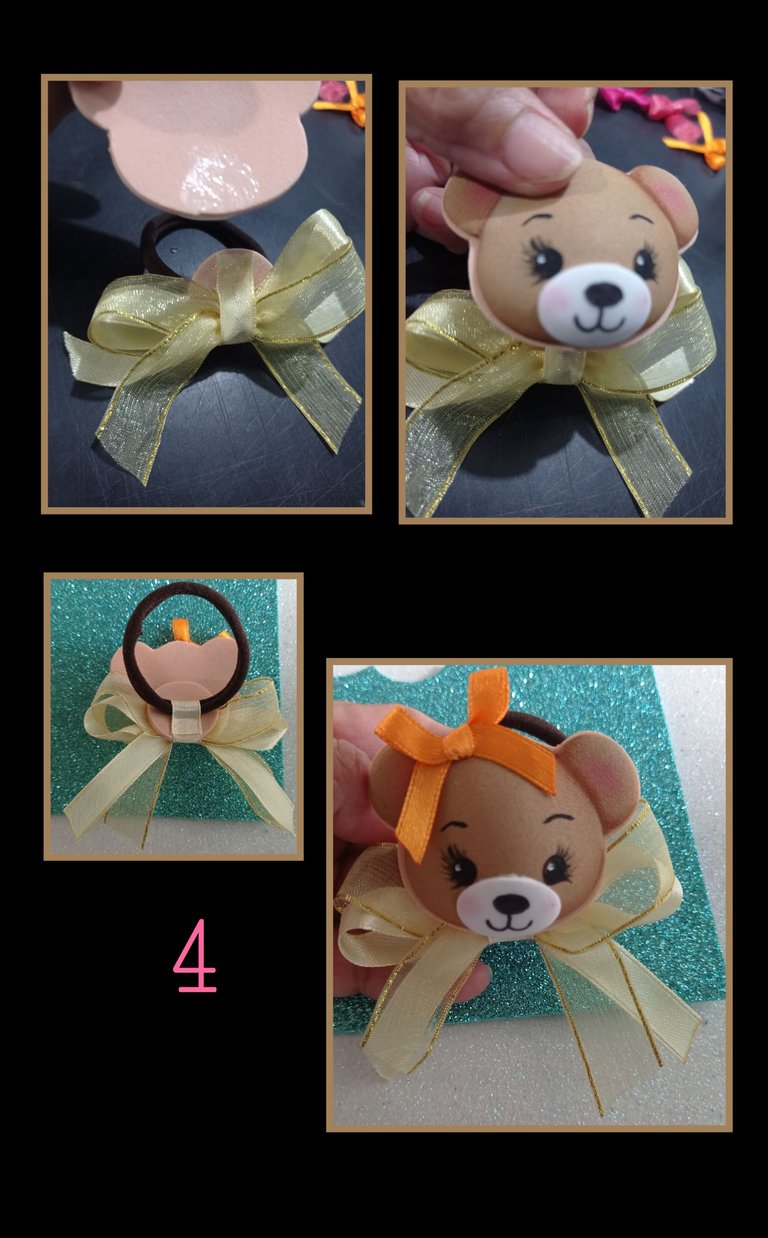
Ya casi listo aplica silicón en la parte baja de la carita y pega al lazo armado.
Como puedes ver es fácil, aqui puedes ver la forma trasera y delantera de la liga, ah y pega un lacito de cinta o foami en la parte de arriba de la carita, así se verá más coqueta.
Paso 5:
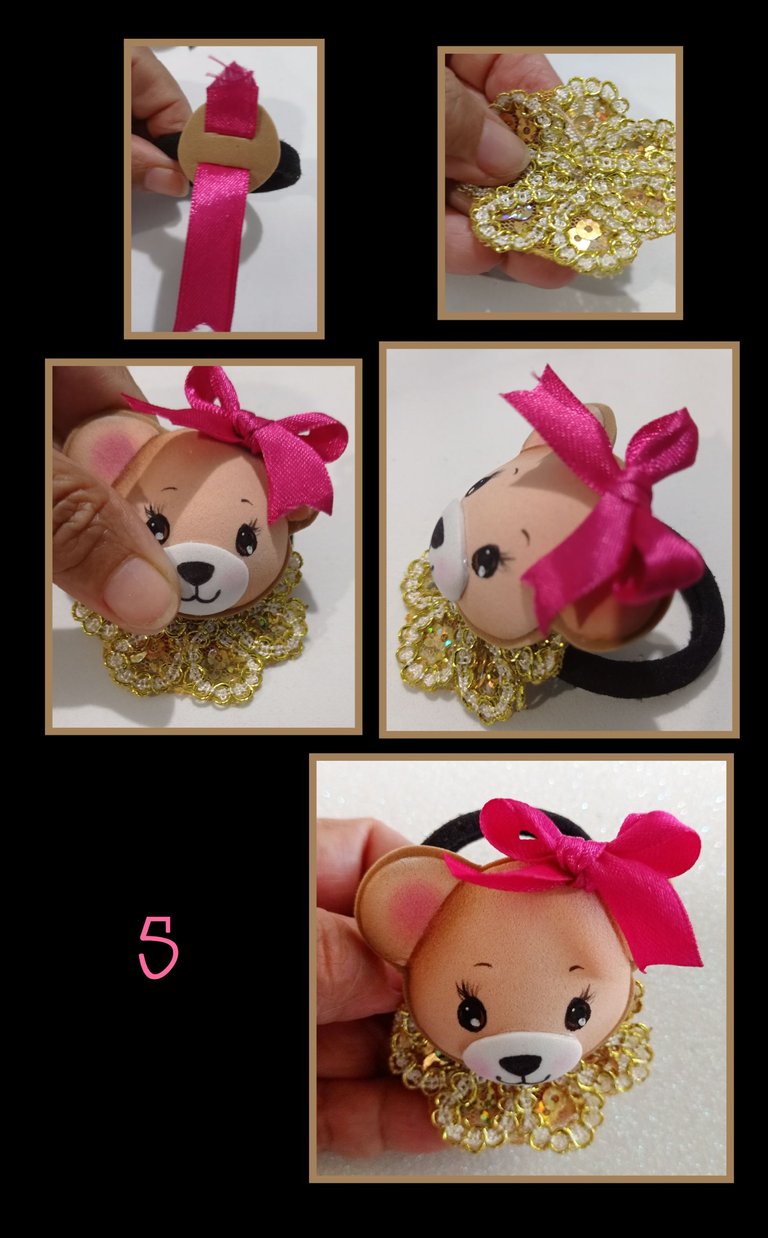
Para la otra liga o cola, haz otro círculo y repite el proceso anterior, aquí conseguí una rosa de tela con lentejuelas y pegué debajo en forma de cuello, como siempre les digo debemos trabajar a veces con lo que tengamos a mano, este es un claro ejemplo, jajajaja...pero creo le quedó bien.
Decora con un lacito fucsia y listo.
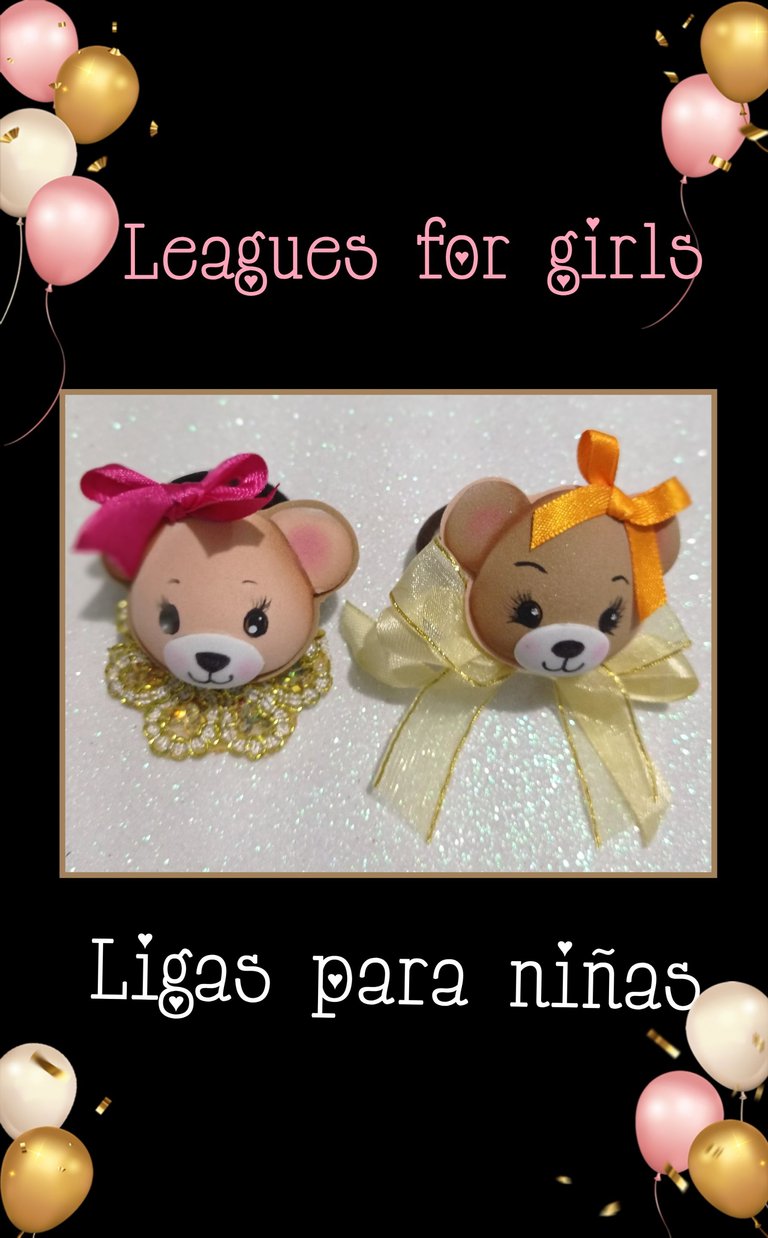
Estos son detalles que podemos hacer en casa, sin tanta dificultad y con la mejor intensión de ver una niña con una carita felíz con su nueva cola o liga.
Ahora te muestro otras foticos.
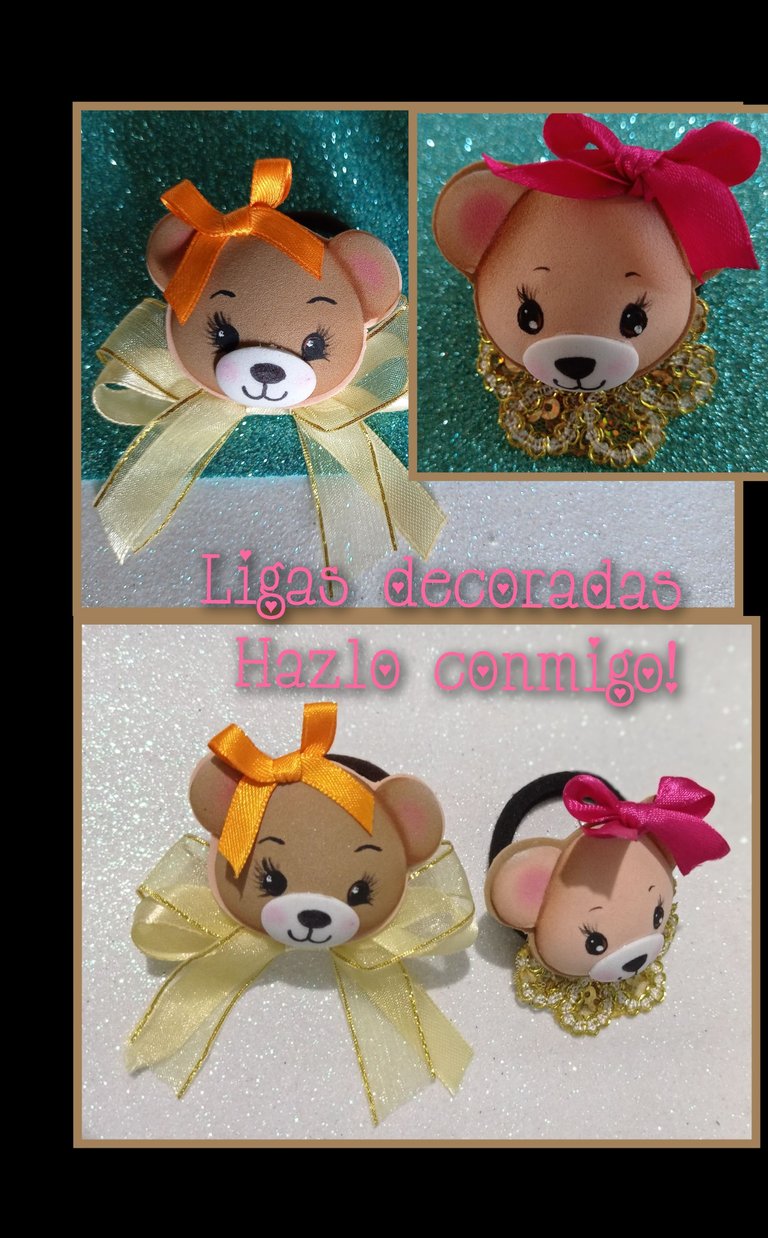
Mi publicación está traducida con DeepL, usando etiquetas HTML y las fotos las capturé con mi Redmi Note 9 y las edite con GridArt.
Un Diseño original para tu niña.
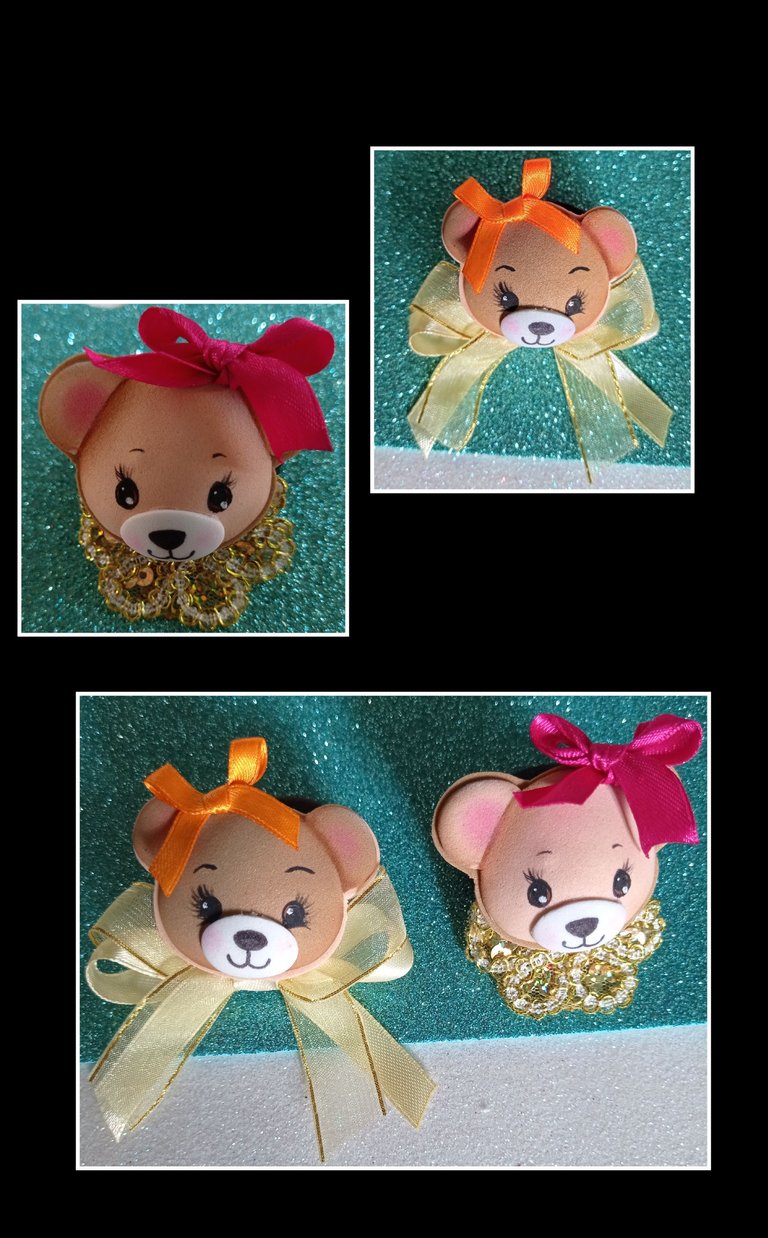

Ahora me despido deseando haya sido de tu agrado mi tutorial, muchas gracias por el apoyo.
English:

Well now I want to show you in this tutorial how you can decorate some rubber bands or tails, making some Bears with scraps of foami and ribbon that I know the little ones at home will love.
This is another way to decorate them so I invite you to join me to see the procedure.
You'll need:

| Ropes or glues | Matte Foami scraps |
|---|---|
| Cloth tapes | Paints and brushes |
| Chalk | Scissors |
| Sponge | Stencil |
| Marker and pencil | Silicone |
| Crayon and pencil | Electric iron |
Step 1:

- Outline the drawing with a soft lead pencil, then place it on the foami cutout and with the rings of the scissors, rub with pressure so that the drawing is well transferred and then without releasing the paper, lift it from one side to ensure that all the drawing is marked and cut along the edge.
- Then wet the brush in water, remove the excess by passing it through a dry cloth and then dip the tip of the brush in paint and begin to paint along the lines of the ears and the entire edge, then when dry, pass the brush with a little white paint to brighten the faces and with the marker or brush paint the eyes and with the chalk paint the center of the ears and cheeks.
Step 2:

- Now heat the iron to medium high temperature and place the faces and snouts until they take shape. If you don't have an iron you can use an anime ball or a round object.
- Apply silicone on the snout and glue with a little pressure, do the same on the ears and all the contour of the head and glue on a piece of foami.
Step 3:

- Cut out a 2 or 3cm circle and make two incisions one on top of the other and insert the fabric ribbon, then apply silicone to the short end of the ribbon and insert the ribbon and glue the ribbon holding the ribbon in place.
- Now take a piece of ribbon and make a loop on the left side and then another to the right and make a few stitches in the center or simply make a loop like a shoe and glue with the ribbon that holds the garter, so the bow will be assembled.
Step 4:

Almost ready, apply silicone on the lower part of the face and glue to the ribbon.
As you can see it is easy, here you can see the back and front shape of the garter, oh and glue a ribbon or foami bow on the top of the face, so it will look more flirtatious.
Step 5:

- For the other garter or tail, make another circle and repeat the previous process, here I got a fabric rose with sequins and glued underneath in the form of a neck, as I always say we must work sometimes with what we have at hand, this is a clear example, hahahaha ... but I think it looked good.
- Decorate with a fuchsia bow and that's it.
- These are details that we can do at home, without so much difficulty and with the best intention of seeing a little girl with a happy face with her new tail or garter.
Now I show you some more pictures.


My post is translated with DeepL, using HTML tags and the photos were captured with my Redmi Note 9 and edited with GridArt.
An original design for your little girl.


Now I say goodbye wishing you liked my tutorial, thank you very much for your support and visit.
Beautiful work, they are very cute those little tails decorated with those cute bears.
Muchas gracias @diyhub por el comentario y el apoyo que siempre me brindan.
Congratulations @elmundodebetty!
You raised your level and are now a Minnow!
Check out our last posts:
¡Que alegría!
Gracias @hivebuzz por mi nuevo nivel.
Una ternura!! Me encanta
Hola amiga, muchas gracias y que bueno que te gustaron.
Saludos.
Que lindo, me gusta 😉
Gracias linda, que bueno que te gustó.
Hola amiga, que bonito ese trabajo que nos compartes, donde esos osos se ven muy tiernos y me gusto la manera como fuiste armando y colocándole cada uno de los detalles y de esa manera obtener un gran resultado. Ademas usar esos materiales, facilitar las cosas y puedes conseguir muchas cosas.
Hola amigo, gracias por ver mi paso a paso y comentar mi publicación sin obviar los detalles.
Gracias por visitarme, me alegro que te haya gustado.
Es una ternura total, y del paso a paso lo que más me impresionó fue ver cómo cobra vida la carita.
Excelente @elmundodebetty como siempre
Agradezco mucho tu visita y comentario, que bueno que te gustó.
Gracias amiga.
Que lindos te quedaron los ositos, son un bello accesorio para las niñas, es muy tierno 🥰