Hola queridos crafteros y amigos de esta comunidad, bienvenidos todos a mi publicación.
Bueno es hora de comenzar.
Los materiales a usar son:
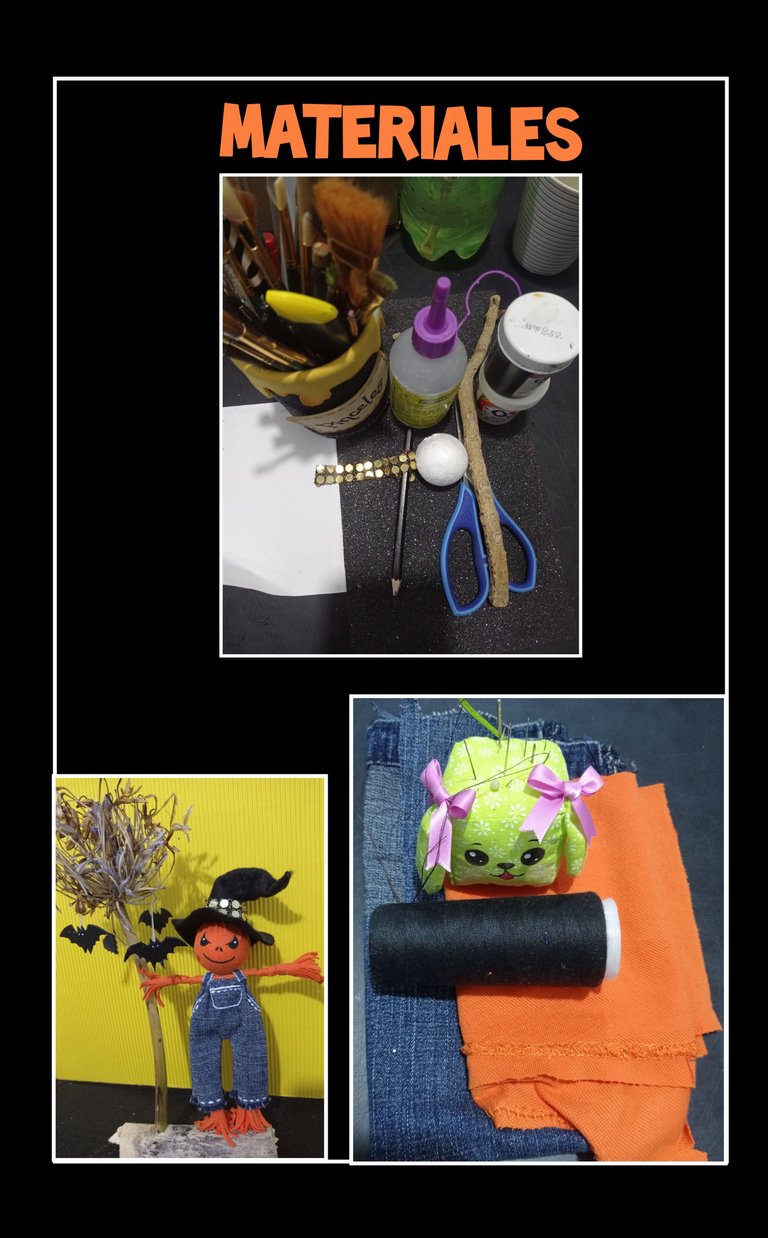
| Retazos de jean y franela y fieltro | Hilo y aguja |
|---|---|
| Foami negro | Esfera de icopor |
| Alambre de cobre y floral | Rama seca y trozo de madera |
| Pinturas y pinceles | Lápiz |
| Tijera | Silicón |
Paso 1:
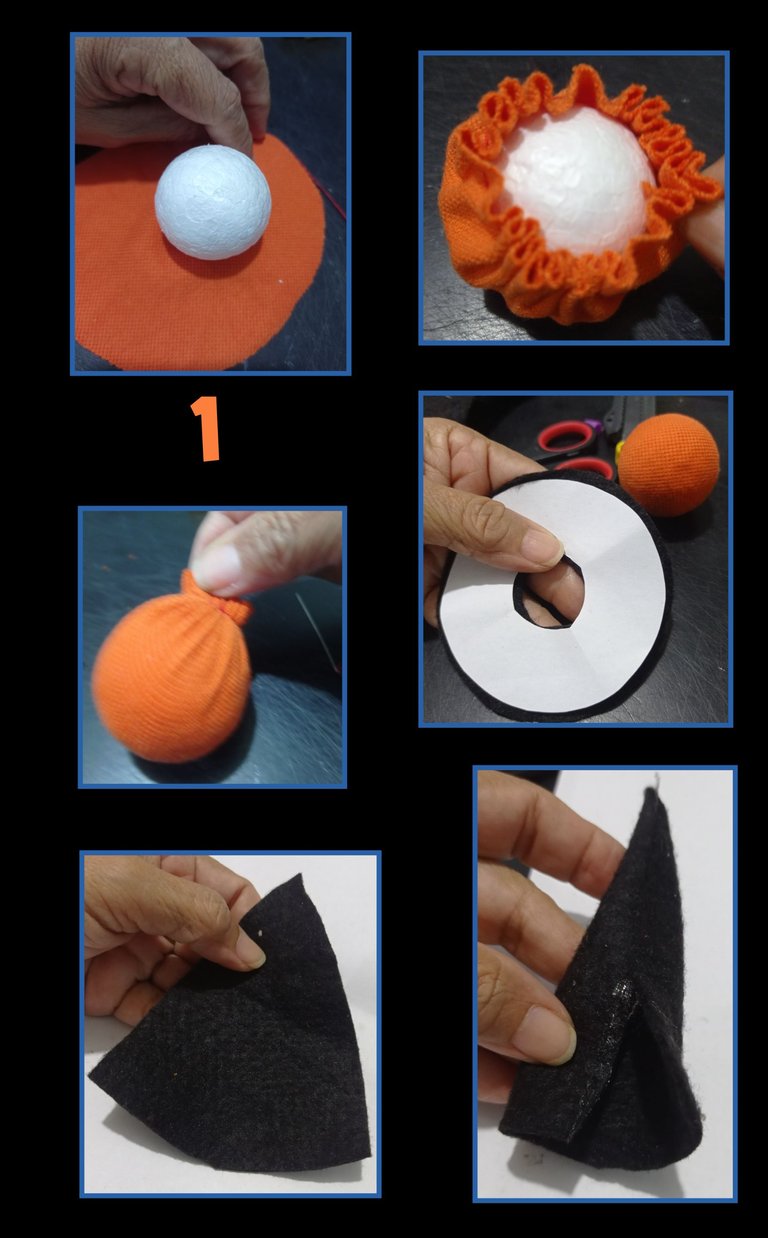
- Para armar la cabeza, recorta un círculo dos veces y medio más grande que la esfera, luego hilvana por toda la orilla, inserta la esfera y hala el hilo, después anuda tratando de que la tela quede bien prensada.
- Para el sombrero, marca un círculo del tamaño deseado en papel y recorta en fieltro negro 1 pieza y recorta el centro.
- Recorta un triangulo en fieltro negro y pega los extremos con silicón.
Paso 2:
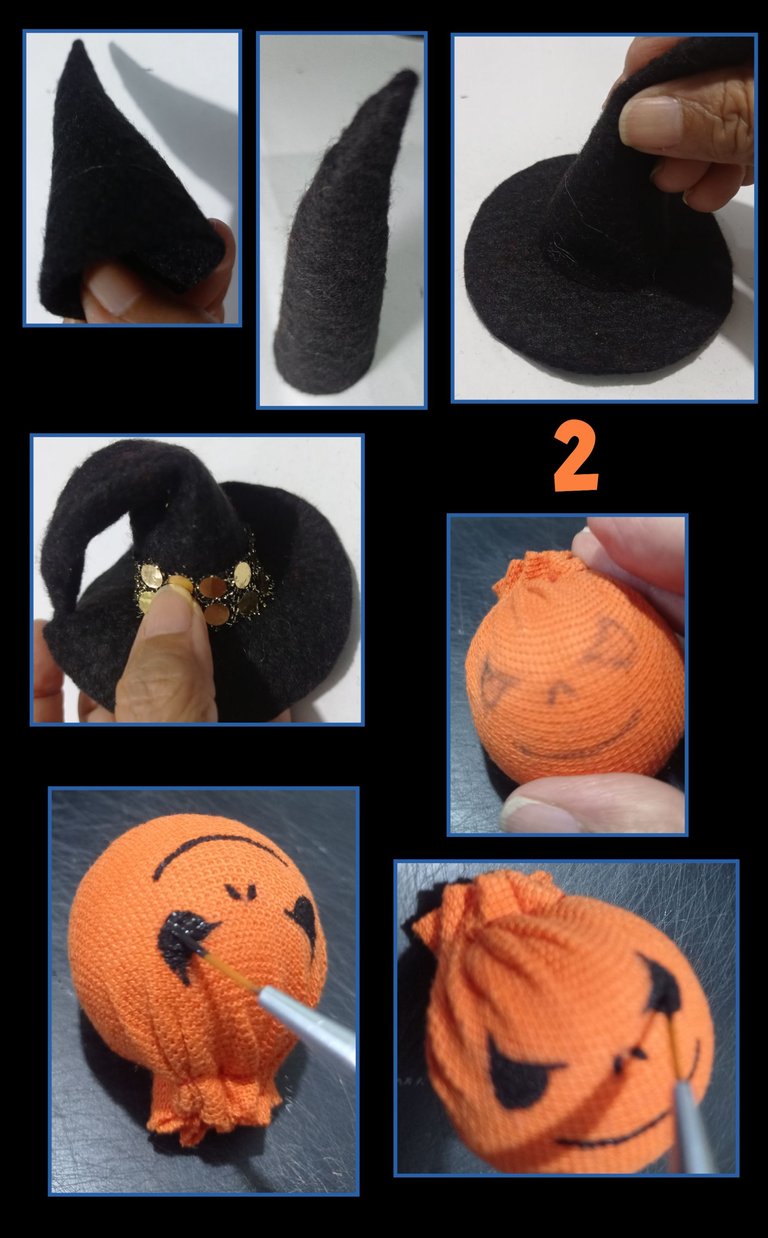
- Después de armar el cono, aplica silicón en la base y pega como se muestra en la foto, luego aplica silicon y pega un adorno y da la forma que quieras al sombrero.
- Ahora dibuja la cara que quieras para tu muñeco y pinta con pincel o marcador y deja secar.
Paso 3:
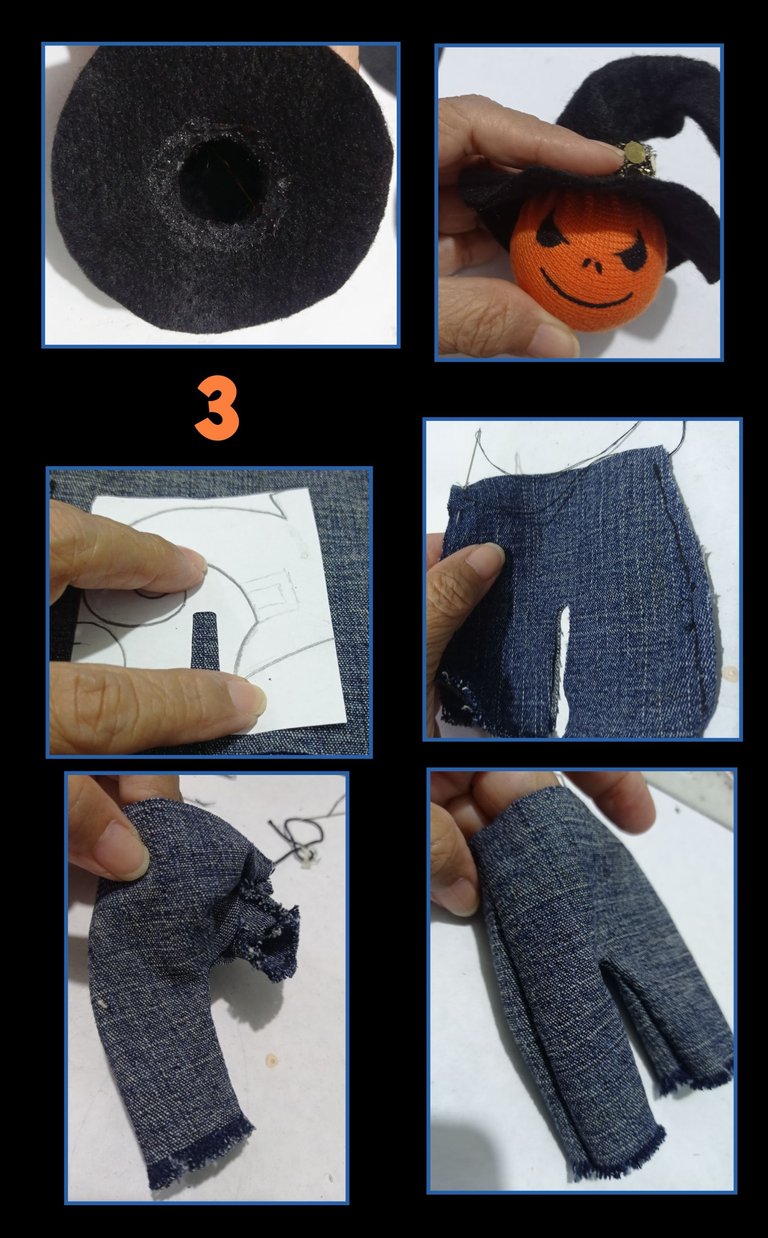
- Aplica silicón en la parte inferior del sombrero y pega a la cabeza.
- Pantalón: Recorta en papel la forma de un pantalón luego marca o fija con alfileres y recorta 2 piezas en tela de jeans y cose por todas las orillas y luego voltea.
Paso 4:
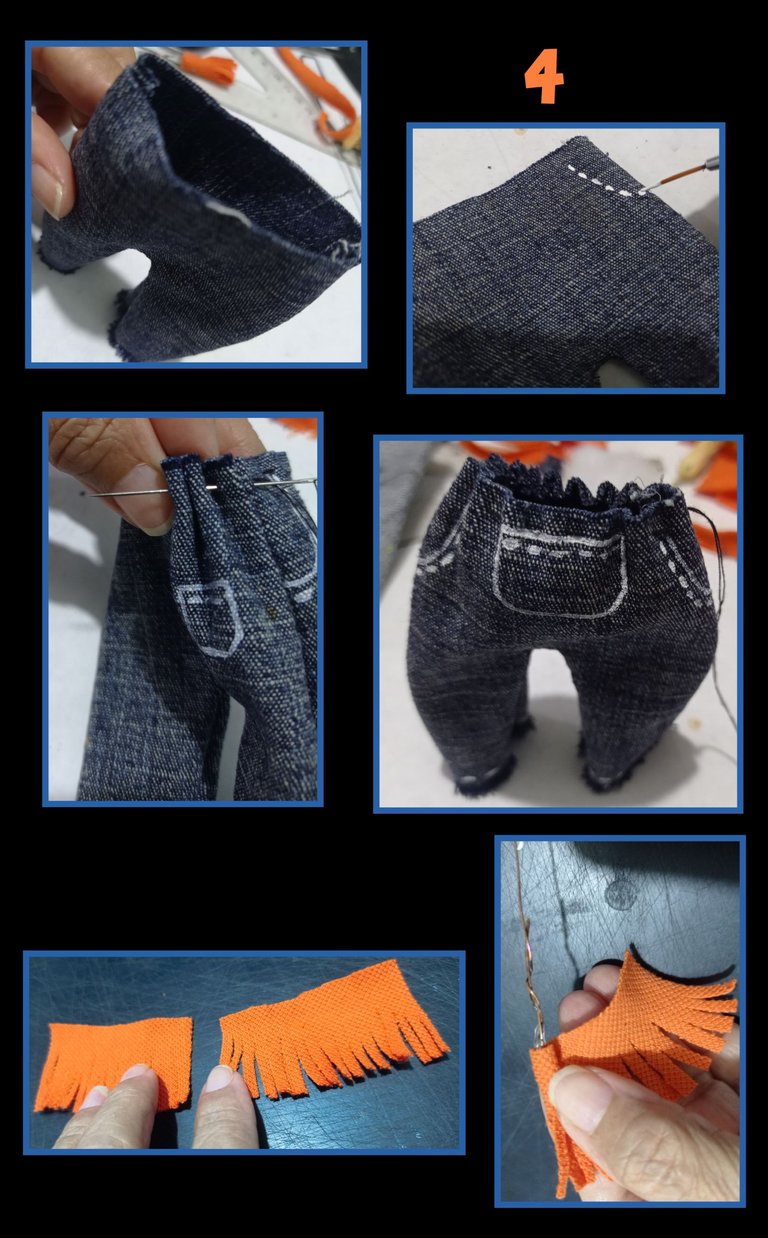
- Armado el pantalón ahora con un pincel delgado pinta las costura semejando bolsillos y costura de ruedos.
- Luego hilvana todo el contorno de arriba y hala el hilo.
- Aparte recorta en tela naranja dos tiras de 5cms de largo y recorta en forma de flequillos.
- Brazos y manos: Tuerce un pedazo de alambre de cobre y pega enrollando a los extremos las tiras de flequillos.(ver fotos)
Paso 5:
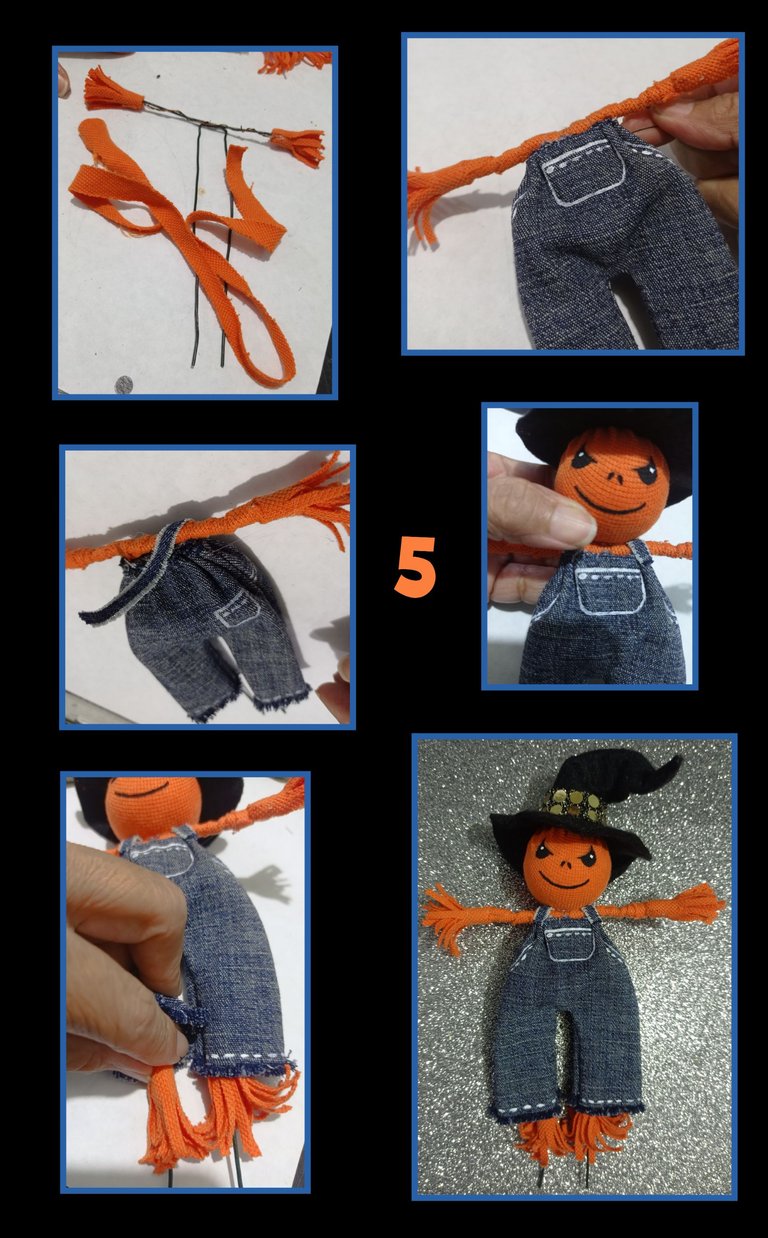
- Piernas: Ahora has una forma de U con el alambre floral y tuerce en el medio con el alambre de los brazos y recorta una tira larga de 1 cm de ancho, pega un extremo y forra todo el alambre de los brazos.
- Aplica silicón en el centro de los brazos y pega al pantalón,
luego recorta una tirita delgada de jean y pega para hacer tiros y semejar una braga. - Luego pega dos tiras mas de flequillos en lo que serán los pies.
Paso 6:
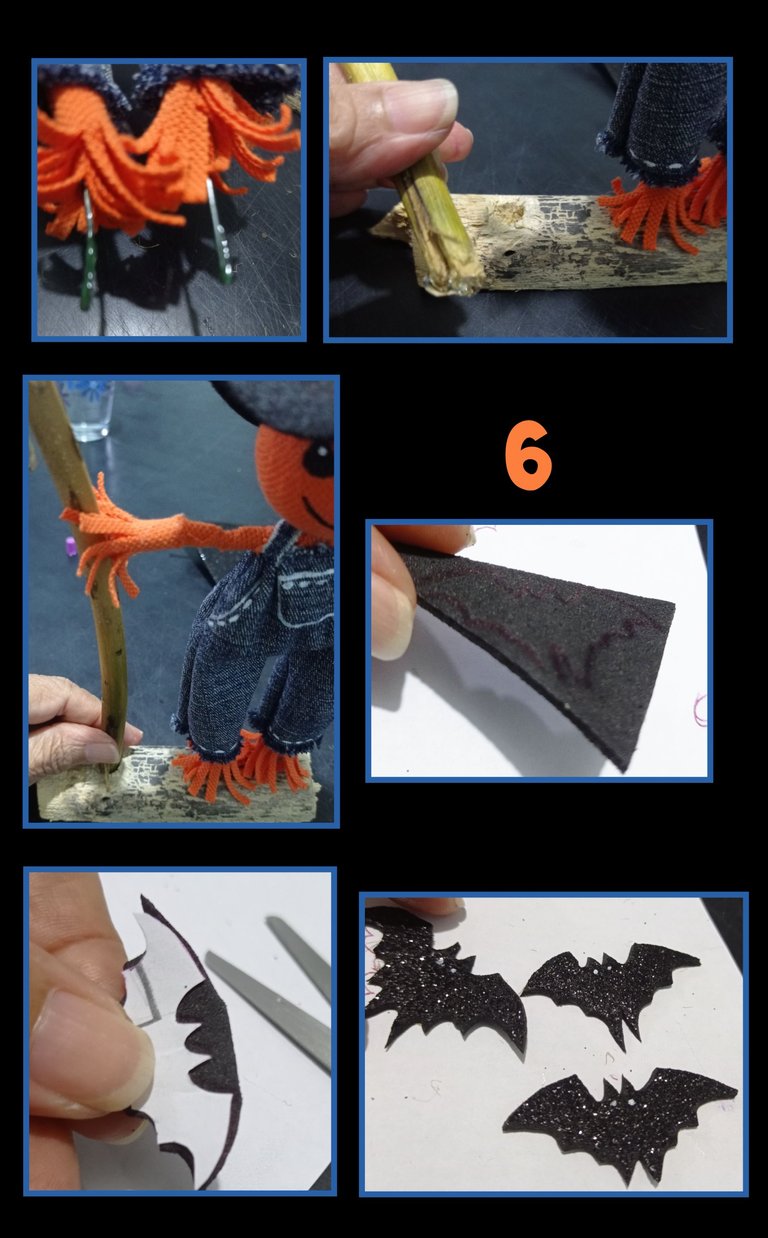
- Aplica silicón e inserta los alambres en el trozo de madera, puedes abrir un orificio con un clavito si es dura la madera o puedes usar un trozo de anime.
- En el otro extremo pega la rama seca.
- Luego sobre el foami, marca la forma de murciélagos y recorta varios.
Paso 7:
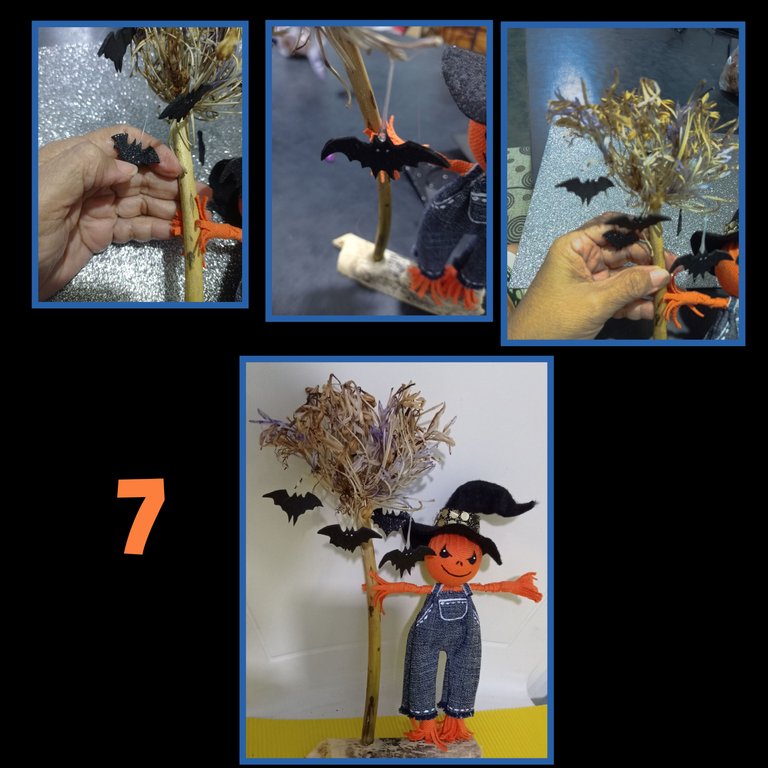
- Para terminar aplica silicón caliente y guinda los murciélagos.
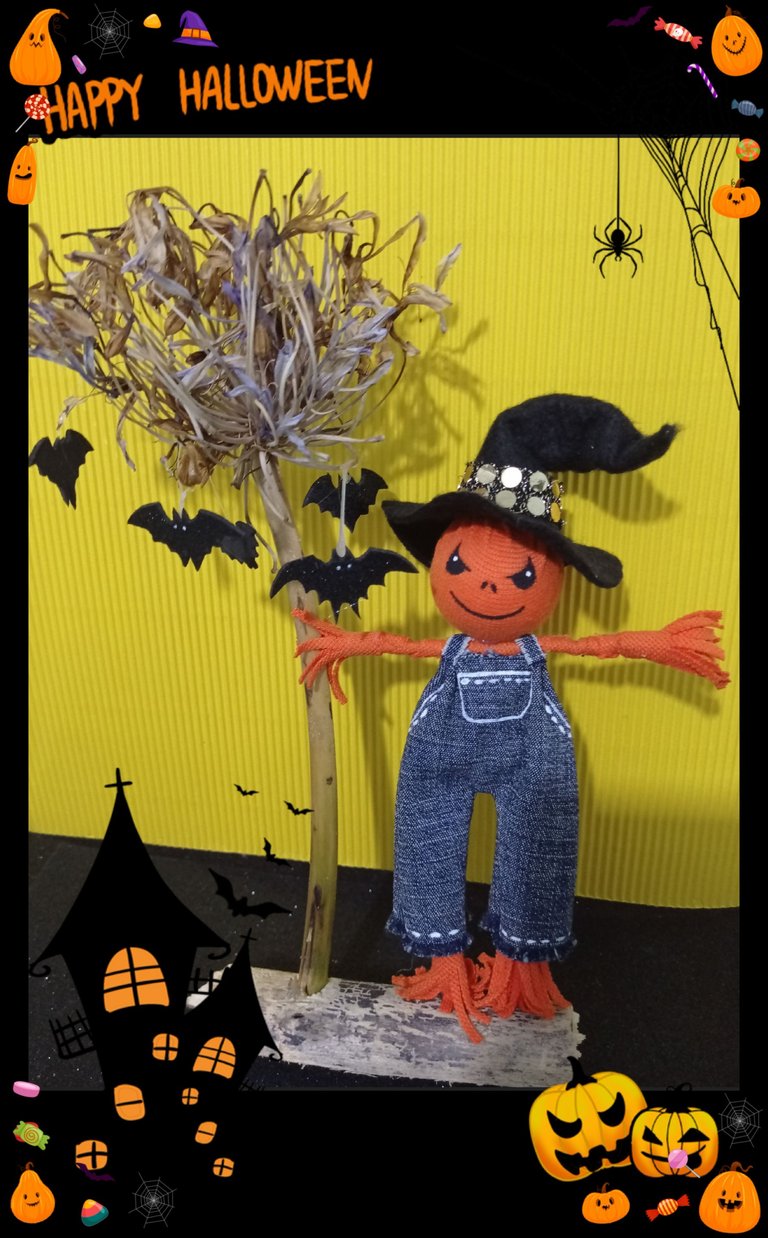
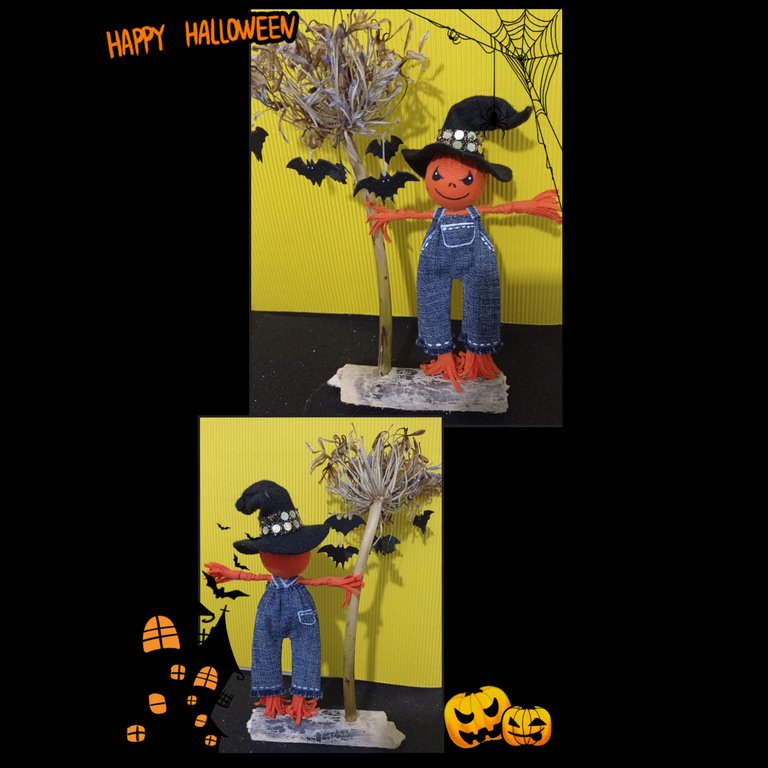
Ahora te muestro el resultado final de este Simpático Espantapájaro!
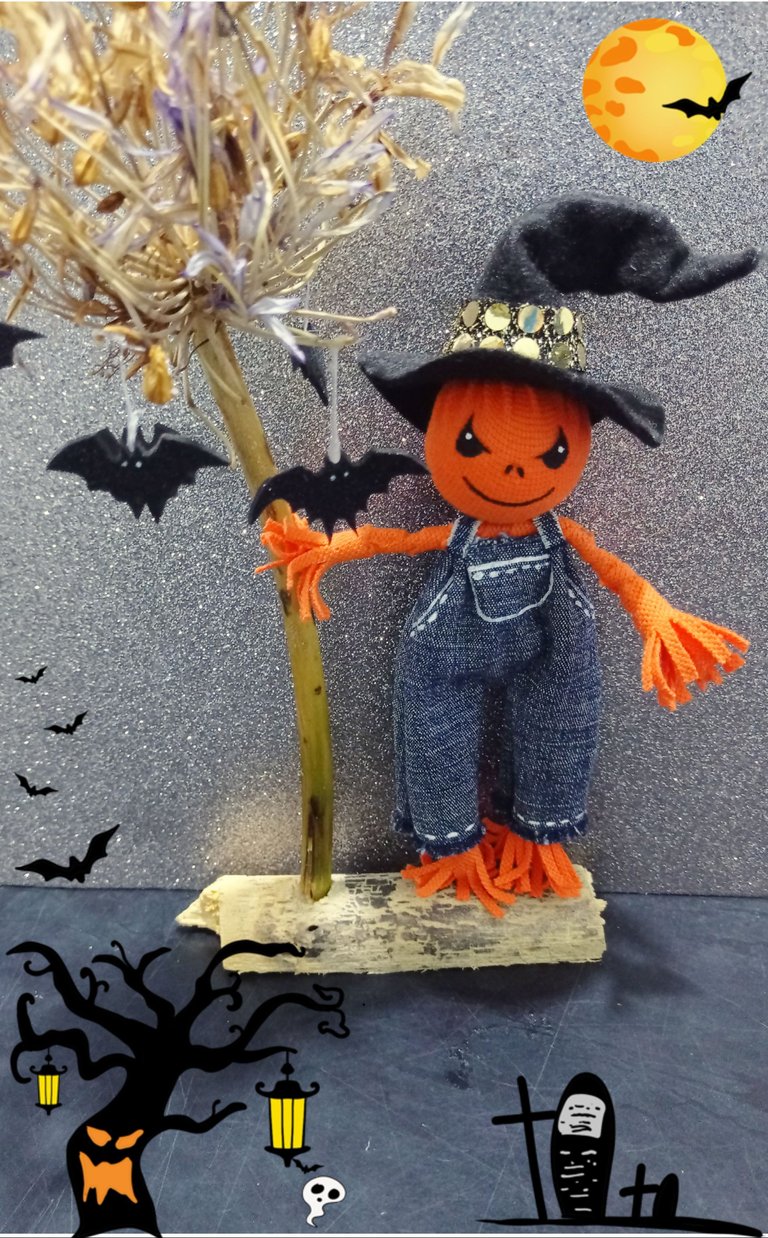
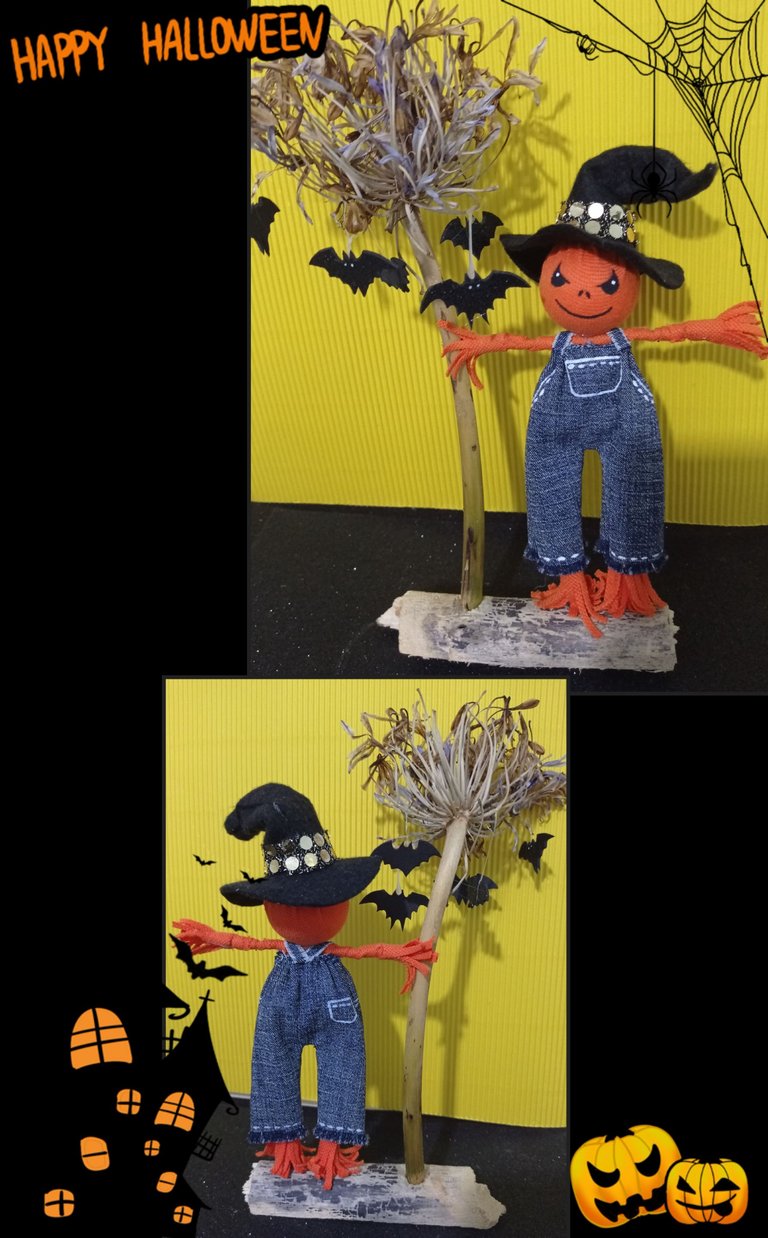
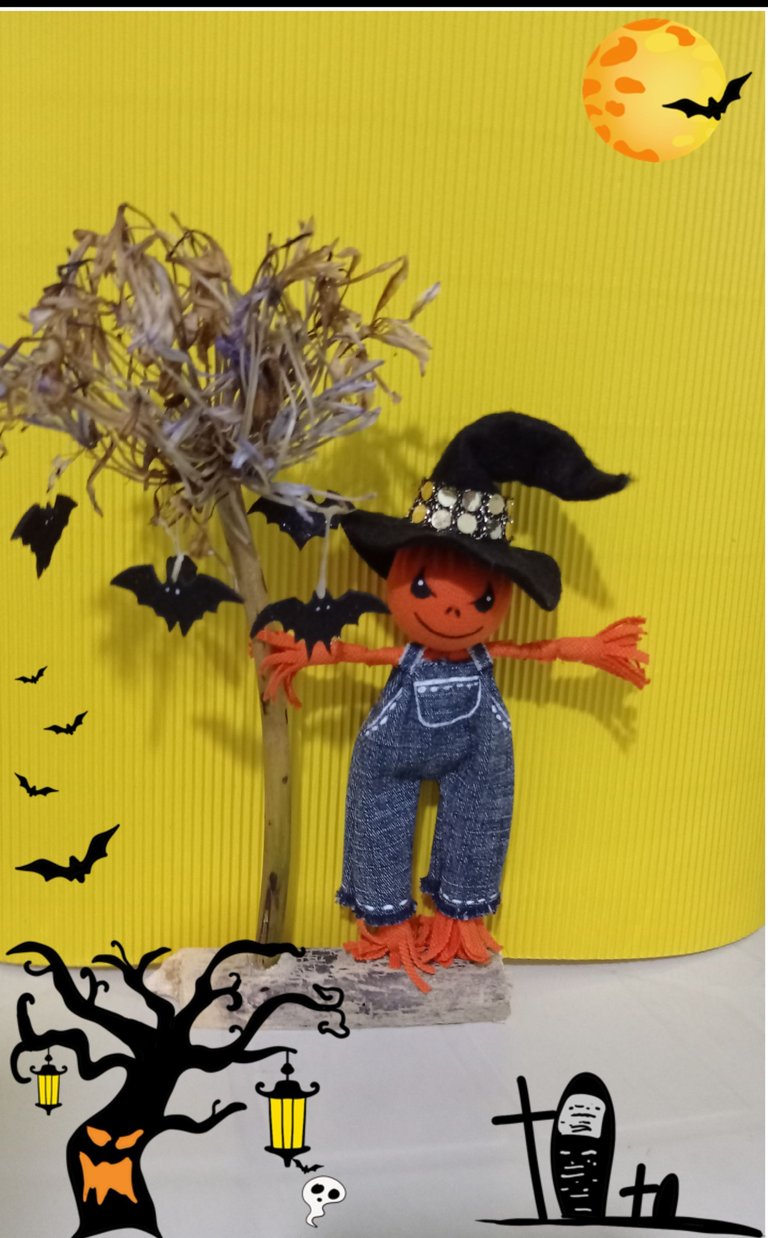
Las fotos capturadas con mi Redmi Note 9
y editadas con GridArt.
Fuente:https://es.wikipedia.org/wiki/Espantap%C3%A1jaros
Esta pieza es muy fácil de hacer y te puede servir como centro de mesa o un simple adorno para decorar cualquier espacio.
Y llegó la hora de despedirme, no sin antes agradecer tu visita y apoyo, espero te guste mi trabajo ya que lo hice con mucho cariño para ti.
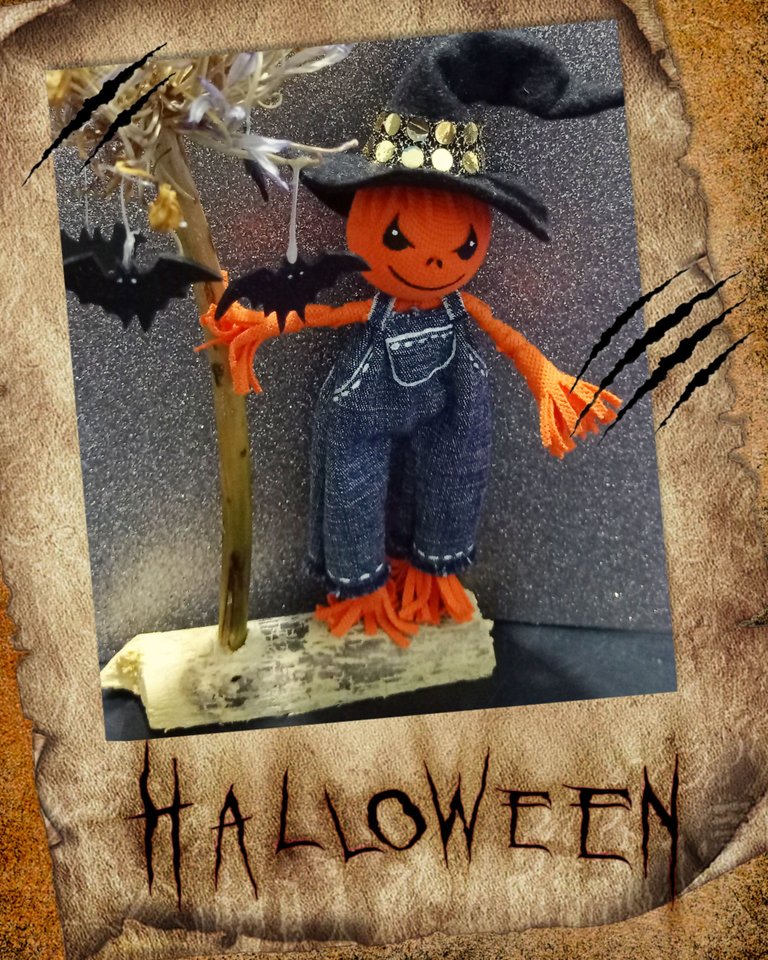
Saludos y hasta mi próximo tutorial.
English:


Hello dear crafters and friends of this community, welcome to my publication.
Well it is time to begin.
The materials to use are:

| Jean and flannel scraps and felt | Thread and needle | |
|---|---|---|
| Black Foami | Icoparbon sphere | |
| Copper wire and floral | Dry branch and piece of wood | |
| Paints and brushes | Pencil | |
| Scissors | Silicone |
Step 1:

- To make the head, cut out a circle two and a half times larger than the sphere, then thread all the way around the edge, insert the sphere and pull the thread through, then knot, making sure the fabric is tightly pressed.
- For the hat, mark a circle of the desired size on paper and cut out 1 piece in black felt and cut out the center.
- Cut out a triangle in black felt and glue the ends with silicone.
Step 2:

- After assembling the cone, apply silicone on the base and glue as shown in the photo, then apply silicone and glue an ornament and give the hat the shape you want.
- Now draw the face you want for your doll and paint with a brush or marker and let dry.
Step 3:

- Apply silicone to the bottom of the hat and glue to the head.
- Pants: Cut out the shape of a pair of pants on paper then mark or pin and cut out 2 pieces of jeans fabric and sew all around the edges and then flip over.
Step 4:

- Once the pants are assembled, paint the seams with a thin brush to resemble pockets and hem seams.
- Then baste all the way around the top and pull the thread.
- Separately, cut two 5 cm long strips of orange fabric and cut them in the shape of bangs.
Arms and hands: Twist a piece of copper wire and glue the fringe strips to the ends (see photos).
Step 5:

- Legs: Now make a U-shape with the floral wire and twist in the middle with the arm wire and cut a long strip 1 cm wide, glue one end and line the entire arm wire.
- Apply silicone in the center of the arms and glue to the pants,
then cut out a thin strip of jean and glue to make strips to resemble a panty. - Then glue two more strips of fringe on what will be the feet.
Step 6:

- Apply silicone and insert the wires into the piece of wood, you can open a hole with a nail if the wood is hard or you can use a piece of anime.
- On the other end, glue the dry branch.
- Then on the foami, mark the shape of bats and cut out several of them.
Step 7:

- To finish, apply hot silicone and glue the bats.
Now I show you the final result of this cute Scarecrow!


The photos captured with my Redmi Note 9
and edited with GridArt.
Source:https://es.wikipedia.org/wiki/Espantap%C3%A1jaros
This piece is very easy to make and can serve you as a centerpiece or a simple ornament to decorate any space.
And it's time to say goodbye, but not before thanking you for your visit and support, I hope you like my work because I made it with love for you.

Greetings and until my next tutorial.
~~~ embed:blogger/comments/1gdykqf/diyespantapájaro_adorno_de_halloween_hazlo_fácil/ reddit metadata:fGJsb2dnZXJ8aHR0cHM6Ly93d3cucmVkZGl0LmNvbS9yL2Jsb2dnZXIvY29tbWVudHMvMWdkeWtxZi9kaXllc3BhbnRhcMOhamFyb19hZG9ybm9fZGVfaGFsbG93ZWVuX2hhemxvX2bDoWNpbC98 ~~~
The rewards earned on this comment will go directly to the people( @yolimarag ) sharing the post on Reddit as long as they are registered with @poshtoken. Sign up at https://hiveposh.com. Otherwise, rewards go to the author of the blog post.
Guaooo amiga, pero es no nos queda más que aplaudir tu trabajo y tu gran don para las manualidades.
Esto es una belleza, cada detalle, los colores, todo el concepto... Bellísimo
Buenas noches querida amiga, que halago siento al ver tus palabras para mi es muy satisfactorio saber que mi trabajo sencillo pero hecho con mucho cariño te gusta. De verdad muy agradecida es me inspira a que lo siga haciendo.
Saludos y muchas gracias.
These are such beautiful and creative decorations for the season.
Awesome job:)
Muchas gracias Milly por tus palabras de apoyo!
Me alegra te haya gustado.
Saludos.
Una belleza te ha quedado increíble, todos los detalles bien realizados, unas manos bendecidas. 😉
Hola Yolimar, me contenta saber que te gustó mi espantapájaro.
Amén y muchas gracias.
Es muy perfecto 😍 ame cada detalle, lo voy a poner en las cajitas de dulces para espantar buhos que quieran adelantarse a Halloween jajaja esta hermoso, espero que estes mejor de salud 🙏
Hola buhito, que bueno saber que te gustó mi espantapájaro, claro sería muy buena idea jajajajaja..
Gracias por tus buenos deseos.
Bendiciones para ti.
Que hermoso y la carita de malo me encantó amiga. Felicidades quedó dibino.
Gracias amiga, si tiene cara de malo.
Muchas gracias y que bueno que te gustó!
Linda creatividad te quedo muy hermoso, saludos.
Gracias Coromoto, me alegra que te haya gustado!
Gracias por comentar.
Awww que belleza es esto... Hiciste un gran trabajo❤️✨
Saludos!!
Hola Yagely, me contenta que te guste.
Muchas gracias por comentar y apoyar mi trabajo.
Igual para ti.