
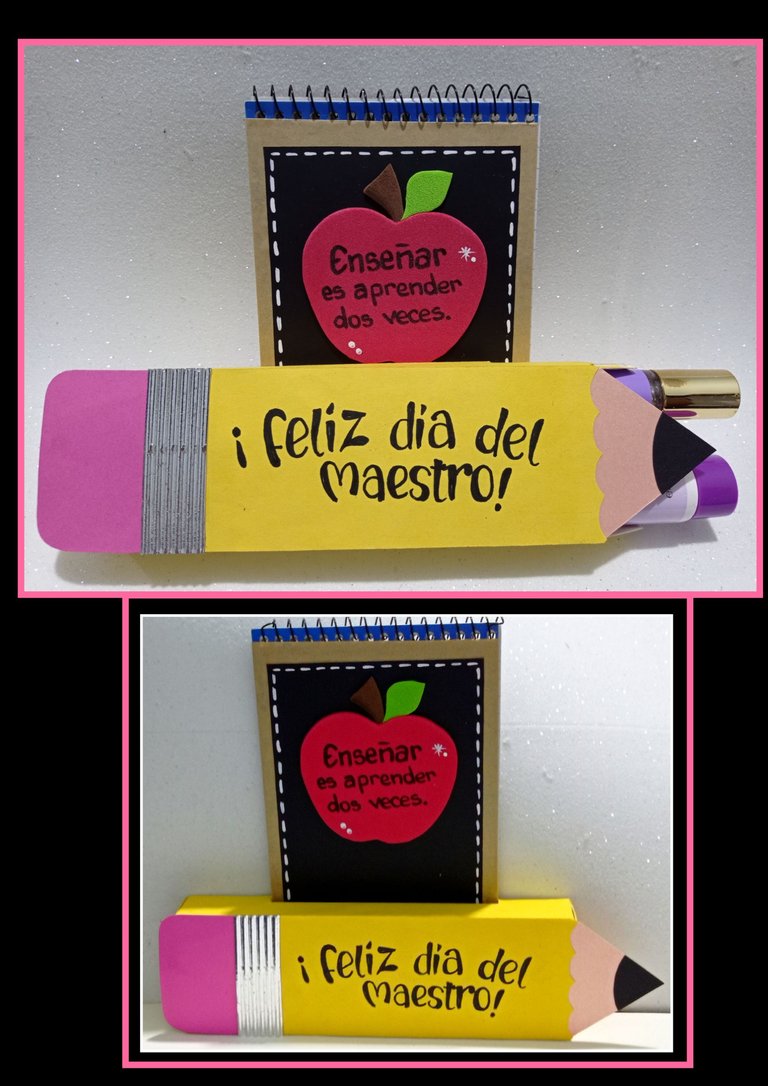
Buenas noches y bienvenidos sean todos a mi Blog.
Para este proyecto vas a necesitar:
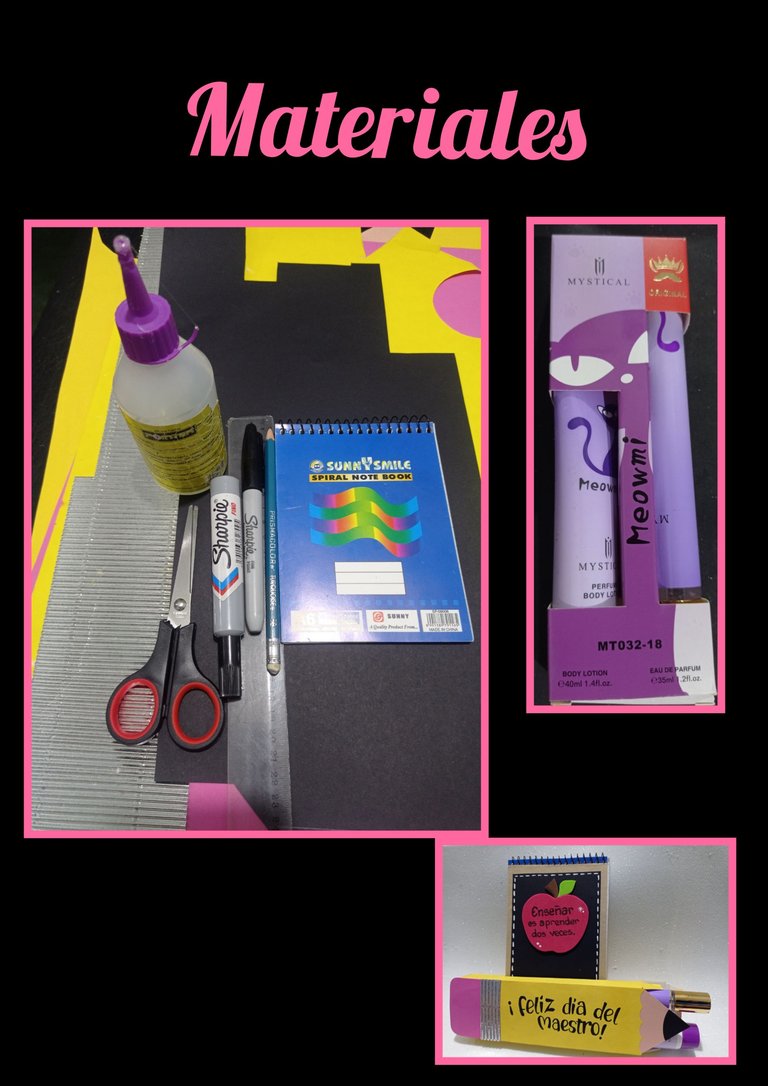
| Estuche de colonia | Libreta |
|---|---|
| Cartulinas | Lápiz y marcadores |
| Silicon | Cuchilla o exacto |
| Tijera | Regla |
Paso 1:
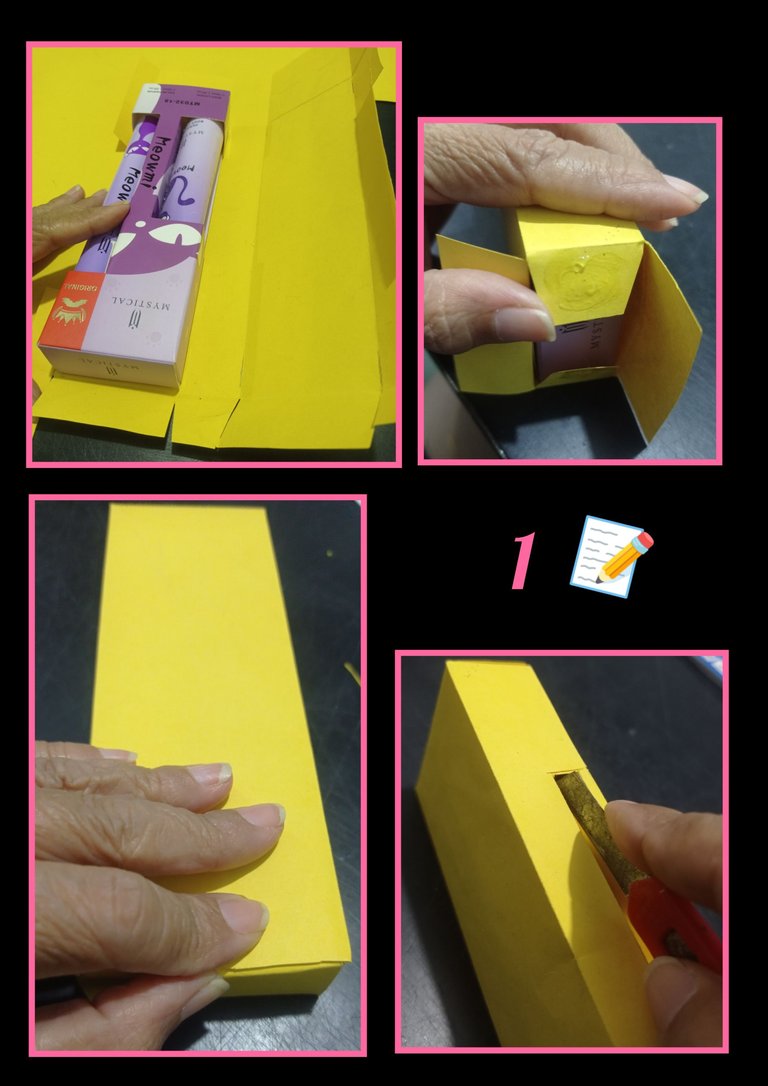
Coloca la caja sobre la cartulina amarilla y comienza a marcar, recortar, doblar y armar para forrar, luego con el exacto haz una abertura en uno de los laterales del ancho de la libreta.
Paso 2:
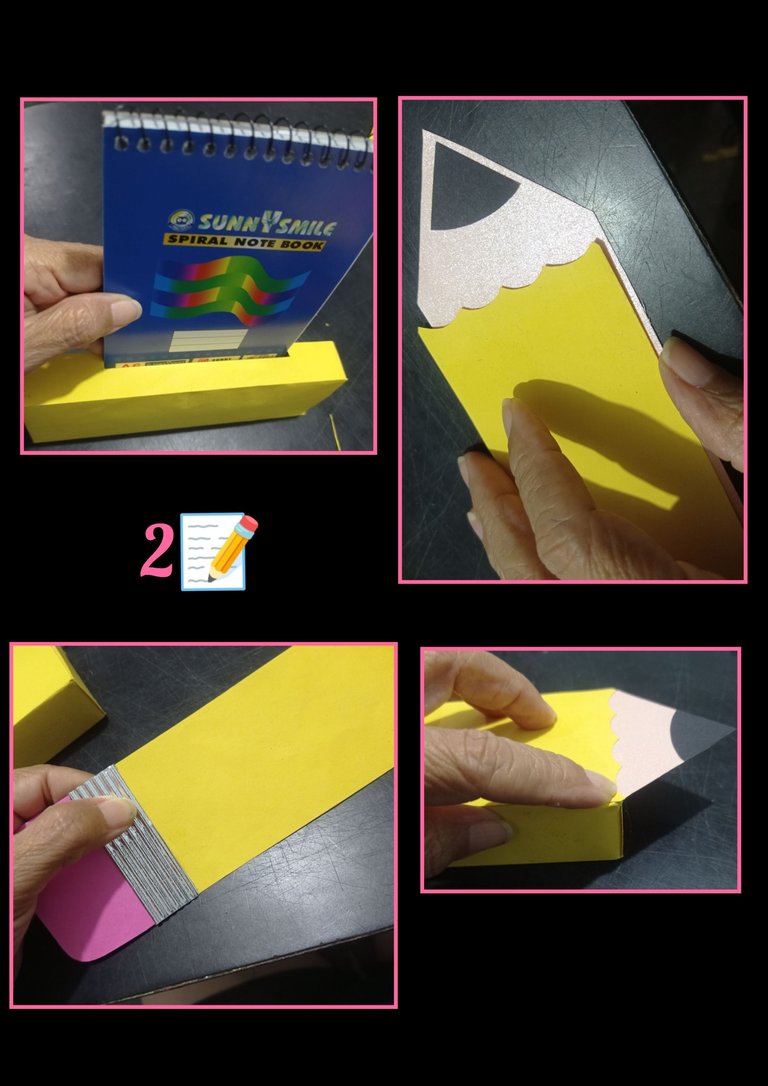
- Introduce o inserta la libreta para asegurar que quede ajustada.
- Ahora mide la caja y recorta con esas medidas, la forma del lápiz en cartulina color piel, la punta y el cuerpo del lápiz en amarillo, el borrador y la parte metálica con cartulina plateada.
- Aplica silicón sobre la caja y pega el lápiz.
- Arma el lápiz y luego pega sobre la caja,
Paso 3:
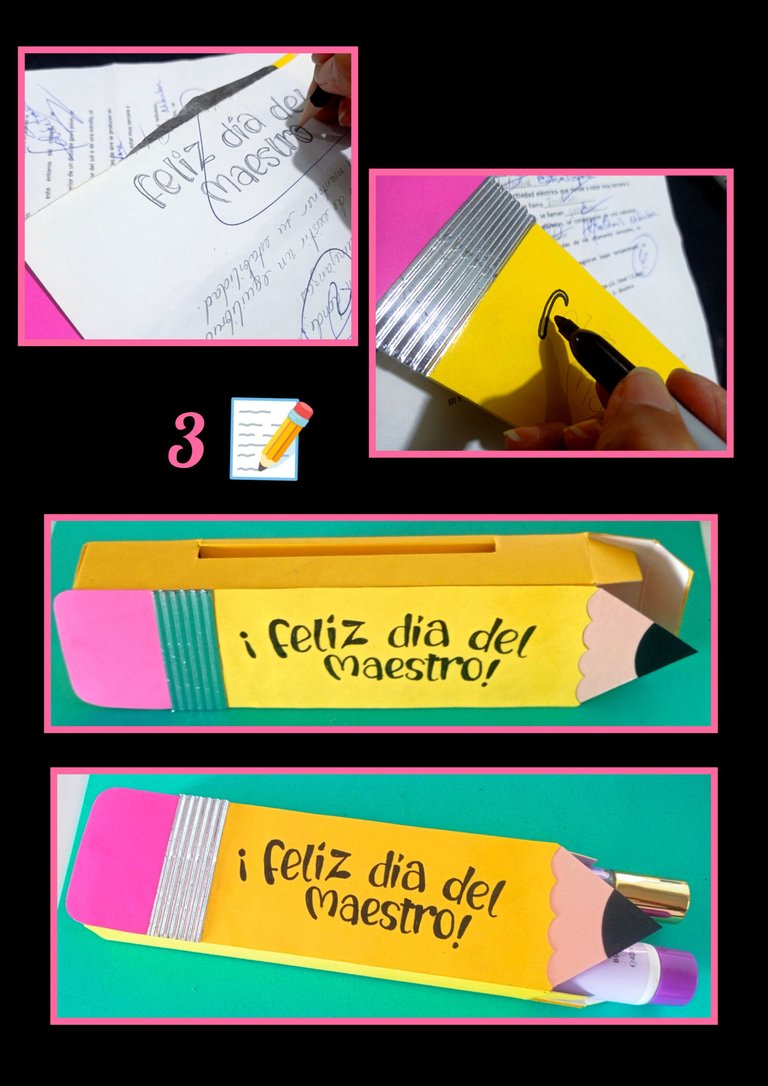
- Ahora dibuja o transfiere la frase sobre el lápiz, usando papel carbón o escribe directamente sobre el lápiz(caja)
- Luego remarca la oración con el marcador.
- Así quedará lista y forrada la caja.
Paso 4:
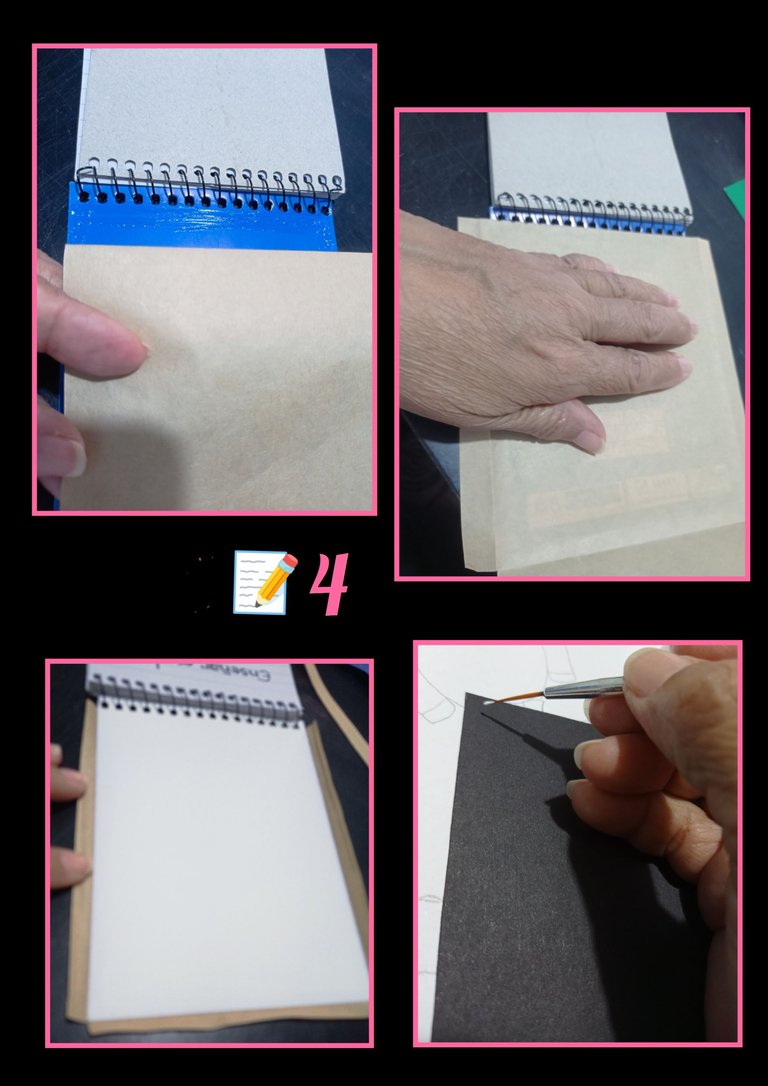
- Aplica silicón sobre la carátula de la libreta y pega el papel craft para forrar.
- Recorta el sobrante y deja un 1 por todo el contorno de la tapa y forra.
- Después recorta un rectángulo en cartulina negra y pinta haciendo un pespunte con pintura blanca.
Paso 5:
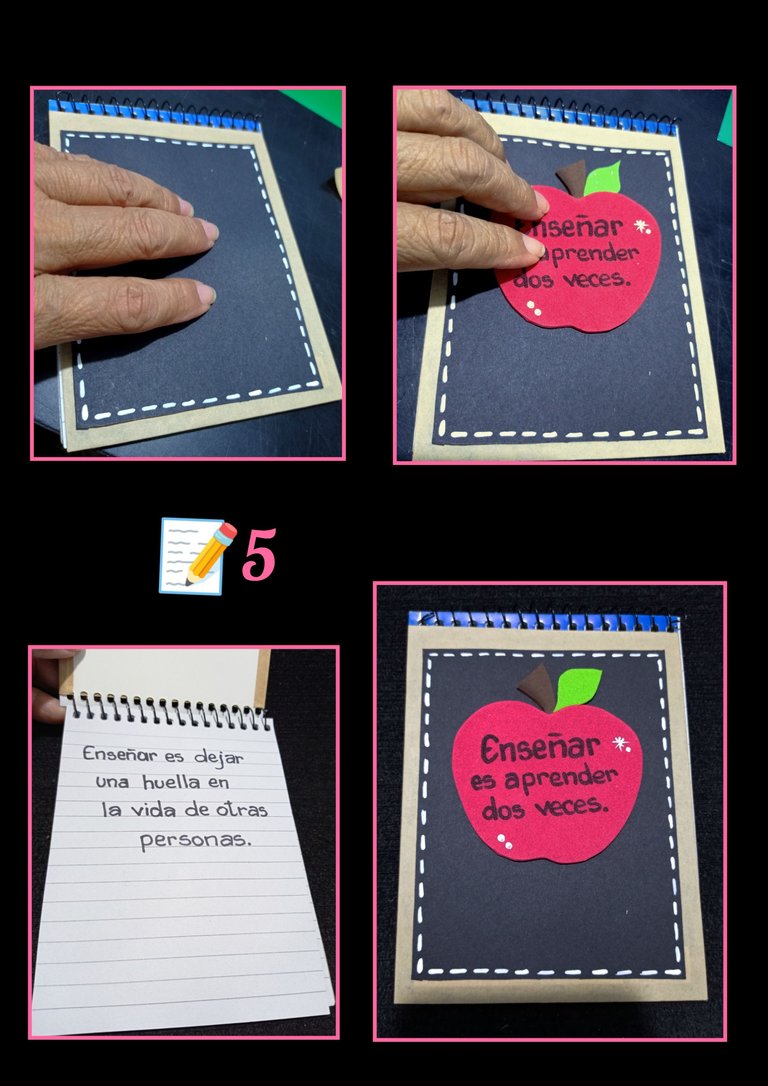
- Aplica silicón y pega sobre la tapa de la libreta y decora a tu gusto, yo recorté una manzana y le coloqué un párrafo y dentro una dedicatoria.
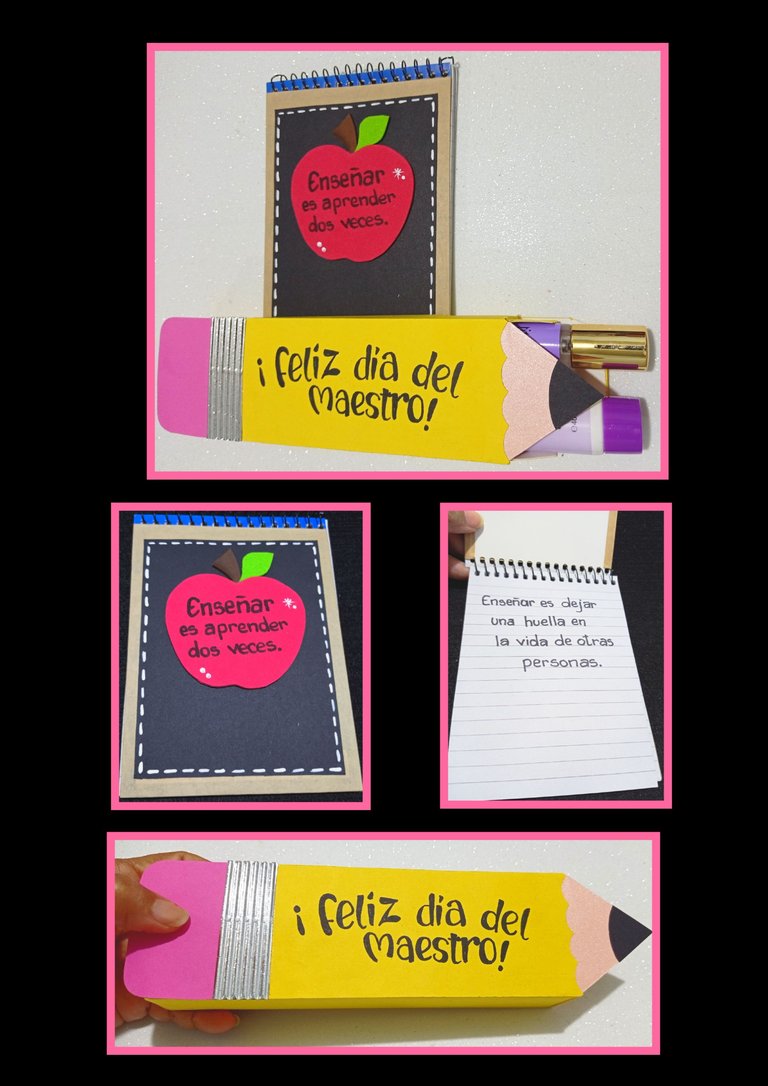
Así quedó decorada la libreta.
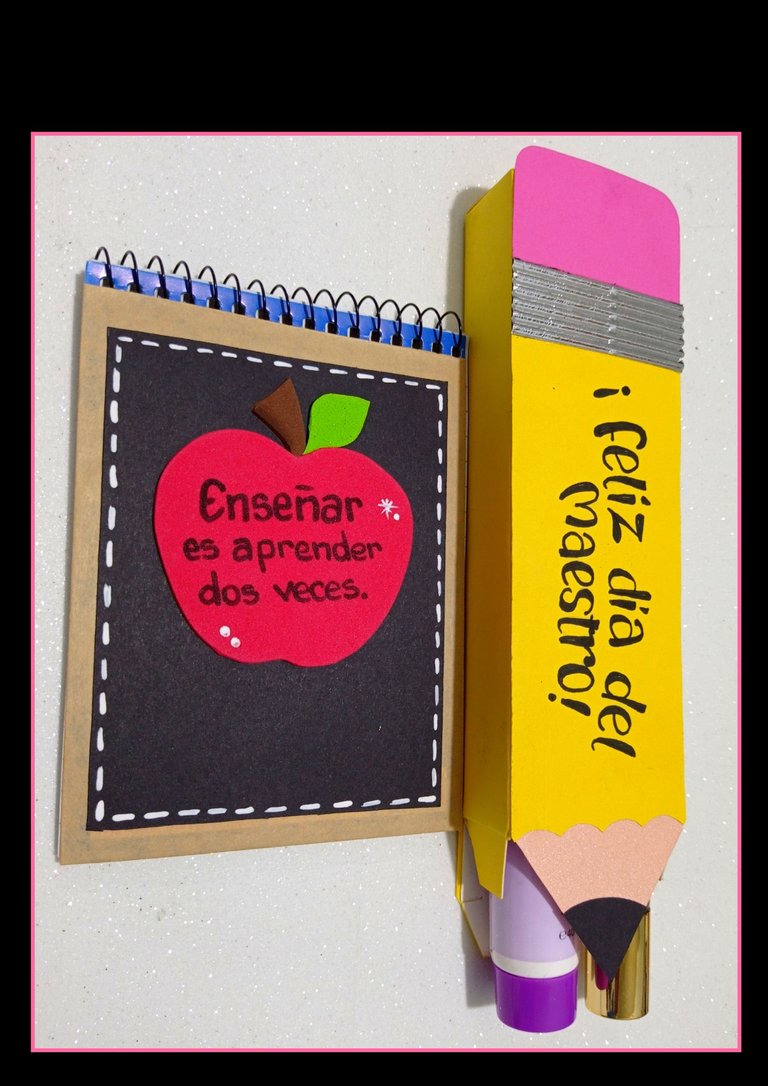
Ahora te muestro el resultado final con mis fotos.
Demás está decirte que los puedes decorar a tu gusto y regalar individualmente o los dos.
Ahora te comento que mi publicación está traducida con:
Editadas con Collage de GridArt.
Mis redes sociales X elmundodebetty
instagram elmundodebetty
Fuentes:
https://es.pinterest.com/pin/476255729363359570/
https://es.pinterest.com/pin/4996249582269099/
Espero te gusten mis fáciles y bonitas ideas de como decoré estos sencillos detalles para regalar a los educadores en su día.


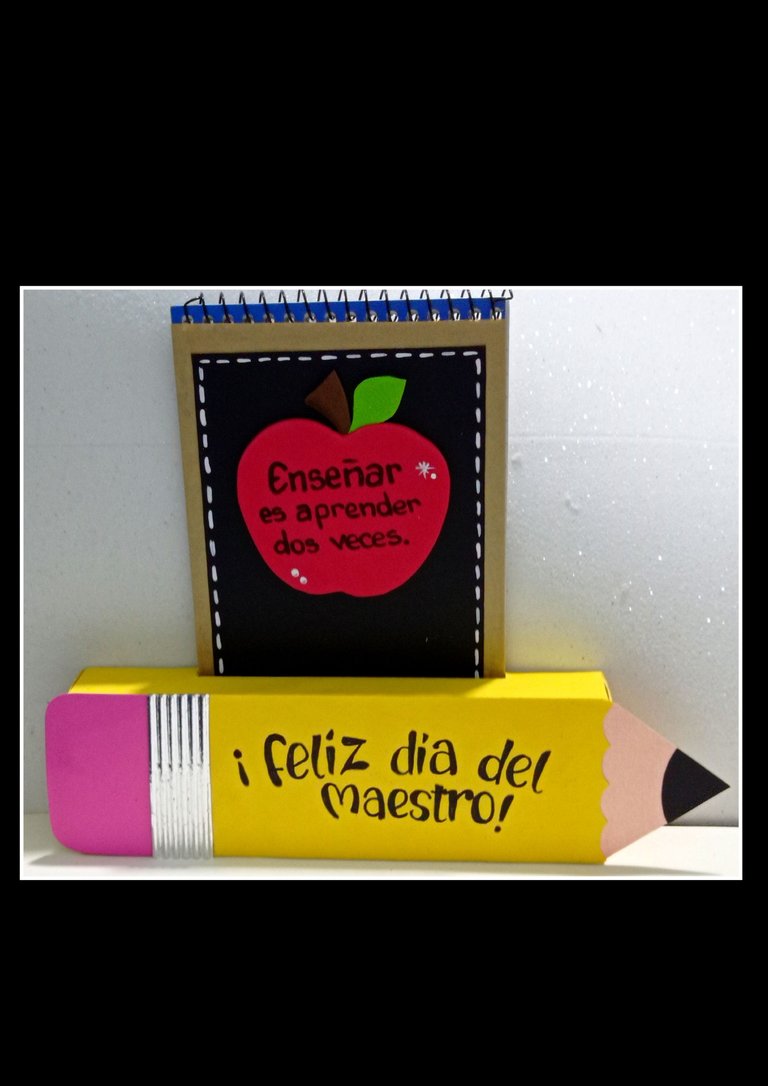
Y ahora si me despido muy felíz de haber compartido con ustedes mi paso a paso, deseando te guste y sirva de guía.
Muchas gracias por tu apoyo y visita, si es de tu agrado comentar me encantará mucho.
Saludos y hasta mi próxima publicación.
English:

Good evening and welcome to my Blog.
For this project you will need:

| Cologne case | Notebook |
|---|---|
| Card stock | Pencil and markers |
| Silicon | Knife or exacto blade |
| Scissors | Ruler |
Step 1:

Place the box on the yellow cardstock and begin marking, trimming, folding and assembling to line, then with the exacto knife make an opening on one side the width of the notebook.
Step 2:

- Insert the notebook to make sure it fits snugly.
- Now measure the box and cut out the pencil shape in skin colored cardboard, the tip and body of the pencil in yellow, the eraser and the metal part in silver cardboard.
- Apply silicone on the box and glue the pencil.
- Assemble the pencil and then glue on the box,
Step 3:

- Now draw or transfer the sentence on the pencil, using carbon paper or write directly on the pencil(box).
- Then highlight the sentence with the marker.
- The box is now ready and lined.
Step 4:

- Apply silicone on the cover of the notebook and glue the craft paper to cover.
- Cut off the excess and leave a 1 all around the cover and line it.
- Then cut out a rectangle in black cardboard and stitch it with white paint.
Step 5:

- Apply silicone and glue on the cover of the notebook and decorate to your liking, I cut out an apple and placed a paragraph and a dedication inside.
This is how the notebook was decorated.

Now I show you the final result with my photos.
Needless to say that you can decorate them as you like and give them individually or both as a gift.

Now I comment you that my publication is translated with:
Edited with GridArt Collage.
My social networks X elmundodedebetty
instagram elmundodebetty
Sources:
https://es.pinterest.com/pin/476255729363359570/
https://es.pinterest.com/pin/4996249582269099/
I hope you like my easy and cute ideas of how I decorated these simple details to give to educators on their day.


And now I say goodbye very happy to have shared with you my step by step, hoping you like it and serve as a guide.
Thank you very much for your support and visit, if you like to comment I will be very happy.
Greetings and until my next publication.
Es un regalo, ademas de bonito, creativo y con reciclaje incluido, esta excelente para realizarlo 😍 no uso perfumes, pero tengo un par de cajitas que podrian funcionar jeje
Hola buhito, que bueno verte por aquí, muchas gracias por tu comentario y sí, puedes usar cualquier cajita que tengas, lo importante es que tengas la idea de como hacerlo...jajajaja y que bueno que no usas ni te hace falta perfume, un gasto menos. 🤣🤣
Feliz y bendecido día!
You did a nice work, you gave a very nice design, good job and welldone
Buen día, muchas gracias por tu comentario y me alegro que te haya gustado.