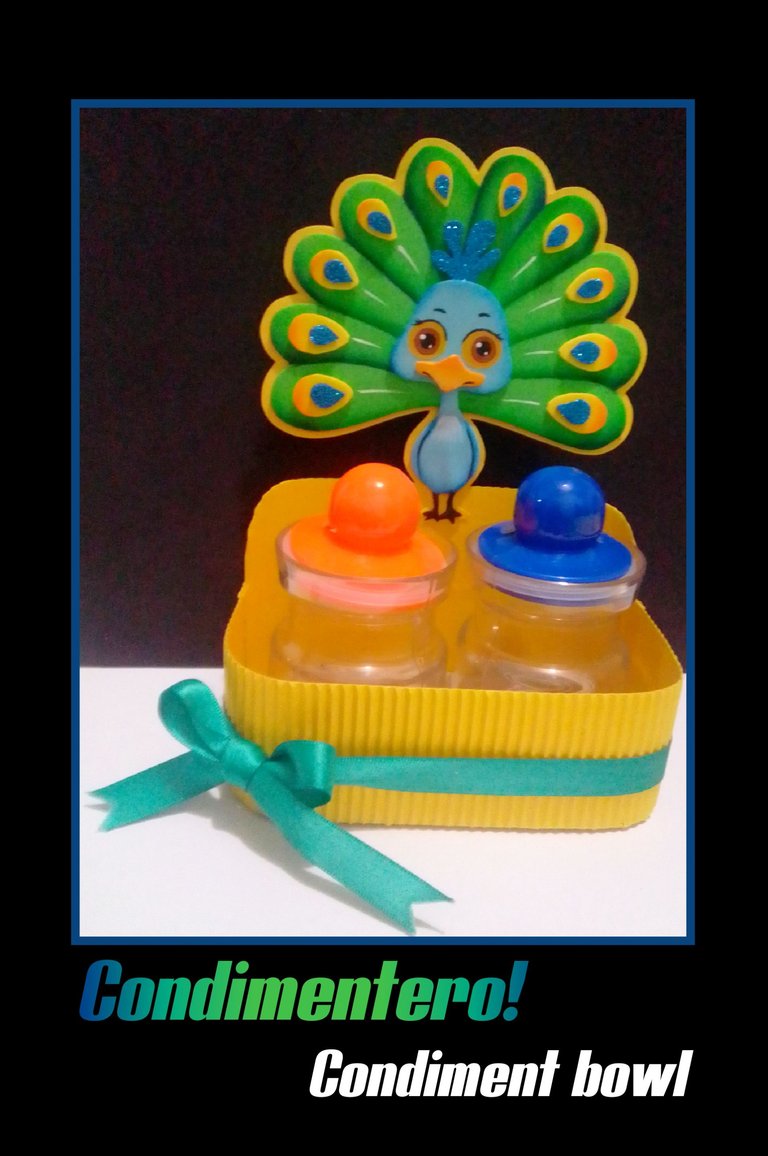
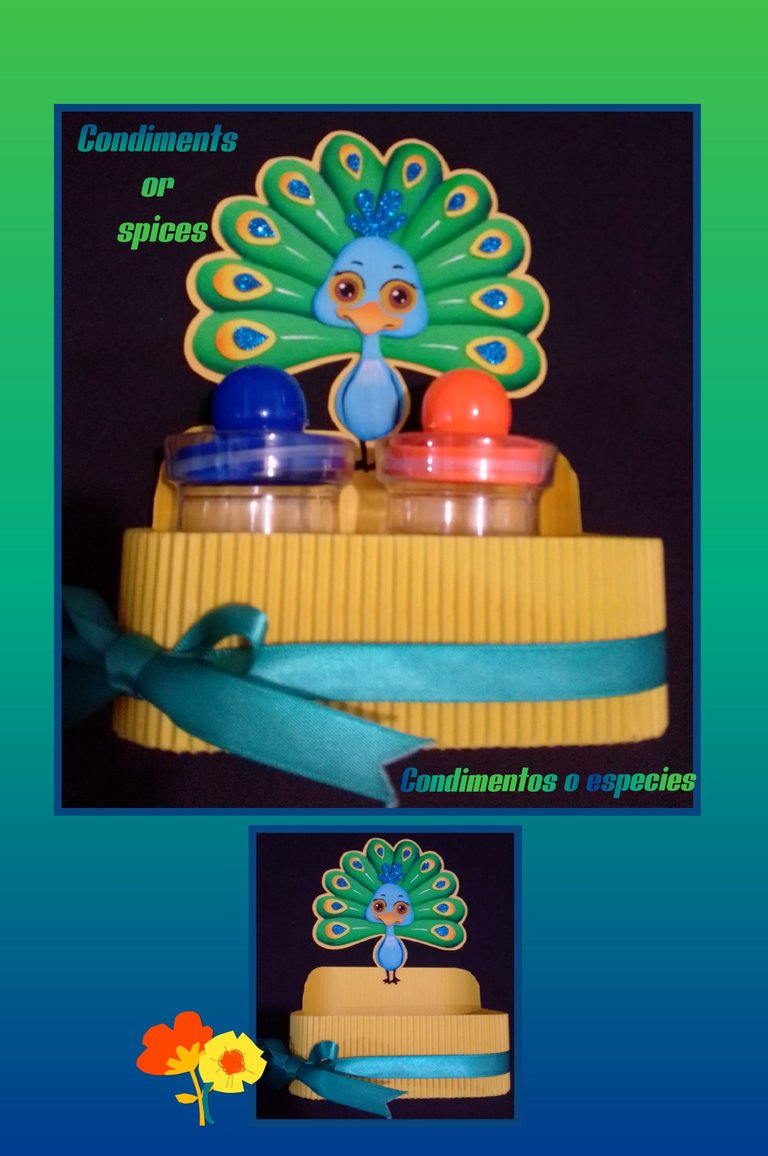
En esta oportunidad les mostraré como hacer un útil y bonito Porta Condimenteros o especies para decorar o adornar nuestra cocina, lo elaboré con retazos de foami, cartulina y cartón.
Así que no perdamos más tiempo y comencemos.
Para este proyecto vas a necesitar:
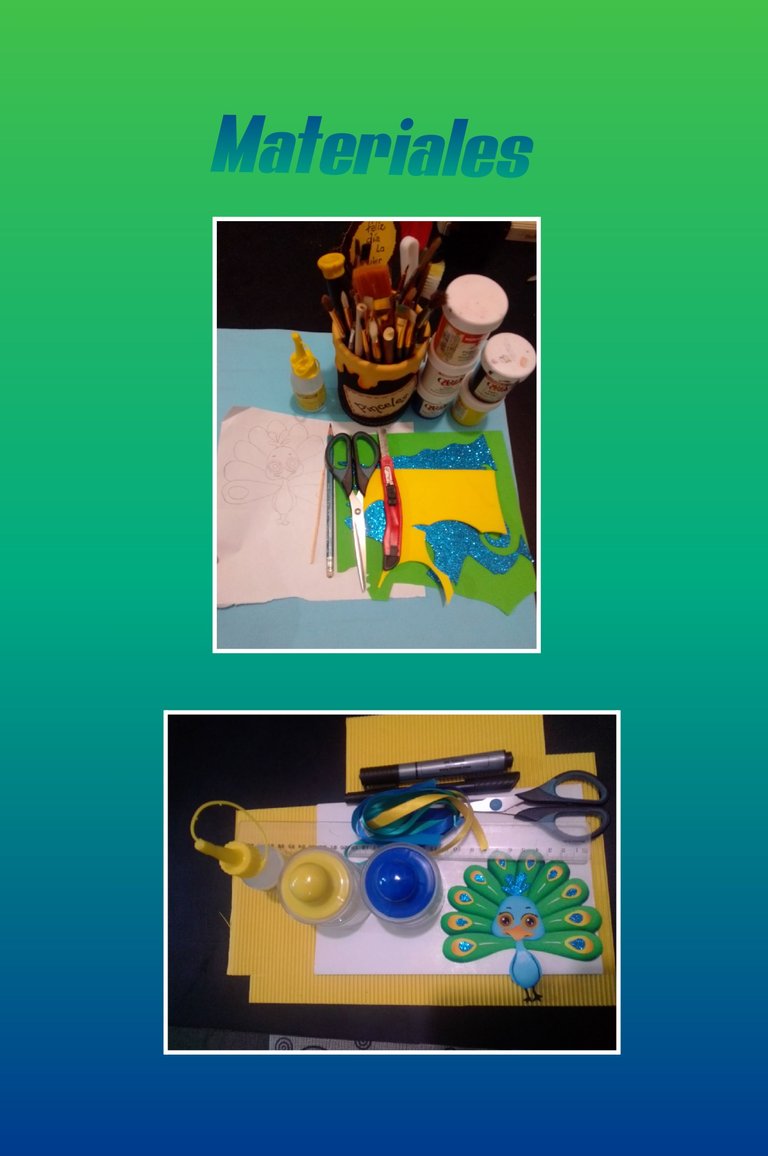
| Foami de colores mate y escarchado | Pinturas y pinceles |
|---|---|
| Tijera | Lápiz |
| Silicón | Palito de madera |
| Molde | Marcadores |
| Envases para condimentos | Figura de foami Avestruz |
| Cartulina corrugada | Cartón |
| Cinta de raso |
Paso 1:

- Lo primero que haremos será remarcar el dibujo o impresión preferiblemente con un lápiz de mina blanda.
- Luego coloca el dibujo remarcado sobre el foami y frota con la tijera haciendo un poco de presión para transferir cada una de las piezas en el color que escojas, luego puedes levantar de un lado el dibujo para asegurarte de que se marque bien, luego recorta las piezas y comienza a pintar, lo puedes hacer de tres maneras, con pincel, pañito o tiza pastel.
- Si es con pincel tienes que mojar el pincel en agua, luego pasa por un pañito para quitar el exceso de agua, ahora moja en pintura solo la punta del pincel y comienza a pintar por todo el borde y las líneas marcadas.
- Deja secar y luego pinta las patas con pintura o marcador negro.
Paso 2:

- Ahora pinta los ojos rellenando con pintura amarilla, deja secar luego pinta el centro marrón y luego con la parte trasera del pincel pinta el iris con pintura negra, pinta cejas con marcador o pincel para pintar ojos y con un palito de madera pon un punto de luz en cada ojo.
- Ahora recorta en amarillo forma de goticas grandes y pequeñas para decorar el plumaje y pega con silicón.
- Luego aplica silicón en la parte trasera de la cabeza y pega al plumaje, luego el pico y has presión hasta que pegue bien.
Paso 3:
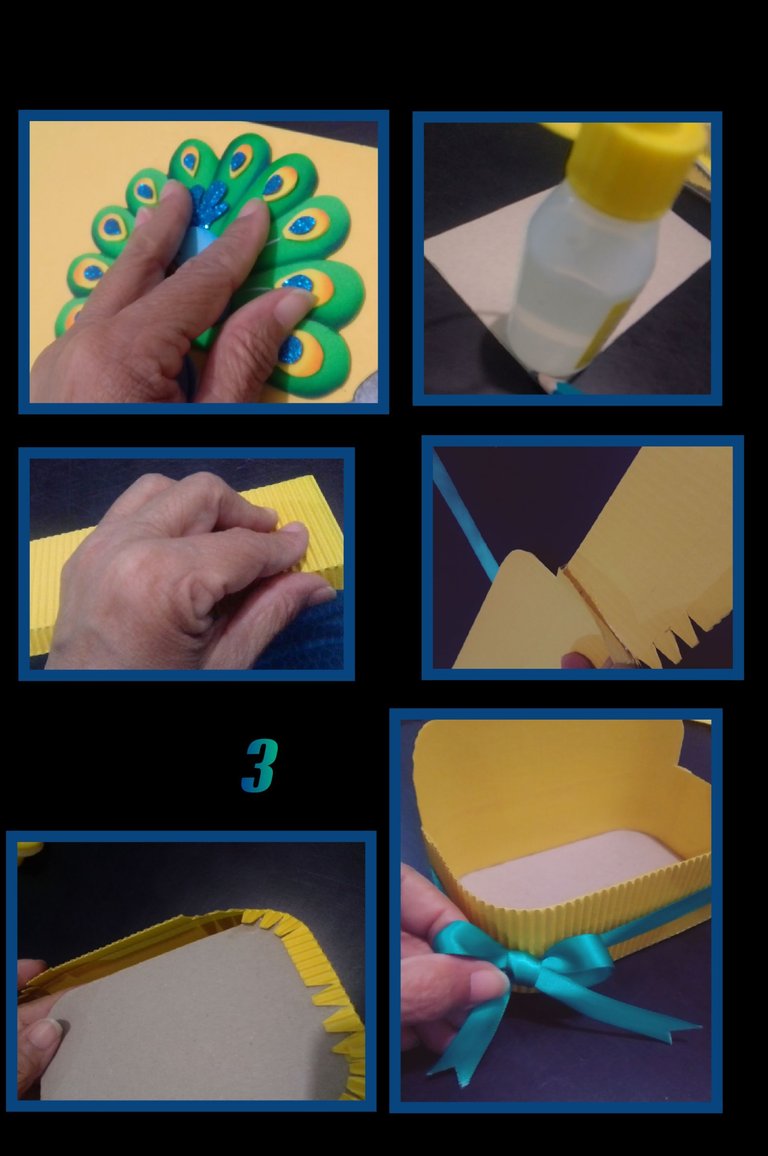
- Ahora aplica silicón en el avestruz y pega sobre cartulina amarilla y recorta dejando un borde de 1 ó 2 milímetros.
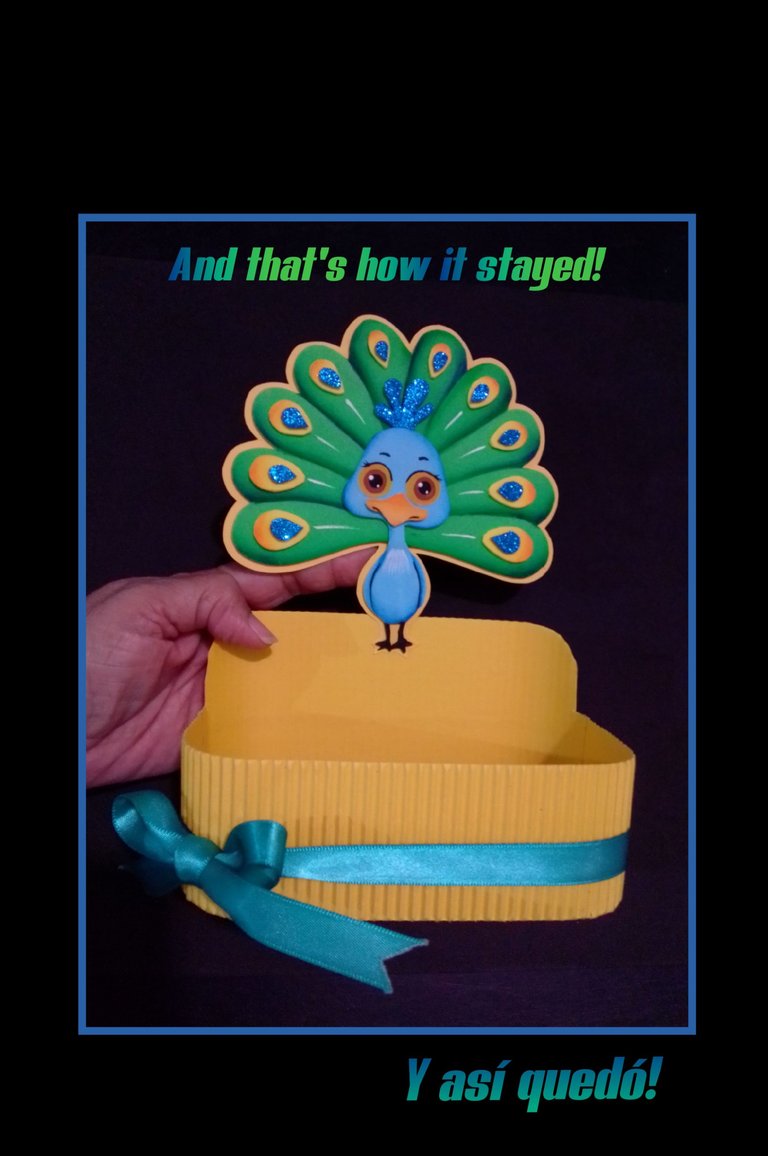
- Ahora en un trocito de cartón, marca las esquinas redondeadas y recorta, luego mide el contorno y recota una tira de ese tamaño aumentando uno o dos centímetros más de largo y coloc el ancho que gustes.
- Luego marca una pestaña de 1cm y remarca,ahora recorta triángulos en esta y dobla, luego aplica silicón en la orilla del cartón y pega la pestaña dando la forma que tiene el cartón, luego recorta la parte trasera más alta, es opcional y pega.
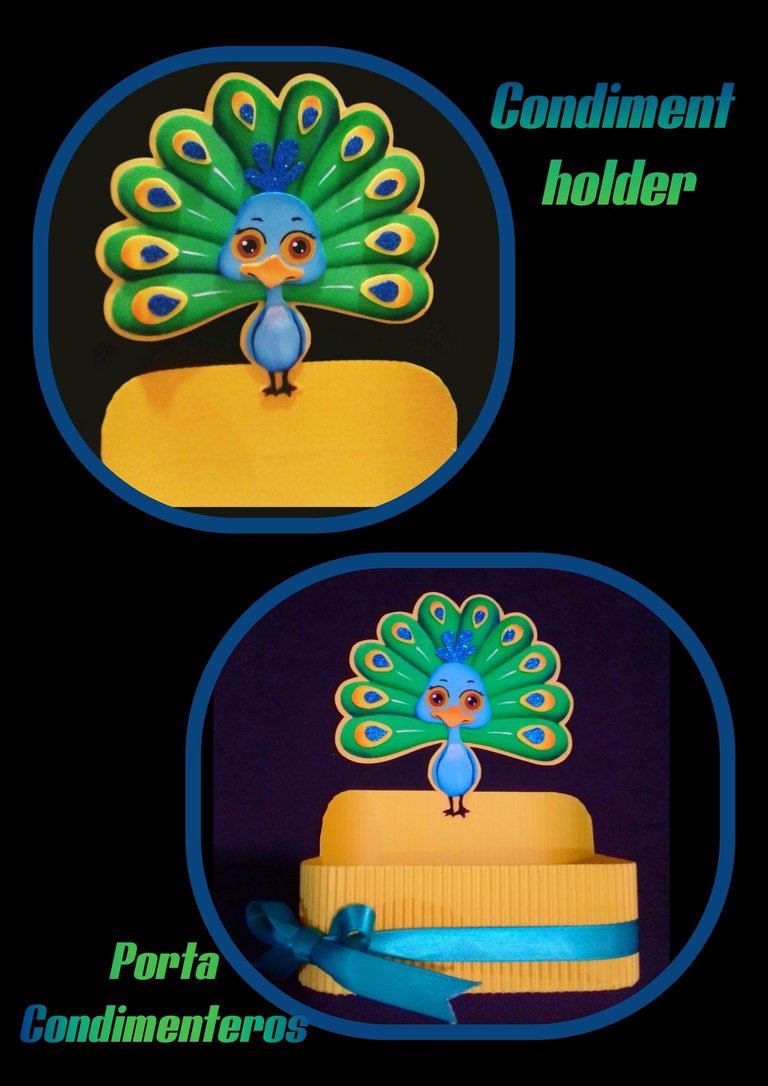
- Ahora decora con una cinta de raso por todo el contorno de la base y remata con un lazo en una esquina.
Paso 4:
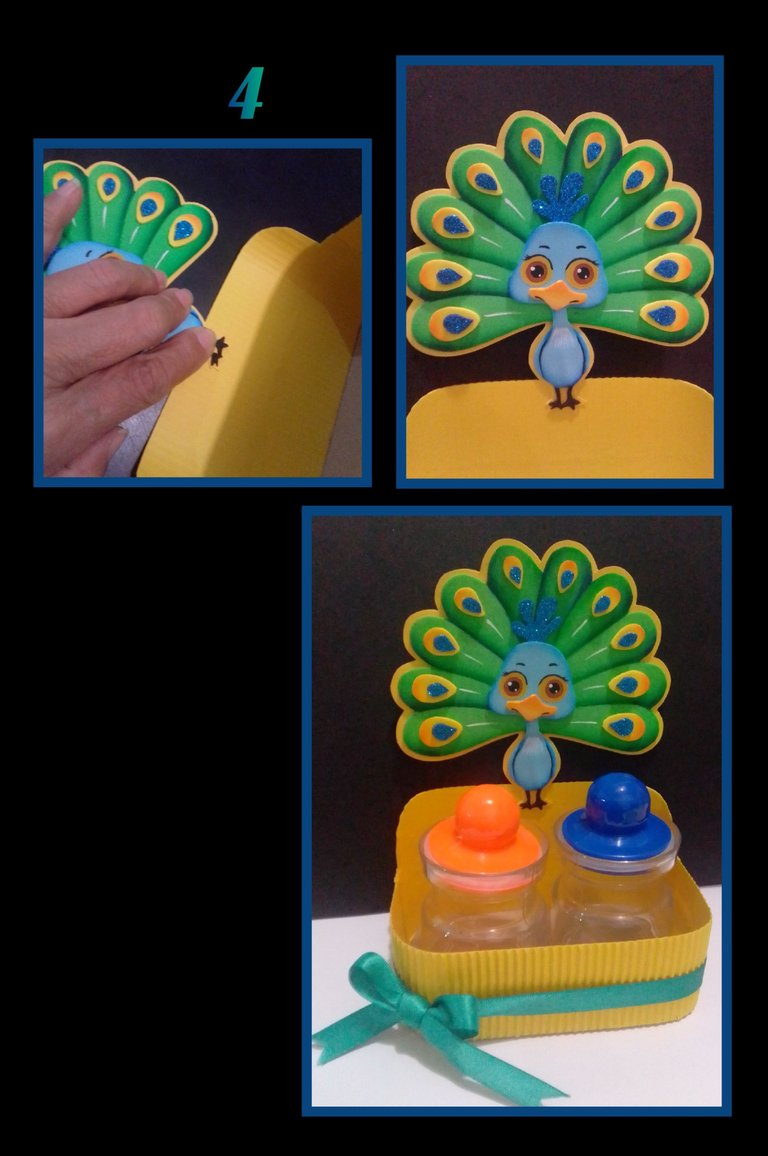
- Por último, aplica un poco de silicón y pega el avestruz en la parte alta y coloca tus condimenteros, así damos por terminado este proyecto.
Fuente:
https://www.pinterest.es/pin/476255729359379654/
Ahora solo me queda comentarles que mi publicación la traduje con DeepL, edité con etiquetas HTML y las fotos las capture con mi Teléfono BLU G5 y edité con GridArt.
Me despido muy felíz de haber compartido con ustedes este mi paso a paso, esperando les guste y sea provechoso.
Saludos y muchas gracias por llegar hasta aquí para leerme, apoyarme y si gustas, comentar.
English:
This time I will show you how to make a useful and beautiful spice or spice holder to decorate or decorate our kitchen, I made it with scraps of foami, cardboard and cardboard.
So let's not waste any more time and let's get started.
For this project you will need:
| Matte and frosted foami colors | Paints and brushes |
|---|---|
| Scissors | Pencil |
| Silicone | Wooden stick |
| Mold | Markers |
| Condiment containers | Foami figure Ostrich |
| Corrugated cardboard | Cardboard |
| Satin ribbon |
Step 1:
- The first thing to do is to outline the drawing or print, preferably with a soft lead pencil.
- Then place the marked drawing on the foami and rub with the scissors making a little pressure to transfer each of the pieces in the color of your choice, then you can lift the drawing on one side to make sure it is well marked, then cut the pieces and start painting, you can do it in three ways, with a brush, a tissue or pastel chalk.
- If you use a brush you have to dip the brush in water, then wipe it with a tissue to remove the excess water, now dip only the tip of the brush in paint and start painting all around the edge and the marked lines.
- Let dry and then paint the legs with black paint or marker.
Step 2:
- Now paint the eyes by filling in with yellow paint, let dry then paint the center brown and then with the back of the brush paint the iris with black paint, paint eyebrows with marker or eye paint brush and with a wooden stick put a light spot on each eye.
- Now cut in yellow the shape of large and small drops to decorate the plumage and glue with silicone.
- Then apply silicone on the back of the head and glue to the plumage, then the beak and press until it sticks well.
Step 3:
- Now apply silicone on the ostrich and glue on yellow cardboard and trim leaving a border of 1 or 2 millimeters.
- Now on a small piece of cardboard, mark the rounded corners and cut out, then measure the outline and cut out a strip of that size, increasing the length by one or two centimeters and place it as wide as you like.
- Then mark a tab of 1cm and mark it, now cut triangles in this and fold, then apply silicone on the edge of the cardboard and glue the tab giving the shape that has the cardboard, then cut the highest rear part, it is optional and glue.
- Now decorate with a satin ribbon all around the base and finish with a bow in one corner.
Step 4:
- Finally, apply a little silicone and glue the ostrich on the top and place your condiment holders, so we finish this project.
Source:
https://www.pinterest.es/pin/476255729359379654/
Now it only remains for me to tell you that I translated my publication with DeepL, I edited with HTML tags and the photos were captured with my BLU G5 Phone and edited with GridArt.
I am very happy to have shared with you this step by step, I hope you like it and that it will be useful.
Greetings and thank you very much for coming here to read me, support me and if you like, comment.
Estupendo trabajo amiga, entré a ver qué material usaste para las plumas del pavo real y quedé impresionada porque es el mismo foami, tienes magia en las manos, Dios las bendiga. Lo labras de una manera que parece otra cosa, pensé que era hasta plástico, guao! Te felicito por tu trabajo estupendo y tu presentación, es sencillamente genial como siempre.
Guaooo! Que halago querida amiga, de verdad me llenan de felicidad tus palabras porque tus trabajos también son muy hermosos y de mucha creatividad.
Amén a tus bendiciones y muchas gracias por tu visita y el apoyo.
Bendiciones y saludos para ti.
Beautiful.
Reviewed and Approved for an Ecency boost. Keep up the good work.
Muchas gracias @djbravo y @ecency por el apoyo.
Yay! 🤗
Your content has been boosted with Ecency Points
Use Ecency daily to boost your growth on platform!
Support Ecency
Vote for new Proposal
Delegate HP and earn more, by @hive-130560.
Feliz y agradecida...Muchas gracias @ecency!
Excelente 👏👏👏Amiga @elmundodebetty que hermoso trabajo pensé que el pavo real era una impresión a computadora te felicito el difuminado le da el toque.
Saludos.. y muchas gracias por el apoyo.Hola amiga @dayanita2, que bueno que te gustó mi trabajo..
🤗
🤗